Sign In
Upload
Download
Table of Contents
Contents
Add to my manuals
Delete from my manuals
Share
URL of this page:
HTML Link:
Bookmark this page
Add
Manual will be automatically added to "My Manuals"
Print this page
×
Bookmark added
×
Added to my manuals
Manuals
Brands
Thermo Scientific Manuals
Laboratory Equipment
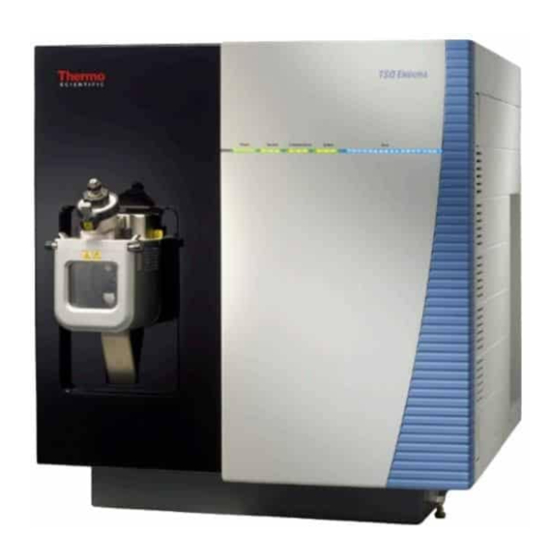
TSQ Endura
Hardware manual
Thermo Scientific TSQ Endura Hardware Manual
Tsq series
Hide thumbs
1
2
3
4
5
6
Table Of Contents
7
8
9
10
11
12
13
14
15
16
17
18
19
20
21
22
23
24
25
26
27
28
29
30
31
32
33
34
35
36
37
38
39
40
41
42
43
44
45
46
47
48
49
50
51
52
53
54
55
56
57
58
59
60
61
62
63
64
65
66
67
68
69
70
71
72
73
74
75
76
77
78
79
80
81
82
83
84
85
86
87
88
89
90
91
92
93
94
95
96
97
98
99
100
101
102
103
104
105
106
107
108
109
110
111
112
113
114
page
of
114
Go
/
114
Contents
Table of Contents
Bookmarks
Table of Contents
Table of Contents
Preface
Accessing Documentation
Special Notices, Symbols, and Cautions
Contacting Us
Chapter 1 Introduction
Introduction
Mass Spectrometer Models
Overview of an LC/MS Analysis
Figure 1. Functional Block Diagram of the TSQ Endura and TSQ Quantiva Systems
LC/MS Functional Block Diagram
Controls and Indicators
Leds
Figure 2. TSQ Endura and TSQ Quantiva Front Panel Leds
Power Entry Module
Figure 3. Power Entry Module
Communications Panel
Figure 4. Communication Connectors (Right Side of the MS)
Electronic Assemblies
Cooling Fans
Chapter 2 Scan Parameters
Scan Types
Full Scan Q1 and Q3 Scan Types
Selected Ion Monitoring Scan Type
Product Scan Type
Figure 5. Illustration of Product Scan Type
Precursor Scan Type
Figure 6. Illustration of the Precursor Scan Type
Neutral Loss Scan Type
Figure 7. Illustration of the Neutral Loss Scan Type
Figure 8. Examples of Compounds with a Common Neutral-Loss Fragment
Selected Reaction Monitoring Scan Type
Scan Mass-To-Charge Ratio Ranges
Data Types
Ion Polarity Modes
Chapter 3 Vacuum System
Schematic of the Internal Gas Supply Lines
Figure 9. Functional Block Diagram of the Vacuum System
Figure 10. Schematic of the Internal Gas Supplies
Inlet Gases Hardware
Figure 11. Gas Inlets and Vacuum (Foreline) Port (Left Side of the MS)
Argon Gas Valves
Nitrogen Gas Valves
Vent Valve
Vacuum Manifold
Vacuum Gauges
Vacuum Pumps
Figure 12. Placement of the Turbomolecular Pump Next to the Vacuum Manifold
Atmospheric Pressure Ionization Source
Figure 13. Ion Max NG and EASY-Max NG Ion Sources
API Source Interface
Figure 14. API Source Interface (TSQ Endura MS Cross Section)
Figure 15. Ion Transfer Tubes
Figure 16. RF and Exit Lenses for the Mass Spectrometers
Vacuum System
Vacuum System Functional Block Diagram
Chapter 4 Ion Transmission and Mass Analysis
Ion Optics
Figure 17. Schematic of the Mass Spectrometer Ion Transmission Path
Figure 18. MP00 RF Lens
Figure 19. Lens L0
MP00 Ion Optics
Figure 20. Multipole MP0 and Beam Blocker
Figure 21. TK1 (Left) and TK2 (Right) Lenses
MP0 Ion Optics
Mass Analyzers
Quadrupole Rod Assemblies
Figure 22. Quadrupole Q1 or Q3 (TSQ Endura MS)
Figure 23. Hyperquad Q1 or Q3 (TSQ Quantiva MS)
Applied RF and DC Fields
Figure 24. Quadrupole Q2 (Bottom) Separated from the Active Collision Cell Housing
Figure 25. Polarity of the RF and DC Voltages Applied to the Q1 and Q3 Mass Analyzers
Figure 26. Magnitude of the Asymmetric RF and DC Voltages Applied to the Q1 and
Mass Analysis
Collision Cell and CID Efficiency
Quadrupole Offset Voltage
Mass Analyzer Lenses
Dual-Mode, Discrete-Dynode Ion Detection System
Chapter 5 Syringe Pump and Divert/Inject Valve
Syringe Pump
Divert/Inject Valve
Figure 27. Syringe Pump Setup (Top View)
Configurations
Figure 28. Divert/Inject Valve Positions
Controlling the Divert/Inject Valve
Figure 29. Divert/Inject Valve Plumbed as a Loop Injector and as a Divert Valve
Figure 30. Divert/Inject Valve (Front View)
Chapter 6 System Shutdown, Startup, and Reset
Shutting down the System in an Emergency
Placing the Mass Spectrometer in Standby Mode
Turning on the Mass Spectrometer
Shutting down the Mass Spectrometer Completely
Starting the System after a Complete Shutdown
Starting the LC
Starting the Data System
Starting the Mass Spectrometer
Starting the Autosampler
Resetting the Mass Spectrometer
Resetting Calibration Parameters
Restarting the Data System
On/Off Status for MS Components under Varying Power Conditions
Chapter 7 Daily Operation
Before Operating the Mass Spectrometer
Checking the System Mode
Checking the Vacuum Pressure Levels
Checking the Gas Supplies
After Operating the Mass Spectrometer
Flushing the Inlet Components
Purging the Oil in the Forepump
Emptying the Solvent Waste Container
Placing the System in Standby Mode
Chapter 8 Maintenance
Maintenance Schedule
Guidelines
Tools and Supplies
Maintaining the API Source Housing
Maintaining the API Source Interface
Cleaning the Ion Sweep Cone, Spray Cone, and Ion Transfer Tube
Figure 31. Ion Sweep Cone Removed from the MS Mount Assembly
Figure 32. Ion Transfer Tube Removal Tool (TSQ Endura MS)
Figure 33. Ion Transfer Tube Removal Tool (TSQ Quantiva MS)
Figure 34. Spray Cone, O-Ring, Ion Transfer Tube, and Ion Sweep Cone (TSQ Endura MS)
Removing the API Source Interface
Cleaning the RF Lens, Exit Lens, MP00 RF Lens, and Lens L0
Figure 35. API Source Interface Removed from the Vacuum Manifold (TSQ Endura MS)
Figure 36. Removing the Multipole MP00 and Lens L0 Assembly
Figure 37. Removing the RF Lens and Exit Lens (TSQ Endura MS)
Figure 38. Removing the Lens L0 and Multipole MP00 from the MP00-L0 Mount Cage
Reinstalling the API Source Interface
Maintaining the Forepumps
Maintaining the Air Filter
Figure 39. Air Filter Location in the Mass Spectrometer with the Front Cover Removed
Chapter 9 Diagnostics and PCB and Assembly Replacement
Running the System Diagnostics
Replacing Fuses, Pcbs, and Power Supplies
Chapter 10 Replaceable Parts
Chemical Kit
Calibration Kit
MS Setup Kit
Performance Specification Kit
Single Mechanical Pump Kit
Dual Mechanical Pumps Kit
TSQ Source Installation Kit
API Source Interface
Miscellaneous Parts
Glossary
Index
Advertisement
Quick Links
1
Mass Spectrometer Models
2
Figure 1. Functional Block Diagram of the Tsq Endura and Tsq Quantiva Systems
Download this manual
TSQ Series
TSQ Endura and
TSQ Quantiva
Hardware Manual
80100-97014 Revision C
February 2017
Table of
Contents
Previous
Page
Next
Page
1
2
3
4
5
Advertisement
Table of Contents
Need help?
Do you have a question about the TSQ Endura and is the answer not in the manual?
Ask a question
Questions and answers
Related Manuals for Thermo Scientific TSQ Endura
Laboratory Equipment Thermo Scientific TSQ Quantiva Hardware Manual
Tsq series (114 pages)
Laboratory Equipment Thermo Scientific TSQ 8000 Evo User Manual
Mass spectrometer (151 pages)
Laboratory Equipment Thermo Scientific TSQ 8000 Evo Hardware Manual
(432 pages)
Laboratory Equipment Thermo Scientific TSQ 8000 Evo Preinstallation Manual
Mass spectrometer (66 pages)
Laboratory Equipment Thermo Scientific TSQ Quantum XLS User Manual
(176 pages)
Laboratory Equipment Thermo Scientific TSQ Quantum GC User Manual
Tsq series (190 pages)
Laboratory Equipment Thermo Scientific TSQ Quantum XLS Pre-Installation Requirements Manual
(50 pages)
Laboratory Equipment Thermo Scientific TSQ 8000 Preinstallation Manual
(64 pages)
Laboratory Equipment Thermo Scientific TSQ Altis Hardware Manual
Tsq ii series (176 pages)
Laboratory Equipment Thermo Scientific TSQ Quantis Hardware Manual
Tsq ii series (176 pages)
Laboratory Equipment Thermo Scientific TSQ Fortis Hardware Manual
Tsq ii series (176 pages)
Laboratory Equipment Thermo Scientific TSQ 9000 Hardware Manual
(477 pages)
Laboratory Equipment Thermo Scientific TSQ Series Hardware Manual
(140 pages)
Laboratory Equipment Thermo Scientific TSQ Series Hardware Manual
(122 pages)
Laboratory Equipment Thermo Scientific TSX Series Installation And Operation Manual
Laboratory refrigerators (56 pages)
Laboratory Equipment Thermo Scientific TSE Series Operating And Maintenance Manual
Ultra low temperature freezer (78 pages)
This manual is also suitable for:
Tsq quantiva
Table of Contents
Save PDF
Print
Rename the bookmark
Delete bookmark?
Delete from my manuals?
Login
Sign In
OR
Sign in with Facebook
Sign in with Google
Upload manual
Upload from disk
Upload from URL


Need help?
Do you have a question about the TSQ Endura and is the answer not in the manual?
Questions and answers