Table of Contents
Advertisement
Quick Links
Advertisement
Table of Contents
Troubleshooting

Related Manuals for Oki COREFIDO B822dn


Summary of Contents for Oki COREFIDO B822dn
- Page 1 B822dn/B842dn User's Manual...
-
Page 2: Table Of Contents
Table of contents Table of contents 4-3. Manual setup and connection ....59 1. Read this first ........7 5. Choosing a valid default gateway ....61 6. Checking the connection from a PC ....62 Safety precautions ..........8 Connecting directly with this machine (AP mode) General precautions .......... - Page 3 Table of contents Setting the time that elapses before entering the Printing on both sides of paper ......180 sleep mode ............105 Printing in the toner save mode ....... 181 Turning off the power automatically (Auto Power N-in-1 printing ..........182 Off) ..............
- Page 4 3. Registering a group ........240 Starting the OKI LPR Utility ......281 4. Setting authentication server ....... 241 Registering this machine with the OKI LPR Utility 5. Enabling access control ....... 242 ................ 281 Using the machine ........... 244 Checking the state of the registered machine .
- Page 5 Table of contents 3. Printing with Mopria Print Service ....298 10. Troubleshooting ......366 Troubleshooting for Mopria Print Service ..299 When an error message appears on the display Printing with IPP Everywhere ......301 ..............367 1. Setting IPP Everywhere ....... 301 Error Message List ..........
- Page 6 Table of contents Troubleshooting for the paper ......435 When a power failure occurs ......438 Appendix ..........439 Specifications ..........440 Dimensions ............ 443 Using the FAQ guide of this machine .... 445 List of consumables, maintenance parts, options and paper ............
-
Page 7: Read This First
Read this first Read this first Safety precautions..................8 General precautions ................... 9 Cautions ....................11 Trademarks ....................13 About this manual..................14 Features of this machine ................16 - 7 -... -
Page 8: Safety Precautions
Read this first Safety precautions Read this manual to use the product safely. Mishandling due to ignoring this indication may cause major injuries or even death. Mishandling due to ignoring this indication may cause personal injury. - 8 -... -
Page 9: General Precautions
Read this first General precautions Do not touch the safety switch inside this machine. High voltage may occur and electric shock may be caused. In addition, gears can rotate, which may result in personal injury. Do not use an inflammable spray near the machine. A fire may be caused since there is an area heating up within the machine. - Page 10 Read this first Keep away from the paper discharger when the machine is powered on or printing. Otherwise, Injury may be caused. Do not touch a broken display. Otherwise, Injury may be caused. If any liquid (liquid crystal) leaking from the display gets into your eyes or mouth, immediately wash with plenty of water.
-
Page 11: Cautions
Read this first Cautions エネルギースターについて 当社は国際エネルギースタープログラムの参加事業者として、 本製品が国際エネルギースタープログラムの基 準に適合していると判断します。 プログラムの対象となる国は、日本です。 ENERGY STAR ® その他の国々では対象となりません。 紙幣、有価証券などの印刷について 紙幣(外国紙幣を含む)、国債証券、地方債券、郵便切手、印紙などを複製・印刷すること、または本物 と紛らわしいものを作ることは、使用する意図がなくても犯罪となり罰せられます。 以下のものを、本物と偽って使用する目的で複製・印刷することは、犯罪として罰せられます。 株券・手形・小切手などの有価証券 公務員又は役所が作成した証明書などの文書 契約書等、権利義務や事実証明に関する文書 役所または公務員の印影、署名、記号 私人の印影または署名 著作権法により保護されている著作物(書籍、雑誌、絵画、地図、写真など)を著作者に無断で複製する ことは、個人または家庭内その他これに準ずる限られた範囲内で使用する場合を除き、違法となります。 関係法律 刑法、紙幣類似証券取締法、印紙等模造取締法、郵便切手等模造等取締法、外国ニ於テ流通スル貨幣 紙幣銀行券証券偽造変造及模造ニ関スル法律、著作権法 インターネットへの接続について プリンター・複合機は、電気通信事業者(移動通信会社、固定通信会社、インターネットプロバイダ等)の通 信回線(公衆無線 LAN 含む)に直接接続することはできません。 プリンター・複合機をインターネットに接続する場合は、必ずルーター等を経由して接続してください。... -
Page 12: 電波障害防止について
Read this first 電波障害防止について この装置は、クラス B 機器です。この装置は住宅環境で使用することを目的としていますが、この装置がラジ オやテレビジョン受信機に近接して使用されると受信障害を引き起こすことがあります。 取扱説明書に従って 正しい取り扱いをしてください。 VCCI-B 高調波規制について この装置は、「高調波電流規格 JIS C 61000-3-2 適合品」です。 本製品を日本国外へ持ち出す場合の注意 本製品 (ソフトウェアを含む) は日本国内仕様のため、 修理・保守サービスおよび技術サポートなどの対応は、 日本国外ではお受けできませんのでご了承ください。 また、日本国外ではその国の法律または規制により、本製品を使用できないことがあります。このような国で は、本製品を運用した結果罰せられることがありますが、当社といたしましては一切の責任を負いかねますの でご了承ください。 VOC(揮発性有機化合物)の放散 粉塵、オゾン、スチレン、ベンゼン、TVOC および超微粒子の放散については、エコマーク No.155「複写機・ プリンタなどの画像機器」の物質エミッションに関する認定基準を満たしています。 (トナーは OKI 純正トナ ーカートリッジを使用し、印刷を行った場合について、試験を実施しました。) - 12 -... -
Page 13: Trademarks
Read this first Trademarks OKI is a registered trademark of Oki Electric Industry Co., Ltd. ENERGY STAR ® is a trademark of the United States Environmental Protection Agency. Microsoft, Microsoft Edge, Windows and Windows Server are registered trademarks or trademarks of Microsoft Corporation in the United States and other countries. -
Page 14: About This Manual
Copyrights All rights belong to Oki Electric Industry Co., Ltd. This manual may not be reproduced, transcribed or translated without permission. Be sure to obtain the written approval from Oki Electric Industry Co., Ltd. - Page 15 Read this first About symbols This section describes the symbols used in this manual and their meanings. Symbol Meaning Indicates buttons on the operator panel of this machine. « » Indicates keys on the PC keyboard. Indicates menu names, item names, options, etc. displayed on the display. Indicates menus, windows and dialog box names displayed on the PC screen.
-
Page 16: Features Of This Machine
Read this first Features of this machine Easy maintenance with front access You can replace consumables and maintenance parts, and clear most paper jams from the front side. Immediate start of printing thanks to short warm-up time The warm-up time of this machine has been shortened in comparison with conventional models. ... -
Page 17: Preparing And Connecting This Machine To Your Pc
Preparing and connecting this machine to your PC Preparing and connecting this machine to your PC About Installation ..................18 Unpacking ....................21 Checking the accessories ................ 25 Installing optional accessories ..............27 Connecting the power cord ..............41 Loading paper in the tray ................. 43 Connecting via a wired LAN .............. -
Page 18: About Installation
Preparing and connecting this machine to your PC About Installation Installation environment Install this machine in the following environment. Ambient temperature: 10℃ ~ 32℃ Ambient humidity: 20% ~ 80% RH (relative humidity) Max. wet-bulb temperature: 25℃ Make sure there is no condensation. Otherwise malfunction may be caused. ... -
Page 19: Installation Space
Preparing and connecting this machine to your PC Installation space Install this machine on a flat desk which is larger than its bottom. Keep sufficient space around this machine as shown in the following figure. Plan view Unit: cm B822dn B842dn 33.5... - Page 20 Preparing and connecting this machine to your PC Side view (When paper with a length of 297mm or above is loaded in the paper cassette) Depending on the installation environment, the temperature inside this machine may rise and the printing speed may slow down.
-
Page 21: Unpacking
Preparing and connecting this machine to your PC Unpacking Injury may be caused. Make sure that at least 2 people carry this machine since it weighs approx. 30 kg. Be sure to start with the consumables/maintenance parts that come with this machine. If you start with any other consumables/maintenance parts than the supplied accessories, the service life will not be displayed correctly or you will not be able to use the accessories later. - Page 22 Preparing and connecting this machine to your PC Remove the desiccant and paper on the top of the machine and the tapes (x 2) that hold the front cover. Press the front cover open button on the side of this machine and open the front cover toward you.
- Page 23 Preparing and connecting this machine to your PC Rotate the blue lever on the left side of the starter toner cartridge in the direction of the lock mark until it stops. Peel off the tape that helps the protective sheet adhere to the image drum, and slowly pull out the protective sheet in the direction of the arrow.
- Page 24 Preparing and connecting this machine to your PC Close the front cover firmly with your both hands. Refer to "Installing optional accessories(P.27)" if you want to use the optional expansion tray unit. - 24 -...
-
Page 25: Checking The Accessories
Preparing and connecting this machine to your PC Checking the accessories Check that you have all of the following. Injury may be caused. Make sure that at least 2 people carry this machine since it weighs approx. 30 kg. Refer to "Unpacking(P.21)" for the unpacking method. ... - Page 26 Preparing and connecting this machine to your PC Easy Operation Guide COREFIDO Guide Explanation of user registration method DVD Power cord COREFIDO window sticker LAN cables and USB cable are not included. Please prepare them separately according to the connection environment.
-
Page 27: Installing Optional Accessories
Preparing and connecting this machine to your PC Installing optional accessories This section describes how to install optional accessories. Proceed to " (P.41)" if you Connecting the power cord do not want to install optional accessories. The following optional accessories are available. ... - Page 28 Preparing and connecting this machine to your PC This section describes the procedure for installing the Wireless LAN module and enabling the Wireless LAN module on the operator panel. You can also use standard wired LAN and wireless LAN on different networks at the same time. Model: WL-D1 Turn off the power supply of this machine, and disconnect the power cord.
-
Page 29: Installing The Wired Lan Module
Preparing and connecting this machine to your PC Close the Wireless LAN module cover. Plug the power cord to this machine. Connecting the power cord(P.41) Refer to the next section for the procedure for connecting via a wireless LAN. Connection form via a wireless LAN(P.51) Connecting via an access point (Infrastructure)(P.52) - Page 30 Preparing and connecting this machine to your PC Loosen the screw on the Wired LAN module cover on the back of this machine, and remove the cover. Keep the Wired LAN module cover and screws properly instead of discarding them. Insert the Wired LAN module into the Wired LAN module port and fix it with screws.
- Page 31 Preparing and connecting this machine to your PC Press ▲ or ▼ to input the admin password, and press «OK». Admin Password(P.207) Check that [Network Setup] is selected, and press «OK». Check that [General Setup] is selected, and press «OK». Check that [Extended Network] is selected, and press «OK».
-
Page 32: Installing The Expansion Tray Unit
Preparing and connecting this machine to your PC Press ▲ or ▼ to input the admin password, and press «OK». Admin Password(P.207) Check that [Network Setup] is selected, and press «OK». Press ▼ several times to select [Wired(LAN2) Setup], and press «OK». Check that [Wired(LAN2)] is selected, and press «OK». - Page 33 Preparing and connecting this machine to your PC The packing case and cushioning materials are required to ship the expansion tray unit. Keep them properly instead of discarding them. When printing from the expansion tray unit, if the print position shifts, the print position is corrected for each expansion tray unit.
- Page 34 Preparing and connecting this machine to your PC On top of the expansion tray unit installed in Step 3, gently stack the other expansion tray unit with the right side and front side aligned so that the holes on the bottom and the protrusions are aligned.
- Page 35 Preparing and connecting this machine to your PC Use a flat-head screwdriver to connect the left and right sides of the main unit and the expansion tray unit with the supplied connecting parts. When moving the machine or replacing consumables or maintenance parts, or loading paper in the tray, check the following points to prevent the printer from tipping over.
-
Page 36: Installing The Caster Base
Preparing and connecting this machine to your PC Installing the Caster Base Injury may be caused. The machine may tip over. Be sure to attach the supplied connecting parts. It is a base with casters for moving this machine. A Phillips screwdriver and a flat-head screwdriver are required to install the Caster Base. ... - Page 37 Preparing and connecting this machine to your PC Lock the casters (x2) so that the Caster Base does not move while the expansion tray unit is being installed. Pull out the paper cassette of the main unit or the expansion tray unit to be attached to the Caster Base by holding its handle until it stops, raise the paper cassette slightly by holding its both sides and take it out.
- Page 38 Preparing and connecting this machine to your PC Connect from the right side with the metal fitting b of Caster Base and the screw (x1). Connect from the left side with the metal fitting c of Caster Base and the screw (x1). Insert the paper cassette from slightly above into the main unit or expansion tray unit attached to the Caster Base, and install it back to its original position.
- Page 39 Preparing and connecting this machine to your PC Use a flat-head screwdriver to connect the left and right sides of the stacked expansion tray units with the supplied connecting parts. To add an expansion tray unit, align the right side and front of the main unit and the extension tray unit, and gently stack them so that the holes on the bottom of the main unit and the protrusions of the expansion tray unit are aligned.
- Page 40 Preparing and connecting this machine to your PC To change the installation location, unlock the casters (x2) before moving the machine. After moving the machine to the destination location, lock the casters (x2) to avoid accidental movement. When moving the machine or replacing consumables or maintenance parts, or loading paper in the tray, check the following points to prevent the printer from tipping over.
-
Page 41: Connecting The Power Cord
Preparing and connecting this machine to your PC Connecting the power cord About the power supply AC Voltage: 100V AC (Range: 90 ~ 110V AC) Power frequency: 50/60 Hz ±3% If the power supply is unstable, use a voltage regulator. ... - Page 42 Preparing and connecting this machine to your PC Open the cord clamp by pressing its protrusion. Thread the power cord from top to bottom of the cord clamp. Close the cord clamp. Connect the earth wire to the earth terminal of the power outlet. Insert the power plug into the power outlet.
-
Page 43: Loading Paper In The Tray
Preparing and connecting this machine to your PC Loading paper in the tray This section describes the procedure assuming that A4-sized plain paper is loaded in Tray1 in landscape (i.e. the factory default state). To load paper in portrait orientation, or to load paper of a different size, please refer to "... - Page 44 Preparing and connecting this machine to your PC While pressing on the center of the metal plate, align the left and right paper feed adjusters. Slide the paper guide and the blue part of the paper stopper to fit the size of the paper to be loaded.
- Page 45 Preparing and connecting this machine to your PC Load the paper with the printing side down, and press it down from top. Do not exceed [ ] of the paper guide when loading paper. If you are using B842dn, please load up to 100 sheets of A3-sized paper with a weight of 210 g/㎡ or above. Check that the size/orientation of the loaded paper matches the setting of the paper size dial.
-
Page 46: Connecting Via A Wired Lan
Preparing and connecting this machine to your PC Connecting via a wired LAN Connect this machine and a PC with a LAN cable to print. Connect the LAN cable, and set the IP address and others on the operator panel. 1. -
Page 47: Setting The Ip Address, Etc
Preparing and connecting this machine to your PC 2. Setting the IP address, etc. Set values suitable for the current environment on the operator panel. This section takes for example a connection to a standard wired LAN (LAN1). If you are using the optional Wired LAN module, please read "Wired(LAN2) Setup" instead of "Wired(LAN1) Setup". - Page 48 Preparing and connecting this machine to your PC To set the IP address manually, press ▼ to select [Manual] and then press «OK», and check that [*] is displayed to the left of the selected value. Go to Step 7. To obtain an IP address automatically, check that [Auto] is selected and [*] is displayed to the left of the selected value, and then press «BACK».
-
Page 49: Checking The Connection From A Pc
Preparing and connecting this machine to your PC Set the subnet mask in the same way as the IP address. After all the digits have been set, the cursor will return to the first digit. Check that [*] is displayed to the left of the set value, and then press «BACK». - Page 50 Preparing and connecting this machine to your PC Press ▼ to select [Wired(LAN1) Information], and then press «OK». Press ▼ to select [IPv4 Address], and then press «OK». Take a note of the displayed IP address. Start the web browser in your PC. Input "http:// (The IP address recorded in Step 6)", and press the «Enter»...
-
Page 51: Connection Form Via A Wireless Lan
Preparing and connecting this machine to your PC Connection form via a wireless LAN There are two types of connection forms between this machine and the PC via a wireless LAN. Select the connection form according to your environment, and prepare what is necessary as per the following table for the connection. -
Page 52: Connecting Via An Access Point (Infrastructure)52
Preparing and connecting this machine to your PC Connecting via an access point (Infrastructure) Put this machine in an unobstructed view position near the wireless LAN access point. (The recommended distance is 30 m or less.) It may be difficult to connect if there is a metal, aluminum sash or reinforced concrete wall between this machine and the wireless LAN access point. -
Page 53: Enabling Infrastructure
Preparing and connecting this machine to your PC Press ▼ to select [Wireless], and press «OK». When [Are You Sure?] is displayed, check that [Yes] is selected, and press «OK». Wait until the standby screen appears as this machine restarts. If [Not connected to wireless access point] is displayed, press «OK». - Page 54 Preparing and connecting this machine to your PC (Example) IP address of this machine: 192.168.101.2 Subnet mask: 255.255.255.0 Gateway address: 192.168.101.1 Press the scroll button ▼ on the operator panel several times to select [Wireless(Infrastructure) Setting], and press «OK». Press ▲...
- Page 55 Preparing and connecting this machine to your PC Since the first digit of the IP address is selected, press ▲ or ▼ to select the value to be set and then press «OK». When the cursor moves to the next digit, follow the same procedure to set the value. After all the values have been input, the cursor will return to the first digit.
-
Page 56: Connecting With The Wireless Access Point
Preparing and connecting this machine to your PC 4. Connecting with the wireless access point There are three ways as follows. (P.56) 4-1. Connecting by selecting a wireless LAN access point (P.57) 4-2. Connecting with WPS (P.59) 4-3. Manual setup and connection ... -
Page 57: 4-2. Connecting With Wps
Preparing and connecting this machine to your PC If no wireless LAN access point is found, only [Manual Setup] is displayed. In that case, make settings by following " (P.59)". 4-3. Manual setup and connection When the encryption key entry screen suitable for the encryption method of the selected wireless LAN access point is displayed, input the encryption key recorded in Step 1, and press «OK». - Page 58 Preparing and connecting this machine to your PC Press the scroll button ▲ on the operator panel several times to select [Wireless (Infrastructure) Setting], and then press «OK». Press ▲ or ▼ to input the admin password, and press «OK». Admin Password(P.207) "It is not possible to use the Wireless(AP Mode) at the same time."...
-
Page 59: 4-3. Manual Setup And Connection
Preparing and connecting this machine to your PC Go to " (P.62)". 6. Checking the connection from a PC When "Not connected to wireless access point" or "Connection failed." is displayed, repeat the procedure from Step 1, or try "4-3. - Page 60 Preparing and connecting this machine to your PC Input the SSID recorded in Step 1, and press «OK». Press ▼ to select [Security], and then press «OK». Select the encryption method recorded in Step 1, and press «OK». Press ▼ to select [WPA Pre-shared Key], and then press «OK». Input the encryption key recorded in Step 1, and press «OK».
-
Page 61: Choosing A Valid Default Gateway
Preparing and connecting this machine to your PC When "Connection successful." is displayed, the connection to the wireless LAN access point is completed. Go to " (P.62)". 6. Checking the connection from a PC When "Not connected to wireless access point" is displayed, repeat the procedure from Step 4. ... -
Page 62: Checking The Connection From A Pc
Preparing and connecting this machine to your PC Check that [General Setup] is selected, and press «OK». Press ▼ to select [Enabling Default Gateway], and then press «OK». Press ▼ to select [Wireless(Infrastructure)], and then press «OK». Press «CANCEL» to return to the standby screen. 6. - Page 63 Preparing and connecting this machine to your PC Input "http:// (The IP address recorded in Step 5)", and press the «Enter» key. Connection is successful when the web page of this machine is displayed. Then, go to " (P.69)". Installing software on a PC When using a mobile device, go to "...
-
Page 64: Connecting Directly With This Machine (Ap Mode)
Preparing and connecting this machine to your PC Connecting directly with this machine (AP mode) It may be difficult to connect if there is a metal, aluminum sash or reinforced concrete wall between this machine and the wireless terminal. ... -
Page 65: Enabling The Ap Mode
Preparing and connecting this machine to your PC Press ▼ to select [Wireless], and press «OK». When [Are You Sure?] is displayed, check that [Yes] is selected, and press «OK». Wait until the standby screen appears as this machine restarts. 2. -
Page 66: Auto Connection (Push Button)
Preparing and connecting this machine to your PC 3-1. Auto connection (Push button) If the wireless terminal supports WPS-PBC (push button), you can connect it to this machine using the WPS button. Check the position of the WPS button in the User's Manual enclosed with the wireless terminal. Press the scroll button ▼... -
Page 67: 3-2. Manual Connection
Preparing and connecting this machine to your PC 3-2. Manual connection If the wireless terminal does not support WPS-PBC (push button), input the SSID and password of this machine in the wireless terminal to connect. Press the scroll button ▼ on the operator panel several times to select [Wireless(AP Mode) Setting], and press «OK». -
Page 68: Connecting Via Usb
Preparing and connecting this machine to your PC Connecting via USB Connect this machine and a PC with a USB cable to print. Prepare a USB 2.0 cable. Not compatible with USB 3.0. The connector shape on the machine side is of type B. To connect in the USB 2.0 hi-speed mode, use a USB cable compliant with USB 2.0 hi-speed specifications. -
Page 69: Installing Software On A Pc
Preparing and connecting this machine to your PC Installing software on a PC If your PC comes with a DVD drive, install the printer driver and other software on the PC from the included DVD. If your PC does not come with a DVD drive, or if you want to update the printer driver or any other software, download and install it from the website. - Page 70 Preparing and connecting this machine to your PC When the [DVD drive] screen is displayed, click [Run Setup.exe]. If the [User Account Control] screen is displayed, click [Yes]. If the [DVD drive] screen is not displayed, open DVD from the Explorer. Choose a language from the pull-down menu of language selection in the [Welcome] screen.
- Page 71 Preparing and connecting this machine to your PC Click [Recommended Install]. The following software will be installed. PCL6 printer driver (including Network Extension) Monitoring Tool Other software is installed from either [Batch Install] or [Individual Install]. Click [Start]. Installation will begin.
-
Page 72: For Macos
Check that this machine and the PC are connected, and that the power supply is on. Insert the included DVD to the PC. Double-click on the [OKI] icon on the desktop. Double-click on [Drivers] - [PCL] - [Installer for OSX]. - Page 73 Make sure that this machine is added to the list of [Printers] and that "OKI *** PCL" (where *** is your model name) is displayed in [Type]. If "OKI *** PCL" (where *** is your model name) is not displayed in [Type], click [-] to delete this machine from [Printer], and then repeat Steps 8 to 11.
-
Page 74: Setting The Printer Driver
If you are using B822, refer to the PCL printer driver section. For Windows PCL printer driver Open "Printer folder". How to open the printer folder(P.145) Right-click the [OKI *** PCL6] icon (where *** is your model name) and select [Printer Properties]. Select the [Device Options] tab. - 74 -... - Page 75 Open "Printer folder". How to open the printer folder(P.145) Right-click the [OKI B842 PS] icon, and select [Printer Properties]. Select the [Device Settings] tab. If using a network connection, select [Get installed options automatically] in [Installable Options], and click [Setup].
- Page 76 Preparing and connecting this machine to your PC Select the total number of trays from [Available Trays], and click [OK]. For macOS PS printer driver Depending on the timing when the printer is added, the information for the expansion tray unit may have been set. Select [System Preferences] from the Apple menu.
-
Page 77: Basic Operations
Basic operations Basic operations Parts identification ..................78 Turning the power on/off ................81 Loading paper ..................82 Checking the output tray ................96 Checking the information of this machine ..........97 - 77 -... -
Page 78: Parts Identification
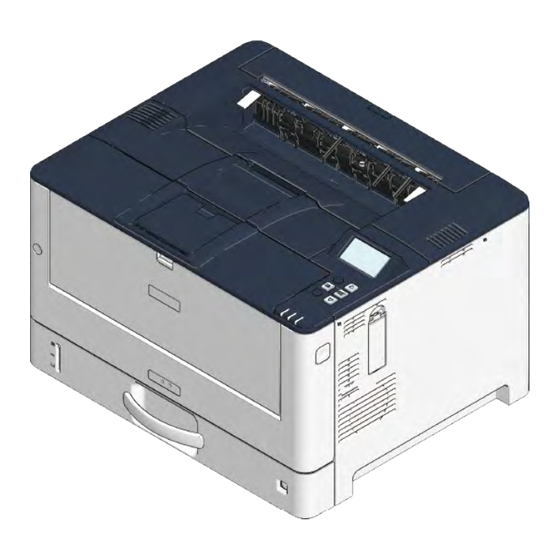
Basic operations Parts identification This section explains the name and functions of each part of the main unit. Front Name Function Front cover This is the cover on the front side of the main unit. You can press the front cover open button to open it towards you. Operator panel This is the panel used to operate the main unit. -
Page 79: Inside The Main Unit
Basic operations Inside the main unit Name Function Toner cartridge, image drum The toner cartridge contains toner (powder ink) for printing. The image drum is a unit to create an image on the paper by using toner, which comes with a toner cartridge. Both the toner cartridge and the image drum are consumables. -
Page 80: Back
Basic operations Back Name Function Power connector This is where the included power cord is plugged in. Rear cover Open it to remove jammed paper. Interface unit There is a connector to connect to a PC. USB interface connector This is where the USB cable is plugged in when the computer and the main unit is connected with a USB cable. -
Page 81: Turning The Power On/Off
Basic operations Turning the power on/off For details about power cord connection, please refer to " (P.41)". Connecting the power cord Turning the power on Press and hold the power switch for approx. 1 second. When this machine gets ready to print, "Ready To Print" will appear on the display. Turning the power off Press and hold the power switch for approx. -
Page 82: Loading Paper
Basic operations Loading paper Procedure for loading paper 1. Check the applicable paper. Applicable paper(P.82) Inapplicable paper(P.84) 2. Load the paper in the tray. Paper applicable to each tray(P.86) Loading paper in Tray1/2/3/4(P.87) Loading paper in the MP Tray(P.91) 3. Set the paper information (media size, media type, media weight) on the operator panel. - Page 83 Basic operations Media type Paper size Paper weight Other conditions Label Total weight: 0.1 ~ Labels for electrophotographic printers or 0.2mm dry PPCs where the surface paper, Letter adhesive, and backing are not degraded by heat. Media with a structure that prevents the front paper from peeling off from the backing in the heat fixing process of the printer.
-
Page 84: Inapplicable Paper
Basic operations Inapplicable paper Do not use the following types of paper. Doing so may cause paper jams or malfunction. Paper with smooth surface, rough paper, and paper with different front and back roughness Paper that is too thin or too thick ... -
Page 85: Paper Precautions By Type
Basic operations Paper precautions by type Plain If the paper width is set to 230 mm or less, the print speed will be slowed down. (e.g.) A4 . A5, A6, etc. When printing on narrow paper, you can set the print speed. Please see "Narrow Paper Speed" of the menu item for details. -
Page 86: Paper Applicable To Each Tray
Basic operations Long paper For thick paper, the toner may stick thinly to the whole paper or the printing may be light. If the paper grain direction does not match the paper feeding direction, paper jams may occur. ... -
Page 87: Loading Paper In Tray1/2/3/4
Basic operations Tray 2/3/4 (Optional) Applicable number of sheets Media type Media size Media weight Expansion tray Expansion tray unit unit (large) Plain A3, A4, A5, A6, B4, B5, B6, Tabloid, Letter, 60 ~ 220g/m 280 (When the 580 (When the Label Legal 13, Legal 14, Statement, Executive, paper weight is... - Page 88 Basic operations When the [Tray1 Config] screen is displayed, press «BACK». Set the paper size dial to fit the paper size. : Select it when you have loaded paper of a standard size not available on the paper size dial. If you are using B842dn, check the size of the paper to be loaded and the position of the paper feed adjuster (x2) according to the table below.
- Page 89 Basic operations To load paper longer than 297 mm (i.e. the length of the long side of A4 paper), unlock the left and right levers of the paper cassette. Extend the paper cassette until it stops on the rear side, and then lock the lever.
- Page 90 Basic operations Load the paper with the printing side down, and press it down from top. Do not exceed [ ] of the paper guide when loading paper. If you are using B842dn, please load up to 100 sheets of A3-sized paper with a weight of 210 g/㎡ or above. Check that the size/orientation of the loaded paper matches the setting of the paper size dial.
-
Page 91: Loading Paper In The Mp Tray
Basic operations Loading paper in the MP Tray This section explains the procedure for loading paper of standard sizes. For the paper that can be used, please refer to " (P.82)" or " (P.86)". Applicable paper Paper applicable to each tray To load paper of irregular sizes, please refer to "... - Page 92 Basic operations Lift the paper placement cover. Adjust the manual feeder guide to the width of the paper to be loaded. Shuffle the paper well. Align edges of the paper horizontally. Load the paper with the print side facing up. Do not exceed the ▽...
-
Page 93: Setting Paper Information On The Operator Panel
Basic operations If you always print on paper of the same size and type from the MP tray, go to " Setting paper (P.93)" and set the information of the loaded paper on this machine. information on the operator panel Setting paper information on the operator panel Set the size, type and weight of the paper loaded in each tray in order. - Page 94 Basic operations Press «CANCEL» to return to the standby screen. For the MP tray Check that "Ready To Print" appears on the display. Press the scroll button ▼ on the operator panel several times to select [Menus], and then press «OK».
-
Page 95: Storing Paper
Basic operations Storing paper Please keep the paper under the following conditions to maintain the quality. A dark and flat place with low humidity Temperature: 20°C Humidity: 50% RH (relative humidity) Do not store in any of the following places. ... -
Page 96: Checking The Output Tray
Basic operations Checking the output tray When printing has completed, the paper is output with the printing side down in the order in which they are printed. Below is the number of sheets that can be ejected to the output tray. For A4 ... -
Page 97: Checking The Information Of This Machine
Basic operations Checking the information of this machine You can print out and check the information of this machine. You can also check the information from the operator panel. Printing the menu map (configuration) Check that "Ready To Print" appears on the display. If the machine is in the power saving mode, press «OK»... -
Page 98: Confirming On The Operator Panel
Basic operations Confirming on the operator panel You can check the supplies status and counter information on the operator panel. Check that "Ready To Print" appears on the display. If the machine is in the power saving mode, press «OK» to restore. Press the scroll button ▼... -
Page 99: Changing Settings From The Operator Panel
Changing settings from the operator panel Changing settings from the operator panel Parts identification of the operator panel ..........100 Inputting text ................... 101 Changing settings................... 102 Adjusting the buzzer volume ..............103 Setting the power save function ............. 104 Menu items ..................... -
Page 100: Parts Identification Of The Operator Panel
Changing settings from the operator panel Parts identification of the operator panel Name Function Display Displays the state of this machine and operation instructions. There are two types of standby screens: "Show Remaining Toner" and "Show Tray Information". The factory default setting is "Show Remaining Toner". «HELP»... -
Page 101: Inputting Text
Changing settings from the operator panel Inputting text You can input alphabetic or numeric characters by using the scroll button ▲ or ▼ on the operator panel. If a same button is pressed in succession, the alphanumeric character will switch. To continue inputting with the same button, press «OK»... -
Page 102: Changing Settings
Changing settings from the operator panel Changing settings This section describes how to change menu settings from the operator panel. See "Menu items(P.110)" for a list of menu items. Check that "Ready To Print" appears on the display. If the machine is in the power saving mode, press «OK» to restore. Press the scroll button ▲... -
Page 103: Adjusting The Buzzer Volume
Changing settings from the operator panel Adjusting the buzzer volume The volume of the following buzzers is adjustable in three steps. When a paper jam or any other error occurs When printing has completed When you use AirPrint, Mopria or IPP Everywhere to find a printer Press the scroll button ▼... -
Page 104: Setting The Power Save Function
Changing settings from the operator panel Setting the power save function Setting the time that elapses before entering the power save mode This machine automatically enters the power save mode (an energy saving mode) if no operation is done for a certain period of time. -
Page 105: Setting The Time That Elapses Before Entering The Sleep Mode
Changing settings from the operator panel Setting the time that elapses before entering the sleep mode This machine automatically enters the sleep mode (a more energy saving mode) if no operation is done for a certain period of time in the power save mode. The following time options can be set. -
Page 106: Turning Off The Power Automatically (Auto Power Off)
Changing settings from the operator panel Turning off the power automatically (Auto Power Off) This machine comes with a function (Auto Power Off) to turn off the power automatically if it has not been used for a certain period of time. There are 3 types of settings for Auto Power Off, and the default factory setting is [Auto Config]. -
Page 107: Setting The Time That Elapses Before Entering The Auto Power Off Mode
Changing settings from the operator panel Check that [Auto Power Off] is selected, and then press «OK». Press ▲ or ▼ to select [Auto Config], [Enable] or [Disable], and then press «OK». Check that [*] is displayed to the left of the selected setting. Press «CANCEL»... -
Page 108: Setting Actions Of The Power Save Mode
Changing settings from the operator panel Press ▲ or ▼ to select the time to be set, and then press «OK». Check that [*] is displayed to the left of the selected setting. Press «CANCEL» to return to the standby screen. Setting actions of the power save mode Set actions of the power save mode. - Page 109 Changing settings from the operator panel Press ▲ or ▼ to select the mode to be set, and then press «OK». Check that [*] is displayed to the left of the selected setting. Press «CANCEL» to return to the standby screen. - 109 -...
-
Page 110: Menu Items
Changing settings from the operator panel Menu items You can print to check the menu list. Printing the menu map (configuration)(P.97) Configuration Item Description Tray Count MP Tray Displays the total print quantity for each tray. Tray2/3/4 is displayed when an optional Tray1 expansion tray is mounted. - Page 111 Changing settings from the operator panel Item Description Wired(LAN2) Wired (LAN2) Displays the status (enabled/disabled) of the Information optional wired LAN2 module. * Displayed IPv4 Address Displays the IP address of the wired network. when the Subnet Mask Displays the subnet mask. optional wired Gateway Displays the gateway address when [Enabling...
-
Page 112: Print Information
Changing settings from the operator panel Item Description IPv4 Address Displays the IP address. System Serial Number Indicates the serial number of the printer. Asset Number Indicates the asset number of the printer. Firmware Indicates the version of firmware. Version CU Version Indicates the firmware version of the Control Unit (CU). -
Page 113: Menus
Changing settings from the operator panel Menus Factory Item default Description setting Tray MPTray Paper Size Sets the size of the paper you want to print Configuration Config on from the MP tray. X Dimension 210millimeter Sets the paper width when you have selected a custom size for the paper that you want to print on from the MP tray. - Page 114 Changing settings from the operator panel Factory Item default Description setting Media Type Plain Sets the type of the paper you want to print on from Tray 2. Media Weight Light Sets the weight of the paper you want to print on from Tray 2.
- Page 115 Changing settings from the operator panel Factory Item default Description setting System Power Save Time 1 minute Sets the time to switch to power saving Adjust mode. Value range: 1 minute, 2 minutes, 3 minutes, 4 minutes, 5 minutes, 10 minutes, 15 minutes, 30 minutes, and 60 minutes Sleep Time 1 minute...
- Page 116 Changing settings from the operator panel Factory Item default Description setting Print Adjust Print Position MPTray X Adjust 0.00millimete Adjusts the printing position of each tray. Adjust Tray2/3/4 is displayed when the expansion Y Adjust 0.00millimete tray is mounted. X Adjust: Corrects the position of the overall print image perpendicularly over Duplex X 0.00millimete...
- Page 117 Changing settings from the operator panel Factory Item default Description setting Trans. Black Setting Used for fine adjustment in case of noticeable blur etc. in the print results during printing when [Transparency] is selected as [Media Type]. Decreases the value if printing such as scattered or snow-covered printing occurs in high-density printing.
-
Page 118: Admin Setup
Changing settings from the operator panel Factory Item default Description setting Ultra Light Paper Care Mode If the following phenomena occur when you are printing with [Media Weight] set to [Light], setting it to [On] may improve the situation. But, the printing speed becomes lower. - Page 119 Changing settings from the operator panel Factory Item default Description setting SNMP Enable Enables the access from SNMP. Displayed when the TCP/IP protocol is enabled. Network Scale Small Normally, [Small] is selected. Network Factory Defaults Execute Initializes the network menu settings. Wired(LAN1) Wired(LAN1) Enable...
- Page 120 Changing settings from the operator panel Factory Item default Description setting Duplex Sets whether or not to implement duplex printing. The value set in the printer driver takes priority. Binding Long Edge Specifies the binding method for duplex printing. The value set in the printer driver takes priority.
- Page 121 Changing settings from the operator panel Factory Item default Description setting Font Pitch 10.00 CPI Sets the PCL font width. Value range: 0.44 ~ 99.99 CPI (in increments of 0.01 CPI) Font Height 12.00 points Sets the PCL font height. Value range: 4.00 ~ 999.75 points (in increments of 0.25 point) Symbol Set...
- Page 122 Changing settings from the operator panel Factory Item default Description setting Bottom Margin 6millimeter Sets the bottom margin of IBM 5577 emulation. It ranges from 4 mm to 100 mm. Image Wrap Mode Specifies whether to print on Image Wrap Mode.
- Page 123 Changing settings from the operator panel Factory Item default Description setting Image Regular Sets the conversion method for converting 180DPI → 300DPI. Private Print Verify job option Disable Specifies whether to verify the print data Setup before printing. If enabled, printing is performed after verifying that the print data has not been changed.
- Page 124 Changing settings from the operator panel Factory Item default Description setting Time Zone +9:00 Sets the GMT time zone.) Value range: -12:00 ~ +13:00 (in increments of 15 minutes) Daylight Saving Sets the daylight saving (daylight saving time). Setting method Manual Selects how to set the time.
- Page 125 Changing settings from the operator panel Factory Item default Description setting Setup User Counter Report Execute Prints a user counter report. Displayed when access control is set to [Enable] and [Save Job Log] is enabled. Language Select Language English Select the language to be displayed on the Setup display.
-
Page 126: Print Statistics
Changing settings from the operator panel Print Statistics Factory Item default Description setting Enter Password **** Input the password required to enter the Print Statistics menu. The input range is a 4-digit number. The factory default setting is "0000". Usage Report Enable Enables/Disables the usage report. -
Page 127: Wireless(Infrastructure) Setting
Changing settings from the operator panel Wireless(Infrastructure) Setting Factory Item default Description setting Enter Password ********** Input the password required to enter the Admin Setup menu. Wireless(Infrastructure) Disable Enables/Disables the wireless LAN (infrastructure). Network IP Address Set Auto Set to obtain the IPv4 address automatically or input it Setting manually. - Page 128 Changing settings from the operator panel Factory Item default Description setting Connection Settings SSID OKI-Printer Inputs a new one to change the SSID. name-Last 6 digits of the MAC address Password Inputs a new one to change the password. IPv4 Address 192.168.110.
-
Page 129: Boot Menu
Changing settings from the operator panel Boot Menu Open the output tray by holding its center. Press and hold «OK» on the operator panel to power on the machine. When [Boot Menu] appears on the display, release your finger and then press «OK» again. Press the scroll button ▲... -
Page 130: Printing From A Pc
Printing from a PC Printing from a PC Printing from a PC .................. 131 Screens and functions of the printer driver ..........134 Printing on various types of paper ............146 Printing methods ..................168 Printing in economy mode ..............180 Refining your finishing ................ -
Page 131: Printing From A Pc
Open the file to be printed. Select [Print] from the [File] menu. Select [OKI *** PCL6] (where *** is your model name) from [Select Printer]. Click [Preferences] (or [Properties]). Select the size of the loaded paper from [Size] in the [Setup] tab. -
Page 132: For Macos Pcl Printer Driver
Printing from a PC Click [Preferences] (or [Properties]). Select the [Paper/Quality] tab. Select the tray to be printed from [Paper Source]. If you cannot select Tray 2/3/4, see "Setting the printer driver(P.74)". Click [Advanced]. Click [Paper Size], and select the size of the loaded paper from the drop-down list. Set other necessary items. - Page 133 Printing from a PC Select the size of the loaded paper from [Media Size], and click [OK]. Select [Print] from the [File] menu. Select the [Paper Feed] panel. Select [All Pages From], and select the tray to be printed from. If you cannot select Tray 2/3/4, see "Setting the printer driver(P.74)".
-
Page 134: Screens And Functions Of The Printer Driver
Printing from a PC Screens and functions of the printer driver Windows PCL printer driver [Setup] tab Item Description Driver Setting Save the settings. Layout image Displays a sample image of the print layout. Size Sets the media size. Source Sets the paper source. - Page 135 Printing from a PC [Job Options] tab Item Description Quality Specifies the print resolution. Scale Sets the enlargement/reduction of printing. Copies Specifies the number of copies. Job Type Sets the type of printing. Print Mode Sets whether the print data sent to the printer is in PCL format or as an image. Advanced Make other printing settings.
-
Page 136: Windows Ps Printer Driver
Printing from a PC Windows PS printer driver [Layout] tab Item Description Orientation Sets the printing orientation. Print on Both Sides Set for duplex printing. Page Order Sets the order of pages to be printed. Page format Specifies the number of pages to be printed on one sheet of paper and booklet printing. - Page 137 Printing from a PC [Job Options] tab Item Description Quality Specifies the print resolution. Job Type Sets the type of print data and the number of copies. When [Shared Print] or [Private Print] is set, [Job Type Options] is available. If [Collate] is checked, multiple documents will be printed as a batch.
-
Page 138: For The Macos Pcl Printer Driver
Printing from a PC For the macOS PCL printer driver [Layout] panel Item Description Pages per Sheet Selects the number of pages to be printed on one sheet of paper. Layout Direction Specifies the layout for printing multiple pages on one sheet of paper. Border Specifies the type of borders. - Page 139 Printing from a PC [Cover Page] panel Item Description Print Cover Page Specifies the cover printing. Cover Page Type Specifies the text string for cover printing. [Setup] panel Item Description Paper Source Sets the paper source, paper type, paper weight and so on. Duplex Specifies settings for printing on both sides.
- Page 140 Printing from a PC [Job Options] panel Item Description Print Quality Specifies the printing resolution. Toner Saving Specify the print density in the toner saving mode. Advanced Sets other job options. Default Restores the panel settings to the default settings. [Image] panel Item Description...
-
Page 141: For The Macos Ps Printer Driver
Printing from a PC [User Authentication] panel Item Description Use User Authentication Checked to set user authentication for printing. User Name The user name for user authentication. Password The password for user authentication. Authentication Type Specifies the authentication type to be used. ... - Page 142 Printing from a PC [Paper Handling] panel Item Description Collate pages Checked to print a multi-page document in collation. Pages to Print Specifies the pages to be printed. Page Order Specifies the order of pages to be printed. Scale to fit paper size Prints by fitting to the media size.
- Page 143 Printing from a PC [Cover Page] panel Item Description Print Cover Page Specifies the cover printing. Cover Page Type Specifies the text string for cover printing. [Printer Features] panel Item Description Job Options, Paper input Specifies the print quality, toner save, media type, etc. options - 143 -...
- Page 144 Printing from a PC [User Authentication] panel Item Description Use User Authentication Checked to set user authentication for printing. User Name The user name for user authentication. Password The password for user authentication. Authentication type Specifies the authentication type to be used. ...
-
Page 145: How To Open The Printer Folder
Printing from a PC How to open the printer folder This section explains how to open the printer driver icon folder for each version of Windows. For Windows 11 Click [Start] - [All apps] to display the application list. Select [Windows Tool] - [Control Panel] - [Devices and Printers]. For Windows 10 (Version 1703 or later)/Windows Server 2022/Windows Server 2019 Click [Start] to display the application list. -
Page 146: Printing On Various Types Of Paper
Printing from a PC Printing on various types of paper Printing on Postcard You can print on postcards using Tray1 or the Multi Purpose Tray (MP Tray). Tray2/3/4 is not applicable. Loading postcards in Tray1 Check the paper precautions. Applicable paper(P.82) Inapplicable... - Page 147 Printing from a PC Press ▼ to select [Tray1 Config], and then press «OK». Check that [Media Size] is selected, and press «OK». Check that [*] is displayed to the left of [Cassette Size], and then press «BACK». If [*] is not displayed, press ▲...
- Page 148 Printing from a PC Load postcards with the print side facing up by referring to the following instructions. Load postcards in portrait orientation. Double postcards can be loaded either in portrait or landscape orientation. For the detailed procedure, please refer to " (P.91)".
- Page 149 Printing from a PC Press ▲ or ▼ several times to select a value that matches the postcards to be loaded, and then press «OK». Check that [*] is displayed to the left of the selected setting. Press «CANCEL» to return to the standby screen. Printing from a PC ...
- Page 150 Printing from a PC Use [Paper Source] in the [Paper/Quality] tab to select the tray to be used. For double postcards, select [Portrait] or [Landscape] from [Orientation] in the [Layout] tab. Specify other settings as necessary, and click [OK]. If you want to print while checking each sheet, check [Feeds paper one by one from the MP tray] in [Advanced] on the [Layout] tab of the printer driver (or select [Yes]).
-
Page 151: Printing On Envelopes
Printing from a PC Specify other settings as necessary, and click [Print]. If you want to print while checking each sheet, select [MP Tray] from [All Pages From] on the [Paper Feed] panel in the printer driver, and check [Feeds paper one by one from the MP tray] of [Paper input options] on the [Printer Features] panel (or select [Yes]). - Page 152 Printing from a PC Check that [Tray Configuration] is selected, and press «OK». Press ▼ to select [Tray1 Config], and then press «OK». Check that [Media Size] is selected, and press «OK». Check that [*] is displayed to the left of [Cassette Size], and then press «BACK». If [*] is not displayed, press ▲...
- Page 153 Printing from a PC Loading envelopes in the MP Tray Check the paper precautions. Applicable paper(P.82) Inapplicable paper(P.84) Paper precautions by type(P.85) Load envelopes with the print side facing up by referring to the following instructions. Load long envelopes (Nagagata #3, Nagagata #4, Nagagata #40, Kakugata #2 and Kakugata #3) with the flap (opening margin) open.
- Page 154 Printing from a PC Check that [MPTray Config] is selected, and then press «OK». Check that [Media Size] is selected, and press «OK». Press ▲ or ▼ several times to select a value that matches the envelopes to be loaded, and then press «OK».
- Page 155 Printing from a PC Click [Preferences]. Click [Advanced] in the [Layout] tab, and select [Envelope*] from [Paper Size]. * Select the type of the envelope loaded. Click [OK]. Select the tray where envelopes are loaded from [Paper Source] in the [Paper/Quality] tab. Specify other settings as necessary, and click [OK].
-
Page 156: Printing On Labels
Printing from a PC Printing on labels Loading labels in Tray 1/2/3/4 Check the paper precautions. Applicable paper(P.82) Inapplicable paper(P.84) Paper precautions by type(P.85) Load labels with the print side facing down by referring to the following instructions. For the detailed procedure, please refer to " (P.87)". - Page 157 Printing from a PC Check that [*] is displayed to the left of [Cassette Size], and then press «BACK». If [*] is not displayed, press ▲ to select [Cassette Size], and press «OK» and then «BACK». If the paper size dial of the paper cassette is set to any other option than [ ], proceed to Step 11. If [ ] is set, press ▲...
- Page 158 Printing from a PC Load labels with the print side facing up by referring to the following instructions. For the detailed procedure, please refer to " (P.91)". Loading paper in the MP Tray Check that "Ready To Print" appears on the display. Press the scroll button ▼...
- Page 159 Printing from a PC Press ▲ or ▼ to select [Labels], and then press «OK». Check that [*] is displayed to the left of the selected setting. Press «CANCEL» to return to the standby screen. Printing from a PC If you are using B822, refer to the PCL printer driver section. For Windows PCL printer driver Open the file to be printed.
- Page 160 Printing from a PC Make settings as follows in [Media]. If you selected [Labels] on the operator panel when you loaded labels in the machine, select [Printer Settings] in [Media]. In other cases, select [Labels] in [Media]. Specify other settings as necessary, and click [OK]. If you want to print while checking each sheet, check [Feeds paper one by one from the MP tray] in [Advanced] on the [Layout] tab of the printer driver (or select [Yes]).
-
Page 161: Printing On Long Paper
Printing from a PC Specify other settings as necessary, and click [Print]. If you want to print while checking each sheet, select [MP Tray] from [All Pages From] on the [Paper Feed] panel in the printer driver, and check [Feed one sheet at a time from the MP tray] of [Paper Feed Options] on the [Printer Features] panel (or select [Yes]). - Page 162 Printing from a PC Click [Preferences]. Click [Advanced] in the [Layout] tab, select [PostScript Custom Page Size] from [Paper Size], and input values in [Width] and [Height]. To change the size, press [Edit Custom Page Size], and input values in [Width] and [Height]. Click [OK].
-
Page 163: Printing On Irregular-Sized Paper (Custom Size)
Printing from a PC If there is no detail settings displayed in the [Print] screen, click [Show Details] at the bottom of the screen. Printing on irregular-sized paper (custom size) When printing on irregular-sized paper (custom size), set the media size, media type and media weight of the irregular size (custom size) on the operator panel. - Page 164 Printing from a PC Press ▼ to select [Custom], and then press «OK». Check that [*] is displayed to the left of [Custom], and then press «BACK». Press ▼ to select [X Dimension], and press «OK». Press ▲ or ▼ to input the paper width, and then press «OK». Check that [*] is displayed to the left of the value, and then press «BACK».
- Page 165 Printing from a PC Press «CANCEL» to return to the standby screen. Load paper in the tray to be used. When the setting change screen is displayed, press «BACK». Loading paper in Tray1/2/3/4(P.87) Loading paper in the MP Tray(P.91) Printing from a PC ...
- Page 166 Printing from a PC Open the file to be printed. Select [Print] from the [File] menu. Click [Preferences]. Click [Advanced] in the [Layout] tab. Select [PostScript Custom Page Size] from [Paper Size]. Click [OK]. Specify the media weight and other settings as necessary, and click [OK]. Click [Print] in the [Print] screen.
- Page 167 Printing from a PC Input values in [Width] and [Height]. Click [OK] until the [Page Setup] is closed. Select [Print] from the [File] menu. Select the media size registered in [Paper Size]. Specify the media weight and other settings as necessary, and click [Print]. If there is no detail settings displayed in the [Print] screen, click [Show Details] at the bottom of the screen.
-
Page 168: Printing Methods
Printing from a PC Printing methods This section describes various printing methods such as zooming-in/-out and booklet printing. Printing one sheet at a time manually You can print one sheet at a time by loading paper to the MP Tray. Each time you print each page, the display shows the message "Manual Printing. -
Page 169: Enlarging/Reducing To Fit The Specified Media Size
Printing from a PC For macOS PCL printer driver Open the file to be printed. Select [Print] from the [File] menu. Select [Multi Purpose Tray] from [Paper Source] on the [Setup] panel. Click [Paper feed options]. Check [Feeds paper one by one from the MP tray], and then click [OK]. Specify other settings as necessary, and click [Print]. -
Page 170: Printing By Enlargement/Reduction
Printing from a PC Select the size of the media to be printed on. Specify other settings as necessary, and click [OK]. Click [Print] in the [Print] screen. For the Windows PS printer driver Open the file to be printed. Select [Print] from the [File] menu. -
Page 171: Printing Only The Cover From Another Tray
Printing from a PC For Windows PCL printer driver Open the file to be printed. Select [Print] from the [File] menu. Click [Preferences]. Input the scaling rate for [Scale] on the [Job Options] tab. If [Print Mode] is set to [PCL] and [Scale] is checked, different scales can be specified for portrait and landscape. The scaling function further enlarges/reduces the state specified in [Scale], [Options] (N-UP, Booklet, Poster Print), [Print Position Adjust], and [Bind Margin]. -
Page 172: Booklet Printing
To create an A4 booklet using A4-sized paper, select [A3] from [Size] in the [Setup] tab. If [Booklet] is not available to the Windows PCL printer driver, open "Printers Folder", right-click on the icon [OKI *** PCL6] (where *** is your model name), and select [Printer Properties] - the [Job Options] tab - [Print Processor] - [OKX05QPP] - [RAW], and click [OK]. -
Page 173: Printing A Poster By Dividing A Document
Click [Print] in the [Print] screen. If [Page Format] is not displayed in the [Layout] tab, open the "Devices and Printers", right-click on the [OKI B842 PS] icon, and select [Printer properties] - [Advanced] tab. Check [Enable advanced printing features]. -
Page 174: Inserting And Printing A Watermark Text (Watermark)
To create an A2-sized poster using 4 sheets of A3 paper, select [A3] in the paper size, and select [4] in [Enlarge]. If this feature is not available to the Windows PCL printer driver, open "Printers Folder", right-click on the icon [OKI *** PCL6] (where *** is your model name), and select [Printer Properties] - the [Job Options] tab - [Print Processor] - [OKX05QPP] - [RAW], and click [OK]. -
Page 175: Printing Overlaid Text Or Logos (Overlay Printing)175
Printing from a PC Printing overlaid text or logos (overlay printing) You can print a document with an overlapping form file (like a logo or format) registered in this machine beforehand. It is called overlay printing. This function is not available to macOS. ... -
Page 176: Outputting To A File Without Printing On Paper
Printing from a PC Click [Detail Settings]. Select the [Job Options] tab. Select [PCL] in [Print Mode]. Select the [Extend] tab. Click [Overlays]. Select [Overlay Print], and then select the form file to overlay from the drop-down list. Click [Edit list] and add it to the list if you want to add a form file registered with the Configuration Tool or if you want to overlay multiple forms as a group. -
Page 177: Printing Frequently Used Documents Without Using A
Printing from a PC For Windows Open "Printers Folder". How to open the printer folder(P.145) Right-click on the icon of your model and select [Printer Properties]. If you are using B842, please be careful about PCL6/PS. Select the [Ports] tab. Select [FILE:] from the port list, and click [OK]. - Page 178 Printing from a PC Input the print data name in [Job Name]. If you check [Input job type option when printing], a prompt asking for the print data name is displayed when the print data is sent to this machine. Click [OK].
-
Page 179: Printing An Email Attachment
Printing from a PC Since a list of shared print data appears, press ▲ or ▼ to select the shared print data you want to print, and then press «OK». To print all shared print data, select [Print All] and then press «OK». ... -
Page 180: Printing In Economy Mode
Printing from a PC Printing in economy mode This section describes how to save paper and toner on printing. Printing on both sides of paper You can print on both sides of paper. Some applications may not be available. ... -
Page 181: Printing In The Toner Save Mode
Printing from a PC Select [Long-Edge binding] or [Short-Edge binding] from [Two-Sided] in the [Layout] panel. Specify other settings as necessary, and click [Print]. If there is no detail settings displayed in the [Print] screen, click [Show Details] at the bottom of the screen. Printing in the toner save mode Print in the toner save mode. -
Page 182: N-In-1 Printing
Printing from a PC Select [Print] from the [File] menu. Select the [Job Options] panel. Select the amount of toner to be saved from [Toner Saving]. Specify other settings as necessary, and click [Print]. If there is no detail settings displayed in the [Print] screen, click [Show Details] at the bottom of the screen. For macOS PS printer driver Open the file to be printed. - Page 183 Printing from a PC Select [Pages per sheet] in the [Page Format] of the [Layout] tab. Select the number of pages to be printed on 1 sheet from the pull-down menu. If you do not want to draw a border, uncheck [Draw Borders]. Click [Advanced], select the order of page layout from the [Pages per sheet layout] in the [Document Options].
-
Page 184: Refining Your Finishing
Printing from a PC Refining your finishing This section describes how to make the print result better when you are printing from your PC. Printing with the specified print resolution You can change the print quality as needed. If you are using B822, refer to the PCL printer driver section. For Windows PCL printer driver Open the file to be printed. -
Page 185: Printing By Correcting Fine Lines
Printing from a PC For macOS PS printer driver Open the file to be printed. Select [Print] from the [File] menu. Select the [Printer Features] panel. Select the value you want to set from [Print Quality]. Specify other settings as necessary, and click [Print]. ... -
Page 186: Printing By Specifying The Font To Use
Printing from a PC Specify other settings as necessary, and click [OK]. Click [Print] in the [Print] screen. For macOS PS printer driver Open the file to be printed. Select [Print] from the [File] menu. Select the [Printer Features] panel. Check [Adjust ultra fine lines]. - Page 187 Printing from a PC Right-click on the icon of [OKI B842 PS], and select [Printer Properties]. Double-click on [Font Substitution Table] in the [Device Setup] tab. Click the TrueType font, and select the substitution printer font from the list. Click [OK].
- Page 188 Printing from a PC For the Windows PS printer driver Open the file to be printed. Select [Print] from the [File] menu. Click [Preferences]. Click [Advanced] in the [Layout] tab. Select [Download as Softfont] from [TrueType Font] in [Graphic]. Click [OK]. Specify other settings as necessary, and click [OK].
-
Page 189: Useful Functions
Printing from a PC Useful functions This section describes useful functions for printing from a PC. Printing with multiple pages sorted into one complete set (Collate) You can print the print data of multiple pages and put them into one complete set. ... -
Page 190: Ejecting Paper Alternately In Portrait And Landscape With Collation (Rotate Sort)
Printing from a PC If there is no detail settings displayed in the [Print] screen, click [Show Details] at the bottom of the screen. Click [Others] in the [Job Options] panel, and uncheck [User Collation of Printer] to print without using the memory of this machine. - Page 191 Printing from a PC Printing For Windows PCL printer driver The function is not available when [Print Mode] is set to [Image]. Open the file to be printed. Click [Print] from the [File] menu. Click [Preferences]. Select the [Setup] tab. Set [Type].
-
Page 192: Printing From The Last Page Of Your Document
Specify other settings as necessary, and click [OK]. Click [Print] in the [Print] screen. If [Page Order] is not displayed, open "Printers Folder", right-click on the [OKI B842 PS] icon, and select [Printer Properties] - the [Job Options] tab. Check [Enable advanced printing features]. -
Page 193: Printing By Automatically Selecting A Tray For The Specified Paper
Printing from a PC Printing by automatically selecting a tray for the specified paper The tray (i.e. the paper tray (Tray1/2/3/4), or the MP Tray) matching the paper size and type that are set in the printer driver will be selected automatically for printing. Trays are selected according to the setting of [Tray Sequence]. -
Page 194: Switching Tray Automatically At Running Out Of Paper
Printing from a PC For the macOS PCL printer driver Open the file to be printed. Select [Print] from the [File] menu. Select [Auto] in [Paper Source] on the [Setup] panel. Specify other settings as necessary, and click [Print]. If there is no detail settings displayed in the [Print] screen, click [Show Details] at the bottom of the screen. For the macOS PS printer driver Open the file to be printed. - Page 195 Printing from a PC Press ▲ to select [Normal Tray], and then press «OK». Trays are switched according to the setting of [Tray Sequence]. Press «CANCEL» to return to the standby screen. For Windows PCL printer driver Open the file to be printed. Select [Print] from the [File] menu.
-
Page 196: Changing Default Settings Of The Printer Driver
Printing from a PC Specify other settings as necessary, and click [Print]. If there is no detail settings displayed in the [Print] screen, click [Show Details] at the bottom of the screen. Changing default settings of the printer driver You can set those frequently used functions as the default settings of the printer driver. - Page 197 Printing from a PC Set the print setup you want to save. In the [Setup] tab, click [Save] in the [Driver Settings]. Specify a name for the setting to save, and click [OK]. Click [OK] to close the [Print Setup] screen. For macOS PCL printer driver ...
-
Page 198: Printing Data Stored In This Machine
Printing from a PC Select the setting to be used from [Presets]. Click [Print]. When you select [Show Presets] from [Presets] and uncheck [Reset Preset Menu to "Default Settings" after Printing], the preset you set will always be applied. For the macOS PS printer driver Open the file to be printed. -
Page 199: Printing Ps Errors
Printing from a PC Click [Advanced]. Check [Job Spool], and click [OK]. Specify other settings as necessary, and click [OK]. Click [Print] in the [Print] screen. Printing PS errors You can print the error content when a PostScript error occurs. ... -
Page 200: Editing Margins
Printing from a PC Select [Margin Setup] in [Item], and set it to [Min] in [Settings]. Click [OK]. Specify other settings as necessary, and click [OK]. Click [Print] in the [Print] screen. Editing margins You can extend the margins to the top, bottom, left, and right to 30.0mm/1.18inch, change the printable area, and print on the paper to be printed. -
Page 201: Correcting The Print Position Of The Tray
Printing from a PC Correcting the print position of the tray You can correct the print start position vertically and horizontally on paper for each tray. Set the correction volume in increments of 0.25 mm on the operator panel. [X Adjust] and [Y Adjust] correct the simplex printing and the back side (the printing side fed from the tray) of duplex printing. -
Page 202: Printing With Print Data Encrypted And Password Set (Private Print)
Printing from a PC Printing with print data encrypted and password set (Private Print) When printing private jobs, to prevent others from seeing the printing results of personal and confidential documents, the print data is encrypted and saved with a password in the machine's memory, and it is authenticated and printed from the operator panel. - Page 203 Printing from a PC Specify other settings as necessary, and click [OK]. Click [Print] in the [Print] screen. Only the print data with a password set for encryption is sent to this machine, but without printing. For macOS PS printer driver Open the file to be printed.
- Page 204 Printing from a PC When [Admin Setup] - [Others Setup] - [Security Setup] is set to [Enable] on this machine, if [Admin Setup] - [Private Print Setup] - [Verify job password] is set to [Off], you can skip inputting the password. ...
-
Page 205: Canceling The Printing
Printing from a PC Canceling the printing To cancel the data being printed or ready to print, press «CANCEL» on the operator panel for a short time (2 seconds or less). You can change how long the button is pressed from [Admin Setup] - [Others Setup] - [Job Cancel Setup] - [Cancel Button Behavior] of the menu items. -
Page 206: Management Of This Machine
Management of this machine Management of this machine Admin Password ..................207 Changing settings of Admin Setup ............212 Managing the machine from the web page ..........213 User restriction (Access control) ............238 Initializing the settings ................247 Moving/Transporting this machine ............249 Disposal .................... -
Page 207: Admin Password
Management of this machine Admin Password The admin password is used to change the settings of the machine. We recommend that you change the admin password to protect your personal information. Checking the factory default admin passwords The factory default admin password is set to a 10-digit value of this machine's serial number with upper-case letters converted to lower-case ones. - Page 208 Management of this machine Press the scroll button ▼ on the operator panel to check that [Configuration] is selected, and then press «OK». Press ▲ to select [System], and then press «OK». Check that [Serial Number] is selected, and press «OK». Check the 10-digit alphanumeric characters displayed in [Serial Number].
-
Page 209: Inputting The Factory Default Admin Passwords
Management of this machine Checking against the sticker on the back of the machine Check the leftmost 10 digits of the alphanumeric characters on the sticker attached on the back of the machine. You may convert the upper-case letters into lower-case ones and use the converted string as the admin password. -
Page 210: Changing The Admin Password
Management of this machine Press ▼ for eight times to check that "2" is displayed, and then press «OK». Input the remaining characters by the same procedure. Press «OK» again to complete inputting the admin password and display [Admin Setup]. Changing the admin password The admin password can consist of 1 to 32 digits. - Page 211 Management of this machine Press ▲ to select [Change Password], and then press «OK». When "Be careful not to forget the new administrator password that you have just changed. It is required to change the settings. Press the OK Button." is displayed, press «OK». Enter a new password and press «OK».
-
Page 212: Changing Settings Of Admin Setup
Management of this machine Changing settings of Admin Setup This section explains the procedure of changing settings of this machine as an administrator. Check that "Ready To Print" appears on the display. If the machine is in the power saving mode, press «OK» to restore. Press the scroll button ▼... -
Page 213: Managing The Machine From The Web Page
Management of this machine Managing the machine from the web page You can manage the machine by accessing the web page of the machine from a web browser on your PC or mobile device. What you can do with the web page is as follows. ... -
Page 214: Logging In As An Administrator
Management of this machine Logging in as an administrator To change settings of this machine from the web page, it is necessary to log in as an administrator. Click [Login]. Input "admin" in [User Name] and the admin password of this machine in [Password], and then click [Sign In]. -
Page 215: Checking/Changing The State Of This Machine
Management of this machine Open the web page of this machine. Opening the web page(P.213) Log in as an administrator. Logging in as an administrator(P.214) Select [Printer Settings]. Cline [Menu] on the upper right corner, and then select [Management] - [Admin Password]. Input the new password in [New Admin Password]. -
Page 216: Saving Configurations
Management of this machine Changing settings of this machine You can change settings of this machine from the web page. Open the web page of this machine. Opening the web page(P.213) Log in as an administrator. Logging in as an administrator(P.214) Change the settings, and click [Apply]. - Page 217 Management of this machine Open the web page of this machine. Opening the web page(P.213) Log in as an administrator. Logging in as an administrator(P.214) Select [Network Setup]. Click [Menu] on the upper right corner, select [Security] - [Communication Encryption (SSL/TLS Server Certificate)], and click [Delete Certificate].
-
Page 218: Disabling Http
Since [Role management] of the Configuration Tool is not available, restrict access to this machine from the web page. The web page of this machine cannot be opened with [Web Setting] of Network Extension and OKI LPR utility. To open the web page of this machine, input "https://<this machine's IP address>" directly from the web browser. -
Page 219: Communication Encryption (Ipsec)
Management of this machine Click [Have Disk]. Insert the included DVD to the PC. If your PC does not come with a DVD drive, double-click on the driver software file downloaded from the website to unzip it. Input the following values in [Copy manufacturer's files from], and click [Ref]. To install the PCL printer driver: "D:¥Drivers¥_PCL"... -
Page 220: Using The Access Control Function (Ip Filter) With The Ip Address
Management of this machine When IPSec is enabled, any communication with the host not specified in this step will be denied. IPSec communication is done when IPSec is set for this machine and the host. If IPSec is not set on the host, IPSec communication will not be done. -
Page 221: Using The Access Control Function With The Mac Address
Management of this machine Configure the settings following the on-screen instructions. If nothing is registered in [Administrator's IP Address setting], access to this machine may be disabled depending on the specified IP address range. If you are using a proxy server, [Your Current Local Host/Proxy IP Address] may not match the IP address of the current host. -
Page 222: Using Snmpv3
Management of this machine Click the Menu button on the upper right corner, and then select [Printer management] - [Email Alert]. Select [Enable] on the displayed screen. Set the mail address allocated to this machine in [Device E-mail Address]. Input the e-mail server name or the address of e-mail server in [SMTP Server]. Set appropriate values for other setting items if necessary. - Page 223 Management of this machine Setting with EAP-TLS This section describes how to set up EAP-TLS, one of the IEEE802.1X authentication. Open the web page of this machine. Opening the web page(P.213) Log in as an administrator. Logging in as an administrator(P.214) Select [Network Setup].
-
Page 224: Setting Ieee802.1X (Wireless Lan)
Management of this machine Select [Enable] in [IEEE802.1X Authentication]. Select [PEAP] in [EAP Type]. Input the user name in [EAP User]. Input the password in [EAP Password]. Select [Authenticate Server] in [Server Authentication Implementation]. Click [Import] in [Import of CA Certificate]. Select the CA certificate file, and click [OPEN]. -
Page 225: Connecting To A Wireless Lan (Wpa/Wpa2-Eap)
Management of this machine Click [Import of Client Certificate], select the certificate file, and click [OPEN]. Only PKCS#12 files can be imported. Select [Authenticate Server] in [Server Authentication Implementation]. When [Not Authenticate Server] is selected, go to Step 14. Click [Import] in [Import of CA Certificate]. Select the CA certificate file, and click [OPEN]. -
Page 226: Setting The Ldap Server
Management of this machine Open the web page of this machine. Opening the web page(P.213) Log in as an administrator. Logging in as an administrator(P.214) Select [Network Setup]. Click the Menu button on the upper right corner, and then select [Network Connection] - [Extended Network]. -
Page 227: Setting E-Mail Receiving (Web Page)
Management of this machine Input the FQDN or IP address of the LDAP server in [LDAP Server]. When [Digest-MD5] or [Secure Protocol] is selected in Step 9, please input the FQDN instead of the IP address. An FQDN is a combination of the host name and domain name. (Example of FQDN: Server1.domain.local) Input the port number of the LDAP server in [Port Number]. -
Page 228: Setting The Power Save Time (Web Page)
Management of this machine Setting the Power Save Time (Web page) Set the time that will elapse before the power save mode is entered. Open the web page of this machine. Opening the web page(P.213) Log in as an administrator. Logging in as an administrator(P.214) Select [Printer Settings]. -
Page 229: Setting Actions Of The Power Save Mode (Web Page)
Management of this machine Setting actions of the power save mode (Web page) Set actions of the power save mode. Mode1: Sets it to the power save mode. Power consumption in the power saving mode is lower than that in Mode2. -
Page 230: Printing Pdf Files (Direct Print)
Management of this machine Importing settings of this machine Open the web page of the device to which you want to copy the settings. Opening the web page(P.213) Log in as an administrator. Logging in as an administrator(P.214) Select [Printer Settings]. Click the Menu button on the upper right corner, and then select [Configuration Management] - [Settings Import]. -
Page 231: Setting Items Of The Web Page
Management of this machine Setting items of the web page Status ◯: Items to display Item Description User Admin ◯ Name Print Job Job Lists Displays a list of print data sent to this machine. You can ◯ also delete the print data during or before printing. Job Log Displays the job history (or job log) saved in this machine. - Page 232 Management of this machine Printer Settings ◯: Items to display Item Description User Admin ◯ ◯ Name Paper Setup Paper Tray Setup Displays or sets the paper size, custom paper, etc. for each tray. Upon using the printer driver, the setup in the printer driver will take priority over this setting value.
- Page 233 Management of this machine ◯: Items to display Item Description User Admin Name Role Assignment Rules for Defines the regulations on assigning roles to users when ◯ LDAP Authentication using LDAP authentication. Print Statistics Configures settings rated to the Print Statistics function. ◯...
- Page 234 Management of this machine Network Setup ◯: Items to display Item Description User Admin ◯ ◯ Name Network Wired(LAN1) Displays and sets the connection information of the Connection standard wired LAN. You can disable the Energy Efficient Ethernet (EEE) function of the wired network (LAN1) by setting [Energy Efficient Ethernet] included in this item to [Disable].
- Page 235 Management of this machine ◯: Items to display Item Description User Admin Name TCP/IP Displays the action status of TCP/IP. ◯ ◯ To disable it, set it on the operator panel. NetBIOS over TCP/IP Displays and sets the information about NetBIOS over ◯...
- Page 236 Management of this machine ◯: Items to display Item Description User Admin Name Sets the information about POP. ◯ ◯ SMTP Sets the information about SMTP. ◯ Security IP Filtering Restricts access by TCP/IP. Controls access from outside the company. However, this function requires knowledge about the IP address.
- Page 237 Management of this machine Links ◯: Items to display Item Description User Admin ◯ ◯ Name ◯ ◯ Links Support Links Displays the links set by the manufacturer. ◯ Other Links Displays the links set by the administrator. Edit Links Sets the URL to be displayed in the links.
-
Page 238: User Restriction (Access Control)
Management of this machine User restriction (Access control) Access control is a function that a user authenticated by this machine can only perform permitted operations. Before using this machine, user authentication is required. The information required for user authentication refer to a user name and its password, or a PIN (Personal Identification Number). To enable the access control function, the administrator shall do the following on the web page of this machine. -
Page 239: Registering A User
Management of this machine Click [Role]. When the Role Information screen is displayed, input the required information. Role Name: Input any role name. The same [Role Name] cannot be registered. Also, [Role Name] cannot be omitted. Role Description: Input a description for the role. ... -
Page 240: Registering A Group
Management of this machine Kerberos server authentication setting is required. Kerberos user cannot be registered. Only reference is possible. You can check the list of users who used this machine. You can also assign a role to a Kerberos user. When the User Information Settings screen is displayed, input the required information. -
Page 241: Setting Authentication Server
Management of this machine Local User List: Set the users you want to assign to this group. Kerberos User List: Set the Kerberos users you want to assign to this group. Click [Submit]. You can copy already registered groups and add new groups based on the copied settings. When you click [Copy] below the group name, the group information screen will be displayed, so change and register the required items. -
Page 242: Enabling Access Control
Management of this machine authentication can be performed even when communication with the LDAP authentication server is not available due to a communication breakdown, etc., so this machine can be used continuously. Cache confirmation information validity period: Appears when [Cache authentication information] is set to [Enable]. - Page 243 Management of this machine Click the Menu button on the upper right corner, and then select [User Management] - [Access Control Setup]. Select [Enable] in [Access Control]. Configure access control settings according to your environment. Set Guest Permissions: The screen for setting the permissions for guest authentication is displayed. By default, guest access rights are granted for all operations.
-
Page 244: Using The Machine
Management of this machine Using the machine When access control is enabled, the home screen of this machine changes to the login screen, and user authentication is required. This section explains the login method to this machine by authenticating a user name and password. Check that "Ready To Print"... - Page 245 Management of this machine Check [Use User Authentication] if it is displayed. Uncheck [Use User Authentication] if the PIN of the job accounting client is used as user authentication information. Input the user name and password. The user name may be fixed as login name depending on the setting of [User Authentication Options] of the [Device Options] tab.
- Page 246 Management of this machine Authentication Type: Sets the authentication type in user authentication settings. Default Authentication Type: Specifies the default authentication type if the authentication type cannot be set. For Windows PCL printer driver, click [OK]. Click [OK]. For macOS Here is an example with Text Edit.
-
Page 247: Initializing The Settings
Management of this machine Initializing the settings This section explains how to initialize the memory and the settings of this machine. Initialization is done to delete the data and settings saved in this machine and restore the machine to its initial settings. -
Page 248: Initializing Settings Of This Machine
Management of this machine Select [Initialize] or [Format Partition], and then press «OK». To initialize it, check that [Execute] is selected, and press «OK». To format partition, select the partition to be formatted, and press «OK». There are two methods to initialize a memory ... -
Page 249: Moving/Transporting This Machine
Management of this machine Moving/Transporting this machine Moving this machine Injury may be caused. Make sure that at least 2 people carry this machine since it weighs approx. 30 kg. Power off this machine. Remove all cables. Power cord ... - Page 250 Management of this machine If the optional expansion tray unit is installed, use a flat-head screwdriver to remove the parts (x2) that connect this machine and the expansion tray unit. Do not remove the parts that connect the expansion tray units to each other. Do not lose the removed connecting parts.
- Page 251 Management of this machine If the Caster Base is installed, pull out the paper cassette by holding its handle until it stops, raise the paper cassette a little by holding its both sides, and take it out. Use a Phillips screwdriver to remove the metal fittings of Caster Base (x4) that are connected to the expansion tray unit.
-
Page 252: Disposal
Management of this machine Disposal To dispose of this machine, it is recommended to erase the information registered or saved in this machine. The following items are included in the information saved in this machine. Admin Password Various menu settings ... -
Page 253: Useful Software
Network Extension ................. 267 PS Gamma Adjuster ................269 Configuration Tool .................. 271 OKI LPR Utility ..................281 Network Card Setup Utility (macOS) ............285 Print Job Accounting Client ..............286 This section describes the software for using this machine more conveniently. -
Page 254: Software List
Configuration settings for this machine. You can also register or delete Tool(P.271) form data. OKI LPR Utility You can check the status of this machine connected to the OKI LPR Utility(P.281) network from your PC. You can also transfer print data to another device. -
Page 255: Macos Software
Item Description Reference Mobile Print You can print web pages or photos with an OKI LED printer Printing with Mobile or LED MFP connected to a network via a wireless LAN Print(P.290) from your smartphone, tablet or other mobile devices. (For... -
Page 256: Installing Software
Useful software Installing software Follow the procedure below to install the software you want to use. If your PC does not come with a DVD drive, or if you want to update the software, download and install it from the website. For Windows Install the software that you want to use with the included DVD. -
Page 257: For Macos
Drag and drop to copy it to the place you want. You can also start directly from the provided DVD. Insert the included DVD to the PC. Double-click on [OKI] - the [Utility] folder. Drag and drop to copy the software folder you want to install to the place you want. -
Page 258: Monitoring Tool (Windows)
Registering the printer Register the printer to be monitored with the Monitoring Tool. Select [Start] - [OKI] - [Monitoring Tool] to start the Monitoring Tool. Select [Register printer] from the [Settings] menu. Select the printer to be registered from the printer list, and click [Register]. - Page 259 Useful software Input the admin password of the printer, and click [OK]. Admin Password(P.207) If an admin password authentication error is displayed, the admin password you input may be incorrect. Input the correct admin password again. If you click [Agree] in Step 4, input the settings of the DNS server and proxy server on the cloud settings screen and click [Apply].
-
Page 260: Updating The Printer Software
Useful software Check that the registered printer is displayed. Updating the printer software Monitoring Tool checks the status of this machine periodically. When software update is available for this machine, follow the on-screen instructions to update the software. When update is available for software, [Update Recommended] is displayed in the [Status] field. Click [Update] on the line where [Update Recommended] is displayed. -
Page 261: Updating The Printer's Firmware
Useful software Select [Exit] from the [File] menu. Updating the printer’s firmware Monitoring Tool checks the status of this machine periodically. When firmware update is available for this machine, follow the on-screen instructions to update the firmware. When firmware update is available for this machine, [Update Recommended] is displayed in the update field. -
Page 262: Check The Replacement Time Of Maintenance Parts And Apply For A Free One
The maintenance parts include the maintenance kit (the fuser and the transfer roller) and the feed roller assembly. To apply for COREFIDO free maintenance parts service, please refer to the "COREFIDO Guide" or visit the website (https://www.oki.com/jp/printing/). Select [Start] - [OKI] - [Monitoring Tool] to start the Monitoring Tool. Click [Confirm]. - 262 -... -
Page 263: Changing Settings Of Monitoring Tool
The website is displayed. Follow the on-screen instructions to complete the application procedure. Changing settings of Monitoring Tool Select [Start] - [OKI] - [Monitoring Tool] to start the Monitoring Tool. Select [Environment Settings] from the [Settings] menu. - 263 -... - Page 264 Useful software Set the values in each tab, and click [Apply]. [Printer Communication] tab Item Description Printer Search Timeout Sets the time for searching for the printer. Printer Communication Timeout Sets the time limit for the timeout error of connection to the printer. Network Search Range Specifies the range for searching for the printer.
-
Page 265: Cloud Setting
Useful software Cloud setting Set the printer to connect to the cloud. Select [Start] - [OKI] - [Monitoring Tool] to start the Monitoring Tool. Select [Cloud Setting] from the [Settings] menu. Input the settings of the DNS server and proxy server. -
Page 266: Troubleshooting (Monitoring Tool)
Useful software Check the printer to be deleted, and click [Delete]. Troubleshooting (Monitoring Tool) Please check the following explanation and the "FAQ" on the website. If the problem persists, please contact the Customer Support Center or your dealer. ... -
Page 267: Network Extension
Network Extension works in conjunction with the printer driver. Do not install Network Extension only. Network Extension works only when the printer driver is connected to the OKI LPR port or standard TCP/IP port. Displaying properties of the printer driver To use Network Extension, display the [Printer Properties] screen. -
Page 268: Setting Options Automatically
Uninstalling Network Extension Click [Start], and then select [Windows System Tools] - [Control Panel] - [Programs and Features]. Select [OKI Network Extension], right-click on it, and then click [Uninstall]. Finish the uninstallation by following the on-screen instructions. - 268 -... -
Page 269: Ps Gamma Adjuster
"Printers Folder", the registered [Gamma Curve Name] is valid for all the identical models. Registering a gamma adjuster name For the Windows PS printer driver Click [Start], and then select [OKI] - [PS Gamma Adjuster]. Select [OKI B842 PS] from [Select Printer]. Click [New]. -
Page 270: Printing With Registered Halftone
Useful software Select [Printers & Scanners] in [System Preferences]. Delete the registered device to which the adjustment has been set, and then register it again. Do not click the [Config] button displayed while adding the printer. If a dialog box for selecting a printer option is displayed while adding a printer, click [Cancel] and then add the printer again. -
Page 271: Configuration Tool
Registering this machine Register this machine with the Configuration Tool when installing it for the first time. Click [Start], and select [OKI] - [Configuration Tool]. Select [Register Device] from the [Tools] menu. When registrable devices are displayed, select this machine, and click [Register]. -
Page 272: Displaying Print Completion On The Pc
Displaying print completion on the PC The time and time zone of this machine must be consistent with your PC. Setup Click [Start], and select [OKI] - [Configuration Tool]. Select [Alert Info] from the [Plug-in] menu. Select [Basic settings]. - Page 273 Change the settings as necessary, and click [OK]. Filter Settings You can set alert conditions to be displayed when an e-mail is received during printing. Click [Start], and select [OKI] - [Configuration Tool]. Select [Alert Info] from the [Plug-in] menu. Select [Filter settings].
-
Page 274: Setting The Network
You can check the details of recorded logs in [Log details]. Setting the network Searching for this machine on the network Click [Start], and select [OKI] - [Configuration Tool]. Select [Network Setting] from the [Plug-in] menu. Select [Discover Devices]. -
Page 275: Registering Forms (Form Overlay)
Useful software Input the IP address. Click [OK]. Input the admin password, and click [OK]. Admin Password(P.207) Click [OK] to restart the machine. Registering forms (form overlay) You can register a logo, etc., as a form file in this machine for overlay printing. This section explains how to register a form file. -
Page 276: Checking Free Space Of Memory/Hard Disk
Useful software Registering a form with this machine using Configuration Tool Click [Start], and select [OKI] - [Configuration Tool]. Select [Storage Manager] from the [Plug-ins] menu. Click the [New Project] icon. Click the [Add File to Project] icon, and select the created form file. - Page 277 "admin" cannot be registered as a new user name. Click [OK]. Click the [Save to Device] icon. Changing user settings Click [Start], and select [OKI] - [Configuration Tool]. Select this machine from [Registered Device Table]. Select the [User Setting] tab. Click [Role management].
-
Page 278: Deleting This Machine
Useful software Deleting this machine You can unregister this machine. Click [Start], and select [OKI] - [Configuration Tool]. Right-click on this machine from [Registered Device Table]. Select [Remove device]. Click [Yes] on the confirmation screen. Name and function of each screen [Device Info] tab Displays the information about the device. - Page 279 Useful software [Alert Info] plug-in Detects and notifies the event such as the end of printing. Item Description Basic settings Configures basic settings such as the notification method and detection interval. Setting devices Sets the type and presence of the event notified by each device. Filter settings Sets filter conditions for pop-up notifications.
-
Page 280: Icon Description
Useful software Icon description Icon Icon name Description Device Settings Changes the IP address or other settings of this machine. Create New Project Creates a new project. Adds File to Project Adds files to a project. Send Project Sends a project to this machine. Save to Device Saves the settings to this machine. -
Page 281: Oki Lpr Utility
Add this machine to the OKI LPR Utility. Administrator privileges are required. If this machine cannot be added, exit the OKI LPR Utility temporarily, right-click on [Start] - [OKI] - [OKI LPR Utility], and select [More] - [Running As Administrator] to restart the utility. -
Page 282: Transferring Print Data To The Registered Device
Transferring print data to the registered device This section explains how to transfer the specified print data to a registered device using the OKI LPR Utility. This section also explains how to transfer the print data to another device when a problem occurs on the destination device. -
Page 283: Opening The Web Page Of A Registered Device
Input the IP address of the devices to print at the same time, and click [OK]. Click [OK]. Opening the web page of a registered device You can open the web page of this machine from the OKI LPR Utility. Start the OKI LPR Utility. Select this machine. -
Page 284: Sending Files To This Machine Registered With The Oki Lpr Utility
Useful software Sending files to this machine registered with the OKI LPR Utility If this machine is connected to the network and registered with the OKI LPR Utility, you can download the print data. Start the OKI LPR Utility. Select the download destination device. -
Page 285: Network Card Setup Utility (Macos)
Useful software Network Card Setup Utility (macOS) The network setting can be done using the Network Card Setup Utility. TCP/IP must be enabled to use the Network Card Setup Utility. Setting the IP address Start the Network Card Setup Utility. Installing software(P.256) Select this machine from the list. -
Page 286: Print Job Accounting Client
Setting the user name and user ID You can set the user name and user ID using "Properties" in the printer driver. Click [Start], and then select [OKI] - [Change Job Accounting Mode]. From the list of drivers, select the driver you want to set. -
Page 287: For Macos
For the spreadsheet software, input one login user name, one user ID, and one user name on each line. Save the file in "CSV" format. Click [Start], and then select [OKI] - [Change Job Accounting Mode]. From the list of drivers, select the driver you want to set. - Page 288 Useful software Registering the user ID Start the Print Job Accounting Client. Click [New]. Input your macOS login name, new user name and new user ID, and then click [Save]. Click [Save]. Exit the Print Job Accounting Client. Registering multiple users simultaneously You can register multiple user IDs and user names simultaneously using a CSV file.
-
Page 289: Printing From A Mobile Device
Printing from a mobile device Printing from a mobile device Printing with Mobile Print ................ 290 Printing with AirPrint ................293 Printing with Mopria Print Service ............297 Printing with IPP Everywhere ..............301 Printing with Print Plugin ................ 304 Showing troubleshooting tips on a mobile device ........ -
Page 290: Printing With Mobile Print
Web browser, and photos taken with the built-in camera directly onto an OKI printer or MFP from your smartphone, tablet or other mobile devices. Mobile Print is now available on App Store and Google Play. -
Page 291: Troubleshooting For Mobile Print
Printing from a mobile device Printing with this machine registered with the app Enable the NFC function of your mobile device, and enable Wi-Fi. Bring the NFC antenna of the mobile device close to the NFC mark on this machine. This machine is registered to the mobile device application. - Page 292 Printing from a mobile device Cause Solution Reference Is there any toner? Check that the out-of-toner message is not displayed. Error Message List(P.368) When an error message appears on the display(P.367) Is any error displayed? Check the error message. Error Message List(P.368) When an error message appears on the...
-
Page 293: Printing With Airprint
Printing from a mobile device Printing with AirPrint With AirPrint, you can print without installing a printer driver. You can print with AirPrint from your Mac, iPhone, iPad, and iPod touch. This section offers an overview and basic settings for AirPrint. About AirPrint AirPrint is a function that allows you to easily print from macOS or iOS. -
Page 294: Registering This Machine On Mac
Printing from a mobile device To connect via a wireless LAN (AP mode), please set it in advance. Connection form via a wireless LAN(P.51) Connecting directly with this machine (AP mode)(P.64) To use from a Mac, connect this machine with the Mac. To print with AirPrint, make settings from the terminal side. -
Page 295: Troubleshooting For Airprint
Printing from a mobile device Set the required items. Tap [Print]. Printing from Mac Open the file to be printed. Select [Print] from the [File] menu. Select the name of the model you are using from [Printers]. Set the required items. Click [Print]. - Page 296 Printing from a mobile device Cause Solution References Is there any toner? Check if the out-of-toner message is displayed. Error Message List(P.368) When an error message appears on the display(P.367) Is AirPrint set to [Enabled]? Press the scroll button on the operator panel several times to check the status of [AirPrint].
-
Page 297: Printing With Mopria Print Service
Printing from a mobile device Printing with Mopria Print Service With Mopria Print Service, you can print from Android or Windows to a Mopria certified printer. ® This section gives an overview of Mopria Print Service and describes its basic settings. About Mopria Print Service Mopria Print Service is an application that allows you to print to Mopria ®... -
Page 298: Registering This Machine With A Windows
Printing from a mobile device To connect via a wireless LAN (AP mode), please set the wireless LAN (AP mode) in advance. Connection form via a wireless LAN(P.51) Connecting directly with this machine (AP mode)(P.64) To use from a Windows, connect this machine to the Windows. To print using the Mopria Print Service, configure the settings from the mobile device. -
Page 299: Troubleshooting For Mopria Print Service
Printing from a mobile device Printing from Windows Open the file to be printed. Select [Print] from the [File] menu. Click [Print]. Select the model you are using. Set the required items. Click [Print]. Troubleshooting for Mopria Print Service It may take two or three minutes for this machine to join a network after it is turned on. Make sure that the machine is ... - Page 300 Printing from a mobile device Cause Solution Reference Is Android print service set to Check the status of [Default Print Service] or [Mopria Print [Enable]? Service] from the Android print service. If [Disable] is displayed, Mopria is not available. - 300 -...
-
Page 301: Printing With Ipp Everywhere
Printing from a mobile device Printing with IPP Everywhere IPP Everywhere allows you to print from Linux or Chromebook to IPP Everywhere™ compatible printers. This section gives an overview of IPP Everywhere and describes its basic settings. 1. Setting IPP Everywhere Connect this machine to the same network as the mobile device. -
Page 302: Registering This Machine With Chromebook
Printing from a mobile device 2. Registering this machine with Chromebook When using IPP Everywhere for the first time, register this machine on your Chromebook. Turn on the power of this machine and the PC. Connect this machine and the PC via a wireless or wired LAN. Open [Setup]. - Page 303 Printing from a mobile device Cause Solution Reference Is the latest firmware Check that the firmware of this machine or the software of installed? Linux or Chromebook is of the latest versions. If it is not of the latest version, update it to the latest versions.
-
Page 304: Printing With Print Plugin
Printing from a mobile device Printing with Print Plugin With Print Plugin, you can print to an OKI printer from a mobile device equipped with Android. Print Plugin is now available on the website or Google Play. Printing by connecting to an access point Connect the mobile device to the same network as this machine. -
Page 305: Troubleshooting For Print Plugin
Printing from a mobile device Select the printer you want to print to. Set the required items. Tap the [Printer] icon. Troubleshooting for Print Plugin This machine may take 2 to 3 minutes to join a network after power-on. Make sure that the machine is connected to the network before attempting to print. - Page 306 Printing from a mobile device Cause Solution Reference Is any error displayed? Check the error message. Error Message List(P.368) When an error message appears on the display(P.367) - 306 -...
-
Page 307: Showing Troubleshooting Tips On A Mobile Device
Printing from a mobile device Showing troubleshooting tips on a mobile device If an error has occurred in the machine, press «HELP» on the operator panel to show the error correction method on the display. At this time, if you move the mobile device* closer to the NFC mark on this machine when "NFC"... -
Page 308: Maintenance
Maintenance Maintenance Precautions for replacing consumables and maintenance parts ... 309 Service life and replacement cycle of consumables ......310 Replacing toner cartridges ..............312 Replacing the image drum ..............315 Replacing the image drum and the toner cartridge ........ 320 Free maintenance parts ................. -
Page 309: Precautions For Replacing Consumables And Maintenance Parts
Store the used toner cartridge in a bag such that toner does not scatter. Use genuine OKI consumables for optimum performance. Failures caused by using non-genuine consumables may void the warranty or maintenance contract. (The use of non-genuine consumables will not necessarily cause failures, but please fully take notice of such usage.) -
Page 310: Service Life And Replacement Cycle Of Consumables
Printing quality will decline after the toner cartridge stays unpacked for one year or longer. Therefore, prepare a new toner cartridge. Use genuine OKI consumables for optimum performance. Failures caused by using non-genuine consumables may void the warranty or maintenance contract. (The use of non-genuine consumables will not necessarily cause failures, but please fully take notice of such usage.) -
Page 311: Image Drum
Do not expose the image drum to direct sunlight or strong light (About 1,500 lux or above). Do not leave it uncovered for more than 5 minutes even under room lighting. Use genuine OKI consumables for optimum performance. Failures caused by using non-genuine consumables may void the warranty or maintenance contract. (The use of non-genuine consumables will not necessarily cause failures, but please fully take notice of such usage.) -
Page 312: Replacing Toner Cartridges
Maintenance Replacing toner cartridges Prepare a new toner cartridge. Press the front cover open button on the side of this machine, and then open the front cover toward you. Rotate the blue lever on the left side of the toner cartridge in the direction of the unlock mark until it stops, and then gently pull the toner cartridge out. - Page 313 Maintenance Hold the toner cartridge so that the blue lever is on the left side. Align the triangle marks on the left and right of the toner cartridge with the triangle marks inside this machine, and install it along the groove. Rotate the blue lever on the left side of the toner cartridge in the direction of the lock mark until it stops.
- Page 314 Maintenance Please support recycling of the used toner cartridge. For details, refer to the separate volume "COREFIDO Guide". - 314 -...
-
Page 315: Replacing The Image Drum
In addition, "Toner low." or "Toner Empty. Replace with a new toner cartridge." may be displayed after the replacement. Please use genuine OKI genuine consumables for optimum performance. Failures caused by using non-genuine consumables may void the warranty or maintenance contract. (The use of non-genuine consumables will not necessarily cause failures, but please fully take notice of such usage.) - Page 316 Maintenance Place the toner cartridge and image drum on a flat surface covered with newspaper or the like. Remove the new image drum from its packaging bag, and then place it on a flat surface covered with newspaper or the like. Handle with adequate care since the green tube of the image drum is very easy to be damaged.
- Page 317 Maintenance Rotate the blue lever on the left side of the toner cartridge attached to the old image drum in the direction of the unlock mark until it stops. While pressing down the image drum, pull out the toner cartridge toward you. Align the triangular marks on the left and right sides of the toner cartridge with the triangular marks on the new image drum, and install the toner cartridge along the groove of the image drum.
- Page 318 Maintenance Place your fingers on the left and right protrusions (blue seals) of the image drum and press them firmly into the toner cartridge. Rotate the blue lever on the left side of the toner cartridge in the direction of the lock mark until it stops.
- Page 319 Maintenance Check the [Installation position] by the right label on the toner cartridge, and press in the toner cartridge. Check that the triangular marks on the left and right sides of the image drum are all the way in. Close the front cover firmly with your both hands. ...
-
Page 320: Replacing The Image Drum And The Toner Cartridge
Maintenance Replacing the image drum and the toner cartridge This section explains how to replace both the image drum and toner cartridge with new ones. Refer to " (P.315)" if you want to replace only the image drum with a new one but Replacing the image drum continue using the existing toner cartridge. - Page 321 Maintenance Remove the new image drum from its packaging bag, and then place it on a flat surface covered with newspaper or the like. Handle with adequate care since the green part of the image drum is very easy to be damaged. Do not expose the image drum to direct sunlight or strong light (approx.
- Page 322 Maintenance Remove the protective tape while keeping the toner cartridge level. Align the triangle marks on the left and right of the toner cartridge with the triangle marks on the image drum, and install it along the groove of the image drum. Place your fingers on the left and right protrusions (blue seals) of the image drum and press them firmly into the toner cartridge.
- Page 323 Maintenance Remove the drum cover of the image drum. Install the toner cartridge and the image drum from diagonally above by holding the toner cartridge. Check the [Installation position] by the right label on the toner cartridge, and press in the toner cartridge.
- Page 324 Maintenance Please support recycling of the used image drum and toner cartridge. For details, refer to the separate volume "COREFIDO Guide". - 324 -...
-
Page 325: Free Maintenance Parts
We will send replacement parts after verifying the service life of your maintenance parts, and the replacement work shall be performed at your end. For the detailed application method, refer to the "COREFIDO Guide" or the website (https://www.oki.com/jp/printing/). - 325 -... -
Page 326: Service Life And Replacement Cycle Of Maintenance Parts
Maintenance Service life and replacement cycle of maintenance parts The maintenance part is the target product of COREFIDO free maintenance parts service. Maintenance kit The maintenance kit is a set of a fuser and a transfer roller. Service life of the maintenance kit The fuser unit and the transfer roller can print approximately 120,000 sheets of A4-sized paper (fed in landscape for simplex printing), but the actual printable number of sheets may vary with the usage condition. -
Page 327: Paper Feed Roller
Maintenance Paper feed roller Replace the paper feed roller of each tray by referring to the following number of printable sheets. Approx. 120,000 for Tray 1/2/3/4 Approx. 100,000 for the MP Tray The display does not show the replacement time of the paper feed roller or a message indicating that it is time to replace the paper feed roller. -
Page 328: Replacing The Maintenance Kit
Maintenance Replacing the maintenance kit The maintenance kit is a set of a fuser and a transfer roller. Follow the procedure below to replace the fuser and transfer roller at the same time. Prepare a new maintenance kit and check that you have all the parts. Fuser Transfer roller Open the output tray by holding its center. - Page 329 Maintenance Remove the fuser from this machine by holding its central handle. Remove the new fuser from the box and rotate the blue lock lever in the direction of the unlock mark until it stops. Install the fuser in this machine with the blue lock lever on the left side. Lock the fuser by rotating the blue lock lever in the direction of the lock mark until it stops.
- Page 330 Maintenance Close the output tray. Press the front cover open button on the side of this machine, and then open the front cover toward you. Hold the toner cartridge, push it up a little, and then pull it out toward you. Remove the toner cartridge with the image drum attached.
- Page 331 Maintenance Tilt the left and right blue levers inside this machine toward you. Remove the transfer roller gently by holding its both ends from above. Be careful not to touch the sponge section in the center. Remove the new transfer roller from the box. - 331 -...
- Page 332 Maintenance Install the transfer roller into the machine by holding its both ends with the sticker in the center of the transfer roller facing you. Be careful not to touch the sponge section in the center. Install the transfer roller so that the back side is lower. If the back side is high, the transfer roller is not installed correctly.
- Page 333 Maintenance Check the [Installation position] by the right label on the toner cartridge, and press in the toner cartridge. Check that the triangular marks on the left and right sides of the image drum are all the way in. Close the front cover firmly with your both hands. ...
-
Page 334: Replacing The Paper Feed Roller (Tray1)
Maintenance Replacing the paper feed roller (Tray1) For the replacement cycle, see " (P.327)". Paper feed roller Please replace the paper feed roller with clean hands. If hand oil or hand cream gets on the rubber part, the paper feed function may deteriorate. - Page 335 Maintenance While pushing the blue lever on the left side of the front paper feed roller (without gear) to the left, slide the paper feed roller (without gear) to the left to remove it. While pushing the blue lever on the right side of the rear paper feed roller (with gear) to the right, tilt the paper feed roller (with gear) downward to remove it.
- Page 336 Maintenance Mount the new paper feed roller (without gear). While pushing the left blue lever to the left, press to mount the paper feed roller (without gears) onto the white shaft. Release your hand from the blue lever. Rotate the white and blue gears to the far side, and check that the two paper feed rollers are rotating.
- Page 337 Maintenance Slide to install it so that the protrusions on both sides of the new separation roller are aligned with the grooves on the paper cassette. Do not touch the rubber portion of the roller. Load paper in the paper cassette, insert it into the main unit from slightly above, and return it to its original position.
-
Page 338: Replacing The Paper Feed Roller (Tray2/3/4)
Maintenance Replacing the paper feed roller (Tray2/3/4) For the replacement cycle, see " (P.327)". Paper feed roller This section takes for example the procedure of replacing the paper feed roller of Tray2. You can replace the paper feed roller of Tray3/4 by following the same procedure. ... - Page 339 Maintenance While pushing the blue lever on the left side of the front paper feed roller (without gear) to the left, slide the paper feed roller (without gear) to the left to remove it. While pushing the blue lever on the right side of the rear paper feed roller (with gear) to the right, tilt the paper feed roller (with gear) downward to remove it.
- Page 340 Maintenance Mount the new paper feed roller (without gear). While pushing the left blue lever to the left, press to mount the paper feed roller (without gears) onto the white shaft. Release your hand from the blue lever. Rotate the white and blue gears to the far side, and check that the two paper feed rollers are rotating.
- Page 341 Maintenance Slide to install it so that the protrusions on both sides of the new separation roller are aligned with the grooves on the paper cassette. Do not touch the rubber portion of the roller. Load paper in the paper cassette, insert it into the main unit from slightly above, and return it to its original position.
-
Page 342: Replacing The Paper Feed Roller (Mp Tray)
Maintenance Replacing the paper feed roller (MP Tray) For the replacement cycle, see " (P.327)" Paper feed roller Please replace the paper feed roller with clean hands. If hand oil or hand cream gets on the rubber part, the paper feed function may deteriorate. - Page 343 Maintenance Slide the manual feeder guide inward. While lifting the MP tray gently, press the right arm inwards and remove the protrusion of the arm from the groove. Lower the MP tray, and lift up the protrusion of the arm. By referring to Steps 5 and 6, remove the protrusion of the left arm of the MP tray from the groove and lift it up.
- Page 344 Maintenance Remove the upper paper feed roller (with gear) by expanding the side protrusion outward and sliding it to the left. Press down on the center of the MP tray, and then press and hold the white part which is visible through the small window at the bottom of the separation roller.
- Page 345 Maintenance Prepare a new separation roller. Press down on the center of the MP tray until the left trapezoidal part of the separation roller fits into the groove on the machine. Do not touch the rubber portion and the transparent film of the roller. Check that the separation roller is in a horizontal position, and then push both ends of the separation roller down at the same time.
- Page 346 Maintenance Prepare a new paper feed roller (with gear). With the gear on the right, slide the paper feed roller (with gear) to the right on the upper shaft and push it in until it clicks. Move the paper placement cover downward. Lift the MP tray gently, press the right arm of the MP tray inwards, and hook the protrusion of the arm into the groove.
- Page 347 Maintenance Clear the counter of the paper feed roller on the MP tray. On the operator panel, select [Admin Setup] - [Others Setup] - [Paper Feed Roller Counter Clear] - [MP Tray Clear] - [Execute] - [Yes], and then press «OK». ...
-
Page 348: Cleaning The Main Unit And The Parts
Maintenance Cleaning the main unit and the parts Cleaning the LED head If there are black or white vertical stripes on the output paper, the image is faded or the text is blurred, clean the LED head. Do not use methyl alcohol or thinner. Doing so may damage the LED head. Power off this machine. - Page 349 Maintenance Gently wipe the lens surface of the LED head with a soft tissue paper. Install the toner cartridge and the image drum from diagonally above by holding the toner cartridge. Check the [Installation position] by the right label on the toner cartridge, and press in the toner cartridge.
-
Page 350: Cleaning The Surface Of The Main Unit
Maintenance Cleaning the surface of the main unit Do not use benzene, paint thinner or alcohol as it may damage plastic parts and coating of this machine. It is not necessary to lubricate the parts of this machine. Do not lubricate. Power off this machine. -
Page 351: Cleaning The Paper Feed Roller (Mp Tray)
Maintenance Wipe the paper feed roller with a cloth slightly moistened with water while rotating the white gear inside this machine to the far side. Wipe the paper feed roller with a blue gear as well. Remove the paper from the paper cassette. Press the recess of the separation roller on the paper cassette, and wipe it with a cloth slightly moistened with water while rotating the separation roller. - Page 352 Maintenance Press the white part of the front recess and pull to open the MP tray towards you. Lift the paper placement cover. Slide the manual feeder guide inward. While lifting the MP tray gently, press the right arm inwards and remove the protrusion of the arm from the groove.
- Page 353 Maintenance Lower the MP tray, and lift up the protrusion of the arm. By referring to Steps 4 and 5, remove the protrusion of the left arm of the MP tray from the groove and lift it up. Lift the removed arm until they touch the main unit. Press down on the center of the MP tray, and then press and hold the white part which is visible through the small window at the bottom of the separation roller.
- Page 354 Maintenance Press down on the center of the MP tray, place your finger over the small window on the lower side of the separation roller and push it up to remove the separation roller. Wipe the separation roller with a cloth slightly moistened with water while rotating it in the arrow direction.
- Page 355 Maintenance Press down on the center of the MP tray, and then press and hold the white part which is visible through the small window at the bottom of the separation roller. With the protrusion side on the left, install the paper feed roller (without gear) onto the lower shaft by sliding it into the innermost position.
-
Page 356: Cleaning The Light-Shielding Film
Maintenance Move the paper placement cover downward. Lift the MP tray gently, press the right arm of the MP tray inwards, and hook the protrusion of the arm into the groove. If you close the MP tray without hooking the protrusion of the arm to the correct position, the paper placement cover may be broken. - Page 357 Maintenance Press the front cover open button on the side of this machine and open the front cover toward you. Hold the toner cartridge, push it up a little, and then pull it out toward you. Remove the toner cartridge with the image drum attached. Do not touch the blue lever on the toner cartridge.
-
Page 358: Cleaning The Resist Roller
Maintenance Check the [Installation position] by the right label on the toner cartridge, and press in the toner cartridge. Check that the triangular marks on the left and right sides of the image drum are all the way in. Close the front cover firmly with your both hands. Cleaning the resist roller When horizontal streaks appear on the printing result, clean the resist roller to improve the printing. - Page 359 Maintenance Hold the toner cartridge, push it up a little, and then pull it out toward you. Remove the toner cartridge with the image drum attached. Do not touch the blue lever on the toner cartridge. Handle with adequate care since the green part of the image drum is very easy to be damaged. Do not expose the image drum to direct sunlight or strong light (approx.
- Page 360 Maintenance Check the [Installation position] by the right label on the toner cartridge, and press in the toner cartridge. Check that the triangular marks on the left and right sides of the image drum are all the way in. Close the front cover firmly with your both hands. - 360 -...
-
Page 361: Installing The Transport Assistance Guide
Maintenance Installing the transport assistance guide If the transport assistance guide comes off, for example, when the jammed paper is removed, follow the steps below to install it. Lift the transport assistance guide, and check that the handle is on the top of the front side. The transport assistance guide cannot be installed if its orientation is not correct. -
Page 362: Updating Software
Maintenance Updating software You can update the printer driver and other software to the latest version. A PC connected to the Internet is required for the update. For Windows For Windows, use the Monitoring Tool. Monitoring Tool (Windows)(P.258) For macOS For macOS, please refer to our official website. -
Page 363: Deleting Software
Maintenance Deleting software This section explains how to delete the printer driver from your PC. The specific method may differ for different printer drivers and versions of Windows or macOS. Uninstalling the Windows printer driver To perform this procedure, you will have to login to the PC as a user with administrator privileges. ... - Page 364 Close the [Printers & Scanners] screen. Insert the included DVD to the PC. Double-click on [OKI] - [Drivers] - [PS] - [Uninstaller]. Confirm the model to be deleted displayed in the dialog box, and click [OK]. Follow the on-screen instructions to delete the printer driver.
-
Page 365: Firmware Update
Maintenance Firmware update You can update the printer firmware (device control program) to the latest version. A PC connected to the Internet is required for the update. For Windows For Windows, use the Monitoring Tool. Monitoring Tool (Windows)(P.258) For macOS For macOS, please refer to our official website. -
Page 366: Troubleshooting
Troubleshooting Troubleshooting When an error message appears on the display ........367 When a paper jam occurs ..............376 Trouble with printing ................412 Troubleshooting for printing results ............419 Software troubleshooting ............... 431 Troubleshooting for this machine and paper .......... 432 - 366 -... -
Page 367: When An Error Message Appears On The Display
Troubleshooting When an error message appears on the display If a problem occurs to this machine, the ATTENTION lamp will light on or flash, and a message will appear on the display. Check the message on the display and take action based on the corresponding message. If [Please See HELP For Details] appears at the bottom of the display, press «HELP»... -
Page 368: Error Message List
Troubleshooting Error Message List Clear the error by referring to the description of the corresponding message. Meanings of symbols used in the error message are as follows. Tray Name: One of the following: Tray 1, Tray 2, Tray 3, Tray 4 and MP Tray ... - Page 369 Troubleshooting Message Error code Description The fuser is approaching the end of its service life. Fuser Near Life. Search Keyword: Prepare a new fuser. P10979 After the message of replacement is displayed, please replace it with a new one. The fuser has reached the end of its service life. Fuser Near Life.
- Page 370 Troubleshooting Message Error code Description An error has occurred to Postscript data. Error Postscript Please check the print result. Press OK Button If there is a problem with the print result, print again. The problem may be solved if you select [Optimize to reduce error] in [PostScript Output Options] of the PS printer driver.
- Page 371 Troubleshooting Message Error code Description If you were printing a private job, the data was deleted because Invalid Print Data Received it was not complete. Press OK Button Please print it again. Or, the received PLD command data is not supported. Please check the printer driver in use.
- Page 372 Troubleshooting Message Error code Description Change Paper in Tray Name 460, 461, 462, 463, The media size or both the media size and media type of the Media Size paper loaded in the displayed tray did not match the settings of Media Type the paper you are trying to print on.
- Page 373 Troubleshooting Message Error code Description Can not connect to the wireless Could not connect to the wireless LAN access point. Could not access point connect to the wireless access point within the specified time of Timeout WPS. Press OK Button Check that the wireless access point is turned on, and then run Press Help for details WPS again.
- Page 374 Troubleshooting Message Error code Description Caution: Non-Genuine consumable You can use any consumables/maintenance parts, but the print detected quality may be lowered and the optimum performance may not Check user's Manual "Trouble be obtained. Shooting" to restore machine If the use of non-genuine consumables/maintenance parts operation causes damage to the product or results in your product not functioning to its full specification, such damage or effects on...
- Page 375 Troubleshooting Message Error code Description The toner cartridge is not installed The toner cartridge is not installed properly. properly Check that the protective tape on the toner cartridge has been Please reinstall the toner cartridge peeled off. Press Help for details If the error still persists, contact our Customer Service Center or your dealer.
-
Page 376: When A Paper Jam Occurs
Troubleshooting When a paper jam occurs For the error code 370 Press the recess on the back of this machine, and open the rear cover on the back of this machine. Pull out any paper that is visible, and proceed to Step 8. If no paper is visible, pull out the paper cassette of Tray 1 by holding its handle until it stops, raise the paper cassette a little by holding its both sides, and take it out. - Page 377 Troubleshooting Remove the paper. Raise the blue lever inside this machine to lock, and close the cover. Insert the paper cassette into the main unit from slightly above and install it back to its original position. If you return the paper cassette to the main unit by force, the paper stopper may shift. Close the rear cover.
-
Page 378: For The Error Code 371
Troubleshooting For the error code 371 Press the recess on the back of this machine, and open the rear cover. Pull out the paper. Close the rear cover. For the error code 372 Press the recess on the back of this machine, and open the rear cover. - 378 -... - Page 379 Troubleshooting Pull out any paper that is visible. If no paper is visible, pull out the paper cassette by holding its handle until it stops, raise the paper cassette a little by holding its both sides, and take it out. Open the cover by pushing up the blue lever inside this machine with the paper cassette removed.
-
Page 380: For The Error Code 380
Troubleshooting Raise the blue lever inside this machine to lock, and close the cover. Insert the paper cassette into the main unit from slightly above and install it back to its original position. If you return the paper cassette to the main unit by force, the paper stopper may shift. Close the rear cover. -
Page 381: For The Error Code 381
Troubleshooting Slowly remove the jammed paper. Do not touch the transport assistance guide. If the transport assistance guide comes off, please refer to "Installing the transport assistance guide(P.361)". Close the front cover firmly with your both hands. For the error code 381 Press the front cover open button on the side of this machine, and then open the front cover toward you. - Page 382 Troubleshooting Hold the toner cartridge, push it up a little, and then pull it out toward you. Remove the toner cartridge with the image drum attached. Do not touch the blue lever on the toner cartridge. Handle with adequate care since the green part of the image drum is very easy to be damaged. Do not expose the image drum to direct sunlight or strong light (approx.
- Page 383 Troubleshooting Once the edge of the paper is visible, slowly pull the paper up to remove it. Return the transparent guide back to its original position. Install the toner cartridge and the image drum from diagonally above by holding the toner cartridge.
-
Page 384: For The Error Code 382
Troubleshooting Close the front cover firmly with your both hands. For the error code 382 Press the front cover open button on the side of this machine, and then open the front cover toward you. Hold the toner cartridge, push it up a little, and then pull it out toward you. Remove the toner cartridge with the image drum attached. - Page 385 Troubleshooting If the paper is visible, remove the paper and proceed to Step 17. Do not touch the transport assistance guide. If the transport assistance guide comes off, please refer to "Installing the transport assistance guide(P.361)". If the paper is not visible, press the recess on the back of this machine, open the rear cover, and open the paper ejection guide.
- Page 386 Troubleshooting Unlock the fuser by rotating the blue lock lever on the left side in the direction of the unlock mark until it stops. Remove the fuser from this machine by holding its central handle. Rotate the blue lock lever on the left side, raise the jam release levers (x 2), and remove any paper left in the fuser.
- Page 387 Troubleshooting Remove any paper left in the main unit of this machine. Install the fuser into this machine by holding its central handle. Lock the fuser by rotating the blue lock lever in the direction of the lock mark until it stops. Close the output tray.
- Page 388 Troubleshooting Close the paper ejection guide and then close the rear cover. Install the toner cartridge and the image drum from diagonally above by holding the toner cartridge. Check the [Installation position] by the right label on the toner cartridge, and press in the toner cartridge.
-
Page 389: For The Error Code 387 Or 391
Troubleshooting For the error code 387 or 391 The error code [387] is displayed only in B842. Pull out the paper cassette of Tray 1 by holding its handle until it stops, raise the paper cassette a little by holding its both sides, and take it out. Remove the jammed paper. -
Page 390: For The Error Code 390
Troubleshooting Press the front cover open button on the side of this machine, open the front cover toward you, and then close it firmly with your both hands. The error cannot be cleared without opening and closing the front cover. For the error code 390 If there is paper loaded in the MP tray, lift the paper placement cover and remove the paper. -
Page 391: For The Error Code 392, 393 Or 394
Troubleshooting Close the front cover firmly with your both hands. Load the paper with the print side facing up. Lower the paper placement cover. For the error code 392, 393 or 394 This section takes the error code 392 for example indicating that a paper jam occurs when paper is feeding from Tray 2. - Page 392 Troubleshooting Pull out the paper cassette of Tray 2 by holding its handle until it stops, raise the paper cassette a little by holding its both sides, and take it out. Remove the jammed paper. Insert the paper cassette into the main unit from slightly above and install it back to its original position.
-
Page 393: For The Error Code 631
Troubleshooting Press the front cover open button on the side of this machine, open the front cover toward you, and then close it firmly with your both hands. The error cannot be cleared without opening and closing the front cover. For the error code 631 Pull out the paper cassette of Tray 1 by holding its handle until it stops, raise the paper cassette a little by holding its both sides, and take it out. -
Page 394: For The Error Code 632, 633 Or 634
Troubleshooting Insert the paper cassette into the main unit from slightly above and install it back to its original position. If you return the paper cassette to the main unit by force, the paper stopper may shift. Press the front cover open button on the side of this machine, open the front cover toward you, and then close it firmly with your both hands. - Page 395 Troubleshooting Remove the jammed paper. Insert the paper cassette into the main unit from slightly above and install it back to its original position. If you return the paper cassette to the main unit by force, the paper stopper may shift. Press the front cover open button on the side of this machine, open the front cover toward you, and then close it firmly with your both hands.
-
Page 396: For The Error Code 637
Troubleshooting For the error code 637 Press the front cover open button on the side of this machine, and then open the front cover toward you. Slowly remove the jammed paper. Do not touch the transport assistance guide. If the transport assistance guide comes off, please refer to "Installing the transport assistance guide(P.361)". - Page 397 Troubleshooting Hold the toner cartridge, push it up a little, and then pull it out toward you. Remove the toner cartridge with the image drum attached. Do not touch the blue lever on the toner cartridge. Handle with adequate care since the green part of the image drum is very easy to be damaged. Do not expose the image drum to direct sunlight or strong light (approx.
- Page 398 Troubleshooting Once the edge of the paper is visible, slowly pull the paper up to remove it. Return the transparent guide back to its original position. Install the toner cartridge and the image drum from diagonally above by holding the toner cartridge.
-
Page 399: For The Error Code 639
Troubleshooting Close the front cover firmly with your both hands. For the error code 639 Press the front cover open button on the side of this machine, and then open the front cover toward you. Hold the toner cartridge, push it up a little, and then pull it out toward you. Remove the toner cartridge with the image drum attached. - Page 400 Troubleshooting If the paper is visible, remove the paper and proceed to Step 17. Do not touch the transport assistance guide. If the transport assistance guide comes off, please refer to "Installing the transport assistance guide(P.361)". If the paper is not visible, press the recess on the back of this machine, open the rear cover, and open the paper ejection guide.
- Page 401 Troubleshooting Unlock the fuser by rotating the blue lock lever on the left side in the direction of the unlock mark until it stops. Remove the fuser from this machine by holding its central handle. Rotate the blue lock lever on the left side, raise the jam release levers (x 2), and remove any paper left in the fuser.
- Page 402 Troubleshooting Remove any paper left in the main unit of this machine. Install the fuser into this machine by holding its central handle. Lock the fuser by rotating the blue lock lever in the direction of the lock mark until it stops. Close the output tray.
- Page 403 Troubleshooting Close the paper ejection guide and then close the rear cover. Install the toner cartridge and the image drum from diagonally above by holding the toner cartridge. Check the [Installation position] by the right label on the toner cartridge, and press in the toner cartridge.
-
Page 404: For The Error Code 641 Or 642
Troubleshooting For the error code 641 or 642 Press the recess on the back of this machine, and open the rear cover. Pull out any paper that is visible. If no paper is visible, pull out the paper cassette of Tray 1 by holding its handle until it stops, raise the paper cassette a little by holding its both sides, and take it out. - Page 405 Troubleshooting Remove the paper. Raise the blue lever inside this machine to lock, and close the cover. Insert the paper cassette into the main unit from slightly above and install it back to its original position. If you return the paper cassette to the main unit by force, the paper stopper may shift. Close the rear cover.
-
Page 406: For The Error Code 652
Troubleshooting For the error code 652 The error code [652] is displayed only in B842. Pull out the paper cassette of Tray 1 by holding its handle until it stops, raise the paper cassette a little by holding its both sides, and take it out. Remove the jammed paper. - Page 407 Troubleshooting Press the front cover open button on the side of this machine, and then open the front cover toward you. Hold the toner cartridge, push it up a little, and then pull it out toward you. Remove the toner cartridge with the image drum attached.
- Page 408 Troubleshooting If the paper is not visible, press the recess on the back of this machine, open the rear cover, and open the paper ejection guide. If the paper is visible, remove the paper and proceed to Step 19. If the paper is not visible, open the output tray. Burns may be caused.
- Page 409 Troubleshooting Unlock the fuser by rotating the blue lock lever on the left side in the direction of the unlock mark until it stops. Remove the fuser from this machine by holding its central handle. Rotate the blue lock lever on the left side, raise the jam release levers (x 2), and remove any paper left in the fuser.
- Page 410 Troubleshooting Remove any paper left in the main unit of this machine. Install the fuser into this machine by holding its central handle. Lock the fuser by rotating the blue lock lever in the direction of the lock mark until it stops. Close the output tray.
- Page 411 Troubleshooting Close the paper ejection guide and then close the rear cover. Install the toner cartridge and the image drum from diagonally above by holding the toner cartridge. Check the [Installation position] by the right label on the toner cartridge, and press in the toner cartridge.
-
Page 412: Trouble With Printing
Troubleshooting Trouble with printing This section describes problems with printing from a PC. If the problem is not solved using the following explanation, contact our Customer Support Center or your dealer. For problems arising from the application, contact the application development company. I cannot print For Windows/macOS Cause... -
Page 413: Troubleshooting For Wired Lan Connection
Troubleshooting Cause Solution Reference The printer is set offline on the PC. Open "Printers Folder", right-click on the icon of the device name (*), and select [See what's printing]. When the icons are grouped, select the device name (*) from [See what's printing]. -
Page 414: Troubleshooting For Wireless Lan Connection
Make sure that the print port of the printer driver is correct. For the OKI LPR Utility, check the IP address settings with the OKI LPR utility. The WSD port is in use. - Page 415 PC. Make sure the configured IP address, subnet mask and gateway address are all correct. For the OKI LPR Utility, check the IP address settings with the OKI LPR utility. The WSD port is in use.
- Page 416 Troubleshooting Unable to connect to wireless LAN (Infrastructure) First, print out the Network Information, and then check the following explanation while having a look at items numbered ① to ⑥ in the following figure in Wireless (Infrastructure) Information. Network Information can be printed from [Print Information] - [Network]. Unable to connect to the access point (State of ④...
- Page 417 Troubleshooting Cause Solution Reference The current frequency band is [Band] displays the current frequency band to which this Connecting via an congested.* Above ⑤ machine is connected. access point This machine is compatible with the 2.4 Ghz/5.0 GHz band. (Infrastructure)(P. If the wireless LAN access point is compatible with the 2.4 GHz/5.0 GHz band, try changing the connecting frequency band of the machine (or changing the SSID settings).
-
Page 418: Troubleshooting For Usb Connection
Troubleshooting Cause Solution Reference The setting of [Security] is not Check that the security of this machine matches the security Connecting consistent with that of the wireless set for the wireless terminal you want to connect. directly with this terminal. machine (AP *Above ③... -
Page 419: Troubleshooting For Printing Results
Troubleshooting Troubleshooting for printing results Please check the following explanation and "FAQ" on your smartphone app or the website. If the problem persists, please contact our Customer Support Center or your dealer. List of troubles with printing results Click the corresponding symptom to see the solution. - Page 420 Troubleshooting Dots and horizontal streaks appear in the paper feeding direction periodically(P.425) Paper feed direction White area is lightly stained(P.425) Edges of text are blurred(P.426) When envelopes or coated paper is printed, the whole area is thinly stained(P.426) Toner comes off when rubbed(P.426) Uneven Gloss(P.427)
- Page 421 Troubleshooting The entire paper is printed in black(P.428) Nothing is printed(P.428) White streaks occur(P.428) The peripheral area is dirty(P.429) An afterimage printed on the front edge of the paper is printed(P.429) Paper feed direction The density differs at two ends of the paper(P.430) Paper feed direction - 421 -...
-
Page 422: White Streaks Appear In The Vertical Direction
Troubleshooting White streaks appear in the vertical direction Cause Solution Reference The LED head is dirty. Wipe the LED head with soft tissue paper. Cleaning the LED head(P.348) The toner is low. When "Toner Low." or "Install Toner" is displayed, replace Replacing toner the toner cartridge. -
Page 423: Printing Is Light
Troubleshooting Printing is light Cause Solution Reference The toner is low. When "Toner Low." or "Install Toner" is displayed, replace Replacing toner the toner cartridge. cartridges(P.312) The paper is moist. Use the paper stored at appropriate temperature and Storing humidity. paper(P.95) The paper is not supported. -
Page 424: Condensation Occurs On Printed Paper
Troubleshooting Condensation occurs on printed paper Cause Solution Reference The paper is moist. Use the paper stored at appropriate temperature and Storing humidity. paper(P.95) This machine is used in a place Use this machine in an environment with an appropriate Installation with high humidity or sudden temperature and humidity. -
Page 425: Dots And Horizontal Streaks Appear In The Paper Feeding Direction Periodically
Troubleshooting Dots and horizontal streaks appear in the paper feeding direction periodically Cause Solution Reference If dots or streaks of a specific color Please replace the image drum. Replacing the appear at intervals of about 94mm, image drum and the green tube of the image drum is the toner scratched or dirty. -
Page 426: Edges Of Text Are Blurred
Troubleshooting Edges of text are blurred Cause Solution Reference The LED head is dirty. Gently wipe the LED head with soft tissue paper. Cleaning the LED head(P.348) The paper is not supported. Use recommended paper. Applicable paper(P.82) The paper is moist. Use the paper stored at appropriate temperature and Storing humidity. -
Page 427: Uneven Gloss
Troubleshooting Uneven Gloss Cause Solution Reference The media weight is set incorrectly. Press the scroll buttons on the operator panel several times Setting paper to select the paper tray you are using from [Menus] - [Tray information on the Configuration], and set an appropriate value for [Media operator Weight]. -
Page 428: The Entire Paper Is Printed In Black
Troubleshooting The entire paper is printed in black Cause Solution Reference The machine may have broken Please contact the Customer Service Center or your dealer. - down. Nothing is printed Cause Solution Reference Multiple pages were fed at a time. Load the paper again after shuffling it well. -
Page 429: The Peripheral Area Is Dirty
Troubleshooting The peripheral area is dirty Cause Solution Reference The size is not reduced by scale Reduce the size by scale according to the paper size. Enlarging/Reduci according to the paper size. ng to fit the specified media size(P.169) An afterimage printed on the front edge of the paper is printed Cause Solution Reference... -
Page 430: The Density Differs At Two Ends Of The Paper
Troubleshooting The density differs at two ends of the paper Cause Solution Reference After narrow paper (i.e. width A in If this occurs when you load the paper in landscape Loading the figure) had been printed on orientation, try printing with the paper loaded in portrait paper(P.82) repeatedly, wide paper was printed orientation. -
Page 431: Software Troubleshooting
Troubleshooting Software troubleshooting Monitoring Tool Troubleshooting (Monitoring Tool)(P.266) - 431 -... -
Page 432: Troubleshooting For This Machine And Paper
Troubleshooting Troubleshooting for this machine and paper Troubleshooting for the machine Please check the following explanation and "FAQ" on the website or your smartphone application. If the problem persists, please contact the Customer Support Center or your dealer. Symptom Cause Solution... - Page 433 Troubleshooting Symptom Cause Solution Reference There is a problem Use another LAN/USB cable. with the LAN/USB cable. The LAN cable does Please use the cable of Ethernet not meet the 10BASE-T/100BASE-TX/1000Base specifications. specifications. The USB cable does Please use the USB cable enclosed with this not meet the machine.
- Page 434 Troubleshooting Symptom Cause Solution Reference The memory is The memory of this Print again after reducing the resolution in the insufficient. machine is insufficient printer driver. as the print data is too big. All pages are not The WSD port is used. Change the print destination port to the printed.
-
Page 435: Troubleshooting For The Paper
Troubleshooting Symptom Cause Solution Reference The web page does [Web] is set to Press the scroll buttons on the operator panel not open. [Disable] in the menu to select [Enable] in [Admin Setup] - [Network of this machine. Setup] - [General Setup] - [Web]. The IP address is Check the IP address of this machine and Printing the menu... - Page 436 Troubleshooting Symptom Cause Solution Reference The paper feed roller As a guide, the paper feed roller reaches its Replacing the has reached the end of service life after printing about 120,000 sheets paper feed roller its service life. for Tray 1/2/3/4 and about 100,000 sheets for (Tray1)(P.334) the MP tray.
- Page 437 Troubleshooting Symptom Cause Solution Reference Thin paper is used. Use thicker paper. There is near-solid Try leaving a margin at the top edge of the filling at the top edge paper. of the paper. With duplex printing, try leaving a margin at the rear edge of the paper.
-
Page 438: When A Power Failure Occurs
Troubleshooting When a power failure occurs If a power failure occurs while the power is on, the power will not turn on automatically even after the power failure is recovered. If you want the power to turn on automatically after the power failure is recovered, select [Always On] or [Last State] in [Boot Menu] - [After AC power supply fails]. -
Page 439: Appendix
Appendix Appendix Specifications ..................440 Dimensions ..................... 443 Using the FAQ guide of this machine ............. 445 List of consumables, maintenance parts, options and paper ....447 Menu tree ....................448 - 439 -... -
Page 440: Specifications
Appendix Specifications General specifications Item B822dn B842dn ARM Processor (667MHz) Memory Built-in 512 MB Weight (including consumables) Approx. 24 kg Approx. 26 kg Dimensions (WxDxH) 478×392×286 mm 478×392×348 mm Power 100V AC +/-10%, 50/60 Hz ±3% Power Operating Max: 1,400W*/Average: 800W** consumption * The value excluding the momentary peak value. - Page 441 Appendix Item B822dn B842dn Resolution 600 x 600 dpi, 1200 x 1200 dpi Printing colors Black Printing speed (A4 landscape) Simplex: 37 ppm Simplex: 45 ppm Duplex: 30 ppm Duplex: 36 ppm First page printing time 6.5 sec (A4 LEF) 5.8 sec (A4 LEF) The time from the start of data reception to the completion of discharge.
- Page 442 Appendix Item B822dn B842dn Warm-up time When powered on 19 sec or below (At room temperature of 22ºC and rated voltage) When restored from sleeping mode 15 sec or below (At room temperature of 22ºC and rated voltage) ...
-
Page 443: Dimensions
Appendix Dimensions Plan view B822dn B842dn 478millimeters 478millimeters Side view B822dn B842dn 790millimeters 790millimeters 135millimeters 135millimeters 392millimeters 392millimeters 263millimeters 263millimeters 256millimeters 303millimeters 286millimeters 348millimeters 307millimeters 360millimeters 437millimeters 500millimeters 585millimeters 585millimeters - 443 -... - Page 444 Appendix With options installed Expansion tray unit Expansion tray unit (large) 478millimeters 478millimeters B822dn: 635millimeters B842dn: 784millimeters B822dn: 381millimeters B842dn: 472millimeters 95millimeters 124millimeters 95millimeters 124millimeters 95millimeters 124millimeters 64millimeters 64millimeters 482millimeters 482millimeters 617millimeters 617millimeters - 444 -...
-
Page 445: Using The Faq Guide Of This Machine
Appendix Using the FAQ guide of this machine If an error occurs in this machine, you can search for a solution by accessing the "FAQ" on the website from the application on the mobile device. You can also easily find a solution by inputting the keyword in "Search Keyword" displayed on this machine. How to display "Search Keyword"... - Page 446 Appendix If "NFC" appears on this machine's display, bring the mobile device where the Mobile Print app is running close to the NFC mark on the machine, and the search result for the solution page will be displayed. If you are using iOS, tap [NFC] to display [Ready to Scan], and then bring the mobile device close to this machine.
-
Page 447: List Of Consumables, Maintenance Parts, Options And Paper
The designated replacement cycle is 5 years. Note that user registration is required to receive the free-of-charge parts. For details of free maintenance parts, visit our website (https://www.oki.com/jp/printing/). Category Product name... -
Page 448: Menu Tree
Appendix Menu tree Functions Configuration Tray Count MPTray Tray1 Tray2 Tray3 Tray4 Paper Feed Roller Counter MPTray Tray1 Tray2 Tray3 Tray4 A4/Letter Impressions Count Supplies Life Toner(n.nK) Drum Fuser Network Network Information General Information Extended Network Enabling Default Gateway Printer Name Short Printer Name NIC Program Version Web Remote Version... - Page 449 Appendix Menus Tray Configuration MPTray Config Media Size X Dimension Y Dimension Media Type Media Weight Tray Usage Tray1 Config Media Size X Dimension Y Dimension Media Type Media Weight Other Size Tray2 Config Media Size X Dimension Y Dimension Media Type Media Weight Other Size...
- Page 450 Appendix Admin Setup Network Setup General Setup Extended Network You must input an administrator password. Enabling Default Gateway TCP/IP NetBIOS over TCP Telnet IPSec SNMP Network Scale Network Factory Defaults Wired(LAN1) Setup Wired(LAN1) IP Address Set IPv4 Address Subnet Mask Gateway Address DHCPv6 Hub Link Setting...
- Page 451 Appendix ESC/P Setup Kanji Font ANK Font Symbol Set Zero Character Reduction Print Print Position H Offset V Offset Right Margin CR Function Auto LF Image Private Print Setup Verify job option Erase job option Keep job for Job Limitation Verify job password Job Auto Search Panel Setup...
- Page 452 Appendix Wireless Network Selection xxxxxx Manual Setup SSID Security WEP Key WPA Encryption Type WPA Pre-shared Key Execute Wireless reconnection Wireless(AP Mode) Setting Wireless(AP Mode) You must input an administrator password. Automatic Setup (PushButton) Manual Setup Connection Setting SSID Password IPv4 Address Execute AP Mode User Setting...
- Page 453 EE8001-4623Z002 Rev2...
Need help?
Do you have a question about the COREFIDO B822dn and is the answer not in the manual?
Questions and answers