Table of Contents
Advertisement
Quick Links
Advertisement
Table of Contents

Related Manuals for TierTime UP mini 3


Summary of Contents for TierTime UP mini 3
- Page 1 UP mini 3 User Manual https://www.tiertime.com...
-
Page 2: Table Of Contents
....................1.2 Printing Environment ....................1.3 One Year Warranty ......................1.4Compliance ......................... 2 Product Introduction ......................2.1 UP mini 3 ........................2.2 Main Structure ....................... 3 Printer Installation ........................3.1 Install Filament Spool Holder ..................3.2Install Air Filter ........................ 3.3Install Build Plate ...................... - Page 3 6.7 Advanced Printing Options .................... 6.8 Printer Information ......................6.9 Software Version and Upgrades ..................6.10 Image Conversion ......................7 Printing Tips and Maintenance ....................7.1 Printing Tips ........................7.2 Printer Nozzle Maintenance ..................7.3 Replace Extruder ......................
-
Page 4: Safety And Printing Environment
1.As the slight odor could be generated during printing, keep the printer in a well ventilated environment. The ideal working temperature of the UP mini 3 is between 15°C and 30°C with a relative humidity between 20–70%. Printing at temperatures out of this range could cause adverse effects to the printing process and print quality. -
Page 5: One Year Warranty
Tiertime and its authorized resellers warrant to the original purchaser that this product is free from defects in material and workmanship. Tiertime or its resellers will for one year, at its option, repair or replace at no charge for parts and labour from the date you purchase the product from Tiertime or its authorized resellers. -
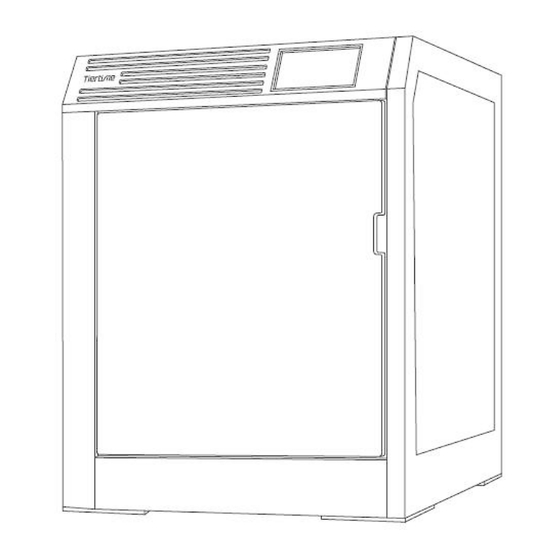
Page 6: Product Introduction
2. Product Introduction 2.1 UP mini 3 UP mini 3 is an entry-level 3D printer launched by Tiertime, which can meet daily work requirements such as high-frequency design verification for schools and research institutes. 2.2 Main Structure... -
Page 7: Printer Installation
3 Printer Installation 3.1 Install Filament Spool Holder Insert the filament spool holder into the slot at the back of the printer. 3.2 Install Air Filter 1. Rotate counterclockwise to remove the top cover of the air filter. 2. Put the air filter provided in the packaging box into the base of the air filter system. -
Page 8: Install Build Plate
3. Turning the upper cover of the air filter clockwise to close it. Note: Change the air filter every 3 months, or every 300 hours of active printing. 3.3 Install Build Plate Place the print board in the slots of the platform with the side of the perf board facing up, push the board forward and make sure the board fits in the slot. -
Page 9: Cable Connection
3.4 Cable Connection 1. Secure the power connector into the power interface at the back of the machine, and plug the other side of the cable in the power outlet. Turn on the power switch at the back of the machine. 2. -
Page 10: Calibrate Printer
3.6 Calibrate Printer All the UP mini 3 3D printers have gone through the calibration process in our factory. However, due to bumpy shipping conditions, we strongly recommend you conduct platform leveling and nozzle height adjustment before your first use of the machine. - Page 11 3, Hang the filament spool on the filament holder at the back of the machine. Note: The spool turns counter clockwise. When placing the spool, make sure the filament is tightly coiled around the spool to avoid any filament tangles. 4, Insert the loose end of the filament into the filament feeding device at the top right at the back of the machine.
- Page 12 7, Click the “Extrude” button to start the extrusion process. The nozzle will get heated to the preset temperature which will be shown on the screen with 100%. 8, The printer will beep when the nozzle temperature reaches the preset value. Press the loose end of the filament into the filament inlet on the top of the extruder, until the motor inside the extruder grabs the filament and drags it into the extruder.
-
Page 13: Software Installation And Printing
4.1 Download and Install the UP Studio Software 1. You can download the latest UP Studio software and other previous released versions via following URL: https://www.tiertime.com/software/ 2 . Double click the installation file, and follow the instructions shown in the installation program. After the installation is finished successfully, you can run the program and start printing. -
Page 14: Software Interface
4.2 Software Interface Connect the printer with a computer via USB cable or WiFi connection. Click the icon and enter the software interface. Printer Status Other Options Main Page Load Print Init Calibrat Maintenance Print Table Model Ops Menu Scale Save More Models... -
Page 15: Touchscreen Interface
4.3 Touchscreen Interface Calibration Filament Operations Printing Options Options, Nozzle height Init Printer Printer Setting/WiFi Printer Info, Setting Reset, and Language Settings... -
Page 16: Load 3D Models
4.4 Load 3D Models Open UP Studio software, click the UP icon on the left navigation menu, and follow the instructions to load models: Load Model Button... -
Page 17: Print Models
4.5 Print Models Make sure the printer is connected via USB or WiFi with your computer, and a model has been loaded into the UP Studio software. Advanced Options Layer Height Shell Mode Surface Model Infill Ratio Print Quality Nozzle Height Adjustment Model Error Raftless Printing No Support... -
Page 18: Print Progress (Touchscreen)
Surface Mode: No top and bottom layer, and no infill, only one go with peripheral wall Infill Ratio: The infill ratio can be 13%, 15%, 20%, 65%, 80%, 99%. The larger the value is, the denser the printed model. After choosing the printing parameter, click the “Print” button. The software will start calculating for slicing, and send the printing data to the printer. -
Page 19: Change Filament During Printing
Stop Print Job Filament Resume Filament Extrude Withdraw Note: Once the print job is stopped, it can not be resumed. You can only start the print from the beginning. 4.7 Change Filament during Printing 1. Click the “Pause” button during an ongoing print job to pause it 2. -
Page 20: Resume Printing After Power Outage
4.8 Resume Printing after Power Outage If the power was lost during printing, after the power is back, the printer will alert the user whether to resume the current print job. If you want the print job resume printing, do not move the models on the build table. After the printer is powered on, do an initialization, and follow the instructions on the touchscreen or UP Studio software to resume the interrupted print job. - Page 21 Instructions to save the print job in the storage slots: 1, After setting up all the printing parameters, click the down arrow on the right of the “Print” button, and click the “Advanced Print”. 2, Choose the slot number for the print job.
-
Page 22: Printer Initialization
5 Printer Initialization 5.1 Printer Initialization After a printer is turned on, a manual initialization is required. In the whole initialization process, the extruder and the build table will move slowly, and touch the limit switches on the XYZ axis. This is a very important step for a printer to work properly, because a printer needs to find its zeros. -
Page 23: Filament Settings
5.2 Filament Settings Filament Setting Interface on Touchscreen Stop Withdraw / Extrude Filament Withdraw Extrude Return Preset Filament Switch Filament Weight Types Filament Interface in UP Studio Software Extrude Stop Extrude / Withdraw Filament Withdraw Filament Select Build Plate Type Select Nozzle Diameter Preheat Build Plate Preheat Time... -
Page 24: Filament Install (Touchscreen)
5.2.1 Filament Install (Touchscreen) 1, Enter filament through the guiding tube, insert the loose end into the inlet on the top of the extruder. Click the “Material” button on the touchscreen. 2, Click the “Filament Type” button (it will switch to different filament types) and choose the right filament type, e.g. -
Page 25: Install Filament (Up Studio Software)
2, Open the UP Studio software, and click the “Maintenance” button on the left menu. First, choose the filament type, say “PLA (Tiertime)”, then enter the filament weight for the system to record the filament usage. -
Page 26: Withdraw Filament (Touchscreen)
5.2.3 Withdraw Filament (Touchscreen) In order to avoid extruder clogging, we suggest that, when changing filament, withdraw the filament in use first, and then extrude the replacement filament. 1, Click the “Material” button on the touchscreen. 2, Pull the filament lever on the extruder to the perpendicular position. -
Page 27: Withdraw Filament (Up Studio)
4, Once filament withdrawal is finished, push down the extruder lever back to horizontal position. Note: During the time of printing, or filament loading, set the extruder lever at the horizontal position. 5.2.4 Withdraw Filament (UP Studio) 1, Open the UP Studio Software, and click the “Maintenance”... - Page 28 3. Click the “Withdraw” button. The extruder starts heating up until the preset temperature, and the printer gives off a beep. The extruder motor starts to turn. Users can gently pull the filament out from the filament inlet on the top of the extruder. 3.
-
Page 29: Set 3Rd Party Filament Printing Parameters
5.2.5 Set the 3rd Party Filament Printing Parameters 1. Open the UP Studio Software, and click the “Maintenance” button on the left menu. 2, In the Filament Type drop down menu, select the “Customized” option. 3, In the “Customized Material” dialog, click the “Edit” button, and the Material Profile Editor will pop up. - Page 30 Click the Material Name on the top left, and select a similar filament, e.g. “PLA Tiertime”, then click the “+” button to copy the settings to a new filament profile, which will be named as “PLA Copy1-Manufacturer”...
- Page 31 6, Enter filament’s “Print Temp”, “Platform Temp”, “Filament Diameter”, and “Shrink Ratio” on the XYZ axes. 7, Click the Printer Model, Nozzle Diameter, Layer Height, and Print Quality, and choose a combination of values that you want to define detail settings with. 8, For a combination of values of Printer Model, Nozzle Diameter, Layer Height, and Print Quality, there are many parameters you can define.
- Page 32 10, In the UP Studio Software, “Maintenance” then “Filament Type”, and choose “New Filament”. 11, You can also export the filament settings to an “.fmd” file using the “Export” option, and import an “fmd” file through the “Import” option. Note: 1, Before changing to a different filament, you need to withdraw the filament in the extruder to avoid possible leftovers inside the nozzle which could cause clogging.
-
Page 33: Wifi Connection
5.3 WiFi Connection Connecting the UP mini 3 through WiFi needs to set up the wireless network (WLAN). The computer and the printer should connect to the same WLAN (same SSID). For a stable WiFi connection, we recommend users to choose a WiFi network with large network capacity and strong processing power. - Page 34 5, Enter an IP address for the printer, and if needed, define a password to create a private access for the printer. 6, Click the “Connect” button on the right to start connecting. If the connection is set up successfully, the status on the top right corner will change to a connected icon.
-
Page 35: Wifi Settings (Up Studio)
5.3.2 WiFi Settings (UP Studio) 1, Connect the UP mini 3 with a computer using a USB cable, and then open the UP Studio software. 2, Click the “Setting” button on the top right corner, and click the “Printer” option. - Page 36 5, Enter the WiFi password, and click “Confirm”. 6, If the printer needs to be set up as a private one, toggle the option “Private” on, and set up the password to restrict the access to the printer through WiFi. Again, this password setting is very weak. The user who can access the USB connection, or the touchscreen can easily reset the password.
-
Page 37: Printer Calibration
5.4 Printer Calibration 5.4.1 Printer Auto Calibration (Touchscreen) 1, Click the “Calibrate” button to enter the calibration page. Make sure the nozzle is away from the build plate. If they are very close, press the “-” button to lower the build table. 2, Click the “Auto”... -
Page 38: Auto Calibration (Up Studio)
5.4.2 Auto Calibration (UP Studio) Click the “Calibration” button in the UP Studio. A Calibration dialog will pop up. 9 Calibration Points on the build plate Click “+/-” to move the print table UP or Down Enter a value between “+” and “-” buttons as the height of the print table, and click “MOVE”... -
Page 39: Manual Calibration And Nozzle Height Adjustment
1, In the Calibration Dialog, click “Auto” 2, The extruder automatically moves from the point 1 to the point 9, stops at each position, tests the height, calculates the compensation value for each point and enters the value The following shows the compensation values for the 9 in the dialog. - Page 40 2, Place the calibration card (accessory) on the build table at point 1. 3, Follow the instructions shown in the software, and start the setting process for point 1. 4, Clicking the up and down arrows on the right of the red area to up or lower the extruder, until the nozzle is just about to touch the surface of the calibration card.
- Page 41 5, Follow the instructions and calibrate the rest of 8 points one by one, and keep the resistance the same when moving the calibration card at all the points. Click the Confirm button. 6, UP Studio calculates the height compensation value for all the 9 points, and the nozzle height.
-
Page 42: Manual Calibration Of Nozzle Height
5.4.4 Manual Calibration of Nozzle Height The nozzle height (the distance between nozzle tip and the print table) is a fundamental setting for a printer. If the value is set too high or too low, it will cause issues for print jobs. If the following incidents happen, it is recommended to adjust the nozzle height: ■... - Page 43 3, Place the calibration card at point 1 on the build table. 4, Move the extruder closer to the build plate. E.g. the right image shows the current nozzle height is “205.63” (blue box). Enter “204.64” in the red box, and click the “Move”...
- Page 44 5, Click the “+” button, slowly raise the print table, until the calibration card touches the nozzle. Try to move the calibration card. The build table is so high that the When moving the calibration card The build table is too low. Moving nozzle pins the calibration card feels a little resistant, the nozzle the calibration card does not feel...
- Page 45 6, If the calibration card can feel some resistance, it means the nozzle height is proper. Enter the current value in the red box on top to the red box in the middle, for example, now the value is 205.40. Click the “OK” button to finish the process.
-
Page 46: Printer Settings
5.5 Printer Settings Switch for WiFi. If OFF, no WiFi Settings WiFi setting button available. Internal Light Switch Preheat Switch. If ON, printer will preheat for 15 minutes before every print job. -
Page 47: Language Settings And Factory Settings
5.6 Language Settings and Factory Settings Model No.: Printer Model Number Printer Serial Number Firmware Ver.: Printer’s Firmware Version Touchscreen Ver: Printer’s Touchscreen Program Version Total Print Time: Total Accumulative Print Time Total Print Weight: Total Accumulative Filament Weight MAC: Printer’s MAC Address Default Factory... -
Page 48: Error Messages
5.7 Error Messages: Error Messages Error Code Note: Please contact Tiertime Technical Support when error messages appear Support@tiertime.com Possible error messages: Unplug the power plug and restart the printer. Initialize the printer. -
Page 49: Up Studio2.X Software Features
6 UP Studio2.x Software Features 6.1 Rotate 1, Choose a model, and click the “Rotate” button. 2, Choose the rotating axis. 3, Users can enter a rotating angle, or a preset value. 4, Users can also drag the mouse using the symbols on the screen to rotate the model. -
Page 50: Scale
6.2 Scale 1, Choose a model, and click the “Scale” button 2, In default mode, 3 axes are scaling at the same time. If users choose to scale along one axis, click the “unlock” button in the middle, and then choose an axis. 3, Users can enter a scale value, or use one of the preset values. -
Page 51: Move
6.3 Move 1, Choose a model, and click the “Move” button. 2, Choose an axis to move the model. 3, Users can enter a specific value to pan the model, or choose a preset value. 4, Users can also follow the instructions on the model, and use a mouse to drag the model along one axis. -
Page 52: Copy
Copy Choose a model, and right click the mouse to bring up a menu. Select the “Copy” option and choose the number of copies needed. 6.5 Fix Errors 1, If a model’s surface has errors, UP Studio software will show the faulty surfaces in red. -
Page 53: Merge / Save Models
6.6 Merge / Save Models 1, Click the right button of a mouse, and select the “Select All” option. 2, Then, click the “More” button, then select the “Merge” option. 3, When you need to save a file, click the “Save”... -
Page 54: Advanced Printing Options
6.7 Advanced Printing Options Click the top right arrow in the red box to open the advanced print settings. - Page 55 Dense (support): Support Top Layers are with full infill to keep the surface of the model in shape and smooth. Support: Support structures lift the model’s overhang structure. Normally, they will be removed after the printing is done. Support Range: Support Angle is between the model and the print platform.
- Page 56 Support Setting: Roof Density: The number of layers for the dense support. Threshold Angle: The support angle to determine the size of the support structure. Min. Surface Area: The minimum area to generate the support structure. Smaller areas than this value will not have support structures.
-
Page 57: Printer Information
Nozzle Adjust the nozzle height. Normally, after changing a build plate, the nozzle height might be Offset: different. In order to compensate for the height, users can change nozzle offset to easily adjust the nozzle height, avoiding the frequent nozzle height process. Unsolid UP Studio can automatically fix and print models with errors. -
Page 58: Software Version And Upgrades
6.9 Software Version and Upgrades Click the icon at the top right corner on UP Studio to open the setting interface. Please check the option “Remind me when a new version is available”. The software will alert the users when a new software release is ready to download. - Page 59 Base height determines the height of the image raft. Click the “Toggle Color” button will invert the Model Height determines the bumpiness of the pixel’s brightness, which will invert the raised printed model. portions to sunken, and vice versa. Pen: Use “Pen” to edit the image. Text: Use “Text”...
-
Page 60: Printing Tips And Maintenance
7 Printing Tips and Maintenance 7.1 Printing Tips ● Make sure the nozzle height is accurate. If the nozzle height is too low, it could cause warpage; if the nozzle height is too high, the nozzle could crash into the build plate and cause damage or clogging. -
Page 61: Printer Nozzle Maintenance
7.2 Printer Nozzle Maintenance 1, In the “Calibrate” Page, click the “Extrude” button, wait the nozzle reach preset print temperature (normally above 200C), then use the nozzle wrench (accessory) to take the nozzle off the extruder. If turning the nozzle without heating up, it could damage the extruder. -
Page 62: Replace Extruder
7.3 Replace Extruder 1. ”Extrude” filament 2, Turn off the power of the printer. Take off the extruder’s ribbon cable lid. - Page 63 3, Unplug the cable. 4, Use an allen key to loosen the screw at the bottom of the extruder clockwise, then the extruder can be taken off.
- Page 64 Tiertime Corporation Technical Support: support@tiertime.com Website: https://www.tiertime.com Support Hotline: 888-828-6124...
Need help?
Do you have a question about the UP mini 3 and is the answer not in the manual?
Questions and answers