Table of Contents
Advertisement
Advertisement
Table of Contents

Related Manuals for TierTime UP BOX+


Summary of Contents for TierTime UP BOX+
- Page 1 USER MANUAL FOR UP BOX+...
-
Page 2: Table Of Contents
Table of Contents Precautions Printer Body Accessories Unpacking Installing Print Board Installing Filament Installing UP Studio Software Initializing Printer Automatic Platform Calibration Automatic Nozzle Height Detection Manual Platform Leveling Preparing for Printing Printer Control Buttons LED Light Bar Software Interface Setup Wi-Fi Product Activation Loading a Model... - Page 3 Table of Contents Moving a Model Making Copies Merging and Saving Models Printing Preference Printing Parameters Converting a 2D Picture into a 3D Model Machine and Software Settings Controlling Multiple Printers with USB Printer Info and Naming a Printer Printing Techniques Fine Manual Calibration Setting Compensation Values Maintenance...
-
Page 4: Precautions
Precautions UP BOX+ 3D printer only works with the power adapter provided by the original manufacturer, otherwise the machine could become damaged or even cause a fire hazard. Keep the power adapter away from water and high temperature environments. During printing, the temperature of the nozzle of UP BOX+ could reach 260°C and the print platform could Warning label on printer: reach 100°C. -
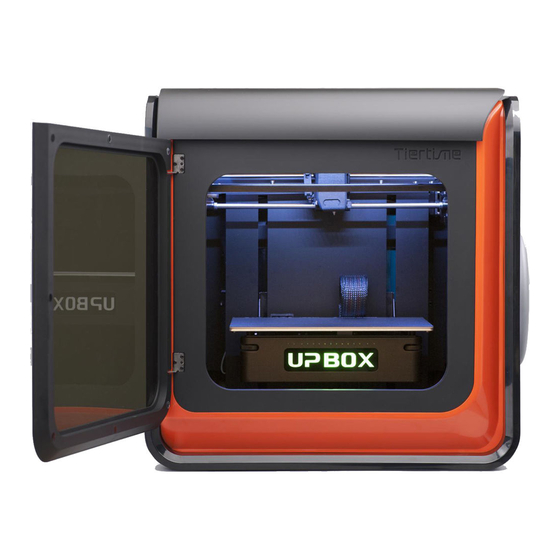
Page 5: Printer Body
Printer Body Top Lid Spool Holder Front Door Filament Spool Magnetic Cover Pause/Stop Button Extrude/Withdraw Button Initialization Button USB Interface Power Interface Power Switch... - Page 6 X-Axis Y-Axis Z-Axis Air Filter LED Bar Print Platform Nozzle Height Detector Print Head Mount Print Head Magnets Wind Lever Duct Fans Nozzle Automatic Leveling Probe Print Head Locking Srew...
-
Page 7: Accessories
Accessories Power Adapter Power Cable Scraper USB Cable Hex Keys Plier ABS Filament Nozzle Wrench 2.0mm, 2.5mm Perforated Print Board Micro SD card and Print Head Nozzle Perforated Print Board (Perf Board) Reader (Perf Board) and UP Flex Print Board Calibration Card 1kg Spool Cover 1kg Spool Rack Add-on... -
Page 8: Unpacking
Unpacking: Remove Foams and Nylon Ties 90° Lay down the foam at the bottom, turn it 90 degrees to Remove the nylon ties (labelled with "Remove me") from the remove, and no need to lift the platform. smooth rods. Keep the packaging material handy. You may need it when shipping the product in the future. -
Page 9: Installing Filament
Installing Filament 1. To install the filament spool, open the magnetic cover and insert the filament into the guiding tube at the spool holder. 2. Push the filament into the guiding tube until it comes out from the other end. Put the spool onto the spool holder and cover the spool with the magnetic cover. -
Page 10: Initializing Printer
Initializing Printer Initialization is required every time the machine is switched on. During initialization, the print head and the print platform move slowly and hit the endstops of the XYZ axes. This is essential as the printer needs to find the endpoints to each axis. Other software options will light up and become available for use only after initialization. -
Page 11: Automatic Platform Calibration
Automatic Platform Calibration Platform calibration is the most important step for successful printing as it ensures part adhesion on the first layer. Ideally, the distance between the nozzle and the platform is constant, but in reality the distance varies at different positions due to many reasons (e.g. a slightly tilted platform), which could cause warping on prints or even a complete print failure. -
Page 12: Automatic Nozzle Height Detection
Automatic Nozzle Height Detection You may initiate the Automatic Nozzle Height Detection without the Autoleveling. In the Calibration section, click " Detect Nozzle". During nozzle height detection, the print head nozzle will touch the thin metal sheet on the detector to make measurement. -
Page 13: Manual Platform Leveling
Manual Platform Leveling Usually users do not need to adjust the platform manually. This is only necessary if the automatic leveling function was unable to effectively level the platform. There are four screws under the platform of UP BOX+: two knobs in the front and two knobs under the platform at the back. -
Page 14: Preparing For Printing
Preparing for Printing Make sure the printer switched on and connected to a computer. Click the "Maintenance" button in the software. Choose ABS or the material you choose from the dropdown material list, and input the filament weight. Click "Extrude". The print head will start to heat up. -
Page 15: Printer Control Buttons
Printer Control Buttons Printer Control Buttons Single Press WITHDRAW FILAMENT Double Press EXTRUDE FILAMENT Long Press LED Light Bar and Front Door Check When a print job is finished, the LED light bar will be in RED color. Under such condition, the machine will not respond to any command and print jobs. -
Page 16: Led Light Bar
LED Light Bar Printing and Pre-heating Progress bar. Sleeping Mode Alternated lighting of progress Sleeping mode: Machine will enter the sleeping mode after it has been idling for 2 minutes when it is not initialized. Single press the initialization button can exit the sleeping mode. -
Page 17: Software Interface
Software Interface Account UP (Print) Library Help Account Printer name Current Settings Material Share Connection Nozzle & Platform Printer Status Skin Temperature type Back to home Model Adjustment Add a Model/ wheel Picture Print Initialize Calibration Maintenance Build Space Move Mirror Rotate Save... -
Page 18: Setup Wi-Fi
Machine Settings - Wi-Fi Connection Connecting to UP BOX+ through Wi-Fi requires a Wireless Local Area Network (WLAN). The computer and the printers must connect to the same WLAN (same SSID) before they can communicate. In order to achieve stable Wi-Fi connection, It is highly recommended to use the printer under a capacious Wi-Fi environment. - Page 19 Wi-Fi Setup Connect UP BOX+ to a computer through USB. At the top right corner click the printer tab Click the “Printer Detail” button.
- Page 20 Click the dropdown menu to choose an available network. Choose your network from the drop down list.
- Page 21 tier Input the password for the Wi-Fi network. If “Private” is set to ON, a private password can be optionally added to limit the printer access via Wi-Fi to trusted users. Please note that the password for private access is a weak protection that anyone who can connect the printer through USB connection can disable or change the password without any limitation.
-
Page 22: Product Activation
Product Activation It is highly recommended to activate UP BOX+ as soon as possible to be able to access its unlimited printing power and the cloud based web functionality. The inactivated machine has limited printing times before the activation is done. Press the "Account"... -
Page 23: Loading A Model
Loading a Model Click "Import Mode or Image", choose to open a 3D model. Choose your model. Open Cancel The loaded model will appear on the print plate. Click "Print" to open the print preview window. -
Page 24: Printing A Model
Printing a Model Make sure the printer is connected to a computer throug USB or Wi-Fi ( go to page 19 for details about Wi-Fi setting), and loaded a model. Click the print button to open the print interface Set Layer Thickness Select Infill Type Select Print Quality/Speed Advanced Options... -
Page 25: Pausing A Print Job
Printing Progress Printing progress is shown in the LED progress bar on top of the UP BOX+ letters. Pausing a Print Job An on-going print job can be paused by clicking the "Pause" button on the left hand side menu. Click the "Resume Print"... -
Page 26: Rotating A Model
Rotating a Model Choose the model and click the rotate button. Choose the rotation axis User could input a specific value or choose a preset value for rotation. Alternatively, user may use the rotation guide to rotate the model in real time by click and drag using mouse. -
Page 27: Scaling A Model
Scaling a Model Choose the model and click scale button. By default the scaling is in all axes. User could also choose a specific axis for scaling. User may input a specific scaling factor or choose a preset value. Click MM or INCH to convert the models to the size of corresponding units. -
Page 28: Moving A Model
Move a Model Choose the model and click the Move button. Choose the direction of movement. User may input a specific value or choose a preset value for the distance of movement. Alternatively, user may use the translational guide on the model to move on the X-Y plane or a single direction by click and drag using mouse. -
Page 29: Making Copies
Making Copies Choose the model by clicking it (hight lighted), then right-click to bring up the menu and select the number of copies. Repairing a Model If the model contains defective surfaces, the software will highlight the defective surfaces in red. Click the "More"... -
Page 30: Merging And Saving Models
Merging and Saving Models Ctrl/CMD-click all the models on the build plate. The Merge button on the second level of the adjustment wheel will become available. Click the "Merge" button to merge the models. Click the "Save" button to save the merged models to the comptuer. -
Page 31: Printing Preference
Print Preference Surface: The number of layers that sealing the top and the bottom of the printed object. Angle: This value determines at which angle the Surface layers start to be printed. Dense: Choose the number of the dense layers between the support structure and the supported surfaces. - Page 32 Print Preference No Raft: Print without raft. No Support: Print without support. Stable Support: Support structure will be stronger but harder to be removed. Unsolid Model: The software will autofix nonsolid models. Thin Wall: The software will detect the wall thickness that is too thin to print and expand the wall to a printable size.
-
Page 33: Printing Parameters
Printing Parameters Surface Infill Surface Support Dense (support) Raft Print Platform <30 <90 Dense: Solid support structure ensures that the surface being supported retains its shape and surface finish. Infill: The inner structure of the printed object. The density of the infill can be adjusted. Raft: The thick structure that assists with the adhesion of the object to the platform. - Page 34 Using Customized Material Profile It is possible to use customized material profile to control the printing temperature and platform temperature. This function is very useful for using third party materials that cannot print well using the preset profiles. The use the customized profile, go Maintenance and choose "Customize"...
-
Page 35: Converting A 2D Picture Into A 3D Model
Converting a 2D Picture Into a 3D Model Click the “Add Picture” button and select a picture. Base Height determines the thickness The "Convert Negative" button of a flat layer that holds the picture. will reverse the pixel intensity so that user could choose the Model Height determines the contrast picture to be protruding from or of the final print. - Page 36 Converting a 2D Picture Into a 3D Model Update 3D model button. This button will convert the modified picture on the left to a 3D rendering on the right. OK button sends the 3D rendering to the 3D printing interface for printing.
-
Page 37: Machine And Software Settings
Machine and Software Settings Click the "Setting" button to bring up the menu Choose a Language Choose and Set the Printer's Name Printer Name and Wi-Fi Settings Privacy Setting Auto Update Setting... -
Page 38: Controlling Multiple Printers With Usb
Controlling Multiple Printers with USB USB Hub Independent Power Supply Multiple printers can be controlled by a single computer one at a time through Wi-Fi or a USB hub. A USB hub with independent power supply is recommended to ensure stable connections. Printer Info and Naming a Printer User could rename the printer by clicking the printer name on the status bar. -
Page 39: Printing Techniques
Printing Techniques 1. Ensure accurate nozzle height. If the nozzle height value is too low, it will cause warping; if it is too high, it will crash the nozzle into the platform, causing damage and clogging. You can manually fine-tune the nozzle height value in the "Calibration"... -
Page 40: Fine Manual Calibration
Fine Manual Calibration Initialize the printer Open the calibration interface. Press the "Reset“ button to set all the compensation values to zero. Press button 5 to move the print head to corresponding position. Then press the "+" button to raise the platform. Raise the platform until it is just touching the nozzle. - Page 41 The platform is too high. The nozzle The height is just right. The platform is too low. No is pinning the Calibration Card onto Can feel some resistance when resistance is felt at all when the platform. Lower the platform moving paper.
-
Page 42: Setting Compensation Values
Setting Compensation Values As shown on the left, when the platform is at the "nozzle height", only part of the platform is close enough to the nozzle. Therefore, you need to set the compensation values for all of the other calibration points to inform the printer about the distance between the nozzle and the print surface throughout the XY plane. -
Page 43: Maintenance
Maintenance Removing the nozzle. After a long period of printing, the nozzle can become very dirty or even clogged. You can replace it with a new one while the old one is cleaned for reuse: 1. Use the "Withdraw" function in the "Maintenance" panel. The nozzle will heat up to the printing temperature. -
Page 44: Filament Check And Blackout Recovery
Filament Check When run out of filament during a print, the printer will be paused automatically, wait for the user to refill and continue. Refer to page 15 for how to refill and resume printing. Blackout Recovery A print job could be resumed after an electricity cutoff. The next time when the printer connects to a computer and after an initialization, a pop up window will appear to let the user choose to resume the interrupted print job. -
Page 45: Troubleshooting
Troubleshooting Problems Solution Initialize the printer. Printing or platform cannot reach The heater cartridge may be broken. Replace the target temp or over heat. cartridge. The heater cable may be broken. Replace the cable. Withdraw the filament from the print head. Cut off the melted tip and reload it into the print head. -
Page 46: Up Box+ Specifications
UP BOX+ Specifications Printing Technology MEM (Melted Extrusion Modeling) 255 x 205 x 205mm (W x H x D) Build Volume 10" x 8" x 8" Print Head Single, Modular for easy replacement. Z-Resloution 0.1/0.15/0.20 /0.25 /0.30 /0.35 /0.40 mm Smart Support Technology: Supporting Structure automactically generated, easy to remove, fine-tunable.
Need help?
Do you have a question about the UP BOX+ and is the answer not in the manual?
Questions and answers