Table of Contents
Advertisement
Quick Links
Advertisement
Table of Contents

Related Manuals for TierTime UP300D


Summary of Contents for TierTime UP300D
-
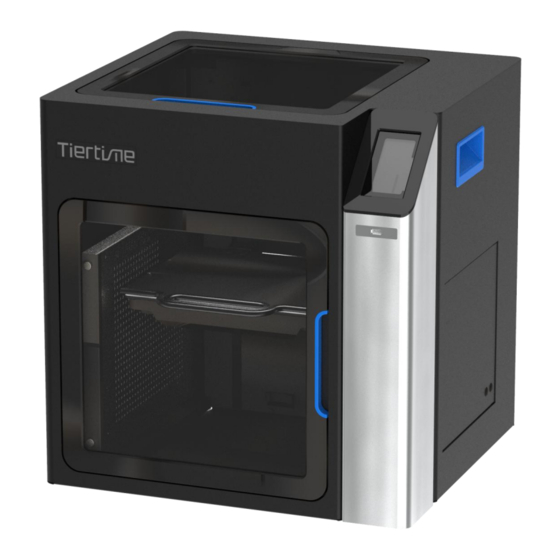
Page 1: Tiertime Up300D
Tiertime UP300D User Manual www.tiertime.com... -
Page 2: Table Of Contents
2. Unboxing..........................6 2.1 Unboxing the UP300D......................... 6 2.2 What’s in the box......................... 7 3.1 Main Par ts of UP300D......................... 8 4. Printer Installation........................ 9 4.1 Install the Pr int Boar d......................... 9 4.2. Install Softwar e UP Studio 3.0....................10 4.3 Update the Touchscr een Fir mwar e.................. - Page 3 7.6 Wi-Fi Connection........................56 8. Touchscreen Introduction....................58 8.1 Pr inter Status Bar ........................58 5.2 Mater ial............................60 8.2 Pr int.............................62 8.3 Calibr ate............................. 65 8.4 Infor mation..........................66 8.5 Config............................67 8.5 Networ k Connection........................68 8.6 Wi-Fi Networ k Connection and Settings:................70 9.
-
Page 4: Safety And Printing Environment
1. Safety and Printing Environment 1.1 Safety Precautions 1. The UP300D 3D printer requires the power adapter provided by the original manufacturer, otherwise the machine could be damaged or even cause fire. Keep the power adapter away from water and out of high temperature environments. -
Page 5: Printing Environment
Tiertime and its authorized resellers warrant to the original purchaser that this product is free from defects in material and workmanship. Tiertime or its resellers will for one year, at its option, repair or replace at no charge for parts and labor from the date you purchased the product from Tiertime or a reseller. -
Page 6: Unboxing
2. Unboxing 2.1 Unboxing the UP300D 1. Cut open the tape on the top of the cardboard box, and open the box from the top. 2. Take out the two boards on the top foam, and remove the top foam. -
Page 7: What's In The Box
One Perf Glass Board One Power Adapter One Power Cord Notice: All accessories may subject to change without prior notice. If anything is missing, please contact your local distributor, or Tiertime’s global technical support center, which can be reached via support@tiertime.com.Introduction... -
Page 8: Main Parts Of Up300D
3.1 Main Parts of UP300D 1. Dual Filter 7. Top Lid 2. Build Platform 8. Right Side Handle 3. Waste Tray 9. Filament Bay 4. Front Door 10. Power Switch 5. Touchscreen 11. Ethernet Socket 6. Front USB Port 12. USB Port 13. -
Page 9: Printer Installation
3. Slide the board onto the build platform and make sure to push the board all the way to the back. 4. Close the front door. 4.4 Connect the Power Cable 1. Plug in the power on the back of the UP300D 2. Plug the other end of the cable into a wall outlet. -
Page 10: Install Softwar E Up Studio 3.0
1. Download the UP300D Touchscreen Upgrade Program from https://www.tiertime.com/touchscreen-upgrade-program/ 2. Save the file to the root directory of the USB drive which comes with the UP300D, and make sure the file is named as “UP300D_x.x.x_update.tt” (Case sensitive), x.x.x being the version number. -
Page 11: Prepare Up300D For Printing
Find a USB cable, and connect one end to the computer and the other end to the UP300D back USB port (type-B). Open the UP Studio on the computer, you will find the connected UP300D listed in the available printer list of Wand. -
Page 12: Auto Calibration
5.2 Auto Calibration Auto Calibration can be triggered from the touchscreen, or from Wand software when connected to a computer ( refer to page xxx). It consist of leveling of the build plate and measurement of nozzle height. For more info please refer to page xxx. Auto Calibration from Touchscreen 1. -
Page 13: Load Filament
1. 500g Tiertime PLA 2. 500g Tiertime PVA In order to archive good consistency and print quality, we recommend use Tiertime filaments. The default print settings of UP Studio are optimized using Tiertime materials, so you can start printing confidently without adjusting any parameters. - Page 14 5. Go to touchscreen 1. Press Material Press “Filament 1”Material 3. Press “ ” to extrude Button until it shows “PLA”, material. The machine will heat then press “+” button to up and buzz when start to increase material weight to extrude.
- Page 15 On touchscreen user should choose the correct support material that match the main material. For PLA, the matching support could be Tiertime PVA or breakaway. For more info refer to page xxx. ---Important!!!--- For Convergence Dual Extruder, both main and support materials must be loaded into the extruder.
-
Page 16: First Print
PLA and Tiertime PVA support for dual material printing. -For more info on the convergence dual please refer to page xxx -UP300D can also use LT/HT Single Extruder for single material printing, for more info on printing with single material, please refer to page xxx. - Page 17 3. Select “Extruder” Tab, Check the “Extruder 2” Option, then select filament “Tiertime PVA” for its filament option. Then click “Apply” => “OK” 4. Go to top menu print settings, select the correct machine type and print settings, eg Layer thick and nozzle diameter, the filament type for both extruders.
- Page 18 STL loaded Please note an Auxiliary support pillar is auto loaded with the file. This is due to the activation of second extruder. On the left object list, two new entries appear, one is the STL model loaded and the other is the Auxiliary support. 6.2 Auxiliary Support (A.S.) It is a special preset object for material switching during a print.
- Page 19 4. Move the Auxiliary support pillar to a suitable location. 1. First left click on the Auxiliary support to select it, then click the “ ” move button. 2. Right-click-drag the Axuiliary support to an area not overlapping with the STL model.
-
Page 20: Connect And Send Print Job To Printer
Ethernet, please refer to page xxx. USB Connection Use the USB cable included, connect to one of your computers USB port and UP300D’s back side USB port (Type-B). Open UP Studio 3 on the computer, click the “ ” button (Print) to bring up the “Wand”... -
Page 21: Remove The Printed Model
6.3 Remove the Printed model To remove the printed model from the print board of the UP300D, it is recommended to wear gloves for protection. Take out the print board with its front handle, using the scraper that comes with the machine, scraping the model off the print board from one corner of the model. -
Page 22: Printer Calibration
7. Printer Calibration Printer calibration in Tiertime system involve of followings: 1. Nozzle Height Measurement 2. Platform Matrix Leveling (9-Point Compensation) 3. Vertical Calibration 4. Dimensional Calibration All the above calibration are made in terms of SOFTWARE. For Nozzle Height and Leveling Compensation are routine procedures that are done by users. -
Page 23: Set Nozzle Height Through Touchscreen, Please Refer To
7.1 Set Nozzle Height through Touchscreen, please refer to page xxx. 7.2 Setup Nozzle Height Value through Wand (computer hosted) 7.2.1 Connect printer to computer, open UP Studio 3.0 and click the “Print” button to open “Wand”. 7.2.2 Click “Nozzle Height” button, the print head will move the position that is near the platform. - Page 24 It is recommend to print a small test object after the measurement, check the following for recommended first layer adhesion.
-
Page 25: Matrix Leveling (9-Point Compensation)
7.3 Matrix Leveling (9-Point Compensation) Tiertime Matrix Leveling can effectively reduce the adverse effects of tilt and uneven surface of build platform. The leveling will not affect the print's dimensional accuracy in contrary to other leveling methods. Its leveling mechanism is to first measure the platform heights at 9 different points and then use the values to generate a compensating raft that provides a flat and leveled build surface. -
Page 26: Auto Matrix Leveling Through Touchscreen, Refer To
7.3.1 Auto Matrix Leveling through touchscreen, refer to page xxxx. 7.3.2 Auto Matrix Leveling through Wand (computer hosted). 1. Connect printer to computer using USB/Wi-Fi cable. 2. In UP Studio click “Print” button to open “Wand”. 3. Click “Connect Printer”, the USB connected printer should in the available printer list, click it to connect. -
Page 27: Manual Calibration
7.4 Manual calibration Although the Auto Calibration is always the easiest way to calibrate the UP300D, some advanced users may prefer to level manually to have full control of result. 1. At plate leveling interface, click the Manual Leveling button 2. - Page 28 Use the nozzle height detector (or a piece paper as feel Click “Next” button to gauge) to determine the platform height at the save the current measurement point. height reading and move to the next measurement point. Repeat the measurement for all 9 points then the software will calculate the compensation values for all the 9 points as well as the nozzle height value?
- Page 29 7.5 Vertical Calibration Vertical Calibration. The main purpose of Vertical Calibration is to ensure all three axes are perpendicular to each other in order to guarantee consistent, high-quality prints. 1. Find the VC.stl in the installation directory of UP Studio. Load it in UP Studio software, and follow the normal process to print it.
- Page 30 6. Click the dropdown menu in the upper left to shift to X/Z mode. X/Z calibration requires measurement of the L-shapes. Only one L-shape is needed to do the measurement, but all the L-shapes are needed to check in order to find the right one. First, remove all the L-shapes from the build plate and peel them off the raft.
- Page 31 Obtuse Angle, Z value will be negative. Acute Angle, Z value will be positive. In our case, for figure 4, the value of Z entered is -1.5 mm. For figure 5, it is 1.5 mm. The H value is the measurement of the L-shape’s height between the bottom of the ruler sitting on the L-shape’s base and top of the L-shape.
-
Page 32: Dimensional Calibration
7.6 Dimensional Calibration XYZ Axial Calibration is used to improve dimensional accuracy for a specific model. When a printed object is found to be deviating from its theoretical dimensions, we can use this method to correct it and achieve better precision. To correct the dimensional error, go to Calibrate ->... - Page 34 8. Introduction to UP Studio 3 8.1 Interface Quick Set Bar Program Log Model Layout Buttons Print Preview View Slider Print Setting Switcher Command Field Model list 8.2 Quick Setting Bar Printer Model Layer Thickness Nozzle Diameter Extruder 2 Material Print Quality Support Material (2) Extruder 1 Material...
- Page 35 Preview Slice Result. The 3D file will be sliced but not saved, the sliced result will appear on file list of right column. The “Print” button. clicking this button will call out the “Wand” hosting module. This button does not initiate printing. Move.
- Page 36 Then user could enable or disable specific supports base on their preference. The support editing result will be shown on the model at real time. Support Types: There are three types of supports in Tiertime’s support generating algorithm. They treated differently and can be edited separately. Support Generated 1.
- Page 37 3. Point Support the “Tip” support features Support Parameters Support List Support Preview View Options Support Angle The overhang angle threshold for support, overhangs less than this angle will not have support generated. Top Layer This determine number of interface layers between the support structure and the surface being supported.
- Page 38 Draft Angle Adding draft angle will make the base of the support to be wider than the top, this increase the stability of the support column. Draft Angle = 0 Draft Angle = 50 Min. Area Area threshold of the support structure, overhang surface with area less then the threshold will not be supported.
- Page 39 The support filter is a quick way to find and selectively edit specific supports. Print Settings - Click Gear button to edit current print setting. - Click the “Profile Name” to switch to profile management. The default profile cannot be deleted. User can created new profiles by copying existing profiles and edit upon the copy.
- Page 40 Print Settings Print Setting Mode: Click the button to switch between Basic, Advanced,Expert mode. Basic Mode, the print setting is similar to UP Studio 2. The basic mode although limited but the print settings are highly optimized, with quick selection of basic print parameters, users will able to get excellent print quality.
- Page 41 Support: Automatically generated structure that support the overhang structures Raft: Thick layers that are under the print to improve adhesion and also compensate for unevenness of platform surface. For most up-to-date details of print settings, please go to Tiertime knowledge base: https://support.tiertime.com/xxxxxxxxx Outter Perimeter...
- Page 42 1.Slice Term Unit Description Quality Layer Thickness Layer thickness of print, the bigger the thickness the faster the print speed and lower the print quality. Max. Layer Adaptive layers is to automatically adjust layer thickness base on the Thickness overhang angle. Set the largest layer thickness for adaptive layers. Adaptive ratio The bigger the adaptive ratio, the more discrete shift from thin to thick layers through overhangs.
- Page 43 Support Space Horizontal distance between path of support and part. Top and Bottom Angle Angle for determining top/bottom layers. Top Layers Layer Set the number of top layers Bottom Layers Layer Set the number of bottom layers Min. Area Threshold area for top and bottom Expand Expand the area of top and bottom.
- Page 44 How much to expand from the perimeter of the bottom layer for the raft layer Mode Raft infill mode, Profile is for Tiertime printer only, the raft is generated by printer. The pattern is not visible at this stage. The hatch and offset are for non-Tiertime printer, Tiertime machines...
- Page 45 2. Path Term Unit Description Path Mode Profile/Perimeter Infill Density Density of the infill pattern, 100%=solid infill, 0%=no infill Support Density Full Fill Area Area threshold that override density to full/solid Infill. Area smaller than this value will be printed 100% infill. Infill Path Top/Bottom Fill Infill pattern for Top/Bottom...
- Page 46 Fill Angle The starting angle of infill pattern Angle Increase Fill Angle increase after each layer Angle Increase = 30 Layer 1 Layer 2 Layer 3 Final Pattern Angle Increase = 45 Layer 1 Layer 2 Layer 3 Final Pattern Angle Increase = 90 Layer 1 Layer 2...
- Page 47 3.Special Special Options Fill Mode Fill = Perimeter+infill+top/bottom Shell = Perimeter+top/bottom (no infill) Vase = Perimeter only (no infill, no top/bottom) Tolerance +0.1 = X and Y plane both increase 0.1mm in size Fuse Gap Radius for small gap to be fused. Hole Shrink (only applied to vertical holes on a part, expand small holes to counter the hole shrink effect)
- Page 48 Raft Print speed of raft layers mm/s Raft Base mm/s Print speed of first layer of raft Jump mm/s Speed of jumps (non- printing movements of extruder) Temperature Temperature Tune Profile Tune Set increase/decrease of nozzle temperature when ℃ printing Perimeters Infill Tune Set increase/decrease of nozzle temperature when ℃...
- Page 49 Platform Preheat Preheat platform for max.15 minutes before printing starts. Within 15 minutes, printing will start as soon as target temp reach. Sleep De-initialize the printer when current print job finishs. When De-initialized, the printer consume less power and produce lower noise. Printer Printer Configuration Manufacturer...
- Page 50 Print End location for customized functions. Accepted Gcodes: Layer Start Layer End Profile Start Profile End Infill Start Infill End Support Start Support End Path Start Path End Mat Lib (Material Library) Filament Select material profile Type Material Type: can only choose from preset types Material ID A unique number for matching materials.
- Page 51 Part Sub-setting Save Mesh Add Child Model Basic Info Delete Model Add Child Profile Link to Main Setting Model Print Profile Save Mesh Save the model to .UP3 format Delete Model Delete the model from the part list Add Child Model Add a child model, please refer to “Part Optimization”...
- Page 52 Setting child profile is same setting of main profile. However some settings are not available in child profiles, eg. Layer thickenss. Child profile allow user to adjust print speed, temperature, extrusion scale, infill density, and etc for a particular vertical section of the part 2.
-
Page 53: Wand - The Printer Hosting Software
7. Wand - the Printer Hosting Software UP Studio 3.0 is a package that includes two softwares; UP Studio now become an independent slicer and the printer hosting functions were spin off into a new software called “Wand” UP Studio 3.0 only handle modeling slicing and all printer communication, operation and maintenance functions are moved to Wand. -
Page 54: Pr Inter Calibr Ation
:current axial coordinates. 3. X-Y axes Platform Map, click the squares to move the print head to Control corresponding X-Y location on the platform. Red square( indicate current location 4. Z-axis Z axis indicator: black dot indicate current Z location of print head. Control click to move print head long Z axis for a small distance click to move the print head long Z axis continuous until... -
Page 55: Ethernet Connection
Find a Ethernet cable. Insert the connector into the LAN socket on the back of your UP300D, and a LAN icon will appear on the touchscreen. To edit the Ethernet Network Settings in UP Studio: Open Up Studio in you computer, and go to Settings, find the printer under Printer section, then click Information button to make further changes. -
Page 56: Wi-Fi Connection
7.6 Wi-Fi Connection To connect your UP300D, you can set it up through UP Studio on your computer or use the touchscreen on the UP300D. Use the UP Studio on the computer: 1, Connect your UP300D with a USB cable to your computer, 2. - Page 57 If you cannot find your UP300D in the printer list, click Refresh. 7, An icon of your UP300D will appear in the Printer section, Click the icon, a green check mark representing your UP300D is connected via Wi-Fi successfully will appear on top of the UP300D icon.
-
Page 58: Touchscreen Introduction
Tiertime UP300D Touchscreen consists of two sections, the Printer Status Bar and the Main Menu. 8.1 Printer Status Bar The Printer Status Bar is at the top of the UP300D Touchscreen, which is easy for you to monitor the printer’s status regularly. Nozzle1... - Page 59 Main Menu There are six buttons in the Main Menu: Material, Print, Calibrate, Information, Config, and Initialize. The following table lists all the information of icons in the Main Menu and summarizes the actions associated with each icon. Table 5.1 Main Menu Icon Description Name Icon Description...
-
Page 60: Material
5.2 Material In the material section, there are Extrude, Withdraw, Change Material Type and Set Total Weight buttons functions. To change the material type, click the Material Type button, and then input your filament’s weight. Make sure the material settings properly reflect your situations, because the default setting may not fit yours. - Page 61 Name Icon Description To take out the filament inserted in the extruder unit with the preset temperature. Click the Withdraw icon. The up arrow on the button will start moving upwards, indicating the extruder is heating up. Withdraw The extruder will start pushing the filament out once the temperature reaches the melting temperature with a beep.
-
Page 62: Print
8.2 Print In the Print section, you can start a print job or manage the print jobs that currently in the print queue or have finished. There are two sections: The Print Job Current List lists the print jobs that have been assigned to the printer. - Page 63 Print Job History List The Print Job History List contains all the print jobs that have finished. Tap the Print Job Name in the list to view the detail print settings. You can add the print job back to the Current Print Job List. The Clear button will erase the entire history print list.
- Page 64 Start a Print Print Job Information Printing Paused Printing Table 5.4 Print Description Name Icon Description Pause the on-going print job. Pause Resume the paused print job. Resume The printer will stop the print job completely. Stop To extrude the inserted filament. Extrude To withdraw the inserted filament.
-
Page 65: Calibrate
Value Box, and then tap the Value Box to move the nozzle to the value you set in the Value Box. Nozzle Height is the current printer’s nozzle height. The default value for the nozzle height for each Tiertime printer has been set as 0mm before leaving factory floor safety reasons. -
Page 66: Infor Mation
8.4 Information In this section, it displays all the information of your printer, which is not editable. Model: The Model Name of your printer’s model. S.N.: Your printer’s ID, which will be required if you look for customer service. ... -
Page 67: Config
8.5 Config Config section contains five parameters, and the Network Settings . Name: it’s the printer’s name, you can change it on the UP Studio software. The default name is the printer’s S.N number. Sound: Toggle the click sound while using touchscreen. Preheat: Toggle the build plate preheating option. -
Page 68: Network Connection
This section includes Ethernet Network Settings and Wi-Fi Network Settings. Ethernet Network Settings: 1. Plug an Ethernet cable to the LAN socket at the back of UP300D. 2. The Ethernet connection Status icon should be appear in the Printer Status Bar. - Page 69 Network Settings Icon Description The following descriptions also applies for Wi-Fi network settings. Icon Description Name The printer is connect with Network Ethernet. Type/ The name of connected Wi- Name Fi network. Toggle the static IP option to Static edit following settings for static IP.
-
Page 70: Wi-Fi Network Connection And Settings
3. Find the desired Wi-Fi Network’s name in the list below. 4. Tap the name to connect the Wi-Fi Network. 5. The UP300D is connect to the Wi-Fi Network successfully, when the red exclamation mark disappeared, a interlock and Information icon appears. - Page 71 Wi-Fi Network Settings Description Name Icon Description Toggle the option to allow the printer connect to Wi-Fi Networks Wi-Fi networks. Choose the name of the network to connect to Wi-Fi Name Once this icon appears next to the Wi-Fi Connection network name, it indicates the printer has been Status connected to this Wi-Fi network.
-
Page 72: Initialize
9. Initialize The printer requires initialization before printing. The Material, Calibration and Print buttons on the Main menu of the touchscreen will be greyed out before the printer is properly initialized. Click Initialize and confirm the printer will start initializing by clicking “√”. -
Page 73: Print Boards
10. Print Boards There are two print boards in the UP300D package. 10.1 Perf Glass Board The one with many small holes on one side of the board. Perforated surface has the strongest surface adhesion when used with raft setting. It is made for printing material with high shrinkage ratio that tend to warp during printing and frequently used in conjunction with the HT extruder. -
Page 74: Extruders
Filament 2 Filament 1 Convergence Dual Extrusion Convergence Dual is a patented technology by Tiertime. The Convergence hotend has two channels “converge” at one nozzle opening, the two channels can extrude different materials alternately. Since the two extrusions share a single nozzle, there is no need for nozzle alignment calibration. The two... -
Page 75: Single Extrusion Print Heads
Extruder Type Filament Maximum Main Material Support Material Diameter Temperature Convergence 300C Tiertime Breakaway Dual Extruder Tiertime PVA (water soluble) Tiertime Breakaway 1.75mm ABS Type 300C ABS, PC, PP, PA, HIPS, ASA, etc... -
Page 76: Maintenance
12. Maintenance 12.1 Replacing Nozzle: 1. Wear heat resistance gloves. 2. The nozzle must be removed while the extruder is heated up to near printing temperature. When the nozzle is cooled, it will be too tight to be removed and unscrew the nozzle with force will destroy the hotend. - Page 77 4. Extruder Internal Structures. 5. Remove heater module and heat sink.
-
Page 78: Clean The Waste Tray
6. Clean the gear with a brush. 8.1 Clean the Waste Tray Located at the bottom of build chamber, a waste tray is introduced in UP300D. 3D printing with plastic extrusion technology is a messy business. Normally lots of unwanted plastic scraps are generated here and there during printing and the post processing stage. - Page 79 We suggest you change the filter every 3 months, or every 300 hours active printing time. You can purchase the new filters from the official Tiertime online store, https://shop.tiertime.com, or popular ecommerce web sites like Amazon, or eBay. To change the Filters The filter system is located at the left side of the build chamber.
-
Page 80: Specification
Supported Materials UP Fila ABS, ABS+, PLA , TPU and more Filament Diameter 1.75mm Filament Spool Compatibility 500 - 1000g Tiertime Print Queue Pause to Change Filament Type Out of Filament Detection Compatible with 3 party Materials Physical dimensions Machine Dimensions 500x523x460 mm (19.6″... -
Page 81: Customer Service
13. Customer Service and Community Support Ticket Email to support@tiertime.com Knowledge Base: https://support.tiertime.com User forum: https://forum.tiertime.com Facebook Group https://www.facebook.com/gr oups/205337203341609/ Facebook Page facebook.com/tiertime... - Page 82 Youtube Channel youtube.com/tiertime Twitter twitter.com/tiertimecorp Instagram instagram.com/tiertime...
Need help?
Do you have a question about the UP300D and is the answer not in the manual?
Questions and answers