Table of Contents
Advertisement
Available languages
Available languages
Quick Links
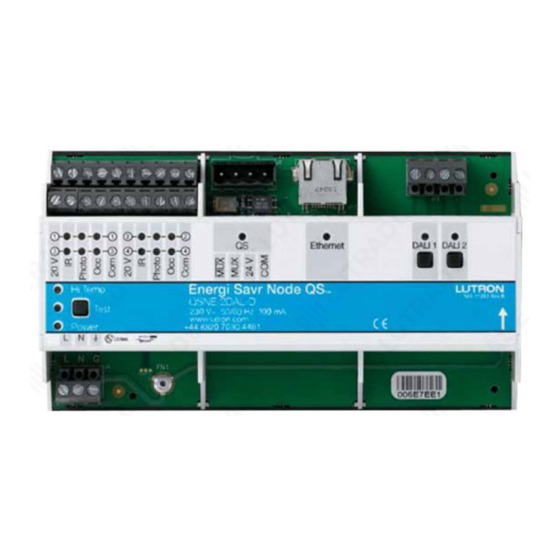
Energi Savr Node QS
Caution: please read this guide before installing.
Contents
Ratings and model number overview
Product overview
Wiring overview
Mounting
Mains voltage wiring
DALI bus wiring
Sensor wiring
Application overview
QS link wiring
Programming connections
Testing and troubleshooting
Warranty
Contact information
System Example
Daylight Sensor
Occupancy Sensor
One sensor group
shown; connections
available for up to four
sensor groups.
220-240 V
Ethernet Programming Link
Energi Savr Node
QS DALI Installation Guide
TM
DALI | Installation Guide
TM
Page
1
2
3
4
5
6
7
8
9
12
13
15
16
DALI Bus 1
IR Sensor
DALI Bus 2
Energi Savr
seeTouch
Node QS
Wallstation
QS Control Link
Ratings
Input: 220 - 240 V
50/60 Hz 100 mA
Output: 16 V
250 mA per DALI bus
Operating environment: 0 ˚C - 40 ˚C
Maximum humidity: 90% non-condensing
Thermal dissipation: 35 BTU/hr
Calibration point maximum: 75 ˚C
QS link: 24 V
, 3 QS keypads
Model number overview
Energi Savr Node QSNE-2DAL-D
Energi Savr Node QS: Digital fixture controller
2:
2 DALI Buses
DAL:
DALI
D:
DIN rail compatible
Ballast
Ballast
QS
®
Quantum
Contact
Panel
Closure
Energi Savr
Interface
Node QS
Up to 64
ballasts on
each bus
Ballast
Ballast
QS
GRAFIK
Eye QS
Up to 100
total QS
devices
Lutron
|
1
®
Advertisement
Table of Contents

Related Manuals for Lutron Electronics Energi Savr Node QS DALI


Summary of Contents for Lutron Electronics Energi Savr Node QS DALI
- Page 1 Energi Savr Node QS DALI | Installation Guide Caution: please read this guide before installing. Contents Page Ratings Ratings and model number overview Input: 220 - 240 V 50/60 Hz 100 mA Product overview Output: 16 V 250 mA per DALI bus Wiring overview Operating environment: 0 ˚C - 40 ˚C Mounting...
-
Page 2: Product Overview
Energi Savr Node QS DALI | Installation Guide Product overview WARNING! Danger of Shock. May result in serious injury or death. DO NOT WIRE WHEN LIVE! Switch off power via circuit breaker or isolator before wiring or servicing the Energi Savr Node QS. Buttons and LEDs on the front of the unit are used for programming and troubleshooting. - Page 3 Energi Savr Node QS DALI | Installation Guide Wiring overview PELV DALI 1 DALI 2 Programming DA1/DA1 DA2/DA2 Sensors Link Jack Ethernet DALI 1 DALI 2 Energi Savr Node Hi Temp ® QSNE-2DAL-D Z096 N1771 Test 230 V~ 50/60 Hz 100 mA www.lutron.com Power +44.(0)20.7680.4481...
- Page 4 Energi Savr Node QS DALI | Installation Guide Step-by-step installation instructions Step 1: Mounting the Energi Savr Node QS Note: Mount the Energi Savr Node QS in a position where it can be easily located and accessed if service Ethernet DALI 1 DALI 2 or troubleshooting is necessary.
- Page 5 Energi Savr Node QS DALI | Installation Guide Step 2: Mains voltage wiring The Energi Savr Node QS operates at 220-240 V . Use the following instructions to wire line voltage to the Energi Savr Node QS. Ethernet DALI 1 DALI 2 WARNING! Danger of Shock.
- Page 6 Energi Savr Node QS DALI | Installation Guide Step 3: DALI bus wiring DALI bus wiring may be considered to be mains voltage. (It is not considered SELV.) Consult applicable national and local codes for compliance. Lutron recommends using two different colours for Ethernet DALI 1 DALI 2 DA1 and DA2.
- Page 7 Energi Savr Node QS DALI | Installation Guide Step 4: Sensor wiring To connect a daylight sensor, occupancy sensor and/or infrared receiver, refer to the instruction sheets provided with the devices. Diagrams for the PELV sensors terminals are shown below. WARNING! Danger of Shock.
- Page 8 Energi Savr Node QS DALI | Installation Guide Simple applications: preconfigured modes require no commissioning Energi Savr Energi Savr Node QS Node QS Preconfigured mode 1 Preconfigured mode 2 Perimeter daylighting Two zones with occupancy sensors * Four fixtures shown on bus 1 and eight fixtures * Six fixtures shown on each bus.
- Page 9 Energi Savr Node QS DALI | Installation Guide Step 5: QS link wiring WARNING! Danger of Shock. May result in serious injury or death. DO NOT WIRE WHEN LIVE! Switch off power via circuit breaker or isolator before wiring or servicing the Energi Ethernet DALI 1 DALI 2 Savr Node QS.
- Page 10 Energi Savr Node QS DALI | Installation Guide QS link wiring (continued) Daisy-Chain Wiring Example Energi Savr Node QS seeTouch QS Keypads ® QS Control Link Sivoia ® Smart Power Sivoia ® Panel Shade T-Tap Wiring Example seeTouch QS Keypads ®...
- Page 11 Energi Savr Node QS DALI | Installation Guide Wiring: QS link wiring (continued) • Connect the terminal 1, 3, and Low-voltage wiring example 4 connections to all control interfaces. ESN = Energi Savr Node QS • Each control unit has its own ESN 3 power supply.
- Page 12 Energi Savr Node QS DALI | Installation Guide Installation of programming connection WARNING! Danger of Shock. May result in serious injury or death. DO NOT WIRE WHEN LIVE! Switch off power via circuit breaker or isolator before wiring or servicing the Energi Savr Node QS. Buttons and LEDs on the front of the unit are used for programming and troubleshooting.
- Page 13 Energi Savr Node QS DALI | Installation Guide Procedure for assigning DALI buses to QS keypads WARNING! Danger of Shock. May result in serious injury or death. DO NOT WIRE WHEN LIVE! Switch off power via circuit breaker or isolator before wiring or servicing the Energi Savr Node QS. Buttons and LEDs on the front of the unit are used for programming and troubleshooting.
-
Page 14: Using Leds To Troubleshoot
Energi Savr Node QS DALI | Installation Guide Using LEDs to troubleshoot WARNING! Danger of Shock. May result in serious injury or death. DO NOT WIRE WHEN LIVE! Switch off power via circuit breaker or isolator before wiring or servicing the Energi Savr Node QS. Buttons and LEDs on the front of the unit are used for programming and troubleshooting. - Page 15 As far as permitted by profits, loss of income, or loss of contracts arising out law, Lutron EA and Lutron Electronics Company Inc. of or relating to the supply or the use of the unit. The (“Lutron”) make no guarantees or representations...
-
Page 16: Contact Information
Contact information Internet: www.lutron.com World headquarters Asian headquarters Lutron Electronics Co., Inc. Singapore 7200 Suter Road, Coopersburg, PA Lutron GL Ltd. 18036-1299 USA 15 Hoe Chiang Road, TEL +1.610.282.3800 #07-03 Euro Asia Centre, FAX +1.610.282.1243 Singapore 089316 Technical Support 1.800.523.9466 TEL +65.6220.4666... -
Page 17: Ejemplo De Sistema
Energi Savr Node QS DALI | Guía de instalación Atención: Lea esta guía antes de proceder con la instalación. Régimen Índice Página Entrada: 220 - 240 V 50/60 Hz 100 mA Perspectiva general de capacidad y números de modelo Salida: 16 V 250 mA por circuito cerrado DALI Perspectiva general de productos Entorno de funcionamiento: 0 ˚C - 40 ˚C... - Page 18 Energi Savr Node QS DALI | Guía de instalación Perspectiva general de productos ¡PRECAUCIÓN! Peligro de descargas eléctricas. Puede causar lesiones graves o letales. ¡NO REALICE LA CONEXIÓN CON CORRIENTE! Corte el suministro eléctrico con el magnetotérmico o aislador antes de realizar el cableado u otros trabajos de servicio en la unidad Energi Savr Node QS.
- Page 19 Energi Savr Node QS DALI | Guía de instalación Perspectiva general de cableado PELV DALI 1 DALI 2 Enlace QS Toma de DA1/DA1 DA2/DA2 Sensores programación Ethernet DALI 1 DALI 2 Energi Savr Node Hi Temp ® QSNE-2DAL-D Z096 N1771 Test 230 V~ 50/60 Hz 100 mA www.lutron.com...
- Page 20 Energi Savr Node QS DALI | Guía de instalación Instrucciones de instalación paso a paso Paso 1: montaje de Energi Savr Node QS Nota: Monte la unidad Energi Savr Node QS donde se disponga de un acceso sencillo para trabajos de Ethernet DALI 1 DALI 2 mantenimiento o reparación.
- Page 21 Energi Savr Node QS DALI | Guía de instalación Paso 2: Cableado de voltaje de red La unidad Energi Savr Node QS funciona a 220-240 Utilice las instrucciones siguientes para conectar correctamente el voltaje de línea a la unidad Energi Savr Node QS.
- Page 22 Energi Savr Node QS DALI | Guía de instalación Paso 3: Cableado de bus DALI El cableado del bus DALI puede considerarse voltaje de red. (No se considera SELV.) Consulte el cumplimiento de los códigos eléctricos nacionales y locales aplicables. Lutron recomienda la utilización de dos colores Ethernet DALI 1 DALI 2...
- Page 23 Energi Savr Node QS DALI | Guía de instalación Paso 4: Cableado de sensor Para conectar un sensor de iluminación, un sensor de presencia y/o un receptor de infrarrojos, consulte las hojas de instrucciones facilitadas con los dispositivos. Se muestran a continuación los esquemas para los terminales de sensores PELV.
- Page 24 Energi Savr Node QS DALI | Guía de instalación Aplicaciones simples: los modos preconfigurados no requieren puesta en servicio Energi Savr Energi Savr Node QS Node QS Modo preconfigurado 1 Modo preconfigurado 2 Iluminación perimetral Dos zonas con sensores de presencia * Se muestran cuatro luminarias en el circuito 1 y * Se muestran seis luminarias en cada circuito;...
- Page 25 Energi Savr Node QS DALI | Guía de instalación Paso 5: Cableado de enlace QS ¡PRECAUCIÓN! Peligro de descargas eléctricas. Puede causar lesiones graves o letales. ¡NO REALICE LA CONEXIÓN CON CORRIENTE! Corte el suministro eléctrico con el magnetotérmico o aislador antes de re- Ethernet DALI 1 DALI 2 alizar el cableado u otros trabajos de servicio...
- Page 26 Energi Savr Node QS DALI | Guía de instalación Cableado de enlace QS (continuación) Ejemplo de cableado en cadena Energi Savr Node QS unidades de control de pared seeTouch ® Enlace de control QS Panel de alimentación Cortina Sivoia Sivoia ®...
- Page 27 Energi Savr Node QS DALI | Guía de instalación Cableado: cableado de enlace QS (continu- ación) • Realice las conexiones de los terminales 1, 3, y 4 a todas las Ejemplo de cableado de bajo voltaje interfaces de control. • Cada unidad de control tiene su ESN = Energi Savr Node QS ESN 3 propia fuente de alimentación.
- Page 28 Energi Savr Node QS DALI | Guía de instalación Instalación de la conexión de programación ¡PRECAUCIÓN! Peligro de descargas eléctricas. Puede causar lesiones graves o letales. ¡NO REALICE LA CON- EXIÓN CON CORRIENTE! Corte el suministro eléctrico con el magnetotérmico o aislador antes de realizar el cableado u otros trabajos de servicio en la unidad Energi Savr Node QS.
- Page 29 Energi Savr Node QS DALI | Guía de instalación Procedimiento para la asignación de circuitos DALI a unidades de control de pared ¡PRECAUCIÓN! Peligro de descargas eléctricas. Puede causar lesiones graves o letales. ¡NO REALICE LA CONEXIÓN CON CORRIENTE! Corte el suministro eléctrico con el magnetotérmico antes de realizar el cableado u otros trabajos de servicio en la unidad Energi Savr Node QS.
- Page 30 Energi Savr Node QS DALI | Guía de instalación Utilización de LEDs para la solución de problemas ¡PRECAUCIÓN! Peligro de descargas eléctricas. Puede causar lesiones graves o letales. ¡NO REALICE LA CONEXIÓN CON CORRIENTE! Corte el suministro eléctrico con el magnetotérmico o aislador antes de realizar el cableado u otros trabajos de servicio en la unidad Energi Savr Node QS.
- Page 31 En la medida especiales, pérdida de beneficios o contratos derivados permitida por la ley, Lutron EA y Lutron Electronics de o relacionados con el suministro de la unidad o el Company Inc. (“Lutron”) no asumen garantías o uso de la misma;...
-
Page 32: Información De Contacto
Información de contacto Internet: www.lutron.com Central internacional Central para Asia Lutron Electronics Co., Inc. Singapur 7200 Suter Road, Coopersburg, PA Lutron GL Ltd. 18036-1299 E.U.A. 15 Hoe Chiang Road, TEL +1.610.282.3800 #07-03 Euro Asia Central, FAX +1.610.282.1243 Singapur 089316 Soporte técnico 1.800.523.9466 TEL +65.6220.4666... -
Page 33: Exemple De Système
Energi Savr Node QS DALI | Guide d’installation Attention : veuillez lire ce guide avant l’installation. Table des matières Page Caractéristiques nominales Aperçu des valeurs nominales et du Entrée : 220-240 V 50/60 Hz 100 mA numéro de modèle Sortie : 16 V 250 mA par boucle DALI Aperçu du produit Temperature ambiente d’utilisation : 0 ˚C –... -
Page 34: Aperçu Du Produit
Energi Savr Node QS DALI | Guide d’installation Aperçu du produit AVERTISSEMENT ! Risque de choc électrique pouvant entraîner de graves bles- sures ou la mort. NE PAS BRANCHER SOUS TENSION ! Couper l’alimentation à l’aide du disjoncteur avant de câbler ou de réparer l’Energi Savr Node QS. Les boutons et LEDs localisés sur le devant de l’appareil servent à... - Page 35 Energi Savr Node QS DALI | Guide d’installation Aperçu du câblage PELV DALI 1 DALI 2 Bus QS Prise du DA1/DA1 DA2/DA2 capteurs programmateur Ethernet DALI 1 DALI 2 Energi Savr Node Hi Temp ® QSNE-2DAL-D Z096 N1771 Test 230 V~ 50/60 Hz 100 mA www.lutron.com Power +44.(0)20.7680.4481...
- Page 36 Energi Savr Node QS DALI | Guide d’installation Instructions d’installation détaillées Étape 1 : montage de l’Energi Savr Node QS Remarque : monter l’Energi Savr Node QS dans un lieu où il sera aisément accessible en cas de nécessité de Ethernet DALI 1 DALI 2 réparation ou de dépannage.
- Page 37 Energi Savr Node QS DALI | Guide d’installation Etape 2 : câblage de la tension secteur L’Energi Savr Node QS fonctionne à 220-240 V . Suivre les instructions ci-dessous pour câbler correcte- ment la tension secteur à l’Energi Savr Node QS. AVERTISSEMENT ! Risque de choc Ethernet DALI 1 DALI 2...
- Page 38 Energi Savr Node QS DALI | Guide d’installation Etape 3 : câblage du bus DALI Le câblage du bus DALI doit être considéré comme la tension secteur (il n’est pas considéré TBTS). Consulter les normes locales et nationales à respecter. Lutron recommande d’utiliser deux couleurs différentes Ethernet DALI 1 DALI 2...
- Page 39 Energi Savr Node QS DALI | Guide d’installation Étape 4 : câblage du capteur Pour raccorder un capteur de lumière, un détecteur de présence et/ou un récepteur infrarouge, consulter les instructions fournies avec les dispositifs. Les schémas des bornes de capteur TBTP sont illustrés ci-dessous. AVERTISSEMENT ! Risque de choc électrique pouvant entraîner de graves blessures ou la mort.
- Page 40 Energi Savr Node QS DALI | Guide d’installation Applications simples : les modes préconfigurés ne nécessite aucune mise en service Energi Savr Energi Savr Node QS Node QS Mode préconfiguré 1 Mode préconfiguré 2 Asservissement du périmètre à la lumière du jour Deux zones avec détecteurs de présence * Quatre luminaires illustrés pour la boucle 1 et huit * Six luminaires illustrés pour chaque boucle, mais...
- Page 41 Energi Savr Node QS DALI | Guide d’installation Étape 5 : câblage du bus QS AVERTISSEMENT ! Risque de choc électrique pouvant entraîner de graves blessures ou la mort. NE PAS BRANCHER SOUS TENSION ! Couper l’alimentation à Ethernet DALI 1 DALI 2 l’aide du disjoncteur avant de câbler ou de réparer l’Energi Savr Node QS.
- Page 42 Energi Savr Node QS DALI | Guide d’installation Câblage du bus QS (suite) Exemple de câblage en série Energi Savr Node QS Commandes murales seeTouch ® Bus de commande QS Armoire d’alimentation intelligente Store Sivoia ® Sivoia ® Exemple de câblage en étoile Commandes murales seeTouch ®...
- Page 43 Energi Savr Node QS DALI | Guide d’installation Câblage : câblage du bus QS (suite) • Raccorder les connexions des Exemple de câblage basse tension bornes 1, 3 et 4 à toutes les interfaces de commande. ESN = Energi Savr Node QS •...
- Page 44 Energi Savr Node QS DALI | Guide d’installation Installation de la connexion de programmation AVERTISSEMENT ! Risque de choc électrique pouvant entraîner de graves blessures ou la mort. NE PAS BRANCHER SOUS TENSION ! Couper l’alimentation à l’aide du disjoncteur avant de câbler ou de réparer l’Energi Savr Node QS.
- Page 45 Energi Savr Node QS DALI | Guide d’installation Procédure d’assignation des boucles DALI aux commandes murales AVERTISSEMENT ! Risque de choc électrique pouvant entraîner de graves blessures ou la mort. NE PAS BRANCHER SOUS TENSION ! Couper l’alimentation à l’aide du disjoncteur avant de câbler ou de réparer l’Energi Savr Node QS. Les boutons et les LED en façade de l’appareil sont utilisés pour la programmation et le diagnostic.
- Page 46 Energi Savr Node QS DALI | Guide d’installation Utilisation des LED pour le dépannage AVERTISSEMENT ! Risque de choc électrique pouvant entraîner de graves blessures ou la mort. NE PAS BRANCHER SOUS TENSION ! Couper l’alimentation à l’aide du disjoncteur avant de câbler ou de réparer l’Energi Savr Node QS.
-
Page 47: Garantie
Lutron, Quantum, Sivoia et seeTouch sont des marques dans la limite autorisée par la loi. La réparation ou le déposées de Lutron Electronics Co., Inc. et Energi Savr remplacement n’affecte pas la date d’expiration de la Node QS est une marque de commerce de Lutron garantie. -
Page 48: Infos De Contact
Infos de contact Internet : www.lutron.com Siège mondial Siège pour l’Asie Lutron Electronics Co., Inc. Singapour 7200 Suter Road, Coopersburg, PA Lutron GL Ltd. 18036-1299 États-Unis 15 Hoe Chiang Road, TÉL +1.610.282.3800 #07-03 Euro Asia Centre, FAX +1.610.282.1243 Singapour 089316 Support Technique 1.800.523.9466... - Page 49 Energi Savr Node QS DALI | Guida all’installazione Attenzione: Leggere questa guida prima dell’installazione. Specifiche Indice Pagina Tensione di alimentazione: 220-240 V 50/60 Hz 100 mA Panoramica delle specifiche e dei codici Potenza erogata: 16 V 250 mA per loop DALI Panoramica del prodotto Temperatura d’esercizio: 0 ˚C - 40 ˚C Schema di cablaggio...
-
Page 50: Panoramica Del Prodotto
Energi Savr Node QS DALI | Guida all’installazione Panoramica del prodotto AVVERTENZA! Pericolo di folgorazione. Può comportare gravi lesioni o morte. NON COLLEGARE FILI SOTTO TENSIONE! Prima di procedere al cablaggio o alla ma- nutenzione dell’Energi Savr Node QS, sezionare la tensione tramite un interruttore automatico o un sezionatore. - Page 51 Energi Savr Node QS DALI | Guida all’installazione Schema di cablaggio PELV DALI 1 DALI 2 Link Jack di DA1/DA1 DA2/DA2 Sensori programmazione Ethernet DALI 1 DALI 2 Energi Savr Node Hi Temp ® QSNE-2DAL-D Z096 N1771 Test 230 V~ 50/60 Hz 100 mA www.lutron.com Power +44.(0)20.7680.4481...
- Page 52 Energi Savr Node QS DALI | Guida all’installazione Istruzioni di installazione dettagliate Fase 1: Montaggio Energi Savr Node QS Nota: installare l’Energi Savr Node QS in un punto in cui possa essere facilmente posizionato e accessibile Ethernet DALI 1 DALI 2 in caso di manutenzione o intervento tecnico.
- Page 53 Energi Savr Node QS DALI | Guida all’installazione Fase 2: Cablaggio a tensione di rete L’Energi Savr Node QS utilizza la tensione 220-240 V . Le seguenti istruzioni illustrano come collegare correttamente la tensione di rete al dispositivo Energi Savr Node QS. AVVERTENZA! Pericolo di folgorazione.
- Page 54 Energi Savr Node QS DALI | Guida all’installazione Fase 3: cablaggio bus DALI Il cablaggio del bus DALI può essere considerato a tensione di rete. (Non è considerato di tipo SELV. Consultare le normative applicabili in vigore a livello nazionale e locale per i requisiti da rispettare. Lutron raccomanda di utilizzare colori distinti per i conduttori Ethernet DALI 1 DALI 2...
- Page 55 Energi Savr Node QS DALI | Guida all’installazione Fase 4: Cablaggio del sensore Per collegare un sensore di luminosità, di presenza e/o un ricevitore a infrarossi, fare riferimento al foglio istruzioni fornito unitamente al dispositivo. Gli schemi per i morsetti a bassa tensione (PELV) dei sensori sono mostrati di seguito. AVVERTENZA! Pericolo di folgorazione.
- Page 56 Energi Savr Node QS DALI | Guida all’installazione Applicazioni semplici: modalità preconfigurate, non richiedono interventi di messa in funzione Loop 1 Loop 2 Loop 1 Collegato Energi Savr al gruppo Energi Savr Node QS di sensori 1 Node QS Sensore di Collegato presenza al gruppo...
- Page 57 Energi Savr Node QS DALI | Guida all’installazione Fase 5: Cablaggio del link QS AVVERTENZA! Pericolo di folgorazione. Può comportare gravi lesioni o morte. NON COLLEGARE FILI SOTTO TENSIONE! Prima di procedere al cablaggio o alla manutenzione dell’Energi Savr Node QS, sezionare la tensione tramite un Ethernet DALI 1 DALI 2 interruttore automatico o un sezionatore.
- Page 58 Energi Savr Node QS DALI | Guida all’installazione Cablaggio del link QS (continua) Esempio di configurazione in cascata (daisy chain) Energi Savr Node QS Tastierini seeTouch ® Link di controllo QS Quadro di alimentazione Tenda Sivoia Smart Sivoia ® ™ Esempio di configurazione in serie-parallelo Tastierini seeTouch ®...
- Page 59 Energi Savr Node QS DALI | Guida all’installazione Cablaggio: cablaggio del link QS (continua) • Collegare le linee dei morsetti Esempio di cablaggio a bassa tensione 1, 3, e 4 a tutte le interfacce di comando. ESN = Energi Savr Node QS •...
- Page 60 Energi Savr Node QS DALI | Guida all’installazione Installazione del collegamento di programmazione AVVERTENZA! Pericolo di folgorazione. Può comportare gravi lesioni o morte. NON COLLEGARE FILI SOTTO TENSIONE! Prima di procedere al cablaggio o alla manutenzione dell’Energi Savr Node QS, sezionare la tensione tramite un interruttore automatico o un sezionatore.
- Page 61 Energi Savr Node QS DALI | Guida all’installazione Procedura per l’assegnazione dei loop DALI ai tastierini AVVERTENZA! Pericolo di folgorazione. Può comportare gravi lesioni o morte. NON COLLEGARE FILI SOTTO TEN- SIONE! Prima di procedere al cablaggio o alla manutenzione dell’Energi Savr Node QS, sezionare la tensione tramite un interruttore automatico o un sezionatore.
- Page 62 Energi Savr Node QS DALI | Guida all’installazione Uso dei LED per le procedure di diagnostica AVVERTENZA! Pericolo di folgorazione. Può comportare gravi lesioni o morte. NON COLLEGARE FILI SOTTO TENSIONE! Prima di procedere al cablaggio o alla manutenzione dell’Energi Savr Node QS, sezionare la tensione tramite un interruttore automatico o un sezionatore.
-
Page 63: Garanzia
Lutron Electronics Co., Inc.; Energi Savr porto franco a Lutron EA entro un termine di 24 Node QS è un marchio di fabbrica di Lutron Electronics mesi dall’acquisto del prodotto, nei limiti previsti dalla Co., Inc. - Page 64 Indirizzi sedi Lutron Sito Internet: www.lutron.com Sede principale Sede in Asia Lutron Electronics Co. Inc. Singapore 7200 Suter Road, Coopersburg, PA Lutron GL Ltd. 18036-1299 USA 15 Hoe Chiang Road, TEL +1.610.282.3800 #07-03 Euro Asia Centre, FAX +1.610.282.1243 Singapore 089316 Assistenza tecnica 1.800.523.9466...
- Page 65 Energi Savr Node QS DALI | Installationsanleitung Achtung: Bitte lesen Sie diese Anleitung vor der Installation. Technische Daten Inhalt Seite Eingang: 220-240 V 50/60 Hz 100 mA Technische Daten und Modellbezeichnungen Ausgang: 16 V 250 mA pro DALI-Schleife Produktübersicht Einsatzumgebung: 0 °C - 40 °C Verdrahtungsschema Maximaler Feuchtigkeitsgehalt der Luft: 90%, nicht Montage...
- Page 66 Energi Savr Node QS DALI | Installationsanleitung Produktübersicht ACHTUNG! Stromschlaggefahr. Gefahr schwerer oder tödlicher Verletzungen. KEINE SPANNUNGSFÜHRENDEN LEITUNGEN ANSCHLIESSEN! Unterbrechen Sie die Stromversorgung am Sicherungsautomaten oder Trennschalter, bevor Energi Savr Node QS angeschlossen oder gewartet wird. Tasten und LEDs auf der Vorderseite des Produktes sind zur Programmierung und Störungsbehebung.
- Page 67 Energi Savr Node QS DALI | Installationsanleitung Verdrahtungsschema PELV DALI 1 DALI 2 QS-Bus Programmier- DA1/DA1 DA2/DA2 Sensoren anschluss Ethernet DALI 1 DALI 2 Energi Savr Node Hi Temp ® QSNE-2DAL-D Z096 N1771 Test 230 V~ 50/60 Hz 100 mA www.lutron.com Power +44.(0)20.7680.4481...
- Page 68 Energi Savr Node QS DALI | Installationsanleitung Schrittweise Installationsanleitung Schritt 1: Montage von Energi Savr Node QS Hinweis: Bringen Sie Energi Savr Node QS an einem Standort an, an dem er leicht zu finden und gut er- Ethernet DALI 1 DALI 2 reichbar ist, falls Wartungs- oder Fehlersucharbeiten nötig werden sollten.
- Page 69 Energi Savr Node QS DALI | Installationsanleitung Schritt 2: Netzspannungsverdrahtung Energi Savr Node QS läuft mit 220-240 V . Schließen Sie Energi Savr Node QS anhand der folgenden Anweisungen an die Netzspannung an. ACHTUNG! Stromschlaggefahr. Gefahr Ethernet DALI 1 DALI 2 schwerer oder tödlicher Verletzungen.
- Page 70 Energi Savr Node QS DALI | Installationsanleitung Schritt 3: DALI-Bus-Verdrahtung Die DALI-Bus-Verdrahtung kann als Netzspannungs- verdrahtung betrachtet werden. (Sie wird nicht als SELV betrachtet.) Überprüfen Sie, ob alle geltenden Vorschriften erfüllt werden. Lutron empfiehlt, für DA1 und DA2 zwei unter- Ethernet DALI 1 DALI 2 schiedliche Farben zu verwenden.
- Page 71 Energi Savr Node QS DALI | Installationsanleitung Schritt 4: Sensoranschluss Zum Anschluss von Tageslichtsensoren, Präsenzmeldern und/oder IR-Empfängern beachten Sie bitte die Anweisungsblät- ter, die den jeweiligen Geräten beiliegen. Zeichnungen für die PELV-Sensorklemmen sind unten abgebildet. ACHTUNG! Stromschlaggefahr. Gefahr schwerer oder tödlicher Verletzungen. KEINE SPANNUNGSFÜH- RENDEN LEITUNGEN ANSCHLIESSEN! Unterbrechen Sie die Stromversorgung am Sicherungsautomaten oder Trennschalter, bevor Energi Savr Node QS angeschlossen oder gewartet wird.
- Page 72 Energi Savr Node QS DALI | Installationsanleitung Einfache Anwendungen: Vorkonfigurierte Modi erfordern keine Inbetriebnahme Energi Savr Energi Savr Node QS Node QS Vorkonfigurierter Modus 1/ Betriebsart 1 Vorkonfigurierter Modus 2/ Betriebsart 2 Tageslichtsteuerung am Umfang des Erfassungs- Zwei Zonen mit Präsenzmeldern bereichs * Die Abbildung zeigt sechs Leuchten an jeder * Die Abbildung zeigt vier Leuchten an Schleife 1 und...
- Page 73 Energi Savr Node QS DALI | Installationsanleitung Schritt 5: QS-Bus-Verdrahtung ACHTUNG! Stromschlaggefahr. Gefahr schw- erer oder tödlicher Verletzungen. KEINE SPAN- NUNGSFÜHRENDEN LEITUNGEN ANSCHLIESSEN! Unterbrechen Sie die Stromversorgung am Sicherungsau- tomaten oder Trennschalter, bevor Energi Savr Node QS Ethernet DALI 1 DALI 2 angeschlossen oder gewartet wird.
- Page 74 Energi Savr Node QS DALI | Installationsanleitung QS-Bus-Verdrahtung (Fortsetzung) Beispiel für Daisy-Chain-Verdrahtung Energi Savr Node QS seeTouch -QS-Bedienstellen ® QS-Bus-Leitung Sivoia -QS-Smart-Panel ® Sivoia -QS-Rollo (Stromversorgung) ® Beispiel für Verdrahtung mit T-Abzweigung seeTouch -QS-Bedienstellen ® Energi Savr Node QS Sivoia -QS- ®...
- Page 75 Energi Savr Node QS DALI | Installationsanleitung Verdrahtung: QS-Bus-Verdrahtung (Fortsetzung) • Schließen Sie die Anschlüsse der Klemmen 1, 3 und 4 an alle Beispiel für Niederspannungsverdrahtung Steuer-Schnittstellen an. • Jede Steuerstelle hat ihre ESN = Energi Savr Node QS ESN 3 eigene Stromversorgung.
- Page 76 Energi Savr Node QS DALI | Installationsanleitung Installation des Programmierungsanschlusses ACHTUNG! Stromschlaggefahr. Gefahr schwerer oder tödlicher Verletzungen. KEINE SPANNUNGSFÜHRENDEN LEITUNGEN ANSCHLIESSEN! Unterbrechen Sie die Stromversorgung am Sicherungsautomaten oder Trennschalter, bevor Energi Savr Node QS angeschlossen oder gewartet wird. Tasten und LEDs auf der Vorderseite des Produktes sind zur Programmierung und Störungsbehebung. Sollten Sie Verkabelungsprobleme beim Zugang zu den Tasten und LEDs feststellen, bitte wenden Sie sich an einen geprüften Elektroinstallateur.
- Page 77 Energi Savr Node QS DALI | Installationsanleitung Zuordnung von DALI-Linien zu Wandbedienstellen ACHTUNG! Stromschlaggefahr. Gefahr schwerer oder tödlicher Verletzungen. KEINE SPANNUNGSFÜHRENDEN LEITUNGEN ANSCHLIESSEN! Unterbrechen Sie die Stromversorgung am Sicherungsautomaten oder Trennschalter, bevor Energi Savr Node QS angeschlossen oder gewartet wird. Die Tasten und LEDs an der Gerätevorderseite werden für Programmierung und Fehlersuche verwendet.
- Page 78 Energi Savr Node QS DALI | Installationsanleitung Fehlersuche mit LEDs ACHTUNG! Stromschlaggefahr. Gefahr schwerer oder tödlicher Verletzungen. KEINE SPANNUNGSFÜHRENDEN LEITUN- GEN ANSCHLIESSEN! Unterbrechen Sie die Stromversorgung am Sicherungsautomaten oder Trennschalter, bevor Energi Savr Node QS angeschlossen oder gewartet wird. Tasten und LEDs auf der Vorderseite des Produktes sind zur Programmierung und Störungsbehebung. Sollten Sie Verkabe- lungsprobleme beim Zugang zu den Tasten und LEDs feststellen, bitte wenden Sie sich an einen geprüften Elektroinstallateur.
-
Page 79: Gewährleistung
Folge von oder in Zusammenhang mit der Lieferung Soweit gesetzlich erlaubt, übernimmt Lutron EA oder Benutzung der Einheit. Der Käufer wird weder und Lutron Electronics Company Inc. (“Lutron”) für Lutron EA noch Lutron wegen solcher Forderungen die Geräte keine anderen Garantien außer der in und Schäden haftbar machen. - Page 80 Kontaktinformationen Internet: www.lutron.com Weltweite Zentrale Asienzentrale Lutron Electronics Co., Inc. Singapur 7200 Suter Road, Coopersburg, PA Lutron GL Ltd. 18036-1299 USA 15 Hoe Chiang Road, TEL. +1.610.282.3800 #07-03 Euro Asia Centre, FAX +1.610.282.1243 Singapur 089316 Technische Unterstützung 1.800.523.9466 TEL. +65.6220.4666 Gebührenfrei 1.888.LUTRON1...
Need help?
Do you have a question about the Energi Savr Node QS DALI and is the answer not in the manual?
Questions and answers