Table of Contents
Advertisement
Quick Links
Advertisement
Table of Contents
Troubleshooting

Related Manuals for Printronix LP654C


Summary of Contents for Printronix LP654C
- Page 1 LP654C Users Manual...
-
Page 2: Table Of Contents
Table of Contents Table of Contents Loading paper in the MP tray ......81 Safety precautions ..........8 Setting paper information on the operator panel 82 General cautions ..........9 Storing paper ............. 84 Preface ............11 Setting the output bin ........85 Trademarks ............. - Page 3 Table of Contents Inserting and printing a watermark text Changing the admin password ......201 (watermark) ............. 159 Changing settings of Admin Setup ....203 Printing overlaid text or logos (overlay printing)160 Web page (Managing this machine from a PC) Outputting to a file without printing on paper ... 161 ...............204 Printing frequently used documents without using Opening the web page ........
- Page 4 Icon description ..........280 Updating software ..........321 Printronix LPR Utility ........281 For Windows ........... 321 Starting the Printronix LPR Utility ....281 For macOS ............321 Registering this machine with the Printronix LPR Deleting software ...........322 utility ..............281 Uninstalling the Windows printer driver ...
- Page 5 Table of Contents For the error code 390 ........348 For the error code 391, 392, 393 or 394 ..349 For the error code 638 ........350 Trouble with printing ........355 I cannot print ............ 355 Troubleshooting for wired LAN connection ..356 Troubleshooting for wireless LAN connection .
- Page 6 Getting started Safety precautions ..................8 General cautions ..................9 Preface ..................... 11 Trademarks ....................12 About this manual ..................13 Features of this machine ................15 - 7 -...
-
Page 7: Safety Precautions
Safety precautions Read this manual for your safety before using the product. Mishandling due to ignoring this display may cause death or serious injury. Mishandling due to ignoring this display may cause personal injury. - 8 -... -
Page 8: General Cautions
General cautions Do not touch the safety switch inside the machine. Doing so may cause electric shock when high voltage occurs. In addition, gears can rotate, which may result in personal injury. Do not use an inflammable spray near the machine. Doing so may cause a fire since there is an area heating up within the machine. - Page 9 Do not approach the paper discharger when the power is on or during printing. Doing so may cause injury. Do not touch a broken display. Doing so may cause injury. If any liquid (liquid crystal) leaking from the display gets into the eyes or mouth, wash it off promptly with a large quantity of water. Consult a physician as necessary.
-
Page 10: Preface
Preface • EMERGENCY FIRST AID Take care with toner powder: If swallowed, give small amounts of cold water and seek medical attention. DO NOT attempt to induce vomiting. If inhaled, move the person to an open area for fresh air. Seek medical attention. If it gets into the eyes, flush with large amounts of water for at least 15 minutes keeping eyelids open. -
Page 11: Trademarks
Trademarks Printronix is a registered trademark of Printronix, LLC. Microsoft, Windows, Windows Server and Internet Explorer are registered trademarks or trademarks of Microsoft Corporation in the United States and other countries. Apple, Mac, macOS, iPad, iPhone, iPod, iPod Touch and Safari are registered trademarks of Apple Inc. in the United States and other countries. -
Page 12: About This Manual
Notwithstanding the foregoing, we shall not have any liability in regard to any operational effect related to the instructions contained in this manual. Copyrights All rights belong to Printronix, LLC. This manual may not be reproduced, transcribed or translated without permission. Be sure to obtain the written approval from Printronix, LLC. © 2022 Printronix, LLC. - Page 13 Mark Meaning Indicates reference items. Please read them to learn the detailed information. Indicates the related items. Please read them to learn the relevant information. About symbols This section describes the symbols used in this manual and their meanings. Symbol Meaning «...
-
Page 14: Features Of This Machine
Features of this machine Installable in restrained space As the machine is compact, the space between both sides of this machine and the wall can be as small as 20 mm. (When the optional caster stand is not installed) ... - Page 15 Connecting to the PC after preparing this machine Installation ....................17 Unpacking ....................19 Checking accessories ................21 Installing the starter toner cartridge ............22 Installing options ..................23 Connecting the power cord ..............34 Loading paper in the tray ................. 35 Connecting via a wired LAN ..............
-
Page 16: Installation
Installation Installation environment Install this machine in the following environment. Ambient temperature: 10°C to 32°C Ambient humidity: 20% to 80% RH (relative humidity) Maximum wet-bulb temperature: 25°C Make sure there is no condensation. Failure to do so may cause a malfunction. ... - Page 17 Side view (When the rear output tray is used) Depending on the installation environment, the temperature inside this machine may rise and the printing speed may slow down. Side view (When the rear output tray is closed and a cable with angled connector is used) Depending on the installation environment, the temperature inside this machine may rise and the printing speed may slow down.
-
Page 18: Unpacking
Unpacking Doing so may cause injury. This machine weighs approx. 30 kg, so be sure to have it lifted by at least 2 personals. Be sure to use the consumables/maintenance items supplied with this machine first. If you install the consumables/maintenance items other than those supplied first, the lifespan may not be displayed correctly or the accessories may not be usable later. - Page 19 Lift this machine and place it at the installation site. Remove the drying agent on the top of this machine. To use the optional expansion tray, see "Installing options ". - 20 -...
-
Page 20: Checking Accessories
Checking accessories Make sure that you have all the following accessories. Doing so may cause injury. This machine weighs approx. 30 kg, so be sure to have it lifted by at least 2 personals. See "Unpacking " for the unpacking method. ... -
Page 21: Installing The Starter Toner Cartridge
Installing the starter toner cartridge When you use this machine for the first time, install the included starter toner cartridge. If an optional toner cartridge is installed and used first, you may not be able to use the starter cartridge later. ... -
Page 22: Installing Options
Installing options This section explains the installation of options. If no option is installed, proceed to " ". Connecting the power cord The following options are available. Be sure to turn off the power and unplug the power cord and cables before installing any options. If an option is installed with the power on, the main unit and the option may be damaged. - Page 23 Model: 45830222 Turn off this machine and unplug the power cord. If you install it with the power on, the main unit or wireless LAN module may be damaged. Turning the power off Open the wireless LAN module cover on the side of this machine. Pull out the connector and insert it into the wireless LAN module.
-
Page 24: Installing The Expansion Tray Unit
Input the admin password using the numeric keypad, and press «OK». Admin password Check that [Network Setup] is selected, and press «OK». Check that [General Setup] is selected, and press «OK». Check that [Extended Network] is selected, and press «OK». Press ▼to select [Wireless], and press «OK». - Page 25 Install the expansion tray unit to increase the quantity of paper that can be loaded. After installation, set the number of trays in the printer driver. Up to three extension trays can be installed. Be sure to install the attached fixing parts. To install any of the three expansion trays, it is recommended to install the optional dedicated caster stand to avoid the risk of tipping.
- Page 26 Fix the stacked expansion trays on both sides with accessories by using a flat-head screwdriver. With the main unit and the expansion trays aligned on the right side and front, gently stack them so that the protrusions of the expansion tray fit into the holes on the bottom of the main unit. Fix the main unit and the expansion trays by using a flat-head screwdriver.
-
Page 27: Installing The Dedicated Caster Stand
Do not press on the back of this machine or the image drum basket when the output tray is open and the image drum is pulled out. Do not press on the cassette from above when the cassette is pulled out. ... - Page 28 A Phillips-head screwdriver and a flat-head screwdriver are required to install the caster stand. To install any of the three expansion trays is installed, be sure to install the dedicated caster stand, the anti-tip feet and the attached fixing parts to avoid the risk of tipping. ...
- Page 29 Then, mount the anti-tip foot b (x 3) to both sides and the back. Check that the anti-tip foot a and the anti-tip foot b (x 3) are inserted in place by turning the dedicated caster stand upside down. Turn the dedicated caster stand back and mount the positioning pin (x 2). Rotate to fix the positioning pin (x 2) with a flat-head screwdriver.
- Page 30 With the main unit or the expansion tray aligned with the dedicated caster on the right side and the front, gently stack them so that the positioning pins of the dedicated caster stand fit into the holes on the bottom. Fix the main unit or the extension tray and the dedicated caster stand with the metal fixtures (x 2) and the screws (x 4) by using a Phillips-head screwdriver.
- Page 31 Fix the stacked expansion trays on both sides with accessories by using a flat-head screwdriver. When multiple expansion trays are installed, with the main unit and the expansion trays aligned on the right side and front, gently stack them so that the protrusions of the expansion tray fit into the holes on the bottom of the main unit.
- Page 32 Before moving this machine, unlock the casters (2 places). After moving this machine, lock the casters (2 places) to prevent accidental sliding. When transporting this machine, replacing consumables or maintenance parts, or loading paper in the tray, check the following points to avoid the risk of tipping. ...
-
Page 33: Connecting The Power Cord
Connecting the power cord About the power supply The power supply must meet the following requirements. Voltage: 110 to 127V AC (Range 99 to 140V AC) / 220 to 240V AC (Range 198 to 264V AC) Power supply frequency: 50/60 Hz ± 2% ... -
Page 34: Loading Paper In The Tray
Loading paper in the tray This section describes the procedure assuming that A4-sized plain paper is loaded in Tray 1. When other paper is loaded, see " ". Loading paper Pull out the paper cassette. Slide the paper guide and the blue part of the paper stopper to fit the size of the paper to be loaded. - Page 35 Return the paper cassette to this machine. Set the size, type and weight of the paper on the operator panel. Loading paper - 36 -...
-
Page 36: Connecting Via A Wired Lan
Connecting via a wired LAN Connect this machine and a PC with a LAN cable to print. Connect the LAN cable, and set the IP address and others on the operator panel. Connecting the LAN cable Prepare a LAN cable (category 5e or better, twisted pair, straight) and a hub. Power off this machine. - Page 37 Power on this machine. Press the scroll button ▼ on the operator panel several times to select [Admin Setup], and press «OK». Input the admin password using the numeric keypad, and press «OK». Admin password Check that [Network Setup] is selected, and press «OK». Press ▼...
- Page 38 Use either the scroll buttons or the numeric keypad to input the first 3 digits of the IP address, and press «OK». Input the next 3 digits in the same way. To move to the next box, press «OK». Press «OK» after inputting all the digits. Check that the cursor has returned to the first 3 digit, and press «BACK».
- Page 39 Press «ON LINE» to return to the standby screen. Checking the connection from a PC Check the IP address of this machine, and access it from a PC by using the Web browser. Press the scroll button ▼ on the operator panel several times to select [Configuration], and press «OK».
- Page 40 If the web page of this machine is not displayed, the network connection between the PC or other terminals and this machine has failed. Check if [IP Address Set], [IPv4 Address], [Subnet Mask] and [Gateway Address] of this machine are set correctly.
-
Page 41: Connecting Via A Wireless Lan
Connecting via a wireless LAN Connect this machine and a PC via a wireless LAN to print. Wired LAN1 and wireless LAN can be used at the same time. If wired LAN1 and wireless LAN are connected to the same subnet, the communication may be unstable. -
Page 42: Connecting Via An Access Point (Infrastructure)
SSID is also called the network name, ESSID or ESS-ID. Encryption key is also called the network key, security key, password, or pre-shared key (PSK). Connecting via an access point (Infrastructure) Put this machine in an unobstructed view position near the wireless LAN access point. (The recommended distance is 30 m or less.) ... - Page 43 When [Are You Sure?] is displayed, check that [Yes] is selected, and press «OK». Wait until the standby screen appears as this machine restarts. If [Not connected to wireless access point] is displayed, press «OK». If "Set-up wireless?" is displayed, select [No], and press «OK». 2.
- Page 44 (Example) IP address of this machine: 192.168.101.2 Subnet mask: 255.255.255.0 Gateway address: 192.168.101.1 When using a wired LAN, see " ". Setting the IP address, etc. Press the scroll button ▼ on the operator panel several times to select [Wireless(Infrastructure) Setting], and press «OK».
- Page 45 Use either the scroll buttons or the numeric keypad to input the first 3 digits of the IP address, and press «OK». Likewise, input the next 3 digits, and press «OK». Press «OK» after inputting all the digits. Press ▼ to select [Subnet Mask], and press «OK». Input the subnet mask in the same way as the IP address.
- Page 46 Connecting with WPS Connecting by selecting a wireless LAN access point from the operator panel Connecting by setting manually from the operator panel When you connect with wireless LAN by WPA/WPA2-EAP, see "Setting IEEE802.1X (Wireless LAN) ".
- Page 47 "Running pushbutton method" is displayed, and this machine will start to search for a wireless LAN access point. Press and hold the push button of wireless LAN access point for the period of time confirmed in Step 1 or for a few seconds. "Running pushbutton method"...
- Page 48 Press ▲ to select [Enable], and press «OK». Press ▼ several times to select [Wireless Network Selection], and press «OK». This machine starts searching for wireless LAN access points. A list of SSID of connectible wireless LAN access points is displayed. Press ▲ or ▼ to select the SSID of the wireless LAN access point recorded in Step 1, and press «OK».
- Page 49 "Implementing this method?" is displayed, and the SSID selected in Step 7 from the confirmation screen and the encryption method input in Step 8 are displayed as the security method. If the SSID is the same as the one recorded in Step 1, press «OK». When "Connection successful."...
- Page 50 Start searching for wireless LAN access points. Please wait. A list of SSID of connectible wireless LAN access points is displayed. Press ▼ several times to select [Manual Setup] at the end of the list, and press «OK». Check that [SSID] is selected, and press «OK». Input the SSID recorded in Step 1, and press «OK».
- Page 51 The encryption key varies with the wireless LAN access point and security method. Press ▼ to select [Execute], and press «OK». "Implementing this method?" is displayed, and the SSID selected in Step 8 from the confirmation screen and the encryption method input in Step 10 are displayed as the security method.
- Page 52 Press the scroll button ▼ on the operator panel several times to select [Admin Setup], and press «OK». Input the admin password using the numeric keypad, and press «OK». Admin password Check that [Network Setup] is selected, and press «OK». Check that [General Setup] is selected, and press «OK».
-
Page 53: Connecting Directly With This Machine (Ap Mode)
Press the scroll button ▼ on the operator panel several times to select [Configuration], and press «OK». Press «5» on the [Configuration] screen. Press ▼ to select [Wireless(Infrastructure) Information], and press «OK». Press ▼ several times to select [IPv4 Address], and press «OK». Take a note of the displayed IP address. - Page 54 1. Enabling the wireless LAN function Power on this machine. Press the scroll button ▼ on the operator panel several times to select [Admin Setup], and press «OK». Input the admin password using the numeric keypad, and press «OK». Admin password Check that [Network Setup] is selected, and press «OK».
- Page 55 Press the scroll button ▼ on the operator panel several times to select [Wireless(AP Mode) Setting], and press «OK». Input the admin password using the numeric keypad, and press «OK». Admin password Check that [Wireless(AP Mode)] is selected, and press «OK». "Cannot be used simultaneously with wireless(infrastructure)."...
- Page 56 Press ▲ to select [Enable], and press «OK». Press ▼ to select [Automatic Setup (PushButton)] , and press «OK». When "Implementing this method? Pushbutton method" is displayed, check that [Yes] is selected, and press «OK». "Running pushbutton method" is displayed, and this machine will start to search for a wireless LAN access point.
- Page 57 Press the scroll button ▼ on the operator panel several times to select [Wireless(AP Mode) Setting], and press «OK». Input the admin password using the numeric keypad, and press «OK». Admin password "Cannot be used simultaneously with wireless(infrastructure)." will be displayed for about 5 seconds. Press ▲...
-
Page 58: Connecting Via Usb
Connecting via USB Connect this machine and a PC with a USB cable to print. Prepare a USB 2.0 cable. Not compatible with USB 3.0. The connector shape on the machine side is of type B. To connect in the USB 2.0 hi-speed mode, use a USB cable compliant with USB 2.0 hi-speed specifications. Power off this machine. -
Page 59: Installing Software On A Pc
Installing software on a PC If your PC comes with a DVD drive, install the printer driver and other software on the PC from the provided DVD. If your PC does not come with a DVD drive, or if you want to update the printer driver or any other software, download and install it from the website. - Page 60 When the [DVD drive] screen is displayed, click [Launch Setup.exe]. If the [User Account Control] screen is displayed, click [Yes]. If the [DVD drive] screen is not displayed, open DVD from the Explorer. Choose a language from the pull-down menu of language selection in the [Welcome] screen. Read the software license agreement, and click [Accept].
- Page 61 Click [Recommended Install]. Check the software, and click [Start]. Installation will begin. The following software will be installed. PCL6 printer driver (including Network Extension, Color Swatch Utility) FAQs Monitoring Tool Other software is installed from either [Batch Install] or [Individual Install]. Check that the software installation is complete.
- Page 62 If you do not need to update, click [Go]. Click [Confirm] if you do not know or an update is required. If the following screen appears, click [Yes]. After the update is completed, click [Go]. Click [Go]. If the following screen appears, click [Yes]. Click [Exit].
-
Page 63: For Macos
Click [Printers and Scanners]. Click [+], and select [Add Printer or Scanner] when the menu appears. If you cannot click [+], click the key mark. Click [Default]. Select this machine, and select [PRINTRONIX LP654C PS] from [Drivers]. Connection Method Listed name Type... -
Page 64: Setting The Printer Driver
Make sure that this machine is added to the list of [Printers] and that "PRINTRONIX LP654C PS" is displayed in [Type]. If "PRINTRONIX LP654C PS" is not displayed in [Type] properly, click [-] to delete this machine from [Print], and then repeat Steps 8 - 12. - Page 65 Open the "Devices and Printers". How to open the printer folder Right-click on the icon of [PRINTRONIX LP654C PS], and select [Printer Properties]. Select the [Device Settings] tab. For a network connection, select [Get installed options automatically] in [Installable Options], and click [Setup].
- Page 66 For macOS Depending on the timing when the printer is added, the information for the expansion tray unit may have been set. Select [System Preferences] from the Apple menu. Click [Print & Scan]. Select this machine, and click [Options and Supplies]. Select the [Options] tab.
- Page 67 Basic operations Parts identification ..................69 Turning the power on/off ................72 Loading paper ..................73 Setting the output bin ................85 Checking the configuration ............... 87 How to use levers L1 and L2 ..............89 - 68 -...
-
Page 68: Parts Identification
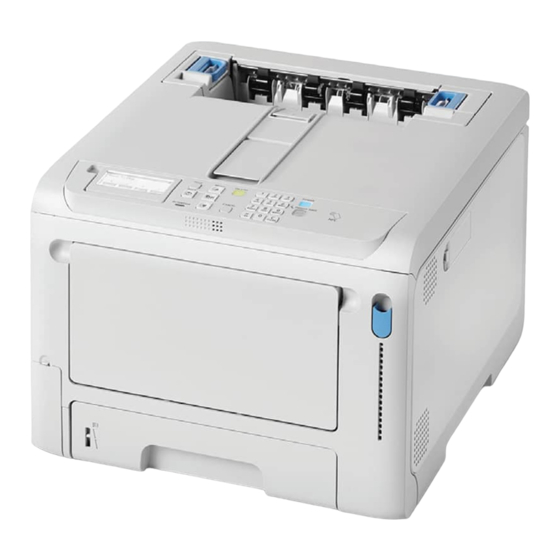
Parts identification This section explains the name and functions of each part of the main unit. Front Name Function Front cover This is the cover on the front side of the main unit. You can open the front cover by pulling its lever towards yourself. Operator panel This is the panel used to operate the main unit. -
Page 69: Inside The Main Unit
Inside the main unit Name Function Toner cartridge black (K: Black) The toner cartridge contains toner (powder ink) for printing. The toner cartridge is a consumable. Toner cartridge (C: Cyan) Toner cartridge (M: Magenta) Toner cartridge (Y: Yellow) Serial number The machine-specific number. -
Page 70: Back
Back Name Function Rear output tray This is the paper exit when the paper is output with the print side facing up. Power connector This is where the included power cord is plugged in. Interface unit There is a connector to connect to a PC. USB interface connector This is where the USB cable is plugged in when the computer and the main unit is connected with a USB cable. -
Page 71: Turning The Power On/Off
Turning the power on/off Turning the power on Press and hold the power switch for approx. one second. When the power is on, the LED lamp of the power switch will light on. When this machine gets ready, "Ready To Print" will appear on the display. Turning the power off Press and hold the power switch for approx. -
Page 72: Loading Paper
Loading paper This section explains the types of paper applicable to this machine, paper precautions and paper storage methods. Procedure for loading paper 1. Check the applicable paper. Applicable paper Inapplicable paper 2. Load the paper in the tray. Paper applicable to each tray Loading paper in Tray 1 Loading paper in Tray 2/3/4 (Optional) Loading paper in the MP tray... - Page 73 Media Type Paper size Paper weight Other conditions Long paper Custom Width: 55 - 216 Length: 91 - 1321 Envelope Com-9 Media using 24 lb paper Media made of craft paper, electrophotographic paper or dry PPC Com-10 paper. Monarch Media with the flap folded tightly. Duplex printing is not available.
-
Page 74: Inapplicable Paper
Depending on the installation environment of the machine, printing on paper that contains moisture may cause white steam or water droplets to appear around the paper exit area of the machine. This is not abnormal because the heat generated when the toner is fixed to the paper evaporates the moisture contained in the paper. Inapplicable paper Do not use the following types of paper. - Page 75 Envelope The paper may warp or wrinkle after printing. The toner may stick thinly to the whole paper or the printing may be light. The toner may be easily removed. The printing quality may decline in an area of about 5 mm around the sealing part (of different weights) of the envelope.
-
Page 76: Paper Applicable To Each Tray
For the paper size that can be fed from each tray and the paper size that can be printed on both sides, please refer to " ". Applicable paper If you cannot print correctly on a large-sized paper, it is suggested to set [Quality] to [Normal] in the PS printer driver. - Page 77 Pull out the paper cassette. If you pull out the paper cassette with the power on, "Change tray settings?" may appear on the display. This message will disappear automatically in 10 seconds after the paper cassette is returned to the main unit. If you have changed the paper, press the «OK»...
-
Page 78: Loading Paper In Tray 2/3/4 (Optional)
Return the paper cassette to this machine. If the paper cassette is returned to the main unit forcefully, the paper stopper may slide. Proceed to " ". Setting paper information on the operator panel Loading paper in Tray 2/3/4 (Optional) For the paper that can be used, please see "... - Page 79 Be cautious for the orientation of paper that can be loaded in either portrait or landscape, like A5 size. Slide the paper guide and the blue part of the paper stopper to fit the size of the paper to be loaded.
-
Page 80: Loading Paper In The Mp Tray
Loading paper in the MP tray For the paper that can be used, please see " " and " ". Applicable paper Paper applicable to each tray Do not load paper of different sizes, types, and weight at the same time. ... -
Page 81: Setting Paper Information On The Operator Panel
Adjust the manual feeder guide to the width of the paper to be loaded. Shuffle the paper well. Align edges of the paper horizontally. Load the paper with the print side facing up. Do not exceed the ▽ mark on the paper guide when loading paper. "Would you like to change the tray settings?”... - Page 82 If the machine is in the power save mode, press «POWER SAVE» to restore. For details about the short cut menu, see "Setting with the short menu (Fn key) ". For Tray 1/the MP tray Check that "Ready To Print" appears on the display. To set the paper size of Tray 1, press the keys in the following order: «Fn»...
-
Page 83: Storing Paper
About values to be set Refer to the following table for settings in the case of plain, partially printed paper and colored paper. Values to be set on the operator panel Media type Media weight Plain 60 - 63 g/m paper: Ultra Light 64 - 74 g/m paper:Light... -
Page 84: Setting The Output Bin
Setting the output bin This machine outputs paper to the output tray or rear output tray. The following types of paper can be output to each output tray. Output bin Types of paper to output Number of sheets to output Output tray Plain, recycled paper 150 (80 g/m... -
Page 85: Rear Output Tray
Rear output tray Use the rear output tray to print on envelopes, labels or custom-sized paper. The paper is output with the printing side up in the reverse order to which they are printed. Open the rear output tray at the back of this machine. Open the paper supporter. -
Page 86: Checking The Configuration
Checking the configuration You can print out and check the configuration of this machine. You can also check the configuration from the operator panel. Printing the menu map (configuration) You can print the list of configurations (menu map) of this machine or the Printer Usage Report. Check that "Ready To Print"... -
Page 87: Confirming On The Operator Panel
For the information not listed in [Configuration], see "Menu list " - [Print Information]. Confirming on the operator panel You can check the supplies status and counter information on the operator panel. Check that "Ready To Print" appears on the display. If the machine is in the power save mode, press «POWER SAVE»... -
Page 88: How To Use Levers L1 And L2
How to use levers L1 and L2 When the front cover is open, you will find the L1 lever and the L2 lever. This section describe how to use these levers. Lever L1 Used to replace the image drum and to clean the LED head. Replacing the image drum Cleaning the LED head After opening the front cover, operate the L1 lever first and then the L2 lever. - Page 89 Lever L2 Used to replace the belt unit and to remove the jammed paper. Replacing the belt unit When paper is jammed After opening the front cover, pull the L2 lever. After the operation, both the output tray and the image drum basket are integrated and raised. Name Output tray Image drum basket...
- Page 90 Changing settings from the operator panel Parts identification of the operator panel ..........92 Adjusting the display orientation .............. 93 Inputting text ..................... 94 Changing settings ..................95 Adjusting the buzzer volume ..............98 Setting the power save function ............... 99 Menu list ....................
-
Page 91: Parts Identification Of The Operator Panel
Parts identification of the operator panel Name Function Display Displays the state of this machine and operation instructions. There are two types of standby screens: "Show Remaining Toner" and "Show Tray Information". The factory default setting is "Show Remaining Toner". «ON LINE»... -
Page 92: Adjusting The Display Orientation
Adjusting the display orientation You can adjust the angle so that it is easier to watch the display. Put your finger in the recess on the left side of the display, and raise the display towards you. To return to the original angle, press it gently. - 93 -... -
Page 93: Inputting Text
Inputting text You can input alphabetic or numeric characters using the numeric keypad. If a same key is pressed in succession, the alphanumeric character will switch. To continue tying with the same key, press «OK» after inputting each alphanumeric character. The following characters can be input when the corresponding key is pressed. -
Page 94: Changing Settings
Changing settings Setting menu display This section describes how to change menu settings from the operator panel. See "Menu list " for a list of menu items. Check that "Ready To Print" appears on the display. If the machine is in the power save mode, press «POWER SAVE» to restore. Press the scroll button ▲... - Page 95 You can print to check the configuration. Printing the menu map (configuration) Check that "Ready To Print" appears on the display. If the machine is in the power save mode, press «POWER SAVE» to restore. Press «Fn» on the operator panel. Since it will be a function number screen, input the number of the menu you want to display using the numeric keypad, and press «OK».
- Page 96 Function No. Corresponding menu item Media Type (Tray 4) Media Weight (Tray 4) Paper Tray Media Size (MP tray) X Dimension (MP tray) Y Dimension (MP tray) Media Type (MP tray) Media Weight (MP tray) Tray Usage (MP tray) Print Information (Menu Map (Configurations)) Print Information (Network) Print Information (Printer Usage Report) Print Information (Error Log)
-
Page 97: Adjusting The Buzzer Volume
Adjusting the buzzer volume The volume of the following buzzers is adjustable in three steps. Paper jam buzzer Printing completion buzzer Buzzer for AirPrint printing IC Card hold buzzer Press the scroll button ▼ on the operator panel several times to select [Admin Setup], and press «OK». -
Page 98: Setting The Power Save Function
Setting the power save function Setting the time that elapses before entering the power save mode This machine automatically enters the power save mode (an energy saving mode) if no operation is done for a certain period of time. The following time can be set. The factory default setting is 1 minutes. 1 min, 2 mins, 3 mins, 4 mins, 5 mins, 10 mins, 15 mins, 30 mins, and 60 mins ... -
Page 99: Restrictions Of The Power Save Function
This machine may not enter the sleep mode after the set period of time since the fan is working until this machine has cooled down depending on the printing environment or the usage conditions. Check that "Ready To Print" appears on the display. If the machine is in the power save mode, press «POWER SAVE»... - Page 100 [Auto Config]: The power is turned off automatically if the machine has not been used for a certain period of time, except in the following situations. When the LAN cable is connected to the network interface connector When the wireless LAN is enabled ...
-
Page 101: Setting The Time That Elapses Before Entering The Auto Power Off Mode
Setting the time that elapses before entering the auto power off mode The following time can be set. The factory default setting is 4 hours. 1 hour, 2 hours, 3 hours, 4 hours, 8 hours, 12 hours, 18 hours, and 24 hours Check that "Ready To Print"... -
Page 102: Menu List
Menu list You can print to check the menu list. Printing the menu map (configuration) The following items are displayed when the wireless LAN module (optional) is installed. AirPrint Wireless(Infrastructure) Setting Wireless(AP Mode) Setting Print From USB Memory Factory Item default Description... - Page 103 Configuration Item Description Tray Count MPTray Displays the total number of print pages for each tray. Tray1 Trays 2 to 4 are displayed when optional Tray2 expansion trays are mounted. Tray3 Tray4 Paper Feed Roller Counter MPTray Displays the number of sheets fed from each tray.
- Page 104 Item Description IPv6 Address Displays the IPv6 address (stateless). (Stateless Address) IPv6 Address Displays the IPv6 address (stateful). (Stateful Address) Wireless(Infrastructure) Firmware Displays the wireless network firmware version. Information Version * Displayed when the wireless LAN Wireless(Infrastr Displays the state (enabled or disabled) of the module (optional) is installed.
- Page 105 Item Description Panel Version Indicates the firmware version of the operator panel. Indicates the total capacity of all RAM installed in this machine. Flash Memory Indicates the total value capacity of all flash memories installed in this machine. Date and Time Displays the current date and time.
- Page 106 Factory Item default Description settings X Dimension (Fn91) Sets the paper width when you have millimeter or selected a custom size for the paper that 8.5 inch you want to print on from the MP tray. Y Dimension (Fn92) Sets the paper length when you have millimeter or selected a custom size for the paper that 11.0 inch...
- Page 107 Factory Item default Description settings For [Cassette Size], follows the settings of the paper size dial of the paper tray. X Dimension (Fn31) Sets the paper width when you have millimeter or selected a custom size for the paper that 8.5 inch you want to print on from Tray 3.
- Page 108 Factory Item default Description settings Value range: 1 minute, 2 minutes, 3 minutes, 4 minutes, 5 minutes, 10 minutes, 15 minutes, 30 minutes, 60 minutes Auto Power Off Time (Fn202) 4hours Sets the time that will elapse before the power is turned off automatically after the standby mode is entered.
- Page 109 Factory Item default Description settings Replace the empty toner cartridge with a new one. [Cancel]: Cancels color print data automatically. Replace the empty toner cartridge with a new one. Jam Recovery Sets whether to reprint pages not printed due to a paper jam after the paper jam is cleared.
- Page 110 Factory Item default Description settings Y Adjust 0.00millimete Duplex X 0.00millimete Adjust Duplex Y 0.00millimete Adjust Paper Black Setting (Fn230) Used for fine adjustment in case of noticeable blur etc. in the print results during mono printing when [Plain] is selected as [Media Type].
- Page 111 Factory Item default Description settings HU Setting Sets the mode to remove the dirt due to leaving this machine idle for a long period of time. VL Cleaning Execute Improves the printing result when there are white streaks in the vertical direction. Gloss Mode A mode used to print with an increased fixing temperature and improved gloss.
- Page 112 Factory Item default Description settings Narrow Paper Speed Mode1 Sets the printing speed when narrow paper is used. The target paper weight ranges from Ultra Light to Medium. Mode1: The recommend mode for massive printing on narrow paper (with a width of 182 mm or less).
- Page 113 Factory Item default Description settings Quiet Mode Sets the quiet print mode to reduce the noise during printing. The print speed becomes lower when [On] is set. Ultra Light Paper Care Mode If the following phenomena occur when you are printing with [Media Weight] set to [Ultra Light] or [Light], setting it to [On] may improve the situation.
- Page 114 *1 Factory default setting values are different according to the country or region. *2 The values are displayed with the unit set in [Admin Setup] - [Tray Setup] - [Unit of Measurement]. Easy Setup Factory Item default Description settings Enter Password ********** Input the password required to enter the Admin Setup menu.
- Page 115 Factory Item default Description settings Network Scale Small Normally, [Small] is selected. Network Factory Defaults Execute Restores network menu settings to factory default settings. Wired(LAN1) Wired(LAN1) Enable Enables/Disables the wired LAN1. Setup IP Address Set Auto Set to obtain the IPv4 address automatically or input it manually.
- Page 116 Factory Item default Description settings Timeout Injob 40seconds Sets the time from loss of the data receipt (canceled by PostScript) until force-printing. Value range: Off, 5 seconds, 10 seconds, 20 seconds, 30 seconds, 40 seconds, 50 seconds, 60 seconds, 90 seconds, 120 seconds, 150 seconds, 180 seconds, 210 seconds, 240 seconds, 270 seconds, 300 Seconds...
- Page 117 Factory Item default Description settings Media Type (Fn93) Plain Sets the type of paper that you want to print on from the MP tray. Media Weight (Fn94) Light Sets the weight of the paper that you want to print on from the MP tray. Tray Usage (Fn95) When Sets how to use the MP tray.
- Page 118 Factory Item default Description settings Y Dimension (Fn32) Sets the paper length when you have millimeter or selected a custom size for the paper that 11.0 inch you want to print on from Tray 3. Media Type (Fn33) Plain Sets the type of the paper you want to print on from Tray 3.
- Page 119 Factory Item default Description settings DHCPv6 Disable Set to obtain the IPv6 address automatically. Set to Disable when you do not use the IPv6 address. Automatic WPS-PBC Executed when setting is done by pressing setup (WPS) the WPS button of the wireless LAN access point.
- Page 120 Factory Item default Description settings IPSec Disable Displayed only when IPSec is enabled. It can be changed to Disable only. Displayed when the TCP/IP protocol is enabled. SNMP Enable Enables the access from SNMP. Displayed when the TCP/IP protocol is enabled.
- Page 121 Factory Item default Description settings The value set in the printer driver takes priority. Media Check Enable Sets whether to check the mismatch between the paper size of the print data and that of the tray. A4/Letter Override Sets the functions of auto switching the printing paper from A4 to Letter when A4 paper runs out and Letter paper is loaded, or from Letter to A4 when Letter paper runs...
- Page 122 Factory Item default Description settings Value range: I0 to I90 when [Resident] is set; or C1 to C4 when [Resident2] is set Font Pitch 10.00 CPI Sets the PCL font width. Value range: 0.44 to 99.99 CPI (in increments of 0.01 CPI) Font Height 12.00 points Sets the PCL font height.
- Page 123 Factory Item default Description settings Character Set SET-2 Specifies a character set. Symbol Set IBM-437 Specifies a symbol set. Letter O Style Disable Specifies the style that replaces 9BH with letter o and 9DH with a zero. Zero Character Normal Sets the zero to be slashed or unslashed.
- Page 124 Factory Item default Description settings If enabled, printing is performed after verifying that the print data has not been changed. The integrity of print data is guaranteed, but the time to start printing will be longer. Erase job option No overwrite Sets the method for erasing the print data.
- Page 125 Factory Item default Description settings Card Hold Buzzer Volume Sets the buzzer volume when the IC card is held. Displayed when access control is enabled. Time Setup Date Format yyyy/mm/dd Sets the date in the format of yyyy/mm/dd. Time Zone +9:00 Sets the GMT time zone.
- Page 126 Factory Item default Description settings Job Cancel Cancel Key Behavior Short Sets the actions when the cancel button is Setup pressed. Short: A short press (for 2 seconds or less) cancels the printing. Long: A long press for 2 to 5 seconds cancels the printing.
- Page 127 Factory Item default Description settings Save Settings Execute Saves the current menu settings. Menu settings that have been saved previously will be overwritten. Restore Settings Execute Restores settings to the saved menu settings. Change New Password Input a new admin password. Password Verify Password Input the new admin password again to...
- Page 128 Factory Item default Description settings Auto Density Mode Standard Sets whether to automatically adjust the density/tone for color printing. Or, changes the frequency to adjust the density/tone for color printing. Adjust Density (Fn300) Execute Executed when you want to adjust the density immediately. Adjust Registration (Fn301) Execute Executed when you want to adjust the registration...
- Page 129 Mode) connection setting is completed/Close by the setting button] is displayed. Manual Setup Displays the SSID and password of this machine for manual setup. Connection Setting SSID Printronix- Inputs a new one to change the SSID. Printer name- Last 6 digits of the MAC address Password Inputs a new one to change the password.
- Page 130 - 131 -...
- Page 131 Boot Menu To display the Boot Menu, do the following. Power on this machine while pressing «OK» on the operator panel. When [Boot Menu] appears on the display, release your finger and press «OK» again. Input the admin password using the numeric keypad, and press «OK». Admin password Factory default...
- Page 132 Printing Printing from a PC .................. 134 Screens and functions of the printer driver ..........136 Printing on various types of paper ............146 Printing methods ..................154 Printing in economy mode ..............165 Color setup ..................... 169 Refining your finishing ................175 Useful functions ..................
-
Page 133: Printing From A Pc
For Windows PCL printer driver Open the file to be printed. Select [Print] from the [File] menu. Select [PRINTRONIX LP654C PCL6] from [Select Printer]. Click [Preferences] (or [Properties]). Select the loaded paper size from [Size] in the [Setup] tab. Select the tray to be printed from in [Source]. -
Page 134: For Windows Ps Printer Driver
For Windows PS printer driver Open the file to be printed. Select [Print] from the [File] menu. Select [PRINTRONIX LP654C PS] from [Select Printer]. Click [Preferences] (or [Properties]). Select the [Paper/Quality] tab. Select the tray to be printed from in [Paper Source]. -
Page 135: Screens And Functions Of The Printer Driver
Screens and functions of the printer driver Windows PCL printer driver [Setup] tab Item Description Driver settings Save the settings. Layout image Displays a sample image of the print layout. Size Sets the media size. Source Sets the paper source. Type Sets the media type. - Page 136 [Job Options] tab Item Description Quality Specifies the print resolution. Scale Sets the enlargement/reduction of printing. Copies Specifies the number of copies. Job type Sets the type of printing. Print mode Sets whether the print data sent to the printer is in PCL format or as an image. Advanced Make other printing settings.
-
Page 137: Windows Ps Printer Driver
Windows PS printer driver [Layout] tab Item Description Orientation Sets the printing orientation. Print on Both Sides Set for duplex printing. Page order Sets the order of pages to be printed. Page format Specifies the number of pages to be printed on one sheet of paper and booklet printing. - Page 138 [Job Options] tab Item Description Quality Specifies the print resolution. Job Type Sets the type of print data and the number of copies. When [Shared Print] or [Private Print] is set, [Job Type Options] is available. If [Collate] is checked, multiple documents will be printed as a batch.
-
Page 139: Macos Printer Driver
macOS printer driver [Layout] panel Item Description Pages per Sheet Selects the number of pages to be printed on one sheet of paper. Layout direction Specifies the layout for printing multiple pages on one sheet of paper. Border Specifies the type of borders. Two-Sided Specifies settings for printing on both sides. - Page 140 [Paper Handling] panel Item Description Collate pages Checked to print a multi-page document in collation. Pages to print Specifies the pages to be printed. Page Order Specifies the order of pages to be printed. Scale to fit paper size Prints by fitting to the media size. Depending on the settings, printing may not work correctly.
- Page 141 [Cover Page] panel Item Description Print Cover Page Specifies the cover printing. Cover Page Type Specifies the text string for cover printing. [Color] panel Item Description Grayscale Print in monochrome. Color Specifies the color adjustment for colored printing. - 142 -...
- Page 142 [Print Options] panel Item Description Quality1, Quality2, Feed, Specifies the print quality, toner save, media type, etc. Paper [User Authentication] panel Item Description Use user authentication Checked to set user authentication for printing. User name The user name for user authentication. Password The password for user authentication.
- Page 143 [Secure Print] panel Item Description Job Type Specifies the type of print data. When [Private Print] or [Shared Print] is set, [Job Type Options] is available. Job Type Options Specifies the password for printing the job name displayed on the panel. [Supply Level] panel Item Description...
-
Page 144: How To Open The Printer Folder
How to open the printer folder This section explains how to open the printer driver icon folder for each version of Windows. For Windows 10 (Version 1703 or later)/Windows Server 2019 Click [Start] to display the application list. Select [Windows System Tool] - [Control Panel] - [Devices and Printers]. For Windows Server 2012 R2/Windows Server 2016 Select [Control Panel] - [View devices and printers]. -
Page 145: Printing On Various Types Of Paper
Printing on various types of paper This section describes how to print on various types of paper. Printing on envelopes To print on envelopes, change the setting of the media size, and use the MP tray and the rear output tray. First, set the media size for the MP tray on the operator panel. - Page 146 Click [Preferences]. Select [Envelope*] from [Size] in the [Setup] tab. * Select the type of the envelope loaded. Select [Multi Purpose Tray] in [Source]. Select [Portrait] or [Landscape] in [Orientation]. Specify the media weight and other settings as necessary, and click [OK]. If you want to print while checking each sheet, click [Paper Feed Options] in [Setup] of the printer driver and check [Feed paper individually] (or select [Yes]).
-
Page 147: Printing On Labels
Printing on labels To print on labels, change the setting of media type, and use the multi-purpose tray (MP tray) and the rear output tray. First, set the media size and media type for the MP tray on the operator panel. Next, set the media size, paper tray, media weight, etc. -
Page 148: Printing On Long Paper
Specify the media weight and other settings as necessary, and click [OK]. If you want to print while checking each sheet, check [Feed paper individually] in the printer driver (or select [Yes]). To print continuously, uncheck [Feed paper individually] (or select [No]). For details, see "Printing one sheet at a time manually ". - Page 149 Loading paper Check the paper precautions. Applicable paper Inapplicable paper Paper precautions by type Load paper in the MP tray. Open the rear output tray on the back. Check that "Ready To Print" appears on the display. If the machine is in the power save mode, press «POWER SAVE» to restore. Press «Fn»...
-
Page 150: Printing On Irregular-Sized Paper (Custom Size)
Right-click on the icon [PRINTRONIX LP654C PS], and select [Printing preferences]. Click [Advanced] in the [Layout] tab. Click [Paper Size], select [PostScript Custom Page Size] from the pull-down menu, and input values in [Width] and [Height]. Click [OK] until the [Print settings] screen is closed. - Page 151 For Windows PCL printer driver Open the "Devices and Printers". How to open the printer folder Right-click on the icon [PRINTRONIX LP654C PCL6], and select [Printing preferences]. Click [Paper Feed Options] in the [Setup] tab. Click [Custom Size]. Input a name for the new size in [Name].
- Page 152 Open the "Devices and Printers". How to open the printer folder Right-click on the icon [PRINTRONIX LP654C PS], and select [Printing preferences]. Click [Advanced] in the [Layout] tab. Click [Paper Size], and select [PostScript Custom Page Size] from the pull-down menu.
-
Page 153: Printing Methods
Printing methods This section describes various printing methods such as zooming-in/-out and booklet printing. Printing one sheet at a time manually You can print one sheet at a time by loading paper to the MP tray. Each time after a single page is printed, the display shows the message "Manual Printing. Set [Media Size] In MP Tray. -
Page 154: Enlarging/Reducing To Fit The Specified Media Size
Select the [Print Options] panel. Check [Feed paper individually] in the [Paper Feed] tab. Specify other settings as necessary, and click [Print]. If a message appears on the display, load paper into the MP tray and press «ON LINE». If you are printing a multi-page document, the same massage appears each time after one page is printed. ... -
Page 155: Printing By Enlargement/Reduction
Specify other settings as necessary, and click [Print]. If there is no detail settings displayed in the [Print] screen, click [Show Details] at the bottom of the screen. Printing by enlargement/reduction You can print at the magnification rate you want without changing the print data. ... -
Page 156: Booklet Printing
Select the paper tray from [Source], and click [OK]. Select the paper type from [Type], and the paper weight from [Weight] as necessary. Specify other settings as necessary, and click [OK]. Click [Print] in the [Print] screen. For macOS Open the file to be printed. Select [Print] from the [File] menu. -
Page 157: Printing A Poster By Dividing A Document
Click [Print] in the [Print] screen. If [Page Format] is not displayed in the [Layout] tab, open the "Devices and Printers", right-click on the [PRINTRONIX LP654C PS] icon, and select [Printer properties] - [Advances] tab. Check [Enable advanced printing features]. -
Page 158: Inserting And Printing A Watermark Text (Watermark)
If this feature is not available to the Windows PCL printer driver, open the "Devices and Printers", right-click on the icon [PRINTRONIX LP654C PCL6], and select [Printer properties] - [Advanced] tab - [Print Processor] - [OKX05NPP] - [RAW], and click [OK]. - Page 159 Printing overlaid text or logos (overlay printing) You can print a document with an overlapping form file (like a logo or format) registered in this machine beforehand. It is called overlay printing. This function is not available to macOS. ...
-
Page 160: Outputting To A File Without Printing On Paper
For Windows Open the "Devices and Printers". How to open the printer folder Right-click on the icon [PRINTRONIX LP654C *], and select [Printer properties]. * Please select the type of printer driver that you want to use. - 161 -... -
Page 161: Printing Frequently Used Documents Without Using A Pc
Select the [Ports] tab. Select [FILE:] from the port list, and click [OK]. Open the file to be printed. Select [Print] from the [File] menu. Click [Print]. Input the file name, and click [OK]. Example: C:¥temp¥printdata.prn For macOS Open the file to be printed. Select [Print] from the [File] menu. - Page 162 Select [Print] from the [File] menu. Click [Preferences]. Select the [Job Options] tab. Select [Shared Print] from [Job Type]. Click [Job Type Option]. Input the print data name in [Job Name]. If you check [Input job type option when printing], a prompt asking for the print data name is displayed when the print data is sent to this machine.
-
Page 163: Printing An Email Attachment
Printing an email attachment This machine can print the file attached to the email you have received. Printable file formats are PDF (v1.7), JPEG and TIFF (V6 baseline). To use this function, you will have to configure email reception settings on the POP server or SMTP server. Setting E-mail receiving (Web page) ... -
Page 164: Printing In Economy Mode
Printing in economy mode This section describes how to save paper and toner on printing. Printing on both sides of paper You can print on both sides of paper. For paper applicable to duplex printing, see “ ". Applicable paper ... - Page 165 [Save Level Low]: Prints at a slightly lighter density. [Save Level Middle]: Prints at a light density. [Save Level High]: Prints at a considerably light density. The density of the image printed using this function varies with the print data. ...
-
Page 166: N-In-1 Printing
N-in-1 printing You can print by zooming in on the data of multiple pages to one side of a single sheet of paper. This function prints data at a reduced size, so the center of the paper may not be aligned accurately. ... -
Page 167: Printing As An Image (Image)
Printing as an image (image) If it takes a long time to print, you can select [Image] in [Print Mode] to shorten the printing time. This function is available to the Windows PCL printer driver only. This function has the following limitations. When this machine is set as a shared printer, or when connected via a WSD / IPP port and in environments such as a remote desktop client, it will not print with the optimal color. -
Page 168: Color Setup
Color setup Printing color data in monochrome You can print color data in monochrome. For Windows PCL printer driver Open the file to be printed. Select [Print] from the [File] menu. Click [Preferences]. Select [Monochrome] in [Color Setting] of the [Setup] tab. Specify other settings as necessary, and click [OK]. -
Page 169: Color Matching In The Printer Driver
Color matching in the printer driver Color matching is to manage and adjust colors of print data to maintain the consistency between input and output devices. This section explains color matching in the printer driver. Settings Description Automatic Color matching shall be done depending on the specific document. In general, use this setting. Office Color Select it if you print a business document by using the word processing software, spreadsheet software, and presentation software. -
Page 170: Simulating Print Results
Specify other settings as necessary, and click [Print]. If there is no detail settings displayed in the [Print] screen, click [Show Details] at the bottom of the screen. Simulating print results By adjusting CMYK color data, this machine will simulate the characteristics of the ink used for offset printing. ... -
Page 171: Printing With Color Separation
Select [Graphic Pro] in [Color]. Select [Printing Simulation] in [Mode Selection]. Select the characteristics of the ink that you want to simulate in [Simulation Target Profile] of [Input] tab. Specify other settings as necessary, and click [Print]. If there is no detail settings displayed on the [Print] screen, click [Show Details] at the bottom of the screen. Printing with color separation The color separation printing function can be used without any application. -
Page 172: Adjusting The Density Manually
Check that "Ready To Print" appears on the display. If the machine is in the power save mode, press «POWER SAVE» to restore. Press «Fn» on the operator panel. On the function number screen, press «3», «0», «1» and finally «OK». Check that [Execute] is selected, and press «OK». -
Page 173: Changing Mono Print Mode
Press the scroll button ▼ several times to select [Calibration], and press «OK». Press ▼ several times to select [Cyan Tuning], [Magenta Tuning], [Yellow Tuning] or [Black Tuning], and press «OK». Press ▼ to select [Highlight], [Dark] or [Mid-Tone], and press «OK». Press ▲... -
Page 174: Refining Your Finishing
Refining your finishing This section describes how to make the print result better when you are printing from your PC. Printing sharper photos You can print more naturally vividly images like photos. This function is not available to the Windows PS printer driver or macOS. For Windows PCL printer driver Open the file to be printed. -
Page 175: Printing By Correcting Fine Lines
For macOS Open the file to be printed. Select [Print] from the [File] menu. Select the [Print Options] panel. Select the value you want to set from [Quality] of the [Quality1] tab. Specify other settings as necessary, and click [Print]. ... -
Page 176: Printing By Specifying The Font To Use
Open the "Devices and Printer". How to open the printer folder Right-click on the icon of [PRINTRONIX LP654C PS], and select [Printer Properties]. Double-click on [Font Substitution Table] in the [Device settings] tab. Click the TrueType font, and select the substitution printer font from the list. - Page 177 Click [Advanced] in the [Layout] tab. Select [Substitute with Device Font] from [TrueType Font] in [Graphic]. Click [OK]. Specify other settings as necessary, and click [OK]. Click [Print] in the [Print] screen. Using PC fonts With the TrueType font of the PC, you can print with the same text as the screen display. ...
-
Page 178: Changing Black Finishing
Changing black finishing The finishing for the black parts can be changed in color printing. The black finishing settings can be used when [Office Color] or [Graphic Pro] is selected in the printer driver. Two types of black finishing can be created: from the toner cartridges of Cyan (C), Magenta (M), Yellow (Y) and Black (K), and from only Black (K). -
Page 179: Blurring White Streaks Between Text And Background (Black Overprint)
Blurring white streaks between text and background (black overprint) If there are white streaks and other gaps between black text and colored backgrounds, you can eliminate them by printing black text over colored backgrounds. This function is not applicable to some applications. ... - Page 180 This function is not available to the Windows PCL printer driver when [Print Mode] is set to [Image]. For Windows PCL printer driver Open the file to be printed. Select [Print] from the [File] menu. Click [Preferences]. Select the [Job Options] tab and click [Advanced]. Change the setting of [Trapping] to [Narrow] or [Wide] according to the corrected amount, and click [OK].
-
Page 181: Useful Functions
Useful functions This section describes useful functions for printing from a PC. Printing with multiple pages sorted into one complete set (Collate) You can print the print data of multiple pages and put them into one complete set. Some applications may not be available. For Windows PCL printer driver Open the file to be printed. -
Page 182: Printing From The Last Page Of Your Document
Specify other settings as necessary, and click [OK]. Click [Print] in the [Print] screen. If [Page Order] is not displayed, open the "Devices and Printers", right-click on the [PRINTRONIX LP654C PS] icon, and select [Printer properties] - [Advanced] tab. Check [Enable advanced printing features]. -
Page 183: Switching Tray Automatically At Running Out Of Paper
Check that "Ready To Print" appears on the display. If the machine is in the power save mode, press «POWER SAVE» to restore. Press «Fn» on the operator panel. On the functional number screen, press «9», «5» and «OK». Press the scroll button ▲ to select [Normal Tray], and press «OK». Press «ON LINE»... - Page 184 Configure the same paper settings of the tray to be used for both the machine and the printer driver. Loading paper When using the MP tray By default, [When Mismatching] is set for the MP tray. In this case, the MP tray is not subject to auto tray switch.
-
Page 185: Changing Default Settings Of The Printer Driver
Open the "Devices and Printers". How to open the printer folder Right-click on the icon [PRINTRONIX LP654C *], and select [Printing preferences]. * represents the type of printer driver you want to use. Configure the print settings to be used as the default settings of the printer driver. - Page 186 Right-click on the icon [PRINTRONIX LP654C PCL6], and select [Printing preferences]. Set the print setup you want to save. In the [Setup] tab, click [Save] in the [Driver Settings]. Specify a name for the setting to save, and click [OK].
-
Page 187: Printing Data Stored In This Machine
Printing data stored in this machine The print data can be stored in the built-in memory of this machine. Because the work on the PC completes more quickly, the PC can do other work while the machine is operating in the background. ... - Page 188 We do not guarantee the use of all USB memory products (The USB memory with security function is not supported). Not compatible with USB 3.0. Not compatible with the USB Hub or external USB-HDD. Not compatible with encrypted PDF. ...
-
Page 189: Printing Qr Codes Or Barcodes
Printing QR codes or barcodes You can print a QR code or barcode if you save the file containing the URL or the like in the OBC format to a USB memory, then connect the USB memory to this machine and finally print the file. Before printing, specify the number of rows and columns in which one QR code or barcode is to be placed on one sheet of paper. -
Page 190: Printing Ps Errors
Press ▲ or ▼ to select [Print], and press «OK». If the text string in the file (.obc) does not meet the standard of the QR code or barcode to be printed, X is printed on the QR code or barcode. ... -
Page 191: Correcting The Print Position Of The Tray
Correcting the print position of the tray You can correct the print start position vertically and horizontally on paper for each tray. Set the correction volume in increments of 0.25 mm on the operator panel. [X Adjust] and [Y Adjust] correct the simplex printing and the back side (the printing side fed from the tray) of duplex printing. -
Page 192: Printing With Print Data Encrypted And Password Set (Private Print)
Printing with print data encrypted and password set (Private Print) When printing private jobs, to prevent others from seeing the printing results of personal and confidential documents, the print data is encrypted and saved with a password in the machine's memory, and it is authenticated and printed from the operator panel. - Page 193 For macOS Open the file to be printed. Select [Print] from the [File] menu. Select the [Secure Print] panel. Select [Job Type] of [Secure Print]. Input the password in [Job Password]. Specify other settings as necessary, and click [Print]. Only the print data with a password set for encryption is sent to this machine, but without printing. If there is no detail settings displayed in the [Print] screen, click [Show details] at the bottom of the screen.
-
Page 194: Canceling The Printing
Canceling the printing To cancel the data being printed or ready to print, press «CANCEL» for a short time (2 seconds or less) on the operator panel. You can change how long the button is pressed from [Cancel Key Behavior] of the menu items. If you press «CANCEL», the following screen will be displayed. - Page 195 Check the operator panel of this machine. If "Processing" or "Data Present" is displayed, cancel the printing from this machine’s operator panel. - 196 -...
- Page 196 Management of this machine Admin password ..................198 Changing settings of Admin Setup ............203 Web page (Managing this machine from a PC) ........204 User restriction (Access control) ............228 Initializing the settings ................240 Moving/Transporting this machine ............242 Disposal ....................
-
Page 197: Admin Password
Admin password The admin password is used to change the settings of the machine. We recommend you to change the admin password to protect your personal information. Checking the factory default admin passwords The factory default admin password is set to a 10-digit value of this machine's serial number with upper-case letters converted to lower-case ones. - Page 198 Check that [Serial Number] is selected, and press «OK». Check the 10-digit alphanumeric characters displayed in [Serial Number]. Convert the upper-case letters of [Serial Number] into lower-case ones and use the converted string as the admin password. Checking by printing the menu map ...
-
Page 199: Inputting The Factory Default Admin Passwords
Check the leftmost 10 digits of the alphanumeric characters written on the sticker on the left to the L2 lever. You may convert the upper-case letters into lower-case ones and use the converted string as the admin password. Inputting the factory default admin passwords This section explains the procedure assuming that the factory default admin password is "ab01234567". -
Page 200: Changing The Admin Password
Press «OK» again to complete inputting the admin password and display [Admin Setup]. Changing the admin password The admin password can consist of 1 to 32 digits. The following characters can be used for the admin password. Upper-case letters ... - Page 201 Press «OK» again to display the [Verify Password] screen. Input the password again, and press «OK». When «OK» is pressed again, the password has been changed and the screen returns to [Admin Setup]. Admin password memo field - 202 -...
-
Page 202: Changing Settings Of Admin Setup
Changing settings of Admin Setup This section explains the procedure of changing settings of this machine as an administrator. Check that "Ready To Print" appears on the display. If the machine is in the power save mode, press «POWER SAVE» to restore. Press the scroll button ▼... -
Page 203: Web Page (Managing This Machine From A Pc)
Opening the web page Set the security level of your browser to medium or enable Cookies. This section takes the following environment for example. Device name: LP654C IP address of this machine: 192.168.0.2 Start the web browser. -
Page 204: Changing Admin Password (Web Page)
Click [Administrator Login]. Input "admin" in [User Name] and the current password in [Password], and click [OK]. The password is the same as "Admin Password" on the operator panel. Admin password When access control is enabled, you can log in as a local user with administrator privileges (with .AdminRole assigned). -
Page 205: Checking/Changing The State Of This Machine
Connecting via a wireless LAN Connecting via a wired LAN This section takes the following environment for example. Device name: LP654C IP address of this machine: 192.168.0.2 Checking the state of this machine Open the web page of this machine. -
Page 206: Saving Configurations
The following screen is displayed. You can check the supplies life, print statistics, and network and system information of this machine. Changing settings of this machine You can change settings of this machine from the web page. Open the web page of this machine. Opening the web page Log in as an administrator. -
Page 207: Communication Encryption (Ssl/Tls)
Click [Export MenuMap]. Save it with a name. Communication encryption (SSL/TLS) You can encrypt the communication between your PC and this machine. The communication is encrypted with SSL/TLS in the following cases. A certificate is pre-installed on this machine to enable the communication using HTTPS. Creating a certificate You can use a certificate when sending data to this machine connected to a network. - Page 208 Confirm the settings, and click [OK]. For a self-signed certificate, follow on-screen instructions to close the web page, and proceed to " ". Enabling encryption settings To obtain a certificate issued by a certificate authority, go to Step 7. Send the CSR to the certificate authority by following on-screen instructions.
-
Page 209: Using Ipp
Exporting a certificate This section describes how to export a certificate from the web page. Depending on the SSL/TLS communication function, your PC may require to trust the machine's certificate. Import the exported certificate of the machine into the PC's trusted certificate store in order for the PC to trust the machine. -
Page 210: Communication Encryption (Ipsec)
When the installation has completed, print a test page. For macOS Insert the included DVD to the PC, and install the driver. Installing software Select [System Preferences] from the Apple menu. Click [Printers & Scanners]. Click [+]. Click the [IP] tab. Select [IPP (Internet Printing Protocol)] in [Protocol]. -
Page 211: Using The Access Control Function (Ip Filter) With The Ip Address
Configure the settings following the on-screen instructions. For the "Phase 2 Proposal" setting, [AH] or [ESP] must be enabled. [AH] and [ESP] cannot be used simultaneously. When both [AH] and [ESP] are enabled, only [ESP] is used. Click [Submit]. The new settings will take effect after the network function of the machine has been reset. ... -
Page 212: Using The Access Control Function With The Mac Address
Using the access control function with the MAC address You can use the MAC Address to control the access to this machine. You can allow or deny the access from the specified MAC Address. Be sure to specify the correct MAC address. If you specify an incorrect MAC address, you will not be able to access the machine using the network. -
Page 213: Using Snmpv3
When the [E-mail Alert Settings] screen is displayed, select appropriate settings in [Way of E- mail Alerting], and click [To STEP2]. When you select [Upon occurrence of an event], an error is notified just once. When you select [Periodically], an error is notified periodically until it is cleared. Configure the settings following the on-screen instructions. - Page 214 Open the web page of this machine. Opening the web page Log in as an administrator. Logging in as an administrator Select [Admin Setup]. Select [Network] - [IEEE802.1X]. Select [Enable] in [IEEE802.1X]. Select [EAP-TLS] in [EAP Type]. Input the user name in [EAP User]. Select [Not use SSL/TLS Certificate for EAP authentication], and click [Import].
-
Page 215: Setting Ieee802.1X (Wireless Lan)
Click [Submit]. The new settings will take effect after the network function of the machine has been reset. When the machine is online, power off the machine. Remove the LAN cable from the machine. Go to " ". Connecting this machine to the authentication switch Connecting this machine to the authentication switch Check that this machine is powered off. -
Page 216: Connecting To A Wireless Lan (Wpa/Wpa2-Eap)
Select the CA certificate file, and click [OK]. Specify the CA certificate used for RADIUS server authentication. PEM, DER and PKCS#7 files can be imported. Click [Submit]. When this machine is online, go to " ". Connecting to a wireless LAN (WPA/WPA2-EAP) Setting with PEAP Open the web page of this machine. -
Page 217: Setting The Ldap Server
Select [Enable] in [Wireless(Infrastructure)] of [Basic Settings]. The factory default setting is "Disable". Select [Manually set the connection to access point ] in [Wireless Network Selection]. Select [Next]. Input the SSID name of the Wireless(AP Mode) network to connect in [SSID]. Select [WPA/WPA2-EAP] in [Security] of [Security Settings]. -
Page 218: Setting E-Mail Receiving (Web Page)
In [Method], select the required authentication method. [Anonymous]: Selected to access the LDAP server using anonymous authentication. [Simple]: Selected to access the LDAP server using simple authentication. [Digest-MD5]: Selected to access the LDAP server using Digest-MD5 authentication. [Secure Protocol]: Selected to access the LDAP server using Secure Protocol (Kerberos) authentication. If [Anonymous] is selected, authentication will always be anonymous, even when the LDAP server is used for LDAP name authentication. -
Page 219: Setting The Sleep Mode (Web Page)
Setting the sleep mode (Web page) Set the time that will elapse before the sleep mode is entered. Open the web page of this machine. Opening the web page Log in as an administrator. Logging in as an administrator Click [Admin Setup]. Click [Management] - [Power Setup]. - Page 220 Click [Admin Setup]. Click [Management] - [Settings Cloning]. Click [Settings Export]. Select the settings to be copied. Click [Export]. Specify the storage location, name the file, and click [Save]. The file may be saved without displaying the saving screen depending on the specific browser. Importing settings of this machine Open the web page of the device to which you want to copy the settings.
-
Page 221: Setting Items Of The Web Page
Setting items of the web page View Information Item Description Status Displays the current status of this machine. Displays all warnings and errors that have occurred in this machine as "Alert Information". Further, you can also check the operation status of each network service, information list, and IP addresses set in this machine. - Page 222 Admin Setup This function is available when you log in as an administrator of this machine. Network Item Description General Network Settings Sets the connection method of the network. Wired(LAN1) Setup Sets the standard wired LAN connection. You can disable the Energy Efficient Ethernet (EEE) function of the wired network (LAN1) by setting [Energy Efficient Ethernet] included in this item to [Disable].
- Page 223 Item Description SSL/TLS Encrypts communication between this machine and your PC (client). IPSec Sets the encryption and tampering of communication between this machine and your PC (client). WebPage Authentication Sets the web page authentication method. Method Maintenance Reset/Restore Initializes or resets the network card. If it is reset, the web page will not be displayed even if you access from the web browser until you have reset.
- Page 224 Item Description Job Limitation Sets whether to save restricted print data. When [Private Print only] is selected, print data other than private print will not be accepted. Verify job password Selects whether to verify the job password when the access control is enabled.
- Page 225 Job Lists This function is available when you log in as an administrator of this machine. Item Description Job Lists Displays a list of print data sent to this machine. You can delete unnecessary print data. Direct Print Item Description Web Printing Prints with any PDF file specified.
- Page 226 User Management This function is available when you log in as an administrator of this machine. Item Description User List Registers/Deletes a user to use this machine. A maximum of 5,000 users can be registered. Role List Manages the role assigned to the user. A maximum of 100 roles can be registered.
-
Page 227: User Restriction (Access Control)
User restriction (Access control) Access control is a function that a user authenticated by this machine can only perform permitted operations. Before using this machine, user authentication is required. The information required for user authentication is one of the following three types: user name and password, PIN (Personal Identification Number) and IC Card. To use the access control function, the administrator of this machine registers the user information, sets the authentication method, and enables access control. - Page 228 By default, two types of roles are registered. .AdminRole: The role of the device administrator. It can be assigned to general users. A user with [.AdminRole] assigned can act as a device administrator and perform [Administrator Login] on the web page. (However, the condition is that access control is enabled and it is a local user.) [.AdminRole] cannot be deleted or edited.
- Page 229 Click [Submit]. You can copy registered roles and add new roles based on the copied configuration. When you click [Copy] to the right of the role name, the role information screen will be displayed, so change and register the required items. Registering a user When performing user authentication using the local confirmation method, register the user on this machine from the web browser.
- Page 230 When the User Information Settings screen is displayed, input the required information. User Name: Input the user name. The same [User Name] can not be registered. Be sure to set it. Password: Input the password. Be sure to set it. ...
- Page 231 When the Group Information screen is displayed, input the required information. Group Name: Input any group name. Be sure to set it. Group Description: Input a description for the group. Local User List: Set the user you want to assign to this group. ...
- Page 232 Create user information based on the LDAP server information. Input the LDAP key from which each value is obtained. Display name: Set the LDAP key to obtain the display name of user information. Mail address: Set the LDAP key to obtain the E-mail address of user information. ...
- Page 233 When the role assignment screen is displayed, input the LDAP key, the LDAP value and the applicable role. When the LDAP value which is registered in the role assignment regulations of the user, and the LDAP value defined by the regulations are identified at the time of authentication, apply the role which is defined by each role assignment regulation to each user.
-
Page 234: Logging Into This Machine
Guest user use: Guest is a user assigned to those who are not successful with user authentication when the access control is enabled. This setting is used to enable or disable the use of this machine by guest. When [Disable] is set, you can limit the use of this machine by users who failed the user authentication. -
Page 235: Printing From A Pc
Check that "Ready To Print" appears on the display. If the machine is in the power save mode, press «POWER SAVE» to restore. Press the scroll button ▲ or ▼ on the operator panel to select [Local Name], and press «OK». Input your own user name, and press «OK». - Page 236 Open the "Devices and Printers". How to open the printer folder Right-click on the icon of [PRINTRONIX LP654C *], and select [Printer properties]. * Driver types (e.g. PCL6/PS) For the Windows PCL printer driver, select the [Device Options] tab, and click [User Authentication Options].
-
Page 237: Registering Ic Card Information
For macOS Here is an example with Text Edit. Select [Print] from the [File] menu. Select the printer driver for this machine. Select [User Authentication] from the panel menu. Check [Use User Authentication]. Uncheck [Use User Authentication] if the PIN of the job accounting client is used as user authentication information. - Page 238 This function is not available if you log in using any method other than local authentication. This function is not available when "Register general user's IC card" is set to [Disable] by the administrator. Enabling access control Log into this machine using the local authentication method. Logging into this machine Press the scroll button ▼...
-
Page 239: Initializing The Settings
Initializing the settings This section explains how to initialize the built-in memory and the settings of this machine. Initialization is done to delete the data and settings saved in this machine and restore the machine to its initial settings. When you forget the admin password, the settings cannot be initialized. Initializing network settings The network settings will return to factory defaults after initialization. -
Page 240: Initializing Settings Of This Machine
Press ▲ to select [Flash Memory Setup], and press «OK». Select [Initialize] or [Format Partition], and press «OK». To initialize it, check that [Execute] is selected, and press «OK». To format partition, select the partition to be formatted, and press «OK». There are two methods to initialize a memory ... -
Page 241: Moving/Transporting This Machine
Moving/Transporting this machine This section describes how to move or transport this machine. Moving this machine Doing so may cause injury. This machine weighs approx. 30 kg, so be sure to have it lifted by at least 2 personals. Power off this machine. Remove all cables. - Page 242 Put the toner cartridge into a plastic bag. Close the front cover firmly with both hands. If the optional expansion tray unit is installed, use a flat-head screwdriver to remove the parts (x 2) that fix this machine and the expansion tray unit. Do not remove the parts connecting the expansion tray yet.
- Page 243 If there are multiple expansion tray units, use a flat-head screwdriver to remove all the fixing parts and pack them together. If the caster stand is installed, use a Phillips-head screwdriver to remove the metal fixtures (x 2) that fix the caster stand and the expansion tray unit. Use a flat-head screwdriver to turn the positioning pins (x 2) in the arrow direction to remove them from the caster stand.
- Page 244 Pinch the protrusion of the anti-tip foot b through the hole on the caster stand and push it out to remove the anti-tip foot b. Follow the same procedure to remove the remaining anti-tip feet b. Remove the anti-tip foot a from the caster stand. Put the caster stand in the packing box.
-
Page 245: Disposal
Disposal To dispose of this machine, it is recommended to erase the information registered or saved in this machine. The following items are included in the information saved in this machine. Admin Password Various menu settings Private print data ... - Page 246 Color Correct Utility ................262 PS Gamma Adjuster ................268 Configuration Tool .................. 270 Printronix LPR Utility ................281 Network Card Setup Utility (macOS) ............285 This section describes the software for using this machine more conveniently. - 247 -...
-
Page 247: Software List
ICC profiles in the printer. The registered ICC profile is used for color matching in the [Graphics Pro] mode of the printer driver. Printronix LPR utility You can check the status of this machine connected to the Printronix LPR Utility... -
Page 248: Applications For Mobile Devices
Item Description Reference Mobile Print You can print web pages or photos with an Printronix LED Using the Mobile Print printer or LED MFP connected to a network via a wireless LAN from your smartphone, tablet or other mobile devices. -
Page 249: Installing Software
Installing software Follow the procedure below to install the software you want to use. If your PC does not come with a DVD drive, or if you want to update the software, download and install it from the website. For Windows Install the software that you want to use with the included DVD. -
Page 250: For Macos
Drag and drop to copy it to the place you want. You can also start directly from the provided DVD. Insert the included DVD to the PC. Double-click on [PRINTRONIX] - [Utility] folder. Drag and drop to copy the software folder you want to install to the place you want. -
Page 251: Monitoring Tool (Windows)
Registering the printer Register the printer to be monitored with the Monitoring Tool. Select [Start] - [Printronix] - [Monitoring Tool] to start the Monitoring Tool. Select [Register printer] from the [Settings] menu. Select the printer to be registered from the printer list, and click [Register]. -
Page 252: Updating The Printer Software
Click [Close]. Check that the registered printer is displayed. Updating the printer software Monitoring Tool checks the status of this machine periodically. When software update is available for this machine, follow the on-screen instructions to update the software. When update is available for software, [Update Recommended] is displayed in the [Status] field. Click [Update] on the line where [Update Recommended] is displayed. -
Page 253: Updating The Printer's Firmware
Check that [The latest software] is displayed in the [Status] field. Select [Quit] from the [File] menu. Updating the printer’s firmware Monitoring Tool checks the status of this machine periodically. When firmware update is available for this machine, follow the on-screen instructions to update the firmware. When firmware update is available for this machine, [Update Recommended] is displayed in the update field. -
Page 254: Changing Settings Of Monitoring Tool
Select [Quit] from the [File] menu. Changing settings of Monitoring Tool Select [Start] - [Printronix] - [Monitoring Tool] to start the Monitoring Tool. Select [Environmental settings] from the [Settings] menu. Set the values in each tab, and click [Apply]. -
Page 255: Deleting The Printer
Restore default Returns all settings to default values. Deleting the printer Delete a printer registered with the Monitoring Tool. Select [Start] - [Printronix] - [Monitoring Tool] to start the Monitoring Tool. Select [Delete printer] from the [Settings] menu. - 256 -... -
Page 256: Troubleshooting (Monitoring Tool)
Check the printer to be deleted, and click [Delete]. Troubleshooting (Monitoring Tool) Please check the following explanation and "Frequently Asked Questions (FAQs)" on your smartphone app or the website. If the problem persists, contact your dealer. For problems arising from the application, contact the application development company. When firmware update has failed Cause Solution... -
Page 257: Network Extension
Network Extension is automatically installed when the printer driver is installed in a TCP/IP network. Network Extension works in conjunction with the printer driver. Do not install Network Extension only. Network Extension works only when the printer driver is connected to the Printronix LPR port or standard TCP/IP port. -
Page 258: Setting Options Automatically
Setting is not possible when Network Extension is used in an unsupported environment. Uninstalling Network Extension Click [Start], and select [Windows System Tools] - [Control Panel] - [Programs and Features]. Select [Printronix Network Extension], and click [Uninstall]. Finish the uninstallation by following the on-screen instructions. - 259 -... -
Page 259: Color Swatch Utility
The Color Swatch Utility is installed automatically when the printer driver is installed. Printing a color sample Click [Start], and select [Printronix] - [Color Swatch Utility]. Click [Print]. Select the device you want to adjust from [Name]. Click [OK]. -
Page 260: Printing A File In Your Desired Color
Printing a file in your desired color Open the file to be printed. Select the text or graphic, and adjust the RGB values from the application. Print the file. Read the User's Manual of the application for instructions on how to specify the color in the application. ... -
Page 261: Color Correct Utility
You can use the Color Correct Utility to specify colors of the palette selected in software like Microsoft Excel. For Windows Click [Start] and select [Printronix] - [Color Correct Utility]. Select [Office Palette Tuning], and click [Next]. and click [Next]. -
Page 262: Changing Gamma Values And Hues
Click [Print Test] to check whether the adjusted color is closer to the color you want, and then click [Next]. If you want to further change the color or change other colors, repeat Steps 8 to 11. Input a name for the setting, and click [Save]. Click [OK]. - Page 263 For Windows Click [Start] and select [Printronix] - [Color Correct Utility]. Select [Hue & Saturation Tuning], and click [Next]. Select the device to be adjusted, and click [Next]. Select the standard mode, and click [Next]. If the settings are initialized after the printer driver has been updated and reinstalled, start the Color Correct Utility to automatically reset the name of the color tuning.
-
Page 264: Printing With Tuned Color Settings
To use this function, you will have to log into the PC as a user with administrator privileges. For Windows Click [Start] and select [Printronix] - [Color Correct Utility]. Select [Import/Export Color Settings] , and click [Next]. Select the device where you want to save the settings, and click [Next]. -
Page 265: Importing Color Tunning Settings
Click [OK] on the confirmation screen. Importing color tunning settings For Windows Click [Start] and select [Printronix] - [Color Correct Utility]. Select [Import/Export Color Settings] , and click [Next]. Select the device into which you want to import settings, and click [Next]. - Page 266 Select [Import/Export Color Settings] , and click [Next]. Select the device from which you want to delete the settings, and click [Next]. Select the settings to be deleted, and click [Delete]. Click [Yes] on the confirmation screen. Check that the settings have been deleted correctly, and click [Finish]. For macOS Start the Color Correct Utility.
-
Page 267: Ps Gamma Adjuster
"Devices and Printers", the registered [Gamma Curve Name] is valid for all identical models. Registering a gamma adjuster name For Windows PS printer driver Click [Start], and select [Printronix] - [PS Gamma Adjuster]. Select [Printronix LP654C PS] from [Select Printer]. Click [New]. -
Page 268: Printing With Registered Halftone
Delete the registered device to which the adjustment has been set, and then register it again. Do not click the [Config] button displayed while adding the printer. If a dialog box for selecting a printer option is displayed while adding a printer, click [Cancel] and then add the printer again. -
Page 269: Configuration Tool
Registering this machine Register this machine with the Configuration Tool when installing it for the first time. Click [Start] and select [Printronix] - [Configuration Tool]. Select [Register Device] from the [Tools] menu. When registrable devices are displayed, select this machine, and click [Register]. -
Page 270: Displaying Job Completion On The Pc
Displaying job completion on the PC The time and time zone of this machine must be consistent with your PC. Setup Click [Start] and select [Printronix] - [Configuration Tool]. Select [Alert Info] from the [Plug-in] menu. Select [Basic settings]. - Page 271 Change the settings as necessary, and click [OK]. Filter Settings You can set alert conditions to be displayed when an e-mail is received during printing. Click [Start] and select [Printronix] - [Configuration Tool]. Select [Alert Info] from the [Plug-in] menu. Select [Filter settings].
-
Page 272: Setting The Network
Checking logs From the event log, you can check whether there are any records for this registered machine. Click [Start] and select [Printronix] - [Configuration Tool]. Select [Alert Info] from the [Plug-in] menu. Select [Display log]. Select [Devices displaying log]. -
Page 273: Registering Icc Profiles
Registering ICC profiles You can register and edit printer profiles in this machine. This section explains how to register ICC profiles. Click [Start] and select [Printronix] - [Configuration Tool]. Select [Storage Manager] from the [Plug-in] menu. Click the [New Project] icon. -
Page 274: Checking Free Space Of Memory/Hard Disk
Select the original port from [Printing Port] on the [Port] tab, and click [OK]. Registering a form with this machine using Configuration Tool Click [Start] and select [Printronix] - [Configuration Tool]. Select [Storage Manager] from the [Plug-in] menu. Click the [New Project] icon. -
Page 275: Registering The User Name And Password
The changed settings are reflected in this machine when the [Save to device] icon is clicked. Creating a new user Click [Start] and select [Printronix] - [Configuration Tool]. Select this machine from [Registered Device Table]. Select the [User Setting] tab. -
Page 276: Deleting This Machine
Deleting a user Click [Start] and select [Printronix] - [Configuration Tool]. Select this machine from [Registered Device Table]. Select the [User Setting] tab. Click [Role management]. Input the admin password, and click [OK]. Admin password Click [User Name/Group]. Select the check box of the user to be deleted. - Page 277 [User Setting] tab Sets the user, role and so on. Item Description Role management Registers/Edits the user and role [Alert Info] plug-in Detects and notifies the event such as the end of printing. Item Description Basic settings Configures basic settings such as the notification method and detection interval Setting devices Sets the type and presence of the event notified by each device...
- Page 278 [Network Setting] plug-in Sets the network information. Item Description Discover Devices Searches for network devices. Environment Settings Changes the device detection criteria and communication options. [Storage Manager] plug-in Registers and edits files to be downloaded to the device. - 279 -...
-
Page 279: Icon Description
Icon description Icon Icon name Description Device Settings Changes the IP address or other settings of this machine. Create New Project Creates a new project. Add File to Project Adds files to a project. Send Project Sends a project to this machine. Save to Device Saves the settings to this machine. -
Page 280: Printronix Lpr Utility
If this machine cannot be added, exit the Printronix LPR utility, right-click on [Start] - [Printronix] - [Printronix LPR Utility], and select [More] - [Running As Administrator] to restart the utility. You cannot set a device that is already registered in the Printronix LPR Utility. To change the port, select [Confirm Connections] from [Remote Print]. -
Page 281: Transferring Print Data To The Registered Device
Transferring print data to the registered device This section explains how to transfer the specified print data to a registered device using the Printronix LPR utility. This section also explains how to transfer the print data to another device when a problem occurs on the destination device. -
Page 282: Opening The Web Page Of A Registered Device
Input the IP address of the devices to print at the same time, and click [OK]. Click [OK]. Opening the web page of a registered device You can open the web page of this machine from the Printronix LPR Utility. Start the Printronix LPR Utility. Select this machine. -
Page 283: Setting The Port Number Of The Web Page For The Registered Device
Input the port number of web page in [Port Numbers]. Click [OK]. Sending files to this machine registered with the Printronix LPR utility If this machine is connected to the network and registered with the Printronix LPR utility, you can download the print data. Start the Printronix LPR utility. -
Page 284: Network Card Setup Utility (Macos)
Network Card Setup Utility (macOS) The network setting can be done using the Network Card Setup Utility. TCP/IP must be enabled to use the Network Card Setup Utility. Setting the IP address Start the Network Card Setup Utility. Installing software Select this machine from the list. - Page 285 Printing from a mobile device Printing from a mobile device ..............287 Showing troubleshooting tips on a mobile device ........291 Troubleshooting for the mobile device ........... 292 - 286 -...
-
Page 286: Printing From A Mobile Device
Web browser, and photos taken with the built-in camera directly onto an Printronix printer or MFP from your smartphone, tablet or other mobile devices. Download Mobile Print from App Store or Google Play Store. -
Page 287: Airprint
Printing with this machine registered with the app Enable the NFC function of your mobile device, and enable Wi-Fi. Bring the NFC antenna of the mobile device close to the NFC mark on this machine’s operator panel. This machine is registered to the mobile device application. If it has already been registered, only the destination is set. - Page 288 Connect this machine and the PC via a wireless or wired LAN. Select [System Preferences] from the Apple menu. Click [Printers & Scanners]. Click [+], and then click [Add Printer or Scanner]. Select [Printronix-LP654C-******] , and click [Add]. - 289 -...
- Page 289 Make sure that this machine is displayed in [Printer] and [LP654C-AirPrint] is displayed in [Type]. Close [Printers & Scanners]. Printing with AirPrint (Print) When using AirPrint on a Mac, register this machine on Mac in advance. Registering this machine on Mac Printing from an iOS device Open the file to be printed.
-
Page 290: Showing Troubleshooting Tips On A Mobile Device
Showing troubleshooting tips on a mobile device If an error has occurred in the machine, pressing «HELP» on the operator panel will display the error correction method on the display. At this time, if you move the mobile device* closer to the NFC mark on this machine when "NFC" appears on the upper left corner of the display, the search result of the page of a more detailed solution from "Frequently Asked Questions (FAQ)"... -
Page 291: Troubleshooting For The Mobile Device
Troubleshooting for the mobile device Troubleshooting for MobilePrint This machine may take 2 to 3 minutes to join a network after power-on. Make sure that the machine is connected to the network before attempting to print. This machine cannot be registered in the app Cause Solution Reference... - Page 292 Cause Solution Reference If the power is on, turn the power off and then on again to Turning the power off see if the problem is solved. Is the machine connected to Check if this machine is displayed on the iOS print screen. the same network as the iOS If this machine is not displayed, check the IP address.
- Page 293 Maintenance Precautions for replacing consumables ..........295 Service life and replacement cycle of consumables ......296 Replacing the black(K) toner cartridge and the waste toner box ... 298 Replacing the toner cartridge (C/M/Y) ............ 301 Replacing the image drum ..............303 Service life and replacement cycle of maintenance parts ......
-
Page 294: Precautions For Replacing Consumables
Store the used toner cartridge and the waste toner box in a bag so that toner does not scatter. Use genuine Printronix consumables for optimum performance. Failures caused by using non-genuine consumables may void the warranty or maintenance contract. (The use of non-genuine consumables will not necessarily cause failures, but please fully take notice of such usage.) -
Page 295: Service Life And Replacement Cycle Of Consumables
Printing quality will decline after the toner cartridge stays unpacked for one year or longer. Therefore, prepare a new toner cartridge. Use genuine Printronix consumables for optimum performance. Failures caused by using non-genuine consumables may void the warranty or maintenance contract. (The use of non-genuine consumables will not necessarily cause failures, but please fully take notice of such usage.) - Page 296 Do not expose the image drum to direct sunlight or strong light (About 1,500 lux or above). Do not leave it uncovered for more than 5 minutes even under room lighting. Use genuine Printronix consumables for optimum performance. Failures caused by using non-genuine consumables may void the warranty or maintenance contract. (The use of non-genuine consumables will not necessarily cause failures, but please fully take notice of such usage.)
-
Page 297: Replacing The Black(K) Toner Cartridge And The Waste Toner Box
Replacing the black(K) toner cartridge and the waste toner The black(K) toner cartridge comes with a waste toner box. By following on-screen instructions, replace the waste toner box first and then the black(K) toner cartridge. Press the knob on the lower left corner on the front of the machine, and open the waste toner box cover toward you. - Page 298 Take the new black(K) toner cartridge out of its packing box. Shake the new toner cartridge both horizontally and vertically for several times. Pull the front cover open lever (blue) to open the front cover. Pull out the black(K) toner cartridge from the machine. Install the new black(K) toner cartridge into the machine.
- Page 299 Press «OK». Check that no error message appears on the display. Please recycle the used toner cartridge and waste toner box. - 300 -...
-
Page 300: Replacing The Toner Cartridge (C/M/Y)
Replacing the toner cartridge (C/M/Y) This section takes the toner cartridge (M) as an example. The toner cartridge (C/Y) can be replaced by the same procedure. To replace the black toner cartridge (K), please refer to "Replacing the black(K) toner cartridge and the waste toner ". - Page 301 Close the front cover firmly with your both hands. Please recycle the used toner cartridge. - 302 -...
-
Page 302: Replacing The Image Drum
Replacing the image drum Pull the front cover open lever (blue) to open the front cover. Pull the L1 lever towards you until the red triangle mark on the L1 lever is aligned with the red triangle mark inside the machine. If the two red triangle marks are not aligned correctly, you cannot proceed to the procedure of replacing the image drum. - Page 303 Check the image drum to be replaced by the label color. Remove the image drum of the color to be replaced. Because image drums (green parts) can easily get damaged, handle with adequate care. Do not expose the image drum to direct sunlight or strong light (About 1,500 lux or above). Do not leave it uncovered for more than 5 minutes even under room lighting.
- Page 304 The output tray cannot be closed unless the image drum basket is pushed all the way in. Close the output tray, and push both sides down from top. Press the L1 lever all the way in. The front cover cannot be closed unless all the image drums of the four colors are installed. Close the front cover firmly with both hands.
-
Page 305: Service Life And Replacement Cycle Of Maintenance Parts
Service life and replacement cycle of maintenance parts Belt unit Service life of the belt unit The belt unit can print approximately 60,000 sheets of A4-sized paper (for simplex printing), but the actual printable number of sheets may vary with the usage condition. The above number is based on the general usage condition (three sheets at a time). -
Page 306: Fuser Unit
Fuser unit Service life of the fuser unit The fuser unit can print approximately 60,000 sheets of A4-sized paper (for simplex printing), but the actual printable number of sheets may vary with the usage condition. The above number is based on the general usage condition (three sheets at a time). If you print a single sheet at a time, the life may be reduced by half. -
Page 307: Replacing The Belt Unit
Replacing the belt unit For the replacement cycle, see " ". Belt unit Pull the front cover open lever (blue) to open the front cover. Pull the L2 lever and lift the output tray to the stop position. Remove the belt unit by holding its blue handle. Doing so may cause burns. - Page 308 Install the belt unit in this machine by holding its blue handle. Close the output tray, and push both sides down firmly from top. Close the front cover firmly with both hands. Please recycle the used belt unit. - 309 -...
-
Page 309: Replacing The Fuser Unit
Replacing the fuser unit For the replacement cycle, see " ". Fuser unit Lift the left and right handles of the fuser unit at the back of the output tray until a click is heard, and then release the lock. The fuser unit cannot be removed unless its handle is raised vertically. - Page 310 With the warning label of the new fuser unit facing the front, hold both the left and right handles and install the fuser unit into this machine. Push down the left and right handles of the fuser unit to lock. Make sure that the fuser unit does not float from the top of the output tray.
-
Page 311: Cleaning The Main Unit And The Parts
Cleaning the main unit and the parts Cleaning the LED head If there are white stripes on the output paper, the image is faded or the text is blurred, clean the LED head. Do not use methyl alcohol or thinner. Doing so may damage the LED head. ... -
Page 312: Cleaning The Surface Of The Main Unit
Gently wipe the lens surface of the LED head (x 4) with a soft tissue paper. Do not expose the image drum to direct sunlight or strong light (About 1,500 lux or above). Do not leave it uncovered for more than 5 minutes even under room lighting. Close the output tray, and push both sides down from top. -
Page 313: Cleaning Paper Feed Rollers (Trays 1-4)
Clean the surface of this machine with a cloth slightly moistened with water or a neutral detergent. Only use water or a neutral washing agent. Wipe the surface of this machine with a soft dry cloth. Cleaning paper feed rollers (Trays 1-4) If paper jams occur frequently, clean the paper feed roller. -
Page 314: Cleaning The Paper Feed Roller (Mp Tray)
Remove the paper from the paper cassette. Wipe the separation roller of the cassette with a cloth slightly moistened with water. Load the paper in the paper cassette. Return the paper cassette to this machine. Cleaning the paper feed roller (MP tray) If paper jams occur frequently, clean the paper feed roller. - Page 315 While lifting the MP tray gently, press the right arm inwards and remove the protrusion of the arm from the groove. Lower the MP tray, and lift up the protrusion of the arm. By referring to Steps 3 and 4, remove the protrusion of the left arm of the MP tray from the groove and lift it up.
- Page 316 Press down on the center of the MP tray, place your finger over the small window on the separation roller cover and push it up to remove the separation roller. Wipe the separation roller with a cloth slightly moistened with water (while rotating it in the arrow direction).
- Page 317 Press down on the center of the MP tray, and then press and hold the white part which is visible through the small window at the bottom of the separation roller cover. With the protrusion side on the left, install the paper feed roller (without gear) onto the lower shaft by sliding it into the innermost position.
-
Page 318: Cleaning The Light-Shielding Film
While pressing the right arm of the MP tray inwards, lift the MP tray lightly and hook the protrusion of the arm into the groove. If you close the MP tray without hooking the protrusion of the arm to the correct position, the paper placement cover may be broken. -
Page 319: Cleaning The Resist Roller
Install the image drum to this machine. Replacing the image drum Clean the light-shielding film of other image drums as well. Cleaning the resist roller When horizontal streaks appear on the printing result, clean the resist roller to improve the printing. Pull the front cover open lever (blue) to open the front cover. -
Page 320: Updating Software
Updating software You can update the printer driver and other software to the latest version. A PC connected to the Internet is required for the update. For Windows For Windows, use the Monitoring Tool. Monitoring Tool (Windows) For macOS For macOS, please refer to the website. - 321 -... -
Page 321: Deleting Software
Deleting software This section explains how to delete the printer driver from your PC. The specific method may differ for different printer drivers and versions of Windows or macOS. Uninstalling the Windows printer driver To perform this procedure, you will have to login to the PC as a user with administrator privileges. ... - Page 322 Insert the provided DVD to the PC. Double-click on [Printronix] - [Drivers] - [PS] - [Uninstaller]. Confirm the model to be deleted displayed in the dialog box, and click [OK]. Follow the on-screen instructions to delete the printer driver. Once the deletion is complete, remove the included DVD from your computer.
-
Page 323: Firmware Update
Firmware update You can update the printer firmware (device control program) to the latest version. A PC connected to the Internet is required for the update. For Windows For Windows, use the Monitoring Tool. Monitoring Tool (Windows) For macOS For macOS, please refer to the website. - 324 -... - Page 324 Troubleshooting When an error message appears on the display ........326 When paper is jammed ................337 Trouble with printing ................355 Troubleshooting for printing results ............361 Software troubleshooting ............... 373 Troubleshooting for this machine and paper .......... 374 - 325 -...
-
Page 325: When An Error Message Appears On The Display
When an error message appears on the display If a problem occurs to this machine, the ATTENTION lamp will light on or flash, and a message will appear on the display. Check the message on the display and take action based on the corresponding message. If [Please see HELP for details] appears at the bottom of the display, press «HELP»... -
Page 326: Error Message List
Error message list Clear the error by referring to the description of the corresponding message. Meanings of symbols used in the error message are as follows. Color Name: One of the following: cyan (C), magenta (M), yellow (Y), black (K) ... - Page 327 Message Error code Description Please See HELP For Details You can continue printing for a while by opening and closing the front cover. To replace the fuser unit, see "Replacing the fuser unit ". Belt Unit End Of Life. Replace With The belt unit has reached the end of its service life.
- Page 328 Message Error code Description Replace With A New Toner You can continue using the device for a while by opening and Cartridge And A New Waste Toner closing the front cover, but the image drum may be Box At The Same Time. Please damaged.Therefore, please replace the toner cartridge with a See HELP For Details new one promptly.
- Page 329 Message Error code Description Wireless Startup Failed Restart this machine. Press OK To Hide This Message. If the problem still persists even after the reboot, power off this Please See HELP For Details machine and check that the model name of the wireless LAN module is applicable to this machine.
- Page 330 Message Error code Description Please See HELP For Details Install the toner cartridge. To install the toner cartridge, see "Replacing the black(K) toner cartridge and the waste toner " or "Replacing the toner cartridge (C/M/Y) ". 610: Yellow; 611: Magenta; 612: Cyan; 613: Black Non Recommended Color Name 549, 550, 551, The toner cartridge of the displayed color is not optimal for this...
- Page 331 Message Error code Description Caution: Non-Genuine You can use any consumables/maintenance parts, but the print consumable detected. Check quality may be lowered and the optimum performance may not User's Manual "Trouble Shooting" be obtained. to restore machine operation If the use of non-genuine consumables/maintenance parts causes damage to the product or results in your product not functioning to its full specification, such damage or effects on the product are not covered by warranty.
- Page 332 The image drum of the displayed color has reached the end of Maximum Performance Always its service life. Please replace the image drum with a new one. Use Printronix Original It is recommended to use the image drum that is optimal for this machine.
- Page 333 Message Error code Description Color Name Toner Low. Search After the message of replacement is displayed, please replace Keyword: P10081 it with a new one. There is no paper in the indicated tray. Tray Name Empty Please load paper. The displayed tray is not properly installed. Tray Name Cassette Missing Please install the tray.
- Page 334 Message Error code Description Color Name Non Recommended It is recommended to use the toner cartridge that is optimal for Toner Detected. Search Keyword: this machine. P40947 The belt unit is not optimal for this machine. Non Recommended Belt It is recommended to use the belt unit that is optimal for this Unit.Search Keyword: P40444 machine.
- Page 335 Message Error code Description An error has occurred to the NFC unit. NFC Unit Error. NFC Function Is NFC-specific functions are not available. Not Available Power off/on this machine. You can hide this message by selecting [Disable] for [Admin Press OK To Hide This Message Setup] - [Others Setup] - [NFC Setup].
-
Page 336: When Paper Is Jammed
When paper is jammed For the error code 370 or 371 Remove the jammed paper from the output exit. Pull the front cover open lever (blue) to open the front cover. Pull the L2 lever and lift the output tray until it reaches the stop position. Remove the paper left on the belt unit if any. - Page 337 Lift the belt unit up by holding its handle. Remove the paper left under the belt unit if any. Reset the belt unit. Close the output tray, and push both sides down from top. Lift the left and right handles of the fuser unit at the back of the output tray until a click is heard, and then release the lock.
- Page 338 Remove the fuser unit from this machine by holding its left and right handles. Doing so may cause burns. When the fuser unit is hot, wait until it cools down before any operation. Do not expose this machine with the fuser unit removed to direct sunlight or strong light (About 1,500 lux or above).
-
Page 339: For The Error Code 372
With the warning label of the fuser unit facing you, hold both the left and right handles. Place the fuser unit in this machine, tilt its left and right handles inward, and lock the fuser unit. Make sure that the fuser unit does not float from the top of the output tray. If floating, the fuser unit will not be recognized so that it is not possible to start printing. - Page 340 Pull the front cover open lever (blue) to open the front cover. Pull the L2 lever and lift the output tray until it reaches the stop position. Remove the paper left on the belt unit if any. Doing so may cause burns. Do not touch the fuser unit because it is hot.
-
Page 341: For The Error Code 380
Remove the paper under the belt unit if any. Reset the belt unit. Close the output tray, and push both sides down from top. Close the front cover firmly with both hands. For the error code 380 Pull the front cover open lever (blue) to open the front cover. - 342 -... -
Page 342: For The Error Code 381
Pull out the jammed paper gently. Close the front cover firmly with both hands. For the error code 381 Remove the jammed paper from the output exit. Pull the front cover open lever (blue) to open the front cover. Pull the L2 lever and lift the output tray until it reaches the stop position. - 343 -... -
Page 343: For The Error Code 382 Or 385
Remove the paper on the belt unit if any. Doing so may cause burns. Do not touch the fuser unit because it is hot. Because image drums (green parts) can easily get damaged, handle with adequate care. Do not expose the image drum to direct sunlight or strong light (About 1,500 lux or above). Do not leave it uncovered for more than 5 minutes even under room lighting. - Page 344 Pull the front cover open lever (blue) to open the front cover. Pull the L2 lever and lift the output tray until it reaches the stop position. Remove the paper left on the belt unit if any. Doing so may cause burns. Do not touch the fuser unit because it is hot.
- Page 345 Lift the left and right handles of the fuser unit at the back of the output tray until a click is heard, and then release the lock. The fuser unit cannot be removed unless its handle is raised vertically. Holding both the left and right handles of the fuser unit, remove the fuser unit from this machine. Doing so may cause burns.
- Page 346 If paper is jammed in the fuser unit, with the warning label of the fuser unit facing you, slowly pull out the jammed paper towards you. Doing so may cause burns. When the fuser unit is hot, wait until it cools down before any operation. Do not pull out in the reverse direction.
-
Page 347: For The Error Code 390
For the error code 390 Temporarily remove any paper loaded in the multi-purpose tray (MP tray). Pull the front cover open lever (blue) to open the front cover. Hold the edge of the jammed paper and pull it out gently. When the top edge is not visible, slowly pull out the paper from its rear edge. -
Page 348: For The Error Code 391, 392, 393 Or 394
For the error code 391, 392, 393 or 394 This section takes the error code 391 (indicating that the paper is jammed in Tray 1) for example. For the error code 392, 393 or 394, remove the jammed paper by following the same procedure. ... -
Page 349: For The Error Code 638
Open and close the front cover. Error cannot be cleared without opening and closing the front cover. For the error code 638 First, check all the trays and remove the remaining paper. Then, remove the remaining paper inside the machine. This section explains how to remove the paper from Tray 2 as an example. - Page 350 Return the paper cassette to this machine. For all trays, repeat Steps 1 - 3 to remove the remaining paper. Pull the front cover open lever (blue) to open the front cover. Pull out the jammed paper slowly if any. Pull the L2 lever and lift the output tray until it reaches the stop position.
- Page 351 Remove the paper left on the belt unit if any. Doing so may cause burns. Do not touch the fuser unit because it is hot. Because image drums (green parts) can easily get damaged, handle with adequate care. Do not expose the image drum to direct sunlight or strong light (About 1,500 lux or above). Do not leave it uncovered for more than 5 minutes even under room lighting.
- Page 352 Close the output tray, and push both sides down from top. Lift the left and right handles of the fuser unit at the back of the output tray until a noise is heard, and then release the lock. The fuser unit cannot be removed unless its handle is raised vertically. Holding both the left and right handles of the fuser unit, remove the fuser unit from this machine.
- Page 353 If paper is jammed in the fuser unit, with the warning label of the fuser unit facing you, slowly pull out the remaining paper towards you. Doing so may cause burns. When the fuser unit is hot, wait until it cools down before any operation. Do not pull out in the reverse direction.
-
Page 354: Trouble With Printing
Set this machine as the default printer. default printer. Open the "Devices and Printers", right-click on the [Printronix LP654C *] icon, and select [Set as Default Printer]. * represents the type of driver. (e.g. PCL6/PS) For Windows 10, uncheck "Let Windows manage my default printer". -
Page 355: Troubleshooting For Wired Lan Connection
Make sure that the print port of the printer driver is correct. For the Printronix LPR utility, check the IP address settings with the Printronix LPR utility. The WSD port is in use. - Page 356 PC. Make sure the configured IP address, subnet mask and gateway address are all correct. For the Printronix LPR Utility, check the IP address settings with the Printronix LPR Utility. The WSD port is in use.
- Page 357 Unable to connect to wireless LAN (Infrastructure) First, print out the Network Information, and then check the following explanation while having a look at items numbered ① to ⑥ in the following figure in Wireless (Infrastructure) Information. Network Information can be printed from [Print Information] - [Network]. Unable to connect to the access point (State of ④...
- Page 358 Communication is not stable Cause Solution Reference The RSSI value is too small.* The signal strength is insufficient. Above ⑥ Put this machine in an unobstructed view position near the wireless LAN access point. (The recommended distance is 30 m or less.) Do not place an electric appliance (especially microwave oven or digital cordless telephone) that emits weak electronic waves near this machine.
-
Page 359: Troubleshooting For Usb Connection
Cause Solution Reference [Wireless (AP Mode)] is set to Set [Wireless(AP Mode) Setting] - [Wireless(AP Mode)] to Connecting [Disable]. [Enable]. directly with this *Above ① *Wireless LAN (Infrastructure) and Wireless LAN (AP machine (AP mode) cannot be enabled at the same time. mode) [SSID] is not consistent with the Check that the SSID of this machine matches the SSID... -
Page 360: Troubleshooting For Printing Results
Troubleshooting for printing results This section describes troubles with printing results. Click the corresponding symptom to see the solution. Please check the following explanation and "Frequently Asked Questions (FAQs)" on your smartphone app or the website. If the problem persists, contact your dealer. List of troubles with printing results White streaks appear in the vertical direction Paper feed direction... - Page 361 Streaks appear in the vertical direction Dots and horizontal streaks appear in the paper feeding direction periodically White area is lightly stained Edges of text are blurred When envelopes or coated paper is printed, the whole area is thinly stained Toner comes off when rubbed Uneven Gloss Point stains appear...
- Page 362 Stains are printed The entire paper is printed in black Nothing is printed White streaks occur The peripheral area is dirty The color of images does not come as expected An afterimage printed on the front edge of the paper is printed Paper feed direction - 363 -...
-
Page 363: White Streaks Appear In The Vertical Direction
White streaks appear in the vertical direction Cause Solution Reference The LED head is dirty. Wipe the LED head with soft tissue paper. Cleaning the LED head The toner is low. "Toner Low. " or "Toner Empty. Replace with a new toner Replacing the cartridge."... -
Page 364: Printing Is Light
Printing is light Cause Solution Reference The toner is low. "Toner Low." or "Toner Empty. Replace with a new toner Replacing the cartridge." is displayed, replace the toner cartridge. black(K) toner cartridge and the waste toner box Replacing the toner cartridge (C/M/Y) The density is not adjusted. -
Page 365: Condensation Occurs On Printed Paper
Condensation occurs on printed paper Cause Solution Reference The paper is moist. Use the paper stored at appropriate temperature and Storing paper humidity. This machine is used in a place Use this machine in an environment with an appropriate Installation with high humidity or sudden temperature and humidity. - Page 366 Cause Solution Reference If dots or streaks of a specific color Please replace the image drum. Replacing the appear at intervals of about 75 image drum mm, the green tube of the image drum is scratched or dirty. If dots or streaks of various colors Replace the fuser unit.
-
Page 367: White Area Is Lightly Stained
White area is lightly stained Cause Solution Reference Static electricity occurs to the Use the paper stored at appropriate temperature and Storing paper paper. humidity. Thick paper is used. Use thinner paper. Loading paper The toner is low. "Toner Low." or "Toner Empty. Replace with a new toner Replacing the cartridge."is displayed, replace the toner cartridge. -
Page 368: When Envelopes Or Coated Paper Is Printed, The Whole Area Is Thinly Stained
When envelopes or coated paper is printed, the whole area is thinly stained Cause Solution Reference When envelopes or coated paper This is not a malfunction. Applicable paper is printed, toner may adhere Do not use coated paper as much as possible. Inapplicable (cover) to the whole area. -
Page 369: Point Stains Appear
Point stains appear Cause Solution Reference The paper is not supported. Use recommended paper. Applicable paper If the paper has a lot of paper dust, load the paper after shuffling it well. If the intervals are approx. 75 mm, If the image drum is scratched, replace it with a new one. Replacing the the green tube of the image drum image drum... -
Page 370: Nothing Is Printed
Nothing is printed Cause Solution Reference Multiple pages were fed at a time. Load the paper again after shuffling it well. Loading paper Clean the paper feed roller. Cleaning paper feed rollers (Trays 1-4) Cleaning the paper feed roller (MP tray) The machine may have broken Print the menu map and check if the device itself can print. -
Page 371: The Color Of Images Does Not Come As Expected
The color of images does not come as expected Cause Solution Reference The toner is low. When "Toner Low." or "Toner Empty. Replace with a new Replacing the toner cartridge." is displayed, replace the toner cartridge. black(K) toner cartridge and the waste toner box The setting of [Black Finish] is not In [Black Finish] of the printer driver, select [Composite... -
Page 372: Software Troubleshooting
Software troubleshooting Monitoring Tool → Troubleshooting (Monitoring Tool) - 373 -... -
Page 373: Troubleshooting For This Machine And Paper
Troubleshooting for this machine and paper Troubleshooting for the machine Please check the following explanation and "Frequently Asked Questions (FAQs)" on the website or your smartphone application. If the problem persists, contact your dealer. Symptom Cause Solution Reference Nothing is displayed The power cord is Firmly insert the power cord. - Page 374 Symptom Cause Solution Reference The LAN/USB cable is Firmly insert the LAN/USB cable. Connecting via a not plugged in. wired LAN There is a problem Use another LAN/USB cable. with the LAN/USB cable. The LAN cable does Please use the cable of Ethernet 10BASE- not meet the T/100BASE-TX/1000Base specifications.
- Page 375 Symptom Cause Solution Reference temperature inside this The printing will automatically start again once machine has risen due the temperature of this machine returns to long-time appropriate. continuous printing. The memory is The memory of this Print again after reducing the resolution in the insufficient.
- Page 376 Symptom Cause Solution Reference (whose factory default automatically setting is 4 hours), the (Auto Power Off) power will turn off automatically. This function is called Auto Power Off. The web page does [Web] is set to Press the scroll buttons on the operator panel not open.
-
Page 377: Troubleshooting For The Paper
Troubleshooting for the paper Please check the following explanation and "Frequently Asked Questions (FAQs)" on the website or your smartphone application. If the problem persists, contact your dealer. Symptom Cause Solution Reference Paper jams occur This machine is tilted. Install it on a stable and flat surface. - Page 378 Symptom Cause Solution Reference The machine is not Open and close the front cover. restored even after the jammed paper is removed. The paper gets curled. The paper is moist or Use the paper stored at appropriate Storing paper The paper is waved. charged with static temperature and humidity.
-
Page 379: When A Power Failure Occurs
Symptom Cause Solution Reference when the paper tray For the Windows PCL printer driver, uncheck runs out of paper [Setup] - [Paper Feed Options] - [Paper feed during printing. options] - [Auto Tray Change]. For the Windows PS printer driver, uncheck [Layout] - [Advanced] - [Printer Features] - [Tray Switch] - [Off]. -
Page 380: Appendix
Appendix Appendix Specifications ..................382 Dimensions ..................... 387 Using the FAQ guide of this machine ............. 389 Contact us ....................392 Menu tree ....................393 - 381 -... -
Page 381: Specifications
Appendix Specifications Model Model Number LP654C N36800A General specifications Item LP654C ARM processor (667 MHz) Memory Built-in DDR3 32bit 1GB Weight (with consumables) Approx. 28 kg Dimensions (WxDxH) 395 × 430 × 290 mm Power N36800A: 110V - 127V AC +/-10%... - Page 382 Appendix Item LP654C First page Color Approx. 6.5 sec (A4) output time Mono Approx. 6.5 sec (A4) Media Size Tray 1 A4, A5, A6, B5, B6, Letter, Legal 13/13.5/14, Executive, Statement, 8.5-inch SQ, Folio, 16K (197 x 273 mm, 195 x 270 mm, 184 x 260 mm), 5 x 7 inches, custom...
-
Page 383: Regulatory Wireless Lan Statements
Appendix Item LP654C ・Operating range Print quality assurance conditions Temperature: 10°C; Humidity: 20% - 80% RH Temperature: 32°C; Humidity: 20% - 60% RH Humidity: 30% RH; Temperature: 10°C - 32°C Humidity: 80% RH; Temperature: 10°C - 27°C ・Full color printing quality assurance range Temperature: 17°C - 27°C;... - Page 384 Appendix interference to radio communications. However, there is no guarantee that interference will not occur in a particular installation. If this equipment does cause harmful interference to radio or television reception, which can be determined by turning the equipment off and on, the user is encouraged to try to correct the interference by one or more of the following measures: - 385 -...
- Page 385 Appendix - Reorient or relocate the receiving antenna. - Increase the separation between the equipment and receiver. - Connect the equipment into an outlet on a circuit different from that to which the receiver is connected. - Consult the dealer or an experienced radio/TV technician for help. This transmitter must not be co-located or operating in conjunction with any other antenna or transmitter.
-
Page 386: Dimensions
Appendix Dimensions Plan view Side view - 387 -... - Page 387 Appendix With options installed - 388 -...
-
Page 388: Using The Faq Guide Of This Machine
Appendix Using the FAQ guide of this machine If an error occurs in this machine, you can search for a solution by accessing the "Frequently Asked Questions (FAQs)" on the website from the mobile device application or the FAQ on your PC. You can also easily find a solution by inputting the keyword in "Search Keyword"... - Page 389 Appendix If "NFC" appears on this machine's display, bring the mobile device where the Mobile Print app is running close to the NFC mark on the operator panel, and "FAQ" will start and display the result of the search for the solution page. If you are using iOS, tap [NFC] to display [Ready to Scan] and then move the mobile device close to this machine.
- Page 390 Appendix Input the keyword in "Search Keyword" displayed on this machine to search for a solution. You can also narrow the search by category or by inputting other keywords. For macOS Install the FAQ. Copy the FAQ from the enclosed DVD to your desktop. You can also install it from the website.
-
Page 391: Contact Us
Appendix Contact us Printronix, LLC. 7700 Irvine Center Drive, Suite 700 Irvine, CA 92618, USA Tel: 1-800-665-6210 http:/www.printronix.com - 392 -... -
Page 392: Menu Tree
Appendix Menu tree - 393 -... - Page 393 05-05-2022 EE8001-1210Z002 Rev3...
Need help?
Do you have a question about the LP654C and is the answer not in the manual?
Questions and answers