Table of Contents
Advertisement
Quick Links
Advertisement
Table of Contents

Related Manuals for FLIR CF-5212


Summary of Contents for FLIR CF-5212
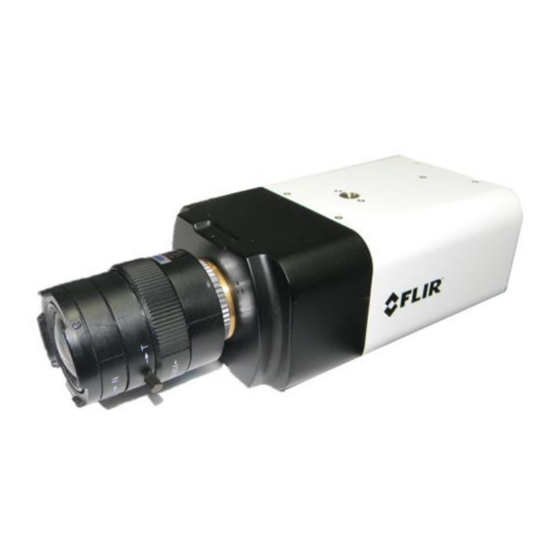
- Page 1 IOI HD User and Installation Guide CF-5212/CF-5222 Ver. 2 April 25, 2017...
- Page 2 © 2017 FLIR Systems, Inc. All rights reserved worldwide. No parts of this manual, in whole or in part, may be copied, photocopied, translated, or transmitted to any electronic medium or machine readable form without the prior written permission of FLIR Systems, Inc.
- Page 3 Business users should contact their supplier or refer to their purchase contract. Document History Version Date Comment April 25, 2017 Second FLIR release April 25, 2017 CF-5212/CF-5222 User and Installation Guide...
- Page 4 CF-5212/CF-5222 User and Installation Guide April 25, 2017...
-
Page 5: Table Of Contents
Document Scope and Purpose ....................1 Overview ........................... 7 Features .......................... 8 Package Contents ......................9 Introduction to the CF-5212/CF-5222 IP Fixed Camera ............. 11 Camera Dimensions ..................... 11 Camera Connections ....................11 Alarm Input/Output Pin-out ..................12 Connecting the Unit to the Network ................12 Connecting Power to the Camera ................ - Page 6 Installing and Deleting the Web Player ............... 116 A.5. Deleting Temporary Internet Files ................118 A.6. Back Focus Adjustment ....................119 A.7. Connecting Wires to a Spring Clamp Terminal Block ..........120 A.8. Mounting and Lens Accessories ................. 121 CF-5212/CF-5222 User and Installation Guide April 25, 2017...
- Page 7 Figure 1: IOI HD Analytic Fixed IP Camera ....................7 Figure 2: Package Contents........................9 Figure 3: CF-5212/CF-5222 Camera Dimensions ................... 11 Figure 4: CF-5212/CF-5222 Camera Input/Output Connections ............. 11 Figure 5: C-CS Mount Adaptor ........................ 18 Figure 6: Installed C-CS Mount ........................ 19 Figure 7: Auto Iris Port Connection ......................
- Page 8 Figure 106: Command Bar Toolbar – Select Internet Options ............... 112 Figure 107: Internet Options Screen ...................... 112 Figure 108: Command Bar Toolbar – Internet Options ................113 Figure 109: Schedule Screen ........................ 113 viii CF-5212/CF-5222 User and Installation Guide April 25, 2017...
- Page 9 Figure 111: Quasar Player Installation Completed ................116 Figure 112: Back Focus Adjustment ...................... 119 Figure 113: Typical Spring Clamp Terminal Block ................. 120 Figure 114: Connecting a Wire to a Terminal Block ................120 April 25, 2017 CF-5212/CF-5222 User and Installation Guide...
- Page 10 CF-5212/CF-5222 User and Installation Guide April 25, 2017...
-
Page 11: Document Scope And Purpose
1 Document Scope and Purpose The purpose of this document is to provide instructions and installation procedures for physically connecting the CF-5212/CF-5222 unit. After completing the physical installation, additional setup and configurations are required before video analysis and detection can commence. - Page 12 A Tip is information and best practices that are useful or provide some benefit for installation and use of FLIR products. Un Conseil correspond à une information et aux bonnes pratiques utiles ou apportant un avantage supplémentaire pour l'installation et l'utilisation des produits FLIR. CF-5212/CF-5222 User and Installation Guide April 25, 2017...
- Page 13 Seul un technicien formé et qualifié est autorisé à entretenir et à réparer cet équipement. Respectez les codes et réglementations locaux, et assurez-vous que l'installation et l'utilisation sont conformes aux normes contre l'incendie et de sécurité. April 25, 2017 CF-5212/CF-5222 User and Installation Guide...
- Page 14 (refroidissement/chauffage). La température de fonctionnement doit être maintenue dans la plage (-40° à 50°C/-40° à 122°F), sans condensation d'humidité supérieur à 90%. CF-5212/CF-5222 User and Installation Guide April 25, 2017...
- Page 15 When finished with the physical installation, complete the second phase of installation, which is the setup and configuration of the unit. April 25, 2017 CF-5212/CF-5222 User and Installation Guide...
- Page 16 CF-5212/CF-5222 User and Installation Guide April 25, 2017...
-
Page 17: Overview
Caution: If you are using FLIR’s Latitude VMS, we recommend that you configure the camera’s settings via the AdminCenter. This is because the camera’s web-based interface might be overwritten by Latitude settings. Refer to the Latitude online help for information regarding configuring camera settings. -
Page 18: Features
ONVIF-conformant RTSP support Per-user permissions Sequential snapshot numbering SNMP v1/v2/v3 SNMP Supports PoE/12VDC/ 24VAC traps Multiple users Group permissions Security IP restricted access allow/deny list CF-5212/CF-5222 User and Installation Guide April 25, 2017... -
Page 19: Package Contents
CD with bundled software Quick Installation Guide and documentation Figure 2: Package Contents Related Documentation IOI HD CF-5212/CF-5222 Quick Installation Guide DNA 2.1 User Manual IOI HTML Edition Units User’s Guide April 25, 2017 CF-5212/CF-5222 User and Installation Guide... - Page 20 CF-5212/CF-5222 User and Installation Guide April 25, 2017...
-
Page 21: Introduction To The Cf-5212/Cf-5222 Ip Fixed Camera
Figure 3: CF-5212/CF-5222 Camera Dimensions Camera Connections Figure 4 shows the connectors and reset button on the connector panel of the CF-5212 and CF-5222 cameras. The connectors, pin numbers and signal definitions related to each pin are listed below. Figure 4: CF-5212/CF-5222 Camera Input/Output Connections... -
Page 22: Alarm Input/Output Pin-Out
Introduction to the CF-5212/CF-5222 IP Fixed Camera Connector Name Pin Number/ Definition Description Connector Type Line Out Audio out 2-way audio transmission Line In/Mic In Audio in 10/100 Mbps Power over Ethernet Network/PoE RJ45, Network LEDs Ethernet/PoE and Network Port... -
Page 23: Connecting Power To The Camera
Introduction to the CF-5212/CF-5222 IP Fixed Camera Note: An Ethernet crossover cable can be used when connecting the CF-5212/CF-5222 camera directly to the PC. Connecting Power to the Camera The camera can be powered by Power over Ethernet (PoE) or by an external 12VDC or 24VAC adaptor (not included in the package). - Page 24 CF-5212/CF-5222 User and Installation Guide April 25, 2017...
-
Page 25: System Requirements
Windows XP, 7, 8, 8.1, and 10 Web Browser Microsoft Internet Explorer 9, 10, or 11 Network Card 10BaseT (10 Mbps), 100Base-TX (100 Mbps), or 1000BaseT (1000Mbps) operation Viewer ActiveX control plug-in for Microsoft IE April 25, 2017 CF-5212/CF-5222 User and Installation Guide... - Page 26 CF-5212/CF-5222 User and Installation Guide April 25, 2017...
-
Page 27: Installation
The longer the focal length is, a narrower scene will be achieved, while the size of objects will increase. Greater size means that more pixels will be used to represent each object, and greater level of details will be present. April 25, 2017 CF-5212/CF-5222 User and Installation Guide... -
Page 28: Figure 5: C-Cs Mount Adaptor
Field of View. After you select your lenses and see the amount of detail provided, consider your security surveillance coverage, camera locations, and any additional needs that may be discovered. Consult your FLIR representative if you have any questions. -
Page 29: Figure 6: Installed C-Cs Mount
AUTO IRIS port of the camera. Figure 7: Auto Iris Port Connection Tip: If there are problems focusing, it might be necessary adjust the back focus. See Back Focus Adjustment (page 119). April 25, 2017 CF-5212/CF-5222 User and Installation Guide... -
Page 30: Initial Camera Configuration
Copy and run dna.exe (see note below) from the included CD. Note: DNA is a user-friendly utility that is designed to easily discover and configure FLIR edge devices on a network. The IOI HD fixed camera is supported by DNA version 2.0.4.8 and above. -
Page 31: Figure 9: Dna Assign Ip Dialog Box
2. The camera default IP Address is automatically set by the DHCP server. If using Latitude, the Address must be set manually. Tip: A camera setup adapter, such as Veracity Pinpoint, can be used to connect a laptop directly to the camera when using PoE. April 25, 2017 CF-5212/CF-5222 User and Installation Guide... -
Page 32: Mounting Instructions
Installation 5.4 Mounting Instructions The following are mounting instructions for the CF-5212 and CF-5222 fixed IP cameras. Caution: To avoid damage from overheating or unit failure, assure that there is sufficient temperature regulation to support the unit’s requirements (cooling/heating). Operating temperature should be kept in the range -40°... -
Page 33: Figure 11: Cf-X200-01 Camera Housing With Bracket
Installation Connect the cables and wiring to the camera. See Figure 4: CF-5212/CF-5222 Camera Input/Output Connections. Note: For outdoor installation, the camera must be installed in a protective housing such as a CF-X200-00 camera housing. See the figure below. Figure 11: CF-X200-01 Camera Housing with Bracket... - Page 34 CF-5212/CF-5222 User and Installation Guide April 25, 2017...
-
Page 35: Using The Dna Utility To Search And Access The Camera
The units may then be configured via the web interface. If the camera is managed by FLIR’s Horizon or Meridian NVR and is configured as a DHCP server, Horizon or Meridian automatically assigns the camera an IP address. Configure the camera with DHCP-enabled. - Page 36 CF-5212/CF-5222 User and Installation Guide April 25, 2017...
-
Page 37: Configuring Communication Settings
6. Click Assign IP. All the discovered IP devices will be listed in the page, as shown in the figure below. The camera’s default IP Address is automatically supplied by the DHCP server. Figure 13: Discovered IP Devices April 25, 2017 CF-5212/CF-5222 User and Installation Guide... -
Page 38: Figure 14: Dna Assign Ip - Use Dhcp Dialog Box
Do not select the Use DHCP checkbox. This is recommended for security purposes and for and Latitude users. In the IP Address, Gateway, and Netmask, enter the respective LAN/VLAN (optional DNS) values. Click Update and wait for OK status to be displayed. CF-5212/CF-5222 User and Installation Guide April 25, 2017... -
Page 39: Figure 16: Login Dialog Box
“Allow software to run or install even if the signature is invalid” checkbox. Uncheck the checkbox after installing ActiveX. Then click OK. Figure 17: IE Tools > Internet Options > Advanced Window April 25, 2017 CF-5212/CF-5222 User and Installation Guide... -
Page 40: Figure 18: Activex Installation Error Message
PC before accessing the camera. For information on how to install the new player, uninstall a previous player, and clear temporary Internet files, see Installing and Deleting the Web Player (page 116). CF-5212/CF-5222 User and Installation Guide April 25, 2017... -
Page 41: Adjusting And Framing-Up The Camera View
If you selected Shutter WDR Off from the Misc screen, select the default mode (Auto Shutter). 4. Save changes and complete the focusing steps. 5. When finished, set your exposure settings as needed. April 25, 2017 CF-5212/CF-5222 User and Installation Guide... - Page 42 CF-5212/CF-5222 User and Installation Guide April 25, 2017...
-
Page 43: Configuration And Operation
The IOI HD camera is provided with a browser-based configuration interface for video playback and recording. If FLIR’s Latitude VMS is used, many of the configurations and features of FLIR’s VMS provide additional configuration and automation options for the camera. - Page 44 Click Disarm to stop the analytics engine. The Clear Alarms button is displayed under the Arm/Disarm button. Click Clear Alarms to stop the alarms and return analytics to their initial stage. CF-5212/CF-5222 User and Installation Guide April 25, 2017...
-
Page 45: Live Screen
Click this button to view the live video in half of the Live View window. Full-Screen Mode Click this button to view the live video on the full screen of your monitor. Click the ESC (Escape) key on your keyboard to exit Full-Screen Mode. April 25, 2017 CF-5212/CF-5222 User and Installation Guide... - Page 46 Click the Speaker button to mute/activate the audio. This function is available only to a user who has been granted this privilege by the Administrator. Refer to User in the Security section for further details. CF-5212/CF-5222 User and Installation Guide April 25, 2017...
-
Page 47: System Tab
System Settings The System section includes the following tabs: Figure 22: System Section Tabs System Security Network Events Setup Schedule File Location Maintenance Import/Export April 25, 2017 CF-5212/CF-5222 User and Installation Guide... -
Page 48: Figure 23: System Screen
Finally, enter the start date and time for daylight saving time, and end date and time for daylight saving time. Time format Enables a choice of formats: either year, month and day (yyyy/mm/dd) or day, month and year (dd/mm/yyyy). CF-5212/CF-5222 User and Installation Guide April 25, 2017... -
Page 49: Security Screens
User HTTPS IP Filter IEEE 802.1X User The User screen is used for entering and managing user credentials and privileges, as well as configuring authentication settings. Figure 24: User Screen April 25, 2017 CF-5212/CF-5222 User and Installation Guide... - Page 50 To edit a user, click the User name drop-down list and select the user. Click EDIT to edit the user’s password and privileges. Note: You must enter the user password and also select the authorized function(s). CF-5212/CF-5222 User and Installation Guide April 25, 2017...
-
Page 51: Figure 25: Edit User Account Dialog Box
HTTPS allows secure connections between the camera and web browser using Secure Socket Layer (SSL) or Transport Layer Security (TLS) to protect camera settings and username/password info. A self-signed certificate or a CA-signed certificate is required to implement HTTPS. April 25, 2017 CF-5212/CF-5222 User and Installation Guide... -
Page 52: Figure 26: Https Screen - Create Self-Signed Certificate
Figure 26: HTTPS Screen – Create Self-Signed Certificate 1. On the HTTPS page, click CREATE under Create Self-Signed Certificate. The Create Self- Signed Certificate dialog box opens. Figure 27: Create Self-Signed Certificate Dialog Box CF-5212/CF-5222 User and Installation Guide April 25, 2017... -
Page 53: Figure 28: Installed Certificate Section
Certificate Properties dialog box. If you want to remove the certificate, click REMOVE. Figure 29: Certificate Properties 5. When the signed certificate is returned from the CA, click Browse in the Install Signed Certificate section to locate the file. April 25, 2017 CF-5212/CF-5222 User and Installation Guide... -
Page 54: Figure 30: Https Screen - Upload Signed Certificate
To create a certificate request 1. Click CREATE CERTIFICATE REQUEST to create and submit a certificate request in order to obtain a signed certificate from a CA. Figure 31: HTTPS Screen – Install Signed Certificate CF-5212/CF-5222 User and Installation Guide April 25, 2017... -
Page 55: Figure 32: Create Certificate Request Dialog Box
3. Click OK to save the details of the certificate request after completion. When the request is complete, the subject of the Created Request is displayed in the Subject field Figure 33: Created Request Subject April 25, 2017 CF-5212/CF-5222 User and Installation Guide... -
Page 56: Figure 34: Certificate Request Properties Dialog Box
Figure 34: Certificate Request Properties Dialog Box 5. Copy the PEM-formatted request and send it to your CA. Note: The self-signed certificate does not provide the same level of security as a CA-issued certificate. CF-5212/CF-5222 User and Installation Guide April 25, 2017... -
Page 57: Figure 35: Ip Filter Screen
2. Click ADD to add a new filtered address. The Filtered IP Addresses box shows the currently configured IP addresses. Up to 256 IP address entries may be specified. 3. To remove an IP address from the list, select the IP address and then click DELETE. April 25, 2017 CF-5212/CF-5222 User and Installation Guide... -
Page 58: Figure 36: Ieee 802.1X/Eap-Tls Screen
Private Key Password – Enter the password associated with the user identity. Up to 16 characters can be used. Enable IEEE 802.1X Select the checkbox to enable IEEE 802.1X security. The setting is disabled by default. Click SAVE to save the IEEE 802.1X/EAPTLS setting. CF-5212/CF-5222 User and Installation Guide April 25, 2017... -
Page 59: Network
The Basic screen is divided into three sections: General, Advanced and IPv6 Configuration. General Select one of the following options in the General area for configuring network settings: Get IP address automatically Use fixed IP address User PPPoE April 25, 2017 CF-5212/CF-5222 User and Installation Guide... - Page 60 MTU – The MTU (Maximum Transmission Unit) is the greatest amount of data that can be transferred in one physical frame on the network. For Ethernet, the MTU is 1500 bytes (default setting). For PPPoE, the MTU is 1492. The range is from 700 to 1500 bytes. CF-5212/CF-5222 User and Installation Guide April 25, 2017...
-
Page 61: Figure 38: Qos Screen
Video DSCP – This class consists of applications such as MJPEG over HTTP, RTP/RTSP and RTSP/HTTP. Audio DSCP – The camera supports audio. Management DSCP – This class consists of HTTP traffic (web browsing). Click SAVE when complete. April 25, 2017 CF-5212/CF-5222 User and Installation Guide... -
Page 62: Figure 39: Snmp Settings Screen
Read Community – Specify the community name that has read-only access to all supported SNMP objects. The default value is public. Write Community – Specify the community name that has read/write access to all supported SNMP objects (except read-only objects). The default value is private. CF-5212/CF-5222 User and Installation Guide April 25, 2017... -
Page 63: Figure 40: Upnp Screen
Warm start – A warm start SNMP trap signifies that the SNMP device, such as the camera, performs a software reload. Click SAVE when complete. UPnP The System > Network > UPnP screen enables the Universal Plug-and-Play protocol on your network devices. Figure 40: UPnP Screen April 25, 2017 CF-5212/CF-5222 User and Installation Guide... -
Page 64: Figure 41: Direct Access To Camera With Upnp Enabled
To enable this function, make sure that your router supports UPnP and that it is activated. Friendly name – Enter the name for the camera for identification. Click SAVE to save the settings. CF-5212/CF-5222 User and Installation Guide April 25, 2017... -
Page 65: Figure 42: Ddns Screen
4. In the Username/E-mail text box, enter the username or e-mail address required by the DDNS provider for authentication. 5. In the Password/Key text box, enter the password or key required by the DDNS provider for authentication. 6. Click SAVE to save the setting. April 25, 2017 CF-5212/CF-5222 User and Installation Guide... -
Page 66: Figure 43: Mail Screen - Smtp
(the default port is 25), account name, password, and recipient e-mail address settings. To encrypt e-mail with SSL, select the 1 SMTP SSL and/or 2 SMTP SSL checkbox. For SMTP server details, contact your network service provider. Click SAVE when finished. CF-5212/CF-5222 User and Installation Guide April 25, 2017... -
Page 67: Figure 44: Ftp Screen
FTP server's ports > 1023 to remote ports > 1023 (server sends ACKs and data to client's data port) To test the connection to the specified FTP server, click TEST for the first or second server. Click SAVE when finished. April 25, 2017 CF-5212/CF-5222 User and Installation Guide... -
Page 68: Events Setup
Click SAVE after configuring the settings. Note: Actions related to an analytic event that is defined in the Analytics > Responses screen are not affected by the status of the alarm switch. CF-5212/CF-5222 User and Installation Guide April 25, 2017... -
Page 69: Figure 46: Upload Image By Ftp
From the FTP address drop-down list, select one of the two FTP addresses to use. From the Pre-trigger buffer and Post-trigger buffer drop-down lists, select the number of frames for the buffer from 1-20 frames. Figure 46: Upload Image by FTP April 25, 2017 CF-5212/CF-5222 User and Installation Guide... -
Page 70: Figure 47: Upload Image By E-Mail
In the Image Frequency text box, from the drop-down list select the number of frames per seconds from 1-15 for the upload. Note: Make sure that SMTP configuration has been completed. See Mail for details. CF-5212/CF-5222 User and Installation Guide April 25, 2017... -
Page 71: Figure 48: Network Failure Detection Screen
Settings on the Network Failure Detection screen enable the camera to periodically ping another IP device within the network to detect a network failure, for example, if a video server is disconnected. Figure 48: Network Failure Detection Screen April 25, 2017 CF-5212/CF-5222 User and Installation Guide... - Page 72 Send message by E-Mail – Select whether to send an alarm message by e-mail when a network failure is detected. Click SAVE to save the network failure detection settings. CF-5212/CF-5222 User and Installation Guide April 25, 2017...
-
Page 73: Schedule
3. Click SAVE to apply the newly created schedule to the camera. To remove a schedule 1. To remove a schedule, select the setup data line by line. 2. Click DELETE to remove. April 25, 2017 CF-5212/CF-5222 User and Installation Guide... -
Page 74: File Location
1. Make sure the selected file path contains valid characters. 2. When using Windows 8 OS, the storage location cannot be C:\. You must define a storage location that does not require Administrator privileges on the PC. CF-5212/CF-5222 User and Installation Guide April 25, 2017... -
Page 75: Maintenance
Click GET USER INFORMATION to see each user’s details. For example: admin: admin. This indicates that the user’s login username is admin and the password is admin. Figure 52: User Information Screen – Get User Information April 25, 2017 CF-5212/CF-5222 User and Installation Guide... -
Page 76: Figure 53: User Information - Get User Privacy
Click FULL RESTORE to restore the factory default settings of the camera system. The system restarts in 30 seconds. Note: The IP address and all other settings will be restored to factory default settings. CF-5212/CF-5222 User and Installation Guide April 25, 2017... - Page 77 Software Version The current version of the camera system software is displayed in the Software Version screen. Figure 56: Software Version Screen Note: To view the analytics firmware version, see Analytics > Firmware. April 25, 2017 CF-5212/CF-5222 User and Installation Guide...
- Page 78 The upgrade status bar is displayed on the page. When the upgrade process is completed, the Live page is displayed. 4. Close and reopen the web browser. Note: If you have problems with the ActiveX plugin, see Installing and Deleting the Web Player (page 116) CF-5212/CF-5222 User and Installation Guide April 25, 2017...
-
Page 79: Import/Export
1. The camera firmware and the analytics firmware use separate configuration files. For analytic firmware configuration file, see Analytics > Backup & Restore. 2. It is not possible to import or export analytic settings from this screen. April 25, 2017 CF-5212/CF-5222 User and Installation Guide... - Page 80 1. Click Browse to select the configuration file 2. Click UPLOAD. The file is uploaded to the camera. Warning: Do not unplug power while changing file names. Avertissement: Ne débranchez pas l'alimentation pendant la modification des noms de fichiers. CF-5212/CF-5222 User and Installation Guide April 25, 2017...
-
Page 81: Streaming Tab
The IOI HD camera supports H.264/MJPEG streaming for resolutions up to 1080p. The default setting for CF-5212 is 1280 x 720. The default setting for CF-5222 is 1920 x 1080. Both H.264 and MJPEG streaming support analog BNC video connections. Following are the supported resolutions:... -
Page 82: Video Compression
Units default to the Main Profile to provide the best trade-off between storage size and video latency. Click SAVE to confirm the settings. Video Compression From the Video Compression page, you can specify MJPEG and H.264 compression settings. Figure 62: Video Compression Screen CF-5212/CF-5222 User and Installation Guide April 25, 2017... -
Page 83: Video Ocx Protocol
From the Video OCX Protocol page, you can select various protocols for streaming media over the network. In the case of multicast networking, select Multicast mode. Figure 63: Video OCX Protocol Screen April 25, 2017 CF-5212/CF-5222 User and Installation Guide... -
Page 84: Video Frame Rate
A lower frame rate decreases video smoothness. Click SAVE to confirm the settings. Note: Images can be sent by FTP or email only when MJPEG steaming is selected as one of the streams. CF-5212/CF-5222 User and Installation Guide April 25, 2017... -
Page 85: Audio
A higher bit rate enables higher audio quality, but requires higher bandwidth. The default setting is uLAW. Note: Latitude does not support G.726. Click SAVE to confirm the settings. April 25, 2017 CF-5212/CF-5222 User and Installation Guide... -
Page 86: Camera Tab
WDR Multiple Shutter RSS – This setting is recommended when flickering occurs in indoor applications where fluorescent lighting is used. The shutter speed decreases in order to compensate for decreased ambient lighting. Figure 67: Exposure Screen with Shutter WDR On CF-5212/CF-5222 User and Installation Guide April 25, 2017... - Page 87 Min Shutter Speed NTSC NTSC 1/425 1/500 1/100 1/100 1/300 1/350 1/75 1/90 1/215 1/250 1/50 1/60 1/150 1/180 1/25 1/30 1/120 1/125 1/12 1/15 Click SET to confirm the new setting. April 25, 2017 CF-5212/CF-5222 User and Installation Guide...
- Page 88 Exposure Screen with Shutter WDR Off Five exposure options are available when Shutter WDR is set to Off: Auto Iris, Auto Shutter, Shutter Priority, Flickerless, and Manual Mode. Figure 69: Exposure Screen with Shutter WDR Off CF-5212/CF-5222 User and Installation Guide April 25, 2017...
- Page 89 From the Min Shutter Speed drop-down list, select one of the following shutter speed options. The shutter speed range is from 1/12 to 1/425 sec (PAL) to 1/15 to 1/500 sec (NTSC). The default setting is 1/12 (PAL) or 1/15 (NTSC). April 25, 2017 CF-5212/CF-5222 User and Installation Guide...
- Page 90 From the Shutter drop-down list, select a suitable shutter speed from 1 to 1/10000 sec (PAL/NTSC), according to the environmental luminance The default setting is 1/150 (PAL) or 1/180 (NTSC). The following table displays the options. CF-5212/CF-5222 User and Installation Guide April 25, 2017...
-
Page 91: Picture Adjustment
Increasing the sharpness level can make the image look sharper, especially enhancing the object’s edge. Select from the range between -15 to +10 in 1dB steps. The default setting is -10. Click SET to confirm the new setting. April 25, 2017 CF-5212/CF-5222 User and Installation Guide... -
Page 92: Advanced Picture Settings
However, it is less precise than 3DNR. Settings include Enable and Disable. The default setting is Disable. Click SET to confirm the new settings. CF-5212/CF-5222 User and Installation Guide April 25, 2017... -
Page 93: Ir Function
Night mode to Day mode. This is the default setting. Night – Activates IR mode (puts camera into monochrome/Night mode). Day– Deactivates IR mode (puts camera into color/Day mode). April 25, 2017 CF-5212/CF-5222 User and Installation Guide... -
Page 94: Miscellaneous
When On is selected, the image has a wide dynamic range, so that the IP camera can capture a greater scale of brightness. This is the default setting. Selecting Off disables this function. Click SET to confirm the new setting. CF-5212/CF-5222 User and Installation Guide April 25, 2017... -
Page 95: Analytics Tab
Use the Analytics tab to configure the following functions: Depth Rules Responses Scheduled Actions On-Screen Display Firmware Backup & Restore April 25, 2017 CF-5212/CF-5222 User and Installation Guide... -
Page 96: Depth
The Auto screen remains the default setting unless you select the Manual depth screen. If you select the Manual screen and click APPLY, the Manual screen remains the default setting until you select the Auto screen again and the Auto Calibration process is completed. CF-5212/CF-5222 User and Installation Guide April 25, 2017... - Page 97 100%, the analytic process will reset. 2. If you change from Auto to Manual mode, you must wait until the analytic process resets in order to use Manual mode. April 25, 2017 CF-5212/CF-5222 User and Installation Guide...
- Page 98 Field of View. Creating the recording of the person in the FoV can be used to adjust settings without requiring another physical walk through the FoV. Use the recording of his movement to setup the depth by marking his height on the camera’s Field of View. CF-5212/CF-5222 User and Installation Guide April 25, 2017...
- Page 99 Play/Pause Speed X1/X0 Speed X2, X4, X8, X16. Click to increase or decrease Fast Forward speed. Speed -X2, -X4, -X8, -X16. Click to increase or Rewind decrease speed. April 25, 2017 CF-5212/CF-5222 User and Installation Guide...
- Page 100 10. Proceed to the tabs for Steps 2-4 of the Depth Setup to complete the setup and apply settings. Note: At any time it is possible to click the Verification tab to verify and apply settings. CF-5212/CF-5222 User and Installation Guide April 25, 2017...
- Page 101 1. Click the Step 1: Ground & Height tab. The Step 1: Ground & Height screen opens. Figure 82: Analytics > Depth > Step 1: Ground & Height Screen 2. Follow the instructions on screen. Figure 83: Analytics > Depth > Step 1: Ground & Height Instructions April 25, 2017 CF-5212/CF-5222 User and Installation Guide...
- Page 102 Figure 84: Analytics > Depth > Step 2: Camera & Horizon Screen 2. Follow the on-screen instructions to configure camera and horizon settings. Figure 85: Analytics > Depth > Step 2: Camera & Horizon Instructions CF-5212/CF-5222 User and Installation Guide April 25, 2017...
- Page 103 Figure 86: Analytics > Depth > Step 3: Advanced Depth Regions Screen 2. Follow the on-screen instructions to configure advanced depth region settings. Figure 87: Analytics > Depth > Step 3: Advanced Depth Regions Instructions April 25, 2017 CF-5212/CF-5222 User and Installation Guide...
- Page 104 1. Click the Step 4: Verification tab. The Step 4: Verification screen opens. Figure 88: Analytics > Depth > Step 4: Verification Screen 2. Follow the on-screen instructions to verify settings. Figure 89: Analytics > Depth > Step 4: Verification Instructions CF-5212/CF-5222 User and Installation Guide April 25, 2017...
-
Page 105: Rules
The Rules tab enables you to define detection rules according to the type of detection you want to be notified about. By default, the Human or vehicle enter region rule is enabled. Figure 90: Analytics > Rules Screen April 25, 2017 CF-5212/CF-5222 User and Installation Guide... - Page 106 Running and viewed from the side Bent over and viewed from the side 2. The camera should not be facing straight down (i.e., it should be at a 30-40 degree angle from the object). CF-5212/CF-5222 User and Installation Guide April 25, 2017...
-
Page 107: Responses
(scheduled actions) at pre-defined times during a defined monitoring period. Refer to the HTML Edition Units User’s Guide for detailed instructions on configuring these settings. Figure 94: Analytics > Responses Screen April 25, 2017 CF-5212/CF-5222 User and Installation Guide... - Page 108 Each automatic response definition includes the following three parameters: Triggering event, Actions and Schedule. Triggering event – Select the event that will start the automatic response. Figure 95: Responses > Triggering Event Tab CF-5212/CF-5222 User and Installation Guide April 25, 2017...
- Page 109 2. Click DELETE. The event is deleted. Actions – Select the action to perform in response to the occurrence of the triggering event. The configurable settings depend on the selected action. Figure 96: Responses > Actions Tab April 25, 2017 CF-5212/CF-5222 User and Installation Guide...
- Page 110 Select Perform immediately or enter the number of seconds (1-999) in After x seconds drop-down list. Click APPLY. Disable detection rule Select Perform immediately or enter the number of seconds (1-999) in After x seconds drop-down list. Click APPLY. CF-5212/CF-5222 User and Installation Guide April 25, 2017...
- Page 111 In the To text box, enter the end date. If there is no end date, check No end date. From the Weekdays list, select the day of the week. In the Between text box, enter the hours during which the monitoring will occur. 2. Click APPLY. April 25, 2017 CF-5212/CF-5222 User and Installation Guide...
-
Page 112: Scheduled Actions (Sched. Actions Screen)
Select the Activation signal: Continuous – From the drop-down list, select On or Off. Pulse activation – In the Sec. text box, enter the number of seconds for the Pulse duration. Click APPLY. CF-5212/CF-5222 User and Installation Guide April 25, 2017... - Page 113 3. Repeat step 1 for each Action. 4. To change the order of the actions, click UP or DOWN. 5. To delete an action, select the action and click DELETE. 6. Click APPLY when finished. April 25, 2017 CF-5212/CF-5222 User and Installation Guide...
- Page 114 In the Between text box, enter the hours during which the monitoring will occur. 2. Click APPLY. Refer to the HTML Edition Units User’s Guide for detailed instructions on configuring these settings. CF-5212/CF-5222 User and Installation Guide April 25, 2017...
-
Page 115: On Screen Display
Display tracking information Tracking shape: Rectangle Display trail enabled (10 seconds) Tracking color: Custom Radial button 1: Red Display camera information Font: Terminal Font size: Medium April 25, 2017 CF-5212/CF-5222 User and Installation Guide... -
Page 116: Firmware
System > Software Version. To upgrade the camera system software version, see System > Software Upgrade. 2. You must close and restart Internet Explorer in order to view the new firmware version. CF-5212/CF-5222 User and Installation Guide April 25, 2017... -
Page 117: Backup & Restore
Analytics firmware is stored in a separate file than the camera system software. To backup and restore the camera system software version, see System > Factory Default. Refer to the HTML Edition Units User’s Guide for detailed instructions on configuring these settings. April 25, 2017 CF-5212/CF-5222 User and Installation Guide... -
Page 118: Log Out
Select the Log Out link in the navigation bar to close the session. The following message appears: Figure 105: Logout Message To return to the application, click Login. The Login dialog box opens. See Figure 16: Login Dialog Box. CF-5212/CF-5222 User and Installation Guide April 25, 2017... -
Page 119: Appendices
Technical Specifications Internet Security Settings Install UPnP Components Installing and Deleting the Web Player Deleting Temporary Internet Files Back Focus Adjustment Connecting Wires to a Spring Clamp Terminal Block Mounting and Lens Accessories April 25, 2017 CF-5212/CF-5222 User and Installation Guide... -
Page 120: Technical Specifications
(Video Mask) Latitude. In the Latitude interface, the Privacy Mask is independent of the camera’s on-screen display and is not embedded. IR Function Day/Night (Auto/On/Off/Smart) CF-5212/CF-5222 User and Installation Guide April 25, 2017... - Page 121 FCC (47 CFR) Part 15, Subpart B, Class A; UL CE-marked (IEC 60950-1:2005+A1:2009 and EN 60950- Regulatory 1:2006+A11:2009+A1:2010+A12:2011); EN55032:2012; EN55024, International IEC 61000; EN61000; CISPR 22: 2009 Class A; EN 50130; ICES-003 Issue 5; RCM; RoHS Warranty Four-year limited warranty April 25, 2017 CF-5212/CF-5222 User and Installation Guide...
-
Page 122: Internet Security Settings
5. If the settings are not defined as default, select Default Level and move the Allowed levels for this zone slider to Medium-high and select OK. Figure 107: Internet Options Screen 6. Close all browsers and reopen so that the settings take effect. CF-5212/CF-5222 User and Installation Guide April 25, 2017... - Page 123 6. Click OK to accept the settings and close the Security screen. 7. Click OK to close the Internet Options screen. 8. Close the browser window and restart IE again to access the camera. April 25, 2017 CF-5212/CF-5222 User and Installation Guide...
-
Page 124: Install Upnp Components
To enable UPnP discovery in Windows 7, 8, 8.1, and 10 1. Click (Start) and select Control Panel. 2. Click Network and Internet. 3. Click Network and Sharing Center. 4. Click Change advanced sharing settings. CF-5212/CF-5222 User and Installation Guide April 25, 2017... - Page 125 2. In the Services manager dialog box, scroll down the list to UPnP Device Host and verify that it shows the status Started. If Started is not displayed, right-click and select Start from the shortcut menu. April 25, 2017 CF-5212/CF-5222 User and Installation Guide...
-
Page 126: Installing And Deleting The Web Player
To delete an existing DVPlayer or DCViewer file 1. Click Start and select Control Panel. The Control Panel opens. 2. In the Control Panel, click Uninstall a program. 2. From the installed program list, select DVPlayer or DCViewer. CF-5212/CF-5222 User and Installation Guide April 25, 2017... - Page 127 4. Click Delete. The Internet Properties dialog box opens. 5. Click OK. Your computer’s cache memory is deleted. After the cache is cleared, the Quasar Player installation wizard opens. 6. Follow instructions above to install the Quasar Player. April 25, 2017 CF-5212/CF-5222 User and Installation Guide...
-
Page 128: Deleting Temporary Internet Files
2. In the General tab in the Internet Options dialog box, click Delete. 3. In the Delete Browser History dialog box that appears, select Temporary Internet files. Uncheck Cookies and History to keep this data. Then click Delete. CF-5212/CF-5222 User and Installation Guide April 25, 2017... -
Page 129: Back Focus Adjustment
Tighten the back focus ring retaining screw to secure the ring in place. Return the camera’s Exposure Setting to Auto Iris if this was temporarily changed to Auto Shutter mode during focusing. April 25, 2017 CF-5212/CF-5222 User and Installation Guide... -
Page 130: Connecting Wires To A Spring Clamp Terminal Block
3. Insert the stripped end of the wire into the female outlet. 4. Release the orange spring clamp button. Figure 114: Connecting a Wire to a Terminal Block CF-5212/CF-5222 User and Installation Guide April 25, 2017... -
Page 131: Mounting And Lens Accessories
Appendices A.8. Mounting and Lens Accessories The following mounting accessories are available from FLIR for installation of your IOI HD CF-5212/CF-5222 Fixed IP Camera. For more information on available options, contact your FLIR sales representative or visit www.FLIR.com/security to request details on where to get the accessories you need. - Page 132 PH: +1 888.747.3547 (Support) FX: +1 805.685.2711 www.FLIR.com/security Corporate Headquarters FLIR Systems, Inc. 27700 SW Parkway Ave. Wilsonville, OR 97070 PH: +1 503.498.3547 FX: +1 503.498.3153 Document: CF-5212/CF-5222 User and Installation Guide Version: 2 Date: April 25, 2017 Language: en-US...
Need help?
Do you have a question about the CF-5212 and is the answer not in the manual?
Questions and answers