FLIR Quasar CP-6302 Series Installation Manual
Gen iii
Hide thumbs
Also See for Quasar CP-6302 Series:
- User and installation manual (142 pages) ,
- Installation manual (32 pages)

Related Manuals for FLIR Quasar CP-6302 Series


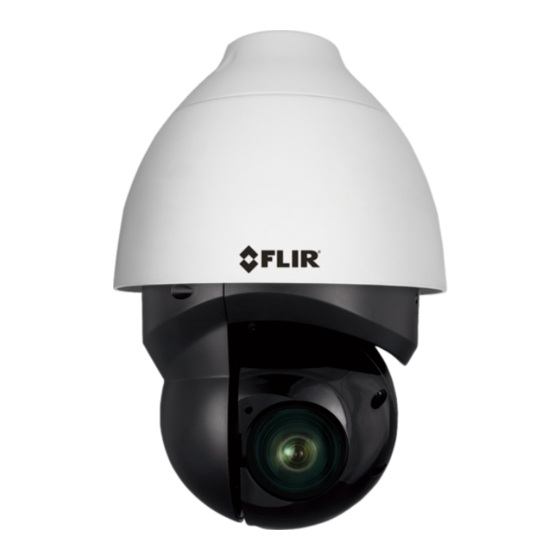
Summary of Contents for FLIR Quasar CP-6302 Series
- Page 1 Quasar™ Gen III Installation Manual CP-6302-30-R CP-6302-31-P CP-6302-31-I Quasar CP-6302 Range Installation Manual - Ver. 3 - June 25, 2020 This document does not contain any export-controlled information.
- Page 2 © 2020 FLIR Systems, Inc. All rights reserved worldwide. No parts of this manual, in whole or in part, may be copied, photocopied, translated, or transmitted to any electronic medium or machine readable form without the prior written permission of FLIR Systems, Inc..
-
Page 3: Table Of Contents
Table of Contents 1. Document Scope and Purpose ................... 1 2. Installation ......................... 5 Waterproofing the Camera Cables ................5 Mounting the Camera ....................6 2.2.1 Wall Mount Bracket CX-ARMX-G3 ..............6 2.2.2 Wall Mount Bracket with Power Box CX-ELBX-G3 ..........8 2.2.3 Gooseneck Mount with Power Box CX-GSNK-G3 .......... -
Page 4: Document Scope And Purpose
DIsclaimer Avis de non-responsabilité Users of FLIR products accept full Il incombe aux utilisateurs des produits FLIR de vérifier responsibility for ensuring the suitability and que ces produits sont adaptés et d'étudier le rôle des considering the role of the product detection capacités et limites de détection du produit appliqués... - Page 5 FLIR products. Un Conseil correspond à une information et aux bonnes pratiques utiles ou apportant un avantage supplémentaire pour l'installation et l'utilisation des produits FLIR. Quasar CP-6302 Range Installation Manual - Ver. 3 - June 25, 2020 This document does not contain any export-controlled information.
- Page 6 Document Scope and Purpose General Cautions and Warnings Précautions et avertissements d'ordre général This section contains information that indicates a Cette section contient des informations procedure or condition where there are potential hazards. indiquant qu'une procédure ou condition présente des risques potentiels. SAVE ALL SAFETY AND OPERATING INSTRUCTIONS FOR FUTURE USE.
- Page 7 Document Scope and Purpose Warning: · Do not drop the camera or subject it to physical shock. · Do not touch sensor modules with fingers. If cleaning is necessary, use a clean cloth with a bit of ethanol and wipe it gently. If the camera will not be used for an extended period of time, put on the lens cap to protect the sensor from dirt.
-
Page 8: Installation
Installation Installation The CP-6302-31-P PTZ and CP-6302-31-I IR PTZ cameras are designed for outdoor installation. For outdoor installation, FLIR recommends: · Always use weatherproof equipment, such as boxes, receptacles, connectors, etc. · For electrical wiring, use the properly rated sheathed cables for conditions to which the cable will be exposed (for example, moisture, heat, UV, physical requirements, etc.). -
Page 9: Mounting The Camera
Installation Mounting the Camera The following accessories and adapters are available for mounting the camera: · Wall Mount Bracket CX-ARMX-G3 · Wall Mount Bracket with Power Box CX-ELBX-G3 · Gooseneck Mount with Power Box CX-GSNK-G3 · Corner Adapter CX-CRNR-G3 · Pole Adapter CX-POLE-G3 For the CP-6302-30-R PTZ recessed model, see In-Ceiling... - Page 10 Installation Step 4 Step 5 Use the Allen key and a hex head Affix the bracket to the wall using cap screw to assemble and firmly the appropriate screws and screw affix the camera's pendant cap to anchors (not provided). the bracket.
-
Page 11: Wall Mount Bracket With Power Box Cx-Elbx-G3
Installation 2.2.2 Wall Mount Bracket with Power Box CX-ELBX-G3 What's in the Box Item Details Wall mount bracket with power CX-ELBX-G3 Parts package NO. 3 Allen Key NO. 5 Allen Key Sponge Hex Head Cap screw M6 x 20 (stainless steel) Cable gland Quick Install Guide (this document) -
Page 12: Gooseneck Mount With Power Box Cx-Gsnk-G3
Installation 2.2.3 Gooseneck Mount with Power Box CX-GSNK-G3 Gooseneck mount (1.5 inch threaded) with IP68 power box. Item Details Gooseneck bracket and CX-GSNK-G3 box 1 power box CX-GSNK-G3 gooseneck pipe Accessory box No. 2 Allen key No. 3 Allen key No. -
Page 13: Mount Adapters
Installation CX-GSNK-G3 dimensions 2.2.4 Mount Adapters The following mount adapters are available for the camera: · Corner Adapter CX-CRNR-G3 · Pole Adapter CX-POLE-G3 2.2.4.1 Corner Adapter CX-CRNR-G3 90-degree exterior angle corner adapter for CX-xxxx-G3 mounts. Item Details Corner mount adapter CX-CRNR-G3 Accessory bag Stainless steel truss head screw... - Page 14 Installation Step 1 Step 2 Step 3 Join parts 1 and 2 together. Tighten hex head cap screws Fix assembled corner adapter to (clockwise). the wall. Step 4 · When using a wall mount bracket (pictured), affix the wall mount bracket onto the corner adapter with washers in the front and screw nuts at the back.
-
Page 15: Pole Adapter Cx-Pole-G3
Installation 2.2.4.2 Pole Adapter CX-POLE-G3 Pole adapter for CX-xxxx-G3 mounts, including 2.5-8.5 inch straps. Item Details Pole mount adapter CX-POLE-G3 8.5" ring Accessory bag Stainless streel truss head screw M8*20 Stainless steel truss head screw M8*30 M8 washer M8 screw nut M8 spring washer Quick install guide Summarized below... - Page 16 Installation Tools Needed: · Circle Cutter · Crosshead Screw Driver (Thread size: M4) Follow the steps to install CP-6302-30-R Network PTZ Camera Step 1: Make a 192mm cut in the ceiling. Step 2: Remove the dome cover by turning the dome cover counter-clockwise. Step 3: Put the Ethernet cable through the ceiling opening.
- Page 17 Installation When tightening the three screws, the ceiling clamps will close towards the ceiling board. Please make sure the clamp is completely flush with the ceiling board. Step 5: Put back and tighten the dome cover back clockwise to complete the installation. Quasar CP-6302 Range Installation Manual - Ver.
- Page 18 FLIR Systems, Inc. 6769 Hollister Ave Goleta, CA 93117 Corporate Headquarters FLIR Systems, Inc. 27700 SW Parkway Ave. Wilsonville, OR 97070 Support: https://www.flir.com/support/ product.enterprise.support@flir.com Document: Quasar Gen III CP-6302 Range Installation Manual Version: Ver. 3 Date: June 25, 2020 This document does not contain any export-controlled information.
Need help?
Do you have a question about the Quasar CP-6302 Series and is the answer not in the manual?
Questions and answers