Chapters
Table of Contents
Troubleshooting

Related Manuals for SamplexPower Evolution Series

Summary of Contents for SamplexPower Evolution Series
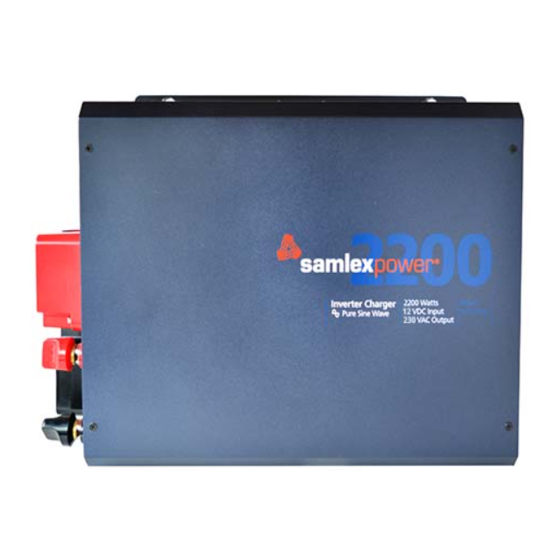
- Page 1 Evolution Series Owner's Please read this manual bEfOrE Manual Inverter/Charger operating. Pure Sine Wave Models: EVO-2212E EVO-3012E EVO-2224E EVO-4024E Firmware: For use with 230 VAC Models Rev 0.70...
-
Page 2: Table Of Contents
InVErTEr/ChargEr ManUaL | Index SeCtion 1 Safety Instructions & General Information ......3 SeCtion 2 Components & Layout ............22 SeCtion 3 Installation ................. 26 SeCtion 4 General Description and Principles of Operation ....58 SeCtion 5 battery Charging in Evolution Series ........ -
Page 3: Safety Instructions & General Information
SECTIOn 1 | Safety Instructions & general Information 1.1 iMPortAnt SAFety inStruCtionS SAVe theSe inStruCtionS. thiS MAnuAL ContAinS iMPortAnt inStruCtionS For MoDeLS: eVo-2212e, eVo-2224e, eVo-3012e, eVo-4024e thAt ShALL be FoLLoweD During inStALLAtion & MAintenAnCe oF the inVerter/ChArger. THE fOLLOWING SYMbOLS WILL bE USED IN THIS MANUAL TO HIGHLIGHT SAfETY AND IMPOrTANT INfOrMATION: wArning! Indicates possibility of physical harm to the user in case of non-compliance. - Page 4 SECTIOn 1 | Safety Instructions & general Information The AC input / output wiring terminals are intended for field connection using Copper conductors that are to be sized based on 70°C. See Tables 3.2.1, 3.2.2 and 3.2.3 for sizing of conductors for AC INPUT circuits and Table 3.3 for sizing of conductors for AC OUTPUT circuits.
- Page 5 SECTIOn 1 | Safety Instructions & general Information Use caution to reduce the risk of dropping a metal tool on the battery. It could spark – or short circuit the battery or other electrical parts and could cause an explosion. Always use insulated tools.
- Page 6 SECTIOn 1 | Safety Instructions & general Information 14. Précautions lorsque vous travaillez avec des piles. Les piles contiennent très corrosif acide sulfurique dilué comme électrolyte. Des précautions doivent être – prises pour empêcher tout contact avec la peau, les yeux ou les vêtements. Porter des lunettes de protection Les batteries produisent de l’hydrogène et de l’oxygène lors de la charge résultant de l’évolution du mélange –...
- Page 7 SECTIOn 1 | Safety Instructions & general Information inductive reactance (X ), Capacitive reactance (X ) and reactance (X): reactance is the opposition of a circuit element to a change of electric current or voltage due to that element’s inductance or capacitance. Inductive reactance (X ) is the property of a coil of wire in resisting any change of electric current through the coil.
- Page 8 SECTIOn 1 | Safety Instructions & general Information • e lectric Motors: At the moment when an electric motor is powered ON, the rotor is stationary (equivalent to being “Locked”), there is no “back EMf” and the windings draw a very heavy starting current (Amperes) called “Locked rotor Amperes”...
- Page 9 SECTIOn 1 | Safety Instructions & general Information lamps, Quartz/Halogen lamps and Quartz / Halogen Infrared heaters. These require higher start- ing surge power due to lower resistance value when the heating elements are cold). reactive Load: A device or appliance that consists of a combination of resistive, inductive and capacitive elements (like motor driven tools, refrigeration compressors, microwaves, computers, audio/ video etc.).
- Page 10 SECTIOn 1 | Safety Instructions & general Information (150 Hz), 5th (250 Hz), 7th (350 Hz) and so on. The high frequency harmonic content in a Modi- fied Sine Wave produces enhanced radio interference, higher heating effect in inductive loads like microwaves and motor driven devices like hand tools, refrigeration / air-conditioning compressors, pumps etc.
- Page 11 SECTIOn 1 | Safety Instructions & general Information The power rating of inverters is specified as follows: • Maximum Continuous Running Power Rating • Starting Surge Power Rating Please read details of the above two types of power ratings in Section 1.2 under “DEfINITIONS” inFo The manufacturers’ specification for power rating of AC appliances and devices indicates only the Maximum Continuous running Power rating.
- Page 12 SECTIOn 1 | Safety Instructions & general Information 1.3.4 electro-Magnetic interference (eMi) and eMC Compliance These inverters contain internal switching devices that generate conducted and radiated electromagnetic interference (EMI). The EMI is unintentional and cannot be entirely eliminated. The magnitude of EMI is, however, limited by circuit design to acceptable levels as per limits laid down in the European EMC Directive 2014/30/EU for Class A limits.
- Page 13 SECTIOn 1 | Safety Instructions & general Information The inverter should, therefore, be sized adequately to withstand the high inrush current and the high Crest factor of the current drawn by the SMPS. Normally, inverters have short duration Surge Power rating of 2 times their Maximum Continuous Power rating. hence, it is recommended that for purposes of sizing the inverter, to accommodate Crest Factor of 3, the Maxi- mum Continuous Power rating of the inverter should be >...
- Page 14 SECTIOn 1 | Safety Instructions & general Information Lead-acid batteries can be categorized by the type of application: Automotive service - Starting/Lighting/Ignition (SLI, a.k.a. cranking), and Deep cycle service. Deep Cycle Lead Acid batteries of appropriate capacity are recommended for powering of inverters. 1.4.1 Deep Cycle Lead Acid batteries Deep cycle batteries are designed with thick-plate electrodes to serve as primary power sources, to have a constant discharge rate, to have the capability to be deeply discharged to up to 80 %...
- Page 15 SECTIOn 1 | Safety Instructions & general Information 1.4.5 Specifying Charging / Discharging Currents: C-rate Electrical energy is stored in a cell / battery in the form of DC power. The value of the stored energy is related to the amount of the active materials pasted on the battery plates, the surface area of the plates and the amount of electrolyte covering the plates.
- Page 16 SECTIOn 1 | Safety Instructions & general Information 1.4.6 Charging / Discharging Curves fig. 1.4 shows the charging and discharging characteristics of a typical 12V / 24V flooded Lead Acid battery at electrolyte temperature of 80°f / 26.7°C. The curves show the % State of Charge (X-axis) versus terminal voltage (Y-axis) during charging and discharging at different C-rates.
- Page 17 SECTIOn 1 | Safety Instructions & general Information tAbLe 1.9 bAttery CAPACity VerSuS rAte oF DiSChArge – C-rAte C-rate Discharge Current usable Capacity (%) C/20 100% C/10 Table 1.9 shows that a 100 Ah capacity battery will deliver 100% (i.e. full 100 Ah) capacity if it is slowly discharged over 20 Hours at the rate of 5 Amperes (50W output for a 12V inverter and 100W output for a 24V inverter).
- Page 18 SECTIOn 1 | Safety Instructions & general Information Check the individual cell voltages / specific gravity. If the inter-cell voltage difference is more than a 0.2V, or the specific gravity difference is 0.015 or more, the cells will require equalization. Please note that only non-sealed / vented / flooded / wet cell batteries are equalized.
- Page 19 SECTIOn 1 | Safety Instructions & general Information In the example given above, the 10.5V / 21.0V Low battery / DC Input Alarm would trigger at around 80% discharged state (20% SOC) when the C-rate discharge current is C/5 Amps. However, for lower C-rate discharge current of C/10 Amps and lower, the battery will be almost completely discharged when the alarm is sounded.
- Page 20 SECTIOn 1 | Safety Instructions & general Information 1.4.13 Series and Parallel Connection of batteries refer to details at Section 3.4. 1.4.14 Sizing the inverter battery bank One of the most frequently asked questions is, “how long will the batteries last?” This question cannot be answered without knowing the size of the battery system and the load on the inverter.
- Page 21 SECTIOn 1 | Safety Instructions & general Information It will be seen from the above that the final rated capacity of the batteries is almost 2 times the energy required by the load in Ah. Thus, as a Rule of Thumb, the Ah capacity of the batteries should be twice the energy required by the load in Ah.
-
Page 22: Components & Layout
SECTIOn 2 | Components & Layout 1 MAin unit: LAyout-Front (Fig 2.1) 1a Red 1b Black Fig 2.1 Layout-Front Protection Covers for Battery Terminals 1. battery Positive (+) Input Connector – M10 x 1.50 Nut & bolt (rED Protection Cover 1(a) is removed) 1a. - Page 23 SECTIOn 2 | Components & Layout 2.2 MAin unit: LAyout-bACk (Fig 2.2) 1. Air outlet vents for 2 internal fans Fig 2.2 Layout-back 2.3 MAin unit: LAyout-AC SiDe (Fig 2.3) [Behind Cover Plate Cover plate for pocket for AC Input/Output terminals Pocket for AC Input/Output Terminals (behind cover plate 1) AC Input/Output Terminal block —...
- Page 24 SECTIOn 2 | Components & Layout 2.4 reMote ControL eVo-rC (Fig 2.4) [oPtionAL] Fault Fig 2.4(a) optional remote Control eVo-rC LCD Screen - 2 rows of 16 characters each ON/Off Key Green LED “Status” red LED “fault" Navigation Key “back” Navigation Key “Up”...
- Page 25 SECTIOn 2 | Components & Layout 2.5 bAttery teMPerAture SenSor eVo-bCtS [Fig 2.5 (a)] Temperature Sensor: Mounting hole: 10mm/0.39” suitable for 3/8” or 5/16” battery studs rJ-45 Plug 5 meter/16.5 ft cable note: Mount the sensor on the Positive or Negative terminal stud on the battery as shown in fig 2.5(b) Fig 2.5(a) temperature Sensor Model eVo-bCtS Fig 2.5(b) temperature Sensor installation 2.6 ContentS oF PACkAge...
-
Page 26: Installation
SECTIOn 3 | Installation 3.1 SAFety oF inStALLAtion wArning! Please ensure safety instructions given under Section 1 are strictly followed. Attention! Se il vous plaît assurer consignes de sécurité fournies à la section 1 sont strictement suivies. 3.2 oVerALL DiMenSionS The overall dimensions and the location of the mounting holes are shown in fig. - Page 27 SECTIOn 3 | Installation CAution! ensure there is oVer 200 mm clear space surrounding the inverter for ventilation. ATTENTION! Assurer qu’il y a PLUS QUE 200 mm d’espace DÉGAGÉ entourant l’onduleur pour faciliter la ventilation. Mounting orientation: • Mount horizontally on a horizontal surface (e.g. table top or a shelf). Please see Fig. 3.2. Wall 115°...
- Page 28 SECTIOn 3 | Installation • Mount vertically on a vertical surface, see Fig. 3.4. Protect against possibility of small objects or water entering the ventilation openings on the top. (If necessary, install a suitable sloping guard at least 200mm from the top surface). Also, ensure there is no combustible material directly under the unit. Wall 115°...
- Page 29 SECTIOn 3 | Installation 3.4.2 Parallel Connection Cable “A” Battery 1 Battery 2 Battery 3 Battery 4 12V Inverter or 12V Charger Cable “B” Fig 3.6 Parallel Connection When two or more batteries are connected in parallel, their voltage remains the same but their Ah capacities add up.
- Page 30 SECTIOn 3 | Installation 3.4.4 wiring order in Parallel Connection of batteries CAution! When 2 or more batteries / battery strings are connected in parallel and are then connected to inverter/charger (See figs 3.6 and 3.7), attention should be paid to the manner in which the inverter/charger is connected to the battery bank.
- Page 31 SECTIOn 3 | Installation Quand il y a 2 batteries/fils de batterie ou plus qui sont liés en parallèle et branché à la fois, à un chargeur (Voir Figs. 3.6 et 3.7), il faut faire attention à la manière dont le chargeur est branché à la banque de batterie. Veuillez assurer que le câble positif de sortie du chargeur de batterie (Câble A) est lié...
- Page 32 SECTIOn 3 | Installation 3.5 DC SiDe ConneCtionS 1a Red 1b Black Fig 3.8 DC Side Connections Protection Covers for Battery Terminals 1. battery Positive (+) Input Connector – M10 x 1.50 Nut & bolt (rED Protection Cover 1(a) is removed) 1a.
- Page 33 SECTIOn 3 | Installation DC Side Grounding Connector (5) is connected to the Earth ground / vehicle chassis – ground as per recommendations at Section 3.14. 3.5.1 Preventing DC input over Voltage It is to be ensured that the DC input voltage of this unit does not exceed 17 VDC for the 12V battery version EVO-2212E and EVO-3012E, and 35 VDC for the 24V battery versions EVO-2224E and EVO-4024E to prevent permanent damage to the unit.
- Page 34 SECTIOn 3 | Installation and will produce abnormal heating leading to risk of insulation melt down and fire. Normally, the thickness of the cable should be such that the voltage drop due to the current & the resistance of the length of the cable should be less than 2%. Use oil resistant, multi-stranded copper wire cables rated at 90º...
- Page 35 SECTIOn 3 | Installation élèvée des bornes, à qui ils sont connectés. L’ampacité des câbles est basé sur UL-1741 et la Norme Nationale Électrique (NEC)-2014. « Notes for table 3.1 » Le circuit d’entrée CC doit subir à des courants CC forts et ainsi, il faut que la taille des câbles et des connecteurs est sélectionnée pour réduire la perte de tension entre la batterie et l’onduleur.
- Page 36 SECTIOn 3 | Installation It is mandatory to use appropriately sized external fuse in the battery and External Charger Circuits. If external fuse is not used and reverse polarity connection is made by oversight, the input section of the unit will be damaged/burnt. warranty will be voided in such a situation. Il est obligatoire d’utiliser un fusible externe de taille appropriée à...
- Page 37 SECTIOn 3 | Installation tAbLe 3.1 SiZing oF bAttery SiDe CAbLeS AnD eXternAL bAttery SiDe FuSeS item rated Continuous Size of external 90°C Copper Conductor. Size based on Ampacity at Column DC input Current Fuse based on DC (3) or 2%Voltage Drop, whichever is thicker (See note 3) (See note 1) input Current at Column 2...
- Page 38 SECTIOn 3 | Installation a) Not less than the rated Continuous DC Input Current (Column 2) b) Closest Standard Ampere rating of fuse has been used c) Type of fuse: fast-acting, Current Limiting, UL Class – Type "Class T" as per UL Standard 248-15 or Type "HrC"...
- Page 39 SECTIOn 3 | Installation 3.6 AC inPut AnD outPut - LAyout AnD ConneCtion ArrAngeMent AC side layout and connection arrangement are shown in fig 3.9. 1. Cover plate for pocket for AC Input/Output terminals 2. Pocket for AC Input/Output Terminals (behind cover plate 1) 3.
- Page 40 SECTIOn 3 | Installation 3.6.1 System grounding and output neutral to Chassis ground bond Switching wArning! • In "Inverting Mode" (default condition), the Neutral of the AC output of the unit gets bonded to the metal chassis of the unit through the internal “Neutral to Chassis Switching relay”...
- Page 41 SECTIOn 3 | Installation 3.6.3 Preventing Paralleling of the AC output wArning! The AC output of the unit cannot be synchronized with another AC source and hence, it is not suitable for paralleling on the output side. The AC output of the unit should never be connected directly to an electrical breaker panel / load center which is also fed from another AC source.
- Page 42 SECTIOn 3 | Installation time of switching on of the unit), the unit will not be powered on and a message “Output failure!” will be displayed. This protection against error in connection of the AC input wiring is active only when this wrong connection is made when the unit is in off condition and is switched on subsequently.
- Page 43 SECTIOn 3 | Installation Crimp barrel Portion ↓ → Wire End Terminal Stripped Wire End Fig 3.11 Stripped wire end terminal on AC wiring 3.7.2 tightening torques Tightening torques to be applied to the wiring terminals are given in Table below: tightening torQueS battery input external Charger input...
- Page 44 SECTIOn 3 | Installation AC input side wiring and breaker sizes depend upon the maximum continuous AC input cur- rent under various operating conditions described in the succeeding paragraphs. — The Maximum Load Current on the output side has to be limited to the rated output Amp capacity of the specific model when operating in Inverter Mode (Column 1 ).
- Page 45 SECTIOn 3 | Installation tAbLe 3.2.3 SiZing oF griD AnD generAtor inPut wiring AnD breAkerS For eVo-4024e Model no. and rated AC rated AC total rated AC Programmed external Conductor rated output Pass through Charging input Current Value of breaker Size Size based on Power in inverter Current...
- Page 46 SECTIOn 3 | Installation ii. Table 3.2.2 is for EVO-3012E and is based on the AC Input Current Limit ("GrID MAX CUrrENT" and"GEN MAX CUrrENT") set at 25A which is its full rated AC input current requirement and is equal to the sum of the full rated AC side charging current of 12A ( for full rated DC side charging current of 130A) and full rated AC pass through current of 13A (equal to the full rated AC output current of 13A in Inverting Mode)
- Page 47 SECTIOn 3 | Installation 3.9.1 tables for wire and breaker Sizing - AC output Side Table 3.3 provides details of wire and breaker sizing for the AC output side. AC wiring and breaker sizes on the AC output side are required to be determined by the rated Load Current when operating in Inverter Mode (Column 1).
- Page 48 SECTIOn 3 | Installation 3.10 reSiDuAL Current DeViCe (rCD) ProteCtion For 230VAC MotorhoMe / CArAVAn APPLiCAtion When this unit is installed in 230VAC motorhome / caravan, ensure that appropriate capac- ity of residual Current Device (rCD) is used in the vehicle wiring system to protect all load circuits.
- Page 49 SECTIOn 3 | Installation Terminal” of the premises “ME” which, in turn, is bonded to the Earth Ground through the Ground rod or through the buried metallic pipe (water / gas). Similarly, the Earthing Terminal “EG” of the Generator is also bonded to the Earth Ground through the Main Earthing Terminal of the Premises “ME”...
- Page 50 SECTIOn 3 | Installation being used. The wire size used for DC side grounding should be minimum 10mm or of the same size as the battery cable, whichever is thicker (battery cable size should have mini- mum Ampacity ≥ the Ampere rating of this battery fuse (150A to 400A) depending upon the being used).
- Page 51 SECTIOn 3 | Installation " Earth Ground through Ground rod / buried metallic water / gas pipe. Hence, the battery Negative, the metal frame/chassis of the DC Distributional Panel and the metal frame/chassis of the EVO will all be bonded to the Earth Ground. If there was a +12V / +24V ground fault in the EVO , very large DC fault current (150A to 400A depending on the Model of EVO being used) from battery+ would flow through the larger DC side grounding wires to the bat-...
- Page 52 SECTIOn 3 | Installation 52 | SAMLEX AMErICA INC.
- Page 53 SECTIOn 3 | Installation 3.15 Shore bASeD inStALLAtion 3.15.1 typical Shore based installation fig. 3.13 illustrates a typical shore based installation battery is connected to the DC input connections through an appropriate fuse in the battery — + line to protect the DC input cables against short circuit battery Temperature Sensor Model EVO-bCTS is installed on the Positive or Negative post —...
- Page 54 SECTIOn 3 | Installation NO - Normally Open Contact Battery Common Temperature To Remote Start/Stop Sensor - Model EVO-BCTS NC - Normally Closed Contact Terminals on the Generator Optional Fuse Lead Acid ELECTRICAL SUB-PANEL FOR EVO Generator Auto (Within 7” Battery Bank Panel for AC loads backed up by EVO of battery...
- Page 55 SECTIOn 3 | Installation 3.16 MobiLe inStALLAtion - generAL inForMAtion 3.16.1 rCD Protection For Motorhome / Caravan / Vehicle Application wArning! 1. When this unit is installed in a motorhome / caravan please ensure that appropriate residual Cur- rent Devices (rCD) are installed as recommended in the typical installation diagram at fig 3.14. 2.
- Page 56 SECTIOn 3 | Installation For eVo-3012e: The maximum continuous DC current required is 373A. The capacity of – the battery Isolator should be more than 373A or more than the capacity of the alternator, whichever is higher For eVo-4024e: The maximum continuous DC current required is 266A. The capacity of –...
- Page 57 SECTIOn 3 | Installation NO - Normally Open Contact Battery Common Temperature To Remote Start/Stop Sensor - Model EVO-BCTS NC - Normally Closed Contact Terminals on the Generator Optional Fuse Lead Acid − − Generator Auto (Within 7” Battery Bank of battery SLI Battery Start/Stop...
- Page 58 SECTIOn 4 | general Description & Principles of Operations generAL DeSCriPtion is a Pure Sine Wave, bi-directional, Single-Phase Inverter / Charger with a Transfer relay that operates either as an inverter Or as a smart battery charger. It uses a common Converter Section that can work in two directions –...
- Page 59 SECTIOn 4 | general Description & Principles of Operations When the unit powers up, it starts in Inverting Mode first. The output voltage ramps up gradually from around 96 VAC to 230 VAC in around 200 ms. This reduces otherwise very high starting inrush current drawn by AC loads like Switched Mode Power Supplies (SMPS) and motor driven loads like fans, pumps, compressors etc.
- Page 60 SECTIOn 4 | general Description & Principles of Operations • When operating as an inverter, the current carrying conductor of the Inverter Section that is con- nected to the Output Neutral terminal of EVO is bonded to the metal chassis of EVO by the “Output Neutral to Chassis Ground bond Switching relay” (K4 in fig 4.1). As the metal chassis of EVO is in turn bonded to the Earth Ground (in shore installations) or to the rV Ground (chas- sis of the rV) or to the boat Ground (DC Negative Grounding bus bar and the Main AC Ground-...
- Page 61 SECTIOn 4 | general Description & Principles of Operations Switching of bonding of output neutral to Chassis ground 40A rated SPDT relay K4 is used to switch the bonding of the Output Neutral Connector (OUTPUT NEUTrAL) to the chassis of the unit When Grid / Generator Power is available, relay K4 will be energized and contact 4 switches over to contact 5.
- Page 62 SECTIOn 4 | general Description & Principles of Operations 4.5.3 Synchronized transfer of Power Direct AC input from Grid and Generator can be fed simultaneously to separate AC Input Circuits. Only one AC source is selected at one time. When both Grid and Generator are available simultaneously, Grid has priority.
- Page 63 SECTIOn 4 | general Description & Principles of Operations Please see details under Section 5 titled “battery Charging in Evolution Series”. 4.7 Auto generAtor StArt / StoP Auto Generator Start / Stop functionality has been provided using “Common” and Normally Open “NO”...
- Page 64 SECTIOn 4 | general Description & Principles of Operations 4.8 MoDeS oF oPerAtion 4.8.1 Charging Mode As long as the external AC input power from the Grid/Generator is available and is within the programmed limits of voltage and frequency, it is passed through to the AC load through the Transfer relay Section.
- Page 65 SECTIOn 4 | general Description & Principles of Operations • transfer from inverter to grid / generator: As soon as qualified AC input power from Grid / Generator is available, the inverter will exit Power Saving Mode and will switch over to Normal Mode. This switch over is necessary for synchronizing the AC output of the inverter with the AC input before transfer (Synchronization can not be carried out with pulsing wave form during Power Saving Mode).
- Page 66 SECTIOn 4 | general Description & Principles of Operations “GS DETECT TIME” (0-600 sec; Default 10 sec)]. On changing over to “Charging Mode”, qualified AC input from the Grid / Generator is passed through to the AC Output and at the same time, the Internal AC Charger starts charging the battery.
- Page 67 1.4, “general information - Lead Acid batteries”. All battery charging voltages are specified at battery temperature of 25˚C / 77˚F. SECTIOn 5 | Battery Charging in Evolution Series 5.1 PrinCiPLe oF oPerAtion oF bAttery ChArging SeCtion Series is a bi-directional Inverter / Charger with a Transfer relay that operates either as an inverter Or as a battery charger.
-
Page 68: Battery Charging In Evolution
SECTIOn 5 | Battery Charging in Evolution Series The battery Charger Section of the EVO is a powerful, 100 MHz DSP micro-controller based, 3 Stage or a 4 Stage Charger. battery charging parameters are detailed at Table 6.2. 3 Stage Charging Algorithm (Default) is used for normal day to day charging. The 3 stages are –... - Page 69 SECTIOn 5 | Battery Charging in Evolution Series inFo If the AC side charging current has been automatically reduced to 0A and the pass through load current is still 1A more than the programmed value of the “GrID MAX CUrrENT” / “GEN MAX CUrrENT” for 5 sec, the EVO will shut down due to fAULT MODE and display “Input over current!”...
- Page 70 SECTIOn 5 | Battery Charging in Evolution Series note: in other inverter chargers that execute Absorption and equalization Stages for a fixed time of 4 to 8 hours, a nearly fully charged battery may overcharge / boil and hence, will reduce battery life. 5.4 PArALLeL ChArging uSing eXternAL ChArger The batteries feeding the EVO can also be charged using appropriately sized external charger.
- Page 71 SECTIOn 5 | Battery Charging in Evolution Series Attention! S'assurer que les paramètres de charge comme l'absorption, flotter et tensions de péréquation et compensation de la température de la charge externe contrôleur sont set / programmé pour correspondre aux paramètres par défaut / pro- grammée de la batterie interne de chargeur d'EVO basé...
- Page 72 SECTIOn 5 | Battery Charging in Evolution Series this stage is displayed as "n-CC" in the Charging Mode screens in the remote Control eVo-rC (Please see Section 3.6.1 of the attached owner's Manual for eVo-rC at Appendix A). LEGEND Voltage Curve BULK FLOAT ABSORPTION...
- Page 73 SECTIOn 5 | Battery Charging in Evolution Series 5.6.2 Absorption Stage During the Absorption Stage, the charging voltage is held constant near the Gassing / Absorption Voltage to ensure that the battery is further charged to the full capacity without overcharging.
- Page 74 SECTIOn 5 | Battery Charging in Evolution Series 1 = Equalize (4-stage)]. Equalization of the batteries is carried out periodically - normally once per month for battery under heavy duty service and every two to four months for battery under light duty service.
- Page 75 SECTIOn 5 | Battery Charging in Evolution Series CAution! For effective equalization to take place, it is desirable that the batteries undergo a longer bulk Stage applicable to the deeply discharged condition of the battery. Please ensure that before the batteries are equalized, they should be deeply –...
- Page 76 SECTIOn 5 | Battery Charging in Evolution Series At the end of Absorption Stage, it transitions to the programmed "EQUALIZE VOLT- – AGE" (see programmable range and defaults at Table 6.2). It remains in this stage for the computed time T2. this stage is displayed as"e-CVe" in the Charging Mode screens in remote Control eVo-rC (Please refer to Section 3.6.1 of owner's Manual for eVo-rC at Appendix A).
-
Page 77: Operation, Protections And Troubleshooting
SECTIOn 5 | Battery Charging in Evolution Series note: Procedure described above is to be used when the optional remote Control EVO-rC has NOT been plugged into the rJ-45 remote Control Jack. Please note if the remote Control has been plugged into the rJ- 45 Jack, the above procedure cannot be activated and the ON/Off of Equalization Mode will be controlled by the remote Control EVO-rC. - Page 78 SECTIOn 6 | Operation, Protections and Troubleshooting 6.1.2 Powering oFF To power Off the unit, press and hold the ON/Off button (11, fig 2.1) for 5 seconds. Wait for the Green LED marked “ON” (12, fig 2.1) and red LED marked –...
- Page 79 SECTIOn 6 | Operation, Protections and Troubleshooting 6.3 oPerAtionAL inForMAtion through LeDS AnD buZZer Table 6.1 shows the operational states of the unit indicated by the following LEDs on the front panel of the unit and buzzer: o green LeD marked “on” (12, Fig 2.1) o red LeD marked “Fault”...
- Page 80 SECTIOn 6 | Operation, Protections and Troubleshooting 6.4 oPtionAL reMote ControL eVo-rC (see Appendix A) For ProgrAMMing oF MoDeS oF oPerAtion AnD PArAMeterS Optional remote Control Model EVO-rC (fig 2.4) will be required for more advanced control and monitoring. Please see separate Owner’s Manual for EVO-rC at Appendix A. The remote Control comes with 10M / 33 ft., rJ-45 Data Cable.
- Page 81 SECTIOn 6 | Operation, Protections and Troubleshooting tAbLe 6.2 ProgrAMMAbLe AnD DeFAuLt PArAMeterS: grouP ChArging CurVe (Continued) Programming range (Programming requires optional Default remote Control Model eVo-rC) Parameter eVo- eVo- eVo- eVo- eVo- eVo- eVo- eVo- 2212e 3012e 2224e 4024e 2212e 3012e 2224e...
- Page 82 SECTIOn 6 | Operation, Protections and Troubleshooting tAbLe 6.5 ProgrAMMAbLe AnD DeFAuLt PArAMeterS - grouP "inPut high LiMit" Setting range Default value group Parameter name eVo- eVo- eVo- eVo- eVo- eVo- eVo- eVo- 2212e 3012e 2224e 4024e 2212e 3012e 2224e 4024e reSet VoLtAge 200.0 –...
- Page 83 SECTIOn 6 | Operation, Protections and Troubleshooting tAbLe 6.6 ProgrAMMAbLe AnD DeFAuLt PArAMeterS - grouP "other FunCtionS" (Continued) Setting range Default Value Parameter name eVo- eVo- eVo- eVo- eVo- eVo- eVo- eVo- 2212e 3012e 2224e 4024e 2212e 3012e 2224e 4024e “reLAy FunCtion”...
- Page 84 SECTIOn 6 | Operation, Protections and Troubleshooting 6.6 Powering oFF the unit in FAuLt MoDe If the unit is in “fault Mode”, it will be possible to power Off the unit with the ON/Off Push button. (As explained under paragraph 6.1.2, as long as AC input voltage > 140 ± 10 VAC is present, the unit CANNOT bE POWErED Off using the ON / Off button on the front panel of the unit or on the optional remote Control EVO-rC (see Appendix A).
- Page 85 SECTIOn 6 | Operation, Protections and Troubleshooting When the EVO is in “Standby Mode”, operational status will be displayed as follows: on the front panel of eVo — No LED display. Green LED marked “ON” (12, fig 2.1) and red LED marked “fAULT” (13, fig 2.1) will both be Off.
-
Page 86: Specifications
SECTIOn 7 | Specifications Models eVo-2212e eVo-3012e eVo-2224e eVo-4024e inVerter SeCtion output waveform Pure Sine Wave input battery Voltage range 9.1 - 17 VDC 18.1 - 34 VDC nominal AC output Voltage 230 VAC ± 5% output Frequency 50 / 60 Hz ± 0.1 Hz (Default 50 ± 0.1 Hz) total harmonic Distortion of Pure <... - Page 87 SECTIOn 7 | Specifications Models eVo-2212e eVo-3012e eVo-2224e eVo-4024e oPerAting MoDeS grid/generator Priority (Default) oFF-Line Mode • Grid/Generator supplies AC loads and charges batteries • Inverter is standby battery / inverter Priority (Programmable) • Inverter supplies AC loads even if Grid/Generator is available on-Line Mode •...
- Page 88 SECTIOn 7 | Specifications SAFety AnD CoMPLiAnCe — CE Marked — Low Voltage Directive 2014/35/EU Safety Compliance — IEC60950-1:2005 (2nd Edition) + A1:2009 + A2:2013 — EN60950-1:2006 + A11:2009 + A1:2010 + A12:2011 + A2:2013 — AS/NZS 60950-1:2011 — CE Marked —...
-
Page 89: Warranty
SECTIOn 8 | Warranty 2 yeAr LiMiteD wArrAnty Series Inverter/Chargers manufactured by Samlex America, Inc. (the “Warrantor“) are warranted to be free from defects in workmanship and materials under normal use and service. The warranty period is 2 years for the United States and Canada, and is in effect from the date of purchase by the user (the “Purchaser“). - Page 90 Contact Information Toll Free Numbers Ph: 1 800 561 5885 Fax: 1 888 814 5210 Local Numbers Ph: 604 525 3836 Fax: 604 525 5221 Website www.samlexamerica.com USA Shipping Warehouses Kent, WA Plymouth, MI Canadian Shipping Warehouse Delta, BC Email purchase orders to orders@samlexamerica.com 11025-EVO-2212E-3012E-2224E-4024E-0317...
- Page 91 APPENDIX A Remote Control Owner's Please read this manual bEfORE Manual for Evolution operating. Series Inverter/ Charger firmware: Model: EVO-RC Rev 020 For use with 230 VAC Models NOTE: REMOTE CONTROL MODEL NO. EVO-RC IS OPTIONAL AND IS REQUIRED TO BE ORDERED SEPARATELY.
- Page 92 EVO-RC OwNER'S MANuAl | Index APPENDIX A SeCtion 1 Safety Instructions, Introduction and Layout ......3 SeCtion 2 Installation ................4 SeCtion 3 Operation ................6 SeCtion 4 Parameter Setup ..............11 SeCtion 5 SD Card ................. 38 SeCtion 6 Monitoring of Operation Using LED and Buzzer ....
-
Page 93: Safety Instructions, Introduction And Layout
SECtION 1 | Safety Instructions, APPENDIX A Introduction and layout 1.0 intRoDUCtion AnD LAYoUt The EVO-RC Remote Control allows you to monitor and customize the operating parameters of Samlex Evolution Series Inverter/Charger Models EVO-2212, 2224, 3012 and 4024. Layout is shown in Fig. 1.1(a) and (b) below. LCD Screen –... -
Page 94: Installation
SECtION 2 | Installation APPENDIX A 2.1 inStALLAtion GUiDeLineS The remote control is provided with 10M/33ft, RJ-45 Data Cable (Straight Wired). Check the proposed routing distance of the wire and use longer wire, if necessary. • Flush mounting of the Remote requires appropriate cut-out in the wall/panel. Take necessary precautions to ensure any wiring/plumbing running behind the wall/panel is not damaged. - Page 95 SECtION 2 | Installation APPENDIX A Take the other end of remote cable and plug it into the RJ-45 Jack at the back of the EVO-RC (Fig. 2.3). Check the remote display to ensure the Power-up self test initiates. If the self test is successful, secure the EVO-RC to the wall using the four screws. (Fig 2.2) Flush mounting the EVO-RC on the wall with 4pcs, Φ3mm self-tapping screws (flat head).
-
Page 96: Operation
SECtION 3 | Operation APPENDIX A 3.0 GeneRAL inFoRMAtion EVO-RC Remote Control provides the user with the ability to modify EVO Inverter/Charger’s operating parameters. The default settings in EVO Inverter/Charger are adequate for some installations but may have to be modified for others. This Section provides details on the remote functions, status and menu maps and displays, fault messages and parameter settings. - Page 97 SECtION 3 | Operation APPENDIX A 3.2 PoWeR on / PoWeR oFF Power on To power ON the EVO Inverter/Charger, press and hold the on/oFF Key continuously for around 2 sec until competion of sequence explained below: Inverter/Charger is OFF and the on/oFF key is When the EVO POWER ON...
- Page 98 SECtION 3 | Operation APPENDIX A inFo Standby Mode may also be used to temporary halt normal operation of the Inverter/ Charger without switching OFF the unit completely. For the Standby Mode to be switched ON, the EVO should be in ON condition and should be operating in one of the 3 Operating Modes –...
- Page 99 SECtION 3 | Operation APPENDIX A INVERTING POWER SAVING OUTPUT BATTERY XX.XXXV 120.00V STANDBY BATTERY XX.XXXV CHARGING N-CC GRID 120.00V Fig 3.1 eVo-RC Mode Screens 3.6.1 Charging Mode Screens explanations Please refer to 19 Screens shown against Screens 1 to 19 under Group 3: "CHARGING MODE"...
- Page 100 SECtION 3 | Operation APPENDIX A ò Up key: Move down to higher Screen No. (See Note 3) Enter key: Move to next Group towards the right Down key: Move up to lower Screen No. (See Note 4) Back key: Move to next Group towards the left Fault Message Fault Fault...
-
Page 101: Parameter Setup
SECtION 4 | Parameter Setup APPENDIX A noteS FoR FiG 3.2: 1. • T he 3-digit No. XXX in “RC-XXX” indicates the Firmware Revision No. for the Remote Control EVO-RC • T he 4-digit No. XX.X in EVO-VX.XX denotes the Firmware Revision No. for the EVO Inverter/Charger • T he 4-digit No. XXXX in EVO-XXXX denotes the Model No. of Evolution Series Inverter/Charger i.e. EVO-2212 / 2224 / 3012 / 4024 The 3 or 4-digit abbreviations on the top right corner of the 19 Screens (Screen Nos. 1 to 19) under “CHARGING”... - Page 102 SECtION 4 | Parameter Setup APPENDIX A Notes for screens when in Online Mode: note FoR GRoUP 1: note FoR GRoUP 2: note FoR GRoUP 3: note FoR GRoUP 4: STANDbY SCREENS INVERTING SCREENS CHARGING SCREENS POWER SAVING SCREENS In Online Mode, the In Online Mode, the In Online Mode, the In Online Mode, the top...
- Page 103 SECtION 4 | Parameter Setup APPENDIX A 4.1 PARAMeteR SetUP MenU MAPS ò Up key: Move down to higher Screen No. Enter key: Move to next Group towards the right (See Note 3 on Page 14) Back key: Move to next Group towards the left Down key: Move up to lower Screen No.
- Page 104 SECtION 4 | Parameter Setup APPENDIX A ò Up key: Move down to higher Screen No. (See Note 3 on Page 14) Enter key: Move to next Group towards the right Down key: Move up to lower Screen No. (See Note 4 on Page 14) Back key: Move to next Group towards the left SCREEN GROUP 5:...
- Page 105 SECtION 4 | Parameter Setup APPENDIX A 4.2.1 PARAMeteR SetUP PRoCeDURe – GeneRAL Please refer to Fig 4.3 below. The enter key is used to enter Parameter Setup Mode from any Operating Mode Screen in Fig 3.2. Example in Fig 4.3 below starts with Inverting Mode Screen (Operating Mode Group 2, Screen 1 in Fig 3.2).
- Page 106 SECtION 4 | Parameter Setup APPENDIX A 4.2.2 CHAnGinG / enteRinG PARAMeteR VALUeS Each parameter has a programmable range of values specific to the model number of the . Please refer to Tables 4.4 to 4.8 for details. During parameter programming, the displayed numerical value of the parameter consists of multiple digits that are necessary to display the highest numerical value within the programmable range.
- Page 107 SECtION 4 | Parameter Setup APPENDIX A 4.3 PASSWoRD PRoteCtion FoR PARAMeteR CHAnGe All parameters except Time and Date are protected with a Password. When the required parameter screen is reached and is displayed and enter Key is pressed to modify the parameter value, the system will request a 4-digit Password.
- Page 108 KEY IN PASSWORD 0000 PASSWORD CORRECT SECtION 4 | Parameter Setup APPENDIX A PASSWORD ERROR!! The first screen for BULK CURENT parameter setting appears as shown BULK CURRENT on the left. The Default Value of 40A will be displayed as “040” using 040 A 3 digits.
- Page 109 SECtION 4 | Parameter Setup APPENDIX A 4.4 GRoUP 1 PARAMeteR Set UP: CHARGe CURVe Please refer to Parameters under Group 1 at Fig 4.1. Details of Parameter set up are given below: tABLe 4.4. GRoUP 1 PARAMeteR Set UP: CHARGe CURVe Screen Programming Range Default...
- Page 110 SECtION 4 | Parameter Setup APPENDIX A “CHARGe MoDe” 0 = Normal (3-Stage) 0 = Normal (3-Stage) 1 = Equalize (4-Stage) (3 or 4 Stage Charging) "onLine MoDe" 0 = Off (Off-Line : Grid priority) 0 = Off 1 = On (On-Line: Battery/Inverter priority) "onLine oPtion"...
- Page 111 SECtION 4 | Parameter Setup APPENDIX A • Heat Sink: In cast the temperature is >65C, the charging current is reduced by 4A (EVO-2212) / 20A (EVO-3012) / 1A (EVO-2224) / 5A (EVO-4024) every 10 sec ABSoRP VoLtAGe: This sets the charging voltage in the Constant Voltage Absorption Stage. Enter Key Up Key x 1 Enter Key...
- Page 112 SECtION 4 | Parameter Setup APPENDIX A • A C input is available and eVo inverter/Charger is operating in Charging Mode: When the battery voltage rises to the set upper threshold of “BATT OVER VOLT”, the Transfer Relay will be de-energized, charging and pass through will be stopped and PWM drive to the Inverter Section will be switched OFF.
- Page 113 SECtION 4 | Parameter Setup APPENDIX A • I f the “Battery low voltage!” fault condition is not reset within the “LV CUTOFF TIME”, the Inverter/Charger will be shut down completely after “LV CUTOFF TIME” has elapsed (LDC Display / LED / Buzzer will be OFF). • I f the batteries are charged by external Solar Charge Controller connected directly to the batteries or through the External Charger Input (3, 4 in Fig 2.1 in the Owner's Manual for Evolution Series Inverter/Chargers) and the battery voltage recovers to the set “RESET VOLTAGE”...
- Page 114 SECtION 4 | Parameter Setup APPENDIX A CHARGe MoDe: Default setting is 3-Stage "Normal Mode" (Parameter Screen setting shows "0=Normal"). The mode can be changed at any time to 4-stage "Equalization Mode" (Change Screen setting to "1=Equalize"). After "Equalization Mode" is completed (the charger enters Float Stage after completing Equalization Stage), the screen automatically resets to Normal (0= Normal).
- Page 115 SECtION 4 | Parameter Setup APPENDIX A (NOTE: The battery will be charged to 100% State of Charge after the Transfer Relay has de-energized on entering Float Stage) 1= Option 2: • T he Transfer Relay will be switched ON (energized) if the battery voltage drops to “LOW VOLT ALARM” [(i) for 12V: 9.5V – 12.5V / Default 11.0V (ii) for 24V: 19.0V –...
- Page 116 SECtION 4 | Parameter Setup APPENDIX A • Automatic Starting and Stopping of Generator: Switching ON (energizing) the Status Relay to initiate Generator starting • o n-Line Mode: Switching ON of the Transfer Relay to transfer from “Inverting” Mode to “Charging”...
- Page 117 SECtION 4 | Parameter Setup APPENDIX A 4.5 GRoUP 2 PARAMeteR Set UP: inPUt SettinG Please refer to Parameters under Group 2 at Fig 4.1. Details of Parameter set up are given below: tABLe 4.5. GRoUP 2 PARAMeteR Set UP: inPUt SettinG Screen Setting range Default value...
- Page 118 SECtION 4 | Parameter Setup APPENDIX A Gen MAX CURRent: Up Key Enter Key Up Key x 2 Enter Key SELECT GROUP SELECT GROUP DEFAUT FREQ GEN MAX CURRENT KEY IN PASSWORD GEN MAX CURRENT CHARGE CURVE INPUT SETTING 0= 50Hz 16.00 A 0000 16.00 A...
- Page 119 SECtION 4 | Parameter Setup APPENDIX A ReSet VoLtAGe: This is the reset voltage at which the unit will revert to "Charging Mode" after it has switched over to "Inverting Mode" due to input voltage falling to "CUT-OFF VOLT 1/CUT-OFF VOLT 2/CUT-OFF VOLT3".
- Page 120 SECtION 4 | Parameter Setup APPENDIX A 4.7 GRoUP 4 PARAMeteR Set UP: inPUt HiGH LiMit Please refer to Parameters under Group 4 at Fig 4.1. Details of Parameter set up are given below: tABLe 4.7. GRoUP 4 PARAMeteR Set UP: inPUt HiGH LiMit Setting range Default value Screen...
- Page 121 SECtION 4 | Parameter Setup APPENDIX A DeteCt tiMe 2: This is the time limit in cycles up to which high AC input voltage "CUT-OFF VOLT 2" is allowed. Up Key x 3 Enter Key Up Key x 4 Enter Key SELECT GROUP SELECT GROUP RESET VOLTAGE...
- Page 122 SECtION 4 | Parameter Setup APPENDIX A PoWeR SAVinG: Enable or disable Power Saving Mode when in "Inverting Mode". Up Key x 4 Enter Key Enter Key SELECT GROUP SELECT GROUP POWER SAVING KEY IN PASSWORD POWER SAVING CHARGE CURVE OTHER FUNCTION 0 = Disable 0000...
- Page 123 SECtION 4 | Parameter Setup APPENDIX A Attention! Logique On / Off montré dans la figure 4,8 contrôle également le fonctionnement du bouton ON/OFF sur le panneau d’avant de l’onduleur chargeur de l' EVO (11 , figure 2,1 dans le manuel d'EVO onduleur chargeur propriétaire ) .
- Page 124 SECtION 4 | Parameter Setup APPENDIX A Automatic Starting and Stopping of Generator (Functions 2, 3 and 4) inFo The following programmable parameters have been referred to in the description be- low. Links to detailed information on these parameters are given below: • “...
- Page 125 SECtION 4 | Parameter Setup APPENDIX A Based on the Generator Stop Logic contained in one of the selected Functions 2, 3 or 4 explained below, the Status Relay will be switched OFF (de-energized), its “Common” and “NO” contacts will open and the external Generator Auto Start Control Control Module will initiate automatic stopping of the Generator.
- Page 126 SECtION 4 | Parameter Setup APPENDIX A 4= Generator 2 This Function will start the Generator at “LOW VOLT ALARM” and stop the Generator after the desired programmed value of run time of the Generator = “GEN ON TIME” (0-240 min; Default = 60 min) counted from the time the Status Relay is switched ON (energized) • I f the battery voltage drops to “LOW VOLT ALARM” [(i) for 12V: 9.5V – 12.5V / Default 11.0V (ii) for 24V: 19.0V –...
- Page 127 SECtION 4 | Parameter Setup APPENDIX A DAtALoG tiMe AnD DAtALoG DiSABLe: Set the time period of the data log. 0 = Disable 1 = 1 sec 2 = 10 sec 3 = 30 sec 4 = 60 sec 5 = 5 min 6 = 10 min Up Key x 4 Enter Key...
-
Page 128: Sd Card
SECtION 5 | SD Card APPENDIX A 5.1 SD CARD GeneRAL inFoRMAtion SD Card slot has been provided for using an SD card for (i) data logging, (ii) saving programmed parameters and (iii) firmware upgrades. SD card supports FAT16/FAT32 format up to 16GB in size. When the SD card is inserted, the LCD screen will display the following. - Page 129 SECtION 5 | SD Card APPENDIX A 5.3 DAtA LoG FiLeS AnD VieWinG DAtA LoG FiLeS USinG MiCRoSoFt eXCeL The Data Log Files are writen as Text Files (.txt) in the DATALOG Folder on the SD Card’s Root Directory. Table 5.1 is an image of the DATALOG Folder showing example of the Data Log Files.
- Page 130 SECtION 5 | SD Card APPENDIX A the data is logged under 28 Data fields: Date, Time, Gen Status, Gen Freq, Gen Volt, Grid Status, Grid Freq, Grid Volt, Input Current, Input VA, Input Watt, Output Freq, Output Volt, Output Current, Output VA, Output Watt, Battery Volt, Battery Current, External Current, Battery Temp, Transformer Temp, Bus Bar Temp, Heat Sink Temp, Fan Speed, Mode, Error Code, Charge Stage, Event.
- Page 131 SECtION 5 | SD Card APPENDIX A • Text Import Wizard – Step 2 will appear (see Fig 5.3). Choose "Semicolon" and click 'Finish' button. Fig 5.3 Screen Shot of Step 2 of "text import Wizard" in excel • Data as in Fig 5.4 will be displayed on your Worksheet, with the Log Data stored in Columns and Rows.
- Page 132 SECtION 5 | SD Card APPENDIX A 5.4 SAVinG / UPLoADinG PRoGRAMMeD PARAMeteRS 5.4.1 Saving Programmed Parameters All the programmed parameters can be saved on an SD Card (FAT 16 / FAT 32 Format, up to 16 GB capacity). The parameters will be saved in File named “xxxx_yyy.cfg”, where the first group of 4 digits xxxx is the Model No.
-
Page 133: Monitoring Of Operation Using Led And Buzzer
SECtION 6 | Monitoring of Operation APPENDIX A using lED and Buzzer tABLe 6.1 LeD & BUZZeR inDiCAtionS FoR oPeRAtion MonitoRinG Status Green LeD "Status" Red LeD "Fault" Buzzer (See note 1) Seen during Power-On Flash 3 times Sequence Indicates completion of Power-On Sequence after Power ON/OFF Button is pressed for... -
Page 134: Fault Messages And Troubleshooting Guide
SECtION 7 | Fault Messages and APPENDIX A troubleshooting Guide tABLe 7.1 FAULt MeSSAGeS AnD tRoUBLeSHootinG GUiDe noteS: 1. Please see table 6.1 for LeD indications in eVo-RC and buzzer indications in eVo inverter/Charger 2. Buzzer is available only in eVo inverter/Charger. - Page 135 SECtION 7 | Fault Messages and APPENDIX A troubleshooting Guide Inverter/Charger is in FAULt MoDe because the battery voltage has risen to the set upper threshold of “BATT OVER VOLTAGE” (a) AC input is not available and eVo inverter/Charger is operating in inverting Mode: •...
- Page 136 SECtION 7 | Fault Messages and APPENDIX A troubleshooting Guide Inverter/Charger is in FAULt MoDe because there is a short circuit on the output side in inverter Mode. Short circuit protection is activated when (i) the output current is over 9.56 Arms for EVO-2212E/2224E, 13.0 Arms for EVO-3012E and 17.39 Arms for EVO-4024E) and (ii) output voltage is less than 15 Vrms for 6 cycles (0.12 second for 50 Hz).
-
Page 137: Specifications
SECtION 8 | Specifications APPENDIX A 8.1 SPeCiFiCAtionS MoDeL no. eVo-RC CoMPAtiBLe MODEL NUMBERS EVO-2212, EVO-3012, EVO-2224, inVeRteR/CHARGeRS EVO-4024 EVO-2212E, EVO-3012E, EVO-2224E, EVO-4024E DiSPLAY LCD DISPLAY 2 Rows, 16 Character each, Alpha-Numeric LCD Display LED INDICATORS Green (Status); Red (Fault / Alarm) inPUt / oUtPUt CABLE SET RJ-45 Data Cable (Straight Wired);... -
Page 138: Warranty
SECtION 9 | warranty APPENDIX A 2 YeAR LiMiteD WARRAntY EVO-RC manufactured by Samlex America, Inc. (the “Warrantor“) is warranted to be free from defects in workmanship and materials under normal use and service. The warranty period is 2 years for the United States and Canada, and is in effect from the date of purchase by the user (the “Purchaser“). - Page 139 APPENDIX A Notes SAMLEX AMERICA INC. | 49...
- Page 140 Contact Information Toll Free Numbers Ph: 1 800 561 5885 Fax: 1 888 814 5210 Local Numbers Ph: 604 525 3836 Fax: 604 525 5221 Website www.samlexamerica.com USA Shipping Warehouses Kent, WA Plymouth, MI Canadian Shipping Warehouse Delta, BC Email purchase orders to orders@samlexamerica.com 11025-EVO-2212E-3012E-2224E-4024E-0217...
Need help?
Do you have a question about the Evolution Series and is the answer not in the manual?
Questions and answers