
Related Manuals for Thermo Scientific RadEye GX


Summary of Contents for Thermo Scientific RadEye GX
- Page 1 Operating Instructions DB-074 E RadEye GX RadEye GX-L Multi-Purpose Survey Meter for external GM-Detectors...
- Page 3 Technical data RadEye GX-L 06.07.15 RM&SI-EH Pijahn 13-1 ECN80229 14.09.16 RM&SI-EH Pijahn ECN80943 *) Category C: editorial correction I: clearing improvement A: substantial amendment Explanations must be given, at least with Category A. RadEye GX, GX-L DB-074 E Pi/Ff 14.09.2016...
-
Page 4: Table Of Contents
Select Probe ............3-9 3.1.5 Measuring unit ........... 3-9 3.1.6 Operation mode ..........3-10 3.1.7 Scaler parameter ..........3-10 3.1.8 Nuclide table ............ 3-10 3.1.9 Settings ............3-11 3.1.10 Alarm indication ..........3-12 DB-074 E RadEye GX, GX-L Pi/Ff 14.09.2016... - Page 5 Audible single pulse indication and finder mode..4-1 4.2 Alarm indication ............4-2 4.3 Additional information ..........4-3 4.4 Key Lock ..............4-3 4.5 Earphone ..............4-5 4.6 Alarm latching ............4-5 4.7 Show alarm ............... 4-6 RadEye GX, GX-L DB-074 E Pi/Ff 14.09.2016...
- Page 6 Edit Tau ............... 4-11 Measurement units ......5-1 5.1 General Count Rate Measurements (cps, cpm) ..5-1 5.2 Surface Contamination (Bq, dps, dpm, Bq/cm ) ..5-2 5.3 Dose Rate (Sv/h, R/h, Rem/h)........5-2 DB-074 E RadEye GX, GX-L Pi/Ff 14.09.2016...
- Page 7 Installation of the optional RadEye.EXE software ... 8-3 8.3 Starting RadEye.exe ..........8-3 8.4 Main menu ..............8-3 8.4.1 RadEye GX Device Parameters ......8-4 8.4.2 Measurements ............ 8-4 8.4.3 Creating a Measurement File ......8-5 8.4.4 Select serial interface ......... 8-7 ...
- Page 8 IR connection cable serial (4254029) ....... 9-2 9.4 IR connection cable USB (4254026) ......9-2 9.5 Bluetooth battery cover (425067087) ....... 9-3 9.6 RadEye inductive charger ......... 9-3 9.7 Holder with vacuum cup and goose neck ....9-4 DB-074 E RadEye GX, GX-L Pi/Ff 14.09.2016...
- Page 9 History data shows the wrong time and date ..10-5 Maintenance ........ 11-1 11.1 Recommended maintenance ........ 11-1 11.2 Cleaning the instrument ........11-1 11.2.1 Remove batteries for storage ......11-1 11.2.2 Check GX with a pulser ........11-1 RadEye GX, GX-L DB-074 E Pi/Ff 14.09.2016...
- Page 10 GM Probes ........14-1 Technical data ......15-1 15.1 RadEye GX ............15-1 15.2 RadEye GX-L ............15-3 15.3 RadEye inductive charger: ........15-6 15.4 Firmware revisions ..........15-7 V1.50 ................15-7 V1.52 ................15-7 ...
- Page 11 The RadEye GX, respectively the connected Geiger Mueller probes are not well suited for pulsed radiation. Depending on the sensitivity of the detector and the conditions of the pulsed field, there can be a significant under-response.
- Page 12 Directives, the recyclers in your country, and in- formation on Thermo Fisher Scientific products which may assist the detection of substances subject to the RoHS Di- rective are available at www.thermo.com/WEEERoHS 0-10 DB-074 E RadEye GX, GX-L Pi/Ff 14.09.2016...
-
Page 13: Introduction
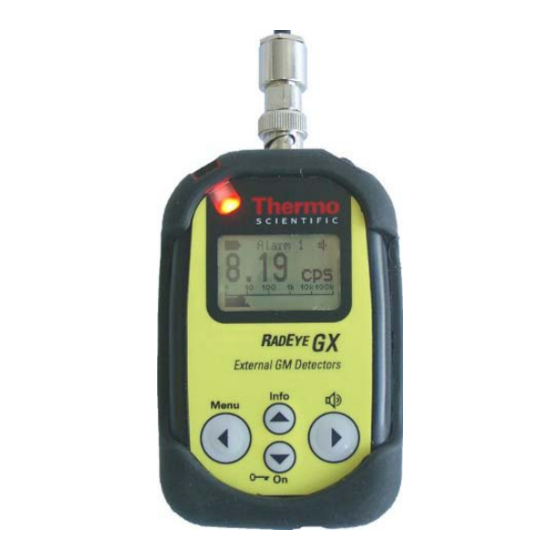
A real time clock is provided to add a time stamp to all buffer data. The characteristic feature of the RadEye GX is the use of sophisticated low power technology components and micro- processor based fully automatic self checks. No maintenance is required. - Page 14 Key on top side to thresholds. acknowledge alarms if worn in a holster Rugged plastic Powerful gra- enclosure phical display Easy to use, four key, Earphone menu driven user connector interface DB-074 E RadEye GX, GX-L Pi/Ff 14.09.2016...
-
Page 15: Installation And Start-Up
2. Installation and start-up Scope of delivery The RadEye GX is delivered in a box together with two AAA cells and an operating manual. Ordering information for accessories see 9: Inserting the battery The two AAA-Alkaline cells as delivered with the instrument allow about 500 h of normal operation. - Page 16 Close the compartment cover, hooks first, care for the rub- ber seal being in its groove. Switch on the unit again. (see chapter 2.4) The instrument continues working in the operating mode set last (see chapter 3.2). DB-074 E RadEye GX, GX-L Pi/Ff 14.09.2016...
- Page 17 If Real Time Clock is set, actual time and date is dis- played for 3 s (see chapter 2.4). After selection of the counter tube the RadEye GX first dis- play 0.00 cps. After the first detector pulse the measurement will be started.
-
Page 18: Mounting Of The Protection Sleeve
For mounting of the sleeve first put the BNC connector into the hole at the top of the sleeve. Then pull lower edges of the sleeve, one after the other into the correct position. First step Second step Third step DB-074 E RadEye GX, GX-L Pi/Ff 14.09.2016... -
Page 19: Switching The Unit On
Switching the unit on To switch on the RadEye GX, keep the ON button pressed for at least one second. The sound generator (beeper) is initiated. The start screen is displayed for two seconds. Date of last instrument test Battery... - Page 20 When the counter tube is selected the RadEye GX first dis- plays 0.00 cps. After the first detector pulse the measurement will be started. The RadEye GX starts working with the pa- rameters previously selected (operation mode, calibration fac- tor, alarm thresholds etc.). The selected probe is displayed in the top line of the LCD.
- Page 21 52 hours of operation will be stored in the history memory. These parameters (except calibration parameters) can be changed with the help of RadEye buttons and the optional PC- program „RadEye.EXE“, version 1.39.0 and greater, and the cable 42540/29 or 42540/26. RadEye GX, GX-L DB-074 E Pi/Ff 14.09.2016...
-
Page 23: Configuration
The Up- and Down arrow key are used to scroll through the menu. To select a menu option, release the left key as the respective menu option has been reached. RadEye GX, GX-L DB-074 E Pi/Ff 14.09.2016... - Page 24 : Select a default display mode Select : Confirmation of an action : Exit menu Exit In Change menu the Up-/Down arrow keys are used to change a digit of an alarm value. DB-074 E RadEye GX, GX-L Pi/Ff 14.09.2016...
-
Page 25: Menu Structure
Scaler with background subtraction Ratemeter netto Ratemeter with background subtraction Select Probe Displays the stored counter tubes Backlight If selected the backlight is always on. Otherwise the backlight extinguishes after RadEye GX, GX-L DB-074 E Pi/Ff 14.09.2016... - Page 26 Edit preset time and preset count Auto restart Auto restart of scaler measurements Nuclide table Displays the stored nuclides Alarm Count Rate Allows setting of Alarm 1 and 2 for count rate mode (cps, cpm). DB-074 E RadEye GX, GX-L Pi/Ff 14.09.2016...
- Page 27 Allows setting of Alarm 1 and 2 for dose. This option is accessible only in dose rate mode (rem/h, R/h, Sv/h). Clear Dose Clears the accumulated dose. This option is accessible only in dose rate mode (rem/h, R/h, Sv/h). RadEye GX, GX-L DB-074 E Pi/Ff 14.09.2016...
- Page 28 Enable / Disable the RadEye BTcom cover Edit Tau Set time constant for Ratemeter Tau. Language Set the menu language to English, German or French Contrast Adjusts the contrast of the LCD display DB-074 E RadEye GX, GX-L Pi/Ff 14.09.2016...
- Page 29 Enabling and disabling the Backlight LCD illumination in case of an alarm Show alarm Display of alarms stored in alarm log. Text info Displays the text stored in the RadEye RadEye GX, GX-L DB-074 E Pi/Ff 14.09.2016...
-
Page 30: Main Menu
“Start Bgr.meas.” starts the back- ground measurement. “Set parameter” edit the preset time and count for background measurement. “Ratem.netto” enables the ratemeter mode with background subtraction. “Scaler netto” ena- bles scaler mode with background subtraction. DB-074 E RadEye GX, GX-L Pi/Ff 14.09.2016... -
Page 31: Select Probe
Be careful: if the preset voltage is too high for the attached probe, the counter tube can be damaged. 3.1.5 Measuring unit This submenu is used to select the measuring unit for ratemeter and scaler measurements. RadEye GX, GX-L DB-074 E Pi/Ff 14.09.2016... -
Page 32: Operation Mode
Preset TimeMode is used to measure a defined time. Pre- set CntMode is used to measure a defined number of counts. With “Auto restart” the RadEye GX restarts automatically the meas- urement. “Set Time/Count” edit the preset time and count. -
Page 33: Settings
Edit Tau means the you may set a fixed time constant from 1..60s for operation mode “Ratemeter Tau”. “Language” is used to change the menu language of the RadEye between English, German and French. Set the display contrast with menu item “Contrast”. RadEye GX, GX-L DB-074 E 3-11 Pi/Ff 14.09.2016... -
Page 34: Alarm Indication
Ratemeter The standard display set by factory is indication of the actual count rate. Selected Measurement Heart beat counter tube value Battery indication Bar graph overview Alarm Alarm threshold 1 threshold 2 3-12 DB-074 E RadEye GX, GX-L Pi/Ff 14.09.2016... - Page 35 Ratemeter Tau: Ratemeter with linear filter. The time con- stant is settable via menu item “Edit Tau” (see chapter 4.17) from 1s to 60s A long key press on the menu button resets the Ratemeter to the actual count rate. RadEye GX, GX-L DB-074 E 3-13 Pi/Ff 14.09.2016...
-
Page 36: Trend Indication
A trend indication is not given at count rates of less than 1 cps. Scaler mode To enter the scaler mode select in the submenu “Operation mode” the option “Scaler“. 3-14 DB-074 E RadEye GX, GX-L Pi/Ff 14.09.2016... -
Page 37: Mean Value
Measuring time in s Background count rate *) Background measuring time *) *) Background count rate and background measuring time are only used in combination with “Scaler netto” RadEye GX, GX-L DB-074 E 3-15 Pi/Ff 14.09.2016... -
Page 38: Accumulated Counts
Preset time Preset count Elapsed time Action of Accumulated “Info” key counts The measurement is finished if either the elapsed time arrived the preset time or the accumulated counts reached preset count. 3-16 DB-074 E RadEye GX, GX-L Pi/Ff 14.09.2016... -
Page 39: Alarm Thresholds
Configuration of the alarms is possible via infrared interface (chapter 8.5) or via the menu. As to the alarm activation, please also read chapter 4.2. RadEye GX, GX-L DB-074 E 3-17 Pi/Ff 14.09.2016... -
Page 40: Alarm Threshold Based On The Relative Standard Deviation (Sigma Threshold)
Additional value (0 if linear ratemeter is enabled) Count rate Measuring Additional Linear time value ratemeter 0…<8 cps 20 s 8…<32 cps 32… <256 cps >256 cps All count Preset time rates constant (1..60s) 3-18 DB-074 E RadEye GX, GX-L Pi/Ff 14.09.2016... - Page 41 There will be no further alarms at background conditions and normal sensitivity will be established again automatically after about two minutes. Alarm 2 is always referring to the total count rate without consid- eration of any learned background. RadEye GX, GX-L DB-074 E 3-19 Pi/Ff 14.09.2016...
-
Page 42: Setting Alarm Thresholds
Once the last number has been set, quit the editing mode by press- ing the “Exit”-key. Then, the value set is saved and after 10s the unit returns to the basic display. 3-20 DB-074 E RadEye GX, GX-L Pi/Ff 14.09.2016... - Page 43 The set points of the actual dose rate alarm thresholds can be seen as triangles on the intensity bar scale. The upper mark shows alarm threshold 1, the lower mark shows alarm threshold 2. RadEye GX, GX-L DB-074 E 3-21...
-
Page 45: Operation
The single pulse indication must be enabled in the menu. It is activated and deactivated by two times pressing the right or top button: Indication of activated single pulse indication RadEye GX, GX-L DB-074 E Pi/Ff 14.09.2016... -
Page 46: Alarm Indication
LED and the vibrator become active, if they are enabled. Alarm 1: LED slowly blinking, two frequency alarm tone Alarm 2: LED quick blinking, continuous alarm tone Dose Alarm: LED constantly on, continuous alarm tone, vibrator slow. DB-074 E RadEye GX, GX-L Pi/Ff 14.09.2016... -
Page 47: Additional Information
It is recommended to lock the keys when wearing the unit in the holster. Thus reduced battery time because of additional power consumption by illumination of the LCD or other unintended operations is avoided. RadEye GX, GX-L DB-074 E Pi/Ff 14.09.2016... - Page 48 Unlocking is performed according to the LCD instructions upon pressing any key: Press left key first, then lower key and then right key. DB-074 E RadEye GX, GX-L Pi/Ff 14.09.2016...
-
Page 49: Earphone
0 s (= off) to 9999 s. A latched alarm is indicated by a “M” near by the alarm indicator. When the alarm is acknowledged the RadEye returns to normal operations. Latching indication RadEye GX, GX-L DB-074 E Pi/Ff 14.09.2016... -
Page 50: Show Alarm
Date and time of the stored alarm By pressing the up and down arrow keys you can scroll through the alarm log. By pressing the right button the display returns to the menu. DB-074 E RadEye GX, GX-L Pi/Ff 14.09.2016... -
Page 51: Text Info
If enabled, a short press on the lower centre key (arrow down) flips the display. If the lower centre key is pressed again or if the menu button is pressed, the screen flips into the normal orienta- tion. RadEye GX, GX-L DB-074 E Pi/Ff 14.09.2016... -
Page 52: Set Date And Time
It is needed for correct low battery warning. Type “Batt” has a threshold of 2.3V. Type “Accu” has a threshold of 2.35V. See also chapter 6.4. Battery type “Battery” Battery type “Accumulator” DB-074 E RadEye GX, GX-L Pi/Ff 14.09.2016... -
Page 53: Manual Data Logging
Last record number 4.13 Graphic display If enabled, one or more short presses on the “On/▼” key display a graphical view of the count rate. This display is only available in ratemeter mode. RadEye GX, GX-L DB-074 E Pi/Ff 14.09.2016... -
Page 54: Change Menu Language
Here, the user can adjust the display contrast. This function is called in sub menu “Settings” “Contrast” 4.16 BTcom cover For detailed installation and operation procedure refer to BTcom cover manual DB-076e which is delivered together with the Blue- tooth battery lid. 4-10 DB-074 E RadEye GX, GX-L Pi/Ff 14.09.2016... -
Page 55: Edit Tau
Edit Tau The time constant for operation mode “Ratemeter Tau” can be set via the menu item “Edit Tau” in sub menu “Settings”. This pa- rameter can be set between 1.0s and 60.0s RadEye GX, GX-L DB-074 E 4-11 Pi/Ff 14.09.2016... -
Page 57: Measurement Units
This value is always displayed in the top section of the LCD in order to re- mind the user that the measured value has been corrected by that particular count rate value. RadEye GX, GX-L DB-074 E Pi/Ff 14.09.2016... -
Page 58: Surface Contamination (Bq, Dps, Dpm, Bq/Cm )
Bq/m can be edited. The user of the RadEye GX can select the required isotope in the menu <Nuclide>. This selected nuclide (e.g. Co-60) is displayed in the LCD (eventually alternating to the subtracted background activity in case of a net measurement). -
Page 59: Functional Test
LC display is illuminated for some seconds. The heart symbol next to the battery indicator must be “beating”. This indicates that the cyclic tasks as calculating measurement values, and checking for alarm thresholds are active. RadEye GX, GX-L DB-074 E Pi/Ff 14.09.2016... -
Page 60: Failure Indication
EEPROM Read or EEPROM Write error. A Watchdog Error indicates that the micro controller has problems to work on its tasks in a given timeframe. Reasons are strong electromagnetic pulses, firmware errors or hardware issues. DB-074 E RadEye GX, GX-L Pi/Ff 14.09.2016... -
Page 61: Overload Indication
1. Overload indication The dose value is marked with an overload indication, if a dose rate overload occurred since the last dose reset. Overload indication in dose display RadEye GX, GX-L DB-074 E Pi/Ff 14.09.2016... -
Page 62: Low Battery Warning
Battery life is significantly decreased at low temperatures. Cells which give a mid-scale voltage reading in a warm building may fail rapidly if the instrument is then operated under outdoors con- ditions in winter. DB-074 E RadEye GX, GX-L Pi/Ff 14.09.2016... -
Page 63: Overload
8-13, probe configuration). Thus overload is indicated as well e.g. for a short circuit in the cable or detector. c) Signal pulse height RadEye GX units with serial no. from #xxxx additionally monitor a degradation of the pulse height caused by excessive dose rate. RadEye GX, GX-L DB-074 E Pi/Ff 14.09.2016... -
Page 65: Pc Configuration
8. PC configuration The configuration of the RadEye via Windows software requires optional Thermo Scientific hardware and software. Please refer also to chapter 9 for details. Connection to a PC A RadEye unit can be connected to a PC either by either serial... -
Page 66: Cable Connection
The optional serial adapter cable is used to connect to a RS232 port of a PC. This serial port is selected directly in the RadEye.EXE software. Alternatively, the optional USB connection cable is used to con- nect to an USB port. DB-074 E RadEye GX, GX-L Pi/Ff 14.09.2016... -
Page 67: Installation Of The Optional Radeye.exe Software
Starting RadEye.exe Once the RadEye.EXE program has been started, device parame- ters are displayed on the screen. Main menu Once the RadEye.EXE program has been started, device parame- ters are displayed on the screen. RadEye GX, GX-L DB-074 E Pi/Ff 14.09.2016... -
Page 68: Radeye Gx Device Parameters
The Frame "RadEye GX" contains the unit's serial number and version number of the software. Click on the Read button, the Parameters of RadEye GX will be read out from device and shown in the Frame. Figure 8-1: Main Window 8.4.2... -
Page 69: Creating A Measurement File
Figure 8-2: Measurement graphics 8.4.3 Creating a Measurement File The actual measured values that are shown in the "Measurement" display field can be stored in a measurement file. RadEye GX, GX-L DB-074 E Pi/Ff 14.09.2016... - Page 70 Close Replay switches back to accessing measurement values via infrared interface. The measurement logfile is an ANSI text file with columns that are separated by <TAB>. This enables this file to be read easily DB-074 E RadEye GX, GX-L Pi/Ff 14.09.2016...
- Page 71 An error message is displayed if the interface is not available. “Read RadEye” is used to check if the right Com port is selected. With “Search RadEye” the program checks every available Com port for a RadEye. RadEye GX, GX-L DB-074 E Pi/Ff 14.09.2016...
-
Page 72: Configuration
If the connection shall be established with the optional Bluetooth battery cover, then this option must be activated. Please refer also the manual db076e delivered with the cover. Configuration On the Configuration / RadEye GX… menu, the following pa- rameters can be modified: 8.5.1 Password protection The configuration of the RadEye can be protected with a pass- word. - Page 73 Figure 8-4: Password Setting No password is set during the first installation of the software. A reminder window is activated, if the configuration window is opened. Figure 8-5: Password reminder RadEye GX, GX-L DB-074 E Pi/Ff 14.09.2016...
-
Page 74: General Configuration
°F in the RadEye unit’s top LCD screen line. An accumulated dose can be displayed through multiple pressing the “” button, if the item “show dose by Info key (DR only)” is enabled. 8-10 DB-074 E RadEye GX, GX-L Pi/Ff 14.09.2016... -
Page 75: User Defined Text
LCD by the RadEye (see 4.10). In the field “Text Field” it is possible to store a text with up to 200 characters in the RadEye. This text cannot be displayed by the RadEye. RadEye GX, GX-L DB-074 E 8-11 Pi/Ff 14.09.2016... -
Page 76: Mode Setting
8.5.4 Mode setting Figure 8-8: Mode setting On the “Mode“ tab, the user may set the operation mode, the physical unit, parameters for background measurement and pa- rameters for scaler mode. 8-12 DB-074 E RadEye GX, GX-L Pi/Ff 14.09.2016... -
Page 77: Probe Configuration
(see chapter 5.3). Dead time: In these fields a dead time correction factor for each counter can be edited. Dead time coefficient: Quadratic correction in ns². RadEye GX, GX-L DB-074 E 8-13 Pi/Ff 14.09.2016... - Page 78 On the other hand, GM-detectors used for dose rate measure- ments may need individual adjustment of these parameters. The quadratic term of the RadEye GX dead time correction formula results e.g. in a significantly improved dose rate linearity of the...
- Page 79 -9.5 -0.6 Over range 50,000 30,000 20,000 30,000 30,000 [cps] *) Over range 2,000 2000 power Area [cm²] Timeout [s] *) Over range [cps] for RadEye GX-L is limited to 10,000 cps. RadEye GX, GX-L DB-074 E 8-15 Pi/Ff 14.09.2016...
-
Page 80: Nuclide Data (Contamination Detectors)
On the tab „Nuclide“, the user may edit a separate nuclide table for every probe. The Activity is calculated as follow: Act: Activity in Bq CR: Count rate Eff: Efficiency The surface activity is calculated as follow SurAct: Surface activity in 8-16 DB-074 E RadEye GX, GX-L Pi/Ff 14.09.2016... -
Page 81: Alarm Settings
The „Alarm“ tab offers the user the possibility of making the alarm settings for the single basic displays. Furthermore, the op- tions on this tab allow beeper and additional alarm monitoring processes to be configured. RadEye GX, GX-L DB-074 E 8-17 Pi/Ff 14.09.2016... -
Page 82: Bluetooth
Here the user may configure the BTcom cover. The frame “De- vice” informs about firmware version, serial number and the physical address of the BTcom cover (not the RadEye GX). The Parameter LED on means the LED at the backside shows the connection status. -
Page 83: Menu Configuration
Once the setting of the parameters is finished, these parameters have to be sent to the RadEye GX by clicking on the Write to RadEye GX button. Parameters including the selected menu configuration can be saved with File / Save as…... -
Page 84: History
The following figure depicts for example the curve of the count rate over the last two days at a time resolution of 120 s. Clearly various levels resulting from different locations and points with high peaks can be recognized. 8-20 DB-074 E RadEye GX, GX-L Pi/Ff 14.09.2016... - Page 85 Figure 8-14: History read out Figure 8-15: Single history value indication Clicking at the graph, each individual, stored measured value can be displayed: RadEye GX, GX-L DB-074 E 8-21 Pi/Ff 14.09.2016...
-
Page 86: Logbook
At the display every event is shown in one line for better overview. The date and time of the PC is used for time relation. Figure 8-16: Logbook 8-22 DB-074 E RadEye GX, GX-L Pi/Ff 14.09.2016... -
Page 87: Optional Accessories
Alignment between the RadEye’s IR data interface window and the IR interface of a PC connection cable is insured with the us- age of the desktop holder. Please see chapter 8.1.2 for details. RadEye GX, GX-L DB-074 E Pi/Ff 14.09.2016... -
Page 88: Ir Connection Cable Serial (4254029)
The IR plug of the connection cable can be fixed easily by screws at the desktop holder. The PC connection plug is a 9 pin sub D type for serial COM ports. Please see chapter 8.1.2 for details. Cable length = 1.2 m DB-074 E RadEye GX, GX-L Pi/Ff 14.09.2016... -
Page 89: Bluetooth Battery Cover (425067087)
For convenient mounting to the dashboard one of the mechanical adaptors 42506/7061 … 64 is required. Note: The charging function of this device requires the battery latch 42506/7034. Without the above mentioned part no charging will be achieved. RadEye GX, GX-L DB-074 E Pi/Ff 14.09.2016... -
Page 90: Holder With Vacuum Cup And Goose Neck
8. Clearance of at least 50cm (20”) between charger and car radio is recommended. LED indicator State LED (green) Voltage supply on Voltage supply off Holder with vacuum cup and goose neck Part No.: 42552/2005 DB-074 E RadEye GX, GX-L Pi/Ff 14.09.2016... -
Page 91: Trouble Shooting
D) Insert two -“AAA” with sufficient capacity: Rechargeable AAA batteries should be completely loaded, non rechargeable batteries should supply together at least 2.3 Volt under load. E) Press the “” button for more than one second (see also 2.4) RadEye GX, GX-L DB-074 E 10-1 Pi/Ff 14.09.2016... -
Page 92: Reading Data From The Start Up Screen
Next, please check the firmware version of your RadEye and compare your version number with the revision table chapter 15.4. The revision table shows the introduction of new functions together with the according firmware version. 10-2 DB-074 E RadEye GX, GX-L Pi/Ff 14.09.2016... -
Page 93: The Radeye Shows An Error Message In The Display's Top Line
The RadEye is not found in the software If the connection between the RadEye and the computer can’t be established with a selected serial port (COM port), then the pro- gram shows the bellow message first: RadEye GX, GX-L DB-074 E 10-3 Pi/Ff 14.09.2016... - Page 94 It is recommended to use the Windows system tools to determine the occupation of the currently active serial ports. Virtual serial ports are labeled accordingly for identification. ´ Device Manager showing the virtual driver for USB „Prolific“ at COM 4 10-4 DB-074 E RadEye GX, GX-L Pi/Ff 14.09.2016...
-
Page 95: Radeye Lost Date And Time Settings
1.5V. Rechargeable batteries offer also a more steep drop from accepta- ble battery voltage to “battery low” than Alkaline types. 10.8 History data shows the wrong time and date See chapter 8.5.2. RadEye GX, GX-L DB-074 E 10-5 Pi/Ff 14.09.2016... -
Page 97: Maintenance
(> 1 week) to avoid damage through battery leakage. 11.2.2 Check GX with a pulser The RadEye GX can be tested with a pluser and a decoupling capacitor. For testing the voltage should be set to the lowest value (300V). - Page 98 Cable RG58 0.8m Cable RG58 0.3m RadEye GX Pulse Generator 50 Ohm termination Pulse 1.5pF/2000V 11-2 DB-074 E RadEye GX, GX-L Pi/Ff 14.09.2016...
-
Page 99: Spare Parts
Part No. Cover upper part assembled incl. Cylinder bolt, 42506/7055 vibration gum and key button without front foil Cover lower part complete 42506/9211 Front foil RadEye GX 42506/703092 Cylinder bolt 4x6mm and key button 42506/703010R (pack=5ea) Battery cover assembled 42506/7033... -
Page 101: Detector Cables
Cable MHV to PET, 1,5 m (59 inches) long 3211 A Cable MHV to PET, 2 m (78 inches) long 3211 B72 Cable MHV to angular PET 0,15 m (6 inches) 3204 A long RadEye GX, GX-L DB-074 E 13-1 Pi/Ff 14.09.2016... -
Page 103: Gm Probes
Beta-gamma GM probe, 0-1 mSv/h, MHV DA/MHV connector Pancake GM probe, BNC connector HP360 Pancake GM frisker probe, MHV connector EP15FL/MHV Pancake GM probe, thin mica end window EP15/MHV GM tube 15.5 cm² RadEye GX, GX-L DB-074 E 14-1 Pi/Ff 14.09.2016... - Page 104 GM tube 6.0 cm² Pancake GM probe with aluminum shield, HP210AL BNC connector Pancake GM probe with aluminum shield, HP210AL/MHV MHV connector Sample holder, 2 inch diameter, for use with SH4A HP-210 14-2 DB-074 E RadEye GX, GX-L Pi/Ff 14.09.2016...
-
Page 105: Technical Data
Two alarm thresholds for count rate, activity, Alarm threshold: dose and dose rate each. Default setting: see chapter 2.4 At least 80 dB(A) at a distance of 30 cm Audible alarm intensity: RadEye GX, GX-L DB-074 E 15-1 Pi/Ff 14.09.2016... - Page 106 Ratemeter ADF (Advanced Digital Filter) Averaging filters: Digital RC-Filter with time constant 1s..180s, depending on dose rate and dose rate changing. Ratemeter Tau: Linear Ratemeter with ad- justable time constant from 1s to 60s 15-2 DB-074 E RadEye GX, GX-L Pi/Ff 14.09.2016...
-
Page 107: Radeye Gx-L
Activity: 9999 kBq, 9999 kdps, 9999 kdpm, 9999 kBq/cm² Dose rate: 9999 R/h, 9999 rem/h, 9999 Sv/h RG 58 or RG62, Max. 2 m – MHV connector, Probe cables 350V…1100V High voltage range 1MΩ Output impedance RadEye GX, GX-L DB-074 E 15-3 Pi/Ff 14.09.2016... - Page 108 Disturbance emission : EN 61000-6-3 EMC: Immunity : EN 61000-6-2 110 mm x 67 mm x 62 mm Size: With rubber protection, without cable around 150g including AAA cells and pro- Weight: tection sleeve 15-4 DB-074 E RadEye GX, GX-L Pi/Ff 14.09.2016...
- Page 109 33 mA acoustic alarm 26 mA vibrator alarm 500h using two alkaline AAA cells de- Battery service pending on the operating mode life: 250h using 800mAh NiMH accumulator RadEye GX, GX-L DB-074 E 15-5 Pi/Ff 14.09.2016...
-
Page 110: Radeye Inductive Charger
18…20h Accumulator RadEye switched off 800mAh, discharged Ambient temperature -20…+50°C Operation –40…+70°C Storage 0…40°C Accumulator charge Ambient pressure 300…2000 hPa *) During operation with backlit LCD, the battery charge is sustained only. 15-6 DB-074 E RadEye GX, GX-L Pi/Ff 14.09.2016... -
Page 111: Firmware Revisions
Display of accumulated counts Sigma alarm threshold V1.60 New menu function "Accumulated Counts" in Submenu "Scaler Parameter" New menu function "Bluetooth" in Submenu "Settings. V1.61 Improved overload detection New dead time correction RadEye GX, GX-L DB-074 E 15-7 Pi/Ff 14.09.2016... -
Page 112: V1.62
New menu item “Edit Tau” New measuring unit Gy/h New menu item “LCD LED”. Display illumination on during alarm Scaler beep and LED flash when Scaler measurement end- History dataset number is increased at measurement start 15-8 DB-074 E RadEye GX, GX-L Pi/Ff 14.09.2016... -
Page 113: Service Contact
16. Service contact To request repair or calibration services, please use the online RGA (Return Goods Authorization) process at: http://www.thermoscientific.com/servicerepair RadEye GX, GX-L DB-074 E 16-1 Pi/Ff 14.09.2016... - Page 116 Post address: Thermo Fisher Scientific Messtechnik GmbH Frauenauracher Straße 96 P.O. Box 16 60 D-91056 Erlangen, Germany D-91051 Erlangen, Germany +49 9131 998-0 www.thermofisher.com +49 9131 998 475 fax info.rmp.erlangen@thermofisher.com...
Need help?
Do you have a question about the RadEye GX and is the answer not in the manual?
Questions and answers
how do I add and MC71 probe to my new radeye
To add an MC71 probe to a Thermo Scientific RadEye GX, follow these steps:
1. Connect the MC71 probe to the RadEye GX using the MHV connector.
2. Switch on the RadEye GX by pressing the ON button for at least one second.
3. When prompted, confirm the external probe that was last used or select the MC71 probe from the list.
4. The device will display 0.00 cps after selecting the counter tube.
Ensure that the MC71 probe is securely connected and properly recognized by the RadEye GX.
This answer is automatically generated
@Mr. Anderson - The MC71 probe isn't on the list - how do I add it to the list. Many thanks Lorna
How can I reset the calibration date. I sent it out for calibration and the RadEye has the old calibration date.