Table of Contents
Advertisement
Quick Links
FEATURES
• Supports 8MP TVI / CVI / AHD, 4K H.265 IP, CVBS
• H.265/H.264, 4K Video Display via Mainstream
• Compact, 4" Touch Screen
• Portable, Easy-to-Carry-and-Hold Design
• ONVIF Compliant with Other Leading Manufacturers' IP Cameras
• Rapid ONVIF, Auto View Video + Test Report Creation
• Built in WIFI, Creates WIFI Hotspot & Displays Wireless Camera Images
• Innovative HD-Over-COAX Focus, Video Signal Quality Test
• 10/100/1000M Ethernet, Network State and Traffic Display
• Tester Play: Simultaneous Tester, Android Mobile Phone, PC Display
• One Button IP Discovery: Detects All Network Camera IP Addresses
• One Button Rapid Video: Detects all Network Cameras with Auto Display
• Network Tool: PING Test, IP Address Scan, Port Flashing
• Drop-down Menu Selects: Poe Power, IP Setting, CVBS, LAN Information
• Self-updating Software: Install Apps with Android
• Media player, Supports 4K Video Files and MKV/MP4 Media Files
• Displays IP Cameras' Genuine Resolution
• PTZ Control Supporting 30+ Protocols (Incl. PELCO-P, PELCO-D, Samsung)
• Audio In, Supports Record / Save Audio
• Features LED Lamp, Calculators, Music Players and Other Application Tools
• 7.4 V / 2400mA Lithium Ion Polymer Battery with 8 hr. Life (4~5 Charging hrs.)
• DC12V / 3A Power Out: Temporary Power Supply
• DC48V PoE Power Output (Max. Power 24W)
• Package Includes: Tester, Adaptor, Battery, Tool Bag, DC12V Power Cable, BNC Cable,
RS485 Cable, Audio Cable
• 3-Year Warranty
PLEASE NOTE:
Complete User Guide, Software,
Tools, and Updates are available
online. Scan the QR Code or visit:
http://www.vitekcctv.com/Downloads
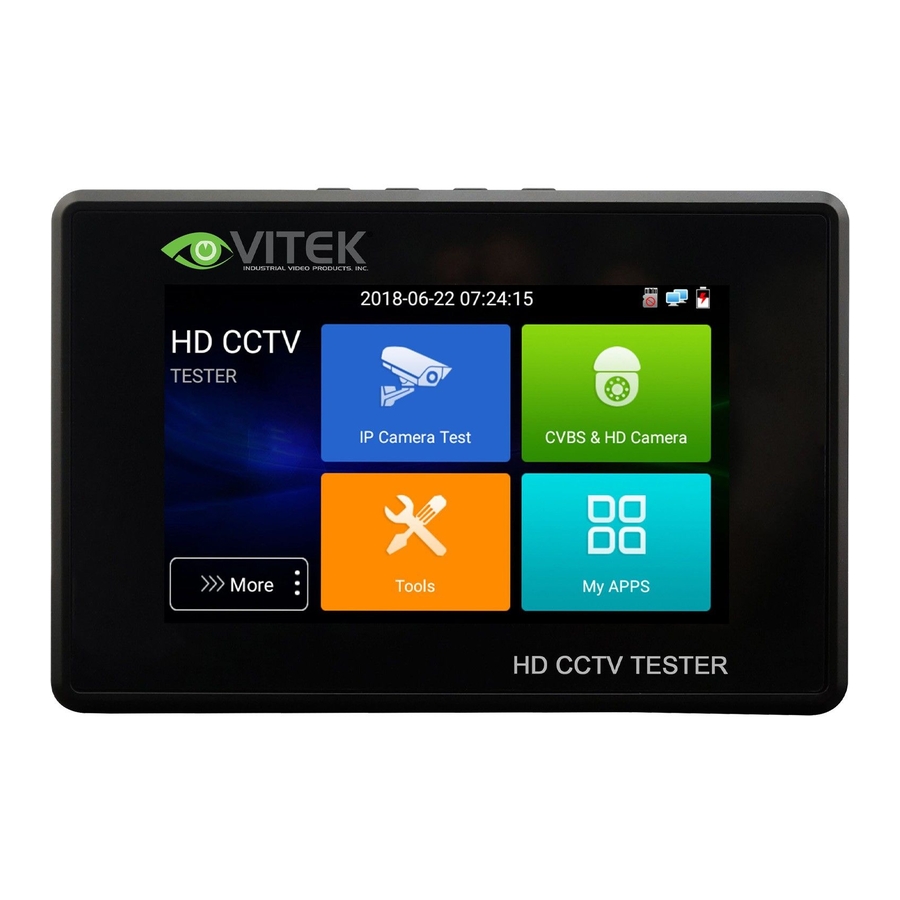
VT-SCT-U4
Four Inch Hand-held 5-in-1 [4K
H.265 IP / TVI / CVI / AHD /
CVBS] CCTV Testing Monitor
Advertisement
Table of Contents

Related Manuals for Vitek VT-SCT-U4


Summary of Contents for Vitek VT-SCT-U4
- Page 1 VT-SCT-U4 Four Inch Hand-held 5-in-1 [4K H.265 IP / TVI / CVI / AHD / CVBS] CCTV Testing Monitor FEATURES • Supports 8MP TVI / CVI / AHD, 4K H.265 IP, CVBS • H.265/H.264, 4K Video Display via Mainstream • Compact, 4” Touch Screen •...
-
Page 2: Table Of Contents
VITEK 5-in-1 CCTV TESTING MONITOR Content 1. Safety information ....................1 2. IP Camera Tester Introduction ................2 2.1 General ............................2 2.2 Packing list ..........................2 2.3 Function interface ........................3 3. Operation ......................6 3.1 Installing the Battery ........................6 3.2 Instrument connection ........................6 3.2.1 IP camera connection ......................6 3.2.2 Analog camera connection ......................7... - Page 3 VITEK 5-in-1 CCTV TESTING MONITOR (6)Trace route ........................44 (7)Link monitor ........................45 3.3.11 Rapid IP Discovery ....................46 3.3.12 PoE power / DC12V 3A power output ................46 3.3.13 RJ45 cable TDR test ....................47 3.3.14 Audio Recording ......................48 3.3.15 Data monitor ......................49 3.3.16 Audio player ......................49 3.3.17 Media Player ......................50...
-
Page 4: Safety Information
VITEK 5-in-1 CCTV TESTING MONITOR Thank you for purchasing this IP camera tester. Please read this manual before using the IP camera tester to ensure proper use. Before using the IP camera tester, please carefully read the Safety Information in this manual. This manual should be retained for reference. Keep the S/N label for after-sale service within the 3-year warranty period. -
Page 5: Ip Camera Tester Introduction
VITEK 5-in-1 CCTV TESTING MONITOR 2. IP Camera Tester Introduction 2.1 General The 4-inch IPS touch screen IP camera monitor is designed for maintenance and installation of IP cameras, analog cameras, TVI, CVI AHD cameras, as well as testing 4K H.264 /4K H.265 cameras by mainstream. -
Page 6: Function Interface
VITEK 5-in-1 CCTV TESTING MONITOR 2.3 Function interface Charge indicator: The light is red while the battery is being charged. When the charging is complete, the indicator turns off automatically. The RS485 data transmission indicator: The light is red during data transmission. - Page 7 VITEK 5-in-1 CCTV TESTING MONITOR Top interface Left interface Right interface Page 4...
- Page 8 VITEK 5-in-1 CCTV TESTING MONITOR Bottom interface Video image signal input(BNC interface)/ AHD, CVI and TVI input (BNC interface) Power battery switch Return/Close: Return or cancel while setting menu parameters, close or decrease aperture Confirm key (A long press will capture the screen interface)
-
Page 9: Operation
VITEK 5-in-1 CCTV TESTING MONITOR 3. Operation 3.1 Installing the Battery The tester has a built-in lithium ion polymer rechargeable battery. The battery cable inside battery cabin should be disconnected for safety during transportation! Prior to use of the instrument, the battery cables inside the battery cabin should be connected. -
Page 10: Analog Camera Connection
VITEK 5-in-1 CCTV TESTING MONITOR Note: If the IP camera requires PoE power, then connect the IP camera to the IP tester’s LAN port. The tester will supply PoE Power for the IP camera. Click on the icon labeled PoE to turn on/off PoE Power. -
Page 11: Osd Menu
VITEK 5-in-1 CCTV TESTING MONITOR (1) Connect the TVI camera’s video output to the IP tester’s “Video IN” interface. The image will display on the tester. The tester only comes with an HD analog input interface. There is no output interface. - Page 12 VITEK 5-in-1 CCTV TESTING MONITOR In Lite mode, tap the finger icon in the lower right corner to ◼ turn Orange, long press the icon to move the function icon to other items. Do not tap the finger icon and long press the application icon, can move the icon in folder.
-
Page 13: Screen Capture
VITEK 5-in-1 CCTV TESTING MONITOR Click SD card, install or remove SD card. 3.3.2 Screen capture Long press the “enter” key, capture screen interface, and save it. Page 10... -
Page 14: Tester Play
VITEK 5-in-1 CCTV TESTING MONITOR Go to file management to view “file management –SD card- Pictures—Screenshots”. 3.3.3 Tester Play Mobile screen projection (Only for Android version) The tester creates a WIFI hotspot. Connect the mobile phone to the tester’s WIFI hotspot, or the tester and mobile phone connect to the same Wi-fi network. -
Page 15: Ip Discovery
VITEK 5-in-1 CCTV TESTING MONITOR 3.3.4IP discovery Press IP discovery , test auto-scan the whole network segment IP, as well as auto-modify the tester’s IP to the same network segment with the scanned camera's IP. The meter Auto-search connects the whole network segment IP, and auto- adds the IP of different network segments. -
Page 16: Rapid Onvif Test
VITEK 5-in-1 CCTV TESTING MONITOR Local IP: : Tester’s IP Address - Tester can auto-modify the tester’s IP to the same network segment with the scanned camera’s IP Discovery IP: : Connected tester equipment’s IP Address - If the camera is connected to the tester directly, the tester will display the camera’s IP address. - Page 17 VITEK 5-in-1 CCTV TESTING MONITOR cameras. It lists the camera name and IP address on the Device List. The tester can auto login camera and display the camera’s image. Click the button “Refresh”, and the tester will scan the ONVIF camera again. Click the newly displayed ONVIF camera on the “Device List”.
- Page 18 VITEK 5-in-1 CCTV TESTING MONITOR Auto Login: After opening this function, the tester can auto log into cameras and display the camera’s image (The login password is the same as previously, and the first-time using the password is the default password "admin")
- Page 19 VITEK 5-in-1 CCTV TESTING MONITOR ONVIF PTZ control: Tap the image in the direction you want the PTZ camera to move. Tap the left side of the image to move left, right, and up to go up and down to go down. Compatible IP PTZ cameras will rotate accordingly.
- Page 20 VITEK 5-in-1 CCTV TESTING MONITOR Image setting: Click “Imaging Set” to adjust image brightness, saturation, contrast, sharpness and backlight compensation mode. Profiles: Click “profiles” to view video streaming current configuration files, as well as switch between Major stream and minor stream.
- Page 21 VITEK 5-in-1 CCTV TESTING MONITOR Time set: click “Time set”, Select " Manual set" to set up the time of camera Maintenance: For camera software reset or restore to factory settings. Page 18...
- Page 22 VITEK 5-in-1 CCTV TESTING MONITOR User Set: Modify camera username, password etc. parameters Page 19...
- Page 23 VITEK 5-in-1 CCTV TESTING MONITOR Network setting:Click “Network Set” to change the IP address. Some cameras cannot support changing IP address, so there is no change after saving. If there is network video input to the tester, the input image will be very clear with enlargement (as the tester supports resolution up to 1080p).
- Page 24 VITEK 5-in-1 CCTV TESTING MONITOR Record:When you click the “Record” icon, video starts recording. A red recording icon appears on the screen and begins to flash, and a timer appears indicating the time elapsed for the video. Click on the “Stop” icon to stop recording and save the video file to the SD card.
- Page 25 VITEK 5-in-1 CCTV TESTING MONITOR Set preset position: Move the camera to preset position, enter the preset number on the Bottom right corner to complete position preset. Call the preset position: Select the preset number on the left, click "Call" to call preset...
- Page 26 VITEK 5-in-1 CCTV TESTING MONITOR RTSP: Get RTSP address of the current camera Doc: Auto generate test reports document of camera, click "Create document”. Click Preview to view the report document. Enter the camera test information, click "Create Document" to complete the report.
-
Page 27: Video Monitor Test
VITEK 5-in-1 CCTV TESTING MONITOR Icons description: the description of function icons on the bottom toolbar IP Camera's IP: Enter the IP camera’s IP address manually or click “Search” to auto-scan for the IP camera’s IP address. It is better to directly connect the IP camera to the tester so the search results will only display the camera’s IP address. - Page 28 VITEK 5-in-1 CCTV TESTING MONITOR Select relative function on the right side Toolbar to operate, functions including “Photos”, “Snapshot” , “Record”, “Playback” , “PTZ” , “Set” , Click , or press “Return”to quit. Click the screen twice quickly, can be full zoom in on the touch screen.
- Page 29 VITEK 5-in-1 CCTV TESTING MONITOR C. Baud Move the yellow cursor to “Baud”, Select the baud rate according to baud rate of the PTZ camera. (150/300/600/1200/2400/4800/9600/19200/57600/115200) D. Address Set the ID according to the ID of PTZ camera (0~254), the setting address data must be consistent in the speed dome address.
- Page 30 VITEK 5-in-1 CCTV TESTING MONITOR For analog video input, as the resolution is 720*480, it is normal that the zoomed-in image is not clear. But for network digital video input, as it supports resolution up to 960*540, the zoomed-in image is very clear. This is very helpful for IP camera installation.
- Page 31 VITEK 5-in-1 CCTV TESTING MONITOR (4) Video Record When you click the “Record” icon, video starts recording. A red recording icon appears on the screen and begins to flash, and a timer appears indicating the time elapsed for the video. Click on the “Record”...
- Page 32 VITEK 5-in-1 CCTV TESTING MONITOR To rename or delete an image, click and hold on the file until this screen below appears. (6) Recorded video playback Click the “Playback” icon to view your recorded videos. Tap on the video file image you want to watch.
-
Page 33: Cvi Camera Test
VITEK 5-in-1 CCTV TESTING MONITOR To rename or delete a video, click and hold on the file until this screen appears: Video files can also play in the main menu “Video Player". 3.3.7 CVI camera test For HD CVI camera, CVI dome camera test and PTZ control, click icon to enter. - Page 34 VITEK 5-in-1 CCTV TESTING MONITOR (1) PTZ control 1.1 Coaxial PTZ control Click the icon “PTZ” on the right toolbar for the corresponding settings. “Port”: select coaxial control Enter PTZ address to perform parameters setting. Page 31...
- Page 35 VITEK 5-in-1 CCTV TESTING MONITOR For operation instructions, please refer to “3.3.9 PTZ (1) Video monitor test”. The PTZ address in the tester must be consistent with the dome camera or decoder, then the IPC tester can test after setting the parameter. The tester can control the PTZ and lens.
- Page 36 VITEK 5-in-1 CCTV TESTING MONITOR Call preset position: Tap the preset position area, input preset position number. Tap “call position” to complete call preset position. 1.2 RS485 control For operation instructions, please refer to “3.3.9 PTZ (1) PTZ control parameters setting”...
- Page 37 VITEK 5-in-1 CCTV TESTING MONITOR Input calling dome camera menu address code, after finishing the parameter settings, you can press the key “Enter” or click the icon to call the dome camera menu. set the parameters with Page 34...
- Page 38 VITEK 5-in-1 CCTV TESTING MONITOR (3) For snapshot, record, photo viewer and video play back, please refer to “3.3.9 PTZ (1) Video monitor test”. Tap “close menu” to close camera menu. (4) Save setting Click icon “Set” on the right toolbar to enter storage setting. The tester support auto-storage and manual storage.
-
Page 39: Tvi Camera Test
VITEK 5-in-1 CCTV TESTING MONITOR 3.3.8 TVI camera test For HD TVI camera, TVI dome camera test and PTZ control, click icon to enter When HD TVI signal input, the tester will display the image resolution on the top bar. Double tap on the screen to make the image displayed full screen. - Page 40 VITEK 5-in-1 CCTV TESTING MONITOR Coaxial camera menu settings Tap icon “UTC”, select “menu setting” to enter the dome camera menu Input calling dome camera menu address code, after finishing the parameter settings, you can press the key “Enter” or click the icon...
-
Page 41: Ahd Camera Test
VITEK 5-in-1 CCTV TESTING MONITOR 3.3.9AHD camera test For AHD camera, AHD dome camera test and PTZ control, click icon to enter When AHD signal input is in, the tester will display the image resolution on the top bar. Double tap on the screen to make the image displayed full screen. -
Page 42: Network Tool
VITEK 5-in-1 CCTV TESTING MONITOR refer to “3.3.10 CVI camera test” 3.3.10 Network tool (1) IP address scan Connect the cable to the LAN port, click icon to enter, set your IP address search range by changing the Start and End IP addresses. Click the “Start” button to scan the IP address range. You can also input an IP address in the Port Number Scan to scan for open ports. -
Page 43: 3)Network Test (Ethernet Bandwidth Test)
VITEK 5-in-1 CCTV TESTING MONITOR Application: PING testing is the most conventional network debugging tool. It is used for testing if the connected IP camera or other network equipment’s Ethernet port is working normally and the IP address is correct. It’s normal that the first data packet will be lost when the test starts. - Page 44 VITEK 5-in-1 CCTV TESTING MONITOR b). Start send packet test: Using the other IP tester, type in the Server’s IP address at the top right corner of the screen. This app is used to send packets for network speed testing. Click the “Start” button to send the packets and start testing.
- Page 45 VITEK 5-in-1 CCTV TESTING MONITOR Or use tester as a Server, computer as test Client(select Client, input tester’s IP address to test) When using tester as Server, shows results: Page 42...
-
Page 46: 4)Port Flashing
VITEK 5-in-1 CCTV TESTING MONITOR ( ( 4) ) Port Flashing Connect a network cable to the switch “LAN” port, click the icon to open the Port Flashing app. Click “Start”. The IP tester sends a unique signal to make the connected LAN port of the switch flash. -
Page 47: 5)Dhcp Server
VITEK 5-in-1 CCTV TESTING MONITOR ( ( 5) ) DHCP server Click on the DHCP icon to open the DHCP server app. Select the “Start” check box at the top and make any desired changes to the network settings. Click “Save” to start assigning dynamic IP addresses for IP cameras and other networked devices. -
Page 48: 7)Link Monitor
VITEK 5-in-1 CCTV TESTING MONITOR ( ( 7) ) Link monitor Click the icon to open the Link Monitor app. This app is used to see if an IP address is occupied by other network devices. This will avoid new address conflicts Click “Add”... -
Page 49: Rapid Ip Discovery
VITEK 5-in-1 CCTV TESTING MONITOR occupied, otherwise it will result in IP conflicts and stop the equipment from working. Link monitor can check if the new setting IP address is occupied. 3.3.11 Rapid IP Discovery Connect the cable to tester’s LAN port. Press to enter Rapid IP Discovery app. -
Page 50: Rj45 Cable Tdr Test
VITEK 5-in-1 CCTV TESTING MONITOR Note: 1. Do not input power into the “DC12/3A OUTPUT” port. 2. Do not connect the DC12V/3A power to the DC12V/IN port of the IP camera tester to avoid damage. 3. The IPC tester power output is close to 3A. If the IP camera’s power is over 3A, the tester will auto enter protection mode. -
Page 51: Audio Recording
VITEK 5-in-1 CCTV TESTING MONITOR Status: After linking up, the screen will display “online”, if not linked up or there is an open circuit, the screen displays “open circuit”, if cable pair has a short circuit, the screen displays “short circuit”. -
Page 52: Data Monitor
VITEK 5-in-1 CCTV TESTING MONITOR 3.3.15 Data monitor Please click icon to enter Click “Setting” to choose the baud rate of RS485/RS232; it must be the same as the DVR or the Control keyboard. The DVR or Control keyboard send the code to the tester. If it can be read, the protocol will show on the upper right, like Pelco D, if not, like P: --- While the tester receives the code, press the “Return”... -
Page 53: Media Player
VITEK 5-in-1 CCTV TESTING MONITOR 3.3.17 Media Player Click the icon to enter. The Media player can browse video and image files. It supports video formats MP4, H.264, MPEG4, and MKV. The IP tester recorded files can play directly via the Media player. The Media player will automatically display the video files from the SD card. - Page 54 VITEK 5-in-1 CCTV TESTING MONITOR Local IP: This is the IP tester’s IP address. RTSP Add: This is where you can manually enter the IP camera’s RTSP URL or click on Search to search the network for cameras that use an RTSP stream.
-
Page 55: Update
VITEK 5-in-1 CCTV TESTING MONITOR 3.3.19 Update Copy the downloaded update file to SD card "update" directory, if there’s no directory, please create one. Click the icon to open the Update menu. Select “Local Update” to update via the SD card or select “Online Update”... -
Page 56: Led Flashlight
VITEK 5-in-1 CCTV TESTING MONITOR 3.3.21 LED Flashlight This is convenient for the installation or maintenance in low light conditions. Click icon enter. While in the flashlight app, click the red button to turn on the LED lamp. Press it again to turn it off. If you don’t press the red button... -
Page 57: Notepad
VITEK 5-in-1 CCTV TESTING MONITOR 3.3.23 Notepad: Notepad can be used to record the important testing results. Click the key “Save” to save the contents. Notepad can auto record the storage date and time. Please click to view the notepad. All saved contents will display. Click each record bar to show the details. - Page 58 VITEK 5-in-1 CCTV TESTING MONITOR Language: Select your desired language: Eng., Chin., Kor., Rus., Ital., Pol., Sp., Fr. or Jp. Typewriter: You can select Typewriter or install another Typewriter: Date/Time: Set the Date/time of the IP tester IP setting: Manually set the IP address, Subnet Mask, Default Gateway and DNS address or select “Dynamic allocation”...
- Page 59 VITEK 5-in-1 CCTV TESTING MONITOR WLAN Net: Turn Wi-Fi off or on by pressing the “Open the Wi-Fi” button. Once Wi-Fi is turned on, click connected WIFI, and it will scan for wireless networks in your area. Select and press “WIFI” for several seconds to set static IP address.
- Page 60 VITEK 5-in-1 CCTV TESTING MONITOR Brightness: Set the desired brightness of the IP tester and adjust the sleep time settings. Volume: Set volume level. SD Card: Displays SD card capacity. You can also format the SD card or unmount it before removal.
-
Page 61: File Explorer
VITEK 5-in-1 CCTV TESTING MONITOR PTZ address scan: You can toggle the PTZ Address scan off or on before entering the “PTZ controller” app. This needs to be turned on in order to use the PTZ Scan feature of the PTZ app. - Page 62 VITEK 5-in-1 CCTV TESTING MONITOR Browse Includes Music, Videos, Pictures, Documents, zip file etc. It is convenient to view and manage. FTP server You can choose internal or external SD card. For other operation details, please refer to FTP settings.
-
Page 63: Theme
VITEK 5-in-1 CCTV TESTING MONITOR 3.3.26 Theme Click Theme icon to enter themes setting. Desktop style: you can select Lite mode or normal mode. Theme: By pressing the square area of any color icon for several seconds, the selected color icon will move to the rectangle area. - Page 64 VITEK 5-in-1 CCTV TESTING MONITOR Set as desktop background: Set color as desktop background. Set as application background: Set color as application background. Set at the same time: Sets color as desktop background and application background. Cancel: Cancel current setting.
-
Page 65: Audio Test
VITEK 5-in-1 CCTV TESTING MONITOR Sliding effect: Tester’s sliding effect includes stereo effect, folding effect, Left and right folding, rotate effect, Ombre effect etc. Select one of the effects to view slide effect in the square area, and click “set” to save. -
Page 66: Dc12V 3A Power Output
VITEK 5-in-1 CCTV TESTING MONITOR Notice a. Please make sure the cable connected to the tester’s Lan port is straight-line cable and has no short circuit, otherwise it will damage the tester b. Before using PoE power output, please check whether the IP camera supports POE power. Otherwise it will damage the IP camera. -
Page 67: Specifications
VITEK 5-in-1 CCTV TESTING MONITOR Notice: Don’t input any power into the “DC12/3A OUTPUT” port of the tester Human error damages are not within our company’s warranty The IP tester’s power output capacity is 3A. If the IP camera uses more than 3A, the tester will Notice: Don’t input any power into the “DC12/3A OUTPUT”... - Page 68 VITEK warrants to the purchaser that products manufactured by VITEK are free of any rightful claim of infringement or the like, and when used in the manner intended, will be free of defects in materials and workmanship for a period of three (3) years, or as otherwise stated above, from the date of purchase by the end user.
Need help?
Do you have a question about the VT-SCT-U4 and is the answer not in the manual?
Questions and answers