Table of Contents
Advertisement
Quick Links
FEATURES
• 19" & 24" Wide Screen LED Display Panel
• HDMI, VGA, and Looping BNC Composite Video Inputs & Stereo Audio
Input
• Resolution up to 1920 x 1080 (1080P)
• Contrast Ratio of 10,000:1
• <5ms Response time
• 170° Horizontal Viewing Angle
• Front Panel Controls
• VESA Standard Mounting
• Professional grade display designed for 24/7 continuous use in security
applications with 50,000 Hour Panel Life
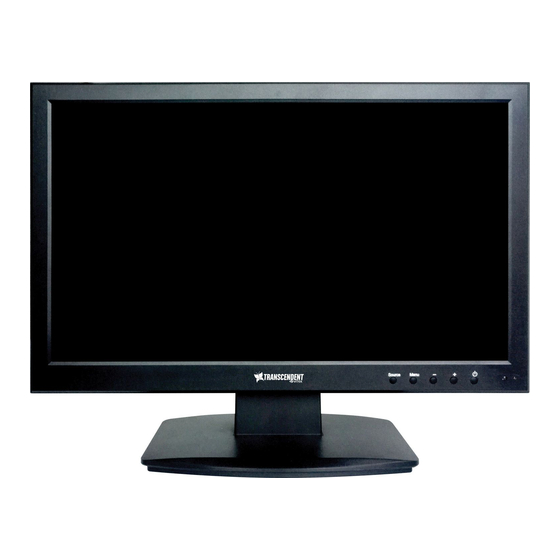
VTM-TLM191
VTM-TLM240
19" & 24" Professional LED Monitors with
HDMI, VGA, and Looping BNC
Advertisement
Table of Contents

Subscribe to Our Youtube Channel
Summary of Contents for Vitek VTM-TLM191
- Page 1 VTM-TLM191 VTM-TLM240 19” & 24” Professional LED Monitors with HDMI, VGA, and Looping BNC FEATURES • 19” & 24” Wide Screen LED Display Panel • HDMI, VGA, and Looping BNC Composite Video Inputs & Stereo Audio Input • Resolution up to 1920 x 1080 (1080P) •...
-
Page 2: Table Of Contents
Table of contents Important safety information In The Box Connections Rear interface Control Layout How to connect your monitor On-Screen Display (OSD) Operation AV Input Configuration HDMI Input Configuration VGA Input Configuration... -
Page 3: Important Safety Information
IMPORTANT SAFETY INFORMATION ENVIRONMENT • Do not install the monitor outdoors or in any hostile environment. To prevent fire or electric shock, do not expose monitor to rain or moisture. Avoid placing the monitor in areas subject to extreme temperature such direct sunlight... - Page 4 USING A WALL MOUNT Caution: Any wall mount must bear a minimum of 5x the monitor’s net weight to mount safely. The stand must be removed first before mounting this way. 1. Place the monitor face down on a surface that is soft, yet strong enough to hold the monitor.
-
Page 5: In The Box
IN THE BOX 1 x LCD Monitor, 1 x AC adapter, 1 x VGA cable, 1 x Audio cable, 1 x User Manual CONNECTIONS Rear Interface Only use the 12v DC power supply included with the monitor. HDMI: (High-Definition Multimedia Interface) supports digital video and audio connections. -
Page 6: Control Layout
CONTROL LAYOUT The control buttons are located on the right hand rear side of the monitor. 5keys series SOURCE MENU POWER 7keys series SOURCE MENU POWER ∨ ∧ SOURCE: Selects input mode – AV, HDMI, VGA. MENU: Access to the On Screen Display (OSD) menu. +... - Page 7 If audio input is required, connect the audio (red and white) cables to the AUDIO INPUT R and L connectors on the rear of the monitor and to the Audio Output connector on the DVR/Camera etc. Connect power to the monitor and video source, and switch on. Using the SOURCE button, press repeatedly until either ‘AV1’...
-
Page 8: On-Screen Display (Osd) Operation
BASIC ON-SCREEN DISPLAY SETUP 1. To access the OSD Menu press ‘MENU’. 2. Use the ‘+’ or ‘-’ buttons to select the required menu item, then press the ‘SOURCE’ button to select the Sub menu. 3. Continue to use the ‘SOURCE’ button to highlight the required field, then press ‘+’... - Page 9 SHARPNESS: (0-100) COLOR TEMP: Select the color temperature. (Normal/Warm/Cool) PICTURE MODE: Select defaults or save user setting. ( User/Standard/Soft/Vivid) LANGUAGE: Select preferred language for OSD. (En/Ch/Ger/Fr/Sp/It/Pt/Pl/Ru) H-POSITION: (0-100) Set the horizontal position of the OSD. V-POSITION: (0-100) Set the vertical position of the OSD. DURATION: (5-60) Set seconds for the OSD to automatically close.
-
Page 10: Hdmi Input Configuration
Audio BASS: (0-100) TREBLE: (0-100) BALANCE: (-50 to +50) SOUND MODE: Set user or preset audio configurations. (User/Standard/Movie/Music) AVC: (ON/OFF) Automatic Volume Control HDMI - Input Configuration Picture CONTRAST: (0–100) Set the difference between the light and dark areas of the picture. BRIGHTNESS: (0–100) Set how bright the display is. - Page 11 COLOR TEMP: Select the color temperature Menu. COLOR TEMP: Select color temperature preset. USER - R: Set RED color level. USER - G: Set GREEN color level. USER - B: Set BLUE color level. LANGUAGE: Select preferred language for OSD. (En/Ch/Ger/Fr/Sp/It/Pt/Pl/Ru) H-POSITION: (0-100) Set the horizontal position of the OSD.
- Page 12 Function HSTART: Set left alignment point of image. HSIZE: Set horizontal size of image. VSTART: Set lower alignment point of image. VSIZE: Set vertical size of image. Audio BASS: (0-100) TREBLE: (0-100) BALANCE: (-50 to +50) SOUND MODE: Set user or preset audio configurations. (User/Standard/Movie/Music) AVC: (ON/OFF) Automatic Volume Control...
-
Page 13: Vga Input Configuration
VGA - Input Configuration Picture CONTRAST: (0–100) Set the difference between the light and dark areas of the picture. BRIGHTNESS: (0–100) Set how bright the display is. COLOR TEMP: Select the color temperature Menu. COLOR TEMP: Select color temperature preset. USER - R: Set RED color level. - Page 14 LANGUAGE: Select preferred language for OSD. (En/Ch/Ger/Fr/Sp/It/Pt/Pl/Ru) H-POSITION: (0-100) Set the horizontal position of the OSD. V-POSITION: (0-100) Set the vertical position of the OSD. DURATION: (5-60) Set seconds for the OSD to automatically close. BACKLIGHT: Set power level in use by backlight (HIGH/MID/LOW) MEM-RECALL: Restore all factory defaults.
- Page 15 bars of noise are still present, this setting can be used to remove them. PHASE: If the phase of your monitor is not fine-tuned, you may observe the image being unstable in the horizontal axis. Use this option to manually correct. AUTO ADJUST: Perform an automatic configuration of the Phase, Clock, vertical and horizontal position.
-
Page 16: Limited Product Warranty
(3) years, or as otherwise stated above, from the date of purchase by the end user. This warranty is nontransferable and extends only to the original buyer or end user customer of a VITEK Authorized Reseller. The product must have been used only for its intended purpose, and not been subjected to damage by misuse, willful or accidental damage, caused by excessive voltage or lightning.


Need help?
Do you have a question about the VTM-TLM191 and is the answer not in the manual?
Questions and answers