
Related Manuals for Gefen EXT-4K600A-MF-51-HBTLS


Summary of Contents for Gefen EXT-4K600A-MF-51-HBTLS
- Page 1 4K Ultra HD 600 MHz Multi-Format 5x1 Scaler w/ Auto-Switching & Split HDMI & HDBaseT™ Outputs User Manual Version A1...
- Page 2 Important Safety Instructions GENERAL SAFETY INFORMATION 1. Read these instructions. 2. Keep these instructions. 3. Heed all warnings. 4. Follow all instructions. 5. Do not use this product near water. 6. Clean only with a dry cloth. 7. Do not block any ventilation openings. Install in accordance with the manufacturer’s instructions.
-
Page 3: Warranty Information
Warranty Information For the latest warranty coverage information, refer to the Warranty and Return Policy under the Connect section of the Gefen website at http://www.gefen.com/connect/warranty-and- return-policy... -
Page 4: Contacting Gefen Technical Support
© 2019 Nortek Security & Control, LLC. All Rights Reserved. All trademarks are the property of their respective owners. Gefen and Nortek Security & Control, LLC reserve the right to make changes in the hardware, packaging, and any accompanying documentation without prior notice. -
Page 5: Licensing
Licensing This product uses software that is subject to open source licenses, including one or more of the General Public License Version 2 and Version 2.1, Lesser General Public License Version 2.1 and Version 3, BSD, and BSD-style licenses. Distribution and use of this product is subject to the license terms and limitations of liability provided in those licenses. -
Page 6: Features And Package Contents
● Power over HDBaseT™ (POH) provides power to a compatible Receiver unit (such as EXT- UHDA-HBTL-RX) over the link cable ● IR In/Ext port works with Gefen EXT-RMT-EXTIRN IR Extender Module or electrical IR from a third-party controller ● Handheld IR Remote works with intuitive On-Screen-Display (OSD) ●... -
Page 7: Package Contents
Features and Package Contents Package Contents ● (1) 4K Ultra HD Multi-Format 5x1 Scaler w/ Auto-Switching and HDBaseT™ Output ● (1) 12V DC power supply with locking connector and US/EU/UK/AU Regional Plugs ● (1) RMT-MF-51A Handheld IR Remote with (1) CR2025 battery ●... -
Page 8: Table Of Contents
Contents Important Safety Instructions ................ii Warranty Information ..................iii Contacting Gefen Technical Support ............... iv Operating Notes ....................iv Licensing ......................v Features and Package Contents ............... vi Getting Started Panel Layout ......................2 Front ......................2 Back ......................3 Installation and Basic Operation ............... - Page 9 Contents Main ► System ► Serial Baud Rate ............25 Main ► System ► Factory Default ............. 25 Main ► System ► Reboot ................25 Main ► System ► System Update ............. 25 Web Interface ..................... 26 Using the built-in Web Interface ..............26 Main ►...
-
Page 11: 01 Getting Started
Multi-Format Scaler 01 Getting Started... -
Page 12: Panel Layout
Make sure to follow the pin assignment indicator on the unit panel. RS-232 extension and unit control are concurrently active. Connect a Gefen EXT-RMT-EXTIRN IR Extender module (available separately) or the IR output of a third-party controller to this port. If... -
Page 13: Back
HDBaseT™ In port on the optional Receiver unit. Connect a Gefen Locking HDMI cable from this port to an HDMI HDMI Out capable display. The HDMI output includes internal HDMI audio or external audio from any of the audio inputs. -
Page 14: Installation And Basic Operation
To deactivate, press and hold the Auto button again for 3 seconds or longer. Press and release the Power button to turn the unit On or Off. 5. Connect a Gefen HDMI cable between the HDMI Out port of the 5x1 Receiver and a display monitor. -
Page 15: Installation And Basic Operation
Push-Buttons RS-232 or Audio Amplifier input (1 shown) Device-To-Be- w/analog L/R input Controlled * Microphone EXT-4K600A-MF-51-HBTLS EXT-UHDA-HBTL-RX 5x1 Switcher (Back) Receiver (Back) IR Emitter to Remote VGA Source Display 4K Ultra HD HDMI Source 4K DisplayPort™ 1.2 Source Audio Amplifier... -
Page 16: Network Configuration Using Syner-G
1. Download the application here: http://www.gefen.com/synerg/ Launch the Gefen Syner-G application. 2. Select the EXT-4K600A-MF-51-HBTLS from the list of products. 3. Under the Device Settings section, select either Static or DHCP from the IP Mode drop-down list. ● Select Static to manually enter the IP address, subnet mask, and gateway IP. Consult with your network administrator, if necessary. - Page 17 Installation and Basic Operation 4. Click the Save button at the bottom of the screen. 5. After saving, select Reboot for the new network settings to take effect. 6. Use the IP address of the switcher to access the built-in web interface or start a Telnet session.
-
Page 18: Ir Remote Control Unit
IR Remote Control Unit Mute Input HD 1 HD 2 HD 3 Auto Menu Exit Main Volume Switcher Remote RMT-MF-51A ID Name Description Press this button to toggle between On and Off power modes. Powering on the unit via IR from the HDBaseT™ receiver is not possible as the link is not active when the unit is in standby mode. -
Page 19: Remote Bottom - Installing The Batteries
IR Remote Control Unit Remote Bottom - Installing the Batteries Name Description Battery slot Holds battery carriage in place. Press inward with your thumb to release the tab that holds the battery carriage in place. Remove and Release Tab replace the battery, then slide and snap the battery carriage back in to place. -
Page 21: 02 Basic Operation
Multi-Format Scaler 02 Basic Operation... -
Page 22: Introduction
Auto-Switch 4K Ultra HD 600 MHz HDMI, DisplayPort™ 1.2 and VGA. Scale and extend up to 70 meters/230 feet, over a single CAT-5. The EXT-4K600A-MF-51-HBTLS is a 5x1 Presentation Switcher with three 4K 600 MHz HDMI, one DisplayPort™ 1.2, one VGA, five independently assignable stereo analog audio and one balanced/unbalanced microphone/line input. -
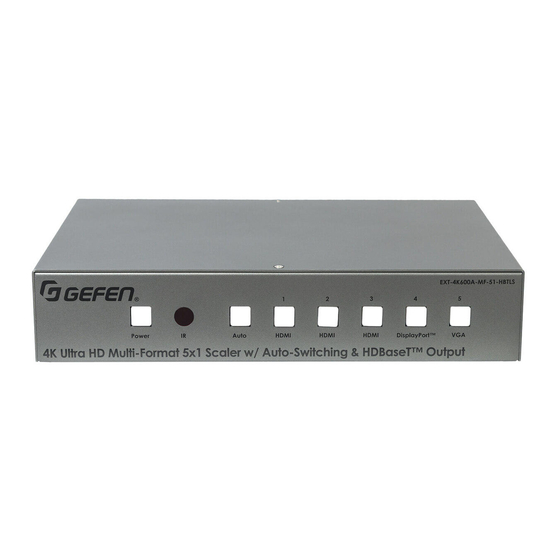
Page 23: Front Panel Controls
1. Make sure the included 12V DC power supply is connected from the Multi-Format Scaler to an available electrical outlet. 2. Press and release the Power button on the front panel. 3. The power button will illuminate blue. Power On EXT-4K600A-MF-51-HBTLS Power Auto HDMI HDMI DisplayPort™... -
Page 24: Using The Ir Remote Control
Using the IR Remote Control You can use the included IR Remote Control to operate the Multi-Format Scaler by pointing the remote at the IR Window on the unit. EXT-4K600A-MF-51-HBTLS Power Auto HDMI HDMI DisplayPort™ HDMI 4K Ultra HD Multi-Format 5x1 Scaler w/ Auto-Switching & HDBaseT™ Output... - Page 25 If the Multi-Format Scaler is concealed in a cabinet or otherwise out of range of the remote, you can plug in a Gefen IR Extender (Gefen part no. EXT-RMT-EXTIR, available separately) to the IR Ext port on the back panel and place the sensor where it will be in range of the remote.
-
Page 26: Osd Menu
OSD Menu Accessing the Menu System Input selection can be controlled using the front panel of the The Multi-Format Scaler. However, the included IR remote control must be used to access the built-in menu system. The menu system is used to manage and control audio, video, and system features. Main Menu Audio Input Audio Setup... -
Page 27: Main Menu
OSD Menu The switcher provides a powerful OSD operation menu. Press the MENU button on IR remote to view the menu and change settings. Press OK to choose a setting or to apply the selected setting Mute Press the ▲ and Input ▼... -
Page 28: Menu System
Menu System The Main Menu includes Audio Input, Audio Setup, Video Setup, VGA, Network and System options. ● Use the IR Remote Control to navigate menu options. ● Press the IR Remote Menu button at any time to save settings and return to the previous menu. -
Page 29: Main ► Video Setup Menu
Menu System Main ► Audio Setup Audio Setup HDMI 1 Ext 1 2. Press ▲ or ▼ to highlight an option, and HDMI 2 press the OK button repeatedly to cycle through available options: Emb, Ext (1 HDMI 3 through 5), No Audio and No Change. Display Port 4 Mixer Mode options include: On, Off Ext 1... -
Page 30: Main ► Video Setup ► Output Resolution
Menu System Main ► Video Setup ► Output Resolution Output Resolution 1024 x 768 60 Hz 1280 x 800 60 Hz 1360 x 768 60 Hz 1680 x 1050 60 Hz 1920 x 1200 60 Hz 1. Press ▲ or ▼ to highlight an option, then 1280 x 720 50 Hz press the OK button. -
Page 31: Main ► Video Setup ► Aspect Ratio
Menu System Main ► Video Setup ► Aspect Ratio Video Setup Output Resolution Picture Adjust Aspect Ratio 1. Select Aspect Ratio to access aspect ratio options. Overscan HDCP Press MENU to go Back Aspect Ratio 16:9 2. Press the ▲ or ▼ buttons to highlight 16:9, 4:3 or AUTO, then press OK. -
Page 32: Main ► Video Setup ► Hdcp
Menu System Main ► Video Setup ► HDCP Video Setup Output Resolution Picture Adjust Aspect Ratio 1. Select HDCP to access options. Overscan HDCP Press MENU to go Back HDCP Always On Active 2. Press the ▲ or ▼ buttons to highlight an option, then press OK to select. -
Page 33: Main ► Network Menu
Menu System Main ► Network Menu Main Menu Audio Input Audio Setup 1. Select Network to access network setting Video Setup options. Network System 2. Press the ▲ or ▼ buttons to highlight a Network setting. IP MODE STATIC MODE, press OK to toggle IP address :192.168.001.072 options. -
Page 34: Main ► System ► Osd Timeout
Menu System Main ► System ► OSD Timeout OSD Timeout 5 seconds 10 seconds * 1. Press the ▲ or ▼ buttons to highlight a setting. Press OK select an option. 30 seconds 60 seconds Press MENU to go Back Main ►... -
Page 35: Main ► System ► Serial Baud Rate
Menu System Main ► System ► Serial Baud Rate Serial Baud Rate 4800 9600 19200 * 1. Press the ▲ or ▼ buttons to highlight a 38400 setting. Press OK select an option. 57600 115200 Press MENU to go Back Main ►... -
Page 36: Web Interface
Web Interface Using the built-in Web Interface This is the login page. Options for login are Administrator and Operator. Password defaults are ‘admin’ and ‘operator’. The Web Interface is divided into six tabs at the top of the screen: Main, Setup, Names, EDID, Network, System. Some tabs have sub-tabs. Default IP Address 192.168.1.72 Username... -
Page 37: Main ► Volume
Web Interface Illuminated orange are the current Video and Audio Inputs in use. Click on desired Video or Audio input to make changes. With Auto Switch enabled, the scaler will automatically switch the input when it detects a new input source. The Auto Switch function uses an Auto Switch Fallback feature to scan for the active input source starting from HDMI 1. -
Page 38: Main ► I/O Status
Web Interface Main ► I/O Status This tab indicates the status of the inputs and outputs. The unit's power status is displayed at the top right of the status window, as well as the Help button. Input The Input table displays the Feature and Input status for: Color Depth : The color depth of the input signal (8-bit, 10-bit, etc). -
Page 39: Setup ► Video
Web Interface Setup ► Video This tab is the main configuration page for the input and outputs. The Output Resolution modes include 12 presets and Native. Native The Native mode will attempt to set the output of the unit based on the native resolution detected in the EDID of the connected display. -
Page 40: Setup ► Vga
Web Interface Setup ► VGA This tab allows you to configure the window VGA Settings for the three VGA input modes: VGA, YPbPr and Composite. Input Mode Select the input mode to adjust: VGA, YPbPr or Composite. Note: Auto switching will not be active for composite or component (YPbPr) video when these modes are enabled. -
Page 41: Setup ► Audio
Web Interface Setup ► Audio This tab allows you to configure an Audio Link setting for each input (HDMI 1-3, DisplayPort and VGA) and global Audio Mixer settings. Audio Link For each Input, click the option that represents the audio source you'd like to use when that input is selected. -
Page 42: Setup ► Hpd Pulse
Web Interface Setup ► HPD Pulse This tab is used to perform HPD (Hot Plug Detect) pulse events. HPD is a low voltage pin in the HDMI cable that is set either HIGH or LOW that indicated the presence of a cable connection. Momentarily changing this voltage from HIGH to LOW and then back to HIGH creates a Pulse that disconnects and reconnects, triggering a connection reset between the unit and the input source(s) without unplugging and plugging in the HDMI cable(s). -
Page 43: Edid ► Mode
Web Interface EDID ► Mode This tab is used to configure the EDID (Extended Display Identification Data), typically a 256 byte file that is hosted on a sink (display or other endpoint device) that contains video and audio capability information for that device. There are three EDID modes: Internal Pre-configured and non-customizable EDIDs that have specific limitations on the resolution... -
Page 44: Edid ► Info
EDID File drop-down menu. Options include the Output, any of the 4 inputs or the 2 internal EDIDs. A downloaded EDID may be loaded into the Gefen Syner-G™ or other EDID modification software to then customize and re-upload back to the unit. -
Page 45: Network ► Settings
Web Interface Network ► Settings This tab is used to configure all of the network related options on the switcher. Once revisions have been made, select Save. Select the Set Network Defaults option to return to default network settings. IP Settings MAC Address The MAC address of the switcher. - Page 46 Web Interface Network ► Settings (continued) TCP/Telnet Settings Enable TCP Access Click Enable to make TCP available, or click Disable to disable TCP access. TCP Port Type in the a TCP port number. Default is set to 23. Login Message on Connect Click Show to display the Telnet Welcome Message.
-
Page 47: System ► Settings
Web Interface System ► Settings This tab is used to configure settings that relate to operational functions or factory default and rebooting operations. Unsolicited feedback This option controls feedback information on both the Serial and TCP/IP interfaces and is used to relay the status of any changes made to options through any of the interfaces. This includes front panel, web server, Telnet, Serial and IR remote control. - Page 48 This page left intentionally blank.
-
Page 49: 03 Advanced Operation
Multi-Format Scaler 03 Advanced Operation... -
Page 50: Firmware Update
Firmware Update Firmware update for this product is managed by Gefen Syner-G™ software. For download and instructions, please download the software from: http://www.gefen.com/synerg/ It's recommended that you perform a power cycle of the unit after the update has completed. IMPORTANT: DO NOT power-off or disconnect power from the switcher at any time during the firmware update process. -
Page 51: Rs-232 And Ip Configuration
IP address of the 4x1 Multiview Seamless Switcher. 3. After correct settings have been used in the terminal program, information similar to the following will be displayed: ********Welcome to the EXT-4K600A-MF-51-HBTLS******** Firmware Version: v3.66 *************************************************** > #help 4. -
Page 52: Commands List
Commands List Name Command(s) Description(s) SET the administrator password (this can only be set when Administrator #SET_ADMIN_PASS telnet login is enabled and the user is administrator. This Pass password will affect other interface logins) #GET_ASPECT Aspect Ratio GET or SET Aspect Ratio adjustment #SET_ASPECT #GET_AUDIO_LINK Audio Link... -
Page 53: Internal Edid
Commands List Name Command(s) Description(s) #GET_FEEDBACK GET status of unsolicited feedback Feedback #SET_FEEDBACK Enable/Disable unsolicited feedback Firmware #GET_FIRMWARE_VERSION GET or SET firmware version version #GET_GATEWAY GET the current gateway address Gateway #SET_GATEWAY SET the gateway address Lists all available TCP/UDP commands. If a command Help #HELP is specified then both the description and syntax will be... -
Page 54: Subnet Mask
Commands List Name Command(s) Description(s) Power #GET_POWER GET current power state Power ON/OFF #POWER Power the unit on/off Reboot #REBOOT Reboot the unit Route Input Route HDMI 1, HDMI 2, HDMI 3, DisplayPort, or VGA input Source to output Routing Status GET currently selected input #GET_RS232_BAUD RS-232... - Page 55 Commands Administrator Password (#SET_) SET the administrator password (this can only be set when telnet login is enabled and the user is administrator. This password will affect other interface logins). Syntax #SET_ADMIN_PASS PARAM1 PARAM1 = 1-12 ALPHANUMERIC CHARACTERS Parameters (param1) ALLOWED CHARACTERS: A-Z, a-z, 0-9 (CASE SENSITIVE, NO SPECIAL CHARACTERS) Example...
- Page 56 Commands Audio Link (#SET_ / #GET_) SET Audio Source link. Syntax #SET_AUDIO_LINK PARAM1 PARAM2 PARAM1 = 1 ~ 5 1 - HDMI 1 2 - HDMI 2 3 - HDMI 3 4 - DISPLAYPORT 5 - VGA/YPBPR/COMPOSITE PARAM2 = 0 ~ 7 Parameters 0 - EMBEDDED AUDIO (VALID WITH HDMI AND DISPLAYPORT INPUTS ONLY) 1 - EXTERNAL 1 AUDIO INPUT...
- Page 57 Commands Auto Switching (#SET_ / #GET_) SET current Audio Routing status. Syntax #SET_AUTO_SWITCH PARAM1 PARAM1 = 0 ~ 1 Parameters (param1) 0 - DISABLED 1 - ENABLED Example #SET_AUTO_SWITCH 1; #SET_AUTO_SWITCH 0 GET the Enable/Disable status of #GET_AUTO_SWITCH the auto-switching feature Example #GET_AUTO_SWITCH Auto Sync...
- Page 58 Commands Clock (#SET_ / #GET_) SET VGA clock adjustment value. Syntax #SET_CLOCK PARAM1 PARAM1 = -, + Parameters (param1) - - DECREASE CLOCK BY ONE STEP + - INCREASE CLOCK BY ONE STEP Example #SET_CLOCK – ; #SET_CLOCK + GET VGA clock adjustment #GET_CLOCK Example #GET_CLOCK...
- Page 59 Commands Contrast(#SET_ / #GET_) SET contrast adjustment. Syntax #SET_CONTRAST PARAM1 PARAM 2 PARAM1 = 0 ~ 5 0 - ALL INPUTS (FEEDBACK LISTS ALL INPUTS IN ORDER 1 ~ 5) 1 - HDMI INPUT 1 2 - HDMI INPUT 2 3 - HDMI INPUT 3 Parameters 4 - DISPLAYPORT INPUT...
- Page 60 Commands Device Description (#SET_ / #GET_) SET the device description. Syntax #SET_DEVICE_DESC PARAM1 PARAM1 = ABCDEFGH...(29 CHARACTERS MAX, NO CASE OR Parameters SPECIAL CHARACTER LIMIT) Examples #SET_DEVICE_DESC DEVICE GET the device description Syntax #GET_DEVICE_DESC Discovery(#SET_ / #GET_) SET (Enable/Disable) the Discovery service. Syntax #SET_DISCOVERY PARAM1 PARAM1 = 0 ~ 1...
- Page 61 Commands EDID Lock (#SET_ / #GET_) SET input EDID Lock (prevents accidental custom EDID overwrite and valid only when EDID mode is set to custom mode). Syntax #SET_EDID_LOCK PARAM1 PARAM1 = 1 ~ 4 1 - HDMI INPUT 1 2 - HDMI INPUT 2 3 - HDMI INPUT 3 Parameters 4 - DISPLAYPORT INPUT...
- Page 62 Commands External EDID Download External EDID. Syntax #GET_EXTERNAL_EDID PARAM1 = L, H Parameters L - LOCAL HDMI H - HDBASET Examples #GET_EXTERNAL_EDID L Factory Reset Reset to factory defaults. Syntax #FACTORY_RESET Fade Time (#SET_ / #GET_) SET main (source) audio fade times when using the "auto" microphone mixer mode. Syntax #SET_FADE_TIME PARAM1 PARAM2 PARAM1 = 0 ~ 1...
- Page 63 Commands Firmware Version GET Firmware version. Syntax #GET_FIRMWARE_VERSION Gateway (#SET_ / #GET_) SET the Gateway address. Syntax #SET_GATEWAY PARAM1 PARAM1 = XXX.XXX.XXX.XXX Parameters (param1) XXX - 0 ~ 255 Examples #SET_GATEWAY 192.168.1.1 GET the current Gateway address. Syntax #GET_GATEWAY Help Lists all available TCP/UDP commands.
- Page 64 Commands Input Mode (#SET_ / #GET_) SET VGA input mode. Syntax #SET_INPUT_MODE PARAM1 PARAM1 = 1 ~ 3 1 - VGA MODE Parameters 2 - YPBPR MODE 3 - COMPOSITE MODE Examples #SET_FEEDBACK 1 GET VGA input mode. Syntax #GET_INPUT_MODE Internal EDID Download a preset Internal EDID.
- Page 65 Commands IP Address (#SET_ / #GET_) SET the IP Address. Syntax #SET_IP_ADDRESS PARAM1 PARAM1 = XXX.XXX.XXX.XXX Parameters XXX - 0 ~ 255 Examples #SET_IP_ADDRESS 192.168.1.72 GET the current IP Address. Syntax #GET_IP_ADDRESS IP Mode (#SET_ / #GET_) SET the IP Mode to STATIC or DHCP. Syntax #SET_IP_ADDRESS PARAM1 #SET_IP_MODE PARAM1...
- Page 66 Commands Mic Volume (#SET_ / #GET_) SET microphone volume level. #SET_MIC_VOL PARAM1 (PARAM2 OPTIONAL PARAMETER WHEN USING Syntax "+" OR "-" TO INCREASE OR DECREASE MIC VOLUME BY VALUE) PARAM1 = 0 ~ 50, +, - 0 ~ 50 - VOLUME LEVEL + - INCREASE VOLUME Parameters - - DECREASE VOLUME...
- Page 67 Commands Operator Password SET the operator password (this can only be set when telnet login is enabled and the user is administrator. This password will affect other interface logins). Syntax #SET_OPER_PASS PARAM1 PARAM1 = 1-12 ALPHANUMERIC CHARACTERS ALLOWED CHARACTERS: A-Z, a-z, 0-9 (CASE SENSITIVE, NO SPECIAL Parameters CHARACTERS) Examples...
- Page 68 Commands Output Resolution (#SET_ / #GET_) SET Output Resolution. Syntax #SET_OUTPUT_RES PARAM1 PARAM1 = 1 ~ 11 1 - 1024 x 768 60 HZ 2 - 1280 x 800 60 HZ 3 - 1360 x 768 60 HZ 4 - 1680 x 1050 60 HZ 5 - 1920 x 1200 60 HZ Parameters 6 - 1280 x 720 50 HZ...
- Page 69 Commands Phase VGA (#SET_ / #GET_) SET VGA phase adjustment. Syntax #SET_PHASE PARAM1 PARAM1 = -, + Parameters - - DECREASE PHASE BY ONE STEP + - INCREASE PHASE BY ONE STEP Example #SET_PHASE -; #SET_PHASE + GET VGA phase adjustment value. Syntax #GET_PHASE Power (#GET)
- Page 70 Commands RS-232 Baud (#SET_ / #GET_) SET the RS-232 communication baud rate. Syntax #SET_RS232_BAUD PARAM1 PARAM1 = 1 ~ 6 1- 115200 2 - 57600 Parameters 3 - 38400 4 - 19200 5 - 9600 6 - 4800 Example #SET_RS232_BAUD 1 GET the RS-232 communication baud rate.
- Page 71 Commands Sleep Timer (#SET_ / #GET_) SET the sleep timer. Syntax #SET_SLEEP_TIMER PARAM1 PARAM1 = 0 ~ 4 0 - OFF 1 - 10 MINUTES Parameters 2 - 30 MINUTES 3 - 1 HOUR 4 - 2 HOURS Examples #SET_SLEEP_TIMER 0 GET the sleep timer.
- Page 72 Commands Telnet Port (#SET_ / #GET_) SET the Telnet communication port. Syntax #SET_TELNET_PORT PARAM1 PARAM1 = 1 ~ 65535 Parameters 1 ~ 65535 – USABLE PORT RANGE (CANNOT CONFLICT WITH OTHER SERVICE PORTS) Examples #SET_TELNET_PORT 23 GET the current Telnet communication port. Syntax #GET_TELNET_PORT Telnet Welcome (#SET_ / #GET_ / #VIEW)
- Page 73 Commands Tint (#SET_ / #GET_) SET Tint adjustment (only for composite video input). Syntax #SET_TINT PARAM1 PARAM1 = 0 ~ 100 Parameters 0 ~ 100 - TINT VALUE Examples #SET_TINT 50 GET tint adjustment value. Syntax #GET_TINT VGA Auto Detect (#SET_ / #GET_) SET VGA to Auto Detect mode.
- Page 74 This page left intentionally blank.
-
Page 75: 04 Appendix
Multi-Format Scaler 04 Appendix... -
Page 76: Default Settings
Default Gateway 192.168.1.1 HTTP Listening Port Telnet Listing Port Telnet / TCP Access Enabled Gefen Syner-G Discovery Enabled Gefen Syner-G Discovery Mode Read / Write Gefen Syner-G Show Device Hide Me Description Setting Input Names Input 1 - Input 4... -
Page 77: Specifications
Specifications Specifications* ● Recommended HDBaseT™ Receiver: EXT-UHDA-HBTL-RX ● Maximum Input TMDS Clock/Bandwidth: 600 MHz/18 Gbps ● Maximum Output TMDS Clock/Bandwidth: 300 MHz/10.2 Gbps ● Video Input Connectors: ○ (3) HDMI Type A 19-pin, locking, female ○ (1) DisplayPort™ 20-pin, female ○... - Page 78 This page left intentionally blank. page | 68...
- Page 79 This page left intentionally blank. page | 69...
- Page 80 5919 Sea Otter Place, Suite 100, Carlsbad, CA 92010, USA 1-707-283-5900 1-800-472-5555 Copyright© 2019 Nortek Security & Control, LLC Part Number: MAN-EXT-4K600A-MF-51-HBTLS Version A1...