Table of Contents
Advertisement
Quick Links
Advertisement
Table of Contents

Related Manuals for Gefen EXT-HD-3G-C


Summary of Contents for Gefen EXT-HD-3G-C
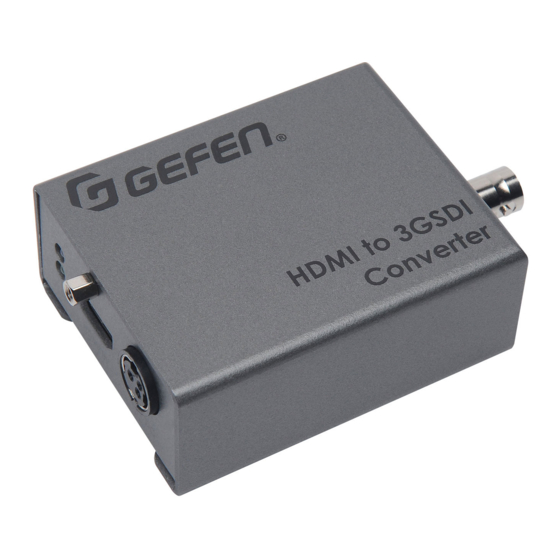
- Page 1 *Preferred HDMI to 3GSDI Converter EXT-HD-3G-C User Manual Release A2...
- Page 2 Important Safety Instructions Read these instructions. Keep these instructions. Heed all warnings. Follow all instructions. Do not use this unit near water. Clean only with a dry cloth. Do not block any ventilation openings. Install in accordance with the manufacturer’s instructions.
- Page 3 Gefen warrants the equipment it manufactures to be free from defects in material and workmanship. If equipment fails because of such defects and Gefen is notified within two (2) years from the date of shipment, Gefen will, at its option, repair or replace the equipment, provided that the equipment has not been subjected to mechanical, electrical, or other abuse or modifications.
-
Page 4: Technical Support
Contacting Gefen Technical Support Technical Support (818) 772-9100 (800) 545-6900 8:00 AM to 5:00 PM Monday - Friday, Pacific Time (818) 772-9120 Email support@gefen.com http://www.gefen.com Mailing Address Gefen, LLC c/o Customer Service 20600 Nordhoff St. Chatsworth, CA 91311 Product Registration Register your product here: http://www.gefen.com/kvm/Registry/Registration.jsp... - Page 5 HDMI to 3GSDI Converter is a trademark of Gefen, LLC. © 2015 Gefen, LLC. All Rights Reserved. All trademarks are the property of their respective owners. Gefen, LLC reserves the right to make changes in the hardware, packaging, and any accompanying documentation without prior written notice.
-
Page 6: Packing List
Packing List The HDMI to 3GSDI Converter ships with the items listed below. If any of these items are not present in the box when you first open it, immediately contact your dealer or Gefen. • 1 x HDMI to 3GSDI Converter •... - Page 7 This page left intentionally blank.
-
Page 8: Table Of Contents
Table of Contents Getting Started Introduction......................2 Installation ......................4 Connection Instructions ................. 4 Sample Wiring Diagram ................4 Basic Operation DIP Switches ......................8 Pre-programmed EDID Modes ..............8 3G Mode ....................... 8 Appendix USB Interface ...................... 12 Verifying the USB Driver ................12 Updating the Firmware .................. - Page 9 This page left intentionally blank.
- Page 10 This page left intentionally blank.
-
Page 11: Getting Started
HDMI to 3GSDI Converter Getting Started... -
Page 12: Introduction
Introduction Page Title SDI Out SDI Out 1 2 3 1 2 3 SDI Out EXT-HD-3G-C EXT-HD-3G-C 1 2 3 EXT-HD-3G-C ® ® ® HDMI to 3GSDI HDMI to 3GSDI Converter Converter HDMI to 3GSDI Converter Power Power 12V DC... - Page 13 Introduction Page Title Name Description This mini-USB port is used for upgrading the firmware. 3GSDI Out Connect a BNC cable from this port to the SDI display. DIP switches Use these DIP switches to set the operating mode of the converter. DIP Switches (page 8) for more information.
-
Page 14: Installation
Connect the included power supply to the 12V DC power receptacle and connect the power cord to an available electrical outlet. Sample Wiring Diagram HDMI CABLE SDI CABLE HDMI Source EXT-HD-3G-C Converter SDI Display or other down- stream equipment EXT-HD-3G-C... - Page 15 This page left intentionally blank.
- Page 16 This page left intentionally blank.
-
Page 17: Basic Operation
HDMI to 3GSDI Converter Basic Operation... -
Page 18: Dip Switches
The HDMI to 3GSDI Converter comes with three pre-programmed EDID configurations. Use DIP switch 1 and 2 to set the desired EDID mode. DIP 3 controls the 3G mode. DIP switches SDI Out 1 2 3 EXT-HD-3G-C DIP 1 DIP 2 DIP 3 Description 3G/HD/SD-SDI with multichannel audio †... - Page 19 This page left intentionally blank.
- Page 20 This page left intentionally blank.
-
Page 21: Appendix
HDMI to 3GSDI Converter Appendix page | 11... -
Page 22: Usb Interface
Converter. The driver is automatically installed when the Syner-G™ Software Suite is installed. Install the Gefen Syner-G™ Software Suite. This software is available under the Support > Downloads section of the Gefen website. Connect a mini-USB-to-USB cable (not included) from the USB port on the HDMI &... - Page 23 USB Interface The Computer Management window will open. In the left window pane, under System Tools, click Device Manager. In the right window pane, locate Human Interface Devices. The device HID-compliant device will be displayed This indicates that the HDMI to 3GSDI Converter has been detected. USB driver page | 13...
-
Page 24: Updating The Firmware
Updating the Firmware The Syner-G™ Software Suite provides an easy way to perform firmware updates. Before launching Syner-G™, makre sure that a USB cable is connected between the product and the computer that is running the Syner-G™ software. Refer to the Syner-G™ Software Suite User Manual for more information on using other features with this product. - Page 25 Updating the Firmware Select the product from the Select your product drop-down list. If the product is not detected by Syner-G™, then the product will not be listed in bold type, within the Select your product drop-down list. Verify the following: ►...
- Page 26 Updating the Firmware Click the Update tab. page | 16...
- Page 27 Updating the Firmware Click the Start button to begin downloading the firmware. The Syner-G™ Software Suite will automatically download the firmware file for the selected product. This process should take a few seconds. Once the download process has completed, the progress bar will indicate 100%, as shown on the next page.
- Page 28 Updating the Firmware A message will also appear at the bottom of the window, indicating that the firmware file was successfully downloaded. Progress bar Click the Install button to begin installing the software. The installation process will begin and the progress bar will indicate the current status. page | 18...
- Page 29 Updating the Firmware After the firmware update process has completed, the following message will be displayed. Click the OK button to dismiss the message box. 10. The procedure is now complete. page | 19...
-
Page 30: Mounting Instructions
Mounting Instructions The HDMI to 3GSDI Converter can be mounted on any flat surface using the included mount or on a camera tripod. Mounting screws are not included. Flat Surface Remove the two screws on the bottom of the unit. Place the included mount, as shown, so that it rests between the two flanges. -
Page 31: Camera Mount
Mounting Instructions Camera Mount The center hole is used to mount the HDMI to 3GSDI Converter to a camera tripod. Camera mount Mount the HDMI to 3GSDI Converter on a camera mount using a 1/4” 20-thread screw. Hand-tighten the mounting screw, from the bottom, until the HDMI to 3GSDI Converter is secure. -
Page 32: Specifications
Specifications Connectors, Controls, and Indicators Video Input • 1 x HDMI Type A 19-pin, female, locking Video Output • 1 x SDI BNC-type, female • 1 x Mini-B Configuration Switches • 3 x DIP-type HDMI Indicator • 1 x LED, green Power Indicator •... - Page 33 This page left intentionally blank.
- Page 34 *Preferred Stretch it. Switch it. Split it. Gefen’s got it. ® 20600 Nordhoff St., Chatsworth CA 91311 20600 Nordhoff St., Chatsworth CA 91311 1-800-545-6900 1-800-545-6900 818-772-9100 818-772-9100 fax: 818-772-9120 fax: 818-772-9120 www.gefen.com www.gefen.com support@gefen.com support@gefen.com...
Need help?
Do you have a question about the EXT-HD-3G-C and is the answer not in the manual?
Questions and answers