Table of Contents
Advertisement
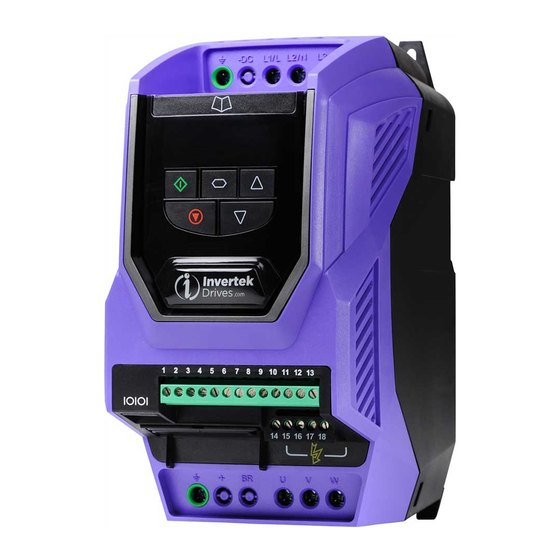
AC Variable Speed Drive
0.75 - 250kW / 1 - 350HP
200-600V Single and 3 Phase Input
General Information
Mechanical Installation
Electrical Installation
LED Keypad and Display Operation
Commissioning
Control Terminal
Communications
Technical Data
Troubleshooting
1
Introduction
2
and Ratings
3
4
5
6
7
Parameters
8
Functions
Extended
9
Parameters
Serial
10
11
12
Advertisement
Table of Contents

Related Manuals for Invertek Drives Eco Optidrive ODV-3-220043-1F12-SN


Summary of Contents for Invertek Drives Eco Optidrive ODV-3-220043-1F12-SN
- Page 1 AC Variable Speed Drive 0.75 - 250kW / 1 - 350HP 200-600V Single and 3 Phase Input Introduction General Information and Ratings Mechanical Installation Electrical Installation LED Keypad and Display Operation Commissioning Parameters Control Terminal Functions Extended Parameters Serial Communications Technical Data Troubleshooting...
-
Page 2: Table Of Contents
1. Introduction ......6. Commissioning ........1. -
Page 3: Declaration Of Conformity
User Guide Revision 3.05 Invertek Drives Ltd adopts a policy of continuous improvement and whilst every effort has been made to provide accurate and up to date information, the information contained in this User Guide should be used for guidance purposes only and does not form the part of any contract. -
Page 4: Introduction
1. Introduction 1.1. Important Safety Information Please read the IMPORTANT SAFETY INFORMATION below, and all Warning and Caution information elsewhere. Danger: Indicates a risk of electric shock, Danger: Indicates a potentially hazardous situation which, if not avoided, could result in damage to other than electrical, which if not avoided, could the equipment and possible injury or death. -
Page 5: General Information And Ratings
2. General Information and Ratings 2.1. Drive Model Numbers 2.1.1. IP20 Units 200 – 240 Volt, 1 Phase Input Model Code Frame Amps Low Harmonic ODV-3-220043-1F12-SN 0.75 ODV-3-220070-1F12-SN ODV-3-220105-1F12-SN 10.5 200 – 240 Volt, 3 Phase Input Model Code Frame Amps Low Harmonic ODV-3-220043-3F12-SN... - Page 6 500 – 600 Volt, 3 Phase Input Model Code Frame Amps Low Harmonic ODV-3-260021-3012-SN 0.75 2. 1 ODV-3-260031-3012-SN 3. 1 ODV-3-260041-3012-SN 4. 1 ODV-3-260065-3012-SN ODV-3-260090-3012-SN ODV-3-360120-3012-SN ODV-3-360170-3012-SN ODV-3-360220-3012-SN ODV-3-460280-3012-MN 18.5 ODV-3-460340-3012-MN ODV-3-460430-3012-MN ODV-3-560540-3012-MN ODV-3-560650-3012-MN 2.1.2. IP66 Enclosed Units 200 – 240 Volt, 1 Phase Input Non Switched With Disconnect Frame...
- Page 7 2.1.3. IP55 Enclosed Units 200 – 240 Volt, 3 Phase Input Model Code Frame Amps Low Harmonic ODV-3-420300-3F1N-TN ODV-3-420460-3F1N-TN ODV-3-520610-3F1N-TN ODV-3-520720-3F1N-TN 18.5 ODV-3-620900-3F1N-TN ODV-3-621 100-3F1N-TN 1 10 ODV-3-621500-3F1N-TN ODV-3-621800-3F1N-TN ODV-3-722020-3F1N-TN ODV-3-722480-3F1N-TN 380 – 480 Volt, 3 Phase Input Model Code Frame Amps Low Harmonic...
-
Page 8: Identifying The Drive By Model Number
2.1.4. Low Harmonic Variants The majority of the Optidrive Eco product range is based on a low harmonic solution using film capacitor technology to achieve compliance with EN 61000-3-12 without the need for any additional equipment. This standard specifies limits for harmonic currents for equipment connected to public low-voltage systems with input current >... -
Page 9: Mechanical Installation
3. Mechanical Installation 3.1. General T he Optidrive should be mounted in a vertical position only, on a flat, flame resistant, vibration free mounting using the integral mounting holes. D o not mount flammable material close to the Optidrive. E nsure that the minimum cooling air gaps, as detailed in sections 3.6. -
Page 10: Mechanical Dimensions And Weight
3.5. Mechanical Dimensions and Weight 3.5.1. IP20 Units Weight Drive Size 8.70 1 10 4.33 7.28 8.23 2.48 2.48 10.28 5. 1 6 8.07 9.72 3. 1 5 3. 1 5 16.46 6.30 9.45 15.75 4.92 4.92 20.3 19. 1 3 8.74 10.24 18. - Page 11 3.5.2. IP55 Units H Ø I Ø H Ø I Ø Weight Drive Size 450 17.72 6.73 252 9.92 428 16.85 1 10 4.33 433 17.05 0.31 8.50 0.34 15 0.60 1 1.5 25.4 540 21.26 235 9.25 270 10.63 515 20.28 175 6.89 520 20.47 0.31 8.50 0.34 15...
- Page 12 3.5.3. IP66 Units H Ø I Ø H Ø I Ø Weight Drive Size 257 10. 1 2 7.40 239 9.41 200 7.87 7.01 220 8.66 1. 1 2 4.2 0. 1 7 8.5 0.33 4.8 10.6 310 12.20 21 1 8.29 266 10.47 252 9.90 200 7.87 277 10.89 33...
-
Page 13: Guidelines For Enclosure Mounting (Ip20 Units)
High moisture, salt or chemical content environments should use a suitably sealed (non-vented) enclosure. The enclosure design and layout should ensure that the adequate ventilation paths and clearances are left to allow air to circulate through the drive heatsink. Invertek Drives recommend the following minimum sizes for drives mounted in non-ventilated metallic enclosures: Recommended Above &... -
Page 14: Mounting The Drive - Ip20 Units
3.7. Mounting the Drive – IP20 Units IP20 Units are intended for installation within a control cabinet. When mounting with screws: o Using the drive as a template, or the dimensions shown above, mark the locations for drilling o Ensure that when mounting locations are drilled, the dust from drilling does not enter the drive o Mount the drive to the cabinet backplate using suitable M5 mounting screws o Position the drive, and tighten the mounting screws securely. -
Page 15: Guidelines For Mounting (Ip66 Units)
X –Above & Below Y –Either Side Drive Size 2 (IP66) 0.394 3 (IP66) 0.394 4 (IP55) 0.394 5 (IP55) 0.394 6 (IP55) 0.394 7 (IP55) 0.394 NOTE Typical drive heat losses are approximately 2% of the operating load power. The above dimensions are for guidance only, the operating ambient temperature of the drive MUST be maintained within the specified limits or allowed derating at all times. -
Page 16: Removing The Terminal Cover
3.10. Removing the Terminal Cover 3.10.1. Frame Sizes 2 & 3 Terminal Cover Release Screws Using a suitable flat blade screwdriver, rotate retaining screws indicated by arrows until the screw slot is vertical. 3.10.2. Frame Size 4 3.10.3. Frame Size 5 3.10.4. -
Page 17: Ip66 (Nema 4X) Gland Plate And Lock Off
3.12. IP66 (Nema 4X) Gland Plate and Lock Off The use of a suitable gland system is required to maintain the appropriate IP / Nema rating. Cable entry holes will need to be drilled to suit this system. Some guidelines sizes are defined below: Please take care when drilling to avoid leaving any particles within the product. -
Page 18: Electrical Installation
NOTE Enclosed drives are not suitable for rigid conduit system connection. This manual is intended as a guide for proper installation. Invertek Drives Ltd cannot assume responsibility for the compliance or the non-compliance to any code, national, local or otherwise, for the proper installation of this drive or associated equipment. -
Page 19: Protective Earth (Pe) Connection
4.2. Protective Earth (PE) Connection 4.2.1. Grounding Guidelines Adequate safety earthing must be provided in accordance with local wiring rules and codes of practice. The ground terminal of each Optidrive should be connected back to the common safety earth bar to maintain touch potentials within safe limits. The ground terminal of each Optidrive should be individually connected DIRECTLY to the site ground bus bar (through the EMC filter if installed). -
Page 20: Emc Compliant Installation
4.3. EMC Compliant Installation 4.3.1. Recommended Installation for EMC Compliance Control cables Twisted-Pair shielded cables for analog Mounting plate control and motor with conductive feedback signals. service ≥ 100mm For Best-Practice use 360° bonding EMC cable gland shielded to motor chassis. U V W PE Fuse / Cable shield exposed... - Page 21 General Compliance with category C1 conducted emissions only is achieved. For compliance with category C1 radiated emissions, additional measures may be required, contact your Sales Partner for further assistance. Supply Cable A screened (shielded) cable suitable for fixed installation with the relevant mains voltage in use. Braided or twisted type screened cable where the screen covers at least 85% of the cable surface area, designed with low impedance to HF signals.
-
Page 22: Incoming Power Connection
4.4. Incoming Power Connection P ower should be connected to the L1 and L2 terminals for single phase drives, L1, L2 and L3 for three phase drives. Phase sequence is not important. F or compliance with CE and C Tick EMC requirements, a symmetrical shielded cable is recommended. A fixed installation is required according to IEC61800-5-1. -
Page 23: Drive And Motor Connection
4.6. Drive and Motor Connection T he drive inherently produces fast switching of the output voltage (PWM) to the motor compared to the mains supply, for motors which have been wound for operation with a variable speed drive then there is no preventative measures required, however if the quality of insulation is unknown then the motor manufacturer should be consulted and preventative measures may be required. -
Page 24: Motor Thermal Overload Protection
4.8. Motor Thermal Overload Protection 4.8.1. Internal Thermal Overload Protection Optidrive Eco has internal motor overload protection (current limit) set at 1 10% of FLA. This level may be adjusted in P4-07. The drive has an in-built motor thermal overload function; this is in the form of an “I.t-trP” trip after delivering >100% of the value set in P1-08 (motor rated current) for a sustained period of time. - Page 25 4.9.1. Control Connections 1 (+24V DC/ 100mA) (0V/ COM) 9 2 (Dl 1) (AO 1) 8 +24 V DC** 0-10V 10-0V 3 (Dl 2) 0/4-20 mA (AO 2) 11 20-4/0 mA 4 (Dl 3) 5 (+10V DC/ 10mA) 0-10 V 10-0 V 6 (AI 1/ DI 4*) -10-10 V...
-
Page 26: Control Terminal Connections
4.10. Control Terminal Connections 4.10.1. +24VDC Input / Output When the mains power is applied to the drive, terminal 1 provides a +24VDC output, maximum load 100mA. This may be used to activate digital inputs or provide power to sensors. When no mains power is applied to the drive, the drive control electronics may be powered from an external +24VDC source. -
Page 27: Safe Torque Off
4.10.5. Auxiliary Relay Outputs Two relay outputs are available, which are intended to be used to switch external resistive loads up to 6A at 230 VAC or 5A at 30VDC. Relay 1 has both normally open and normally closed contacts available. Relay 2 provides a simple open or closed contact. The relay output function may be configured using parameters P2-15 and P2-18, which are described in section 8. - Page 28 4.11.3. “STO“ Operation When the “STO” inputs are energised, the “STO” function is in a standby state, if the drive is then given a “Start signal/command” (as per the start source method selected in P1-13) then the drive will start and operate normally. When the “STO”...
- Page 29 4.11.7. Recommended “STO” Wiring Using an External 24Vdc Power Supply Using the drives on-board 24Vdc supply Protective Capped Trunking or equivalent to prevent Protective Capped Trunking Protective Capped Trunking STO Cable short circuit to an or equivalent to prevent or equivalent to prevent external Voltage source .
- Page 30 4.11.10. Enabling the “STO” Function The “STO” function is always enabled in the drive regardless of operating mode or parameter changes made by the user. In order to ensure that the drive does not immediately re-start when the STO is energised, the 'start mode' (P2-36) should be set to 'Edge-r' as opposed to the default value of 'Auto-0'.
-
Page 31: Keypad And Display Operation
5. Keypad and Display Operation The drive is configured and its operation monitored via the keypad and display. 5.1. OLED Keypad and Display Layout Control Keypad provides access to the drive parameters, and also allows control of the drive when Keypad Mode is selected in P1-12. TFT Display Main Displayed Parameter Drive Address... -
Page 32: Selecting The Language On The Oled Display
5.2. Selecting the Language on the OLED Display 01 Select Language Select Language STOP Español Español Deutsch Deutsch 15kW 400V 3Ph English English Hold down the Start Use the Up and Down Press the Navigate and Up keys for >1s arrows to select a button to select. -
Page 33: Changing Parameters
Switching Frequency Mains Loss Maintenance Reduction Time Elapsed LED Display : Not Indicated Not Indicated Not Indicated TFT and OLED Display : 01 ECO 01 ECO 23.7Hz 23.7Hz 23.7Hz SF 15.3A 15.3A 6.9kW 15.3A 6.9kW Switching frequency is The incoming mains The user programmable reduced, due to high heatsink power supply has been... -
Page 34: Parameter Factory Reset / User Reset
5.5. Parameter Factory Reset / User Reset Optidrive ECO provides a feature to allow the user to define their own default parameter set. After commissioning all required parameters, the user can save these as the defaul parameters by setting P6-29 = 1. If required, the User Default Parameters may be cleared by setting P6-29 = 2. -
Page 35: Keypad Short Cuts
5.8. Keypad Short Cuts The following short cuts can be used to speed up selecting and changing parameters when using the keypad. 5.8.1. Selecting the Parameter Groups When extended or advanced parameter access is enabled (see section 9. Extended Parameters on page 40), additional parameter groups are visible, and may be selected quickly by the following method. -
Page 36: Commissioning
6. Commissioning 6.1. General The following guidelines apply to all applications: 6.1.1. Entering the Motor Nameplate Information Optidrive Eco uses the information from the motor nameplate to: Operate the mot or with the best possible efficiency level. Protect the motor against possible damage due to operation in overload condition. In order to achieve this, the Optidrive requires that the following information from the motor nameplate is entered into the parameters: P1-07 Motor Rated Voltage. -
Page 37: Parameters
7. Parameters 7.1. Parameter Set Overview The Optidrive Eco Extended Parameter set consists of 7 groups as follows: Group 1 – Basic Parameter Set Group 2 – Extended Parameter Set Group 3 – User PID Control Parameter Set Group 4 –... - Page 38 Par. Parameter Name Minimum Maximum Default Units P1-10 Motor Rated Speed 30000 This parameter can optionally be set to the rated (nameplate) Rpm of the motor. When set to the default value of zero, all speed related parameters are displayed in Hz, and the slip compensation for the motor is disabled. Entering the value from the motor nameplate enables the slip compensation function, and the Optidrive display will now show motor speed in estimated Rpm.
-
Page 39: Control Terminal Functions
8. Control Terminal Functions 8.1. Digital Input Configuration Parameter P1-13 Local Analog Digital Analog P1-13 (Hand) Digital Input 1 Digital Input 2 Input 1 Input 3 Input 2 Notes Control (Terminal 2) (Terminal 3) (Terminal *(2) (Terminal 4) (Terminal 10) Function All functions User defined in Menu 9 or configured through PLC function in OptiTools studio software suite. -
Page 40: Extended Parameters
9. Extended Parameters 9.1. Parameter Group 2 – Extended parameters Parameter Name Minimum Maximum Default Units P2-01 Preset Frequency / Speed 1 -P1-01 P1-01 50.0 (60.0) Hz / Rpm P2-02 Preset Frequency / Speed 2 -P1-01 P1-01 40.0 Hz / Rpm P2-03 Preset Frequency / Speed 3 -P1-01... - Page 41 Parameter Name Minimum Maximum Default Units P2-12 Analog Output 1 Format - - = 0 to10V - = 10 to 0V - = 0 to 20mA - = 20 to 0mA - = 4 to 20mA ...
- Page 42 Parameter Name Minimum Maximum Default Units P2-15 Relay 1 Function Digital Output Mode. Logic 1 = +24V DC Selects the function assigned to Relay Output 1. The relay has normally open and normally closed contacts. Logic 1 indicates the relay is active, and therefore the normally open contact is closed (terminals 14 and 15 will be linked together) and the normally closed contact is opened (terminals 14 and 16 will no longer be connected together).
- Page 43 Parameter Name Minimum Maximum Default Units P2-21 Display Scaling Factor -30.000 30.000 0.000 Determines the factor for scaling display. The variable selected in P2-22 is scaled by the factor set in P2-21. P2-22 Display Scaling Source Source value used when custom units are to be shown on the drive display. 0 : Motor Speed 1 : Motor Current 2 : Analog Input 2...
- Page 44 Parameter Name Minimum Maximum Default Units P2-31 Analog Input 1 Scaling 2000.0 100.0 P2-31 is used to scale the analog input prior to being applied as a reference to the drive. For example, if P2-30 is set for 0 – 10V, and the scaling factor is set to 200.0%, a 5 volt input will result in the drive running at maximum speed (P1-01).
-
Page 45: Parameter Group 3 - Pid Control
Parameter Name Minimum Maximum Default Units P2-39 Parameter Lock 0 : Unlocked. All parameters can be accessed and changed 1 : Locked. Parameter values can be displayed, but cannot be changed. Also disables Hand and Auto button on keypad. P2-40 Extended Menu Access Code 9999 Defines the access code which must be entered in P1-14 to access parameter groups above Group 1. -
Page 46: Parameter Group 4 - High Performance Motor Control
Parameter Name Minimum Maximum Default Units P3-11 PID Error to Enable Ramp 25.0 Defines a threshold PID error level, whereby if the difference between the set-point and feedback value is less than the set threshold, the internal ramp times of the drive are disabled to allow the drive to react quickly to small errors. Where a greater PID error exists, the ramp times are enabled to limit the rate of change of motor speed. -
Page 47: Parameter Group 5 - Communication Parameters
Parameter Name Minimum Maximum Default Units P4-03 Vector Speed Controller Proportional Gain 400.0 50.0 Sets the proportional gain value for the speed controller. Higher values provide better output frequency regulation and response. Too high a value can cause instability or even over current trips. For applications requiring best possible performance, the value should be adjusted to suit the connected load by gradually increasing the value and monitoring the actual output speed of the load until the required dynamic behaviour is achieved with little or no overshoot where the output speed exceeds the setpoint. - Page 48 Name Minimum Maximum Default Units P5-07 Fieldbus Ramp Control Selects whether the acceleration and deceleration ramps are control directly via the Fieldbus, or by internal drive parameters P1-03 and P1-04. 0 : Disabled. Ramps are control from internal drive parameters. 1 : Enabled.
-
Page 49: Advanced Parameters
9.5. Advanced Parameters For Advanced Parameters, basic information only is provided in this guide. The parameter functions are described more fully in Optitools Studio PC software. 9.5.1. Parameter Group 6 – Advanced Configuration Par. Function Setting Range Default Notes P6-01 Disabled Firmware Upgrade Enable This parameter should not be... -
Page 50: Parameter Group 8 - Application Function Specific Parameters
9.5.2. Parameter Group 7 – Motor Control Par. Function Setting Range Default Notes 0.000 – 65.535 P7-01 Motor Stator Resistance Drive Motor date, measured or calculated curing the autotune. Dependent 0.0000 – 1.0000 P7-03 Motor Stator Inductance (d) P7-04 is not used for PM & BLDC Motors. Drive Dependent P7-04 P7-06 is used only for PM motors. - Page 51 Name Minimum Maximum Default Units P8-06 Load Monitor Enable This parameter enables the Total Motor Current Profile Monitoring Function, which can be used to detect belt failure in belt driven fan applications, or Dry Pump, Pump Blockage or broken impeller in Pump applications. 0 : Disabled 1 : Low Current Detection Enabled (Belt Failure / Dry Pump / Broken Impeller) 2 : High Current Detection Enabled (Pump Blockage)
-
Page 52: Fire Mode
Name Minimum Maximum Default Units P8-14 Pump Staging Function Select Parameter enables the pump staging (cascade) function on the drive. 0 : Disabled 1 : Single VFD with DOL Cascade (max 4 DOL pumps) 2 : Multiple Drive Cascade (Optiflow) Master Drive. (Only valid when drive set to Optibus master address, P5-01 = 1). 3 : Multiple Drive Cascade with Jockey Pump (Optiflow). -
Page 53: Parameter Group 9 - User Inputs And Output Programming
9.8. Parameter Group 9 – User Inputs and Output Programming Par. Function Setting Range Default Notes P9-01 Enable Input Source These parameters allow the user to directly select the source of the various command points. Parameters are only adjustable if P1-13 = 0. This allows complete flexibility over the drive control P9-02 Fast Stop Input Source functions, and interaction with the internal Function Block programming environment. -
Page 54: Parameter Group 0 - Monitoring Parameters (Read Only)
9.9. Parameter Group 0 – Monitoring Parameters (Read Only) Par. Parameter Name Units P0-01 Analog Input 1 Value Displays the signal level applied to analog input 1 (Terminal 6) after scaling and offsets have been applied. P0-02 Analog Input 2 Value Displays the signal level applied to analog input 2 (Terminal 10) after scaling and offsets have been applied. - Page 55 Par. Parameter Name Units P0-23 Time Heatsink >85°C HH:MM:SS Two entry display: First display shows hours. Second display shows minutes and seconds. Displays the amount of time in hours and minutes that the Optidrive has operated for during its lifetime with a heatsink temperature in excess of 80°C.
- Page 56 Par. Parameter Name Units P0-36 DC Bus Voltage Log (256ms) Diagnostic log for DC bus voltage. Values logged every 256mS with 8 samples total. Logging suspended on drive trip. P0-37 DC Bus Voltage Ripple Log (20ms) Diagnostic log for DC bus voltage ripple. Values logged every 20mS with 8 samples total. Logging suspended on drive trip. P0-38 Heatsink Temperature Log (30s) Diagnostic log for heatsink temperature.
-
Page 57: Serial Communications
10. Serial Communications 10.1. RS-485 Communications Optidrive Eco has an RJ45 connector located within the wiring enclosure of the drive. This connector allows the user to set up a drive network via a wired connection. The connector contains two independent RS485 connections, one for Invertek’s Optibus Protocol and one for Modbus RTU / BACnet MSTP. -
Page 58: Modbus Rtu Communications
10.2. Modbus RTU Communications 10.2.1. Modbus Telegram Structure The Optidrive Eco supports Master / Slave Modbus RTU communications, using the 03 Read Multiple Holding Registers and 06 Write Single Holding Register commands and 16 Write Multiple Holding Registers (Supported for registers 1 – 4 only). Many Master devices treat the first Register address as Register 0;... -
Page 59: Bacnet Mstp
Register Read Upper Byte Lower Byte Notes Number Write DC Link Voltage Measured DC Link Voltage VDC (P0-20). Drive Temperature Measured Heatsink Temperature in °C (P0-21). kWh Meter (User Resettable) User resettable energy meter kWh (P0-26). MWh Meter (User Resettable) User resettable energy meter MWh (P0-27). - Page 60 10.3.3. BACnet MSTP Parameters The following parameters are used to configure the drive when connecting to a BACnet MSTP network. Par. Parameter Name Description P1-12 Control Source Set this parameter to 6 to activate BACnet MSTP operation. This parameter is used to set the drive address on the BACnet network. Each drive on a given P5-01 Drive Address network should have a unique value.
- Page 61 10.3.5. Object Dictionary Binary Value Object: Binary Value Objects Table Instance ID Object Name Access Description Active/Inactive Text Run/Stop State This object indicates drive run status RUN/STOP Trip State This object indicates if drive is tripped TRIP/OK Hand Mode This object indicates if drive is in hand or auto mode HAND/AUTO Inhibit Mode This object indicates drive is hardware inhibit...
- Page 62 Analog Value Object Analog Value Objects Table Instance ID Object Name Access Description Units Motor Frequency Motor output frequency Hertz Motor Speed Motor output speed (0 if P1-10=0) Motor Current Motor output current Amps Motor Power Motor output power Kilowatts Motor torque Reserved DC Bus Voltage...
- Page 63 10.3.8. Object/Property Support Matrix Object Type Property Device Binary Value Analog Value Object Identifier × × × Object Name × × × Object Type × × × System Status × Vendor Name × Firmware Revision × Application Software Revision × Protocol Version ×...
- Page 64 10.3.9. BACnet Protocol Implementation Conformance Statement Date: 15th April, 2015 Vendor Name: Invertek Drives Ltd Product Name: OPTIDRIVE ECO Product Model Number: ODV-3-xxxxxx-xxxx-xx Application Software Version: 2.00 Firmware Revision: 2.00 BACnet Protocol Revision: Product Description: Invertek Optidrive Eco BACnet Standardized Device Profile (Annex L): ...
- Page 65 Device Address Binding: Is static device binding supported? (This is currently necessary for two-way communication with MS/TP slaves and certain other devices.) Yes No Networking Options: Router, Clause 6 - List all routing configurations, e.g., ARCNET-Ethernet, Ethernet-MS/TP, etc. ...
-
Page 66: Technical Data
11.4. Output Power and Current ratings The following tables provide the output current rating information for the various Optidrive Eco models. Invertek Drives always recommend that selection of the correct Optidrive is based upon the motor full load current at the incoming supply voltage. - Page 67 11.4.2. 200 – 240 Volt, 3 Phase Input Models Output Nominal Maximum Maximum Motor Fuse or Current Typical Power Rating Input Frame Cable Size Cable Length Capacity Current Size (Type B) sq.mm 0.75 10.5 21.6 41.4 48.2 18.5 75.9 1 10 126.7 300MCM 172.7...
-
Page 68: 1.5. Additional Information For Ul Compliance
The rise time and peak voltage can affect the service life of the motor. Invertek Drives recommend using an output choke for motor cable lengths of 50m or more to ensure good motor service life. -
Page 69: 1.6. Internal Emc Filter And Varistors - Disconnection Procedure
Mechanical Installation Requirements All Optidrive Eco units are intended for indoor installation within controlled environments which meet the condition limits shown in section 1 1. 1 . Environmental. The drive can be operated within an ambient temperature range as stated in section 1 1. 1 . Environmental. For IP20 units, installation is required in a pollution degree 1 environment. - Page 70 11.6.2. IP55 & IP66 Models These models require disassembly in order to disconnect the EMC filter. Disconnection should be carried out only by Invertek Drives Approved Service Partners. 70 | Optidrive Eco User Guide | Version 3.05...
-
Page 71: 1.7. Derating Information
11.7. Derating Information Derating of the drive maximum continuous output current capacity is require when: Operating at ambient temperature in excess of 40°C / 104°F (IP55 & IP66) or 50°C / 122°F (IP20). Operating at Altitude in excess of 1000m/ 3281 ft. Operation with Effective Switching Frequency higher than the minimum setting. -
Page 72: Troubleshooting
12. Troubleshooting 12.1. Fault Messages Fault OLED Message Description Corrective Action Code o-Ft No Fault No Fault Displayed in P0-13 if no faults are recorded in the log. - Fault Occurs on Drive Enable Over current trip Instantaneous over current on drive Check the motor and motor connection cable for phase –... - Page 73 A historical log is stored at 20ms intervals prior to a trip in parameter P0-37. Check all three supply phases are present and within the 3% supply voltage level imbalance tolerance. Reduce the motor load. If the fault persists, contact your local Invertek Drives Sales Partner. P-o Input phase loss Input phase missing...
- Page 74 Fault OLED Message Description Corrective Action Code tF- Autotune fail 1 Autotune Failed Measured motor stator resistance varies between phases. Ensure the motor is correctly connected and free from faults. Check the windings for correct resistance and balance. tF- Autotune fail 2 Measured motor stator resistance is too large.
- Page 75 www.invertekdrives.com Version 3.05 | Optidrive Eco User Guide | 75...
- Page 76 Ñ82-HEMAN-IN_V3.05UÓ 82-HEMAN-IN_V3.05 Invertek Drives Ltd. Offa's Dyke Business Park, Welshpool, Powys SY21 8JF United Kingdom Tel: +44 (0)1938 556868 Fax: +44 (0)1938 556869 www.invertekdrives.com...
- Page 77 ® The Invertek Eco range is available to purchase online at https://invertek.inverterdrive.com...
Need help?
Do you have a question about the Eco Optidrive ODV-3-220043-1F12-SN and is the answer not in the manual?
Questions and answers