Table of Contents
Advertisement
Quick Links
Advertisement
Table of Contents

Related Manuals for Tenda V1200


Summary of Contents for Tenda V1200
- Page 1 AC1200 Dual-Band Wireless VDSL2/ADSL2+ Modem Router User Guide...
- Page 2 Tenda does not assume any liability that may occur due to the use or application of the product described herein. Every effort has been made in the preparation of this document to ensure accuracy of the contents, but all statements, information and recommendations in this document do not constitute a warranty of any kind, express or implied.
- Page 3 Preface Thank you for choosing Tenda! Please read this user guide before you start with V1200. Conventions The typographical elements that may be found in this document are defined as follows. Item Presentation Example Cascading menus > System > Live Users...
- Page 4 Acronym or Abbreviation Full Spelling Domain Name Server IEEE Institute of Electrical and Electronics Engineers Internet Protocol IPTV Internet Protocol Television Internet Service Provider Local Area Network L2TP Layer 2 Tunneling Protocol Point to Point Protocol PPPoE Point-to-Point Protocol over Ethernet PPTP Point to Point Tunneling Protocol Routing Information Protocol...
- Page 5 Technical Support If you need more help, contact us by any of the following means. We will be glad to assist you as soon as possible. Global: (86) 755-27657180 United States: 1-800-570-5892 support@tenda.cn Canada: 1-888-998-8966 Hotline Email Hong Kong: 00852-81931998 http://www.tendacn.com...
-
Page 6: Table Of Contents
Contents PRODUCT OVERVIEW ............................1 1.1 I ................................1 NTRODUCTION 1.2 F ..................................1 EATURES 1.3 A .................................. 2 PPEARANCE 1.3.1 LED indicators ..............................2 1.3.2 Ports and buttons ............................... 3 1.3.3 Label ................................... 4 QUICK SETUP ..............................5 2.1 C .......................... - Page 7 3.5 ARP ................................... 25 3.6 DHCP ..................................26 ADVANCED SETUP ............................27 4.1 I ............................... 27 NTERNET SETTINGS 4.1.1 Setting the ATM connection ..........................27 4.1.2 Setting the PTM connection ..........................69 4.1.3 Setting the Ethernet connection ........................75 4.2 LAN ................................... 81 4.2.1 Local Area Network (LAN) Setup ........................
- Page 8 4.8 ALG ..................................121 4.9 B ..............................123 ANDWIDTH CONTROL 4.9.1 Overview ................................. 123 4.9.2 Adding a bandwidth control rule ........................123 4.10 Q ..............................124 UALITY OF SERVICE 4.10.1 QoS queue ..............................125 4.10.2 QoS classification............................130 4.10.3 Example of configuring QoS ......................... 131 4.11 R .................................
- Page 9 4.18.2 Configuring the IPSec function ........................160 4.19 C ................................162 ERTIFICATE 4.19.1 Local ................................162 4.19.2 Trusted CA ..............................164 4.20 M ................................165 ULTICAST 4.21 IPTV ..................................168 4.21.1 ATM interface ............................... 168 4.21.2 ETH interface ..............................169 4.21.3 PTM interface ...............................
- Page 10 7.1.3 Restore default ............................... 206 7.2 S ................................208 YSTEM LOG 7.2.1 Overview ................................. 208 7.2.2 Viewing system logs ............................208 7.2.3 Configuring system logs ..........................209 7.3 P ................................211 ASSWORDS 7.3.1 Overview ................................. 211 7.3.2 Changing the login password ......................... 211 7.4 SNMP ................................
-
Page 11: Product Overview
Product overview Introduction Compatible with VDSL2 Profile 17a, Tenda V1200 offers a VDSL broadband access speed as high as of 100 Mbps, 5x faster than ADSL2+. With DSL modem and WiFi router in one, it features an integrated DSL port that supports all standard DSL connections, including VDSL2, ADSL2+, ADSL2, and ADSL. -
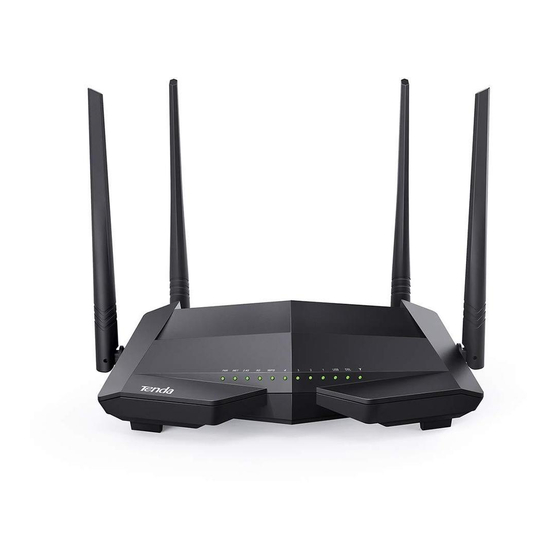
Page 12: Appearance
Appearance 1.3.1 LED indicators LED Indicator Color Status Description Solid on The modem router is starting. Blinking The modem router is upgrading. Green Solid on The modem router is working properly. Solid on The modem router is connected to the internet successfully. Green INET Blinking... -
Page 13: Ports And Buttons
LED Indicator Color Status Description The WPS feature is disabled, or the WPS feature is enabled but the modem router does not perform WPS negotiation. Solid on This port is connected properly. Green Blinking Data is being transmitted over the port. The port is disconnected, or not connected properly. -
Page 14: Label
Button/Port Description WLAN This button is used to enable or disable both 2.4 GHz and 5 GHz WiFi networks. Enable the WPS function on the web UI of the modem router. Press this button for about 3 seconds and then release it to perform the WPS negotiation process. Within 2 minutes after pressing the button, enable the wireless device’s WPS feature to establish WPS connection. -
Page 15: Quick Setup
Quick setup Connecting the device to the internet The modem router supports phone cable connection, Ethernet cable connection, and 3G/4G data card. Select a connection type to follow according to your internet service. Phone cable connection If you access the internet with a phone cable, connect the modem router as follows: LINE PHONE MODEM... -
Page 16: Ethernet Cable Connection
Ethernet cable connection If you access the internet with an Ethernet cable, connect the modem router as follows: Ethernet jack Step 1 Connect port 4 of the modem router to the internet. Step 2 Use the included power adapter to connect the modem router to a power supply. Step 3 Turn the modem router on. -
Page 17: Connecting A Client To The Modem Router For Setup
Connecting a client to the modem router for setup Connecting a wireless client to the modem router Use your smart device to search and connect to the default SSID (WiFi name) of the modem router. The default SSID is specified on the product label. This label is on the bottom of the modem router. And by default, there is no WLAN key (WiFi password). -
Page 18: Setting Up An Internet Connection
Setting up an internet connection 2.3.1 Login Step 1 Start a web browser on the client connected to the modem router, and visit 192.168.1.1. Step 2 Enter the default login user name and password (both are admin), and click Login. To prevent an unauthorized user from changing the settings of the mode router, you’d better change the default login user name and password. - Page 19 Step 1 Enter the Home page. Step 2 Link Type: Select VDSL. Step 3 Connection Type: Select a connection type according to the instructions in the table below, and enter the related internet parameters. Connection Type Description Select this type if your ISP provides a user name and password to you PPPoE for internet access.
- Page 20 If you cannot access the internet after completing the primary settings, contact your ISP for help. ----End ADSL If the link type your ISP provided to you is ADSL, follow the procedures below: Step 1 Enter the Home page. Step 2 Link Type: Select ADSL.
- Page 21 Step 4 Country/Region: Select your country or region. Step 5 ISP: Select your ISP. Step 6 Auto PVC scan: Select your country or region from the drop-down list, and the VPI and VCI values will be automatically populated. If your country/region and ISP are not available in the drop-down list or the VPI and VCI values are incorrect, select Other both from the Country/Region and ISP lists, and enter the VPI and VCI values manually.
- Page 22 Step 4 Auto Vlan scan: If the VLAN ID is provided, deselect Auto Vlan scan, and select your country or region. The VLAN ID will be automatically populated. If it is incorrect, change the value in the Vlan ID box. If you cannot find your country or region in the drop-down list, set both the Country/Region and ISP to Other, select input Vlan, and enter the VLAN ID in the Vlan ID box.
- Page 23 IPoE Dynamic IP Use this type if you can access the internet without setting any information on your computer. Step 1 Enter the Home page. Step 2 Link Type: Select Ethernet. Step 3 Connection Type: Select IPoE. Step 4 Address Mode: Select Dynamic IP.
- Page 24 Static IP Use this type if you can access the internet only after setting a static IP address and other related information on your computer. Step 1 Log in to the web UI and enter the Home page. Step 2 Link Type: Select Ethernet.
- Page 25 Bridge Select this type when this device only serves as a switch, and you want to set up a dial-up connection or enter other internet parameters directly on your computer for internet access. Step 1 Enter the Home page. Step 2 Link Type: Select Ethernet.
- Page 26 3G/4G dongle If you connect the modem router to the internet via a 3G/4G dongle, refer to the configuration in this part to complete your internet settings. Step 1 Log in to the web UI and enter the Home page. Step 2 Link Type: Select 3G/4G.
-
Page 27: Wireless Setup
Wireless setup The wireless feature is enabled by default. The default SSID for 2.4 GHz wireless network is Tenda_XXXXXX, and for 5 GHz wireless network is Tenda_5G_XXXXXX, where XXXXXX is the last six characters of the MAC address of the modem router. There is no Wireless Key (WiFi password) by default. -
Page 28: Connecting To The Modem Router For Internet Access
To disable wireless function: Step 1 Enter the Home page. Step 2 Deselect the Wireless Enable option for 2.4 GHz or 5 GHz wireless networks. Step 3 Click OK. ----End When the wireless feature is disabled, wireless devices cannot connect to the modem router wirelessly. -
Page 29: Device Info
Device info Summary Here you can view WAN status, xDSL information, and the device information. 3.1.1 WAN status If a WAN connection is established, you can check the WAN status here, including connection status, connection type, link type, WAN IP address, gateway, WAN MAC address, WAN link time, and DNS server information. -
Page 30: Device Info
3.1.3 Device info You can check the basic information of the modem router here. Parameter description Parameter Description Board ID It specifies the model of the main chip. Symmetric CPU Threads It specifies the number of symmetric CPU threads of the modem router. Software Version It specifies the software version of the modem router. -
Page 31: Wan
Here you can view the WAN Information including Interface, Description, Type, IGMP, NAT, Firewall, Status, IPv4 Address and VLAN ID. Parameter description Parameter Description Interface It specifies the interface that the WAN connection uses. Description It specifies the description of the WAN connection. Type It specifies the connection type of the WAN connection. -
Page 32: Statistics
Statistics Here you can view the packets received and transmitted on LAN ports, WAN port, DSL port, and USB port. Statistics--LAN: Displays the received and transmitted packets on the LAN ports. Click Reset Statistics to clear the current statistics. Statistics--WAN: Displays the received and transmitted packets on the WAN port. Click Reset Statistics to clear the current statistics. - Page 33 Statistics--xDSL: Displays the received and transmitted packets on the DSL port. Click Reset Statistics to clear the current statistics. Statistics—3G/4G: Displays the packets received and transmitted on the USB port. Click Clear to clear the current statistics.
-
Page 34: Route
Route Here you can view the route table of the modem router. If the modem router fails to access the internet, you can check the route table to find the problem. Parameter description Parameter Description Destination It specifies the destination IP address of the route. Gateway It specifies the gateway address of the route. -
Page 35: Arp
Here you can view the ARP list of the device. According to the information in the list, you can identify whether there is ARP attack in your network. Parameter description Parameter Description IP address It specifies the IP address of the connected device. Flags It specifies the status of the connection between the device and the modem router. -
Page 36: Dhcp
DHCP Here you can view the devices whose IP addresses are assigned by the DHCP server of the modem router. You can check the IP address, MAC address and hostname of the corresponding device and remaining lease time of the IP address. Parameter description Parameter Description... -
Page 37: Advanced Setup
Advanced setup Internet settings In this module, it allows you to set up multiple internet connections or set detailed parameters for internet access. To set up an internet connection: Step 1 Create an interface. Step 2 Set up an internet connection. This modem router provides three types of Layer2 Interface: ATM interface for accessing ADSL broadband internet service −... - Page 38 ----End Parameter description Parameter Description PPPoE (PPP over Ethernet), PPPoA (PPP over ATM): If your ISP (ISP) provides a user name and password to you for internet access, your connection type may be PPPoE or PPPoA, contact your ISP for details. ...
- Page 39 Select the default scheduler for the queues with equal precedence. Round Robin It assigns different weights for different kinds of packets and Select Scheduler for provides the packets with different bandwidths based on the weights. Queues of Equal Weighted Fair Queuing It divides groups into different queues based on the ...
- Page 40 Step 3 Select PPP over Ethernet (PPPoE). Step 4 Enter the 802.1P Priority and 802.1Q VLAN ID, and select the VLAN TPID according to the VLAN parameters provided by your ISP. Step 5 Select IPv4 Only and click Next. Step 6 Enter the PPPoE user name and password provided by your ISP, and set other parameters as required.
- Page 41 Parameter description Parameter Description PPPoE Service Name If your ISP provides this name, enter it here. Otherwise, leave it blank. It specifies the authentication method the ISP-side uses to authenticate the Authentication Method client. If you do not certain about it, select AUTO. If you can only access the internet via a specified computer, it may indicate that your ISP binds the internet service to the MAC address of the computer MAC Clone...
- Page 42 Default gateway interface list can contain multiple WAN interfaces serving as system default gateways. Step 8 If your ISP provides you with the DNS IP addresses, select Use the following Static DNS IP address, and enter the DNS IP addresses information. If not, select the option Select DNS Server Interface from available WAN interfaces, and click Next.
- Page 43 ----End The WAN service you set is shown on the WAN Service page.
- Page 44 IPv4&IPv6 PPPoE Step 1 Choose Advanced Setup > WAN Service to enter the following page, and click Add. Step 2 Select ATM interface you create on the Layer2 Interface page, which is atm0/(0_0_35) in this example, and click Next. Step 3 Select PPP over Ethernet (PPPoE).
- Page 45 Step 6 Enter the PPPoE user name and password provided by your ISP, and set other parameters as required. Parameter description Parameter Description PPPoE Service Name If your ISP provides this name, enter it here. Otherwise, leave it blank. It specifies the authentication method the ISP-side uses to authenticate the Authentication Method client.
- Page 46 Parameter Description Data transmitted by a computer in LAN through the UDP port A will be forwarded to the UDP port B in WAN. And data received by the UDP port B in Enable Fullcone NAT WAN will be forwarded to the UDP port A of the corresponding computer in LAN.
- Page 47 Default gateway interface list can contain multiple WAN interfaces serving as system default gateways. Step 8 If your ISP provides you with the DNS IP addresses, select Use the following Static DNS IP address/Use the following Static IPv6 DNS IP address, and enter the DNS IP addresses. If not, select the option Select DNS Server Interface from available WAN interfaces/Obtain IPv6 DNS info from a WAN interface, and click Next.
- Page 48 ----End The WAN service you set is shown on the WAN Service page. IPv6 PPPoE Step 1 Choose Advanced Setup > WAN Service to enter the following page, and click Add. Step 2 Select ATM interface you create on the Layer2 Interface page, which is atm0/(0_0_35) in this example, and click Next.
- Page 49 Step 3 Select PPP over Ethernet (PPPoE). Step 4 Enter the 802.1P Priority and 802.1Q VLAN ID, and select the VLAN TPID according to the VLAN parameters provided by your ISP. Step 5 Select IPv6 Only and click Next. Step 6 Enter the PPPoE user name and password provided by your ISP, and set other parameters as required.
- Page 50 Parameter description Parameter Description PPPoE Service Name If your ISP provides this name, enter it here. Otherwise, leave it blank. It specifies the authentication method the ISP-side uses to authenticate the Authentication Method client. If you do not certain about it, select AUTO. If you can only access the internet via a specified computer, it may indicate that your ISP binds the internet service to the MAC address of the computer MAC Clone...
- Page 51 Parameter Description When there is no data exchange within the specified time, the device Dial on demand (with idle disconnects the connection between its WAN port and the ISP. Flow-based timeout timer) charging users can select this option to save cost. Month-based charging users do not need to select the option.
- Page 52 Default gateway interface list can contain multiple WAN interfaces serving as system default gateways. Step 8 If your ISP provides you with the DNS IP addresses, select Use the following Static IPv6 DNS IP address, and enter the DNS IP addresses. If not, select the option Obtain IPv6 DNS info from a WAN interface, and click Next.
- Page 53 The WAN service you set is shown on the WAN Service page. IPoE Choose the corresponding procedure to follow according to your IP address type: IPv4 IPoE, IPv4&IPv6 IPoE, and IPv6 IPoE. IPv4 IPoE Step 1 Choose Advanced Setup > WAN Service to enter the following page, and click Add. Step 2 Select ATM interface you create on the Layer2 Interface page, which is atm0/(0_0_35) in this example, and click Next.
- Page 54 Step 6 Set the WAN IP address. Obtain an IP address automatically: If your ISP does NOT provide you with the IP address − information, select this option. Use the following Static IP address: If your ISP provides you with the IP address −...
- Page 55 Parameter description Parameter Description If you can only access the internet via a specified computer, it may indicate that your ISP binds the internet service to the MAC address of the computer MAC Clone to restrict access. In this case, you need to clone the MAC address of this computer to the modem router for internet access.
- Page 56 Parameter Description Option 51 Request Leased It is used to specify the request leased of DHCP option 51. Time Option 54 Request Server It is used to specify the request server address of DHCP option 54. Address Step 8 Select the options as required based on the parameter description form below. Parameter description Parameter Description...
- Page 57 Step 9 Leave the configuration unchanged on Routing - Default Gateway page, and click Next. Default gateway interface list can contain multiple WAN interfaces serving as system default gateways. Step 10 If your ISP provides you with the DNS IP addresses, select Use the following Static DNS IP address, and enter the DNS IP addresses information.
- Page 58 Step 11 Check the parameters you select or set, and click Apply/Save. ----End The WAN service you set is shown on the WAN Service page. IPv4&IPv6 IPoE Step 1 Choose Advanced Setup > WAN Service to enter the following page, and click Add. Step 2 Select ATM interface you create on the Layer2 Interface page, which is atm0/(0_0_35) in this example, and click Next.
- Page 59 Step 3 Select IP over Ethernet. Step 4 Enter the 802.1P Priority and 802.1Q VLAN ID, and select the VLAN TPID according to the VLAN parameters provided by your ISP. Step 5 Select IPv4&IPv6(Dual Stack) and click Next. Step 6 Set the WAN IP address.
- Page 60 Parameter description Parameter Description If you can only access the internet via a specified computer, it may indicate that your ISP binds the internet service to the MAC address of the computer MAC Clone to restrict access. In this case, you need to clone the MAC address of this computer to the modem router for internet access.
- Page 61 Parameter Description Option 61 IAID It is used to specify the IAID value of DHCP option 61 client-indentifier. Option 61 DUID It is used to specify the DUID value of DHCP option 61. Option 77 User ID It is used to specify the User ID of DHCP option 77. It specifies the vendor-Identifying Vendor option.
- Page 62 Parameter description Parameter Description Enable NAT It is used to enable the NAT. Data transmitted by a computer in LAN through the UDP port A will be forwarded to the UDP port B in WAN. And data received by the UDP port B in Enable Fullcone NAT WAN will be forwarded to the UDP port A of the corresponding computer in LAN.
- Page 63 Step 9 Leave the configuration unchanged on Routing - Default Gateway page, and click Next. Default gateway interface list can contain multiple WAN interfaces serving as system default gateways. Step 10 If your ISP provides you with the DNS IP addresses, select Use the following Static DNS IP address/Use the following Static IPv6 DNS IP address, and enter the DNS IP addresses.
- Page 64 Step 11 Check the parameters you select or set, and click Apply/Save. ----End The WAN service you set is shown on the WAN Service page. IPv6 IPoE Step 1 Choose Advanced Setup > WAN Service to enter the following page, and click Add. Step 2 Select ATM interface you create on the Layer2 Interface page, which is atm0/(0_0_35) in this example, and click Next.
- Page 65 Step 3 Select IP over Ethernet. Step 4 Enter the 802.1P Priority and 802.1Q VLAN ID, and select the VLAN TPID according to the VLAN parameters provided by your ISP. Step 5 Select IPv6 Only and click Next. Step 6 Set the WAN IP address.
- Page 66 Parameter description Parameter Description If you can only access the internet via a specified computer, it may indicate that your ISP binds the internet service to the MAC address of the computer MAC Clone to restrict access. In this case, you need to clone the MAC address of this computer to the modem router for internet access.
- Page 67 Parameter Description Option 77 User ID It is used to specify the User ID of DHCP option 77. It specifies the vendor-Identifying Vendor option. If you are not instructed by Option 125 a professional, the default is recommended. Option 50 Request IP Address It is used to specify the request IP address of DHCP option 50.
- Page 68 Default gateway interface list can contain multiple WAN interfaces serving as system default gateways. Step 10 If your ISP provides you with the DNS IP addresses, select Use the following Static DNS IP address/Use the following Static IPv6 DNS IP address, and enter the DNS IP addresses. If not, select the option Select DNS Server Interface from available WAN interfaces/Obtain IPv6 DNS info from a WAN interface, and click Next.
- Page 69 ----End The WAN service you set is shown on the WAN Service page. Bridge Step 1 Choose Advanced Setup > WAN Service to enter the following page, and click Add. Step 2 Select ATM interface you create on the Layer2 Interface page, which is atm0/(0_0_35) in this example, and click Next.
- Page 70 Step 3 Select Bridging, set other parameters as required, and click Next. Step 4 Check the parameters you select or set, and click Apply/Save.
- Page 71 ----End After the settings take effect, you need to set the internet settings on the devices connected to the modem router for internet access.
- Page 72 PPPoA (Only for internet access through phone cable) If the DSL Link Type is set to PPPoA when you create an ATM interface, refer to the following procedure. Step 1 Choose Advanced Setup > WAN Service to enter the following page, and click Add. Step 2 Select ATM interface you create on the Layer2 Interface page, which is atm0/(0_0_35) in this example, and click Next.
- Page 73 and click Next. Parameter description Parameter Description It specifies the authentication method the ISP-side uses to authenticate the Authentication Method client. If you do not certain about it, select AUTO. Data transmitted by a computer in LAN through the UDP port A will be forwarded to the UDP port B in WAN.
- Page 74 Step 6 If your ISP provides you with the DNS IP addresses, select Use the following Static DNS IP address, and enter the DNS IP addresses. If not, select the option Select DNS Server Interface from available WAN interfaces, and click Next. Step 7 Check the parameters you select or set, and click Apply/Save.
- Page 75 ----End The WAN service you set is shown on the WAN Service page. IPoA (Only for internet access through phone cable) If the DSL Link Type is set to IPoA when you create an ATM interface, refer to the following procedure.
- Page 76 Step 3 Change the service description if required, and click Next. Step 4 Enter the WAN IP address and subnet mask provided by your ISP, and click Next.
- Page 77 Step 5 Set other parameters as required, and click Next. Parameter description Parameter Description Enable NAT It is used to enable the NAT. Data transmitted by a computer in LAN through the UDP port A will be forwarded to the UDP port B in WAN. And data received by the UDP port B in Enable Fullcone NAT WAN will be forwarded to the UDP port A of the corresponding computer in LAN.
- Page 78 Step 8 Check the parameters you select or set, and click Apply/Save. ----End The WAN service you set is shown on the WAN Service page.
-
Page 79: Setting The Ptm Connection
4.1.2 Setting the PTM connection Step 1 Create a PTM interface. Choose Advanced Setup > Layer2 Interface > PTM Interface to enter the following page, and click Add. Leave the parameters for queue parameters unchanged, and click Apply/Save. Parameter description Parameter Description Select Scheduler for Queues of... - Page 80 Choose Advanced Setup > WAN Service to enter the following page, and click Add. Select the interface you create in Layer2 Interface, which is ptm0/(0_1_1) in this example, and click Next. Select a WAN service type according to the instructions in the table below. Here takes PPPoE as an example.
- Page 81 Connection Type Description Select this type if your ISP (ISP) provides a user name and password to you PPP over Ethernet (PPPoE) for internet access. Select this type if your ISP does not provide any parameters to you for Dynamic IP internet access.
- Page 82 Parameter description Parameter Description PPPoE Service Name If your ISP provides this name, enter it here. Otherwise, leave it blank. It specifies the authentication method the ISP-side uses to authenticate the Authentication Method client. If you do not certain about it, select AUTO. If you can only access the internet via a specified computer, it may indicate that your ISP binds the internet service to the MAC address of the computer MAC Clone...
- Page 83 Parameter Description If this option is selected: The NAT and firewall functions are disabled. PPP IP extension Only a computer in LAN can obtain the IP address which is the same as that of the WAN port to access the internet. Other compurters cannot obatin IP addresses to access the internet.
- Page 84 Check the parameters you select or set, and click Apply/Save. ----End The WAN service you set is shown on the WAN Service page.
-
Page 85: Setting The Ethernet Connection
4.1.3 Setting the Ethernet connection Step 1 Create an Ethernet interface. Choose Advanced Setup > Layer2 Interface > ETH Interface to enter the following page, and click Add. Click Apply/Save. Step 2 Set up a WAN service for the Ethernet interface. Choose Advanced Setup >... - Page 86 Select a WAN service type according to the instructions in the table below. Here takes PPPoE as an example. Select your network protocol type as required, and click Next. IPv4 is used to illustrate here. Refer to Setting up a WAN Service for the ATM Interface for the instruction of other network protocols.
- Page 87 Connection Type Description Select this type when this device only serves as a modem, and you Bridging want to set up a dial-up connection or enter other internet parameters directly on your computer for internet access. Enter the user name and password provided by your ISP, set other parameters as required according to the parameter description form, and click Next.
- Page 88 Parameter Description Data transmitted by a computer in LAN through the UDP port A will be forwarded to the UDP port B in WAN. And data received by the UDP port B in Enable Fullcone NAT WAN will be forwarded to the UDP port A of the corresponding computer in LAN.
- Page 89 Default gateway interface list can contain multiple WAN interfaces serving as system default gateways. The first WAN interface has the highest priority. Enter the DNS IP addresses information if they are provided by your ISP. If not, leave then blank. Click Next.
-
Page 91: Lan
Here you can configure the LAN settings. Choose Advanced Setup > LAN to enter the configuration page. It allows you to modify the LAN IP of the modem router, configure the DHCP server settings, and DNS server settings. 4.2.1 Local Area Network (LAN) Setup 4.2.1.1 Primary lan ip address Parameter description... - Page 92 Parameter description Parameter Description IGMP snooping is an IPv4 layer-2 multicast constraint mechanism, which is used to Enable IGMP Snooping manage and control IPv4 multicast groups. If it is enabled, the specified multicast data of IPv4 multicast groups can be forwarded to the specified LAN port. If a multicast group has no member, data of the group will be broadcast.
- Page 93 Parameter Description router. Primary DNS server It specifies the primary DNS IP addresses assigned to connected devices. Secondary DNS It specifies the secondary DNS IP addresses assigned to connected devices. server 4.2.1.4 DHCP reservation Overview Generally, IP addresses assigned by the modem router to devices are changeable. Some functions require static device IP addresses, such as DMZ Host and virtual server.
- Page 94 ----End The added entry displays in the following table. The IP address specified in the table will be always assigned to the device with the specified MAC address in the table after the rule takes effect. 4.2.1.5 Secondary lan ip address Overview By default, there is only one LAN IP address for the modem router, and you can access the web UI of the modem router by this IP address.
- Page 95 ----End The second LAN IP address can also be used to log in to the web UI of the modem router.
-
Page 96: Connections Limited
4.2.2 Connections limited 4.2.2.1 Overview This function allows you to specify the maximum connections between the modem router and a specified IP address or IP network segment. Parameter description Parameter Description IP Address It specifies the IP address or IP network segment of the clients. It specifies the maximum number of point-to-point connections that the modem router Max Connections can handle at the same time. -
Page 97: Ipv6 Autoconfig
4.2.3 IPv6 autoconfig This section allows you to set up an IPv6 internet connection through auto configuration, including the following 2 parts: Static LAN IPv6 Address Configuration: Setting up an IPv6 global unicast address for the LAN port. IPv6 LAN Applications: Setting up the DHCPv6 server to assign IPv6 addresses to the computers in LAN. - Page 98 The computers in LAN can visit this address to log in to the web UI of the modem router. For example, if the address is set to 2000::1/64, enter http://[2000::1] in the address bar to access the web UI. 4.2.3.2 IPv6 LAN Applications The Modem router supports two IPv6 address auto-configuration types: Stateless Address Auto...
- Page 99 Parameter Description The RADVD (Router Advertisement Daemon) implements link-local advertisements of IPv6 router addresses and IPv6 routing prefixes using the Neighbor Discovery Protocol Enable RADVD (NDP) and is used by system administrators for stateless auto configuration of network hosts on Internet Protocol version 6 networks. Select the checkbox to enable the RADVD. Enable ULA Prefix If enabled, the modem router will advertise ULA prefix periodically.
- Page 100 Parameter description Parameter Description Stateful DHCPv6 is supported based on the assumption of prefix length less than 64. Stateful Select this option and configure the start/end interface ID and lease time. The modem router will automatically assign IPv6 addresses to IPv6 clients. It specifies the start/end interface ID.
- Page 101 Parameter Description If this option is selected, you need to manually configure the address prefix and validity Statically Configure period. Prefix It specifies the prefix of the IPv6 address. It specifies the preferred life time in hour. When the time is out, the computer can Preferred Life Time continue to use the address in initiated communications, but cannot use it in new (hour)
-
Page 102: Vpn
4.3.1 Overview A VPN is a virtual private network set up over a public network (usually the internet). This modem router can function as two kinds of VPN clients: PPTP or L2TP client. The following section describes how to configure the router as a PPTP/L2TP client. If you set up a PPTP/L2TP server, you can enable PPTP/L2TP client function to help you visit the PPTP/L2TP server. - Page 103 Parameter Description PPP Username It specifies the user name and password assigned by peer L2TP server. PPP Password PPPoE Service Optional. If a special service name is specified on peer L2TP server, it can be entered Name here. If not, leave it blank. Authentication It specifies the authentication method of the L2TP VPN connection.
- Page 104 Parameter Description Select DNS Server Interface from You can select this option to automatically get DNS server information from the selected available WAN WAN interface. Interfaces Use the following You can select this option to manually enter the primary/secondary DNS server IP Static DNS IP addresses.
-
Page 105: Configuring Modem Router As A Pptp Client
4.3.3 Configuring modem router as a PPTP client Step 1 Choose Advanced Setup > VPN > PPTP Client to enter the configuration page, and click Add. Step 2 Set Tunnel Name and PPTP Server(IP address/domain name) based on the information set on the PPTP server, select an Associated WAN Interface, and click Next. - Page 106 Parameter Description PPP Username It specifies the user name and password assigned by peer PPTP server. PPP Password PPPoE Service Optional. If a special service name is specified on peer PPTP server, it can be entered Name here. If not, leave it blank. Authentication It specifies the authentication method of the VPN connection.
- Page 107 Parameter Description Select DNS Server Interface from You can select this option to automatically get DNS server information from the selected available WAN WAN interface. Interfaces Use the following You can select this option to manually enter the primary/ secondary DNS server IP Static DNS IP addresses provided by your ISP.
-
Page 108: Wan 3G/4G
WAN 3G/4G 4.4.1 Overview If you connect the modem router to the internet via a 3G/4G dongle, and do not complete the internet settings in Quick Setup, you can refer to the configuration in this part. Choose Advanced Setup > WAN 3G/4G to enter the configuration page. Parameter Description Country... - Page 109 Step 3 APN/Dial number/Username/Password: Generally, if you select correct country/region and ISP, the necessary parameters can be automatically filled in. If not, set them manually based on the internet parameters provided by your ISP. Step 4 PIN Code: If the PIN code is provided, check the option box on the right of the input box of Pin Code, and enter the Pin code in the input box.
-
Page 110: Nat
4.5.1 Virtual server 4.5.1.1 Overview If computers are connected to the modem router to form a LAN and access the internet through the modem router, internet users cannot access the hosts on the LAN. Therefore, the servers, such as web servers, email servers, and FTP servers, on the LAN are inaccessible to internet users. To enable internet users to access a LAN server, enable the virtual server function of the modem router, and map one service port of the virtual server to the IP address of the LAN server. - Page 111 Parameter Description Select a Service: Allows you to select an existing service from the drop-down list. Service Name Custom Service: Allows you to customize a service. Server IP Address Enter the IP address of your local computer that provides this service. External Port Start and These are the start number and end number for the public ports at the internet External Port End...
- Page 112 ----End Remote access: Your friends from the internet can access your FTP server by entering in the ftp://183.37.227.201:21 address bar of a web browser. As the WAN ip address changes dynamically, to ensure the stability of this function, it is recommended to use this function together with DDNS function to allow internet users to access the service through domain names.
-
Page 113: Port Triggering
4.5.2 Port triggering Some applications, such as games, video conferencing, and remote access, require that specific ports in the router's firewall be opened for access by the applications. Port triggering opens an incoming port when the user's computer is using a specified outgoing port for specific traffic. This allows computers behind a NAT-enabled router on a local network to provide services. - Page 114 Parameter Description Trigger Protocol Select the protocol from the drop-down list. If you are unsure, select TCP/UDP. These are the starting number and ending number for the ports that are Open Port Start/ Open automatically opened by the built-in firewall when connections initiated by an Port End application are established.
-
Page 115: Dmz Host
4.5.3 DMZ host 4.5.3.1 Overview The default DMZ (De-Militarized Zone) host feature is helpful when you are using some online games and video conferencing applications that are not compatible with NAT (Network Address Translation). Choose Advanced Setup > NAT > DMZ Host to enter the configuration page. DMZ Host IP Address: The IP Address of the device for which the firewall of the modem router is disabled. -
Page 116: Multi-Nat
4.5.4 Multi-NAT 4.5.4.1 Overview Multi-NAT is a network function whereby one network address is rewritten (translated) to another address: Network Address Translation is frequently used to allow multiple network nodes (computers or inter-networked devices) to share a single public (or local network) IP address. Multi-NAT can work in one-to-one or many-to-one mode. - Page 117 Local IP It specifies a local IP address. Public IP It specifies a public IP address. 4.5.4.2 Configuring the Multi-NAT function Step 1 Choose Advanced Setup > NAT > Multi-NAT to enter the configuration page, and click Add. Step 2 Select an interface from the drop-down list.
-
Page 118: Security
Security 4.6.1 DoS defence 4.6.1.1 Overview This function allows you to enable ICMP-FLOOD Attack Filtering, UDP-FLOOD Attack Filtering, and TCP-SYN-FLOOD Attack Filtering to defend the modem router against ICMP-FLOOD attack, UDP-FLOOD attack, and TCP-SYN-FLOOD attacks. Choose Advanced Setup > Security > Dos Defense to enter the configuration page. Parameter description Parameter Description... -
Page 119: Ip Filtering
Parameter Description Enable TCP-SYN-FLOOD Attack It specifies whether to enable TCP-SYN-FLOOD attack filtering. Filtering TCP-SYN-FLOOD It specifies the maximum number of incoming TCP SYN packets allowed in one Packets Threshold (5 ~ second. If the threshold is exceeded, it is inferred that the modem router is under 3600) SYN Flood attack. - Page 120 Step 4 Protocol: Select a protocol for the filter rule. Step 5 Source IP address[/prefix length]: Enter the LAN IP address to be filtered. Step 6 Source Port (port or port:port): Enter a port number or a port range used by LAN computers to access the internet.
- Page 121 4.6.2.2 Incoming Overview When the firewall is enabled on a WAN or LAN interface, all incoming IP traffic is BLOCKED. However, some IP traffic can be ACCEPTED by setting up filtering rules. The Incoming IP Filtering function allows you to create a filter rule to identify incoming IP traffic by specifying a new filter name and at least one condition.
-
Page 122: Mac Filtering
----End Parameter description Parameter Description Filter Name It specifies the name of a rule. IP Version It allows you to select an IP protocol, IPv4, or IPv6. Protocol It allows you to select a protocol for the filter rule. Source IP It specifies the IP address and its prefix length of the computer from the internet address[/prefix length] which is allowed to access the LAN service. - Page 123 FORWARDED indicates that all MAC layer frames will be FORWARDED except those matching the rules you specify. BLOCKED indicates that all MAC layer frames will be BLOCKED except those matching the rules you specify. 4.6.3.2 Adding a frame forwarding rule Step 1 Choose Advanced Setup >...
- Page 124 Parameter description Parameter Description Protocol Type It allows you to select the protocol type from the drop-down list. Destination MAC Address It specifies the destination MAC address to which the MAC filter rule applies. Source MAC Address It specifies the source MAC address to which the MAC filter rule applies. Frame Direction It specifies the direction the frame that you want to restrict.
- Page 125 to which you want to apply the MAC filtering rule. Step 6 Source MAC Address: Enter the source MAC address to which you want to apply the MAC filtering rule. Step 7 Frame Direction: Select a frame direction from the drop-down list. Step 8 WAN Interfaces: Select a WAN interface from the drop-down list.
-
Page 126: Parental Control
Parental control This function enables you to control internet connectivity availability and content accessibility for devices connected to the router. 4.7.1 Time restriction 4.7.1.1 Overview Time Restriction allows you to forbid a LAN device to access the internet during the specified time. 4.7.1.2 Adding a time restriction rule Step 1... -
Page 127: Url Filter
----End Parameter description Parameter Description User Name It specifies the description of the rule. It specifies the MAC address of the computer where the current browser is running (the browser used to log in to the web UI of the modem router). If the Browser's MAC rule needs to apply to this device, select this option. -
Page 128: Example Of Configuring Parental Control
Step 2 Select URL List Type. Exclude indicates that the URLs added to the list cannot be accessed. Include indicates that only the URLs added to the list can be accessed. Step 3 Click Add. Step 4 Enter a URL. For example, Set URL Address to www.google.com. Step 5 Specify a port number based on the URL you entered. - Page 129 Set the User Name to Lily. Select Other MAC Address, and enter C8:3A:35:00:00:11. Select Mon to Fri. Set the Start Blocking Time and End Blocking Time to 18:00 and 20:00 respectively. Click Apply/Save. Perform step 2 to 6 to add the other rule Tom. The added rules are shown in the following table.
- Page 130 Enter www.youtube.com in the URL Address box. Enter 80 in the Port Number box. Click Apply/Save. The added rule is shown in the following table. ----End 4.7.3.4 Verification During 18:00 to 20:00 on weekdays, the computers with MAC address C8:3A:35:00:00:11 and C8:3A:35:00:00:12 are not allowed to visit YouTube.
-
Page 131: Alg
ALG allows you to enable SIP, FTP, TFTP, H323, RTSP functions, and VPN pass through as required. Parameter description Parameter Description The IP phone function can be used on the computers connected to the modem router SIP Enabled only when it is selected. The users on LAN can share resources on the FTP server on WAN only when it is FTP Enabled selected. - Page 132 VPN pass-through PPTP Enabled: If you select PPTP protocol when you create a VPN connection on your − computer, it takes effect only when this checkbox is selected. L2TP/IPSEC Enabled: If you select L2TP or IPSEC protocol when you create a VPN −...
-
Page 133: Bandwidth Control
Bandwidth control 4.9.1 Overview If multiple devices access the internet through the modem router, bandwidth control is recommended, so that high-speed file download by a device does not reduce the internet access speed of the other devices. 4.9.2 Adding a bandwidth control rule Step 1 Choose Advanced >... -
Page 134: Quality Of Service
4.10 Quality of service QoS helps to prioritize data. By attaching special identification marks or headers to incoming packets, QoS determines queue of packets based on priority. It is useful when there are certain types of data you want to give higher priority, such as voice data packets give higher priority than Web data packets. -
Page 135: Qos Queue
Class-Selector PHB: It specifies that the DSCP mark is XXX000 where X can be 0 or 1. The − class of service of Class-Selector PHB is the same as that of IP Precedence used in the current internet. When the XXX are all 0, it is the default PHB. Assured Forwarding PHB: RFC2597. - Page 136 Parameter description Parameter Description Name It specifies the description of the QoS queue rule. Enable It specifies whether to enable the QoS queue rule. Interface It specifies the interface to which the QoS queue rule applies. It specifies the precedence value of the queue. ...
- Page 137 Parameter Description Interface It specifies the interface to which the QoS queue rule applies. It specifies the precedence value of the queue. Queues with the same precedence: It is scheduled using WRR and WFQ, and the device Queue Precedence assigns the bandwidth based on the queue weight.
- Page 138 Parameter Description Interface It specifies the interface to which the QoS queue rule applies. It specifies the precedence value of the queue. Queues with the same precedence: It is scheduled using WRR and WFQ, and the Queue Precedence device assigns the bandwidth based on the queue weight. Queues with different precedence: It is scheduled according to the precedence value.
- Page 139 ----End 4.10.1.2 Wlan queue It displays the QoS rules of wireless networks. Parameter description Parameter Description Name It specifies the description of the QoS queue rule.
-
Page 140: Qos Classification
It specifies the key number of the QoS queue rule. Interface It specifies the wireless interface the QoS queue rule applies. It specifies the value the QoS queue rule. It specifies the priority level of the QoS queue rule. A lower value indicates a higher Prec/Alg/Wght priority. -
Page 141: Example Of Configuring Qos
Specify Egress Interface (Required): Select an interface. Specify Egress Queue (Required): Select a queue to which packets are distributed (The queue should be set in Advanced Setup >Quality of Service > QoS Queue > QoS Configuration in advance.) Mark Differentiated Service Code Point (DSCP): Select a mark for the queue when the queue exits. - Page 142 UDP port for IP phone: 65060. − Online video uses PPlive. UDP port for PPlive: 7100 and 7101. − Solution Video Conference: High priority is required. We set the priority to 1. − IP Phone and Online Video: Average priority is required. We set the priority to 2. The −...
- Page 143 Name: Enter a name for the queue. Enable: Select Enable. Interface: Select atm0. Queue Precedence: Select 1 (WRR). Click Apply/Save. Perform the procedure in Step 2 to add IP phone, online video, web, FTP and Email queues.
- Page 144 Step 3 Configure QoS classification. Choose Advanced Setup > Quality of Service > QoS Classification to enter the configuration page, and click Add. Traffic Class Name: Enter a name for the classification, which is VideoConference in this example. Rule Order/Rule Status: Keep the default values. Ingress Interface: Select Local.
- Page 145 Step 4 Perform the procedure in Step 3 to add classifications for IP phone, online video, web, FTP and Email services. ----End Verification The network services of the company can be identified by the modem router. Video conference is higher than IP phone and online video. FTP/Web/Email service has the lowest priority. It ensures the efficient operation of the network when the network overload or congestion.
-
Page 146: Routing
4.11 Routing The Routing part includes default gateway and static route. 4.11.1 Default gateway Default gateway interface list can contain multiple WAN interfaces serving as system default gateways. Choose Advanced Setup > Routing > Default Gateway to enter the configuration page. Selected Default Gateway Interfaces: It specifies the current effective default IPv4 gateway interface. - Page 147 reliable. Appropriate static routes help reduce the number of route selection problems and reduce route selection load, increasing the packet forwarding speed. 4.11.2.2 Adding a static route Step 1 Choose Advanced Setup > Routing > Static Route to enter the configuration page, and click Add.
-
Page 148: Rip
Destination IP address cannot be in the same IP network segment as that of WAN or LAN IP address of the modem router. When the interface is set to a WAN interface, the gateway IP address should be in the ... - Page 149 Apply/Save Click this button to apply the settings. Only the WAN service with NAT disabled is displayed in the list. After configuration, reboot the modem router for the settings to take effect. ...
-
Page 150: Dns
4.12 The DNS part includes DNS server and Dynamic DNS. 4.12.1 DNS server 4.12.1.1 Overview The DNS server translates domain names to IP addresses. It is used to look up site addresses based on their names. It allows you to set the DNS server information manually. 4.12.1.2 Configuring IPv4 DNS server manually Step 1... - Page 151 ----End In ATM mode, static DNS server IP addresses must be entered if only single PVC with IPoA or static IPoE protocol is configured. If a wrong DNS server address is configured, webpages may not be accessible ...
-
Page 152: Dynamic Dns
4.12.2 Dynamic DNS 4.12.2.1 Overview DDNS maps the WAN IP address (changeable public IP address) of the router to a domain name for dynamic domain name resolution. This ensures proper operation of functions that involve the WAN IP address of the modem router, such as the remote management and virtual server functions. 4.12.2.2 Configuring the DDNS function Step 1... - Page 153 Example of configuring the DDNS function Networking requirement An enterprise uses V1200 to deploy its WLAN network. The modem router is connected to the internet. Now the enterprise establishes a web server and wants to be accessed by internet users. Thus when employees are not in the enterprise, they can also access the web server.
- Page 154 Username/Password: Set the user name and password registered on a DDNS service provider's website for logging in to the DDNS service. Click Apply/Save. ----End Verification Verify that internet users can access the local web server at http://tenda.ddns.net:80.
-
Page 155: Dsl
4.13 This page allows you to configure DSL parameters. DSL parameters configuration should be based on the parameters of the upstream device. Final parameters can be checked on Statistics-xDSL page. Wrong configurations may fail your Internet access. Change them only when you are instructed by your ISP or our technical staff when your modem router fails to negotiate with ISP in DSL (ATM) mode. - Page 156 Parameter Description It specifies ANSI_T1.413. Based on DMT standard, the maximum T1.413 uploading/downloading rate is 1.5 Mbps/15 Mbps. When it is used, POTS splitter is required for clients. It specifies G992.3. The maximum uploading/downloading rate is 1 Mbps/12 ADSL2 Mbps. It specifies reach Extended ADSL2.
-
Page 157: Upnp
4.14 UPnP 4.14.1 Overview After the UPnP function is enabled, it can automatically enable ports for UPnP-supported programs, such as P2P and gaming software, in the internal network to improve your network experience. 4.14.2 Configuring the UPnP function Step 1 Choose Advanced Setup >... -
Page 158: Storage Service
Example of configuring the storage service function 4.15.3.1 Network requirement A V1200 modem router is used to set up a LAN in an apartment. Users in the apartment need to share some pictures and videos over the LAN through FTP or Samba. - Page 159 4.15.3.2 Solution Connect a USB storage device with the pictures and videos to the USB port of the modem router. The modem router can function as a file server. Assume that: The server address is 192.168.1.1 (the LAN IP address of the modem router). 4.15.3.3 Configuration procedure Step 1...
- Page 160 ----End To access the USB storage device over the LAN through FTP, perform the following procedure: (Browser example: Google Chrome) Step 1 Start the Google Chrome, enter ftp://192.168.1.1 in the address bar. Step 2 Press Enter on the keyboard. ----End...
-
Page 161: Interface Grouping
4.16 Interface grouping 4.16.1 Overview If you create multiple WAN services (PPPoE and other WAN service types), and want a LAN or WLAN to use a WAN service exclusively, you can use this function to map the LAN or WLAN onto the WAN service. - Page 162 Step 5 Click Apply/Save. ----End After the configuration takes effect, all wireless interfaces belong to WLAN_group, and use the WAN service IP over Ethernet (eth3.1). All wired interfaces (port 1, 2, and 3) belong to the default group, and use the WAN service Bridging (eth3.2). If you create many groups, the LAN IP address used by the Default group members is ...
-
Page 163: Ip Tunnel
4.17 IP tunnel An IP tunnel is an Internet Protocol (IP) network communications channel between two networks. It is used to transport another network protocol by encapsulating one IP packet in another IP packet. To encapsulate an IP packet in another IP packet, an outer header is added with source IP, the entry point of the tunnel and the destination point, the exit point of the tunnel. -
Page 164: Ipv4Inipv6
----End 4.17.2 IPv4inIPv6 4.17.2.1 Overview IPv4inIPv6 is an Internet interoperation mechanism allowing Internet Protocol version 4 (IPv4) to be used in an IPv6 only network. 4in6 uses tunneling to encapsulate IPv4 traffic over configured IPv6 tunnels. 4.17.2.2 Configuring the IPv4inIPv6 tunnel Step 1 Choose Advanced Setup >... - Page 165 Automatic: The modem router obtains the AFTR name through DHCPv6 option, and − translates the AFTR name to specific IPv6 IP address through DNS. If you select Automatic, skip step 7. Step 7 AFTR: Set the IPv6 AFTR address. Step 8 Click Apply/Save.
-
Page 166: Ipsec
4.18 IPSec 4.18.1 Overview Internet Protocol Security (IPSec) is a network protocol suite that authenticates and encrypts the packets of data sent over a network. IPsec can protect data flows between a pair of hosts (host-to-host), between a pair of security gateways (network-to-network), or between a security gateway and a host (network-to-host). - Page 167 Parameter description Parameter Description IPSec Connection It specifies a name for the IPSec connection. Name IP Version Select an IP version to which the rule applies. It specifies tunnel protocol the rule uses. ESP: It specifies Encapsulating Security Payload. This protocol is used to test data integrity and encryption.
- Page 168 Parameter Description Stage 2: Both communication sides take ISAKMP SA as IPSec security protocol parameters, and create IPSec SA which is used to secure data transmission. Manual: Refer to Key Exchange Method-Manual Key Exchange Method-Manual When Manual is selected, the following parameters appear. Parameter description Parameter Description...
- Page 169 Parameter Description message digest for a message. SHA1: It specifies Secure Hash Algorithm. The system generates a 128 bit message digest for a message. It specifies an authentication key. Both communication sides should set it to the Authentication Key same one.
-
Page 170: Configuring The Ipsec Function
Parameter Description DES: It specifies Data Encryption Standard. 3DES: It specifies Triple DES. Encryption Algorithm AES: It specifies Advanced Encryption Standard. AES - 128/192/256 indicates that the key length is 128/192/256 bit. MD5: It specifies Message Digest Algorithm. The system generates a 128 bit message digest for a message. - Page 171 ----End The rule is displayed in the list shown as below.
-
Page 172: Certificate
4.19 Certificate 4.19.1 Local 4.19.1.1 Overview Local certificate is used by peers to verify your identity. 4.19.1.2 Importing a certificate Step 1 Choose Advanced Setup > Certificate > Local to enter the configuration page, and click Import Certificate. Step 2 Certificate Name: Enter the name of applied certificate. - Page 173 Common Name: Enter the website domain name, company name or name of the applicant, such as Tendacn.com, Tenda or Lucy. Step 4 Organization Name: Enter the name of an organization/company, such as Tenda. Step 5 State/Province Name: Enter the state or province where the certificate is to be used.
-
Page 174: Trusted Ca
4.19.2 Trusted CA 4.19.2.1 Overview CA certificates are used by user to verify peers' certificates. 4.19.2.2 Importing a certificate Step 1 Choose Advanced Setup > Certificate > Trusted CA to enter the configuration page, and click Import Certificate. Step 2 Certificate Name: Enter the name of the certificate. -
Page 175: Multicast
4.20 Multicast Multicast (one-to-many or many-to-many distribution) is the group communication where information is addressed to a group of destination computers simultaneously. Multicast can be used for one-to-many networking applications such as online streaming video and gaming, and allows more efficient use of resources when supporting these types of applications. To configure multicast function, choose Advanced Setup >... - Page 176 Parameter Description Maximum Multicast It specifies the maximum number of multicast group members. The default is 25. The Group Members value range is 1 to 32. If the function is enabled, the modem router does not send group specific-queries Fast Leave Enable when it receives a leave message.
- Page 177 Parameter Description If the function is enabled, the modem router does not send group specific-queries Fast Leave Enable when it receives a leave message.
-
Page 178: Iptv
4.21 IPTV If your ISP provides IPTV service, this function enables you to watch IPTV programs through TV and the network set-top box while surfing the internet 4.21.1 ATM interface If your layer 2 interface is ATM Interface, perform the following procedure: Step 1 Choose Advanced Setup >... -
Page 179: Eth Interface
4.21.2 ETH interface If your layer 2 interface is Ethernet Interface, perform the following procedure: Step 1 Choose Advanced Setup > IPTV to enter the configuration page. Step 2 Select Enable IPTV option. Step 3 Select Ethernet Interface. Step 4 Select a LAN port to serves as an IPTV port for connecting to the set-top box. - Page 180 ----End...
-
Page 181: Wireless
Wireless 2.4G 5.1.1 Basic 5.1.1.1 Overview This section allows you to configure basic features of the 2.4 GHz wireless network. Choose Wireless > 2.4G > Basic to enter the configuration page. Parameter description Parameter Description Enable Wireless Select the option to enable the wireless function. Select the option to hide the SSID of the modem router. - Page 182 Parameter Description environment and communications environment. Enable Wireless Select the option to enable WMF of the modem router. Wireless multicast forwarding is Multicast a network data transmission method, which improves the efficiency of data Forwarding (WMF) transmission to effectively save network bandwidth and reduce network load. SSID Wireless network name of the modem router.
-
Page 183: Security
certification based on the IEEE 802.11e standard. Select it if you need to disable WMM advertise. Step 6 Enable WMF: It specifies whether to forward multicast packets through unicast tunnels. Generally, multicast packets are transmitted at the lowest rate, such as 1 Mbps, leading to poor transmission efficiency. - Page 184 5.1.2.1 WPS setup Wi-Fi Protected Setup makes it easy for home users who know little of wireless security to establish a home network, as well as to add new devices to an existing network without entering long passphrases or configuring complicated settings. They can set up network connections simply by entering a PIN code on the device web interface or pressing hardware WPS button (on the back panel of the device).
- Page 185 configuration page. Step 2 Select Enabled to enable the function. Step 3 Click Apply/Save on the bottom of this page. Step 4 Select Enter STA PIN. Step 5 Check the WPS PIN code on your wireless device and enter it to the blank box on the WPS Setup page of the web UI.
- Page 186 5.1.2.2 Manual setup AP Overview This part allows you to manually configure the encryption settings for the wireless network. A wireless network uses radio, which is open to the public, as its data transmission medium. If the wireless network is not protected by necessary measures, any client can connect to the network to use the resources of the network or access unprotected data over the network.
- Page 187 WPA2 Enterprise Parameter description Parameter Description Security modes implemented based on the IEEE 802.1x, which requires the WPA2 Enterprise third-party RADIUS server for authentication. Network Re-auth It specifies an interval at which a WPA key is updated. A shorter interval leads to Interval higher security.
- Page 188 WPA-PSK/WPA2-PSK/Mixed WPA2/WPA-PSK Parameter description Parameter Description WPA-PSK/WPA2-PSK/Mixed They specify the security modes implemented based on a shared key. WPA2/WPA-PSK WPA/WAPI Passphrase It specifies the password of the wireless network. It specifies an algorithm for WPA encryption. AES: If selected, the maximum wireless speed can reach 300Mbps. ...
-
Page 189: Mac Filter
5.1.3 MAC filter 5.1.3.1 Overview The MAC-based wireless access control feature can be used to allow or disallow clients to connect to your 2.4 GHz wireless networks. Choose Wireless > 2.4G > MAC Filter to enter the configuration page. Parameter description Parameter Description Select a SSID to which the rule is applied. -
Page 190: Wireless Bridge
Step 5 Click Apply/Save. Step 6 Select Allow or Deny according to your needs. ----End 5.1.4 Wireless bridge 5.1.4.1 Overview This section allows you to configure wireless bridge (also known as Wireless Distribution System) functions of the modem router. The function requires that the upstream wireless router supports wireless bridge as well. - Page 191 5.1.4.2 Configuration procedure Step 1 Login to the web UI of V1200, choose Wireless > 2.4G > Basic to enter the configuration page to set the channel and bandwidth to the same with the upstream router. Step 2 Choose Wireless > 2.4G > Security to set up the network authentication type and security key (if required) to the same with the upstream router.
- Page 192 When you set up wireless bridge successfully, it can extend the wireless network of the upstream wireless router to provide both wired and wireless internet connection. Network topology: V1200 Modem router The WDS function (access point and wireless bridge) requires that the wireless channel, encryption type, and wireless network password of the modem router must be the same as those of the upstream router.
- Page 193 Solution To improve internet connectivity in the bedroom and study room, the user can add a V1200 modem router and configure the wireless bridge function of the router to extend the 2.4 GHz WiFi network coverage. That will eliminate blind areas in the apartment, enabling the user to access the internet anywhere in the apartment.
- Page 194 Choose Wireless > 2.4G > Security to enter the configuration page. Set the Network Authentication, WPA/WAPI Passphrase, and WPA/WAPI Encryption to Mixed WPA2/WPA-PSK, 12345678, and AES respectively. Click Apply/Save on the bottom of this page. Configure the wireless bridge function. Choose Wireless >...
-
Page 195: Station Info
Click Apply/Save. Step 2 Configure the upstream router. Perform the steps in procedure ----End Verification Connect your wireless devices to the WiFi network of the modem router, or connect your wired devices to ports 1, 2 or 3 of the modem router, and try accessing the internet in the bedroom and study room. -
Page 196: 186
5.2.1 Basic 5.2.1.1 Overview This section allows you to configure basic features of the wireless network of 5 GHz. Choose Wireless > 5G > Basic to enter the configuration page. Parameter description Parameter Description Enable Wireless Select the option to enable the wireless function. Select the option to hide the SSID of the modem router. - Page 197 Parameter Description BSSID MAC address of the wireless network. 802.11ac: If 802.11ac is selected, only 11ac wireless devices can connect to the wireless network. The maximum of 866 Mbps wireless rate is supported in this mode. Wireless Mode 802.11a/n/ac Mixed: If 802.11a/n/ac Mixed is selected, 11a, 11n or 11ac wireless ...
-
Page 198: Security
----End 5.2.2 Security This section allows you to configure security features of the wireless network. Choose Wireless > 5G > Security to enter the configuration page. 5.2.2.1 WPS setup Wi-Fi Protected Setup makes it easy for home users who know little of wireless security to establish a home network, as well as to add new devices to an existing network without entering long passphrases or configuring complicated settings. - Page 199 If the wireless network of the modem router is not encrypted, or the wireless network is encrypted but you forget or do not want to enter the complicated password, you can use WPS function to encrypt or connect clients to it quickly. There are three options for you: Option 1: PBC negotiation Step 1 Choose Wireless >...
- Page 200 Step 6 Click Apply/Save. ----End The WPS LED indicator blinks for about 2 minutes, and then turns to solid green. It indicates that the wireless device is connected to the modem router, and the wireless network is encrypted. Option 3: Using the WPS PIN code of the modem router Step 1 Log in to the web UI of the modem router, choose Wireless >...
- Page 201 Open/Shared Open/Shared supports WEP encryption. WEP is a security mode for data exchange between two devices. Wireless speed can reach 54Mbps if WEP is used. Parameter description Parameter Description Encryption Strength Select 128-bit or 64-bit according to your needs. Current Network Key Select a network key to be used.
- Page 202 WPA2 Enterprise Parameter description Parameter Description Security modes implemented based on the IEEE 802.1x, which requires the WPA2 Enterprise third-party RADIUS server for authentication. Network Re-auth It specifies an interval at which a WPA key is updated. A shorter interval leads to Interval higher security.
-
Page 203: Mac Filter
WPA-PSK/WPA2-PSK/Mixed WPA-PSK/WPA2-PSK Parameter description Parameter Description WPA-PSK/WPA2-PSK/ Mixed They specify the security modes implemented based on a shared key. WPA-PSK/WPA2-PSK WPA/WAPI It specifies the password of the wireless network. Passphrase It specifies an algorithm for WPA encryption. AES: If it is selected, the maximum wireless speed can reach 300Mbps. ... - Page 204 Parameter description Parameter Description Select a SSID to which the rule is applied. Select SSID The rule is only applicable to the devices connected to the modem router wirelessly. Disabled: Disable this feature. Allow: To allow only devices with specified MAC addresses (in the list) to connect to MAC Restrict Mode your wireless network.
-
Page 205: Wireless Bridge
Choose Wireless > 5G > Wireless Bridge to enter the configuration page. 5.2.4.2 Configuration procedure Step 1 Login to the web UI of V1200, choose Wireless > 5G > Basic to enter the configuration page, and set channel and bandwidth to the same with the upstream router. - Page 206 Step 2 Choose Wireless > 5G > Security to set up the security information, and set the network authentication type to the same with the upstream router. Step 3 Choose Wireless > 5G > Wireless Bridge to access the configuration page set up wireless bridge.
- Page 207 Solution To improve internet connectivity in the bedroom and study room, the user can add a V1200 modem router and configure the wireless bridge function of the router to extend the 5 GHz WiFi network coverage. That will eliminate blind areas in the apartment, enabling the user to access the internet anywhere in the apartment.
- Page 208 LAN IP 192.168.1.10 Configuration procedure Step 1 Configure V1200. Change the wireless channel, encryption, and password to the same as those of the upstream router. Choose Wireless > 5G > Basic to enter the configuration page. Set Channel to 149.
- Page 209 Click Apply/Save, Bridge Restrict turns to Enabled automatically. Click Apply/Save. Step 2 Configure the upstream router. Perform the steps in procedure 2 ----End Verification Connect your wireless devices to the WiFi network of the modem router, or connect your wired devices to ports 1, 2 or 3 of the modem router, and try accessing the internet in the bedroom and study room.
-
Page 210: Station Info
5.2.5 Station info This section allows you to check the information of wireless clients connected to the 5 GHz wireless networks of the modem router. Choose Wireless > 5G > Station Info to enter this page. Click Refresh to view the latest wireless stations and their status. -
Page 211: Diagnostics
Diagnostics Ping Ping test can help test whether a host or the internet is reachable. To perform the ping test: Step 1 Choose Diagnostics > Ping to enter the configuration page. Step 2 Enter the IP address or domain name of the host in the Ping IP Address or Domain Name field. -
Page 212: Traceroute
Traceroute Traceroute helps you check the specific routes to a host. To perform the traceroute: Step 1 Choose Diagnostics > Traceroute to enter the configuration page. Step 2 Enter the IP address or domain name of the host in the Host Name field. Step 3 Click Traceroute. -
Page 213: Nslookup
Nslookup Nslookup helps you translate the domain name to a specific IP address. To translate a domain name: Step 1 Choose Diagnostics > Nslookup to enter the configuration page. Step 2 Enter a domain name in the Host Name field. Step 3 Click Nslookup. -
Page 214: Diagnostics
Diagnostics The device is capable of testing the connection to your DSL service provider, the connection to your ISP and the connection to your local network. If a test fails, click Help and check the troubleshooting procedures to solve the problem. -
Page 215: Management
Management Settings Here you can back up the current settings, restore earlier settings, and restore the factory settings of the device. 7.1.1 Backup 7.1.1.1 Overview This function allows you to save a copy of your device’s configurations to your computer. Once you have configured the device, you can save these settings to a configuration file on your local computer. -
Page 216: Restore Default
----End Wait until the progress bar elapses. 7.1.3 Restore default 7.1.3.1 Overview This function allows you to restore the factory settings of the device. 7.1.3.2 Restoring default settings Step 1 Choose Management > Setting > Restore Default to access the configuration page. Step 2 Click Restore Default Settings. - Page 217 ----End...
-
Page 218: System Log
System log 7.2.1 Overview This function allows you to configure, view, and export system logs, which helps you understand the operating conditions of the device. 7.2.2 Viewing system logs You can view system logs only after enabling the logging function. For details, see section 7.3.2 Configuring System Logs. -
Page 219: Configuring System Logs
On the page that appears: To update the system logs, click Refresh. − To export the system logs, click Save Log and follow the onscreen instructions to save the − system logs to a file on your computer. 7.2.3 Configuring system logs Step 1 Choose Management >... - Page 220 Step 4 Select a logging level from the Log Level drop-down list box. All the system events at or above the selected level are logged. Step 5 Select a log display level from the Display Level drop-down list box. Only the logs at or above the selected level can be viewed.
-
Page 221: Passwords
Passwords 7.3.1 Overview This function allows you to change the login password of the device. 7.3.2 Changing the login password Step 1 Choose Management > Passwords to access the configuration page. Step 2 Set User Name to the current user name, such as the user name admin. Step 3 Set Old Password to the current password, such as the default password of the administrator account admin. -
Page 222: Snmp Agent
SNMP agent 7.4.1 Overview The Simple Network Management Protocol (SNMP) is the most widely used network management protocol in TCP/IP networks. SNMP enables you to remotely manage all your network devices compliant with this protocol, such as monitoring the network status, changing network device settings, and receive network event alarms. -
Page 223: Configuring The Snmp Agent
Parameter Description It specifies whether to enable the SNMP agent function of the modem router. By SNMP Agent default, it is disabled. It specifies the read password shared between SNMP managers and this SNMP agent. Read Community The default password is public. It specifies the set password shared between SNMP managers and this SNMP agent. -
Page 224: Tr-069 Client
TR-069 client 7.5.1 Overview The WAN Management Protocol (TR-069) allows an Auto-Configuration Server (ACS) to perform auto-configuration, provision, collection, and diagnostics to the modem router from the internet. Choose Management > TR-069 Client to enter the configuration page. Parameter description Parameter Description It specifies the interval at which the CPE uses the inform method to send messages to... -
Page 225: Configuring The Tr-069 Client
Parameter Description Connection Request It specifies whether to authenticate the connection request sent by the ACS. Authentication Connection Request It specifies the user name used to authenticate the ACS when it sends the connection User Name request to the CPE. Connection Request It specifies the password used to authenticate the ACS when it sends the connection Password... -
Page 226: Internet Time
Internet time 7.6.1 Overview This function allows you to synchronize the time of the device with the internet time. 7.6.2 Synchronizing the system time with the internet Step 1 Choose Management > Internet Time to access the configuration page. Step 2 Select Automatically synchronize with Internet time servers. -
Page 227: Access Control
Access control This function allows you to use the HTTP, ICMP, SSH, TELNET, SNMP, FTP, TFTP and HTTPS to manage the modem router from LAN or WAN side. Choose Management > Access Control to enter the configuration page. Parameter description Parameter Description After it is enabled, users can manage the modem router using HTTP protocol through... -
Page 228: Update Software
Upgrading the firmware locally Step 1 Choose Management > Update Software to access the configuration page. Step 2 Click Choose File. Step 3 Select the firmware downloaded from the Tenda official website to your computer. Step 4 Click Update Firmware. -
Page 229: Upgrading The Firmware Using Ftp Server
Step 5 Click OK. ----End 7.8.3 Upgrading the firmware using FTP server Step 1 Choose Management > Update Software to access the configuration page. Step 2 Set FTP Server IP to the IP address of the FTP server where the target firmware resides. Step 3 Set Port to the port number of the FTP server. -
Page 230: Upgrading The Firmware Using Tftp Server
7.8.4 Upgrading the firmware using TFTP server Step 1 Choose Management > Update Software to access the configuration page. Step 2 Set TFTP Server IP to the IP address of the TFTP server where the target firmware resides. Step 3 Set Firmware File Name to the file name of the target firmware. -
Page 231: Reboot
Reboot This function allows you to manually reboot the device on the web UI. Choose Management > Reboot to enter the configuration page. To manually reboot the device, click Reboot, and then wait for the modem router to restart. -
Page 232: Appendix
Appendix Q1: I cannot log in to the web UI of the modem router. What should I do? A1: Use the following method to troubleshoot the fault, and then try again. Ensure that the Ethernet cable between your computer and the modem router is connected properly. -
Page 233: Vpi/Vci List
VPI/VCI List The following table lists common ISPs and their VPI and VCI numbers. If you cannot locate your ISP and their VPI and VCI information here, ask your ISP to provide it. Country/Region Encapsulation Australia Telstra PPPoA LLC Australia GoldenIT PPPOA_VCMUX Australia... - Page 234 Country/Region Encapsulation Belgium Turboline PPPoA LLC Belgium Turboline 1483 Bridged IP LLC Belgium ADSL Office 1483 Bridged IP LLC Bolivia 1483 Routed IP LLC Brazil Brasil Telcom PPPoE LLC Brazil Telefonica PPPoE LLC Brazil Telmar PPPoE LLC Brazil South Region PPPoE LLC Canada Primus Canada...
- Page 235 Country/Region Encapsulation Dubai 1483 Bridged IP LLC Egypt: TE-data 1483 Bridged IP LLC Egypt: Linkdsl 1483 Bridged IP LLC Egypt: Vodafone 1483 Bridged IP LLC Finland Sauna Lahti 1483 Bridged IP LLC Finland Elisa 1483 Bridged IP LLC Finland 1483 Bridged IP LLC Finland Sonera 1483 Bridged IP LLC...
- Page 236 Country/Region Encapsulation [Shatel] Iran PPPOE LLC Aria-Rasaneh-Tadbir Iran Asia-Tech PPPOE LLC Iran Pars-Online (Tehran) PPPOE LLC Iran Pars-Online (Provinces) PPPOE LLC [Saba-Net] Iran PPPOE LLC Neda-Gostar-Saba Iran Pishgaman-Tose PPPOE LLC Iran Fan-Ava PPPOE LLC Iran Datak PPPOE LLC Iran Laser (General) PPPOE LLC Iran Laser (Privates)
- Page 237 Country/Region Encapsulation Jamaica (4) 1483 Bridged IP LLC SNAP Kazakhtelecom Kazakhstan LLC/SNAP Bridging «Megaline» Kazakhstan PPPoA VC-MUX kuwait 1483 Bridged IP LLC unitednetwork Malaysia Streamyx PPPOE LLC Malaysia PPPoE LLC Mexico Telmex (1) PPPoE LLC Mexico Telmex (2) PPPoE LLC Mexico Telmex (3) PPPoE LLC...
- Page 238 Country/Region Encapsulation Pakistan(PTCL) PPPoE LLc Philippines(1) 1483 Bridged IP LLC Philippines(2) 1483 Bridged IP LLC Portugal PPPoE LLC Puerto Rico Coqui.net PPPoA LLC RomTelecom 1483 Bridged IP LLC Romania: Russia Rostel PPPoE LLC Russia Port telecom PPPoE LLC Russia VNTC PPPoE LLC Saudi Arabia (1) PPPoE LLC...
- Page 239 Country/Region Encapsulation Spain Telefónica (España) 1483 Bridged IP LLC/SNAP Spain Albura, Tiscali PPPoA VC-MUX Colt Telecom, Ola Spain PPPoA VC-MUX Internet Spain EresMas, Retevision PPPoA VC-MUX Spain Telefonica (1) PPPoE LLC Spain Telefonica (2), Terra 1483 Routed IP LLC Spain Wanadoo (1) PPPoA VC-MUX Spain...
- Page 240 Country/Region Encapsulation Telefónica 1483 Bridged IP LLC-based (Argentina) Telefónica (Perú) 1483 Bridged IP VC-MUX Thailand TRUE PPPoE LLC Thailand PPPoE LLC Thailand PPPoE LLC Thailand Cat Telecom PPPoE LLC Thailand BuddyBB PPPoE LLC Trinidad & Tobago TSTT PPPoA VC-MUX Turkey (1) PPPoE LLC Turkey (2) PPPoA VC-MUX...
- Page 241 Country/Region Encapsulation United States CenturyTel (2) 1483 Bridged IP LLC United States Coqui.net PPPoA LLC United States Covad PPPoE LLC United States Earthlink (1) PPPoE LLC United States Earthlink (2) PPPoE LLC United States Earthlink (3) PPPoE VC-MUX United States Earthlink (4) PPPoA LLC United States...
- Page 242 Country/Region Encapsulation United States SouthWestern Bell 1483 Bridged IP LLC United States Sprint (1) PPPoALLC United States Sprint (2) PPPoE LLC United States Sprint Territory PPPoE LLC SureWest United States 1483 Bridged LLC Snap Communications(1) SureWest United States PPPoE LLC Communications(2) SureWest United States...
-
Page 243: Vlan List
Country/Region Encapsulation Venezuela CANTV 1483 Routed IP LLC Vietnam PPPoE LLC Vietnam PPPoE LLC Vietnam Viettel PPPoE LLC Vietnam PPPoE LLC VLAN List Country/Region VLANID Protocol VDSL PPPoE Albania Other VDSL Disabled PPPoE Algeria Other Telecom PPPoE Argentina Telefonica PPPoE Other TransAct PPPoE... - Page 244 Country/Region VLANID Protocol Other Telekom PPPoE Austria Other VDSL Disabled PPPoE Bahrain Other VDSL Disabled PPPoE Balize Other VDSL Disabled PPPoE Belgium Other VDSL Disabled PPPoE Bengal Other VDSL Disabled PPPoE Bolivia Other VDSL Disabled PPPoE Brazil Other VDSL Disabled PPPoE Cameroon Other...
- Page 245 Country/Region VLANID Protocol Other VDSL Disabled PPPoE Czech Republic Other VDSL Disabled PPPoE Denmark Other VDSL Disabled PPPoE Dominican Republic Other VDSL Disabled PPPoE Egypt Other VDSL Disabled PPPoE Fiji Other VDSL Disabled PPPoE Finland Other Orange PPPoE Sfr(1) PPPoE PPPoE Sfr(1) Dynamic IP Dynamic IP...
- Page 246 Country/Region VLANID Protocol Nordnet Dynamic IP Dynamic IP Other VDSL Dynamic IP Georgia Other 1&1 PPPoE Alice(1) PPPoE Alice(2) PPPoE Congstar PPPoE Easybell PPPoE EncoLine Dynamic IP EWE TEL 2019 PPPoE PPPoE KielNET PPPoE M-Net PPPoE Germany Osnatel 2019 PPPoE O2(1) PPPoE O2(2)
- Page 247 Country/Region VLANID Protocol Vodafone/Arcor(1) PPPoE Vodafone/Arcor(2) PPPoE Wilhelm.tel PPPoE Willy.tel 2511 PPPoE Other CYTA PPPoE Forthnet 1102 PPPoE Hellas Online PPPoE Greece PPPoE WIND PPPoE Other VDSL PPPoE Guatemala Other VDSL PPPoE Honduras Other Hutchison PPPoE Disabled PPPoE Hutchison Dynamic IP Disabled Dynamic IP Hutchison Static IP...
- Page 248 Country/Region VLANID Protocol VDSL Disabled PPPoE Iceland Other VDSL Disabled PPPoE India Other VDSL Disabled PPPoE Indonesia Other VDSL Disabled PPPoE Iran Other Eircom PPPoE Ireland Bbnet PPPoE Other BEZEQ Disabled PPPoE Israel Other VDSL Disabled PPPoE Italy Other VDSL Disabled PPPoE Jamaica...
- Page 249 Country/Region VLANID Protocol Other VDSL Disabled PPPoE kuwait Other VDSL Disabled PPPoE Lebanon Other VDSL Disabled PPPoE Lesotho Other VDSL Disabled PPPoE Macau Other VDSL Disabled PPPoE Malaysia Other VDSL Disabled PPPoE Mexico Other VDSL Disabled PPPoE Morocco Other VDSL Disabled PPPoE Nepal...
- Page 250 Country/Region VLANID Protocol Other Spark/Telecom PPPoE KiwiLink PPPoE Slingshot PPPoE Vodafone NZ PPPoE New Zealand Snap PPPoE Myrepublic PPPoE Callplus PPPoE PPPoE Other VDSL Disabled PPPoE Norway Other VDSL Disabled PPPoE Oman Other VDSL Disabled PPPoE Pakistan Other VDSL Disabled PPPoE Palestine Other...
- Page 251 Country/Region VLANID Protocol Other Orange Disabled PPPoE Poland Netia Disabled PPPoE Other VDSL Disabled PPPoE Portugal Other VDSL Disabled PPPoE Puerto Rico Other Q-Tel/Ooreedo PPPoE Qatar Other VDSL Disabled PPPoE Romania Other Rostelecom Disabled PPPoE Russia Other VDSL Disabled PPPoE Saudi Arabia Other VDSL...
- Page 252 Country/Region VLANID Protocol Telefonica PPPoE Vodafone PPPoE Spain Jazztel 1074 PPPoE Other VDSL Disabled PPPoE Sri Lanka Other VDSL Disabled PPPoE Sweden Other Swisscom PPPoE Switzerland Other SAMA-Net PPPoE Syria Other VDSL Disabled PPPoE Taiwan Other VDSL Disabled PPPoE Thailand Other VDSL Disabled...
- Page 253 Country/Region VLANID Protocol D-Smart PPPoE Other VDSL Disabled PPPoE Ukraine Other VDSL Disabled PPPoE United Arab Emirates Other AAISP PPPoE PPPoE Claranet PPPoE PPPoE Idnet PPPoE United Kingdom Plusnet PPPoE TalkTalk Dynamic IP Vispa PPPoE PPPoE Other VDSL Disabled PPPoE United States Other VDSL...
- Page 254 Country/Region VLANID Protocol VDSL Disabled PPPoE Vietnam Other VDSL Disabled PPPoE Yemen Other VDSL Disabled PPPoE Zimbabwe Other...
-
Page 255: Factory Settings
Factory settings Parameter Default Setting Login Method HTTP (web UI) Login IP 192.168.1.1 Login Information Login User name/Password admin/admin Web Logout 3 minutes Link Type VDSL Connection Type PPPoE IP Address Type IPv4 Firewall Enabled Network Settings Enabled IGMP Multicast Proxy Disabled 802.1P Priority -1 (indicates disabled) - Page 256 Parameter Default Setting 2.4GHz: The MAC address on the product label + 1. BSSID 5GHz: The MAC address on the product label + 2. Enabled Channel Auto Network Authentication Open WPS Setup Disabled MAC Filter Disabled Wireless Bridge Disabled IP Address 192.168.1.1 LAN Settings Subnet Mask...
- Page 257 Parameter Default Setting Virtual Servers Disabled Port Triggering Disabled DMZ Host Disabled UPnP Enabled Storage Service Enabled IPTV Disabled...
Need help?
Do you have a question about the V1200 and is the answer not in the manual?
Questions and answers