Table of Contents
Advertisement
Quick Links
Advertisement
Table of Contents

Subscribe to Our Youtube Channel
Related Manuals for Tenda 4G03 Pro


Summary of Contents for Tenda 4G03 Pro
- Page 1 Document Version: V1.1 User Guide N300 Wi-Fi 4G LTE Router 4G03 Pro/4G05...
- Page 2 Tenda does not assume any liability that may occur due to the use or application of the product described herein. Every effort has been made in the preparation of this document to ensure accuracy of the contents, but all statements, information and recommendations in this document do not constitute the warranty of any kind, express or implied.
- Page 3 Document Version: V1.1 Preface Thank you for choosing Tenda! This user guide walks you through all functions of the N300 Wi-Fi 4G LTE Router. Conventions The typographical elements that may be found in this document are defined as follows. Item...
- Page 4 Document Version: V1.1 Revision history Tenda is constantly searching for ways to improve its products and documentation. The following table indicates any changes that might have been made since this guide was first published. Version Date Description 1. Optimized the description of the...
-
Page 5: Table Of Contents
Document Version: V1.1 Contents Get to know your device ...................... 1 1.1 Introduction ..........................1 1.2 LED indicators .......................... 2 1.3 Ports and buttons ........................3 1.4 Label ............................4 Quick setup ......................... 5 Web UI ..........................8 3.1 Log in to the web UI ........................ 8 3.2 Log out of the web UI ...................... - Page 6 Document Version: V1.1 Internet settings ........................ 31 5.1 Access the internet with a SIM card ..................31 5.1.1 Change mobile network preference ................33 5.1.2 Create an APN profile manually to access the internet ..........34 5.2 Access the internet through the WAN port ................36 5.2.1 Access the internet with a PPPoE account ..............
- Page 7 9.1.2 Enable PIN lock for the SIM card .................. 76 9.1.3 Disable PIN lock for the SIM card ................. 77 9.1.4 Use PUK code to set PIN code ..................78 9.2 Tenda WiFi App ........................79 9.3 Mobile data ........................... 83 9.3.1 Overview ........................83 9.3.2 An example of mobile data configurations ..............
- Page 8 Document Version: V1.1 10 System settings ........................95 10.1 DHCP reservation ........................ 95 10.1.1 Overview ........................95 10.1.2 Assign static IP addresses to LAN clients ..............96 10.2 Time settings ........................97 10.2.1 Sync system time with the internet time ..............97 10.2.2 Set the time manually ....................
-
Page 9: Get To Know Your Device
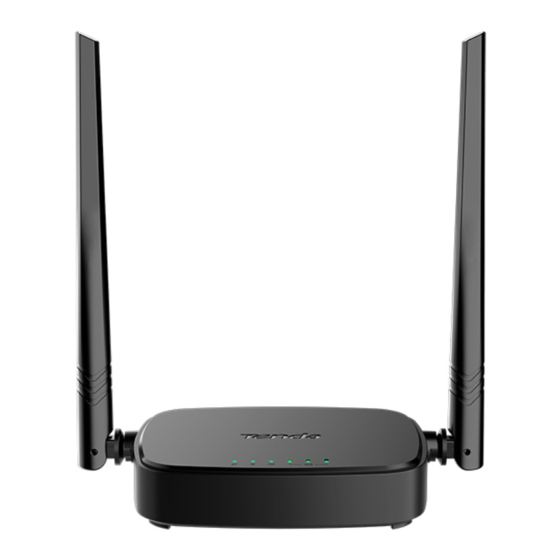
It realizes instant internet access with just a SIM card and achieves simultaneous communication with multiple devices. Feature Ethernet 4G LTE Wi-Fi network Wireless rate 4G antennas port management category Model 2.4 GHz: 300 Two external 4G03 Pro/4G05 CAT4 2.4 GHz 2*FE Support Mbps antennas... -
Page 10: Led Indicators
Document Version: V1.1 LED indicators LED indicator Status Description Solid on Connected to internet Internet LED Blinking No internet access indicator Powered off Solid on Wi-Fi enabled Wi-Fi LED indicator Blinking Ready for WPS negotiation Wi-Fi disabled Solid on Device connected to the Ethernet port Ethernet port LED indicator No device connected to the Ethernet port... -
Page 11: Ports And Buttons
Document Version: V1.1 Ports and buttons PWR, WPS/RST, WAN/LAN, LAN, NANO SIM Port/Button Description Power jack Used to reset the router, or start WPS negotiation of the router. − WPS: Press the button, and the Wi-Fi LED indicator ( ) blinks. Within 2 minutes, you can enable the WPS function of the client device (such as a WPS/RST smartphone) to connect to the Wi-Fi network of the router without... -
Page 12: Label
Document Version: V1.1 Label The bottom label shows the access URL, power, Wi-Fi name, Wi-Fi key, MAC address, model, SN, and IMEI of the router. See the following figure. Access URL: URL used to log in to the web UI of the router Power: Power supply for the router Wi-Fi Name: Default Wi-Fi name of the router Wi-Fi Key: Default Wi-Fi password of the router... -
Page 13: Quick Setup
Document Version: V1.1 Quick setup This chapter describes how to connect the devices and enable internet access through the quick setup wizard. You can complete quick setup for internet access by following the instructions on the web UI wizard. This wizard only occurs upon your first setup. Procedure: Connect your smartphone to the Wi-Fi network, or connect your computer to a LAN port Step 1... - Page 14 Document Version: V1.1 − If the SIM card is inserted properly and the internet connection is normal, you can continue the setup in Step − If No SIM Card is shown on the page, refer to No SIM card detected. −...
- Page 15 Document Version: V1.1 If the following information is displayed, the quick setup for internet access is finished. Step 5 Click More. ---End Now you can access the internet with: Wired devices: Connect to the LAN port of your router − −...
-
Page 16: Web Ui
Document Version: V1.1 Web UI Log in to the web UI Procedure: Connect your smartphone to the Wi-Fi network, or connect your computer to a LAN port Step 1 of the router. By default, the WAN/LAN and LAN port are both LAN ports. When the Failover function is enabled, the WAN/LAN port only serves as a WAN port. - Page 17 Document Version: V1.1 ---End If the above page does not appear, try the following solutions: − Ensure that the router is powered on properly. − Ensure that the computer is connected to a LAN port of the router, and Configure the computer to obtain an IP address automatically.
-
Page 18: Log Out Of The Web Ui
Document Version: V1.1 Log out of the web UI If you log in to the web UI of the router and perform no operation within 5 minutes, the router logs you out automatically. You can also log out by clicking Exit at the top right corner of the web UI. -
Page 19: Internet Status
Document Version: V1.1 Internet status Log in to the web UI of the router, and navigate to Internet Status to enter the page. On this page, you can: View the internet status − View wireless information − − View system information −... - Page 20 Document Version: V1.1 SIM card blocked When SIM card blocked is shown on the page, refer to Unlock the SIM card in the quick setup wizard.
- Page 21 Document Version: V1.1 Automatically matching APN failed On the SIM Settings page, automatic matching of APN parameters is available. Manually selecting Profile name or creating Profile will suspend the matching. When “Matching failed, please set Profile manually.” is shown on the page, you need to manually configure the correct APN parameters according to the page prompts.
- Page 22 Document Version: V1.1 Data traffic disabled When “The data traffic has been manually disabled. Please enable it.” is shown between the internet and the router, ensure that the Mobile Data function is enabled on the Internet Settings page.
- Page 23 Document Version: V1.1 Network connection disabled When “The network connection has been manually disabled. Please enable it.” is shown between the internet and the router, you can click Connect to connect to the internet again on the Internet Settings page. Monthly data limit reached When “The monthly data limit is...
-
Page 24: Access The Internet Through The Wan Port (Example: Pppoe)
Document Version: V1.1 Connection failed When “Connection failed.” is shown between the internet and the router, it indicates that the connection is abnormal. Try the following solutions: − Navigate to Internet Settings, and ensure that the Mobile Data and Data Roaming functions are enabled, and the mobile data option is set to 4G Preferred. - Page 25 Document Version: V1.1 Ethernet cable disconnected When “No Ethernet cable is connected to the WAN port” is shown between the internet and the router, ensure the Ethernet cable is connected to the WAN port properly. Incorrect user name and password When “The user name and password are incorrect.”...
- Page 26 Document Version: V1.1 No response from the remote server When “No response from the remote server.” is shown between the internet and the router, you are recommended to access the internet through dynamic IP address or contact our technical support for help. Connection disconnected When “Disconnected”...
-
Page 27: Access The Internet With Sim Card And Wan Port
Document Version: V1.1 4.1.3 Access the internet with SIM card and WAN port When you access the internet through the SIM card and WAN port, the WAN port is prioritized for internet access by default. You can click to manually switch the current internet connection mode on the Internet Status page as required. -
Page 28: View Wireless Information
Document Version: V1.1 View wireless information On this page, you can view or configure the wireless information. Procedure: Log in to the web UI of the router. Step 1 Navigate to Internet Status. Step 2 Click Step 3 ---End You can change wireless parameters as required. -
Page 29: View Wan Status
Document Version: V1.1 View WAN status On this page, you can view the WAN status, including 3G/4G and Ethernet WAN status. Before checking the WAN status, you should connect the WAN/LAN port to the internet using an Ethernet cable, enable the Failover function and configure internet parameters on the Internet Settings page. - Page 30 Document Version: V1.1 Parameter description Parameter Description SIM Card Status Specifies the SIM card status inserted in the router. Connection Status Specifies internet connection status of 3G/4G mobile network. Specifies the signal strength of 3G/4G mobile network, including Excellent, Signal Strength Good and Fair.
-
Page 31: Ethernet Wan Status
Document Version: V1.1 Parameter Description Specifies the IP address of the router obtained from the ISP. IPv4/IPv6 Address After the IPv6 function is configured, the WAN port of the router obtains a global unicast IPv6 address or a tunnel address. IPv4/IPv6 Default Gateway Specifies the gateway IP address of the router. - Page 32 Document Version: V1.1 Parameter description Parameter Description Specifies internet connection status of WAN/LAN port connected to the Ethernet Connection Status cable. Specifies how your router connects to the internet, including: − PPPoE: Select this type if you access the internet using the PPPoE account and PPPoE password.
-
Page 33: View System Information
Document Version: V1.1 View system information On this page, you can view the system information, including system time, uptime, firmware version, hardware version, LAN status, Wi-Fi status and IPv6 status. Procedure: Log in to the web UI of the router. Step 1 Navigate to Internet Status. -
Page 34: Lan Status
Document Version: V1.1 Parameter description Parameter Description System Time Specifies the system time of the router. Uptime Specifies operating time of the router since it is powered on. Firmware Version Specifies the firmware version of the router. Hardware Version Specifies the hardware version of the router. IMEI Specifies the International Mobile Equipment Identity (IMEI) of the mobile device. -
Page 35: Wi-Fi Status
Document Version: V1.1 Parameter description Parameter Description Specifies the LAN IP address of the router which is the IP address for logging in to IP Address the web UI of the router. Specifies the LAN IPv6 address of the router. IPv6 Address After the IPv6 function is configured, the LAN port of the router obtains a global unicast IPv6 address or a tunnel address, and a link local address. -
Page 36: View Online Or Blacklist Device Information
Document Version: V1.1 View online or blacklist device information On this page, you can view the information of devices connected to the router, including the current speed and access type. You can also view and add devices to the blacklist. To access the page, log in to the web UI of the router, navigate to Internet Status and click... -
Page 37: Add Devices To The Blacklist
Document Version: V1.1 Parameter Description Device Name Specifies the name of the blacklist device. MAC Address Specifies the MAC address of the blacklist device. Blacklist Remove from Specifies Whether to remove the device from the blacklist. Blacklist 4.5.1 Add devices to the blacklist On this page, you can add devices to the blacklist to block the internet access. - Page 38 Document Version: V1.1 Procedure: Log in to the web UI of the router. Step 1 Navigate to Internet Status. Step 2 Click Step 3 Choose Blacklist, and target the device to be removed from the blacklist. Step 4 Click Remove. Step 5 ---End After the configuration is completed, the device is removed from the blacklist and can be...
-
Page 39: Internet Settings
Document Version: V1.1 Internet settings By configuring the internet settings, you can achieve the shared internet access (IPv4) for multiple users within the LAN. Access the internet with a SIM card On this page, you can change the internet settings by following the instructions here. To access the page, log in to the web UI of the router, and navigate to Internet Settings. - Page 40 Document Version: V1.1 Parameter description Parameter Description Used to enable or disable the mobile data traffic. When it is disabled, you Mobile Data cannot access the internet through the router. Used to enable or disable data roaming for the SIM card inserted in the router.
-
Page 41: Change Mobile Network Preference
Document Version: V1.1 Parameter Description Maximum Transmission Unit (MTU) is the largest data packet transmitted by a network device. The default MTU value is 1460. Do not change the value unless necessary. Used to share the hotspot and traffic of the SIM card for internet access, which can solve the problem of ISP traffic restrictions. -
Page 42: Create An Apn Profile Manually To Access The Internet
Document Version: V1.1 ---End After the configuration is completed, you can refresh the configuration page and use the 4G network only to access the internet outside the coverage of your ISP. 5.1.2 Create an APN profile manually to access the internet If the router cannot identify APN parameters automatically and access the internet, you can add a new APN profile manually for dial-up. - Page 43 Document Version: V1.1 Click Save. Step 5 ---End Wait a moment. The router will use the parameters you entered to dial up for internet access, and you can access the internet with the APN profile you create.
-
Page 44: Access The Internet Through The Wan Port
Document Version: V1.1 Access the internet through the WAN port If you want to connect your broadband to the router to access the internet, you can access the internet through the WAN port. Parameters for accessing the internet are provided by your ISP. Contact your ISP for any doubt. 5.2.1 Access the internet with a PPPoE account If the ISP provides you with PPPoE user name and password, you can choose this connection type... - Page 45 Document Version: V1.1 ---End Wait a moment until “Eth ” is shown on the Internet Status page, and you can access the internet. If you fail to access the internet, try the following methods: − “No response from the remote server.”...
-
Page 46: Access The Internet Through Dynamic Ip Address
Your ISP does not provide PPPoE user name and password, or any information − including IP address, subnet mask, default gateway and DNS server. You have a router with internet access and want to add a 4G03 Pro as the other one. − The application scenario is shown below. - Page 47 Document Version: V1.1 Procedure: Log in to the web UI of the router. Step 1 Navigate to Internet Settings. Step 2 Enable the Failover function. Step 3 Set Connection Type to Dynamic IP Address. Step 4 Click Connect. Step 5 ---End Wait a moment until “Eth ”...
-
Page 48: Access The Internet With Static Ip Address Information
Document Version: V1.1 If you fail to access the internet, refer to View internet status to find a solution. Parameter description Parameter Description Failover Specifies whether the Failover function is enabled. Specifies how your router connects to the internet, including: −... - Page 49 Document Version: V1.1 Set Connection Type to Static IP Address. Step 4 Enter IP Address, Subnet Mask, Default Gateway and Primary/Secondary DNS Server. Step 5 Click Connect. Step 6 ---End Wait a moment until “Eth ” is shown on the Internet Status page, and you can access the internet.
- Page 50 Document Version: V1.1 If you fail to access the internet, refer to refer to View internet status to find a solution. Parameter description Parameter Description Failover Specifies whether the Failover function is enabled. Specifies how your router connects to the internet, including: −...
-
Page 51: Set Failover Connection
Document Version: V1.1 Set Failover connection 5.3.1 Overview By configuring the Failover function, you can set parameters of the internet connection mode other than the current one. If there is a network failure, the router will automatically switch to an available internet connection mode, therefore ensuring an uninterrupted internet access for clients under the router. - Page 52 Document Version: V1.1 Procedures: Connect the WAN/LAN port of the router to the LAN port of your smart home gateway. Step 1 Log in to the web UI of the router. Step 2 Navigate to Internet Settings. Step 3 Enable the Failover function. Step 4 Set Connection Type to PPPoE, and enter the PPPoE Username and PPPoE Password Step 5...
-
Page 53: Wi-Fi Settings
Document Version: V1.1 Wi-Fi settings Wi-Fi name & password 6.1.1 Overview To access the page, log in to the web UI of the router, and navigate to Wi-Fi Settings > Wi-Fi Name & Password. On this page, you can configure basic Wi-Fi parameters, such as the Wi-Fi name and password. Parameter description Parameter Description... -
Page 54: Change The Wi-Fi Name And Wi-Fi Password
Change the Wi-Fi Name of the 2.4 GHz network, which is John_Doe_2.4GHz in this example. Set the Encryption Mode, which is WPA/WPA2-PSK (recommended) in this example. Set the Wi-Fi Password of the 2.4 GHz network, which is Tenda+Wireless24 in this example. Click Save. -
Page 55: Hide The Wi-Fi Network
Document Version: V1.1 ---End After the configuration is completed, you can connect your wireless devices to the Wi-Fi network of the router to access the internet. 6.1.3 Hide the Wi-Fi network The hidden Wi-Fi network is invisible to the wireless device, thus improving the security of the network. -
Page 56: Connect To A Hidden Wi-Fi Network
Step 2 Scroll the Wi-Fi list to the bottom, and tap Other…. Step 3 Enter the Wi-Fi name and password, which are John_Doe and Tenda+Wireless24 in this Step 4 example. Set Security to WPA2/WPA3 (If WPA2/WPA3 is not available, select WPA2). -
Page 57: Channel & Bandwidth
Document Version: V1.1 Channel & bandwidth In this section, you can change the wireless channel and wireless bandwidth of 2.4 GHz Wi-Fi network. To access the page, log in to the web UI of the router, and navigate to Wi-Fi Settings > Channel & Bandwidth. -
Page 58: Wps
Document Version: V1.1 6.3.1 Overview The WPS function enables wireless devices, such as smartphones, to quickly and easily connect to Wi-Fi network of the router without entering the Wi-Fi password. There are two ways to connect devices to the Wi-Fi network. Connect devices to the Wi-Fi network using the WPS button −... - Page 59 Document Version: V1.1 Tap WPS connection. ---End Wait a moment until the WPS negotiation is completed, and the smartphone is connected to the Wi-Fi network.
- Page 60 Document Version: V1.1...
-
Page 61: Connect Devices To The Wi-Fi Network Through The Web Ui Of The Router
Document Version: V1.1 6.3.3 Connect devices to the Wi-Fi network through the web UI of the router Log in to the web UI of the router. Step 1 Navigate to Wi-Fi Settings > WPS. Step 2 Enable WPS. Step 3 Click Click Here. - Page 62 Document Version: V1.1 ---End Wait a moment until the WPS negotiation is completed, and the smartphone is connected to the Wi-Fi network.
-
Page 63: Sms
Document Version: V1.1 Manage SMS messages This router supports sending, receiving, deleting and exporting SMS messages on the web UI. To access the page, log in to the web UI of the router, and navigate to SMS > Messages. 7.1.1 Send SMS messages Send SMS messages to a new smartphone number Log in to the web UI of the... - Page 64 Document Version: V1.1 Click Send at the bottom right corner. Step 6 ---End Send messages to an existing smartphone number Log in to the web UI of the router. Step 1 Navigate to SMS > Messages. Step 2 Click the targeted smartphone number. Step 3...
- Page 65 Document Version: V1.1 Enter the message content in the Messages column at the bottom. Step 4 Click Send. Step 5 ---End After the messages are sent, you can view them on the same page.
-
Page 66: Delete Sms Messages
Document Version: V1.1 7.1.2 Delete SMS messages Delete all messages of the same smartphone numbers Log in to the web UI of the router. Step 1 Navigate to SMS > Messages. Step 2 Click Edit in the upper right corner. Step 3 Select the smartphone number to be deleted. - Page 67 Document Version: V1.1 Click Edit. Step 4 Select the messages to be deleted. Step 5 Click Step 6 ---End...
-
Page 68: Export Sms Messages
Document Version: V1.1 Delete certain messages of the SIM card This function is available only when messages are stored in the SIM card. Log in to the web UI of the router. Step 1 Navigate to SMS > Messages. Step 2 Click SIM Messages. - Page 69 Document Version: V1.1 Select the smartphone number to export messages. Step 5 Click Export to Router (click Done to cancel). Step 6 ---End After the messages are exported, you can view them on the Messages page.
-
Page 70: Set The Message Center Number
Document Version: V1.1 Set the message center number Message center is the short message server for SMS messages. You will be unable to send SMS messages with a wrong message center number. The router can automatically detect the message center number after you insert a SIM card. If you have problems in sending SMS messages, you are recommended to inquire your ISP for the message center number and change it on the web UI of the router if it is wrong. -
Page 71: Inquire Information By Sending Ussd Commands
Document Version: V1.1 Inquire information by sending USSD commands With USSD function, you can inquire specific information or perform specific operations by send a special code or command to your ISP. Such codes or commands are predetermined. You can contact your ISP to find those codes or commands. -
Page 72: Vpn
Document Version: V1.1 A VPN (Virtual Private Network) is a private network built on a public network (usually the Internet). This private network exists only logically and has no actual physical lines. VPN technology is widely used in corporate networks to share resources between corporate branches and headquarters, while ensuring that these resources are not exposed to other users on the internet. -
Page 73: Enable Internet Users To Access Resources Of The Lan
Document Version: V1.1 Parameter description Parameter Description Used to enable or disable the PPTP server. PPTP Server When it is enabled, the router functions as a PPTP server, which can accept the connections from PPTP clients. Specifies the range of IP address range within which the PPTP server can assign to PPTP IP Address Pool clients. - Page 74 Document Version: V1.1 Please ensure the WAN IP address of router is a public network. This function may not work on a host with an IP address of a private network. Common IPv4 addresses are classified into class A, class B and class C.
- Page 75 Document Version: V1.1 Choose VPN on the left side, and click Add a VPN connection. Step 2 Configure the VPN parameters. Step 3 Enter a connection name, such as VPN connection. Enter the server address, which is 113.88.112.220 in this example. Select a VPN type, which is Point to Point Tunneling Protocol (PPTP) in this example.
- Page 76 Document Version: V1.1 Target the VPN connection added, and click Connect. Step 4 Click the icon on the desktop, and enter the address in the address bar to access the Step 5 FTP server, which is ftp://192.168.0.136:21 in this example.
- Page 77 Document Version: V1.1 Enter the user name and password for logging in to the FTP server, which are both Step 6 JohnDoe in this example, and click Log On. ---End By performing the steps above, you can access the resources on the FTP server.
-
Page 78: Online Pptp Users
Document Version: V1.1 Online PPTP users When the PPTP server function is enabled, you can view the detailed information of VPN clients that establish connections with the PPTP server. To access the page, log in to the web UI of the router, and navigate to VPN >... -
Page 79: Pptp/L2Tp Client
Document Version: V1.1 PPTP/L2TP client 8.3.1 Overview This router can function as a PPTP/L2TP client and connect to PPTP/L2TP servers. The PPTP/L2TP client function is disabled by default. When it is enabled, the page is shown as below. Parameter description Parameter Description PPTP/L2TP Client... -
Page 80: Access Vpn Resources With The Router
Document Version: V1.1 8.3.2 Access VPN resources with the router Scenario: You have subscribed to the PPTP VPN service when purchasing the broadband service from your ISP. Goal: Access the VPN resources of your ISP. Solution: You can configure the PPTP/L2TP client function to reach the goal. Assume that: The IP address of the PPTP server is 113.88.112.220. -
Page 81: Advanced Settings
Document Version: V1.1 Advanced settings SIM PIN SIM PIN is a protective measure to prevent your SIM card from misuse. If your SIM card is locked when you insert it into the router, you are required to unlock it for internet access. You can also enable the PIN lock and specify a PIN code for an unlocked SIM card. - Page 82 Document Version: V1.1 Enter the PIN Code, and click Save. Step 3 − It is recommended to enable the Auto-unlock PIN function. − Contact your ISP for the original PIN code. − You can try the PIN code for only 3 times. If you fail all, you must use PUK code to reset the PIN code.
- Page 83 Document Version: V1.1 Unlock the SIM card on the web UI When “Please unlock the SIM card” is shown between the internet and the router, it indicates that you need to enter the PIN code. Click Please unlock the SIM card to navigate to the SIM PIN page and configure the related parameters.
-
Page 84: Enable Pin Lock For The Sim Card
Document Version: V1.1 After the configuration is completed, you can access the internet normally. 9.1.2 Enable PIN lock for the SIM card You can enable a PIN lock for a SIM card. SIM PIN is a protective measure to prevent your SIM card from misuse. -
Page 85: Disable Pin Lock For The Sim Card
Document Version: V1.1 9.1.3 Disable PIN lock for the SIM card After PIN lock is disabled for the SIM card, your SIM card will not be protected by PIN lock. − Contact your ISP for the original PIN code. − You can try the PIN code for only 3 times. -
Page 86: Use Puk Code To Set Pin Code
Document Version: V1.1 9.1.4 Use PUK code to set PIN code If you fail to enter PIN code for three times, you must use PUK code to reset the PIN code. Contact your ISP for the PUK code. Otherwise the SIM card will be locked permanently after you enter the wrong PUK code for 10 times. -
Page 87: Tenda Wifi App
Scan the QR code or search in the App store for the Tenda WiFi App. Download and install Step 1 it on your smartphone. If you already have a Tenda WiFi App account or want to use the fast login approach, skip to Step 3 proceed with the settings. - Page 88 Document Version: V1.1 Tap Register at the top right corner, and register with an Email account. Check the Email sent to your Email account and follow the instruction to finish the Email account confirmation process.
- Page 89 Log in with a registered account. Step 3 Follow the instructions on the home page of the Tenda WiFi App to add the router. You can also choose to log in with your Google, Facebook and Twitter account without registering a...
- Page 90 Enable the Tenda WiFi App. Enter an account registered in the Tenda WiFi App in Cloud Account. Click Save. ---End After the configuration is completed, you can manage your router with Tenda WiFi App on your smartphone anywhere and anytime through the internet.
-
Page 91: Mobile Data
Document Version: V1.1 Mobile data 9.3.1 Overview You can view and update data usage statistics, and configure data usage settings, such as data usage limit and usage alert. To access the page, log in to the web UI of the router, and navigate to Advanced Settings >... -
Page 92: An Example Of Mobile Data Configurations
Document Version: V1.1 Parameter Description Used to enable or disable the data limit function. When the limit is reached, the Data Limit router will disconnect from the internet automatically. Monthly Allowance Specifies the specific maximum data usage allowed for each month. When the percentage of data traffic used reaches the limit, the router will send an Usage Alert alert SMS message to a specified smartphone number. - Page 93 Document Version: V1.1 Set SMS Alert of Usage to 188****5555. Step 7 Enable Monthly Data Statistics. Step 8 Set Start Date to 1, and click Save. Step 9 ---End After the configuration is completed, you will receive a SMS message when the data traffic usage reached 8 GB and cannot access the internet through the router when the data traffic usage reached 10 GB.
-
Page 94: Bandwidth Control
Document Version: V1.1 Bandwidth control 9.4.1 Overview By configuring this function, you can limit the upload and download speed of devices connected to the router and allocate the bandwidth reasonably. To access the page, log in to the web UI of the router and navigate to Advanced Settings >... - Page 95 Document Version: V1.1 Navigate to Advanced Settings > Bandwidth Control. Step 2 Target the devices to be controlled, and set the Download Limit to 4.0 Mbps (For HD Step 3 Video). Click Save. Step 4 ---End After the configuration is completed, the highest speed for the device is 4 Mbps (or 512 KB/s) and the requirement of 720p videos can be satisfied.
-
Page 96: Filter Mac Address
Document Version: V1.1 Filter MAC address 9.5.1 Overview This function enables you to add devices to the whitelist or blacklist to enable or disable specified users to access the internet through the router. To access the page, log in to the web UI of the router, and navigate to Advanced Settings >... -
Page 97: Only Allow Specified Device To Access The Internet
Document Version: V1.1 Parameter Description Add all online devices to It is only available when you set the whitelist for the first time. By clicking it, you the whitelist can add all currently connected devices to the whitelist. 9.5.2 Only allow specified device to access the internet Scenario: The Wi-Fi in your home is misused by unknown users sometimes. - Page 98 Document Version: V1.1 Repeat Step 4 Step 6 to add Kid 2’s smartphone (98:9C:57:19:D0:1B) to the whitelist. Step 6 Click Save. ---End After the configuration is completed, only the three devices added can access the internet through the router.
-
Page 99: Disallow Specified Device To Access The Internet
Document Version: V1.1 9.5.3 Disallow specified device to access the internet Scenario: The final exam for your kid is approaching and you want to restrict the internet access through the router. Goal: Disallow the certain device of family member to access the internet. Solution: You can configure the MAC address filter function to reach the goal. -
Page 100: Firewall
Document Version: V1.1 Firewall The firewall function helps the router detect and defend ICMP flood attack, TCP flood attack and UDP flood attack, and ignore Ping packet from WAN port. It is recommended to keep the default settings. To access the page, log in to the web UI of the router, and navigate to Advanced Settings >... - Page 101 Document Version: V1.1 Parameter Description Used to enable or disable the Ignore Ping packet from WAN Port function. Ignore Ping Packet When it is enabled, the router automatically ignores the ping to its WAN from hosts From WAN Port from the internet and prevent itself from being exposed, while preventing external ping attacks.
-
Page 102: Isp Update
Document Version: V1.1 ISP update On this page, you can update the ISP information to obtain the better user experience. When you cannot access the internet or the APN mismatch appears, you can try to use this function to solve the problem. -
Page 103: System Settings
Document Version: V1.1 System settings 10.1 DHCP reservation 10.1.1 Overview Through the DHCP reservation function, specified clients can always obtain the same IP address when connecting to the router. This function takes effect only when the DHCP server function of the router is enabled. -
Page 104: Assign Static Ip Addresses To Lan Clients
Document Version: V1.1 10.1.2 Assign static IP addresses to LAN clients Scenario: You have set up an FTP server within your LAN. Goal: Assign a fixed IP address to the host of the FTP server and prevent the failure of access to the FTP server owing to the change of IP address. -
Page 105: Time Settings
Document Version: V1.1 10.2 Time settings You can change the time settings on this page. The functioning of functions based on time requires an accurate system time. The system time of the router can be synchronized with the internet or set manually. - Page 106 Document Version: V1.1 To access the page, log in to the web UI of the router, and navigate to System Settings > Time Settings. Procedure: Log in to the web UI of the router. Step 1 Navigate to System Settings > Time Settings. Step 2 Select Manual for System Time.
-
Page 107: Login Password
Document Version: V1.1 10.3 Login password To ensure network security, a login password is recommended. A login password consisting of more types of characters, such as uppercase letters and lowercase letters, brings higher security. To access the page, log in to the web UI of the router, and navigate to System Settings >... -
Page 108: Reboot And Reset
Document Version: V1.1 10.4 Reboot and reset 10.4.1 Reboot the router If any parameter fails to take effect or the router does not work properly, you can try rebooting the router. Rebooting the router will disconnect all connections to the router. Reboot the router during leisure times. - Page 109 Document Version: V1.1 Reset the router using the reset button Hold down the WPS/RST button on the rear panel of the router for about 8 seconds and release when all LED indicators blink once. The router is reset and restored to factory settings. Reset the router on the web UI Log in to the web UI of the router, navigate to System Settings >...
-
Page 110: Firmware Upgrade
Document Version: V1.1 10.5 Firmware upgrade This function enables the router to obtain the latest functions and more stable performance. The router supports online firmware upgrade and local firmware upgrade. 10.5.1 Online upgrade When the router is connected to the internet, it auto-detects whether there is a new firmware and displays the detected information on the page. -
Page 111: Local Upgrade
Document Version: V1.1 10.5.2 Local upgrade To prevent the router from being damaged: − Ensure that the firmware is applicable to the router. − It is recommended to upgrade the firmware by connecting a LAN port to a computer and performing the upgrade on the web UI. -
Page 112: Lan Settings
Document Version: V1.1 10.6 LAN settings To access the page, log in to the web UI of the router, and navigate to System Settings > LAN Settings. On this page, you can: ◼ Change the LAN IP address and subnet mask of the router. ◼... - Page 113 Document Version: V1.1 Parameter Description Used to enable or disable the DHCP server. Once enabled, the DHCP server DHCP Server automatically assigns internet parameters such as IP address, subnet mask and gateway address to the terminal device. This function is recommended to be enabled. Specifies the range of IP addresses that can be assigned to devices connected to the router.
-
Page 114: Automatic Maintenance
Document Version: V1.1 10.7 Automatic maintenance Automatic maintenance enables you to make the router restart regularly, improving the stability and service life of the router. This function is enabled by default. To access the page, log in to the web UI of the router, and navigate to System Settings >... -
Page 115: Appendix
Document Version: V1.1 Appendix Configuring the computer to obtain an IPv4 address automatically Perform the configuration procedures corresponding to Windows Windows 8 Windows 7 and as required. A computer installed with a wired network adapter is used as an example to describe the procedures. - Page 116 Document Version: V1.1 Right click on the connection which is being connected, and then click Properties. Step 3 Double-click Internet Protocol Version 4 (TCP/IPv4). Step 4...
- Page 117 Document Version: V1.1 Select Obtain an IP address automatically and Obtain DNS server address automatically, Step 5 and click OK. Click Close in the Ethernet Properties window. Step 6 ---End...
-
Page 118: Windows 8
Document Version: V1.1 A.1.2 Windows 8 Right-click in the bottom right corner of the desktop and navigate to Open Network Step 1 and Sharing Center. Click Ethernet and then Properties. Step 2 Double-click Internet Protocol Version 4 (TCP/IPv4). Step 3... - Page 119 Document Version: V1.1 Select Obtain an IP address automatically and Obtain DNS server address automatically, Step 4 and click OK. Click OK in the Ethernet Properties window. Step 5 ---End...
-
Page 120: Windows 7
Document Version: V1.1 A.1.3 Windows 7 Click in the bottom right corner of the desktop and navigate to Open Network and Step 1 Sharing Center. Click Local Area Connection and then Properties. Step 2 Double-click Internet Protocol Version 4 (TCP/IPv4). Step 3... - Page 121 Document Version: V1.1 Select Obtain an IP address automatically and Obtain DNS server address automatically, Step 4 and click OK. Click OK in the Local Area Connection Properties window. Step 5 ---End...
-
Page 122: Acronyms And Abbreviations
Document Version: V1.1 Acronyms and abbreviations Acronym or Abbreviation Full Spelling Advanced Encryption Standard DDNS Dynamic Domain Name System DHCP Dynamic Host Configuration Protocol Demilitarized Zone Domain Name System Hop Limit Internet Protocol IPv4 Internet Protocol Version 4 IPv6 Internet Protocol Version 6 Internet Service Provider L2TP Layer 2 Tunneling Protocol... - Page 123 Document Version: V1.1 Acronym or Abbreviation Full Spelling User Datagram Protocol UPnP Universal Plug and Play USSD Unstructured Supplementary Service Data Wide Area Network WPA-PSK WPA-Pre-shared Key...
Need help?
Do you have a question about the 4G03 Pro and is the answer not in the manual?
Questions and answers