Avaya Vantage K175 Installing And Administering
Hide thumbs
Also See for Vantage K175:
- User manual (57 pages) ,
- Manual (163 pages) ,
- User manual (13 pages)
Table of Contents
Advertisement
Advertisement
Table of Contents

Related Manuals for Avaya Vantage K175


Summary of Contents for Avaya Vantage K175
- Page 1 Installing and Administering Avaya ™ Vantage Release 2.0 Issue 2 September 2018...
- Page 2 RESERVES THE RIGHT TO TAKE LEGAL ACTION AGAINST YOU the express behalf of Avaya. End User agrees to indemnify and hold AND ANYONE ELSE USING OR SELLING THE SOFTWARE harmless Avaya, Avaya's agents, servants and employees against all WITHOUT A LICENSE.
- Page 3 IMPLIED FOR ANY OTHER USE. ADDITIONAL INFORMATION written consent of Avaya can be a criminal, as well as a civil offense FOR H.264 (AVC) AND H.265 (HEVC) CODECS MAY BE under the applicable law.
- Page 4 AC adapters shipped with the equipment or specified by • Increase the separation between the equipment and receiver. Avaya to be used with the equipment. If you use any other equipment, it may cause failures, malfunctioning, • Connect the equipment into an outlet on a circuit different from or fire.
- Page 5 Android, Google and Google Play are trademarks of Google Inc. Device Usage Consent By using the Avaya device you agree that Avaya, from time to time, may collect network and device data from your device and may use such data in order to validate your eligibility to use the device.
-
Page 6: Table Of Contents
DHCP settings worksheet ™ ................31 Connecting a handset to Avaya Vantage ™ ............31 Connecting the handset cradle to Avaya Vantage ..................... 32 Connecting a wired handset ..................32 Connecting a wireless handset ..................34 Installing the K155 wireless module ...................... - Page 7 ............... 43 Avaya Aura Device Services configuration ™ ................43 IP Office configuration for Avaya Vantage ............ 43 Avaya Session Border Controller for Enterprise configuration Chapter 5: Security configuration..................45 ..................... 46 Password security policies ......................47 Certificate management .................... 48 Certificate usage by applications .................
- Page 8 Chapter 11: Troubleshooting....................97 ......................97 Firmware is corrupted Chapter 12: Resources......................99 ........................99 Documentation ............100 Finding documents on the Avaya Support website ................101 Avaya Documentation Portal navigation ....................102 Viewing Avaya Mentor videos ..........................103 Support .................
-
Page 9: Installing And Administering Avaya Vantage
Phone lock and idle time parameters ...................... 161 Security parameters ™ ..................162 Avaya Breeze CSDK parameters ™ ..................169 Avaya Vantage Basic parameters ......................174 IP Office parameters ™ September 2018 Installing and Administering Avaya Vantage Comments on this document? infodev@avaya.com... -
Page 10: Chapter 1: Introduction
38, File server configuration page 40, and Certificate usage by applications on page 48. ® • Added information about using Avaya Aura Utility Services as a file server in File server configuration on page 40. • Updated Parameter configuration for secure installation page 49. - Page 11 Date Summary of changes • Added information about logging in as an administrator in Setting the Avaya Aura Device Services server address on page 69, Setting up an HTTP proxy and exception on page 70, and Configuring SIP server settings on page 71.
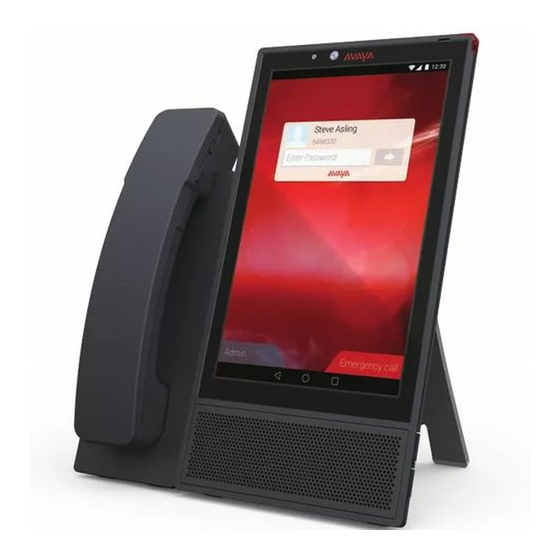
- Page 12 (CSDK) and custom applications to integrate communications into business processes by using ™ your Avaya Vantage device. ™ According to your business needs, you can choose from the following Avaya Vantage device variants: ™ • Avaya Vantage K175: Standard device with an 8-inch screen and an integrated camera for full access to video calls and conferences.
-
Page 13: Device Layout
The standard Avaya Vantage device resembles a tablet in the portrait orientation. The only ™ difference in the layout of the Avaya Vantage K165 and K175 variants is that K175 comes with an integrated camera and a mechanical camera shutter. - Page 14 USB Type-A port Keypad Stand Speaker Handset cradle (optional) Wired or wireless handset (optional) Functional keys on the keypad ™ The Avaya Vantage K155 device includes a physical keypad. ™ September 2018 Installing and Administering Avaya Vantage Comments on this document? infodev@avaya.com...
-
Page 15: Connectors And Controls
Speaker Volume Connectors and controls ™ The following images show the options available on the Avaya Vantage device. Rear panel The rear panel contains a power adapter connector, an RJ9 headset port, and dual Ethernet ports with an internal Ethernet switch. - Page 16 Slot for wireless module Right side panel ™ On Avaya Vantage K165 and K175, the right side panel contains a 3.5 mm audio jack socket and a USB Type-C port. ™ September 2018 Installing and Administering Avaya Vantage Comments on this document? infodev@avaya.com...
- Page 17 K155, the right side panel contains a 3.5 mm audio jack socket and a USB Type-A port. 3.5 mm stereo headset jack with microphone support USB Type-A port ™ September 2018 Installing and Administering Avaya Vantage Comments on this document? infodev@avaya.com...
- Page 18 Handset cradle connector ™ Optional components for the Avaya Vantage device ™ You can use the following optional components with the Avaya Vantage device: • J1B1 wired handset and cradle kit • J2B1 wireless handset and cradle kit • Replacement handset cord •...
-
Page 19: Wireless Handset Layout
Wireless handset layout Wireless handset layout Power button LED indicator Mute Volume up Volume down Specifications ™ The following table provides Avaya Vantage device specifications. Differences between device models are mentioned as applicable. Feature Specifications ™ Screen Avaya Vantage K165 and K175: •... - Page 20 K155 has a Type-A USB port. The USB port supports the following types of accessories: • Multi-port USB hub. • USB pen drive. • Mouse. • Keyboard. Table continues… ™ September 2018 Installing and Administering Avaya Vantage Comments on this document? infodev@avaya.com...
- Page 21 Security lock slot. Stand Adjustable stand for K165 and K175 that you can use either as a desk stand or a wall-mounted stand. Fixed-angle, detachable stand for K155. ™ September 2018 Installing and Administering Avaya Vantage Comments on this document? infodev@avaya.com...
-
Page 22: Wireless Handset Specifications
When fully charged, the new battery provides approximately 12 hours of talk time. You might need to charge the battery before the first use to achieve the full talk time. To prevent damage to the battery, the protection system does not allow the battery to discharge below a certain point. Avaya ™... - Page 23 When fully charged, the new battery provides approximately 60 hours of standby time. When the ™ handset is not in range or Avaya Vantage is turned off for approximately 22 minutes, the handset is turned off automatically to save battery. To turn on the handset again, press the Power button for approximately 2 seconds.
-
Page 24: Camera Specifications
• Avaya Vantage K175. ™ • Avaya Vantage K155. ™ If you use Avaya Vantage K165, which does not include an integrated camera, you can still receive video from other devices. ™ Camera specifications for Avaya Vantage with an integrated camera •... -
Page 25: Environmental Specifications
0 °C to 45 °C (32 °F to 113 °F) Relative humidity 10% to 95% non-condensing Storage temperature -10 °C to 50 °C (14 °F to 122 °F) ™ September 2018 Installing and Administering Avaya Vantage Comments on this document? infodev@avaya.com... -
Page 26: Chapter 3: Initial Setup And Connectivity
Chapter 3: Initial setup and connectivity Initial setup checklist ™ The following checklist describes tasks that you must perform to set up your Avaya Vantage device. Task Notes Review prerequisite information. If you do not have all required software and ™... -
Page 27: Software And Hardware Prerequisites
• A file server for downloading software distribution packages and the settings file. ® You can use an external HTTP or HTTPS file server. In the Avaya Aura environment, you ®... -
Page 28: Preinstallation Data
Preinstallation data System Manager user profile worksheet ™ ® To create a user profile on System Manager for Avaya Vantage Basic or Avaya Equinox in the ® Avaya Aura environment, you must have the following information: Identity tab •... -
Page 29: Ip Office Sip User And Extension Settings
IP Office SIP user and extension settings Use IP Office Manager or IP Office Web Manager to configure a SIP user and then configure the extension settings for the user. For information about the key settings to be configured, see Avaya ™... -
Page 30: Dhcp Settings Worksheet
Avaya Vantage DHCP settings worksheet ™ You need the following information for dynamically assigning IP addresses to Avaya Vantage devices and for initial configuration that is performed through DHCP options. In the following table, populate the following values for your deployment:... -
Page 31: Connecting A Handset To Avaya Vantage
One cradle connector pin is closed so that you can position the cradle in the correct direction. ™ 3. Connect the handset cradle cable to the cradle connector of the Avaya Vantage device. Tip: Bend the cradle cable to make an arc so that you can join the cable with the cradle connector easily. -
Page 32: Connecting A Wired Handset
Connecting a wireless handset About this task ™ Use this procedure to connect or pair a wireless handset with your Avaya Vantage device. You cannot use the wired handset after you connect the wireless handset. You can connect only one wireless handset at a time. - Page 33 You can now use your wireless handset for calls as long as the handset is turned on. When the ™ handset is turned off, you cannot use it for calls, but it is still paired with Avaya Vantage . When you turn on the handset the next time, you do not need to repeat the pairing procedure.
-
Page 34: Installing The K155 Wireless Module
1. Insert the screwdriver into the opening of the module panel to release the latch. Do not pry open the panel. 2. To remove the module panel, slide the panel out in the direction of the arrow. ™ September 2018 Installing and Administering Avaya Vantage Comments on this document? infodev@avaya.com... -
Page 35: Power Management
• The networking switch port does not support the 802.3af or 802.3at PoE specification. • The device requires more power than 802.3af and 802.3at PoE switch port is not available. For example, when a USB device that requires more than 0.5 watt is connected to Avaya ™... - Page 36 You can connect Avaya Vantage to your network by using a wireless or an Ethernet connection. Procedure 1. (Optional) Connect a power adapter to the 48-V DC power connector at the back of Avaya ™ Vantage and plug the power adapter into an electrical outlet if: •...
-
Page 37: Device Deployment Through Device Enrollment Services
Device Enrollment Services discovery. This is an automated ™ process. If you configure the file server address manually in the Settings menu, Avaya Vantage does not attempt Device Enrollment Services discovery. In an environment without Device Enrollment Services, the startup process progresses based on the preinstallation data that you configured. -
Page 38: Chapter 4: Server Configuration
In a Device Enrollment Services environment, the DHCP server is mainly used to assign IP addresses to the devices. The device receives the file server address from Device Enrollment Services. In networks controlled by a Session Border Controller, you can configure Avaya Session Border ™ Controller for Enterprise (Avaya SBCE) to use Avaya Vantage devices. -
Page 39: Dhcp Server Configuration
Setting up a DHCP server About this task ™ Use this procedure to set up a third-party DHCP server. Avaya Vantage supports any DHCP server software as long as the software is correctly configured. In the IP Office environment, you can use either the IP Office system as the DHCP server or a ™... -
Page 40: File Server Configuration
URL in either the FQDN or IP address format. While the file server can be an HTTP or HTTPS server, Avaya recommends to use HTTPS with FQDN. For more information about Device Enrollment Services, see Using Avaya Device Enrollment Services to Manage Endpoints. -
Page 41: Setting Up A File Server
Avaya Vantage Basic and to use Personal Profile Management (PPM). ® ™ • Avaya Aura Device Services: To use Unified Login to log in to Avaya Vantage and to manage contacts. ™ September 2018 Installing and Administering Avaya Vantage... -
Page 42: Avaya Aura ® System Manager Configuration
CSDK-based applications, such as Avaya Vantage Basic, use PPM for the following purposes: ® • For contact management, such as retrieving and updating of PPM or Avaya Aura contacts. • To obtain emergency numbers and Differentiated Service Code Point (DSCP) values. -
Page 43: Avaya Aura ® Device Services Configuration
The Avaya Session Border Controller for Enterprise (Avaya SBCE) is a network device that controls real-time session traffic between networks. Avaya SBCE manages the endpoints or user ™ agents that are authorized to use a network. If you plan to use Avaya Vantage Basic in networks ™... - Page 44 Session Border Controller for Enterprise. In the IP Office environment, with Avaya SBCE resiliency, remote workers are not supported if networks are controlled by Avaya SBCE and the SIP controller is defined in an IP address format instead of an FQDN format.
-
Page 45: Chapter 5: Security Configuration
Avaya Vantage provides lock and logout functionality for the protection of user privacy. Each user ™ has their own login and password, so when a user locks Avaya Vantage , other users cannot unlock ™ the device. When Avaya Vantage is in a locked state, you can receive calls or make emergency ™... -
Page 46: Password Security Policies
® Avaya Aura Device Services use these trusted certificates. • No built-in Avaya certificates except Avaya Product Root CA. This certificate is only used for software signature validation. • Application download control using a configurable XML file. • Installation of applications from unknown sources disabled by default. -
Page 47: Certificate Management
Avaya Aura Device Services or Authenticated file server, and PPM. • Communication applications: Use certificates for different activities, such as SIP connectivity ® using SIP over TLS and PPM over TLS and connection to Avaya Aura Device Services servers. ™... -
Page 48: Certificate Usage By Applications
• The Settings > Security > Client credentials menu on the device contains identity certificates. Certificate usage by applications ™ The following table shows certificates that are used by different applications on Avaya Vantage The use of built-in Android trusted certificates by some applications depends on the ENABLE_PUBLIC_CA_CERTS parameter setting. Application... -
Page 49: Parameter Configuration For Secure Installation
(not included in ID_CERT_APPLICATIO N_LIST) Note: ™ For information about IP Office security certificates, see Avaya IP Office Platform SIP Telephone Installation Notes for Release 11.0. Parameter configuration for secure installation For secure installation, configure the following parameters. Parameter... - Page 50 TLS_VERSION 0 or 1 Specifies which TLS versions are supported with all TLS connections used by Android and Avaya applications. Assign one of the following values: • 0: TLS versions 1.0 and 1.2 are supported. • 1: TLS version 1.2 only is permitted.
- Page 51 Numeric Specifies the period of the certificate's validity interval. ™ This period is specified as a percentage. Avaya Vantage uses this percentage to calculate the date of the certificate replacement before its expiration. The range is from 1 to 99.
- Page 52 Security configuration Parameter Set to Notes unreachable, the device sends untagged packets. On Avaya ™ Vantage , the behavior is same for both values. • Untag (2): The device sends untagged packets. L2QVLAN Non- Specifies the 802.1Q VLAN identifier. This parameter must not zero have the same value as that of PHY2VLAN.
-
Page 53: Chapter 6: Device Configuration
Chapter 6: Device configuration ™ The following list shows the methods you can use to configure Avaya Vantage . The methods are listed in order of precedence: • DHCP - Standard - Option 43 - Option 242 • 46xxsettings.txt file ®... -
Page 54: Device Configuration Using Dhcp Options
To use this option, Avaya Vantage sends option 60 with the value ccp.avaya.com. Option 43 is processed only if the first code in the option is 1 with a value of 6889. All values are interpreted as strings of ASCII characters that are accepted with or without a null termination character. - Page 55 Specifies the maximum DHCP message size. The maximum packet size can be up to 1500 bytes. The default value is 1000. ™ Option 60 Specifies the vendor class identifier. To use option 43, Avaya Vantage sends option 60 with the value ccp.avaya.com. Option 242 Specifies site-specific options.
-
Page 56: Dhcp Site-Specific Options
43 only if the first code of option 43 is 1 with a value ™ of 6889. All values are interpreted as strings of ASCII characters. Avaya Vantage ignores invalid values and does not set the corresponding parameters. - Page 57 When the device receives DHCP ACK contents options 43 and 242, the device uses option 242. ™ To use configuration parameters on Avaya Vantage , you must specify the option in DHCP Site- Specific Option Number (SSON) on the device interface.
-
Page 58: Device Configuration Using A 46Xxsettings.txt Settings File
™ You can administer Avaya Vantage devices centrally using the 46xxsettings.txt settings file that Avaya provides with the devices. The settings file is a text file that resides on a file server and contains configuration parameters. Important: In an IP Office environment, Avaya strongly recommends that you allow the IP Office system to auto-generate the settings files for devices rather than using the uploaded file. -
Page 59: Configuring The Settings File
Device configuration using a 46xxsettings.txt settings file ™ system configuration. For more information, see Avaya IP Office Platform SIP Telephone Installation Notes. Configuring the settings file About this task Use this procedure to modify the settings file with appropriate values to provision the device configuration parameters. - Page 60 If the file exists, ™ Avaya Vantage downloads this file, stops to interpret the current settings file, and tries to interpret the downloaded Table continues… ™ September 2018 Installing and Administering Avaya Vantage Comments on this document? infodev@avaya.com...
-
Page 61: User Group Configuration In The Settings File
™ ™ Avaya Vantage handles the lines of the settings file one by one. Avaya Vantage interprets only one command per line. All arguments of the command must be placed on the same line as the command. To include spaces in an argument value, you must enclose the value using double quotes (“”). -
Page 62: Initial Values Of Parameters Transmitting In Lldp Frames
LLDP_RCV_CONTENT every time the value of LLDP_RCV_CONTENT changes. Initial values of parameters transmitting in LLDP frames ™ The following table shows the initial values of LLDP fields that are set by Avaya Vantage before the first LLDP frame is transmitted. LLDP field... -
Page 63: Tlv Impact On System Parameter Values
L2Q is set to 2 (OFF) if the Tagged Flag T is set to 0 Network Policy L2Q is set to 1 (ON) if the Tagged Flag T is set to 1. (Voice) TLV Table continues… ™ September 2018 Installing and Administering Avaya Vantage Comments on this document? infodev@avaya.com... - Page 64 • The current L2QVLAN value was set by an IEEE 802.1 VLAN name. • The current L2QVLAN value was set by a TIA LLDP MED Network Policy (Voice) TLV. ™ September 2018 Installing and Administering Avaya Vantage Comments on this document? infodev@avaya.com...
-
Page 65: Device Configuration Using The Settings Menu On The Device
Device configuration using the Settings menu on the device Device configuration using the Settings menu on the device Device configuration checklist ™ The following checklist describes task you must perform to configure Avaya Vantage device settings. Task Notes ™ Configure your administration password. Avaya Vantage... -
Page 66: Administrator Password Configuration
K165 and K175 on page 77. Administrator password configuration ™ You must set up an administrator password to enable administrator settings on Avaya Vantage ™ Avaya Vantage uses the ADMIN_PASSWORD or PROCPSWD parameters to store the password and provide access to administrator options in the Settings menu. -
Page 67: Enabling Administrator Settings On The Device
• If ADMIN_PASSWORD is not configured and PROCPSWD uses the default value, you ™ cannot access administrator options in the Settings menu on Avaya Vantage In an IP Office environment, ADMIN_PASSWORD is added to the automatically-generated 46xxsettings.txt file if the No User Source Number (NUSN) is set for the administrator password in IP Office Manager. -
Page 68: Setting Up A File Server Address
If the file server address is configured through DHCP or LLDP, you do not need to configure the ™ file server address in the Settings menu of Avaya Vantage . If Device Enrollment Services is used, then the file server redirection URL information is configured in Device Enrollment Services. - Page 69 Use this procedure as an alternative to administering the Avaya Aura Device Services server ® address by using the 46xxsettings.txt file. You can set the server address of Avaya Aura Device Services if you want to use the Unified Login feature. ®...
-
Page 70: Setting A User Group For A Specific Configuration
Use this procedure to set a group identifier ™ to the device. You can only set the group identifier using the Settings menu of Avaya Vantage Procedure 1. On the Home screen, tap Applications. -
Page 71: Configuring Sip Server Settings
67 Configuring SIP server settings About this task ™ Use this procedure to register Avaya Vantage to the SIP server. You can configure the SIP server and SIP domain through the Settings menu only as an administrator. Before you begin Get the administrator password that is set through ADMIN_PASSWORD or PROCPSWD. -
Page 72: Setting Up A Dhcp Site-Specific Option Number
SSON to determine which set of site-specific parameters must be downloaded from the DHCP ™ server. You can only set the SSON using the Settings menu of Avaya Vantage Procedure 1. On the Home screen, tap Applications. 2. Tap Settings. - Page 73 6. (Optional) To change the Extensible Authentication Protocol (EAP) type to be used for IEEE 802.1x authentication, tap EAP Type, and select one of the following options: • EAP-MD5 • EAP-TLS ™ September 2018 Installing and Administering Avaya Vantage Comments on this document? infodev@avaya.com...
-
Page 74: Chapter 7: Application Setup
™ or websites, to Avaya Vantage ™ With the telephony application APKs that are bundled with the Avaya Vantage firmware package, you do not need to use the installation options listed above. However, if you choose to install or update using these options, they take priority over the bundled APKs. If you use one of these ™... - Page 75 ™ Pushing applications onto the Avaya Vantage device The installation options, in order of priority, for the Avaya CSDK applications are: 1. Google Play store (for K165 and K175) 2. PUSH_APPLICATION parameter 3. Bundled APKs Note: ™ IP Office Release 11.0 only supports Avaya Vantage Basic.
-
Page 76: Push Command Examples
4. Save the settings file. 5. Upload the settings file on the file server. Result ™ In the next polling period, Avaya Vantage downloads the settings file and the application package and installs the application on the device. Push command examples... -
Page 77: Access To Google Play Applications For K165 And K175
If you do not already have one, create an XML-based configuration file for third-party application control. Procedure 1. Open the XML-based configuration file in a text editor. ™ September 2018 Installing and Administering Avaya Vantage Comments on this document? infodev@avaya.com... - Page 78 6. In the settings file, set the APPS_CONTROL_FILE parameter to define the URL that specifies the location of the XML-based configuration file. Result ™ On the next polling period, Avaya Vantage downloads the file and applies the settings. ™ September 2018 Installing and Administering Avaya Vantage Comments on this document? infodev@avaya.com...
-
Page 79: Access To Applications From Unknown Sources
When you enable this option, end users can download application APKs from common ™ third-party application stores and other sources, such as emails and websites, to Avaya Vantage When installation from unknown sources is enabled, on K155, Application Stores Links ( becomes available and provides links to common third-party application stores, such as F-Droid and GetJar. -
Page 80: Avaya Telephony Applications Supported On Avaya Vantage
Package names of CSDK-based applications on page 80. Note: ™ ™ Avaya Vantage with IP Office Release 11.0 only supports the Avaya Vantage Basic ® ™ application. Avaya Equinox and Avaya Vantage Open are not supported. Package names of CSDK-based applications The following table shows package names of the CSDK-based phone applications. - Page 81 Note: If you include the line GET 46xxsettings.txt, then all lines after this line will be ignored. You must include such lines in the 46xxsettings.txt file. ™ September 2018 Installing and Administering Avaya Vantage Comments on this document? infodev@avaya.com...
-
Page 82: Chapter 8: Kiosk Mode Configuration
For the device to work as a kiosk, you must pin the Avaya Kiosk application as a special Home screen launcher, where only predefined applications are available to the end user. To avoid getting a scroll bar, Avaya recommends that you define up to six applications to be pinned on the Home screen of the launcher. -
Page 83: Applications To Be Pinned In Kiosk Mode
Avaya CSDK-based telephony applications: ™ • “com.avaya.android.vantage.basic”: Avaya Vantage Basic. ® • “com.avaya.android.flare”: Avaya Equinox ™ Changes to the PIN_APP parameter setting only take effect after you reboot the Avaya Vantage device. An example of the parameter setting: SET PIN_APP “com.avaya.endpoint.avayakiosk,com.avaya.android.vantage.basic,com.android.chrome,com.av aya.endpoint.login,com.avaya.endpoint.upgrade,com.avaya.endpoint.avayavoiceassistant” ™... -
Page 84: Unpinning Applications In Kiosk Mode
Procedure 1. Log on to the device using the SIP user credentials. 2. On the Home screen, tap the Avaya Kiosk application icon. The device displays the special Home screen of the launcher and the icons for the pinned applications. -
Page 85: Chapter 9: Maintenance
4. Tap Backup & reset > Factory data reset. 5. Tap Reset device. 6. Tap Erase everything. The device restarts. The process takes approximately 20 minutes to complete. ™ September 2018 Installing and Administering Avaya Vantage Comments on this document? infodev@avaya.com... -
Page 86: Failover And Survivability
2. Tap Backup & reset. 3. Tap Reboot and then tap Yes to confirm. ™ If the file server contains a new version of software, Avaya Vantage downloads and installs updates according to the configured upgrade policy. Failover and survivability If the control server that is currently active fails, the exact behavior of a communication application is determined by the application’s internal policies. -
Page 87: September 2018 Installing And Administering Avaya Vantage
, on a USB mass storage ™ device, or on an HTTP or HTTPS server. When you generate a debug report, Avaya Vantage overwrites any existing report, if applicable. The report remains available in the internal flash memory for up to 14 days. -
Page 88: Generating An Audio Report
, on a USB mass storage ™ device, or on an HTTP or HTTPS server. When you generate an audio report, Avaya Vantage overwrites any existing report, if applicable. The report remains available in the internal flash memory for up to 14 days. -
Page 89: Opening A Debug Or Audio Report
• Audio report: media_report.decrypted.tar.gz 4. To extract the decrypted archive file, do one of the following: • On Windows-based computers, use any program that can extract zip archives. ™ September 2018 Installing and Administering Avaya Vantage Comments on this document? infodev@avaya.com... -
Page 90: Configuring The Ssh Server Settings
Use this procedure to copy the Ethernet packets that are transmitted or received on the network to the secondary Ethernet port. ™ This functionality is only available if you have an embedded Ethernet switch on Avaya Vantage Before you begin Get the administrator password that is set through ADMIN_PASSWORD or PROCPSWD. -
Page 91: Pinging A Device On The Network
Pinging a device on the network About this task ™ Use this procedure to ensure that Avaya Vantage can reach a particular IP address or a host on the network. This option is also available when you are logged out of the device. -
Page 92: Chapter 10: Device Upgrade
• Manual: Upgrade the device manually without the device waiting for a polling interval by: - Using the Update now option in the Settings > About Avaya Vantage > Software information menu on the device. With this option, the device immediately downloads and installs the software if an updated software version is available. -
Page 93: Device Upgrade Process
You can configure the settings file to allow Avaya Vantage to periodically check for a newer ™ version of the software on the file server. If the file server contains new software, Avaya Vantage ™ automatically downloads and installs upgrade files. Avaya Vantage downloads upgrade files in the background so the download does not affect the user experience. - Page 94 ™ Vantage compares the current version of the software with the version specified in the ™ upgrade file. If the file server contains the newer version of software, Avaya Vantage performs the upgrade. ™ September 2018 Installing and Administering Avaya Vantage...
-
Page 95: Csdk-Based Application Upgrades
Platform System Monitor and Using ™ Avaya IP Office Platform System Status Application. ™ If an updated version of software is available for Avaya Vantage , then the device upgrades immediately after the reboot. ™ To upgrade all Avaya Vantage devices, do the following: 2. - Page 96 If installation of applications from unknown sources is enabled, then end users can also download application APKs from other sources, such as emails or websites. ™ For more information about installing and updating applications on Avaya Vantage , see the sections under Application setup on page 74.
-
Page 97: Chapter 11: Troubleshooting
Solution ™ Use the boot recovery procedure to clear the device and restore Avaya Vantage to its factory settings. Use the boot recovery menu options only when the device does not boot up properly for some reason. - Page 98 • Erase /data only: Erases the data stored on the device. • Swap memory banks: Swaps the boot banks on the device so the primary boot bank ™ becomes the secondary boot bank. Avaya Vantage always has 2 copies of firmware: ™...
-
Page 99: Chapter 12: Resources
Chapter 12: Resources Documentation See the following related documents at http://support.avaya.com. Title Use this document to: Audience Overview ® Avaya Aura Session Manager Understand characteristics and capabilities, • Customers Overview and Specification including feature descriptions, • Sales, services, interoperability, performance specifications,... -
Page 100: Finding Documents On The Avaya Support Website
Finding documents on the Avaya Support website Procedure 1. Navigate to http://support.avaya.com/. 2. At the top of the screen, type your username and password and click Login. 3. Click Support by Product > Documents. -
Page 101: Avaya Documentation Portal Navigation
Customer documentation for some programs is now available on the Avaya Documentation Portal at http://documentation.avaya.com/. Important: For documents that are not available on the Avaya Documentation Portal, click Support on the top menu to open http://support.avaya.com/. Using the Avaya Documentation Portal, you can: •... -
Page 102: Viewing Avaya Mentor Videos
Avaya Mentor videos provide technical content on how to install, configure, and troubleshoot Avaya products. About this task Videos are available on the Avaya Support website, listed under the video document type, and on the Avaya-run channel on YouTube. Procedure •... -
Page 103: Support
• Links to other pertinent information If you are an authorized Avaya Partner or a current Avaya customer with a support contract, you can access the Knowledge Base without extra cost. You must have a login account and a valid Sold-To number. -
Page 104: Appendix A: Supported Configuration Parameters
® configuration files and image files, and Avaya Aura Device Services configuration retrieval. Assign one of the following values: • 0: Secure file downloading is not required. Avaya ™ Vantage downloads firmware and configuration files from HTTP or HTTPS servers. -
Page 105: Phone Parameters
Name of the telephone model or the truncated settings model identifier. This parameter can have one of the following values: ™ • K175 for the standard Avaya Vantage device with a camera. ™ • K165 for the standard Avaya Vantage device without a camera. -
Page 106: General Phone Functionality
BRANDING_VOLU Numeric Specifies the level of the Avaya audio brand. Assign one of the following values: • 8: 9 db above nominal • 7: 6 db above nominal • 6: 3 db above nominal • 5: nominal •... - Page 107 PNG, JPG (JPEG), GIF, and BMP. GIF is presented without animation. The screen of the K165 and K175 devices is 8 inches with a resolution of 800x1280 pixels. Table continues… ™ September 2018 Installing and Administering Avaya Vantage Comments on this document? infodev@avaya.com...
- Page 108 Default Is set to Description value default on reset Therefore, Avaya recommends that you use the following image sizes: • 800x1280: Fits the entire screen and appears on all pages. • 600x1280, 2400x1280, or 3200x1280: Provides scrolling on all pages.
-
Page 109: Phone Ui Related Settings
Specifies whether bidirectional signaling is supported on the headset interface. Bidirectional signalling allows you to forward off-hook events and ™ incoming call alerts from Avaya Vantage to a headset when a headset base station is connected to the headset connector. - Page 110 • HOMESCREEN • ADMIN For provisioning, use the Settings > Display > Screen presented after login menu on the device. This parameter is not supported in the non Avaya ™ Breeze CSDK application based mode. This parameter can be stored on the PPM or backup server.
- Page 111 • 0: AGC is disabled. • 1: AGC is enabled. This parameter is supported in all modes. For provisioning, use: • The SET command in the 46xxsettings.txt file. Table continues… ™ September 2018 Installing and Administering Avaya Vantage Comments on this document? infodev@avaya.com...
- Page 112 • 6: Five levels softer than normal. • 7: Six levels softer than normal. • 8: One level louder than normal. • 9: Two levels louder than normal. Table continues… ™ September 2018 Installing and Administering Avaya Vantage Comments on this document? infodev@avaya.com...
- Page 113 46xxsettings.txt file. For example, to rename the first and third profiles and to retain the default name of the second profile, enter the following: SET Table continues… ™ September 2018 Installing and Administering Avaya Vantage Comments on this document? infodev@avaya.com...
- Page 114 For example, to rename the first and third profiles and to retain the default name of the second profile, enter the following: SET HANDSET_PROFILE_NAMES “Profile 1,,Profile 3” ™ September 2018 Installing and Administering Avaya Vantage Comments on this document? infodev@avaya.com...
- Page 115 This parameter is supported in all modes. For provisioning, use the SET command in the 46xxsettings.txt file. ™ COUNTRY String Specifies a country where Avaya Vantage is used. This parameter is used for country-specific Wi-Fi and anti-flickering frequency settings. If Avaya ™ Vantage cannot identify the country specified in the parameter, it applies default settings.
-
Page 116: Server Addresses And Ports
When DES_STAT is set to 2 and FILE_SERVER_URL is not retrieved from DHCP or LLDP, the device attempts to communicate with Device Enrollment Services during startup to obtain Table continues… ™ September 2018 Installing and Administering Avaya Vantage Comments on this document? infodev@avaya.com... - Page 117 DNS names must include the sub-domain name and DOMAIN must be set to the lowest level common domain. This parameter is supported in all modes. Table continues… ™ September 2018 Installing and Administering Avaya Vantage Comments on this document? infodev@avaya.com...
- Page 118 Utility Services as an HTTPS server, you must specify the TCP port as 411 instead of 443. ™ If this parameter is set, Avaya Vantage ignores the HTTPSRVR, HTTPPORT, HTTPDIR, TLSSRVR, TLSSRVRDIR, and TLSPORT parameters. This parameter is supported in all modes.
- Page 119 • The siaddr field value in the DHCPACK message. The precedence is 2. Only the dotted decimal ™ format is supported. Avaya Vantage considers addresses received using this method as HTTP server addresses. • The SET command in the 46xxsettings.txt file.
- Page 120 255 ASCII characters. This parameter is supported in all modes. For provisioning, use: • LLDP Avaya/Extreme Proprietary File Server TLV. The precedence is 1. • DHCP option 43. The precedence is 2. • A name=value pair in a DHCPACK message.
- Page 121 • The SET command in the 46xxsettings.txt file. HTTPPORT Numeric Specifies the destination TCP port for HTTP requests. The range is from 0 to 65535. Table continues… ™ September 2018 Installing and Administering Avaya Vantage Comments on this document? infodev@avaya.com...
- Page 122 • host is an IP address in the dotted decimal or DNS format. • port is the optional port number. If you do not ™ specify a port number, Avaya Vantage uses the following default values: - 5060 for TCP - 5061 for TLS Table continues…...
- Page 123 ™ Avaya Vantage uses the TLS transport type. The parameter value can have up to 255 characters. This parameter is not supported in the non Avaya ™ Breeze CSDK application based mode. For provisioning, use: • LLDP Avaya/Extreme Proprietary Call Server TLV.
- Page 124 String Null Specifies a list of user authenticated file server _SERVER_URL URLs. ™ • If this parameter is configured, Avaya Vantage displays the Unified Login screen. In the current ™ ® release, Avaya Vantage supports Avaya Aura Device Services user authentication servers only.
-
Page 125: Network Settings
™ IPADD String 0.0.0.0 Specifies the IP address of the Avaya Vantage device. The range is from 7 to 15 ASCII characters. This is a testable parameter. The parameter can be used in conditional statements in the 46xxsettings.txt file. - Page 126 IP address through DHCP. The options are: • 0: Use a static IP address configured on the device. • 1: Obtain the IP address automatically through DHCP. Table continues… ™ September 2018 Installing and Administering Avaya Vantage Comments on this document? infodev@avaya.com...
- Page 127 Specifies the DHCP lease violation flag. Assign one of the following values: • 1: To comply with the DHCP standard. When the ™ DHCP lease expires, Avaya Vantage immediately releases an IP address. • 0: To enter the proprietary state. When the DHCP ™...
- Page 128 Assign one of the following values: • 1496 • 1500 This parameter is applicable for wired Ethernet connections only and is not used for Wi-Fi. Avaya ™ Vantage uses MTU_SIZE to provide compatibility with Ethernet switches that do not support the longest maximum frame length possible with tagged frames.
- Page 129 IPv6 traffic. ™ For Avaya Vantage , set this parameter to 0 to ™ block IPv6 traffic because Avaya Vantage does not support IPv6. This parameter is applicable for both wired Ethernet and wireless connections. This parameter is supported in all modes.
- Page 130 Specifies whether users can configure the Avaya AVAYA_SMARTLO Smart Lock feature. CK_STAT • 0: Users cannot access Avaya Smart Lock in the Settings menu. The Avaya Smart Lock feature is disabled. • 1: Users can access Avaya Smart Lock in the Settings menu.
- Page 131 • 1: Avaya Vantage keeps information about Wi-Fi connections and the active wireless connection, such as Wi-Fi passwords. This parameter is not supported in the non Avaya ™ Breeze CSDK application based mode. For provisioning, use the SET command in the 46xxsettings.txt file.
-
Page 132: Ethernet Interface Settings
Assign one of the following values: • 0: Auto-MDIX is disabled. • 1: Auto-MDIX is enabled. For provisioning, use the SET command in the 46xxsettings.txt file. Table continues… ™ September 2018 Installing and Administering Avaya Vantage Comments on this document? infodev@avaya.com... -
Page 133: Vlan Settings
• The SET command in the 46xxsettings.txt file. The precedence is 3. • LLDP. The precedence is 4. - The Avaya/Extreme Proprietary 802.1Q Framing TLV. - The parameter is set indirectly by receiving a VLAN name with the “voice” prefix in the IEEE 802.1 VLAN Name TLV. - Page 134 The Settings > Network > Ethernet > VLAN > VLAN menu on the device. The precedence is 5. VLANTEST Numeric 60 Specifies the number of seconds that Avaya ™ Vantage waits for DHCPOFFER message reception on a non-zero VLAN. The range is from 0 to 999.
- Page 135 Is set to Description value default on reset DOT1X Numeric Specifies whether the IEEE 802.1X Pass through ™ operating mode is enabled on Avaya Vantage Table continues… ™ September 2018 Installing and Administering Avaya Vantage Comments on this document? infodev@avaya.com...
- Page 136 802.1x authentication > Pass through mode menu on the device. DOT1XSTAT Numeric Specifies whether the IEEE 802.1X supplicant operating mode for Ethernet is enabled on Avaya ™ Vantage . The options are: • 0: Supplicant operation is disabled. • 1: Supplicant operation is enabled. Avaya ™...
- Page 137 • The Settings > Network > Ethernet > IEEE 802.1x authentication > 802.1x credentials menu on the device. Other operational parameters and settings ™ The following sections describe configuration parameters that control Avaya Vantage behavior, but do not relate to network operations or UI appearance. ™ September 2018 Installing and Administering Avaya Vantage Comments on this document? infodev@avaya.com...
- Page 138 Specifies a list of applications that administrators ™ string define for installation on Avaya Vantage . Each entry in the list represents a URL of the application. The URL can be specified using: • The relative path format. The origin is the directory specified by the FILE_SERVER_URL or Table continues…...
- Page 139 • 0: End users cannot install applications. • 1: End users can install applications. This parameter is supported in all modes. For provisioning, use the SET command in the 46xxsettings.txt file. Table continues… ™ September 2018 Installing and Administering Avaya Vantage Comments on this document? infodev@avaya.com...
- Page 140 Home screen. You can also specify a comma-separated list of package names for applications to be pinned using an Avaya Launcher. You must push the launcher onto the device using the PUSH_APPLICATION parameter. PIN_APP can include a list of application, login, and upgrade package names.
- Page 141 Emergency call. The parameter value can contain up to 30 characters. You can use 0–9, *, and # characters. This parameter is not supported in the non Avaya ™ Breeze CSDK application based mode.
- Page 142 46xxsettings.txt file. MYCERTURL String null Specifies a URL of the Simple Certificate string Enrollment Protocol (SCEP) server. Avaya ™ Vantage attempts to contact the server if the parameter value is not the default. A valid URL must start with http://.
- Page 143 The parameter value must start with the slash (/) symbol. Note: Do no use the asterisk (*) symbol. If the value ™ contains this symbol, Avaya Vantage considers the value to be invalid. For example: /C=US/ST=CA/L=MILPITAS/ O=Avaya This parameter is supported in all modes.
- Page 144 46xxsettings.txt file. ENABLE_PUBLIC_ Numeric Specifies whether embedded Android trusted CA_CERTS certificates are used by the trusted certificate repository for file download using HTTPS, Avaya ® Aura Device Services, 802.1x, EAP-TLA, SCEP, and PPM. You can assign one of the following values: •...
- Page 145 • MACADDR: This option is replaced with the ™ Avaya Vantage MAC address without colons ™ For example: An Avaya Vantage device has the 00-24-D7-E4-2E-98 MAC address. The URL of the PKCS file is specified as http:// <path_to_the_file>/pkc12file_ $MACADDR.cer. In this case, the PKCS file for the device must have the pkc12file_0024D7E42E98 name.
- Page 146 Specifies the number of failed attempts to enter the _RETRY password for the PKCS#12 file. If the user fails to ™ enter the correct password, Avaya Vantage will not install the PKCS#12 file. The range is from 0 to 100, where 0 means that the user cannot retry to enter the password.
- Page 147 CERT_WARNING_ Numeric Specifies the number of days before the certificate ™ DAYS expiry date when Avaya Vantage starts to display certificate expiration warning messages. Avaya ™ Vantage displays the warning message every seven days. This parameter relates to trusted certificates, OSCP certificates, EASG certificates, and the identity certificate.
- Page 148 Description value default on reset not have access to the Avaya network to generate EASG responses for SSH login. The value of the parameter is a list of file names separated by commas without any spaces between entries. The value can contain up to 255 ASCII characters.
- Page 149 TLS_VERSION Numeric Specifies which TLS versions are supported with all TLS connections used by Android and Avaya applications. Assign one of the following values: • 0: TLS versions 1.0 and 1.2 are supported. • 1: TLS version 1.2 only is permitted.
- Page 150 Is set to Description value default on reset ™ • 2: Enabled. Avaya Vantage starts to transmit LLDP frames only after receiving of an LLDP frame. This parameter is supported in all modes. For provisioning, use the SET command in the 46xxsettings.txt file.
- Page 151 The device filters all ANDROID and KERNEL syslog or log categories in the following cases: • You do not configure this parameter for these categories. Table continues… ™ September 2018 Installing and Administering Avaya Vantage Comments on this document? infodev@avaya.com...
- Page 152 This message is displayed on a SSH client before authentication. This parameter is supported in all modes. For provisioning, use the SET command in the 46xxsettings.txt file. Table continues… ™ September 2018 Installing and Administering Avaya Vantage Comments on this document? infodev@avaya.com...
-
Page 153: Usb Parameters
• 1: USB port is enabled. This parameter is supported in all modes. For provisioning, use the SET command in the 46xxsettings.txt file. PPM does not back up or restore the parameter. ™ September 2018 Installing and Administering Avaya Vantage Comments on this document? infodev@avaya.com... -
Page 154: September
• 0: Disabled • 1-10080: Enabled ™ This parameter is supported by Avaya Vantage with a range of 0 to 65535. This parameter has no effect on any upgrade command that is triggered by the management application or UI. - Page 155 For provisioning, use the SET command in the 46xxsettings.txt file. ™ UPGRADE_INSTA String 1970-01 Specifies the date and time when Avaya Vantage LL_DATE_TIME -01T00: starts to install upgrade files. The value of the parameter uses the YYYY-MM- DDThh:mm format, where: •...
- Page 156 The interval is measured in seconds. Assign one of the following values: ™ • 0: The interval is not specified. Avaya Vantage starts the download immediately after reboot. ™ • 1 – 32767: After reboot, Avaya Vantage delays the download.
- Page 157 The interval is measured in seconds. Assign one of the following values: ™ • 0: The interval is not specified. Avaya Vantage performs background download attempts without delay. ™ • 1 – 32767: Avaya Vantage inserts a delay between two background download attempts.
- Page 158 SIP server. HA1 is calculated as MD5 (username:domain:password). The parameter value can contain up to 255 alphanumerical characters. This parameter is not supported in the non Avaya ™ Breeze CSDK application based mode. This parameter is only configurable from Avaya ®...
-
Page 159: Phone Lock And Idle Time Parameters
Specifies whether the Lock screen is enabled on LOCK the device. • 0: The Lock screen is disabled. • 1: The Lock screen is enabled. This parameter is not supported in the non Avaya ™ Breeze CSDK application based mode. For provisioning, use: •... - Page 160 145 and the value specified by the Exchange policy is 123 minutes, then the Automatically lock field provides options from 1 minute to 2 hours inclusively. This parameter is not supported in the non Avaya ™ Breeze CSDK application based mode.
-
Page 161: Security Parameters
End users get the options to reset immediately or later. This parameter is supported in all modes. For provisioning, use the SET command in the 46xxsettings.txt file. ™ September 2018 Installing and Administering Avaya Vantage Comments on this document? infodev@avaya.com... - Page 162 Supported configuration parameters ™ Avaya Breeze CSDK parameters ™ The following parameters are supported by Avaya Breeze CSDK-based applications. ® Avaya Aura Device Services parameters Parameter Type Default Is set to Description value default on reset ™ ACSENABLED Numeric Specifies whether Avaya Vantage Basic uses ®...
- Page 163 For provisioning, use the SET command in the 46xxsettings.txt file. ™ RTP_PORT_RAN Numeric Specifies the UDP port range that Avaya Vantage Basic uses for RTP/RTCP or SRTP/SRTCP connections. You can assign a value between 32 and 64511. The maximum value of the range is calculated as a sum of the RTP_PORT_LOW and RTP_PORT_RANGE values.
- Page 164 • 1: Enabled WIDEBAND_20K. • 2: Enabled NARROWBAND_16K. • 3: Enabled NARRWOBAND_12K. ™ For Avaya Vantage Basic, this parameter is ® supported in both the Avaya Aura and IP Office environments. For provisioning, use the SET command in the 46xxsettings.txt file. OPUS_PAYLOAD_ Numeric...
- Page 165 • Debug: To collect Debug log messages. • Notice: To collect Info log messages. ANALYTICSENAB Integer Defines whether to allow Avaya to collect data using Google Analytics on behalf of the administrator's user community. Assign one of the following values: • 0: Data collection is disabled.
- Page 166 Valid values are from 5 to 15. PHNOL String Null string Specifies the outside line access code, which is the number you press to access an external line. Table continues… ™ September 2018 Installing and Administering Avaya Vantage Comments on this document? infodev@avaya.com...
- Page 167 Specifies whether the area code must be ACODE removed for local calls. This parameter is obsolete. While it is still supported for backward compatibility, Avaya recommends that you use the newer parameter, DIALPLANLOCALCALLPREFIX. DIALPLANLOCAL String Indicates whether the area code must be CALLPREFIX removed for local calls.
- Page 168 PHNPBXMAINPRE String Null string Specifies the PBX main prefix. This parameter is obsolete. While it is still supported for backward compatibility, Avaya recommends that you use the newer parameter, DIALPLANPBXPREFIX. DIALPLANAREAC String Null string Specifies the area or city code.
- Page 169 You can assign a value between 0 and 63. For provisioning, use: • The SET command in the 46xxsettings.txt file. The precedence is 3. Table continues… ™ September 2018 Installing and Administering Avaya Vantage Comments on this document? infodev@avaya.com...
- Page 170 Assign one of the following values: ™ • 0: Avaya Vantage Basic uses the values of parameters related to these features. You can Table continues… ™ September 2018 Installing and Administering Avaya Vantage Comments on this document? infodev@avaya.com...
- Page 171 46xxsettings.txt file. CONFSTAT Numeric Specifies whether the Conference button is ™ available to users. Avaya Vantage Basic ignores this parameter if CCBTNSTAT is set to 1. Assign one of the following values: • 0: The Conference button is disabled. • 1: The Conference button is enabled.
- Page 172 Specifies the ring tone that Avaya Vantage Basic RINGTONE uses for incoming calls. When the parameter is set to “Default”, the Avaya built-in ringtone is used for incoming calls. Otherwise, you can specify the name of one of the ringtones available on the device.
- Page 173 Specifies the URL of a branding image. Avaya ™ string Vantage Basic displays this image on the top left corner of all screens instead of the Avaya logo. Specify the URL using the absolute path format, where the URL must start with either http:// or https://. ™...
-
Page 174: Ip Office Parameters
46xxsettings.txt file includes parameter settings that are required for IP Office operation, including those that are automatically adjusted to match the configuration of the IP Office system. ™ The following tables only list new IP Office parameters that are supported on Avaya Vantage Note: ™... -
Page 175: Ip Office Parameters
PSTN_VM_NUM is used with IP Office and third-party SIP call control environments instead of MSGNUM. ® New parameters supported on both IP Office and Avaya Aura ™ The following table lists the new parameters supported on Avaya Vantage for both IP Office and ® Avaya Aura Parameter... - Page 176 .............53 device configuration checklist ..........black list ................Device Enrollment Services ..........37 device layout Avaya Vantage K155 ............ K165 and K175 standard Avaya Vantage device ..camera .................24 device settings LED states ..............file server ..............certificates ................48 device upgrade ..............
- Page 177 ..............layout setting up address ............Avaya Vantage K155 ............ file server configuration ............40 K165 and K175 standard Avaya Vantage device ..file server configuration checklist .........38 legal notices ................finding content on documentation portal ......101 LLDP firmware got corrupted ............97...
-
Page 178: Upgrade Related Parameters
..............97 related documentation ............requirements hardware ...............27 uninstall pushed applications ..........76 software ................ unknown sources ..............79 reset a device to factory settings ......... unpin ..................™ September 2018 Installing and Administering Avaya Vantage Comments on this document? infodev@avaya.com... - Page 179 LED indication .............. multifunction button functionality ........specifications ..............wireless module ..............worksheets DHCP settings worksheet ..........30 settings file worksheet ..........System Manager user profile worksheet ...... ™ September 2018 Installing and Administering Avaya Vantage Comments on this document? infodev@avaya.com...
Need help?
Do you have a question about the Vantage K175 and is the answer not in the manual?
Questions and answers