Avaya 9600 Series Manual
For ip office
Hide thumbs
Also See for 9600 Series:
- Using manual (51 pages) ,
- Quick reference (2 pages) ,
- User manual (162 pages)

Related Manuals for Avaya 9600 Series


Summary of Contents for Avaya 9600 Series
- Page 1 IP Office Using 9600 Series Phones on Avaya IP Office Release 11.1 Issue 6 November 2021...
- Page 2 Documentation, or as authorized by Avaya in writing. A “Unit” means SUCCESSOR SITE AS DESIGNATED BY AVAYA, AND ARE the unit on which Avaya, at its sole discretion, bases the pricing of its APPLICABLE TO ANYONE WHO ACCESSES OR USES THE licenses and can be, without limitation, an agent, port or user, an e- HOSTED SERVICE.
- Page 3 INFORMATION FOR H.264 (AVC) AND H.265 (HEVC) CODECS written consent of Avaya can be a criminal, as well as a civil offense MAY BE OBTAINED FROM MPEG LA, L.L.C. SEE HTTP:// under the applicable law.
- Page 4 The trademarks, logos and service marks (“Marks”) displayed in this site, the Documentation, Hosted Service(s), and product(s) provided by Avaya are the registered or unregistered Marks of Avaya, its affiliates, its licensors, its suppliers, or other third parties. Users are not permitted to use such Marks without prior written consent from Avaya or such third party which may own the Mark.
-
Page 5: Table Of Contents
........................ 35 Busy Indication ....................... 36 En-Bloc Dialing ................ 36 Dialing a Number in En-Bloc Mode ................ 36 Enabling/Disabling En-Bloc Dialing .................... 37 Withholding Your Number November 2021 Using 9600 Series Phones on Avaya IP Office Comments on this document? infodev@avaya.com... - Page 6 Adding Another Party Without Using Hold ..................... 60 Viewing Conference Details .................... 61 Dropping/Muting Parties .................... 61 Holding a Conference Call ....................... 61 Exiting a Conference .................. 62 Context Sensitive Conferencing November 2021 Using 9600 Series Phones on Avaya IP Office Comments on this document? infodev@avaya.com...
- Page 7 Adding a Contact from Your Call Log ...................... 94 Editing a Contact ...................... 94 Deleting a Contact Chapter 17: Using the Call Log.................. 96 ........................ 96 Missed Calls November 2021 Using 9600 Series Phones on Avaya IP Office Comments on this document? infodev@avaya.com...
- Page 8 Headset Alert Sounds Chapter 21: Handsfree Speaker Operation.............. 119 ...................... 119 Using Handsfree ...................... 120 Speaker Volume ...................... 120 Default Audio Path .................... 121 Automatic Gain Control Chapter 22: Logging In/Out.................... 122 November 2021 Using 9600 Series Phones on Avaya IP Office Comments on this document? infodev@avaya.com...
- Page 9 Setting the Number of Quick Touch Lines ............... 144 Configuring Quick Touch Line Buttons Chapter 26: Volume and Sound.................. 146 ......................... 146 Button Clicks ........................ 147 Error Tones ...................... 147 Ringer Volume ...................... 147 Handset Volume November 2021 Using 9600 Series Phones on Avaya IP Office Comments on this document? infodev@avaya.com...
- Page 10 .................. 166 Managing the Memory Cards .................... 168 Reporting System Alarms Chapter 30: The Status Menu.................. 169 ...................... 169 Do Not Disturb ......................... 170 Follow Me To November 2021 Using 9600 Series Phones on Avaya IP Office Comments on this document? infodev@avaya.com...
- Page 11 Chapter 32: Entering Text Characters................ 180 .............. 180 Entering Characters for a Directory Search .............. 180 Entering Additional and Accented Characters ................. 181 Entering Characters for Other Functions November 2021 Using 9600 Series Phones on Avaya IP Office Comments on this document? infodev@avaya.com...
-
Page 12: Part 1: Your Phone
Part 1: Your Phone November 2021 Using 9600 Series Phones on Avaya IP Office Comments on this document? infodev@avaya.com... -
Page 13: Chapter 1: Phone Overview
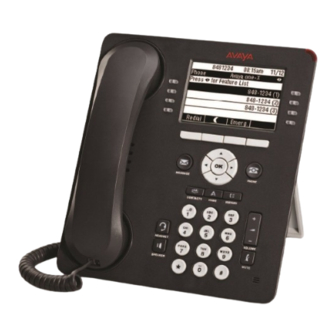
Chapter 1: Phone Overview This guide covers using 9600 Series telephones. These phones are supported on a number of Avaya telephone systems and support different features depending on the telephone system. This guide covers only the features supported on an IP Office telephone system. -
Page 14: Other User Guides
Using a Voicemail Pro IP Office Mode Mailbox Related links Phone Overview on page 13 9608 Telephone The system supports the 9608 and 9608G telephones. The latter support Gigabit Ethernet. November 2021 Using 9600 Series Phones on Avaya IP Office Comments on this document? infodev@avaya.com... - Page 15 • The use of the button lamps depends on the feature assigned to the button. • Buttons programmed with a feature that is not supported by the phone, display as Invalid. Related links Phone Overview on page 13 November 2021 Using 9600 Series Phones on Avaya IP Office Comments on this document? infodev@avaya.com...
-
Page 16: 9611 Telephone
• The use of the button lamps depends on the feature assigned to the button. • Buttons programmed with a feature that is not supported by the phone, display as Invalid. Related links Phone Overview on page 13 November 2021 Using 9600 Series Phones on Avaya IP Office Comments on this document? infodev@avaya.com... -
Page 17: 9621 Telephone
• The use of the button lamps depends on the feature assigned to the button. • Buttons programmed with a feature that is not supported by the phone, display as Invalid. Related links Phone Overview on page 13 November 2021 Using 9600 Series Phones on Avaya IP Office Comments on this document? infodev@avaya.com... -
Page 18: 9641 Telephone
• The use of the button lamps depends on the feature assigned to the button. • Buttons programmed with a feature that is not supported by the phone, display as Invalid. Related links Phone Overview on page 13 November 2021 Using 9600 Series Phones on Avaya IP Office Comments on this document? infodev@avaya.com... -
Page 19: Button Modules
When changing the position of the stand, be sure to check that the stand has locked into the chosen position. Related links Phone Overview on page 13 November 2021 Using 9600 Series Phones on Avaya IP Office Comments on this document? infodev@avaya.com... -
Page 20: Chapter 2: Phone Keys And Display
See Call Soft Keys on page 22. On touch screen phones the labels on the screen can be pressed. Table continues… November 2021 Using 9600 Series Phones on Avaya IP Office Comments on this document? infodev@avaya.com... - Page 21 This key is used to answer and end calls using the phone's handsfree speaker and microphone. The button is lit when you are connected to a call handsfree. Related links Phone Keys and Display on page 20 November 2021 Using 9600 Series Phones on Avaya IP Office Comments on this document? infodev@avaya.com...
-
Page 22: Call Soft Keys
Put your current call on hold and present dial tone for you to dial the number to which you want to transfer the call. ToVM Send an alerting call to your voicemail. Related links Phone Keys and Display on page 20 November 2021 Using 9600 Series Phones on Avaya IP Office Comments on this document? infodev@avaya.com... -
Page 23: Programmable Feature Buttons
Select soft key), on a touch screen you can simply press the required option directly. Related links Phone Keys and Display on page 20 November 2021 Using 9600 Series Phones on Avaya IP Office Comments on this document? infodev@avaya.com... -
Page 24: Chapter 3: Status Display
The top lines of the display can include the following status letters. These letter may appear as a group of letters, for example OG or NG. November 2021 Using 9600 Series Phones on Avaya IP Office Comments on this document? infodev@avaya.com... - Page 25 Cannot Retrieve Settings – This indicates that the phone was not able to retrieve all your user settings. If this happens, it may limit some telephone functions. Contact your system administrator. Related links Status Display on page 24 November 2021 Using 9600 Series Phones on Avaya IP Office Comments on this document? infodev@avaya.com...
-
Page 26: Chapter 4: Appearance Buttons
Related links Call Appearance Buttons on page 27 Bridged Appearance Buttons on page 27 Call Coverage Buttons on page 28 Line Appearance Buttons on page 28 November 2021 Using 9600 Series Phones on Avaya IP Office Comments on this document? infodev@avaya.com... -
Page 27: Call Appearance Buttons
A bridged appearance button shows the state of one of another user's call appearance buttons. It can be used to answer or join calls on that other user's call appearance button. November 2021 Using 9600 Series Phones on Avaya IP Office Comments on this document? infodev@avaya.com... -
Page 28: Call Coverage Buttons
Line Appearance button and not on any other buttons. These calls will also not follow any forwarding. November 2021 Using 9600 Series Phones on Avaya IP Office Comments on this document? infodev@avaya.com... - Page 29 Line Appearance Buttons Related links Appearance Buttons on page 26 November 2021 Using 9600 Series Phones on Avaya IP Office Comments on this document? infodev@avaya.com...
-
Page 30: Part 2: Making And Answering Calls
Part 2: Making and Answering Calls November 2021 Using 9600 Series Phones on Avaya IP Office Comments on this document? infodev@avaya.com... -
Page 31: Chapter 5: Making Calls
• If the call is to an internal user, and they do not answer, you can set a callback by pressing CallBack and then ending the call by pressing Drop. When a callback is set, the next time a November 2021 Using 9600 Series Phones on Avaya IP Office Comments on this document? infodev@avaya.com... -
Page 32: Making Additional Calls
Use the left and right cursor keys to select the type of directory entries shown. • All - All directory entries. • Personal - Your own personal directory entries. November 2021 Using 9600 Series Phones on Avaya IP Office Comments on this document? infodev@avaya.com... -
Page 33: Calling From The Call Log
2. Press Call to call the number displayed in the call record. This option is not available if the caller withheld their number. Related links Making Calls on page 31 November 2021 Using 9600 Series Phones on Avaya IP Office Comments on this document? infodev@avaya.com... -
Page 34: Redialling A Previous Number
2. The number for the most recent outgoing call in your personal call log is redialed. 3. Continue in the same way as for a normal dialed call. Related links Redialling a Previous Number on page 34 November 2021 Using 9600 Series Phones on Avaya IP Office Comments on this document? infodev@avaya.com... -
Page 35: Making A
When enabled, calling those users displays Do Not Disturb or On Another Call on your phone if the call is not diverted to voicemail. Related links Making Calls on page 31 November 2021 Using 9600 Series Phones on Avaya IP Office Comments on this document? infodev@avaya.com... -
Page 36: Bloc Dialing
SPEAKER button to start the call on your phone's handsfree speaker. Related links En-Bloc Dialing on page 36 Enabling/Disabling En-Bloc Dialing You can enable or disable your en-bloc dialing setting through the phone's Features menu. November 2021 Using 9600 Series Phones on Avaya IP Office Comments on this document? infodev@avaya.com... -
Page 37: Withholding Your Number
Whilst talking, you can adjust the volume of the incoming call. The volume is adjusted separately for whichever device is in use (handset, headset or speaker). November 2021 Using 9600 Series Phones on Avaya IP Office Comments on this document? infodev@avaya.com... -
Page 38: Muting A Call
• To end the call connected on the phone's speaker, press the SPEAKER key. • To end the call connected on the phone's headset, press the HEADSET key. Related links Making Calls on page 31 November 2021 Using 9600 Series Phones on Avaya IP Office Comments on this document? infodev@avaya.com... -
Page 39: Chapter 6: Answering Calls
• To answer the call using the handset, lift the handset. • To answer the call handsfree, press the SPEAKER key. • To answer the call on a headset, press the HEADSET key. November 2021 Using 9600 Series Phones on Avaya IP Office Comments on this document? infodev@avaya.com... -
Page 40: Answering Another Call
Related links Answering Calls on page 39 November 2021 Using 9600 Series Phones on Avaya IP Office Comments on this document? infodev@avaya.com... -
Page 41: Diverting A Call To Voicemail
- Else, the call continues to ring (drop has no effect). • If the call is returning from being held or parked for too long, you cannot drop it. November 2021 Using 9600 Series Phones on Avaya IP Office Comments on this document? infodev@avaya.com... -
Page 42: Page Calls
• The soft keys at the bottom of the display automatically change to reflect actions that can be performed on the call, if any, associated with the currently highlighted button. November 2021 Using 9600 Series Phones on Avaya IP Office Comments on this document? infodev@avaya.com... -
Page 43: Using Call Pickup
To use a short code, you may have to put your currently call on hold. November 2021 Using 9600 Series Phones on Avaya IP Office Comments on this document? infodev@avaya.com... - Page 44 • Pickup a Group Members Call: *53*N# – Pickup a call ringing the members of a group (N). This does not necessarily have to be a group call. Related links Answering Calls on page 39 November 2021 Using 9600 Series Phones on Avaya IP Office Comments on this document? infodev@avaya.com...
-
Page 45: Chapter 7: Redialling
3. Continue in the same way as for a normal dialed call. Related links Redialling a Previous Number on page 34 Redialling on page 45 November 2021 Using 9600 Series Phones on Avaya IP Office Comments on this document? infodev@avaya.com... -
Page 46: Redialling A Previous Number
• Last Dialled – In this mode, pressing Redial immediately repeats your most recent outgoing call. 5. To change the mode, press Change. 6. When the desired mode is displayed, press Save. Related links Redialling on page 45 November 2021 Using 9600 Series Phones on Avaya IP Office Comments on this document? infodev@avaya.com... -
Page 47: Chapter 8: Transferring Calls
Related links Transferring a Call to Voicemail on page 48 Transferring a Held Call on page 48 Transferring a Call to Your Mobile on page 49 November 2021 Using 9600 Series Phones on Avaya IP Office Comments on this document? infodev@avaya.com... -
Page 48: Transferring A Call To Voicemail
• Press the Transfer soft key and enter the destination manually using the numerical keypad and press Complete. • Alternatively, press Dir to select a destination from the directory or use the Redial option, if applicable. November 2021 Using 9600 Series Phones on Avaya IP Office Comments on this document? infodev@avaya.com... -
Page 49: Transferring A Call To Your Mobile
• To do this during a call, press the PHONE key and then press Features. 2. Use the cursor keys to select Transfer to Mobile. Related links Transferring Calls on page 47 November 2021 Using 9600 Series Phones on Avaya IP Office Comments on this document? infodev@avaya.com... -
Page 50: Chapter 9: Holding Calls
You are also still listed as a member of the conference call in the conference details. November 2021 Using 9600 Series Phones on Avaya IP Office Comments on this document? infodev@avaya.com... -
Page 51: Holding A Call
The current call is automatically put on hold and the previously held call is connected. November 2021 Using 9600 Series Phones on Avaya IP Office Comments on this document? infodev@avaya.com... -
Page 52: Transferring A Held Call
Held calls that are not pending transfer are not affected. Moreover, it is not possible to have more than one call 'on hold pending transfer'. Related links Transferring Calls on page 47 November 2021 Using 9600 Series Phones on Avaya IP Office Comments on this document? infodev@avaya.com... - Page 53 Transferring a Held Call Holding Calls on page 50 November 2021 Using 9600 Series Phones on Avaya IP Office Comments on this document? infodev@avaya.com...
-
Page 54: Chapter 10: Parking Calls
To use a short code, you may have to put your currently call on hold. November 2021 Using 9600 Series Phones on Avaya IP Office Comments on this document? infodev@avaya.com... -
Page 55: Parking Calls (Features Menu)
If there are any calls parked against your phone, you can view and unpark them via the Status menu. • Your system administrator can configure whether you can access this menu. November 2021 Using 9600 Series Phones on Avaya IP Office Comments on this document? infodev@avaya.com... -
Page 56: Park & Page
3. There are several methods by which you can select the user or hunt group that you want to page: • Select one of the pre-configured hunt groups and press Page. November 2021 Using 9600 Series Phones on Avaya IP Office Comments on this document? infodev@avaya.com... - Page 57 • Dial the extension number of the user or hunt group that you want to page and then press Page. Related links Parking Calls on page 54 November 2021 Using 9600 Series Phones on Avaya IP Office Comments on this document? infodev@avaya.com...
-
Page 58: Chapter 11: Conferencing
• If they do not want to join the call or do not answer, press Drop. Then press the appearance key of the previously held call to reconnect to that call. November 2021 Using 9600 Series Phones on Avaya IP Office Comments on this document? infodev@avaya.com... -
Page 59: Turning A Normal Call Into A Conference
• If they do not want to join the call or do not answer, press Drop. Then press the appearance key of the previously held call to reconnect to that call. Related links Conferencing on page 58 November 2021 Using 9600 Series Phones on Avaya IP Office Comments on this document? infodev@avaya.com... -
Page 60: Adding Another Party Without Using Hold
• To add another party to the conference without putting the conference on hold, press Add. • To return to the call display, press the Back soft key. Related links Conferencing on page 58 November 2021 Using 9600 Series Phones on Avaya IP Office Comments on this document? infodev@avaya.com... -
Page 61: Dropping/Muting Parties
• If you are the only internal user in the conference, depending on your telephone system's configuration, dropping yourself might end the conference. Consult your system administrator for details. November 2021 Using 9600 Series Phones on Avaya IP Office Comments on this document? infodev@avaya.com... -
Page 62: Context Sensitive Conferencing
Call held pending transfer Conferences the connected call – and the held pending transfer call. Any other held calls are unaffected. Table continues… November 2021 Using 9600 Series Phones on Avaya IP Office Comments on this document? infodev@avaya.com... -
Page 63: Conference Short Codes
That is indicated by N in the short codes shown below. • For a list of other common dialing short codes, see Short Codes on page 159. November 2021 Using 9600 Series Phones on Avaya IP Office Comments on this document? infodev@avaya.com... - Page 64 • Conference Held Calls: *47 – Start a conference between yourself and any calls that you have on hold. Related links Conferencing on page 58 November 2021 Using 9600 Series Phones on Avaya IP Office Comments on this document? infodev@avaya.com...
-
Page 65: Part 3: Redirecting Your Calls
- Mobile Twinning – Ring on your extension and an external number. - Fallback Twinning – Ring on an external number when the system cannot detect a connection to your normal phone. November 2021 Using 9600 Series Phones on Avaya IP Office Comments on this document? infodev@avaya.com... - Page 66 Forward on No Answer – – Forward Unconditional Do Not Disturb – – – Twinning Internal Mobile – – Fallback – – 1. Configured by your system administrator. November 2021 Using 9600 Series Phones on Avaya IP Office Comments on this document? infodev@avaya.com...
-
Page 67: Chapter 12: Forwarding Calls
• If you also have voicemail enabled , if the forwarded call is still unanswered, the system redirects the call to voicemail. Note, this is not always possible for calls that have been forwarded to an external number. November 2021 Using 9600 Series Phones on Avaya IP Office Comments on this document? infodev@avaya.com... -
Page 68: Forward Unconditional (Status Menu)
• To switch off forward unconditional, press the Off soft key. • To change the forwarding settings, press the Details soft key. 3. Press Save. Related links Forwarding Calls on page 67 November 2021 Using 9600 Series Phones on Avaya IP Office Comments on this document? infodev@avaya.com... -
Page 69: Forward Unconditional (Features Menu)
• To do this during a call, press the PHONE key and then press Features. 2. Use the cursor keys to select Forward. 3. Use the cursor keys to select Forward Busy/No Answer. November 2021 Using 9600 Series Phones on Avaya IP Office Comments on this document? infodev@avaya.com... -
Page 70: Forward On No Answer (Status Menu)
• To change the destination, highlight Destination and press Edit. Enter the number and press Select. • Press Save to save any changes. Related links Forwarding Calls on page 67 November 2021 Using 9600 Series Phones on Avaya IP Office Comments on this document? infodev@avaya.com... -
Page 71: Forward On Busy (Status Menu)
That is indicated by N in the short codes shown below. • For a list of other common dialing short codes, see Short Codes on page 159. November 2021 Using 9600 Series Phones on Avaya IP Office Comments on this document? infodev@avaya.com... - Page 72 • Cancel All Forwarding: *00 – Switch off any forwarding (includes 'forward unconditional,' 'forward on busy,' 'forward on no answer,' 'follow me,' and 'do not disturb'). Related links Forwarding Calls on page 67 November 2021 Using 9600 Series Phones on Avaya IP Office Comments on this document? infodev@avaya.com...
-
Page 73: Chapter 13: Do Not Disturb
2. Use cursor keys to select Call Settings. 3. Use the cursor keys to select Do Not Disturb. 4. Press the Change button to select On or Off. November 2021 Using 9600 Series Phones on Avaya IP Office Comments on this document? infodev@avaya.com... -
Page 74: Dnd Off (Status Menu)
- If your system uses an external dialing prefix to make outgoing calls, add the prefix when adding an external number as an exception. • To remove an existing number, highlight it and press Remove. 4. Press Done when completed. November 2021 Using 9600 Series Phones on Avaya IP Office Comments on this document? infodev@avaya.com... -
Page 75: Do Not Disturb Short Codes
• Cancel All Forwarding: *00 – Switch off any forwarding (includes 'forward unconditional,' 'forward on busy,' 'forward on no answer,' 'follow me,' and 'do not disturb'). Related links Do Not Disturb on page 73 November 2021 Using 9600 Series Phones on Avaya IP Office Comments on this document? infodev@avaya.com... -
Page 76: Chapter 14: Follow Me
4. Dial the number of another user. When it matches a user, their name is displayed. Alternatively, use the Dir soft key to select a user from the directory. November 2021 Using 9600 Series Phones on Avaya IP Office Comments on this document? infodev@avaya.com... -
Page 77: Follow Me (Status Menu)
3. Use the cursor keys to select Follow Me Here. 4. Use the menu to add or remove users: • Use the up and down cursor keys to scroll through the names. November 2021 Using 9600 Series Phones on Avaya IP Office Comments on this document? infodev@avaya.com... -
Page 78: Follow Me Here (Status Menu)
That is indicated by N in the short codes shown below. • For a list of other common dialing short codes, see Short Codes on page 159. November 2021 Using 9600 Series Phones on Avaya IP Office Comments on this document? infodev@avaya.com... - Page 79 • Cancel All Forwarding: *00 – Switch off any forwarding (includes 'forward unconditional,' 'forward on busy,' 'forward on no answer,' 'follow me,' and 'do not disturb'). Related links Follow Me on page 76 November 2021 Using 9600 Series Phones on Avaya IP Office Comments on this document? infodev@avaya.com...
-
Page 80: Chapter 15: Twinning
Reclaiming a Twinned Call on page 82 Switching Mobile Twinning Off on page 82 Switching Fallback Twinning On on page 83 Switching Fallback Twinning Off on page 83 November 2021 Using 9600 Series Phones on Avaya IP Office Comments on this document? infodev@avaya.com... -
Page 81: Switching Mobile Twinning On
• Use the Bksp to remove the last digit of the existing number. • Use Clear to remove the whole number. • Dial the number you want to use for twinning and press Select. November 2021 Using 9600 Series Phones on Avaya IP Office Comments on this document? infodev@avaya.com... -
Page 82: Transferring A Call To Your Mobile
Switching Mobile Twinning Off If you have been configured as a mobile twinning user, you can use the status menu to switch mobile twinning mode off. November 2021 Using 9600 Series Phones on Avaya IP Office Comments on this document? infodev@avaya.com... -
Page 83: Switching Fallback Twinning On
Fallback twinning is used when the system cannot detect the normal connection to your phone. The twinning menu is only available if you have been configured by the system administrator to be able to use mobile twinning. November 2021 Using 9600 Series Phones on Avaya IP Office Comments on this document? infodev@avaya.com... - Page 84 4. If no twinning number has been set yet, select Destination and click Edit. Enter the number required and press Select. 5. Select Fallback Twinning. Press Off. 6. Press Save. Related links Twinning on page 80 November 2021 Using 9600 Series Phones on Avaya IP Office Comments on this document? infodev@avaya.com...
-
Page 85: Part 4: Contacts And Call Log
Part 4: Contacts and Call Log November 2021 Using 9600 Series Phones on Avaya IP Office Comments on this document? infodev@avaya.com... -
Page 86: Chapter 16: Contacts
• Some external contacts are entered into the telephone system configuration by the system administrator. • Other external contacts are those imported by the telephone system from other directory sources. November 2021 Using 9600 Series Phones on Avaya IP Office Comments on this document? infodev@avaya.com... -
Page 87: How The Directory Search Works
• At any time, you can scroll the list of matches and select one of the matches or press another dialpad key to improve the matching further. For example, to search for "Henry Jones", you can dial HENRY by pressing 43679. November 2021 Using 9600 Series Phones on Avaya IP Office Comments on this document? infodev@avaya.com... - Page 88 Sales Help John Smith Tony George Simon Henricks Sales Support Sales Help Alternatively to search for "Henry Jones", you could dial JONES by pressing 56637. November 2021 Using 9600 Series Phones on Avaya IP Office Comments on this document? infodev@avaya.com...
- Page 89 However, the change applies to all phones on the system. Related links Contacts on page 86 November 2021 Using 9600 Series Phones on Avaya IP Office Comments on this document? infodev@avaya.com...
-
Page 90: Managing External Contacts
2. When the required entry is highlighted, press Details to display the name, number and type of contact. 3. Use the up and down cursor keys to scroll through the contacts. November 2021 Using 9600 Series Phones on Avaya IP Office Comments on this document? infodev@avaya.com... -
Page 91: Making A Call From The Directory
"Jason") and with KAR (for example "Karl") plus any other letter combinations from those 3 key presses. See How the Directory Search Works on page 87. • To remove all the characters entered so far, press Clear. November 2021 Using 9600 Series Phones on Avaya IP Office Comments on this document? infodev@avaya.com... -
Page 92: Using The Directory For Other Functions
• If you have been configured as a system phone user by the system administrator, then you can also add, edit and delete some external directory contacts. November 2021 Using 9600 Series Phones on Avaya IP Office Comments on this document? infodev@avaya.com... -
Page 93: Adding A Contact From Your Call Log
5. When the name and number are set as required, press the Save soft key. To return without saving the name and number, press the Cancel soft key. Related links Contacts on page 86 November 2021 Using 9600 Series Phones on Avaya IP Office Comments on this document? infodev@avaya.com... -
Page 94: Editing A Contact
• If you have been configured as a system phone user by the system administrator, then you can also add, edit and delete some external directory contacts. November 2021 Using 9600 Series Phones on Avaya IP Office Comments on this document? infodev@avaya.com... - Page 95 2. Locate the required entry and press Details. 3. Press More and then Delete. 4. Press Delete again to confirm the action. Related links Contacts on page 86 November 2021 Using 9600 Series Phones on Avaya IP Office Comments on this document? infodev@avaya.com...
-
Page 96: Chapter 17: Using The Call Log
Related links Using the Call Log on page 96 November 2021 Using 9600 Series Phones on Avaya IP Office Comments on this document? infodev@avaya.com... -
Page 97: Missed Group Calls
• +Contact – Add the currently highlighted call log record to your personal contacts. 3. To exit the call log, press PHONE button. Related links Using the Call Log on page 96 November 2021 Using 9600 Series Phones on Avaya IP Office Comments on this document? infodev@avaya.com... -
Page 98: Making A Call From Your Call Log
• Number - The number of the caller if available. • Time and Date - The time of the call. • Call Type Icon - The type of call record. November 2021 Using 9600 Series Phones on Avaya IP Office Comments on this document? infodev@avaya.com... -
Page 99: Deleting A Call From Your Call Log
Use the up/down cursor keys to scroll through the records. 2. When the required record is highlight, press More and then press Delete. Related links Using the Call Log on page 96 November 2021 Using 9600 Series Phones on Avaya IP Office Comments on this document? infodev@avaya.com... -
Page 100: Deleting The Whole Call Log
5. When the name and number are set as required, press the Save soft key. To return without saving the name and number, press the Cancel soft key. November 2021 Using 9600 Series Phones on Avaya IP Office Comments on this document? infodev@avaya.com... - Page 101 Adding a Call Log Call to Your Contacts Related links Using the Call Log on page 96 November 2021 Using 9600 Series Phones on Avaya IP Office Comments on this document? infodev@avaya.com...
-
Page 102: Part 5: Voicemail
Part 5: Voicemail November 2021 Using 9600 Series Phones on Avaya IP Office Comments on this document? infodev@avaya.com... -
Page 103: Chapter 18: Voicemail
The system administrator can also configure it so that you receive new message waiting indications for hunt groups or other users. Related links Voicemail on page 103 November 2021 Using 9600 Series Phones on Avaya IP Office Comments on this document? infodev@avaya.com... -
Page 104: Accessing The Visual Voice Menus
7. Use the soft keys to control the playback actions for the currently highlighted message: • To select the next message or previous message, use the up and down cursor keys. November 2021 Using 9600 Series Phones on Avaya IP Office Comments on this document? infodev@avaya.com... -
Page 105: Leaving A Message
Send. • Play – Listen to the recording. • Cancel – Abandon the message. Related links Voicemail on page 103 November 2021 Using 9600 Series Phones on Avaya IP Office Comments on this document? infodev@avaya.com... -
Page 106: Using Voicemail Email
Done. 2. The Visual Voice menu is displayed. 3. Use the up and down cursor keys to select Greeting and press Select. November 2021 Using 9600 Series Phones on Avaya IP Office Comments on this document? infodev@avaya.com... -
Page 107: Record Your Name
• Delete - Delete your current name. • Cancel - Cancel any new recording and return to the main visual voice menu. Related links Voicemail on page 103 November 2021 Using 9600 Series Phones on Avaya IP Office Comments on this document? infodev@avaya.com... -
Page 108: Changing Your Voicemail Code
3. Use the up and down cursor keys to highlight Voicemail. 4. Press the Change to switch between On or Off. 5. Press Save to save the change. Related links Voicemail on page 103 November 2021 Using 9600 Series Phones on Avaya IP Office Comments on this document? infodev@avaya.com... -
Page 109: Transferring A Call To Voicemail
These are useful as they can be dialed from any phone on the system. For example, this allows you to login at a basic analog extension and still control a number of features. November 2021 Using 9600 Series Phones on Avaya IP Office Comments on this document? infodev@avaya.com... -
Page 110: Other Mailbox Guides
Using IP Office Embedded Voicemail Intuity Mode • Using a Voicemail Pro Intuity Mode Mailbox • Using a Voicemail Pro IP Office Mode Mailbox Related links Voicemail on page 103 November 2021 Using 9600 Series Phones on Avaya IP Office Comments on this document? infodev@avaya.com... -
Page 111: Part 6: Other Features
Part 6: Other Features November 2021 Using 9600 Series Phones on Avaya IP Office Comments on this document? infodev@avaya.com... -
Page 112: Chapter 19: Account Codes
3. Press the Done soft key. 4. If the account code was not a valid account code, the Reenter Account menu is displayed. Related links Account Codes on page 112 November 2021 Using 9600 Series Phones on Avaya IP Office Comments on this document? infodev@avaya.com... -
Page 113: Manual Account Code Entry
6. Press the Done soft key. 7. If the account code was not a valid account code, the Failed menu is displayed. Related links Account Codes on page 112 November 2021 Using 9600 Series Phones on Avaya IP Office Comments on this document? infodev@avaya.com... -
Page 114: Chapter 20: Headset Operation
• To mute the call while on the headset: Press the MUTE button. The button remains lit whilst the call is muted. November 2021 Using 9600 Series Phones on Avaya IP Office Comments on this document? infodev@avaya.com... -
Page 115: Headset Caller Volume
By default, when you make a call or answer a call without lifting the handset, the audio is played through the phone's speaker while you speak via the phone's microphone. November 2021 Using 9600 Series Phones on Avaya IP Office Comments on this document? infodev@avaya.com... -
Page 116: Using Bluetooth Headsets
• When on, you can use the Devices option to pair a Bluetooth headset and to select the currently connected headset. Related links Using Bluetooth Headsets on page 116 November 2021 Using 9600 Series Phones on Avaya IP Office Comments on this document? infodev@avaya.com... -
Page 117: Pairing A Bluetooth Headset
If done by mistake, the device needs to be paired again. Related links Using Bluetooth Headsets on page 116 November 2021 Using 9600 Series Phones on Avaya IP Office Comments on this document? infodev@avaya.com... -
Page 118: Headset Alert Sounds
(three clicks) whenever a call is waiting to be answered. 6. When completed, press Save. 7. Press Back/Exit to exit the menus. Related links Headset Operation on page 114 November 2021 Using 9600 Series Phones on Avaya IP Office Comments on this document? infodev@avaya.com... -
Page 119: Chapter 21: Handsfree Speaker Operation
• To switch to handsfree from the handset: Press the SPEAKER button. The button remains lit whilst you have a call connected handsfree. Replace the handset. November 2021 Using 9600 Series Phones on Avaya IP Office Comments on this document? infodev@avaya.com... -
Page 120: Speaker Volume
5. Use the left and right cursor keys to switch between Headset or Speaker. 6. When completed, press Save. 7. Press Back/Exit to exit the menus. Related links Handsfree Speaker Operation on page 119 November 2021 Using 9600 Series Phones on Avaya IP Office Comments on this document? infodev@avaya.com... -
Page 121: Automatic Gain Control
6. To change the highlighted setting, press Toggle. 7. When completed, press Save. 8. Press Back/Exit to exit the menus. Related links Handsfree Speaker Operation on page 119 November 2021 Using 9600 Series Phones on Avaya IP Office Comments on this document? infodev@avaya.com... -
Page 122: Chapter 22: Logging In/Out
Related links Logging In on page 123 Logging Out on page 125 Changing Your Security PIN on page 125 Locking Your Phone on page 126 November 2021 Using 9600 Series Phones on Avaya IP Office Comments on this document? infodev@avaya.com... -
Page 123: Logging In
Enter your extension number and press Next . b. Enter your security PIN (login code). c. Press Done. Related links Logging In on page 123 November 2021 Using 9600 Series Phones on Avaya IP Office Comments on this document? infodev@avaya.com... -
Page 124: Logging In On A "Not Logged In" Phone
4. When you have entered the phone password, press Done. If the details are correct, you user details are loaded into the phone. Related links Logging In on page 123 November 2021 Using 9600 Series Phones on Avaya IP Office Comments on this document? infodev@avaya.com... -
Page 125: Logging Out
2. Use the cursor keys to select Phone User. 3. Use the cursor keys to select Set Security Pin. 4. Enter your current security PIN if you already have one and press Done. November 2021 Using 9600 Series Phones on Avaya IP Office Comments on this document? infodev@avaya.com... -
Page 126: Locking Your Phone
3. Use the up and down cursor keys to highlight Lock. Press the SelectSelect. 4. The phone is now locked and displays Phone Locked. Related links Logging In/Out on page 122 November 2021 Using 9600 Series Phones on Avaya IP Office Comments on this document? infodev@avaya.com... -
Page 127: Unlocking Your Phone
5. Press the Change soft key to change the setting or use the left or right cursor keys. • Disabled - Do not use the inactivity timer. November 2021 Using 9600 Series Phones on Avaya IP Office Comments on this document? infodev@avaya.com... -
Page 128: Login Short Codes
• Log In: *35*N*P# – Log in to a phone using your extension number (N) and login code (P). • Log Out: *36 – Log yourself out from the phone where you are currently logged in. Related links Logging In/Out on page 122 November 2021 Using 9600 Series Phones on Avaya IP Office Comments on this document? infodev@avaya.com... -
Page 129: Chapter 23: Groups
Related links Groups on page 129 Switching Your Group Membership On/Off (Status Menu) on page 130 Switching Your Group Membership On/Off (Features Menu) on page 130 November 2021 Using 9600 Series Phones on Avaya IP Office Comments on this document? infodev@avaya.com... -
Page 130: Switching Your Group Membership On/Off (Status Menu)
• To change your membership to the highlighted group, press Change. • To change your membership to all groups, press More and then press either All Ena or All Dis. November 2021 Using 9600 Series Phones on Avaya IP Office Comments on this document? infodev@avaya.com... -
Page 131: Group Service Status And Fallback
• The system administrator is able to configure whether you have access to the Membership, State and Fallback options of a group. If you are not configured for any groups, the Group menu is not shown November 2021 Using 9600 Series Phones on Avaya IP Office Comments on this document? infodev@avaya.com... -
Page 132: Changing A Group's Service Status (Status Menu)
PHONE key and then press the Status soft key. 2. Use the up and down cursor keys to highlight the hunt group name and your current membership status. November 2021 Using 9600 Series Phones on Avaya IP Office Comments on this document? infodev@avaya.com... -
Page 133: Changing A Group's Fallback Destination
• To change the fallback destination of the currently highlighted hunt group, press Edit. • To change the fallback destination of all the hunt groups, press More and then press Edit All. November 2021 Using 9600 Series Phones on Avaya IP Office Comments on this document? infodev@avaya.com... -
Page 134: Short Codes
• Night Service Status Off: *21*N# – Take a hunt group out of night service status by entering its extension number (N). Related links Group Service Status and Fallback on page 131 November 2021 Using 9600 Series Phones on Avaya IP Office Comments on this document? infodev@avaya.com... -
Page 135: Part 7: Phone Configuration
Part 7: Phone Configuration November 2021 Using 9600 Series Phones on Avaya IP Office Comments on this document? infodev@avaya.com... -
Page 136: Chapter 24: Ringer Controls
The lamp is flashed to indicate a call waiting to be answered. Procedure 1. Press the button. On 9621/9641 phones, select Settings. November 2021 Using 9600 Series Phones on Avaya IP Office Comments on this document? infodev@avaya.com... -
Page 137: Coverage Ring
Related links Ringer Controls on page 136 Ringer Volume You can adjust the ringer volume while the phone is idle or while it is ringing. November 2021 Using 9600 Series Phones on Avaya IP Office Comments on this document? infodev@avaya.com... -
Page 138: Internal Auto-Answer
3. Use the up/down cursor keys to selectt Internal Auto-Answer. 4. To change the setting, press the Change. Related links Ringer Controls on page 136 November 2021 Using 9600 Series Phones on Avaya IP Office Comments on this document? infodev@avaya.com... -
Page 139: Chapter 25: Display Controls
5. Use the left/right cursor keys to adjust the brightness. 6. When completed, press Save. 7. Press Back/Exit to exit the menus. Related links Display Controls on page 139 November 2021 Using 9600 Series Phones on Avaya IP Office Comments on this document? infodev@avaya.com... -
Page 140: Display Contrast
3. Use the up and down cursor keys to highlight Show Last Call Duration. 4. Press the Change button to select On or Off. 5. Press Save. Related links Display Controls on page 139 November 2021 Using 9600 Series Phones on Avaya IP Office Comments on this document? infodev@avaya.com... -
Page 141: Call Timer Display
2. Use the cursor keys to select Options & Settings. 3. Use the cursor keys to select Screen & Sound. 4. Use the Language. 5. Use the scroll through the different languages available. November 2021 Using 9600 Series Phones on Avaya IP Office Comments on this document? infodev@avaya.com... -
Page 142: Auto Display Waiting Call
Visual Voice menu after 10 minutes if idle. Procedure 1. Press the Features soft key if shown. • To do this during a call, press the PHONE key and then press Features. November 2021 Using 9600 Series Phones on Avaya IP Office Comments on this document? infodev@avaya.com... -
Page 143: Quick Touch Lines
3. Use the cursor keys to select Phone Screen Settings. 4. Select Quick Touch Lines. 5. The current settings is shown: • Off – No quick touch rows. November 2021 Using 9600 Series Phones on Avaya IP Office Comments on this document? infodev@avaya.com... -
Page 144: Configuring Quick Touch Line Buttons
- Select the required function from the list and press Select. - Depending on the function, you may need to enter some information such as a target extension number. November 2021 Using 9600 Series Phones on Avaya IP Office Comments on this document? infodev@avaya.com... - Page 145 Note that the label is only shown while editing the label and after you exit the administration menu. 6. When completed, press Back. Related links Quick Touch Lines on page 143 November 2021 Using 9600 Series Phones on Avaya IP Office Comments on this document? infodev@avaya.com...
-
Page 146: Chapter 26: Volume And Sound
4. Use the cursor keys to select Button clicks. 5. When completed, press Save. 6. Press Back/Exit to exit the menus. Related links Volume and Sound on page 146 November 2021 Using 9600 Series Phones on Avaya IP Office Comments on this document? infodev@avaya.com... -
Page 147: Error Tones
1. With the call connected, use the + plus and – minus keys to adjust the volume. 2. The display returns to normal after a few seconds. Related links Volume and Sound on page 146 November 2021 Using 9600 Series Phones on Avaya IP Office Comments on this document? infodev@avaya.com... -
Page 148: Headset Volume
5. Use the cursor keys to switch between Handset, Headset, or Speaker. 6. To change the highlighted setting, press Toggle. 7. When completed, press Save. 8. Press Back/Exit to exit the menus. November 2021 Using 9600 Series Phones on Avaya IP Office Comments on this document? infodev@avaya.com... -
Page 149: Default Handsfree Audio Path
5. Use the left and right cursor keys to switch between Headset or Speaker. 6. When completed, press Save. 7. Press Back/Exit to exit the menus. Related links Volume and Sound on page 146 November 2021 Using 9600 Series Phones on Avaya IP Office Comments on this document? infodev@avaya.com... -
Page 150: Chapter 27: Programmable Feature Buttons
• To remove the existing function from a button press Erase. • You can also press More and use the Copy and Paste options to copy the settings of an existing button to another button. November 2021 Using 9600 Series Phones on Avaya IP Office Comments on this document? infodev@avaya.com... -
Page 151: Programmable Button Features
155 Page Button on page 155 Park and Page Button on page 155 Ringer Off Button on page 155 Self-Administer Button on page 156 November 2021 Using 9600 Series Phones on Avaya IP Office Comments on this document? infodev@avaya.com... -
Page 152: Abbreviated Dial Button
A button configured with this action can be used to switch 'internal auto-answer' on or off. When 'internal auto-answer' is on, the button's red lamp is lit. Pressing the button again turns 'internal auto-answer' off. November 2021 Using 9600 Series Phones on Avaya IP Office Comments on this document? infodev@avaya.com... -
Page 153: Call Forward All Button
The button can be set with a target user number or left blank for number entry when the button is pressed. The button's red lamp is lit when a call is parked. The button can be pressed again to retrieve the call. November 2021 Using 9600 Series Phones on Avaya IP Office Comments on this document? infodev@avaya.com... -
Page 154: Call Pickup Button
Programmable Button Features on page 151 Flash Hook Button A button configured for this action sends a flash hook signal to a currently connected analog line. November 2021 Using 9600 Series Phones on Avaya IP Office Comments on this document? infodev@avaya.com... -
Page 155: Group Button
When you turn the ringer off, visual alerting is also turned off. When the ringer has been turned off, the button's red lamp is lit. Pressing the button again turns the ringer on. Related links Programmable Button Features on page 151 November 2021 Using 9600 Series Phones on Avaya IP Office Comments on this document? infodev@avaya.com... -
Page 156: Self-Administer Button
• If pressed while connected to a call on the phone, the system attempts to transfer the call to the twinned destination. You do not need twinning switched on to use this feature. November 2021 Using 9600 Series Phones on Avaya IP Office Comments on this document? infodev@avaya.com... -
Page 157: User Button
- Intrude – Join the user's current call, turning it into a conference call. - Listen – Start silent monitoring of the user's call. Related links Programmable Button Features on page 151 November 2021 Using 9600 Series Phones on Avaya IP Office Comments on this document? infodev@avaya.com... -
Page 158: Part 8: Miscellaneous
Part 8: Miscellaneous November 2021 Using 9600 Series Phones on Avaya IP Office Comments on this document? infodev@avaya.com... -
Page 159: Chapter 28: Short Codes
• Cancel All Forwarding: *00 – Switch off any forwarding (includes 'forward unconditional,' 'forward on busy,' 'forward on no answer,' 'follow me,' and 'do not disturb'). November 2021 Using 9600 Series Phones on Avaya IP Office Comments on this document? infodev@avaya.com... - Page 160 • Log Out: *36 – Log yourself out from the phone where you are currently logged in. Voicemail • Check Messages: *17 – Access mailboxes to check for messages. November 2021 Using 9600 Series Phones on Avaya IP Office Comments on this document? infodev@avaya.com...
- Page 161 • Voicemail Ringback On: *48 – Have voicemail ring your phone when you have any new messages. It rings after you next use the phone. • Voicemail Ringback Off: *49 – Switch off ringback. November 2021 Using 9600 Series Phones on Avaya IP Office Comments on this document? infodev@avaya.com...
-
Page 162: Chapter 29: System Administration
4. Enter your security PIN (login code) and press Done. 5. Use the cursor keys to select System Information. 6. The system displays information about itself. Related links System Administration on page 162 November 2021 Using 9600 Series Phones on Avaya IP Office Comments on this document? infodev@avaya.com... -
Page 163: Checking The Time Server Status
4. Enter your security PIN (login code) and press Done. 5. Use the cursor keys to select Date. 6. The current date being used by the telephone system is displayed. November 2021 Using 9600 Series Phones on Avaya IP Office Comments on this document? infodev@avaya.com... -
Page 164: Setting The Time
9. To set the time as the new time to be used by the telephone system, press Set. Related links System Administration on page 162 November 2021 Using 9600 Series Phones on Avaya IP Office Comments on this document? infodev@avaya.com... -
Page 165: Setting The Time Offset
• A shutdown must always be used to switch off the system. Simply removing the power cord or switching off the power input may cause errors. November 2021 Using 9600 Series Phones on Avaya IP Office Comments on this document? infodev@avaya.com... -
Page 166: Managing The Memory Cards
The memory card menu allows you to check the status of the memory card or cards fitted to your telephone system and to perform a number of actions on the cards. November 2021 Using 9600 Series Phones on Avaya IP Office Comments on this document? infodev@avaya.com... - Page 167 System card in the system control unit. • Upgrade Binaries (IP500 V2) – Copy software files from an Option card to the System card in the system control unit. November 2021 Using 9600 Series Phones on Avaya IP Office Comments on this document? infodev@avaya.com...
-
Page 168: Reporting System Alarms
• If displayed, press Admin to see additional information. • If displayed, press Clear to clear the alarm. Related links System Administration on page 162 November 2021 Using 9600 Series Phones on Avaya IP Office Comments on this document? infodev@avaya.com... -
Page 169: Chapter 30: The Status Menu
2. Use the cursor keys to select Do Not Disturb. 3. To clear the 'do not disturb' setting, press the Off soft key. Related links The Status Menu on page 169 November 2021 Using 9600 Series Phones on Avaya IP Office Comments on this document? infodev@avaya.com... -
Page 170: Follow Me To
If your phone is set to 'forward on busy' you can clear or change the forward settings through the Status menu. • Your system administrator can configure whether you can access this menu. November 2021 Using 9600 Series Phones on Avaya IP Office Comments on this document? infodev@avaya.com... -
Page 171: Forward On No Answer
• To select which calls are forwarded, highlight Call type. Press Change to change the option between All Calls or External Only. • To change the destination, highlight Destination and press Edit. Enter the number and press Select. November 2021 Using 9600 Series Phones on Avaya IP Office Comments on this document? infodev@avaya.com... -
Page 172: Forward Unconditional
PHONE key and then press the Status soft key. 2. Use the up and down cursor keys to highlight Fwd To Here. Related links The Status Menu on page 169 November 2021 Using 9600 Series Phones on Avaya IP Office Comments on this document? infodev@avaya.com... -
Page 173: Group Membership
A hunt group can also be put into and out of night service automatically by the telephone system using a time profile. November 2021 Using 9600 Series Phones on Avaya IP Office Comments on this document? infodev@avaya.com... -
Page 174: Switch Mobile Twinning Off
2. If you have any parked calls, the Parks... option is displayed. The option is not present if you do not have calls parked against your extension. November 2021 Using 9600 Series Phones on Avaya IP Office Comments on this document? infodev@avaya.com... -
Page 175: System Alarms
• If displayed, press Admin to see additional information. • If displayed, press Clear to clear the alarm. Related links The Status Menu on page 169 November 2021 Using 9600 Series Phones on Avaya IP Office Comments on this document? infodev@avaya.com... -
Page 176: Chapter 31: Menus
See The Status Menu on page 169. Related links Menus on page 176 Features Menu This menu is accessed by pressing the Features soft key. November 2021 Using 9600 Series Phones on Avaya IP Office Comments on this document? infodev@avaya.com... -
Page 177: A Menu
The menu is accessed by pressing the key. On some phones, press the key and then select Settings. Note that the options available vary between different models of telephone. November 2021 Using 9600 Series Phones on Avaya IP Office Comments on this document? infodev@avaya.com... -
Page 178: Menu Access Control
• Forwarding Functions – Controls whether you can access the phone's menu options for forwarding and follow me functions. November 2021 Using 9600 Series Phones on Avaya IP Office Comments on this document? infodev@avaya.com... - Page 179 • System Administration Controls – The System Administration option is only shown if you have been configured as a 'System Phone' user. Related links Menus on page 176 November 2021 Using 9600 Series Phones on Avaya IP Office Comments on this document? infodev@avaya.com...
-
Page 180: Chapter 32: Entering Text Characters
À, Á, Á, Ã, Ä, Å and Ç. The set of additional unmarked characters matched varies depending on the language settings of your system. November 2021 Using 9600 Series Phones on Avaya IP Office Comments on this document? infodev@avaya.com... -
Page 181: Entering Characters For Other Functions
• Use the left and right cursor keys to move the cursor. • Press Bksp to delete the character before the cursor. Related links Entering Text Characters on page 180 November 2021 Using 9600 Series Phones on Avaya IP Office Comments on this document? infodev@avaya.com... - Page 182 Suppress Digits ............Attention Ring ..............Twinning ..............Auto Display Waiting Call ...........142 User ................Auto Lock ................127 Button Module ..............19 Auto-Answer ..............Buttons .................20, November 2021 Using 9600 Series Phones on Avaya IP Office Comments on this document? infodev@avaya.com...
- Page 183 Buttons ............... Call from ............... Contacts ............... Edit ................Feature Buttons ............Make a call ..............Programmable Buttons ..........150 Search ..............87, Code Display ................. 24, November 2021 Using 9600 Series Phones on Avaya IP Office Comments on this document? infodev@avaya.com...
- Page 184 Idle Line Preference .............26 Features Menu ..............176 Ignore ...................41 Flash Hook Button ............. Internal Auto-Answer ............Follow Me ..............65, Internal Twinning ............65, Short Codes ..............78 November 2021 Using 9600 Series Phones on Avaya IP Office Comments on this document? infodev@avaya.com...
- Page 185 Group calls ..............9621 ................17 Mobile 9641 ................18 Mobile Twin Button ............. Auto Lock ..............127 Mobile Twinning ............65 Language ..............141 Number .................81 Lock ................Reclaim call ..............November 2021 Using 9600 Series Phones on Avaya IP Office Comments on this document? infodev@avaya.com...
- Page 186 Ringing Line Preference ............9608 ................14 9611 ................9621 ................17 9641 ................18 SBM24 ................. Auto Lock ..............127 Screen ................Lock ................Auto-Return ..............Unlock .................127 November 2021 Using 9600 Series Phones on Avaya IP Office Comments on this document? infodev@avaya.com...
- Page 187 Transfer to ..............Visual Voice ..............Voicemail Email ............Voicemail guides ..............Volume ................146 Call ................Handset ..............Handsfree ..............Headset ...............115, Ringer ..............137, November 2021 Using 9600 Series Phones on Avaya IP Office Comments on this document? infodev@avaya.com...
Need help?
Do you have a question about the 9600 Series and is the answer not in the manual?
Questions and answers