Agilent Technologies ESA-E Series User Manual
Esa spectrum analyzers, 9 khz-1.5/3.0/6.7/13.2/26.5 ghz
Hide thumbs
Also See for ESA-E Series:
- Programmer's manual (379 pages) ,
- User and programming manual (170 pages) ,
- User manual (46 pages)
Table of Contents
Advertisement
This guide documents firmware revision A.05.xx
This manual provides documentation for the following instruments:
Manufacturing Part Number: E4401-90189
Supersedes E4401-90174 Includes changes documented in E4401-90254
User's Guide
Agilent Technologies
ESA Spectrum Analyzers
Agilent Technologies ESA-E Series
E4401B (9 kHz–1.5 GHz)
E4402B (9 kHz–3.0 GHz)
E4404B (9 kHz–6.7 GHz)
E4405B (9 kHz–13.2 GHz)
E4407B (9 kHz–26.5 GHz)
Agilent Technologies ESA-L Series
E4411B (9 kHz–1.5 GHz)
E4403B (9 kHz–3.0 GHz)
E4408B (9 kHz–26.5 GHz)
Printed in USA
August 2000
© Copyright 2000 Agilent Technologies
and
Advertisement
Table of Contents

Related Manuals for Agilent Technologies ESA-E Series


Summary of Contents for Agilent Technologies ESA-E Series
- Page 1 User’s Guide Agilent Technologies ESA Spectrum Analyzers This guide documents firmware revision A.05.xx This manual provides documentation for the following instruments: Agilent Technologies ESA-E Series E4401B (9 kHz–1.5 GHz) E4402B (9 kHz–3.0 GHz) E4404B (9 kHz–6.7 GHz) E4405B (9 kHz–13.2 GHz) E4407B (9 kHz–26.5 GHz)
- Page 2 The information contained in this document is subject to change without notice. Agilent Technologies makes no warranty of any kind with regard to this material, including but not limited to, the implied warranties of merchantability and fitness for a particular purpose. Agilent...
- Page 3 Agilent Technologies from another country. Agilent Technologies warrants that its software and firmware designated by Agilent Technologies for use with an instrument will execute its programming instructions when properly installed on that instrument. Agilent Technologies does not warrant that the operation of the instrument, or software, or firmware will be uninterrupted or...
- Page 4 CONTRACT, TORT, OR ANY OTHER LEGAL THEORY. Where to Find the Latest Information Documentation is updated periodically. For the latest information about Agilent Technologies ESA Spectrum Analyzers, including firmware upgrades and application information, please visit the following Internet URL: http://www.agilent.com/find/esa...
-
Page 5: Table Of Contents
Contents 1. Preparing for Use Initial Inspection ............1-2 Power Requirements . - Page 6 Contents Procedure (10 MHz to 500 MHz) E4401B and E4411B ......3-6 Procedure (501 MHz to 1.0 GHz) E4401B and E4411B ......3-7 Procedure (1.01 GHz to 1.5 GHz) E4401B and E4411B .
- Page 7 How to Contact Agilent Technologies ........
- Page 8 Contents –299 to –200: Execution Error Messages ..........4-29 Execution Error Message Descriptions .
- Page 9 Contents Source ..............6-76 SPAN X Scale .
- Page 10 Contents RF Communications Hardware (Option B7E) ....... . 7-10 Distance to Fault Accessory Kit (Option B7K) ....... 7-10 FM Demodulation (Option BAA) .
-
Page 11: Preparing For Use
Preparing for Use This chapter provides information on how to inspect your analyzer when it arrives and what to expect when it is first powered on. It also includes the analyzer power requirements. -
Page 12: Initial Inspection
If the contents are incomplete, or the analyzer does not pass the performance tests, notify the nearest Agilent Technologies office. If the shipping container is damaged or the cushioning material shows signs of stress, also notify the carrier. - Page 13 Preparing for Use Initial Inspection Table 1-1 Accessories Supplied with the Analyzer HP/Agilent Part Comments Description Number Adapter, Type-N (m) to 1250-0780 Not shipped with Option 1DP. Two adapters BNC (f) are shipped with Option 1DN. Adapter, BNC (m) to F (f), 1250-2477 Shipped only with Option 1DP.
-
Page 14: Power Requirements
Preparing for Use Power Requirements Power Requirements The analyzer is a portable instrument and requires no physical installation other than connection to a power source. There is no need to select a line voltage. Table 1-2 AC Power Requirements Voltage 90-132 Vrms (47 to 440 Hz) Voltage 195 - 250 Vrms (47 to 66 Hz) -
Page 15: Ac Power Cable
Preparing for Use Power Requirements AC Power Cable The analyzer is equipped with a three-wire power cable, in accordance with international safety standards. When connected to an appropriate power line outlet, this cable grounds the instrument cabinet. Failure to ground the analyzer properly can result in personal WARNING injury. - Page 16 Preparing for Use Power Requirements Chapter 1...
-
Page 17: Preparation
This instrument has autoranging line voltage input. Be sure the supply CAUTION voltage is within the specified range. (Refer to the Agilent Technologies ESA Spectrum Analyzer Specifications Guide.) Ventilation Requirements: When installing the product in a cabinet, the CAUTION convection into and out of the product must not be restricted. -
Page 18: Turning On The Analyzer For The First Time
Preparing for Use Turning On the Analyzer for the First Time Turning On the Analyzer for the First Time Before using your analyzer, plug the power cord into the analyzer. Press | (the On key). Choose a power on preference using the switch on the rear panel (refer Figure 2-2 on page 2-8, item 14). - Page 19 Record the firmware revision number and keep it for reference. If you NOTE should ever need to call Agilent Technologies for service or with any questions regarding your analyzer, it will be helpful to have the firmware revision number readily available. You can also obtain the firmware revision number by pressing...
-
Page 20: Getting Started
Getting Started... -
Page 21: What You Will Find In This Chapter
Getting Started What You Will Find in This Chapter What You Will Find in This Chapter This chapter introduces the basic functions of the analyzer. In this chapter you will: • Get acquainted with the front-panel and rear-panel features. • Get acquainted with the function keys. •... -
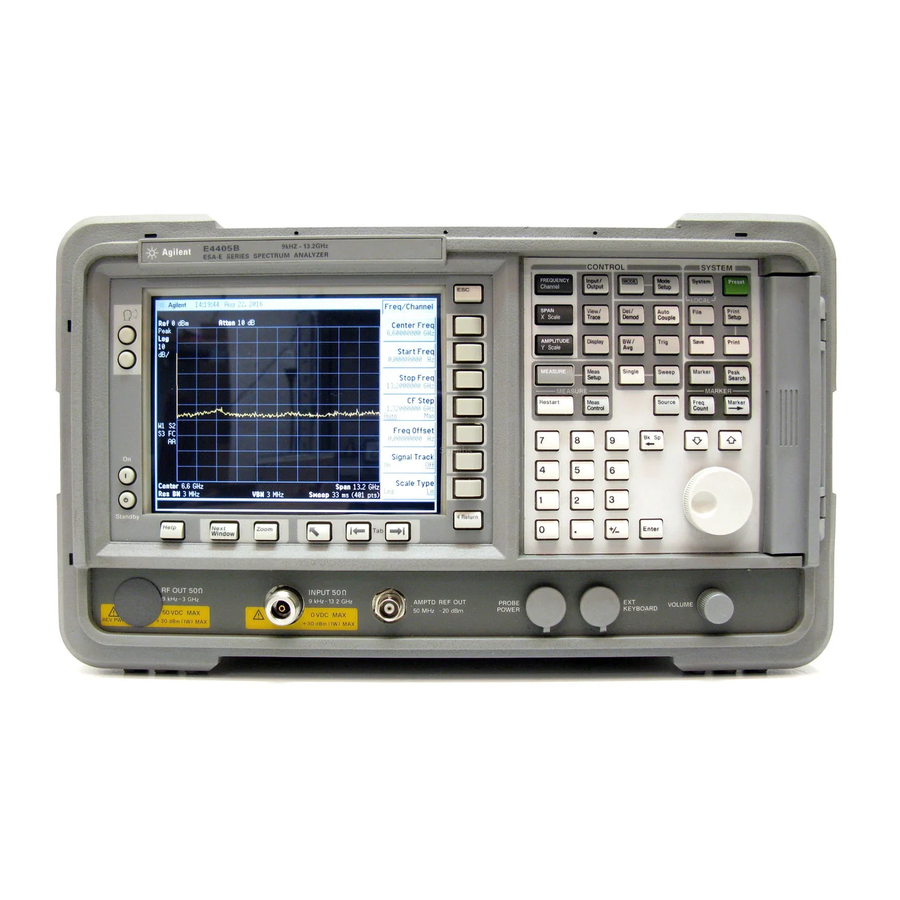
Page 22: Front-Panel Features
Getting Started Front-Panel Features Front-Panel Features Figure 2-1 Front-Panel Feature Overview Viewing Angle keys allow you to adjust the display so that it can be optimally viewed from different angles. . The (escape) key cancels any entry in progress. will abort a print (if one is in progress) and clear error messages from the status line at the bottom of the display. - Page 23 Getting Started Front-Panel Features , and FREQUENCY Channel SPAN X Scale AMPLITUDE Y are the three large keys that activate the primary Scale analyzer functions and access menus of related functions. The secondary labels on these keys (Channel, X Scale, and Y Scale) are used in some measurements. functions access menus that allow you to CONTROL adjust the resolution bandwidth, adjust the sweep time,...
- Page 24 Getting Started Front-Panel Features The Data Control Keys, which include the step keys, knob, and numeric keypad, allow you to change the numeric value of an active function. Data control keys are used to change values for functions such as center frequency, start frequency, resolution bandwidth, and marker position.
- Page 25 Return menus. provides an amplitude reference signal AMPTD REF OUT of 50 MHz at –20 dBm. Agilent Technologies E4402B, E4403B, E4404B, E4405B, E4407B, and E4408B only. are used to move around in the Limit editor Tab Keys and the Correction editor.
- Page 26 Getting Started Front-Panel Features key can be used to select the active Next Window window in functions which support split-screen display modes, such as Zone markers. (Refer to “Zone” in Chapter 6 for more information.) In such modes, pressing allows you to switch between the Zoom split-screen and full-sized display of the active window.
-
Page 27: Rear-Panel Features
Getting Started Rear-Panel Features Rear-Panel Features Figure 2-2 Rear-Panel Feature Overview is the input for the AC line power source. Power input Make sure that the line-power source outlet has a protective ground contact. is the input for the DC power source. Refer to DC Power the “Power Requirements”... - Page 28 Getting Started Rear-Panel Features Service Connector. The service connector is for service use only. Inputs/Outputs (Refer to Agilent Technologies ESA Spectrum Analyzer Specifications Guide for more information.) drives an external VGA VGA OUTPUT compatible monitor with a signal that has 31.5 kHz horizontal, 60 Hz vertical synchronizing rate, non-interlaced.
- Page 29 Getting Started Rear-Panel Features Table 2-2 Agilent ESA-E Series (E4401B, E4402B, E4404B, E4405B, E4407B) Slot # GPIB Serial FADC IF and Fre- (Opt Sweep Demod quency Comm Parallel Parallel AYX) Ports (Opt Exten- Fast Hard- (Opt (Opt (Opt BAA) ware...
- Page 30 Getting Started Rear-Panel Features provides detected video output (before AUX VIDEO OUT the analog-to-digital conversion) proportional to vertical deflection of the trace. Output is from 0 V to 1 V. Amplitude-correction factors are not applied to this signal. The output signal is blanked during retrace. Ω...
- Page 31 Getting Started Rear-Panel Features protects the analyzer from drawing too much DC Fuse DC power. Replace only with a fuse of the same rating. See the label on the rear panel. 2-12 Chapter 2...
-
Page 32: Display Annotation
Getting Started Display Annotation Display Annotation Here is an example of the annotation that may appear on an analyzer display. The display annotation is referenced by numbers which are listed in the following table. The Function Key column indicates which key activates the function related to the annotation. - Page 33 Getting Started Display Annotation Table 2-3 Screen Annotation Item Description Function Key Detector mode Detector Reference level Ref Level Active function block Refer to the description of the activated function. Screen title Change Title Time and date display Time/Date On Off RF attenuation Attenuation Auto Man Marker frequency...
- Page 34 Getting Started Display Annotation Table 2-3 Screen Annotation Item Description Function Key Amplitude corrections Correction On Off are on (This indicates that the overall correction state is On. There may be any or none of the individual corrections On.) Trigger/Sweep Trig, Sweep See below for more information.
- Page 35 Getting Started Display Annotation Item 24 refers to the trace modes of the analyzer. The first letter W indicates that the analyzer is in clear-write mode. The second letter is 1, representing trace 1. The trace 2 trace mode is S2, indicating trace 2 (2) is in the store-blank mode (S).
- Page 36 Getting Started Display Annotation Table 2-7 Screen Annotation for GPIB Annunciators Screen Description Annotation Remote Operation GPIB Listen GPIB Talk GPIB SRQ Chapter 2 2-17...
-
Page 37: Key Overview
Getting Started Key Overview Key Overview The keys labeled , and are all FREQUENCY Channel System Marker examples of front-panel keys. Pressing most front-panel keys accesses menus of functions that are displayed along the right side of the display. These are called menu keys. Front-panel keys that are white perform an immediate action rather than bringing up a menu. - Page 38 Getting Started Key Overview In some menus of keys, one key label will always be highlighted to show which key has been selected but the menu is immediately exited when a selection is made. For example, when you press the key (a Orientation menu key), it will bring up its own menu of keys.
-
Page 39: Making A Measurement
Getting Started Making a Measurement Making a Measurement Let’s begin using the analyzer by measuring an input signal. Since the internal 50 MHz amplitude reference signal is readily available, we will use it as our test signal. You cannot hurt the analyzer by using this reference signal and NOTE pressing any of the keys described in this section. - Page 40 Getting Started Making a Measurement 6. Set the amplitude. When the peak of a signal does not appear on the screen, it may be necessary to adjust the amplitude level on the screen. Press . Ref Level 0.0 dBm appears in the active AMPLITUDE Y Scale function block (48.75 dBmV with Option 1DP).
-
Page 41: Measurement Summary
Getting Started Making a Measurement 7. Set the marker. Marker functions measure the frequency and amplitude of a signal. You can place a diamond-shaped marker on the signal peak to find the signal’s frequency and amplitude. To activate a marker, press the key (located in the Marker MARKER... - Page 42 Getting Started Making a Measurement Figure 2-5 Reading the Amplitude and Frequency Chapter 2 2-23...
-
Page 43: Analyzer Accuracy And The Internal Alignment Process
Getting Started Analyzer Accuracy and the Internal Alignment Process Analyzer Accuracy and the Internal Alignment Process Data from the internal alignment routine is necessary for spectrum analyzer operation. The internal alignment routine runs continuously to ensure that the analyzer is using current alignment data that improves the analyzer frequency and amplitude accuracy. -
Page 44: File Menu Functions
Getting Started File Menu Functions File Menu Functions This section describes how to use the functions located under the front-panel key. Data storage and retrieval are handled similarly to File that of personal computers (PCs). Like PCs, these analyzers include an internal storage drive and a floppy disk drive, both of which have directory and sub-directory capability. - Page 45 Getting Started File Menu Functions Figure 2-6 Catalog Menu 1. The entry fields show the parameters for the files viewed. Entry fields that are being modified or are modifiable are indicated by highlighting (inverse video). Each file menu function has its own unique set of entry fields pertaining to that function.
-
Page 46: Creating A Directory
Getting Started File Menu Functions d. Modified: column displays the date and time the last change occurred. 3. The softkey menu has four options: allows you to choose the type of file you wish to view. (You Type: may view all types by using the key under Type.) : Under the... -
Page 47: Format A Floppy Disk
Getting Started File Menu Functions Format a Floppy Disk You can format a floppy disk in the analyzer. The format is MS-DOS® Note that it is not necessary to format your floppy disk with the analyzer; preformatted disks can be used with the analyzer. 1. -
Page 48: Save A File
Getting Started File Menu Functions Figure 2-7 Format Menu You will see the message: Formatting Disk in the display window. Pressing any other key after receiving the warning in step 3 on page 2-28, will abort the formatting process. 5. When formatting is complete, a message, Volume A: formatted appears on the status line. - Page 49 Getting Started File Menu Functions 2. Set the center frequency to 50 MHz and the span to 75 MHz: press FREQUENCY 50 MHz SPAN 75 MHz The reference signal appears on the display. 3. View trace 1 and put it into maximum hold by pressing View/Trace .
- Page 50 Getting Started File Menu Functions Figure 2-9 Viewing Traces 1 and 2 5. Activate trace 3 by pressing . Your analyzer Trace (3) Clear Write display should look similar to Figure 2-10. Figure 2-10 Viewing Traces 1, 2, and 3 Chapter 2 2-31...
- Page 51 Getting Started File Menu Functions Step 2. Save the file 1. To access the menu, press, Save File Save 2. Select the type of file you want to save. In this example you are saving a trace; press Type, Trace 3.
-
Page 52: Load A File
Getting Started File Menu Functions Load a file 1. Reset the analyzer by pressing (if present). Preset Factory Preset 2. To access the menu, press Load File Load 3. Select the type of file you want to load (setup, state, trace, limits, or corrections). - Page 53 Getting Started File Menu Functions You should notice that the trace you saved, in this example trace 3, is NOTE loaded to trace 2. If you wish to verify this condition, remove the signal input. For Agilent E4401B and E4411B, press Input/Output Amptd Ref (Off), for all other models, press...
-
Page 54: Rename A File
Getting Started File Menu Functions Rename a File 1. To access the menu, press Rename File Rename 2. Select the type of file you want to rename (setup, state, trace, limits, screens, or corrections). In this example you are renaming a trace file;... -
Page 55: Copy A File
Getting Started File Menu Functions Copy a File 1. To access the Copy menu, press . This menu function File Copy brings up 2 directory boxes as described by the From: and To: fields located directly above the boxes. Refer to Figure 2-14. -
Page 56: Delete A File
Getting Started File Menu Functions Highlighting a filename in the To: directory box has no significance. NOTE The file cannot be placed inside another file. 7. Press to execute the operation. The message: Copying Copy Now file is displayed during the copying process. Upon completion, the status bar reads: C:\START\RENAME.TRC file copied. -
Page 57: Printer Setup And Operation
Getting Started Printer Setup and Operation Printer Setup and Operation Equipment • Agilent ESA Spectrum Analyzer equipped with Options A4H (GPIB and Parallel Interface) or 1AX (RS-232 and Parallel Interface) • IEEE 1284 compliant printer cable (such as HP/Agilent C2950A) •... - Page 58 Getting Started Printer Setup and Operation 6. Press to access the menu keys. Press Printer Type Printer Type Auto make the analyzer attempt to identify the connected printer. When you press , the analyzer will respond in one of the three Auto following ways: •...
-
Page 59: Testing Printer Operation
Getting Started Printer Setup and Operation Testing Printer Operation When you have completed the analyzer’s printer setup, press Print and then press on the front panel. If the Setup Print (Screen) Print printer is ready and the printer setup was successful, a printout of the analyzer display will be printed. -
Page 60: Analyzer Battery Information
Getting Started Analyzer Battery Information Analyzer Battery Information The analyzer uses a lithium battery to enable the internal memory to retain data. The date when the battery was installed is on a label on the rear panel of the analyzer. See Figure 2-15. -
Page 61: Functional Testing
Functional Testing... -
Page 62: What You Will Find In This Chapter
Functional Testing What You Will Find in This Chapter What You Will Find in This Chapter This chapter describes the functional tests and provides information on how to perform them. What Are the Functional Tests? Functional tests are tests of various instrument parameters that give a high degree of confidence that the instrument is operating correctly. -
Page 63: Test Descriptions
Functional Testing Test Descriptions Test Descriptions Each of the following test descriptions include the test limits (pass/fail criteria), a description of what the test does or what it measures, a list of equipment required for the performance of the test, an illustration of the test setup used, and a step by step test procedure. -
Page 64: Test Limits
Functional Testing Displayed Average Noise Level Displayed Average Noise Level Test Limits Model (50 Ω Inputs) Frequency Range Maximum TR Entry (50 Ω Inputs) 10 MHz to 500 MHz E4401B, E4411B – 119 dBm 501 MHz to 1.0 GHz – 117 dBm 1.01 GHz to 1.5 GHz –... -
Page 65: Test Description
Functional Testing Displayed Average Noise Level Test Description The Displayed Average Noise Level is measured within the frequency range specified. The analyzer input is terminated into either 50 Ω or 75 Ω, depending on analyzer options. The test tunes the analyzer frequency across the band, uses the marker to locate the frequency with the highest response, and then reads the average noise in zero span. -
Page 66: Procedure (10 Mhz To 500 Mhz) E4401B And E4411B
Functional Testing Displayed Average Noise Level Procedure (10 MHz to 500 MHz) E4401B and E4411B 1. Connect the equipment as shown in Figure 3-1. 2. Press on the System Power On/Preset Preset (Factory) Preset analyzer. Wait for the preset routine to finish. Set the analyzer by pressing the following keys: FREQUENCY Start Freq... -
Page 67: Procedure (501 Mhz To 1.0 Ghz) E4401B And E4411B
Functional Testing Displayed Average Noise Level 7. Press the following keys on the analyzer: BW/Avg 1 kHz Video BW Auto Man 30 Hz Single Wait for the sweep to finish. 8. Press the following keys on the analyzer: Display Display Line (On) Adjust the display so that it is centered on the average trace noise, ignoring any residual responses. - Page 68 Functional Testing Displayed Average Noise Level 4. Press the following keys on the analyzer: Sweep Sweep (Cont) BW/Avg Average (Off) BW/Avg Resolution BW (Auto) Video BW (Auto) SPAN 50 kHz FREQUENCY 5. Press . Set the center frequency of the analyzer to the Center Freq frequency recorded in the Measured Frequency column (b) in Table 3-1...
-
Page 69: Procedure (1.01 Ghz To 1.5 Ghz) E4401B And E4411B
Functional Testing Displayed Average Noise Level Procedure (1.01 GHz to 1.5 GHz) E4401B and E4411B 1. Press the following keys on the analyzer: Sweep Sweep (Cont) FREQUENCY Start Freq 1.0 GHz Stop Freq 1.5 GHz BW/Avg 1 MHz Video BW Auto Man 10 kHz 2. - Page 70 Functional Testing Displayed Average Noise Level 7. Press the following keys on the analyzer: Display Display Line (On) Adjust the display line so that it is centered on the average trace noise, ignoring any residual responses. 8. Record the display line amplitude setting as TR Entry 3 (TR Entry 18 for a 75 Ω...
- Page 71 Functional Testing Displayed Average Noise Level 5. Press . Set the center frequency of the analyzer to the Center Freq frequency recorded in the Measured Frequency column (d) in Table for 10 MHz to 1.0 GHz. 6. Press the following keys on the analyzer: BW/Avg 1 kHz Video BW Auto Man...
- Page 72 Functional Testing Displayed Average Noise Level 4. Press the following keys on the analyzer: Sweep Sweep (Cont) BW/Avg, Average (Off) BW/Avg Resolution BW (Auto) Video BW (Auto) SPAN 50 kHz FREQUENCY 5. Press . Set the center frequency of the analyzer to the Center Freq frequency recorded in the Measured Frequency column (e) in Table 3-1...
- Page 73 Functional Testing Displayed Average Noise Level 2. Press the following keys on the analyzer: Single BW/Avg Average (On) Enter Single Wait until AVG 3 is displayed to the left of the graticule (the analyzer will take 3 sweeps and then stop). 3.
-
Page 74: Procedure (3.01 Ghz To 6.0 Ghz) E4404B, E4405B, E4407B, E4408B
Functional Testing Displayed Average Noise Level Procedure (3.01 GHz to 6.0 GHz) E4404B, E4405B, E4407B, E4408B 1. Press on the System Power On/Preset Preset (Factory) Preset analyzer. Wait for the preset routine to finish. Set the analyzer by pressing the following keys: FREQUENCY Start Freq 3.01 GHz... -
Page 75: Procedure (6.01 Ghz To 6.7 Ghz) E4404B
Functional Testing Displayed Average Noise Level 7. Press the following keys on the analyzer: Display Display Line (On) Adjust the display line so that it is centered on the average trace noise, ignoring any residual responses. 8. Record the display line amplitude setting as TR Entry 10 in Table 3-1. -
Page 76: Procedure (6.01 Ghz To 12.0 Ghz) E4405B, E4407B, E4408B
Functional Testing Displayed Average Noise Level 5. Press . Set the center frequency of the analyzer to the Center Freq frequency recorded in the Measured Frequency column (h) in Table for 6.01 GHz to 6.7 GHz. 6. Press the following keys on the analyzer: BW/Avg 1 kHz Video BW Auto Man... -
Page 77: Procedure (12.01 Ghz To 13.2 Ghz) E4405B
Functional Testing Displayed Average Noise Level 4. Press the following keys on the analyzer: Sweep Sweep (Cont) BW/Avg, Average (Off) BW/Avg Resolution BW (Auto) Video BW (Auto) SPAN 50 kHz FREQUENCY 5. Press . Set the center frequency of the analyzer to the Center Freq frequency recorded in the Measured Frequency column (i) in Table 3-1... - Page 78 Functional Testing Displayed Average Noise Level 2. Press the following keys on the analyzer: Single BW/Avg Average (On) Enter Single Wait until AVG 3 is displayed to the left of the graticule (the analyzer will take 3 sweeps and then stop). 3.
-
Page 79: Procedure (12.01 Ghz To 22 Ghz) E4407B And E4408B
Functional Testing Displayed Average Noise Level Procedure (12.01 GHz to 22 GHz) E4407B and E4408B 1. Press on the System Power On/Preset Preset (Factory) Preset analyzer. Wait for the preset routine to finish. Set the analyzer by pressing the following keys: FREQUENCY Start Freq 12.01 GHz... -
Page 80: Procedure (22.01 Ghz To 26.5 Ghz) E4407B And E4408B
Functional Testing Displayed Average Noise Level 7. Press the following keys on the analyzer: Display Display Line (On) Adjust the display line so that it is centered on the average trace noise, ignoring any residual responses. 8. Record the display line amplitude setting as TR Entry 14 in Table 3-1. - Page 81 Functional Testing Displayed Average Noise Level 4. Press the following keys on the analyzer: Sweep Sweep (Cont) BW/Avg, Average (Off) BW/Avg Resolution BW (Auto) Video BW (Auto) SPAN 50 kHz FREQUENCY 5. Press . Set the center frequency of the analyzer to the Center Freq frequency recorded in the Measured Frequency column (l) in Table 3-1...
- Page 82 Functional Testing Displayed Average Noise Level Table 3-1 Maximum Average Measured Model Number Frequency Range Noise Level 50 Ω 75 Ω Frequency (TR Entry) Input Input E4401B, E4411B 10 MHz to 500 MHz (a) _________ (1) or (16) _____ –119 dBm –65 dBmV 501 MHz to 1.0 GHz (b) ________...
-
Page 83: Frequency Readout Accuracy
Functional Testing Frequency Readout Accuracy Frequency Readout Accuracy Test Limits Span Minimum Maximum 10 MHz 1.48988 GHz 1.49012 GHz 100 kHz 1.4899988 GHz 1.4900012 GHz Marker Count 1.489999999 GHz 1.490000001 GHz Accuracy with Counter Resolution at 1 Hz Test Description The frequency readout accuracy of the analyzer is tested with an input signal of known frequency. -
Page 84: Procedure
Functional Testing Frequency Readout Accuracy Figure 3-2 Procedure 1. Connect the equipment as shown in Figure 3-2. Remember to connect the 10MHz REF OUT of the analyzer to the 10MHz REF IN of the synthesized sweeper. 2. Perform the following steps to set up the equipment: a. - Page 85 Functional Testing Frequency Readout Accuracy 5. Repeat step 3. If the instrument is functioning correctly, the result should be between 1.4899990 GHz and 1.4900009 GHz. The Frequency Readout Accuracy in now complete. Continue with the NOTE Marker Count Accuracy functional check. Chapter 3 3-25...
-
Page 86: Marker Count Accuracy
Functional Testing Marker Count Accuracy Marker Count Accuracy Procedure 1. Press on the System Power On/Preset Preset (Factory) Preset analyzer, then wait for the preset routine to finish. Set the analyzer to measure the marker count accuracy by pressing the following keys: Frequency 1.490 GHz... -
Page 87: Frequency Response
Functional Testing Frequency Response Frequency Response Test Limits ESA Model Frequency Minimum Maximum (dB) (dB) E4411B & 9 kHz to 1.5 GHz –1.5 E4401B E4402B & 9 kHz to 3 GHz –1.5 E4403B E4404B 9 kHz to 3 GHz –1.5 3.01 GHz to 6.7 GHz –3.0 E4405B... -
Page 88: Required Equipment
Functional Testing Frequency Response Required Equipment Critical Recommended Instrument Specifications HP/Agilent Model (for this test) Signal Sources Synthesized Sweeper 8340A/B or 83630A Series Adapters Type-N (f) to BNC (f) 1250-1474 APC 3.5 (f) to 5061-5311 APC 3.5 (f) BNC(f) to SMA(m) 1250-1237 Type-N(m), to APC 1250-1743... -
Page 89: Procedure
Functional Testing Frequency Response Figure 3-3 Procedure 1. Zero and calibrate the power meter and power sensor as described in the power meter operation manual. for a 50 Ω analyzer 2. Connect the equipment as shown in Figure 3-3 input. Use only 75 Ω... - Page 90 Functional Testing Frequency Response Video BW Auto Man 3 kHz Peak Search FREQUENCY Signal Track (On) 5. Adjust the synthesized sweeper amplitude for a marker amplitude reading of –14 dBm +/– 0.10 dB. The power level of the synthesized sweeper remains unchanged for the NOTE duration of the test.
- Page 91 Functional Testing Frequency Response Table 3-3 Frequency Response Report Model Center Analyzer Power Flatness Flatness Freq Amplitude Meter Error Error Test Amplitude Limits (dB) ± 1.5 All Models 50 MHz ± 1.5 100 MHz ± 1.5 750 MHz ± 1.5 1250 MHz ±...
-
Page 92: Reference Level Accuracy
Functional Testing Reference Level Accuracy Reference Level Accuracy Test Limits Reference Level Minimum Maximum (dB) (dB) dBmV –30 21.76 Reference Reference –20 31.76 –1.40 1.40 –10 41.76 –1.40 1.40 –40 11.76 –1.40 1.40 –50 1.76 –1.40 1.40 –60 –8.24 –1.40 1.40 –70 –18.24... -
Page 93: Required Equipment
Functional Testing Reference Level Accuracy Required Equipment Instrument Critical Specifications Recommended (for this test) HP/Agilent Model Signal Sources Synthesized Sweeper 8340A/B or 836XX Series Adapters Type-N(m), to BNC(f) 1250-1476 Cables Type-N,152-cm 11500D (60-in) BNC,122-cm (48-in) 10503A Additional Equipment for 75-ohm Input Pad, minimum loss 11852B Type-N(f), to BNC(m) -
Page 94: Log Mode Procedure
Functional Testing Reference Level Accuracy Log Mode Procedure 1. Connect the equipment as shown in Figure 3-4. 2. Press on the synthesized sweeper. Set the synthesized PRESET sweeper controls as follows: 50 MHz Power Level –30 dBm 3. Press on the System Power On/Preset Preset (Factory) -
Page 95: Linear Mode Procedure
Functional Testing Reference Level Accuracy Table 3-4 Analyzer Synthesized Minimum Analyzer Maximum Marker ∆ Reference Level Sweeper Amplitude (dB) (dB) (dBm) Amplitude (dB) dBmV –30 21.76 Reference + _____ 0 (Reference) 0 (Reference) 0 (Reference) –20 31.76 Reference + (10 dB) 8.60 11.40 –10... - Page 96 Functional Testing Reference Level Accuracy 4. Now that the reference has been established in step 4, adjust the synthesized sweeper power level and the analyzer reference level according to Table 3-5. (The synthesized sweeper output power and the analyzer’s reference level will be changed in 10 dB steps.) 5.
-
Page 97: Resolution Bandwidth Switching Uncertainty
Functional Testing Resolution Bandwidth Switching Uncertainty Resolution Bandwidth Switching Uncertainty Test Limits Resolution Bandwidth Minimum (dB) Maximum (dB) 1 kHz 0 (Ref) 0 (Ref) 3 kHz –0.3 dB 0.3 dB 10 kHz –0.3 dB 0.3 dB 30 kHz –0.3 dB 0.3 dB 100 kHz –0.3 dB... -
Page 98: Required Equipment
Functional Testing Resolution Bandwidth Switching Uncertainty Required Equipment (No Equipment Required) Procedure The 50 MHz reference output will automatically be switched internally NOTE on the E4401B and E4411B and will not require any external connections. All other ESA analyzers require that the AMPTD REF OUT be connected to the INPUT to perform this test. - Page 99 Functional Testing Resolution Bandwidth Switching Uncertainty 5. Repeat step 3 and 4 for each of the remaining resolution bandwidth 3-6. The ∆ Mkr 1 amplitude reading and span settings listed in Table should be within the range indicated in the table “Test Limits”...
-
Page 100: Scale Fidelity
Functional Testing Scale Fidelity Scale Fidelity Test Limits dB from Reference Level Minimum (dB) Maximum (dB) –4 –1.0 –16 –1.40 1.40 –28 –1.40 1.40 –40 –1.40 1.40 –52 –1.40 1.40 –64 –2.0 Test Description A 50 MHz CW signal is applied from a synthesized sweeper to the input of the analyzer. -
Page 101: Procedure
Functional Testing Scale Fidelity Instrument Critical Specifications Recommended (for this test) HP/Agilent Model Additional Equipment for 75 Ω Input Pad, minimum loss 11852B Type-N(f), to 1250-1534 BNC (m) Figure 3-5 Procedure 1. Connect the equipment as shown in Figure 3-5. 2. - Page 102 Functional Testing Scale Fidelity Peak Search 4. Adjust the amplitude on the sythesized sweeper until the marker amplitude on the analyzer reads 0 dBm +/– 0.10 dB. Record the synthesized sweeper output level as the reference in Table 3-7 on page 3-42.
-
Page 103: Second Harmonic Spurious Responses
Functional Testing Second Harmonic Spurious Responses Second Harmonic Spurious Responses Test Limits Model Number Maximum E4401B –55 dBc E4402B –55 dBc E4403B –50 dBc E4404B –55 dBc E4405B –55 dBc E4407B –55 dBc E4408B –50 dBc E4411B –55 dBc Test Description To test second harmonic distortion, a 50 MHz low pass filter is used to filter the source output, ensuring that harmonics read by the analyzer are internally generated and not coming from the source. -
Page 104: Required Equipment
Functional Testing Second Harmonic Spurious Responses Required Equipment Instrument Critical Specifications Recommended (for this test) HP/Agilent Model Signal Sources Synthesized Sweeper 8340A/B or 836XX Series Misc 50 MHz Low pass filter Rejection at 80 MHz: >60dB 0955-0306 Adapters (2) Type-N(m) to BNC(f) 1250-1476 BNC(f) to BNC(f) 1250-0080... -
Page 105: Procedure
Functional Testing Second Harmonic Spurious Responses Procedure 1. Connect the equipment as shown in Figure 3-6. 2. Set the synthesized sweeper controls as follows: Frequency 40 MHz (50 Ω Input only) Amplitude –10 dBm (75 Ω Input only) Amplitude –4.3 dBm 75 Ω... -
Page 106: Tracking Generator Level Flatness: Hp E4401B And E4411B, Options 1Dn And 1Dq
Functional Testing Tracking Generator Level Flatness: HP E4401B and E4411B, Options 1DN and 1DQ Tracking Generator Level Flatness: HP E4401B and E4411B, Options 1DN and 1DQ Test Limits Minimum Maximum Flatness ≤ 10 MHz, 50 Ω –2.5 dB 2.5 dB Flatness >... -
Page 107: Procedure
Functional Testing Tracking Generator Level Flatness: HP E4401B and E4411B, Options 1DN and 1DQ Figure 3-7 Procedure 1. Calibrate the tracking generator by pressing System Alignments . Connect the RF Out to the Input when prompted. Align Now 2. Press on the System Power On/Preset... - Page 108 Functional Testing Tracking Generator Level Flatness: HP E4401B and E4411B, Options 1DN and 1DQ 7. Enter the appropriate power sensor Cal Factor for the test frequency into the power meter as indicated on the label of the power sensor. 8. Record the power level displayed on the power meter as the Level Flatness in Table 3-8.
-
Page 109: Tracking Generator Level Flatness: E4402B, E4403B, E4404B, E4405B, E4407B And E4408B, Option 1Dn
Functional Testing Tracking Generator Level Flatness: E4402B, E4403B, E4404B, E4405B, E4407B and E4408B, Option 1DN Tracking Generator Level Flatness: E4402B, E4403B, E4404B, E4405B, E4407B and E4408B, Option 1DN Test Limits Minimum Maximum Flatness ≤ 10 MHz −3.5 dBm +3.5 dBm −2.5 dBm −2.5 dBm Flatness >... -
Page 110: Procedure
Functional Testing Tracking Generator Level Flatness: E4402B, E4403B, E4404B, E4405B, E4407B and E4408B, Option 1DN Figure 3-8 Procedure 1. Calibrate the tracking generator by pressing System Alignments . Connect the RF OUT to the RF INPUT when Align Now prompted. 2. - Page 111 Functional Testing Tracking Generator Level Flatness: E4402B, E4403B, E4404B, E4405B, E4407B and E4408B, Option 1DN 9. Repeat steps 5 through 7 to measure the flatness at each center 3-9. The ⇑ may be used to tune to frequency setting listed in Table center frequencies above 500 MHz.
-
Page 112: Troubleshooting
Troubleshooting... -
Page 113: What You Will Find In This Chapter
What You Will Find in This Chapter This chapter includes information on how to check for a problem with your Agilent Technologies ESA spectrum analyzer, and how to return it for service. It also includes descriptions of all of the analyzer built-in messages. -
Page 114: Before You Call Agilent Technologies
Viewing Angle front panel. If other equipment, cables, and connectors are being used with your Agilent Technologies ESA spectrum analyzer, make sure they are connected properly and operating correctly. Review the procedure for the measurement being performed when the problem appeared. Are all the settings correct? -
Page 115: Read The Warranty
. If the analyzer is equipped with a System Alignments Align Now 3.0 GHz tracking generator (Option 1DN on Agilent Technologies E4402B, E4403B, E4404B, E4405B, E4407B, or E4408B), connect a short cable from AMPTD REF OUT to INPUT 50 Ω, and press . -
Page 116: How To Contact Agilent Technologies
“Component Level Service Documentation (Option 0BV)” Chapter How to Contact Agilent Technologies Agilent Technologies has sales and service offices around the world to provide you with complete support for your analyzer. To obtain servicing information or to order replacement parts, contact the nearest Agilent Technologies sales and service office listed in... - Page 117 Troubleshooting Before You Call Agilent Technologies Table 4-1 Agilent Technologies Sales and Service Offices UNITED STATES Instrument Support Center Agilent Technologies (800) 403-0801 EUROPEAN FIELD OPERATIONS Headquarters France Germany Agilent Technologies S.A. Agilent Technologies France Agilent Technologies GmbH 150, Route du Nant-d’Avril...
-
Page 118: How To Return Your Analyzer For Service
How to Return Your Analyzer for Service Service Tag If you are returning your analyzer to Agilent Technologies for servicing, fill in and attach a blue service tag. Several service tags are supplied at the rear of this chapter. Please be as specific as possible about the nature of the problem. - Page 119 Troubleshooting How to Return Your Analyzer for Service Figure 4-1 Chapter 4...
-
Page 120: Other Packaging
Troubleshooting How to Return Your Analyzer for Service Other Packaging Analyzer damage can result from using packaging materials other than CAUTION those specified. Never use styrene pellets in any shape as packaging materials. They do not adequately cushion the equipment or prevent it from shifting in the carton. -
Page 121: Error Messages
Troubleshooting Error Messages Error Messages The analyzer can generate various messages that appear on the display during operation. There are four types of messages. • Status Messages appear on the right side of the analyzer display and/or set status bits in the SCPI Status Register system. These messages indicate a condition that may result in erroneous data being displayed. -
Page 122: Status Messages
. Restore the Align Now alignment by pressing System Alignments Align Now . On all Agilent Technologies ESA spectrum analyzer models except Agilent Technologies E4401B and Agilent Technologies E4411B you must connect the to the with the appropriate AMPTD REF OUT INPUT cable to perform this alignment. - Page 123 Troubleshooting Status Messages E4411B only: disconnect any signals from the INPUT prior to performing this procedure. Align RF Skipped (Align RF Skipped) The RF alignment has been skipped because a 50 MHz signal was detected at the INPUT; alignment will resume when the 50 MHz signal is removed.
- Page 124 Troubleshooting Status Messages Input is internal (no corresponding status bit) This message applies to the Agilent Technologies E4401B and E4411B only. Indicates the 50 MHz Amptd selection is . With the 50 MHz amplitude reference on, the input is routed through an internal signal path.
- Page 125 Status Messages Overload: Reduce Signal and press <ESC> (Input Overload Tripped) This message applies to the Agilent Technologies E4401B and E4411B only. A signal has been applied to the input connector that caused the overload protection circuitry to engage. The input signal must be reduced.
- Page 126 Troubleshooting Status Messages Source Unlevel (Source Unleveled) Indicates the source power is set higher or lower than the analyzer can provide, the frequency span extends beyond the specified frequency range of the tracking generator, or the calibration data for the source is incorrect.
-
Page 127: Informational Messages
Troubleshooting Informational Messages Informational Messages The following messages provide information that requires no intervention. The information provided in brackets, for example <filename> or <directory>, is a variable that represents a specific input provided previously. Informational messages are displayed at the bottom of the screen in the status line (green on color displays). - Page 128 Troubleshooting Informational Messages Atten auto set to 15 dB Indicates that an input signal has been detected which is of sufficient level to force the input attenuator to be autocoupled at 15 dB. If the signal level is reduced, the attenuator will stay at 15 dB.
- Page 129 Troubleshooting Informational Messages Default spur table values loaded. No spur table has been previously saved when the Out-of-Band Spurious measurement begins. Press Meas to enter the frequency ranges of Setup, Edit Table interest and press to save that information. Save Table This saved table will be loaded the next time the measurement is run.
- Page 130 Troubleshooting Informational Messages Measurement halted. Press a measurement key to continue. This error occurs after you choose to refrain Cancel from setting the attenuator to 0 dB during the Receive Channel Power and Receive Spur measurements. Not enough frequency range to measure harmonics for channel.
- Page 131 Troubleshooting Informational Messages Table saved successfully. This message appears after the user presses the key on the second page of the edit table for Save Table the out-of-band spurious measurement. It indicates that the current spur table has been written successfully to disk and is available to be loaded by means of the key.
-
Page 132: Error Queues
Troubleshooting Error Queues Error Queues When a user-error condition occurs in the instrument as a result of SCPI (remote interface) activity, it is reported to both the front-panel display error-queue and the SCPI error queue. If it is a result of front-panel activity, it reports to the front panel display error queue, and may also report to the SCPI error queue depending on the error. -
Page 133: Error Message Format
Troubleshooting Error Message Format Error Message Format The system–defined error numbers are chosen on an enumerated (“1 of N”) basis. The error messages are listed in alphabetical order within each error message type section. In this chapter, an explanation is included with each error to further clarify its meaning. -
Page 134: Error Message Types
Troubleshooting Error Message Types Error Message Types Events do not generate more than one type of error. For example, an event that generates a query error will not generate a device-specific, execution, or command error. These errors indicate that the instrument output queue control has –499 to –400: Query Errors detected a problem with the message exchange protocol described in... - Page 135 Troubleshooting Error Message Types These errors indicate that a device operation did not properly complete, 201 to 799: Device-Specific possibly due to an abnormal hardware or firmware condition. These Errors codes are also used for self-test response errors. Errors in this class set the device-specific error bit (bit 3) in the event status register (IEEE 488.2, section 11.5.1).
-
Page 136: No Error
Troubleshooting 0: No Error No Error No error The queue is empty. Every error in the queue has been read or the queue was purposely cleared by power-on or *CLS. Chapter 4 4-25... -
Page 137: To -400
Troubleshooting –499 to –400: Query Errors –499 to –400: Query Errors The instrument output queue control has detected a problem with the message exchange protocol described in IEEE 488.2, Chapter 6. Errors in this class set the query error bit (bit 2) in the event status register (IEEE 488.2, section 11.5.1). - Page 138 Troubleshooting –499 to –400: Query Errors –440 Query UNTERMINATED after indefinite response Indicates that a query was received in the same program message after a query requesting an indefinite response was executed (see IEEE 488.2, 6.3.7.5). Chapter 4 4-27...
-
Page 139: To -300
Troubleshooting –399 to –300: Device-Specific Error Messages –399 to –300: Device-Specific Error Messages An error number in the range [−399 to −300] indicates that the instrument has detected an error where some device operations did not properly complete, possibly due to an abnormal hardware or firmware condition. -
Page 140: To -200
Troubleshooting –299 to –200: Execution Error Messages –299 to –200: Execution Error Messages An error number in the range [–299 to –200] indicates that an error has been detected during instrument execution. Execution Error Message Descriptions –221 Settings conflict; parameter currently disabled This parameter is grayed out (unavailable) in the current context. -
Page 141: To -100
Troubleshooting –199 to –100: Command Errors –199 to –100: Command Errors The instrument parser detected an IEEE 488.2 syntax error. Errors in this class set the command error bit (bit 5) in the event status register (IEEE 488.2, section 11.5.1). In this case: •... - Page 142 Troubleshooting –199 to –100: Command Errors –100 Command error This is a generic syntax error for devices that cannot detect more specific errors. The code indicates only that a command error as defined in IEEE 488.2, 11.5.1.1.4 has occurred. –110 Command header error An error was detected in the header.
- Page 143 Troubleshooting –199 to –100: Command Errors –114 Header suffix out of range The value of a header suffix attached to a program mnemonic makes the header invalid. –161 Invalid block data A block data element was expected, but was invalid (see IEEE 488.2, 7.7.6.2).
- Page 144 Troubleshooting –199 to –100: Command Errors –151 Invalid string data A string data element was expected, but was invalid (see IEEE 488.2, 7.7.5.2). For example, an END message was received before the terminal quote character. –131 Invalid suffix The suffix does not follow the syntax described in IEEE 488.2, 7.7.3.2, or the suffix is inappropriate for this device.
- Page 145 Troubleshooting –199 to –100: Command Errors –150 String data error This error, as well as errors –151 through –159, is generated when parsing a string data element. This particular error message is used if the device cannot detect a more specific error. –158 String data not allowed A string data element was encountered, but not allowed...
-
Page 146: Device-Specific Errors
Calibration Defaults The Auto Alignment system cannot be used until an is executed by pressing Align Now All System . For Agilent Technologies Alignments Align Now E4402B, E4403B, E4404B, E4405B, E4407B, and E4408B only, you must connect the AMPTD REF OUT... - Page 147 You have selected a directory instead of a file when attempting to perform the Load function under the File front-panel key. Connect Amptd Ref Output to Input For Agilent Technologies E4402B, E4403B, E4404B, E4405B, E4407B, and E4408B only: you must connect to the analyzer with the AMPTD REF OUTPUT INPUT appropriate cable.
- Page 148 Troubleshooting 201 to 799: Device-Specific Errors File Name Error An invalid file name has been specified. Use filenames with a maximum of 8 characters (letters and digits only) and use a 3 character extension. Note that lowercase and uppercase are perceived as the same. This error will also occur if you attempt to delete a nonexistent file.
- Page 149 Troubleshooting 201 to 799: Device-Specific Errors In <filename>: error reading file Appears when loading data from a limit line or corrections disk file and a failure to the file occurs. In <filename>, line <numeric_value>: line too long When loading data from a limit line or corrections disk file, this message will appear if the length of any line in the file exceeds 255 characters.
- Page 150 Instrument mode requested is not supported Instrument mode specified with: INST command is not valid. Refer to Chapter 5, “Instrument Subsystem” of Agilent Technologies ESA Series Spectrum Analyzers Programmer’s Guide for more information. Instrument state may be corrupt, state has...
- Page 151 Troubleshooting 201 to 799: Device-Specific Errors Invalid instrument mode You have attempted to switch to an instrument mode that is currently not installed. Confirm that the mode name (for INST:SEL) or number (for INST:NSEL) was entered correctly and that the requested personality is actually installed in the instrument.
- Page 152 Troubleshooting 201 to 799: Device-Specific Errors Option not licensed. The selected option requires a license. Refer to the installation procedures in the user’s guide available for this particular option. Preselector centering failed An attempt to center the preselector failed. Printer interface error An error occurred while trying to print.
- Page 153 Troubleshooting 201 to 799: Device-Specific Errors Trigger Offset unavailable in swept spans Trigger Offset is only available in Zero Span. Refer to “Trig” on page 6-100 for a description of this function. TG start freq is less than 1/2 res bw TG uncalibrated at start frequencies below 1/2 the current resolution bandwidth.
- Page 154 Troubleshooting 201 to 799: Device-Specific Errors Unable to load state from file Loading of state from a file failed. Unable to load state from register Loading a state from an internal state register failed. Unable to load user state, factory preset was done An attempt to perform a failed, so the...
- Page 155 Troubleshooting 201 to 799: Device-Specific Errors Unable to store flatness data A failure occurred in setting the flatness data in the internal EEROM. Contact your local Agilent Technologies sales and service office. Unknown printer In attempting to identify the printer, a valid response was received but the printer is not known to the analyzer.
-
Page 156: Greater Than 1000: Personality Specific Error Messages
Troubleshooting Greater than 1000: Personality Specific Error Messages Greater than 1000: Personality Specific Error Messages An error detected with a number greater than 1000 indicates the instrument has detected an error relating to an installed personality. For more information on these errors, refer to the user’s guide for the personality in use. - Page 157 Troubleshooting Greater than 1000: Personality Specific Error Messages 10168 Cannot update the list of cable types on drive The file update failed. 10179 Carrier Present. Test Stopped! A carrier was found in the transmit band. Either disable the carrier or insert a bandpass filter for the receive bandwidth.
- Page 158 Troubleshooting Greater than 1000: Personality Specific Error Messages 3. Center the signal. (There must be a point on the trace that is “X dB” down from the maximum on both sides of that maximum.) 10246 Error reading file: CDMASTUN.CSV. Please reinstall cdmaOne.
- Page 159 Troubleshooting Greater than 1000: Personality Specific Error Messages 10251 Error reading file: RHOPMCO. Please reinstall cdmaOne. The file is missing or corrupt. Please reinstall the cdmaOne personality. 10245 Error reading file: SPCLIMIT.CSV. Cannot use custom limits. The file could be missing or corrupt. Create a new limits file.
- Page 160 Troubleshooting Greater than 1000: Personality Specific Error Messages 10161 Lower Custom Mask is Invalid! The user-specified lower custom mask cannot be resolved into a limit line. 10231 Measurement failed for unknown reasons. Check instrument settings and restart measurement. 10154 Measurement not defined for Out of Band. User has changed to an out-of-band frequency range.
- Page 161 Troubleshooting Greater than 1000: Personality Specific Error Messages 10149 Opt BAH DSP algorithm code file requires upgrade. The Digital Signal Processing algorithm code file revision is not supported by the currently loaded personality version. Refer to the user’s guide for the personality in use for more information on installation/upgrade.
- Page 162 Troubleshooting Greater than 1000: Personality Specific Error Messages 10239 Opt Freq Ref setting does not match external reference. This message is generated if Source is set to External on the properties form under the front-panel Mode key and the frequency on the same form is set to Setup a frequency that does not match the frequency of the signal being used as the external reference.
- Page 163 Troubleshooting Greater than 1000: Personality Specific Error Messages 10172 Sweep Time too fast(<2sec) The sweep time must be set to 2 seconds or longer for the results to be valid. 10141 Sync word not found in frame (Burst Type) One or more active GSM bursts that match the selected Burst Type have been detected in the RF Input signal, but none contain the selected Training Sequence Code (TSC).
- Page 164 Troubleshooting Greater than 1000: Personality Specific Error Messages 10170 The Cable Fault Measurement is active. Mode Setup is disabled. Mode setup is not available in the cable fault utility. 10177 There are no spurs to inspect. The user has attempted to switch the Inspect Spur softkey to the position after the measurement has...
- Page 165 Troubleshooting Greater than 1000: Personality Specific Error Messages 10138 Valid GSM burst not found in frame (Burst Type). No active GSM bursts that match the selected Burst Type have been detected in the RF input signal. The search was performed over the complete GSM frame. 10140 Valid GSM burst not found in frame (Ref Burst).
-
Page 166: Menu Maps
Menu Maps This chapter provides a visual representation of the front panel keys and their associated menu keys. Refer to the Chapter 6 , “Front-Panel Key Reference” for key function descriptions. -
Page 167: What You Will Find In This Chapter
Menu Maps What You Will Find in This Chapter What You Will Find in This Chapter This chapter provides menu maps for the front-panel keys having associated menus. The Alpha Editor Menus are associated with both keys, but they are shown separately. The Display File front-panel key menus appear in alphabetical order as follows:... - Page 168 Menu Maps What You Will Find in This Chapter Chapter 5...
- Page 169 Menu Maps What You Will Find in This Chapter Chapter 5...
- Page 170 Menu Maps What You Will Find in This Chapter Chapter 5...
- Page 171 Menu Maps What You Will Find in This Chapter Chapter 5...
- Page 172 Menu Maps What You Will Find in This Chapter Chapter 5...
- Page 173 Menu Maps What You Will Find in This Chapter Chapter 5...
- Page 174 Menu Maps What You Will Find in This Chapter Chapter 5...
- Page 175 Menu Maps What You Will Find in This Chapter 5-10 Chapter 5...
- Page 176 Menu Maps What You Will Find in This Chapter Chapter 5 5-11...
- Page 177 Menu Maps What You Will Find in This Chapter 5-12 Chapter 5...
- Page 178 Menu Maps What You Will Find in This Chapter Chapter 5 5-13...
- Page 179 Menu Maps What You Will Find in This Chapter 5-14 Chapter 5...
- Page 180 Menu Maps What You Will Find in This Chapter Chapter 5 5-15...
- Page 181 Menu Maps What You Will Find in This Chapter 5-16 Chapter 5...
- Page 182 Menu Maps What You Will Find in This Chapter Chapter 5 5-17...
- Page 183 Menu Maps What You Will Find in This Chapter 5-18 Chapter 5...
- Page 184 Menu Maps What You Will Find in This Chapter Chapter 5 5-19...
- Page 185 Menu Maps What You Will Find in This Chapter 5-20 Chapter 5...
- Page 186 Menu Maps What You Will Find in This Chapter Chapter 5 5-21...
- Page 187 Menu Maps What You Will Find in This Chapter 5-22 Chapter 5...
- Page 188 Menu Maps What You Will Find in This Chapter Chapter 5 5-23...
- Page 189 Menu Maps What You Will Find in This Chapter 5-24 Chapter 5...
- Page 190 Menu Maps What You Will Find in This Chapter Chapter 5 5-25...
- Page 191 Menu Maps What You Will Find in This Chapter 5-26 Chapter 5...
- Page 192 Menu Maps What You Will Find in This Chapter Chapter 5 5-27...
-
Page 193: Front-Panel Key Reference
Front-Panel Key Reference The front-panel keys in this chapter are listed alphabetically and are described with their associated menu keys. The menu keys are arranged as they appear in your analyzer menus. Use the following table to locate a specific key. - Page 194 Front-Panel Key Reference Page Page Key Label Key Label Location Location < Display Line page 6-64 Auto Align page 6-93 > Display Line page 6-64 Auto Couple page 6-13 1 ↔ 2 page 6-105 Average On Off page 6-15 1 → 3 page 6-105 Average Type Video page 6-15...
- Page 195 Front-Panel Key Reference Page Page Key Label Key Label Location Location Corrections page 6-9 Emiss BW X dB page 6-52 Corrections page 6-33 Emission BW page 6-55 Corrections On Off page 6-9 Enter page 6-25 Counter Zoom On Off page 6-53 Entire Frame page 6-101 Coupling AC DC...
- Page 196 Front-Panel Key Reference Page Page Key Label Key Label Location Location Gate Delay page 6-85 Load page 6-30 Gate Length page 6-85 Load Defaults page 6-94 Gate On Off page 6-84 (Local) page 6-92 Gate Setup page 6-84 page 6-85 Graticule On Off page 6-24 Main Chan BW...
- Page 197 Front-Panel Key Reference Page Page Key Label Key Label Location Location Mkr → CF Step page 6-49 Other page 6-29 Mkr → Ref Lvl page 6-49 Pause page 6-50 Mkr → Start page 6-49 Peak page 6-17 Mkr → Stop page 6-49 Peak Excursn page 6-63...
- Page 198 Front-Panel Key Reference Page Page Key Label Key Label Location Location Ref Lvl Offst page 6-9 Show System page 6-95 Ref Level page 6-8 Signal ID Mode page 6-41 Remote Port page 6-95 Signal Ident On Off page 6-41 Rename page 6-34 Signal Track On Off page 6-38...
- Page 199 Front-Panel Key Reference Page Page Key Label Key Label Location Location Trace page 6-105 Zone Span page 6-80 Trace + State page 6-28 Zoom page 6-108 Trace 1 2 3 page 6-105 Tracking Peak page 6-77 Trig page 6-100 Trig Delay On Off page 6-103 Trig Type Edge Level page 6-84...
-
Page 200: Amplitude Y Scale
Front-Panel Key Reference AMPLITUDE Y Scale AMPLITUDE Y Scale Activates the reference level function and accesses the amplitude menu keys. Amplitude menu keys allow you to set functions that affect the way data on the vertical axis is displayed or corrected. Allows the reference level to be changed. - Page 201 See also the key description. Key Access: Ext Amp Gain AMPLITUDE Y Scale More 1 of 2 Agilent ESA-E Series only (E4401B, E4402B, E4404B, E4405B and Int Preamp E4407B) with Option 1DS. Turns the internal preamp on and off. On Off Pressing...
- Page 202 Front-Panel Key Reference AMPLITUDE Y Scale Selects which set of correction factors is to be modified. Select Once the selection has been made, the menu automatically returns to the previous menu. Pressing will return you to the previous menu without Return making a selection.
- Page 203 Front-Panel Key Reference AMPLITUDE Y Scale Point Allows you to create or edit an amplitude-correction factor data point. Up to 200 points may be defined for each set. Enter the point number to be created or edited by using the numeric keypad, then press , or use Enter the knob, Tab, or step keys to move to an existing point.
- Page 204 Front-Panel Key Reference AMPLITUDE Y Scale Delete Point Allows you to delete the amplitude-correction data for the currently selected point. The prompt If you are sure, press key again to delete will appear on the display. Pressing again will delete the point Delete Point and adjust all of the point numbers as appropriate.
-
Page 205: Auto Couple
Front-Panel Key Reference Auto Couple Auto Couple Couples the following functions: resolution bandwidth, video bandwidth, sweep coupling (SR/SA), attenuation, sweep time, center-frequency step, and frequency counter resolution. Coupled functions are functions that are linked. If one function is NOTE changed, the coupled function is changed. During normal operation, the sweep time, resolution bandwidth, and video bandwidth are coupled to span, the input attenuation is coupled to the reference level, and the center frequency step is coupled to the span. -
Page 206: Bw/Avg
Front-Panel Key Reference BW/Avg BW/Avg Activates the resolution bandwidth function and accesses the menu keys that control the bandwidth functions and averaging. Changes the 3 dB resolution bandwidth on the analyzer from 1 kHz to Resolution BW 5 MHz in a 1, 3, 10 sequence using the knob or step keys. If an Auto Man unavailable bandwidth is entered using the numeric keypad, the closest available bandwidth in the 1, 3, 10 sequence is used. - Page 207 Front-Panel Key Reference BW/Avg initiates a digital averaging routine that averages Average Type Average Type (Video) on a point-by-point basis over a number of successive sweeps. The effect Video Power is to minimize the impact of transients on the displayed signals and noise.
- Page 208 Option 1DR (narrow resolution bandwidth) is installed and the span is less than 5 MHz. (Option 1DR is available with Agilent ESA-E Series only (E4401B, E4402B, E4404B, E4405B and E4407B.) This function is set to when the resolution bandwidth is set to any...
-
Page 209: Det/Demod
Demod Time menu key only appears when the FM demod option (Option NOTE BAA) is installed. Option BAA is available on Agilent ESA-E Series spectrum analyzers only (E4401B, E4402B, E4404B, E4405B and E4407B). Segmented sweep is not available with the demodulation functions in NOTE this section. - Page 210 Front-Panel Key Reference Det/Demod Demod View When is pressed, the vertical scaling of On Off Demod View (On) the display is in frequency, and marker will read out the FM deviation in kHz when. When Demod View is On, the following functions are not available: Log/Lin (the display is calibrated in Hz), Y Axis Units, Marker Search functions, Normalize, Display Line, Peak Excursion, and Peak Threshold.
-
Page 211: Display
Front-Panel Key Reference Display Display Accesses menu keys that allow you to control what is displayed on the analyzer, including titles, the display line graticule and annotation, as well as the testing of trace data against user entered limits. Allows the measurement window to expand horizontally over the entire Full Screen instrument display. - Page 212 Front-Panel Key Reference Display Limits Fixed Rel Allows you to choose fixed or relative limit lines. The fixed ( ) type uses the current limit line as a Fixed reference with fixed frequency and amplitude values. The relative ( ) setting causes the current limit line value to be relative to the displayed center frequency and reference level amplitude values.
- Page 213 Front-Panel Key Reference Display Accesses menu keys that allow you to modify individual Modify limit lines. Key Access: Display Limits Limit 1 2 Allows you to select between the two available limits. The menu keys below the key allow you to set Limit 1 2 parameters for the selected limit.
- Page 214 Front-Panel Key Reference Display Edit Accesses the menu keys which include Edit Point , (or has been Frequency Time X Axis Units (Time) selected), , and Amplitude Connected No Yes Delete Point also accesses the limits table. The Tab keys allow Edit you to move between the rows in the limits table.
- Page 215 Front-Panel Key Reference Display if a new point, to allow to be entered for the Frequency new point. Key Access: Display Limits Modify More 1 of Edit allows you delete the current point in the Delete Point limit line. You will be prompted with the message If you are sure, press key again to delete.
- Page 216 Front-Panel Key Reference Display Accesses the following menu keys which allows you to change or Title Title clear a title on your display. Key Access: Display Allows you to write a title across the top of the display. Change Title The marker readout may interfere with the last characters.
-
Page 217: Enter
Front-Panel Key Reference Enter Enter Terminates and enters into the analyzer a numerical value that has been entered from the front panel using the numeric keypad. (For most applications, it is better to use the units menu keys.) When using the key menus, the key is also used to terminate File... -
Page 218: Esc
Front-Panel Key Reference Deactivates the active function and blanks the active function text from the display. No data can be accidentally entered using the knob, step keys, or numeric keypad. Pressing will also abort a print, clear input or output overloads, and clear error messages from the status line along the bottom of the display. -
Page 219: File
Front-Panel Key Reference File File Accesses the menu keys used to view, save, load, and manage data on a floppy disk or the internal analyzer drive. See page 2-25 for more information. Displays all directories and files located on the selected drive, Catalog depending upon the preferences set under the keys... - Page 220 Front-Panel Key Reference File Save Accesses menu keys that allow you to save analyzer setups, states, traces, limits, corrections and screen data to a floppy (A:) drive or internal flash (C:) drive. Never remove the floppy disk during a save operation. To do so could NOTE corrupt all data on the floppy disk.
- Page 221 Front-Panel Key Reference File can only be saved individually. Refer to the File, Source key description. Screen Displays all previously saved screen files and captures the current screen displayed in preparation to save it in a file for retrieval at a future date. Screen files can be saved in any of the following formats: Bitmap, Metafile, Reverse Bitmap, and Reverse Metafile.
- Page 222 Front-Panel Key Reference File When is set to accesses the Type Corrections Source menu keys, which allow Antenna Cable Other User you to select the type of correction to be saved. When is set to accesses the Type Limits Source Limit 1 menu keys.
- Page 223 Front-Panel Key Reference File Trace Displays all trace files you may wish to load (TRC and CSV). Traces can be loaded individually or as a group. When a trace is loaded, the state that existed when that trace was saved is loaded along with the trace. Also, the loaded trace is placed in view mode.
- Page 224 Front-Panel Key Reference File Allows you to move up one directory level. If at the top Dir Up level, moves to the drive level, displaying the Dir Up available disk drives. Accesses the highlighted directory on your display. If Dir Select [..] is highlighted, this key acts in the same manner Dir Up Allows you to delete files and directories.
- Page 225 Front-Panel Key Reference File accesses a menu of keys that allow you view the Sort Sort files you wish to delete, according to a selected file attribute. The selections include, By Date By Name , and allows Extension By Size Order Up Down Order (Up) you to view files you may wish to delete in ascending...
- Page 226 Front-Panel Key Reference File Allows you to select the source and destination Dir From To directories for your copy on one or more drives. Allows you to move up one directory level. If at the top Dir Up level, moves to the drive level, displaying the Dir Up available disk drives.
- Page 227 Front-Panel Key Reference File Accesses the Alpha Editor and allows you to enter a Name filename. The external keyboard can also be used to enter a filename while the alpha editor is accessed. Complete your entry by pressing Return Enter Only capital letters (A-Z) and digits (0-9) may appear in file names (8 NOTE characters, maximum).
-
Page 228: Freq Count
Front-Panel Key Reference Freq Count Freq Count Activates the function if there are no markers, and then Marker Normal turns the marker count function on. turns on the marker counter. If no marker is active Marker Count Marker Count (On) before is pressed, a marker is activated at the center On Off... -
Page 229: Frequency Channel
Front-Panel Key Reference FREQUENCY Channel FREQUENCY Channel Activates the center frequency function, and accesses the menu of frequency functions. The center frequency, or start and stop frequency values appear below the graticule on the display. Although the analyzer allows entry of frequencies greater than the specified frequency range, using frequencies greater than the frequency span of the analyzer is not recommended When changing both the center frequency and the span, change the... - Page 230 Front-Panel Key Reference FREQUENCY Channel When a frequency offset is entered, its value appears on the bottom of the display (as opposed to reference level offsets, which appear on the left side of the display). To eliminate an offset, press , and Freq Offset .
-
Page 231: Help
Front-Panel Key Reference Help Help Accesses a short description of any front panel or menu key. After pressing , an explanation of the next key pressed will appear on the Help display. After the information is displayed, press or any other key to remove the help window. -
Page 232: Input/Output
Front-Panel Key Reference Input/Output Input/Output Sets the input impedance for voltage-to-power conversions. The Input Z Corr 50Ω impedance you select is for computational purposes only, since the 75Ω actual impedance is set by internal hardware to 50 Ω (except for Option 1DP). - Page 233 Front-Panel Key Reference Input/Output Accesses the Ext Mix Band key menus and allows you Ext Mix Band to select one of the pre-defined bands corresponding to the external mixer being used. The start and stop frequencies and a letter corresponding to the letter suffix of the mixer model number in use, appears on each menu key.
- Page 234 Front-Panel Key Reference Input/Output Since two measurements are taken for each display cycle, the display update rate is reduced. Key Access: Input/Output Input Mixer Signal ID ModeImage Shift Image Shift Allows the analyzer, in a two sweep sequence, to place data from the first sweep in Trace 1, and data from the second (frequency shifted) sweep in Trace 2.
- Page 235 Front-Panel Key Reference Input/Output activates and allows adjustment of an Mixer Bias (On) internal bias source for use with external mixers. The bias signal is present on the center conductor of the IF INPUT connector on the front panel. The mixer bias will be Harmonic (Auto) Mixer Type (Presel)
-
Page 236: Marker
Front-Panel Key Reference Marker Marker Accesses the marker control keys which select the type and number of markers and turns them on and off. Markers are diamond-shaped characters that identify points of traces. Up to four pairs of markers may appear on the display simultaneously; only one pair can be controlled at a time. - Page 237 Front-Panel Key Reference Marker The delta marker function permits signal-to-noise measurements NOTE provided the signal is a single spectral component (sinusoid). Place a normal marker on the signal, press , place the delta marker in the Delta noise, and activate (see below).
- Page 238 Front-Panel Key Reference Marker Key Access: Marker More 1 of 2 Accesses the following menu keys that allow you to change the active Readout marker readout. Key Access: Marker More 1 of 2 Sets the marker to . The default selection in Frequency Frequency non-zero spans, displays the absolute frequency of a...
- Page 239 Front-Panel Key Reference Marker You can use to indicate noise level relative to NOTE Delta Marker Noise sinusoidal signal (signal to noise). However, be sure to activate the delta marker before pressing or the reference marker units Marker Noise may be incorrect. The noise marker averages 5% of the trace data values (one-half a horizontal division), centered on the location of the marker on the frequency or time scale.
- Page 240 Front-Panel Key Reference Marker In log detector mode, with the result reported in dBm in a 1 Hz bandwidth, the final reported value will be: ) 10 × × Averaged value over 32 values – log 1.12 Resolution bandwidth 2.51 dB In linear detector mode (dBm) units, with the result reported in dBm in a 1 Hz bandwidth, the final reported value will be:...
-
Page 241: Marker
Front-Panel Key Reference Marker → Marker → Accesses the following marker function menu keys: Mkr → CF Sets the center frequency of the analyzer to the marker frequency. In → Delta mode, Mkr CF sets the center frequency to the marker delta →... -
Page 242: Meas Control
Front-Panel Key Reference Meas Control Meas Control Accesses a menu of keys that allow you to pause or restart one of the measurements available in the key menu. also MEASURE Meas Control allows you to select between continuous and single sweeps or measurements. -
Page 243: Meas Setup
Front-Panel Key Reference Meas Setup Meas Setup If in a measurement, displays one of five measurement setup menus. The setup menu displayed depends on which measurement ( ) has been Channel Power Occupied BW Emission BW Harmonic Dist selected in the menu. - Page 244 Front-Panel Key Reference Meas Setup Occupied BW Meas Setup Menu Keys To access the following keys for setting up an occupied bandwidth measurement, press and then the front panel MEASURE Occupied BW key. Meas Setup Press to specify the number of sweep averages used Avg Number Avg Number (On) when calculating the measurement result.
- Page 245 Front-Panel Key Reference Meas Setup Press to specify the number of sweep averages used Avg Number Avg Number (On) when calculating the measurement result. The average will be On Off displayed at the end of each sweep. disables the Avg Number (Off) measurement averaging.
-
Page 246: Measure
Front-Panel Key Reference MEASURE MEASURE In the Spectrum Analyzer ( mode, accesses a menu of keys that allow you to make adjacent channel power, channel power, occupied bandwidth, emission bandwidth, and harmonic distortion measurements. When a measurement is activated, Signal Track, Video Averaging, NOTE Segmented Sweep, Band Power and Marker Noise will be turned off. - Page 247 Front-Panel Key Reference MEASURE Integrates the power of the displayed spectrum and puts markers at Occupied BW the frequencies between which a selected percentage of the power is contained. The measurement defaults to 99% of the occupied bandwidth power. The power-bandwidth routine first computes the combined power of all signal responses contained in the trace.
- Page 248 Front-Panel Key Reference MEASURE When measuring the Nth harmonic, the analyzer will choose the narrowest resolution bandwidth that is ≥N times the resolution bandwidth used to measure the fundamental. Widening the resolution bandwidth allows the measurement to capture all modulation on the harmonics.
-
Page 249: Mode
Front-Panel Key Reference MODE MODE Selects the measurement mode of your analyzer. Spectrum analyzer mode ( ) is the default mode. Other modes include GSM (requires Option BAH) and cdmaOne (requires Option BAC). Chapter 6 6-57... -
Page 250: Mode Setup
Front-Panel Key Reference MODE SETUP MODE SETUP Brings up a menu for setting up the current mode. The mode has no mode setup functions. 6-58 Chapter 6... -
Page 251: Next Window
Front-Panel Key Reference Next Window Next Window Allows you to select the active window in functions which support split-screen display modes, such as zone span. In split-screen display modes, pressing allows you to switch between split-screen and Zoom full-sized displays of the active window. See also “Zoom”. The active window is indicated by a solid green box around the window. -
Page 252: Peak Search
Front-Panel Key Reference Peak Search Peak Search Places a marker on the highest priority peak based upon one of two criteria: (default) or (see under Param Peak Search Param Max Search below). If is the criterion, pressing places a Param Peak Search marker on the highest point of the trace excluding the LO feedthrough. - Page 253 Front-Panel Key Reference Peak Search Marker Noise Reads out the average noise level, referenced to a 1 Hz noise power bandwidth. If the marker delta function is on and the noise marker is activated and moved to measure the noise floor, the marker readout will display the signal-to-noise ratio.
- Page 254 Front-Panel Key Reference Peak Search The detection mode also affects the measurement. If in log mode, the log detector understates the noise response. To compensate, 2.51 dB is added to the measurement. If the detector is in linear mode, the firmware uses 1.049 dB as a correction value.
- Page 255 Front-Panel Key Reference Peak Search For example, N dB Points can be used to measure the 3 dB bandwidth NOTE of a filter in a transmission test with the tracking generator. The default value is -3 dB. Possible values range from −1.00 dB to −80.00 dB.
- Page 256 Front-Panel Key Reference Peak Search The value of the threshold appears in the active-function block and on the lower-left side of the display. The threshold level does not influence the trace memory or marker position. The value of the peak threshold level can be changed using the step keys, the knob, or the numeric keypad.
-
Page 257: Preset
Front-Panel Key Reference Preset Preset Provides a convenient starting point for making most measurements. You can select whether a factory preset or user preset is performed. The default is factory preset, which will always set the analyzer to the same state for a given model number. - Page 258 Front-Panel Key Reference Preset If the Power On function is set to and the Preset function is set to NOTE Preset , turning on the analyzer performs a factory preset. Turning on Factory the analyzer also fetches alignment data; clears trace 2, trace 3, and both the input and output buffers;...
- Page 259 Front-Panel Key Reference Preset Table 6-1 Factory Preset Conditions Reference level 0 dBm in power-on units Reference level offset 0 dB Reference level position top (10th) graticule Resolution bandwidth 3 MHz (auto-coupled) Span E4401B and E4411B 1.5 GHz E4402B and E4403B 3.0 GHz E4404B 6.7 GHz...
- Page 260 Front-Panel Key Reference Preset Table 6-1 Factory Preset Conditions Trigger free run 1 µsec Trig Delay Off Trig Offset Off 0 sec VBW/RBW ratio 1.000 X Video averaging Video bandwidth 3 MHz (auto-coupled) Loads the analyzer configuration that existed when User Preset Save User Preset was pressed.
-
Page 261: Print
Front-Panel Key Reference Print Print Option A4H (GPIB and Parallel) and 1AX (RS-232 and Parallel) only. initiates an output of the display data, without an external Print controller, to a previously specified graphics printer. Refer to Chapter 1 of this manual or the Agilent ESA Spectrum Analyzers Programmer’s Guide for detailed information about printing. -
Page 262: Print Setup
Front-Panel Key Reference Print Setup Print Setup Option A4H (GPIB and Parallel) or 1AX (RS-232 and Parallel) only. Accesses the menu keys which allow you to define a printer and select printer options. Accesses the Printer Type menu keys. When you connect your printer Printer Type and press the key, the analyzer will attempt to identify your... - Page 263 Front-Panel Key Reference Print Setup Allows you to select either printing. The Orientation Portrait Landscape key will not function with a PCL3 (HP DeskJet) printer. Orientation Allows you to select between color or black and white printing. This key Color On Off will not function when pressed unless the connected printer supports color.
-
Page 264: Restart
Front-Panel Key Reference Restart Restart Restarts the current measurement activated in the key menu. Measure When in mode, ( ) the averaging function is Average (On) BW/Avg Average restarted (the trace is reset and the average number is reset to zero). 6-72 Chapter 6... -
Page 265: Return
Front-Panel Key Reference Return Return Returns you to the previous menu. Repeated presses of this key move back through previously selected menus (including previous pages selected by the key. MORE When a menu requiring a yes or no key press has been accessed, the NOTE key will not respond. -
Page 266: Save
Front-Panel Key Reference Save Save Executes a save operation as though you were in the menu File Save and had pressed . The hardkey always performs the same Save Now Save save function as if the user had pressed File Save Save Now In the event that a valid save cannot be performed because a drive has... -
Page 267: Single
Front-Panel Key Reference Single Single When analyzer is in continuous sweep mode and not in a measurement ), this key changes the sweep control to single sweep Measure Meas Off and executes a sweep after the trigger condition is met. If the analyzer is already in single sweep, pressing re-executes a new sweep Single... -
Page 268: Source
Front-Panel Key Reference Source Source Accesses the tracking generator key functions (Options 1DN or 1DQ only). Without Option 1DN or 1DQ, pressing will cause the error Source message “Option not installed” to appear on the analyzer display. is on, the 3 GHz tracking generator will be momentarily CAUTION Auto Align retuned to approximately 1.557 GHz between most sweeps. - Page 269 Front-Panel Key Reference Source Allows you to select between automatic and manual adjustment of the Attenuation tracking generator’s output attenuator. The Agilent E4401B and Auto Man Agilent E4411B can be manually adjusted from 0 to 60 dB in 10 dB steps.
-
Page 270: Span X Scale
Front-Panel Key Reference SPAN X Scale SPAN X Scale Activates the function and accesses the menu of span functions. Span Pressing allows the user to change the frequency range SPAN X Scale symmetrically about the center frequency. The frequency-span readout describes the total displayed frequency range;... - Page 271 Front-Panel Key Reference SPAN X Scale Zero Span is not available when is selected. Segments NOTE Segmented (On) in the segmented sweep function can be set to zero span by setting the span parameter in the segmented sweep editor to 0 Hz. ( Sweep, Segmented, Modify, Edit, Span Changes the analyzer frequency span to the previous span setting.
- Page 272 Front-Panel Key Reference SPAN X Scale Pressing will return you to a one-window Zone (Off) display of the active window. Key Access: SPAN X Scale Zone Pressing will set , if it is off. NOTE Zoom Zone (On) Allows you to change the frequency of the zone markers Zone Center without changing the zone span.
- Page 273 Front-Panel Key Reference SPAN X Scale Zone Span is not available when is selected. NOTE Segmented (On) Finds the next peak to the right of the zone center Zone Pk Right frequency on the upper window trace and then moves the zone so that it is centered around the new peak.
-
Page 274: Standby
Front-Panel Key Reference Standby Standby Removes power from the analyzer, except for a small portion of circuitry inside the switching power supply. No internal time base circuitry, or any other function outside of the power supply is powered when the analyzer is in “standby.”... -
Page 275: Sweep
(with 101 sweep points) and 4 milliseconds (with 401 sweep points). The maximum sweep time is 4000 seconds for any set of conditions. Refer to the Agilent Technologies ESA Spectrum Analyzers Specifications Guide for more information about Sweep Time and its relation to other instrument settings. - Page 276 Front-Panel Key Reference Sweep Switches the analyzer between the continuous-sweep mode and the Sweep Cont single-sweep mode. Pressing puts the analyzer in Single Sweep (Single) single-sweep mode. Press on the front panel, to enable a sweep Single when in single-sweep mode. When is selected, one sweep Sweep (Cont) follows another as soon as it is triggered.
- Page 277 Front-Panel Key Reference Sweep Accesses menu keys that allow you to set up edge Edge Setup triggering. Key Access: Sweep Gate Setup Edge Pos Neg Sets the polarity for edge triggering of the gate. When is pressed, a positive-going edge will trigger Edge (Pos) the opening of the gate, after the delay set with the Gate...
- Page 278 For measurement examples of the segmented sweep function, refer to the Agilent Technologies ESA Spectrum Analyzers Measurement Guide. This feature is only available on ESA-E series analyzers (E4401B, NOTE E4402B, E4404B, E4405B, E4407B) with firmware revision ≥ A.05.00.
- Page 279 Front-Panel Key Reference Sweep Segmented Sweep Editor When the editor is entered ( ), the Sweep, Segmented, Modify, Edit segmented sweep mode is turned on, and a dual-display appears. The upper window shows the trace, displayed as described above. The lower window shows the editor data in tabular form: one segment per row with segment number and parameter values occupying the seven columns.
- Page 280 Front-Panel Key Reference Sweep Interaction with Other Analyzer Functions Certain conditions prevent segmented sweep from being activated, while others cause this mode to be turned off. For analyzers with Option AYZ, the mixer frequency range ( Input, Input Mixer (Ext), Ext Mix Band must be set to include the frequencies of interest in the segmented sweep table.
- Page 281 Front-Panel Key Reference Sweep Turn markers off ( ) when entering or exiting segmented NOTE Marker sweep ( Segmented (On)(Off) Performing a factory preset will turn segmented sweep off. This is also true if you select full span or last span. Functions which are parameters of segmented sweep are not available when accessed by pressing the following front-panel keys: Auto Couple...
- Page 282 Front-Panel Key Reference Sweep Allows you to select a frequency range symmetrically about the center frequency for the current segment using the data control keys. The order of the segments may change when you enter center frequency NOTE or span because the sequence is based upon increasing start frequency. Refer to the “Displaying the Trace”...
- Page 283 Front-Panel Key Reference Sweep Delete Segment Deletes the highlighted segment. Key Access: Sweep, Segmented, Modify Edit, More 1 of 2 Initiates the deletion of all segments. After pressing Delete this key once, the message: If you are sure, press key again to delete will be displayed. Pressing again will complete the process.
-
Page 284: System (Local)
Front-Panel Key Reference System (Local) System (Local) Accesses the System menu keys. Pressing after the System (Local) analyzer has been placed in the remote mode, places the analyzer in the local mode and enables front-panel control. During remote operation, R appears in the upper-right corner of the screen. - Page 285 Front-Panel Key Reference System (Local) Pressing sets the analyzer to the settings Preset (User) defined by the key. Refer to “Preset” Save User Preset this chapter for more information. Key Access: System Power On/Preset Save User Saves the active state of the analyzer into the User Preset Preset register for recall on Preset...
- Page 286 Front-Panel Key Reference System (Local) Accesses the menu keys and immediately Align Now Align Now executes an alignment cycle of the selected system(s). Menu key selections include (for the alignment of all systems), (Internal), RF (Ext Cable) TG (Ext Cable) Option 1DN is installed in Agilent E4402B, E4403B, E4404B, E4405B, E4407B, and E4408B), and FM Demod...
- Page 287 It is grayed out if you are on the first page or only one page exists. Key Access: System Show Hdwr Agilent ESA-E Series only (E4401B, E4402B, E4404B, E4405B and Color Palette E4407B) Accesses the menu keys. These keys are only Color Palette available with analyzers having a color display.
- Page 288 Front-Panel Key Reference System (Local) Accommodates the use of protective goggles while Optical Filter viewing lasers. Key Access: System More 1 of 3 Color Palette Sets the display screen to green monochrome. The Monochrome monochrome display uses different shades of green for each green value.
- Page 289 Front-Panel Key Reference System (Local) Table 6-2 System Default Settings Feature Default Setting Date Format Time Date Display GPIB Address Display Viewing Angle Speaker Volume Manual Tracking Adjustment 2048 External Amplifier Gain 0 dBm Input Impedance 50 (Ohm) a. This value maybe 75 ohms, depending upon the analyzer hardware configuration.
- Page 290 Front-Panel Key Reference System (Local) Allows you to activate the option. When a valid option Activate key number and license key number have been entered, press . If your entry was correct, the option will Activate be enabled and the message: Option activated will appear in the status line of your display.
- Page 291 Front-Panel Key Reference System (Local) Allows you to install personalities in the analyzer. For Install more information on this key, see the documentation that accompanies the personalities. Key Access: System More 1 of 3 More 2 of 3 Personalities Allows you to uninstall a personality. Highlight the Uninstall appropriate personality and press Uninstall...
-
Page 292: Trig
Front-Panel Key Reference Trig Trig Accesses the menu of keys that allow you to select the sweep mode and trigger mode of the analyzer. New sweep starts as soon as possible after the current sweep ends. Free Run Activates the trigger condition that allows the next sweep to start if the Video detected RF envelope voltage rises to a level set by the video trigger level. - Page 293 Front-Panel Key Reference Trig Option B7B (TV Trigger and Picture on Screen) only. Accesses the setup TV Trig Setup functions for TV Trigger. Allows you to determine how the fields of the TV Field picture signal will be affected by the trigger system. One complete TV image consists of one frame of 525 or 625 horizontal lines depending on the TV standard being used.
- Page 294 Front-Panel Key Reference Trig Field One Causes the selected line number to be viewed as an offset into the first field starting with Line 1, the first line in Field One. Key Access: Trig TV Trig Setup Field Field Two Causes the selected line number to be viewed as an offset into the second field.
- Page 295 Front-Panel Key Reference Trig Allows you to set and turn on or off a delay, during which the analyzer Trig Delay On Off will wait to begin a sweep after receiving an external trigger signal. This function is not available when is on.
-
Page 296: Viewing Angle
Front-Panel Key Reference Viewing Angle Viewing Angle Controls the optimum viewing angle of the display. The viewing angle keys are located next to each other at the upper left-hand corner of the analyzer, bordering the display. These two keys allow you to adjust the intensity of the objects on the display so that it can be optimally viewed from different angles. -
Page 297: View/Trace
Front-Panel Key Reference View/Trace View/Trace Accesses the trace keys that allow you to store and manipulate trace information. Each trace is comprised of a series of data points in which amplitude information is stored. The analyzer updates the information for any active trace with each sweep. Selects the menu keys used for trace 1, trace 2, or trace 3 functions. - Page 298 Front-Panel Key Reference View/Trace Exchanges the contents of the trace 1 register with the 1↔2 trace 2 register and puts trace 1 and 2 in view mode. Key Access: View/Trace More 1 of 2 Operations 2 - DL → 2 Subtracts the display line from trace 2 and places the result in trace 2 and puts trace 2 in view mode.
- Page 299 Front-Panel Key Reference View/Trace Trace 1 should be in clear write mode prior to setting normalize to on. CAUTION The normalize function is most useful for applying correction data to a trace while making a stimulus response measurement with a tracking generator. For example, connect the cables and a thru line, in place of the device to be measured, between a tracking generator and the analyzer input.
-
Page 300: Zoom
Front-Panel Key Reference Zoom Zoom Allows you to switch between the split-screen and full-sized display of the active window in zone span and other functions which support split-screen display modes. The active window is indicated by a solid green line surrounding the window. is pressed while in a non-split-screen display mode, it will Zoom activate the zone span mode. -
Page 301: Options And Accessories
Options and Accessories This chapter lists the options and accessories that can be ordered along with your analyzer. The Option Table on the following page shows which options are available for your particular product. - Page 302 Options and Accessories Table 7-1 Option Table Option • • • • • • • • Delete Manual Set • • • • • • • • Add Manual Set • • • • • • • • Service Documentation, Component Level •...
- Page 303 Options and Accessories Table 7-1 Option Table Option • • • • Digital Signal Processing and Fast ADC • • • • RF Communications Hardware • • • • Distance to Fault Accessory Kit • • • • • FM Demodulation •...
-
Page 304: Options
Options and Accessories Options Options Options can be ordered by option number when you order your analyzer. Some of the options are also available as kits that can be ordered and installed after you have received your spectrum analyzer. Refer to Table 7-1 on page 7-2 to determine which options are available for your particular product. -
Page 305: How To Order Options
Options and Accessories How to Order Options How to Order Options Options can be ordered using your product number and the number of the option you are ordering. For example, if you are ordering Option 1DP for an Agilent E4401B, you would order E4401B 1DP. If you are ordering an option after the purchase of your analyzer, you will need to add a U (for upgrade) to the product number and then specify which option you are ordering. -
Page 306: Rack Mount Kit With Handles (Option 1Cp)
Options and Accessories How to Order Options Rack Mount Kit With Handles (Option 1CP) Option 1CP provides the parts necessary to mount the analyzer in an HP/Agilent System II cabinet or in a standard 19 inch (482.6 mm) equipment rack. It includes front handles and rack slides for added convenience. -
Page 307: Narrow Resolution Bandwidth (Option 1Dr)
Options and Accessories How to Order Options Narrow Resolution Bandwidth (Option 1DR) This option provides additional narrow resolution bandwidths of 10 Hz, 30 Hz, 100 Hz, and 300 Hz. These bandwidths improve the analyzer sensitivity and allow you to resolve closely spaced signals. 75 Ω... -
Page 308: Vdc Power Cable (Option A5D)
Options and Accessories How to Order Options AUX VIDEO OUT - provides detected video output (before the analog-to-digital conversion) proportional to vertical deflection of the trace. AUX IF OUT - provides a 50 Ω, 21.4 MHz IF output that is the down-converted signal of the RF input of the analyzer. -
Page 309: External Mixing (Option Ayz)
Options and Accessories How to Order Options AUX VIDEO OUT - provides detected video output (before the analog-to-digital conversion) proportional to vertical deflection of the trace. AUX IF OUT - provides a 50 Ω, 21.4 MHz IF output that is the down-converted signal of the RF input of the analyzer. -
Page 310: Tv Trigger And Picture On Screen (Option B7B)
Options and Accessories How to Order Options TV Trigger and Picture on Screen (Option B7B) Option B7B requires Option BAA. Option B7B allows you to trigger the analyzer sweep on a TV line of a demodulated TV waveform and view TV images in NTSC, PAL and SECAM standards on the analyzer display. -
Page 311: Apc 3.5 Input Connector (Option Bab)
Options and Accessories How to Order Options APC 3.5 Input Connector (Option BAB) The type-N female connector is replaced with an APC 3.5 mm male connector. An APC 3.5 (f) to APC 3.5 (f), and BNC (f) to SMA (m) adapters are included for alignment purposes. -
Page 312: Front Panel Protective Cover (Option Uk9)
Options and Accessories How to Order Options Front Panel Protective Cover (Option UK9) The cover assembly snaps onto the front of your analyzer to protect the front panel during travel and when the unit is not in use. The front panel protective cover includes a storage compartment to house small accessories or cables. -
Page 313: Accessories
Options and Accessories Accessories Accessories A number of accessories are available from Agilent Technologies to help you configure your analyzer for your specific applications. They can be ordered through your local Agilent Sales and Service Office. Refer to Table 4-1 on page 4-6 for a list of Agilent Sales and Service Offices. -
Page 314: Hp/Agilent E1779A Battery Pack
Options and Accessories Accessories HP/Agilent E1779A Battery Pack The E1779A is a battery pack that will power an Agilent ESA spectrum analyzer for 80 to 114 minutes, depending on the options installed in the analyzer. Refer to the E1779A Battery Pack User’s Guide for more information. -
Page 315: External Keyboard
Options and Accessories Accessories External Keyboard The HP/Agilent C1405B keyboard is an IBM AT compatible keyboard that can be connected to the external keyboard connector on the front panel of the analyzer. You may use any IBM AT compatible keyboard with a mini DIN connector. -
Page 316: Hp/Agilent 11970 Series Harmonic Mixers
Options and Accessories Accessories HP/Agilent 11970 Series Harmonic Mixers The 11970 Series harmonic mixers are available to extend the frequency range of analyzers with Option AYZ (external mixing) up to 110 GHz. The following six models are available: HP/Agilent Frequency Range Model Number 11970K 18.0 to 26.5 GHz... - Page 317 Index Symbols Amptd Ref (f=50 MHz) On Off Color On Off 6-71 6-40 Color Palette 6-95 6-64 AMPTD REF OUT command error messages 4-30 (Local) key 6-92 Amptd Ref Out (f=50 MHz) On Connected No Yes 6-22 > Display Line 6-64 6-40 connector...
- Page 318 Frequency (Display Edit menu) finding next 6-62 error queues 6-22 hold key empty message 4-25 Frequency (Marker Readout how to call Agilent Technologies front panel 4-21 menu) 6-46 SCPI remote interface 4-21 FREQUENCY Channel 6-37 how to return your analyzer for...
- Page 319 Index Input key 6-40 Marker All Off 6-48 Source Input menu map marker control keys 6-44 SPAN X Scale Input Mixer Int Ext key 6-40 marker counter 6-36 Sweep Input Mixer key 6-40 resolution 6-36 System Input Z Corr 6-40 Marker Counter On Off 6-36 Trace...
- Page 320 Index overview, keys and key menus probes sample detection mode 6-17 2-18 AC and DC 7-14 Save 6-28 Properties 6-19 save files 2-29 2-32 2-33 Save key save limits 6-28 packaging save setup files 6-28 parallel interface connector 2-10 queries save states 6-28 Pause...
- Page 321 Index last 6-79 Timebase 6-94 View/Trace menu map zero 6-78 timebase adjust Viewing Angle 6-104 span functions 6-78 Fine, Coarse 6-94 Viewing Angle keys Span key timebase verification 6-94 volume control Span Pair Span Center 6-45 Title 6-24 VOLUME knob SPAN X Scale 6-78 trace...