Extron electronics IN1606 User Manual
Scaling presentation switchers
Hide thumbs
Also See for IN1606:
- Setup manual (4 pages) ,
- User manual (85 pages) ,
- User manual (132 pages)

Related Manuals for Extron electronics IN1606


Summary of Contents for Extron electronics IN1606
- Page 1 User Guide Scalers IN1606 IN1608 IN1608 SA IN1608 MA Scaling Presentation Switchers 68-2290-01 Rev. B 06 13...
- Page 2 Safety Instructions • English Chinese Simplified (简体中文) 警告: 产品上的这个标志意在警告用户该产品机壳内有暴露的危险 WARNING: This symbol, , when used on the product, is intended to alert the user of the presence of uninsulated dangerous voltage within 电压, 有触电危险。 the product’s enclosure that may present a risk of electric shock. 注...
- Page 3 Compliance Guide” on the Extron website. Copyright © 2013 Extron Electronics. All rights reserved. Trademarks All trademarks mentioned in this guide are the properties of their respective owners. The following registered trademarks , registered service marks...
- Page 4 Conventions Used in this Guide Notifications The following notifications are used in this guide: Attention indicates a situation that may damage or destroy the product or ATTENTION: associated equipment. NOTE: A note draws attention to important information. TIP: A tip provides a suggestion to make working with the application easier. Software Commands Commands are written in the fonts shown here: ^AR Merge Scene,,Op1 scene 1,1 ^B 51 ^W^C...
-
Page 5: Table Of Contents
Output Submenu .......... 21 Audio Submenu ..........23 Advanced Submenu ........24 Communication Submenu ......26 Device Info Submenu ........27 Front Panel Lockout (Executive Modes) .... 27 Reset Modes ............ 28 IN1606 and IN1608 Series Scaling Presentation Switcher • Contents... - Page 6 Device Name Page ........79 Communication Settings Page ...... 80 Firmware Loader Page ........81 Executive/Power Mode Page ......82 Date and Time Page ........83 Password Page ..........84 Reset Device Page ........85 IN1606 and IN1608 Series Scaling Presentation Switcher • Contents...
-
Page 7: Introduction
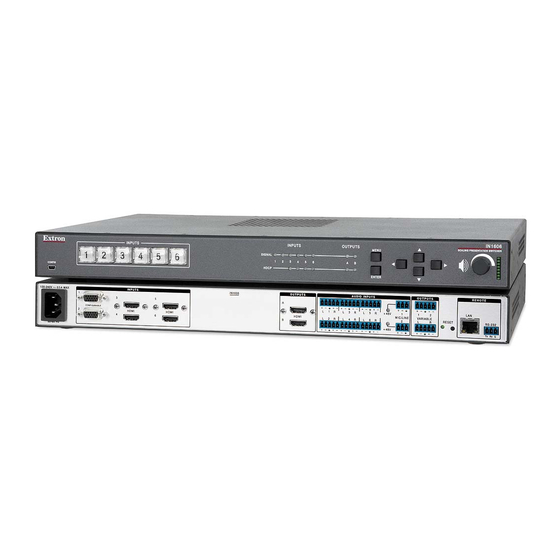
IN1606 and IN1608 models. IN1606 and IN1608 Series Description The Extron IN1606 is a six input, HDCP-compliant video scaler in a 1U, full rack width enclosure. The IN1608 series includes the IN1608, IN1608 SA, and IN1608 MA. They are eight input, HDCP-compliant video scalers in a 1U or 2U, full rack width enclosures. - Page 8 They are ideal in boardrooms where superior performance is essential and instructional environments for complete integration of digital and analog AV sources and displays. The following diagram demonstrates an example of a typical application for the IN1606 with multiple sources and outputs. Extron...
- Page 9 Document to HDMI HDMI Camera Adapter -2 32 HDMI with D TP Embedded Audio A MA Laptop Extron DTP HDMI 230 Tx Transmitter Blu-ray Laptop Figure 2. Typical IN1608 SA Application IN1606 and IN1608 Series Scaling Presentation Switcher • Introduction...
-
Page 10: Licensed Third-Party Software Used In The Scalers
The following table lists the licensed third-party software used by the scalers. NOTE: Licensed third-party software used by the scalers are subject to change without notice. Licensed Third-party Software Used in the IN1606 and IN1608 Models Package License Package... -
Page 11: Key Features
Class D amplifier designs. CDRS eliminates the high frequency switching ripple characteristic of Class D amplifiers. IN1606 and IN1608 Series Scaling Presentation Switcher • Introduction... -
Page 12: General
Quick Setup screen, while additional screens provide full control over the unit’s other functions and settings. IN1606 and IN1608 Series Scaling Presentation Switcher • Introduction... -
Page 13: Controlling The Scalers
Front panel USB configuration port — Enables easy configuration without having to access the rear panel. • Rack-mountable 1U (IN1606 and IN1608) or 2U (IN1608 SA and IN1680 MA), full rack width metal enclosure • Includes LockIt HDMI cable lacing brackets •... -
Page 14: Installation
Connection Details Rear Panel Connections The IN1606 shares all of its connectors with the IN1608 models (see figure 3). However, the IN1608 models also include DTP inputs and an output with corresponding RS-232 and IR passthrough connectors (see figure 4). The IN1608 SA and IN1608 MA include an amplified audio output in addition to the features of the IN1606 and IN1608 (see figure 5). - Page 15 5-pole captive screw connector. This port only includes the 2 poles labeled “IR” and shares the ground pole with the RS-232 port. Tx Rx G Tx Rx NOTE: RS-232 and IR data can be transmitted simultaneously. IN1606 and IN1608 Series Scaling Presentation Switcher • Installation...
- Page 16 NOTE: RS-232 and IR data can be transmitted simultaneously). Amplified audio output connector (IN1608 SA and IN1608 MA models only) — Connect speakers to the 4-pole or 2-pole captive screw connector. IN1606 and IN1608 Series Scaling Presentation Switcher • Installation...
- Page 17 RS-232 serial control. The default baud rate is 9600. RS-232 Tx Rx G Do not tin the wires! Controlling Device Bidirectional Ground (G) Ground (G) Receive (Rx) Receive (Rx) Transmit (Tx) Transmit (Tx) Figure 9. RS-232 Wiring IN1606 and IN1608 Series Scaling Presentation Switcher • Installation...
-
Page 18: Connection Details
The LockIt bracket can also be used in a stacked formation, as shown below. Side Mounted Stacked Figure 10. LockIt Bracket Mounting Options IN1606 and IN1608 Series Scaling Presentation Switcher • Installation... -
Page 19: Twisted Pair Recommendations For Dtp Communication
Do not comb the cable for the first 20 m, where cables are straightened, aligned, and secured in tight bundles. • Loosely place cables and limit the use of tie wraps or hook and loop fasteners. • Separate twisted pair cables from AC power cables. IN1606 and IN1608 Series Scaling Presentation Switcher • Installation... -
Page 20: Operation
The number of input selection buttons depends on the scaler model (The IN1606 has six and the IN1608 models have eight). Input and output LED indicators The number of input and output LED indicators depends on the scaler model. -
Page 21: Powering Up
Also use the navigation buttons to adjust settings according to specific setting directions. Input Selection buttons — Press any of the Input selection buttons to change the selected input. IN1606 and IN1608 Series Scaling Presentation Switcher • Operation... -
Page 22: Menu Overview
Press the Enter button to accept the new value. Press the Menu button to cancel any pending changes. To exit the OSD menu: Hold the Menu button for 3 seconds to exit the OSD menu. IN1606 and IN1608 Series Scaling Presentation Switcher • Operation... -
Page 23: Quick Setup Submenu
DHCP — Press the Navigation buttons to enable or disable DHCP mode. IP Address — Press the Left and Right buttons to change octets. Press the Up and Down buttons to change the value of a selected octet. IN1606 and IN1608 Series Scaling Presentation Switcher • Operation... -
Page 24: User Presets Submenu
• Preset name NOTE: To save and recall input presets, use SIS commands (see Preset Commands on page 44) or the internal web pages (see Preset Management Page on page 76). IN1606 and IN1608 Series Scaling Presentation Switcher • Operation... -
Page 25: Picture Controls Submenu
Press the Up and Down buttons to adjust the value of the selected feature. These settings are only applicable to analog NTSC, PAL, and SECAM signals. Detail — Press the Navigation buttons to adjust the detail of the image. IN1606 and IN1608 Series Scaling Presentation Switcher • Operation... -
Page 26: Input Submenu
37), there are unique commands to execute an Auto-Image and fill the output and to execute an Auto-Image and maintain input aspect ratio. These commands simply ignore the current aspect mode setting, Auto-Image the input, and then apply a “fill” or “follow.” IN1606 and IN1608 Series Scaling Presentation Switcher • Operation... -
Page 27: Output Submenu
Resolution on page 22 for a full list of available resolution and refresh rates). Output Submenu Figure 17. Output Submenu (IN1608) NOTE: The IN1608 models include a submenu for DTP output. IN1606 and IN1608 Series Scaling Presentation Switcher • Operation... - Page 28 When HDCP notification is enabled or On and an HDCP-encrypted input is sent to a display that is non-compliant, a green background is displayed. If HDCP notification disabled or Off, a black or muted output is displayed. IN1606 and IN1608 Series Scaling Presentation Switcher • Operation...
-
Page 29: Audio Submenu
Mic/Line Volume — Press the Navigation buttons to set the Mic/Line mix volume (in dB). Program Volume — Press the Navigation buttons to set the Program mix volume (in dB). Output 1/2 Format — Press the Navigation buttons to set the audio output format. IN1606 and IN1608 Series Scaling Presentation Switcher • Operation... -
Page 30: Advanced Submenu
NOTES: • The audio test outputs pink noise on the embedded digital audio output (2-channel, 48 kHz, 16 bit). • All test patterns include a single pixel border (except Blue mode). IN1606 and IN1608 Series Scaling Presentation Switcher • Operation... - Page 31 Each change in input sync causes default values to be applied. Manual changes made to the image and picture controls are lost when a new rate is applied, a new input is applied, or after a power cycle. IN1606 and IN1608 Series Scaling Presentation Switcher • Operation...
-
Page 32: Communication Submenu
Remote Port — Displays the Baud rate for the serial RS-232. MAC Address — Displays the MAC address of the device (read only). DHCP — Press the Navigation buttons to turn the DHCP mode on or off. The default is Off. IN1606 and IN1608 Series Scaling Presentation Switcher • Operation... -
Page 33: Device Info Submenu
56). To enable executive mode 2, press and hold the Menu and Enter buttons simultaneously for 3 seconds. The menu system returns to the default menu within 10 seconds. IN1606 and IN1608 Series Scaling Presentation Switcher • Operation... -
Page 34: Reset Modes
Resets all user modifiable configuration command ZQQQ. to default values including IP settings and real-time adjustments. Deletes all user loaded files. The Reset LED blinks 4 times in quick succession during the reset. IN1606 and IN1608 Series Scaling Presentation Switcher • Operation... -
Page 35: Sis Configuration And Control
The copyright message is displayed upon connecting to a scaler via TCP/IP or Telnet or after a power cycle via RS-232 and depends on the scaler model. is the firmware Vx.xx version number. The current date and time are displayed. IN1606 and IN1608 Series Scaling Presentation Switcher • SIS Communication and Control... -
Page 36: Password Information
= Commands that give an (privilege violation) error if not administrator level. = Commands that may give an (file not found) error. IN1606 and IN1608 Series Scaling Presentation Switcher • SIS Communication and Control... -
Page 37: Sis Overview
X& Active pixels ±512 of the default value Active lines ±256 of the default value Enable or disable 0 = off or disabled 1 = on or enabled IN1606 and IN1608 Series Scaling Presentation Switcher • SIS Communication and Control... - Page 38 1 = sink or source detected with HDCP 2 = sink or source detected but no HDCP Video switching effect 0 = cut 1 = fade through black (default) IN1606 and IN1608 Series Scaling Presentation Switcher • SIS Communication and Control...
- Page 39 0 = clear or none (default for Telnet connections) 1 = verbose mode (default for RS-232) 2 = tagged responses for queries 3 = verbose mode and tagged for queries IN1606 and IN1608 Series Scaling Presentation Switcher • SIS Communication and Control...
- Page 40 1024x768 1024x852 1024x1024 1280x768 1280x800 1280x1024 1360x765 1360x768 1365x768 1366x768 1365x1024 1440x900 1400x1050 1600x900 1680x1050 1600x1200 1920x1200 480p 576p 720p 1080i 1080p 2048x1080 * = Default output resolution IN1606 and IN1608 Series Scaling Presentation Switcher • SIS Communication and Control...
-
Page 41: Command And Response Tables
(IN1606) or (IN1608 models) = Auto switch mode = disable = gives priority to the highest numbered active input = gives priority to the lowest numbered active input IN1606 and IN1608 Series Scaling Presentation Switcher • SIS Communication and Control... -
Page 42: Input Configuration Commands
= RGB = YUV = RGBcvS = S-video = composite = HDMI = Text label Up to 16 characters = EDID emulation See the EDID table on page 34. IN1606 and IN1608 Series Scaling Presentation Switcher • SIS Communication and Control... - Page 43 = H/V start 0-255 = Enable or disable = off or disabled = on or enabled = Auto-Image threshold value (where = black and = white; = default) 0-100 IN1606 and IN1608 Series Scaling Presentation Switcher • SIS Communication and Control...
- Page 44 X& = Active pixels ± of the default value = Active lines ± of the default value = Film detect mode = disable = auto (default) IN1606 and IN1608 Series Scaling Presentation Switcher • SIS Communication and Control...
-
Page 45: Picture Adjustment Commands
= Video mute on all outputs = all outputs are unmuted = at least one output is muted = at least one outupt is muted and sync is disabled IN1606 and IN1608 Series Scaling Presentation Switcher • SIS Communication and Control... - Page 46 = Input selection (IN1606) or (IN1608 models) = Picture adjustment = default) 0-127 = Horizontal position ±2048 X1& = Vertical position ±1200 = Horizontal size 0-4096 = Vertical size 0-2400 IN1606 and IN1608 Series Scaling Presentation Switcher • SIS Communication and Control...
-
Page 47: Output Configuration Commands
= no active input; timer running; output sync enabled = no active input; timer expired; output sync disabled = Output rate See the Output Rate table on page 34. IN1606 and IN1608 Series Scaling Presentation Switcher • SIS Communication and Control... -
Page 48: Audio Configuration Commands
0.1 dB increments, to raise or lower a group fader (for example, = 10 dB) = Volume knob group number = program volume = mic volume = output volume (default) IN1606 and IN1608 Series Scaling Presentation Switcher • SIS Communication and Control... - Page 49 = 12 dB -240 +120 -240 = Increment value dB value multiplied by ten, in 0.1 dB increments, to raise or lower a group fader (for example, = 10 dB) IN1606 and IN1608 Series Scaling Presentation Switcher • SIS Communication and Control...
-
Page 50: Preset Commands
Brightness H Active Image H/V Size Contrast Image H/V Position Audio Gain/Attenuation Detail V Active Brightness Image H/V Size Color Total Pixels Phase Tint H Start Film Mode IN1606 and IN1608 Series Scaling Presentation Switcher • SIS Communication and Control... -
Page 51: Advanced Configuration Commands
= mode 2 (input selection and volume control only) = Aspect ratio setting = fill (default) = follow = Video switching effect = cut = fade through black (default) IN1606 and IN1608 Series Scaling Presentation Switcher • SIS Communication and Control... - Page 52 = Video signal status = video/HDMI signal not detected = video/HDMI signal detected = HDMI input HDCP authorization status = block HDCP encryption = allow HDCP encryption (default) IN1606 and IN1608 Series Scaling Presentation Switcher • SIS Communication and Control...
-
Page 53: Device Commands
This reset is recommended after a firmware update. NOTES: = On-screen display bug time-out = OSD bug is never displayed (in 1 second increments) 1-500 = default = OSD bug never times out IN1606 and IN1608 Series Scaling Presentation Switcher • SIS Communication and Control... - Page 54 = on or enabled (mute to black) = mute all output sync = Default name A combination of model name and the last 3 pairs of the MAC address IN1606 and IN1608 Series Scaling Presentation Switcher • SIS Communication and Control...
-
Page 55: Ip Control Port Commands
= Verbose mode = clear or none (default for Telnet connections) = verbose mode (default for RS-232 connections) = tagged responses for queries = verbose mode and tagged queries IN1606 and IN1608 Series Scaling Presentation Switcher • SIS Communication and Control... -
Page 56: Configuration Software
This section describes the software installation and communication (see Internal Web Pages on page 56 or refer to the IN1606 and IN1608 Series Product Configuration Software help file for detailed control information). Topics in this section include: • Installing the Software Starting the Software •... -
Page 57: Starting The Software
• Device Name Click the button. A tab for the scaler opens in Emulation mode Open Device (see Connect on page 53 to connect to a device). IN1606 and IN1608 Series Scaling Presentation Switcher • Configuration Software... -
Page 58: Using The Software
Internal Web Pages NOTE: For general software navigation, see on page 56 or open the IN1606 and IN1608 Series Product Configuration Software Help file. Figure 26. New Device Page in Live Mode (IN1608) Under the device tab, the PCS has two unique drop-down menus: Connections and Tools... - Page 59 Disconnect device is connected. Exit This option disconnects the scaler from the software and closes the application. From the menu, select . The application closes. Connections Exit IN1606 and IN1608 Series Scaling Presentation Switcher • Configuration Software...
-
Page 60: Tools Menu
Include Communication Settings communication settings to the restored configuration. Click the button to apply the saved configuration settings. Restore Click the button to close the System Backup and Restore window. Close IN1606 and IN1608 Series Scaling Presentation Switcher • Configuration Software... - Page 61 Reset Confirmation Dialogs This option resets all disabled confirmation dialogs to the default settings. From the menu, select . A dialog box opens. Tools Reset Confirmation Dialogs Click the button. Reset IN1606 and IN1608 Series Scaling Presentation Switcher • Configuration Software...
-
Page 62: Internal Web Pages
Display all websites in Compatibility View and that the IP address of the scaler is not in the list of websites that have been added to Compatibility view. IN1606 and IN1608 Series Scaling Presentation Switcher • Internal Web Pages... -
Page 63: Navigating The Internal Web Pages
AV Controls Panel The unlocked icon indicates that an input or output is not HDCP-encrypted. The lock with a check mark icon indicates that an input or output is HDCP-encrypted. IN1606 and IN1608 Series Scaling Presentation Switcher • Internal Web Pages... - Page 64 To unmute any signal, click the appropriate button. The button reverts to the default color, indicating the signal has been unmuted. Freeze button Click the button to freeze the current video frame. The button turns blue. Freeze IN1606 and IN1608 Series Scaling Presentation Switcher • Internal Web Pages...
-
Page 65: Configuration Pages
Auto-Image, Auto Memory, HDCP Authorized status, and Film Detect. Figure 34. Input Configuration (IN1608) NOTE: DTP inputs 7 and 8 are not available on the IN1606. Input (renaming) By default, the name associated with an input channel is . To rename an Input <number>... - Page 66 Figure 35. Output Configuration (IN1608) NOTE: Output is not available on the IN1606. DTP C Resolution From the drop-down menu, select the applicable output resolution. Resolution IN1606 and IN1608 Series Scaling Presentation Switcher • Internal Web Pages...
-
Page 67: Edid Minder Page
Click the icon on the Global Navigation Bar to open the EDID Minder page. EDID Minder Figure 37. EDID Minder Page IN1606 and IN1608 Series Scaling Presentation Switcher • Internal Web Pages... - Page 68 Click the button to save the file. NOTE: Saving a factory scaler EDID exports an HDMI, LPCM-2Ch EDID to the PC. The file is saved as a BIN file. IN1606 and IN1608 Series Scaling Presentation Switcher • Internal Web Pages...
-
Page 69: Image Settings Page
(ignores aspect ratio setting). • Click the button to perform a one-time Auto-Image and to Auto-Image & Follow maintain the aspect ratio of the input signal (ignores aspect ratio setting). IN1606 and IN1608 Series Scaling Presentation Switcher • Internal Web Pages... - Page 70 Figure 41. Overscan Panel For each input signal type, select a value from the corresponding drop-down menu. NOTE: Setting a value of disables overscan for the corresponding input format. IN1606 and IN1608 Series Scaling Presentation Switcher • Internal Web Pages...
- Page 71 NOTE: User presets can be saved on one input resolution and recalled on a different one. Input presets can only be recalled on the same input resolution that was present when the preset was saved. Figure 42. Input and User Presets Panels IN1606 and IN1608 Series Scaling Presentation Switcher • Internal Web Pages...
- Page 72 From the User Presets list, select the desired preset. Click the button. The Presets dialog box opens. Clear Click the button to erase saved data. Click the button to return to the Clear Cancel Image Settings page. IN1606 and IN1608 Series Scaling Presentation Switcher • Internal Web Pages...
-
Page 73: Size And Position Page
(ignores aspect ratio settings). • Click the button to perform a one-time Auto-Image and to Auto-Image & Follow maintain the aspect ratio of the input signal. (ignores aspect ratio settings) IN1606 and IN1608 Series Scaling Presentation Switcher • Internal Web Pages... -
Page 74: Audio Config Page
Audio Format The L and R meters display audio levels for analog or LPCM-2Ch inputs. Select the check box to display input meters. Enable Meters IN1606 and IN1608 Series Scaling Presentation Switcher • Internal Web Pages... - Page 75 When enabled, lower frequencies are attenuated, allowing higher frequencies to pass. The button turns blue when enabled. The default cutoff is 100 Hz. IN1606 and IN1608 Series Scaling Presentation Switcher • Internal Web Pages...
- Page 76 Level below the slider or click the arrow button. Down Click a button below the Mic 1 or Mic 2 slider to mute the corresponding Mic input. Mute IN1606 and IN1608 Series Scaling Presentation Switcher • Internal Web Pages...
- Page 77 (see the Members table on the next page for a list of available group members per group masters). Click the button. Close IN1606 and IN1608 Series Scaling Presentation Switcher • Internal Web Pages...
- Page 78 — The front panel volume knob adjusts mic volume. • Mic Volume (Group #3) — The front panel volume knob adjusts output • Output Volume (Group #8) volume (default). Click the button. Close IN1606 and IN1608 Series Scaling Presentation Switcher • Internal Web Pages...
- Page 79 • Down Enter a value in the field of the corresponding output. • NOTE: On the IN1608 SA, click the button to control both output level sliders Gang simultaneously. IN1606 and IN1608 Series Scaling Presentation Switcher • Internal Web Pages...
- Page 80 Click the button for either slider to mute the output. Mute Click the button to control both sliders simultaneously. Gang Select the check box to display output meters. Enable Meters IN1606 and IN1608 Series Scaling Presentation Switcher • Internal Web Pages...
- Page 81 Click the button for either slider to mute the output. Mute Click the button to control both sliders simultaneously. Gang Select the check box to display output meters. Enable Meters IN1606 and IN1608 Series Scaling Presentation Switcher • Internal Web Pages...
-
Page 82: Preset Management Page
Input Presets or User Presents Recall Preset panel. The Presets dialog box opens. Click the button to recall the preset. Click the button to return to the Recall Cancel Preset Management page. IN1606 and IN1608 Series Scaling Presentation Switcher • Internal Web Pages... -
Page 83: Device Settings Page
• Duration On Screen Down arrows to specify a duration to wait before disabling output sync during inactivity. The default is to never disable the output sync. IN1606 and IN1608 Series Scaling Presentation Switcher • Internal Web Pages... -
Page 84: Hardware Pages
DHCP status • Model description • IP address • Firmware version • Subnet mask Temperature Default gateway • • • Default web version • MAC address • DNS server IN1606 and IN1608 Series Scaling Presentation Switcher • Internal Web Pages... -
Page 85: Device Name Page
Click the button to change the name. Click the button to keep the Apply Cancel previous name. To reset the name: Click the button. Reset to Default IN1606 and IN1608 Series Scaling Presentation Switcher • Internal Web Pages... -
Page 86: Communication Settings Page
To reset the device to default connection values, click the button. Reset to Default To cancel changes: At any time, click the Cancel button to keep the last saved settings. IN1606 and IN1608 Series Scaling Presentation Switcher • Internal Web Pages... -
Page 87: Firmware Loader Page
Navigate to the firmware file location and select the firmware file. Valid firmware files have an .eff extension. Click the button. The window closes Open Click the button. Upload NOTE: The connection to the scaler may have to be re-established. IN1606 and IN1608 Series Scaling Presentation Switcher • Internal Web Pages... -
Page 88: Executive/Power Mode Page
Click the radio button or the radio button Full Power Low Power - Standby State to select the desired power mode. Click the button. Apply IN1606 and IN1608 Series Scaling Presentation Switcher • Internal Web Pages... -
Page 89: Date And Time Page
Time Down arrow button to specify hours, minutes, and seconds. From the drop-down menu to the right of the field, select Seconds Click the button. Apply IN1606 and IN1608 Series Scaling Presentation Switcher • Internal Web Pages... -
Page 90: Password Page
NOTE: Select the check box to display the password characters. Show Password Click the button. Apply NOTE: When passwords are set, a notification to close and restart the browser appears. IN1606 and IN1608 Series Scaling Presentation Switcher • Internal Web Pages... -
Page 91: Reset Device Page
Click the button. A confirmation dialog box opens. Apply In the dialog box, click the button to continue with the reset, or the Reset Cancel button to abort the reset. IN1606 and IN1608 Series Scaling Presentation Switcher • Internal Web Pages... -
Page 92: Reference Information
Use the provided screws to attach the device to the rack. Rack Ears Rack Ears Rack Mounting Figure 63. Figure 64. 1U Rack Mounting 2U Rack Mounting IN1606 and IN1608 Series Scaling Presentation Switcher • Reference Information... -
Page 93: Furniture Mounting
Mounting Screws (2) Places Each Side #8 Screw MBU 149 (4) Places Each Side Mounting Bracket Figure 65. Under-Desk Mounting IN1606 and IN1608 Series Scaling Presentation Switcher • Reference Information... -
Page 94: Downloading Updated Firmware
Use Extron Firmware Loader, the internal web pages (see Firmware Loader Page page 81), or the Product Configuration Software to upload firmware from the PC to the scaler. IN1606 and IN1608 Series Scaling Presentation Switcher • Reference Information... - Page 95 Extron Electronics makes no further warranties either expressed or implied with respect to the product and its quality, performance, merchantability, or fitness for any particular use. In no event will Extron Electronics be liable for direct, indirect, or consequential damages resulting from any defect in this product even if Extron Electronics has been advised of such damage.
Need help?
Do you have a question about the IN1606 and is the answer not in the manual?
Questions and answers