Table of Contents
Advertisement
I
n
t
e
I
n
t
e
G
S
G
S
I
n
s
I
n
s
800-10938 1/12 Rev. B
T
M
T
M
l
l
i
P
a
t
h
S
e
r
i
e
s
4
l
l
i
P
a
t
h
S
e
r
i
e
s
4
A
u
t
o
-
s
e
l
e
c
t
s
O
p
t
i
m
u
m
A
u
t
o
-
s
e
l
e
c
t
s
O
p
t
i
m
u
m
M
X
4
G
/
G
M
X
4
G
/
G
t
a
l
l
a
t
i
o
n
a
n
t
a
l
l
a
t
i
o
n
a
n
G
G
S
M
C
o
m
m
u
n
i
G
G
S
M
C
o
m
m
u
n
i
G
S
M
p
a
t
h
–
2
G
,
3
G
G
S
M
p
a
t
h
–
2
G
,
3
G
S
M
X
C
N
4
S
M
X
C
N
4
s
s
u
u
p
p
p
p
o
o
r
r
t
t
s
s
t
t
w
w
o
o
-
-
w
w
a
a
y
y
d
S
e
t
u
p
G
u
d
S
e
t
u
p
G
u
c
a
t
o
r
c
a
t
o
r
,
o
r
4
G
,
o
r
4
G
G
G
v
v
o
o
i
i
c
c
e
e
i
d
e
i
d
e
Advertisement
Table of Contents

Related Manuals for Honeywell GSMX4G


Summary of Contents for Honeywell GSMX4G
- Page 1 – – 800-10938 1/12 Rev. B...
-
Page 2: Table Of Contents
Contents General Information ................... 1 Features......................1 Modes of Operation ..................2 Supervision and Fault Detection ..............2 Specifications....................2 Data Encryption ..................... 3 Remote Services Features................3 Testing the System..................3 Compatibility ....................4 Compliance ..................... 4 Mount and Wire the Module................4 Select a Mounting Location ................ -
Page 3: General Information
The GSMX4G communicates with AlarmNet using GSM (Global System for Mobile) technology utilizing GPRS (General Packet Radio Service) as a means of data transfer. If the GPRS part of the GSM cellular network is unavailable, it will attempt to send a transmission via SMS (Short Message Service) also known as a text message. -
Page 4: Modes Of Operation
GSMX4G / GSMXCN4G Installation and Setup Guide Modes of Operation The GSMX4G is for control panels that support ECP communication. • The control panel treats the communicator as an ECP device, so • ensure to program the control panel with the communicator’s device address. -
Page 5: Data Encryption
KEY used to encrypt the data. Each device produced by Honeywell is loaded with a unique identi- fier called a MAC number, and a large random number or KEY. This KEY and MAC number are also stored in the AlarmNet servers. -
Page 6: Compatibility
GSMX4G / GSMXCN4G Installation and Setup Guide Compatibility The communicator functions with any control panel that utilizes a Honeywell ECP bus and supports a GSM communicator (or LRR). Compliance This device has been tested by ETL to meet the following standards: •... -
Page 7: Verify Satisfactory Signal Strength
GSMX4G / GSMXCN4G Installation and Setup Guide Log in and follow the on-screen prompts. At this time only activate the SIM so signal strength may be checked. DO NOT register the communicator at this time. Please have the following information available to activate the SIM: •... -
Page 8: Mounting The Module On The Control Panel
GSMX4G / GSMXCN4G Installation and Setup Guide Hole Cap SIGNAL LED (green) ON - Satisfactory Signal BLINKING - Marginal Signal OFF - Unsatisfactory Signal Verify the SIGNAL LED (green) remains steady for a few minutes, then mark that mounting position. Turn power off. -
Page 9: Wiring The Module For Two-Way Voice
Secure the wiring with ties as necessary. Wiring the Module for two-way voice The GSMX4G requires an optional audio cable (GSMX-AUDIO, black) to support two-way voice using the AVS Base Unit. Note the AVS Base Unit is part of Honeywell’s AVS Audio Verification System. This system consist of the AVS Base Unit, Remote Station, and the Remote Station PC board. -
Page 10: Mounting The Module On The Wall
GSMX4G / GSMXCN4G Installation and Setup Guide restore power to the communicator, control panel and AVS Audio Verification System.) Audio Connector AVS BASE UNIT Connect one end of the audio cable (5-pin connector) to the audio connector located on the PC board in the communicator. - Page 11 GSMX4G / GSMXCN4G Installation and Setup Guide Mounting Hole (2) Wiring Access Hole Audio Connector Hole ECP Cable PANEL DATA OUT - Yellow To ECP Bus AUX PWR (+12V) - Red on control panel GND - Black circuit board. PANEL DATA IN - Green Connect the ECP cable to the communicator circuit board.
-
Page 12: Programming The Module
ECP cable wiring. Secure the wiring with ties as necessary. Programming the Module The GSMX4G requires an AlarmNet account. For new installations, please obtain the account information from the central station prior to programming. You can program the communicator by one of the following methods: •... -
Page 13: Using The 7720P Programming Tool
GSMX4G / GSMXCN4G Installation and Setup Guide Using the 7720P Programming Tool Ensure the communicator is powered, and connect the 7720P Programming Tool. Each key has two possible functions; a Normal function and a Shift function. • To perform a Normal key function, simply press the desired key. -
Page 14: Programming Conventions
GSMX4G / GSMXCN4G Installation and Setup Guide SPACE [SPACE]: For scrolling option list No SHIFT function [0]: For entering the number 0 No SHIFT function #/ENTER [#/ENTER]: Starts programming No SHIFT function mode; Press to accept entries * Active only when the "Exit Programming Mode" prompt is displayed. -
Page 15: Programming For 4204 And Two-4204 Emulation Modes
4204 module. If two 4204s are enabled in the communicator, it acts as two 4204s using consecutive device addresses. The compatible Honeywell VISTA series or First Alert control panel sends data (triggers) to the communicator as if it were a 4204 module. (The control panel must be configured to recognize one or two 4204 relay modules accordingly.) On VISTA-32FB (or higher) control panels and First Alert... -
Page 16: Programming Options
GSMX4G / GSMXCN4G Installation and Setup Guide 4204 Relay Outputs map to zones First 4204 Zones (device Second 4204 Zones (device address address entered in Prompt 16): entered in Prompt 16, plus 1): Relay 1 = Zone 1 Relay 1 = Zone 5... - Page 17 GSMX4G / GSMXCN4G Installation and Setup Guide PROMPTS ENTRY OPTIONS DESCRIPTION [Y], [N] To begin programming the Program Device? communicator, press [Y] and go to Prompt 9: "Device Mode." (Y/N)_ To create a password if none has been assigned, press [N] and go to Prompt 4: "Create Password?."...
- Page 18 GSMX4G / GSMXCN4G Installation and Setup Guide PROMPTS ENTRY OPTIONS DESCRIPTION [0-9, A-F, Re-enter the password as Verify Password N, S, T, X, confirmation. If the password doesn't match the first entry, the following is displayed followed by the "Exit Prog.
- Page 19 The 4204 relay events used to trigger email notifications are defined on the • Honeywell Total Connect website, and must correspond to outputs (relays) programmed in the control panel through Output Device programming. The Multi-Mode address selected at prompt #11 in the communicator (or at the •...
- Page 20 GSMX4G / GSMXCN4G Installation and Setup Guide PROMPTS ENTRY OPTIONS DESCRIPTION The address used must also be enabled as a 4204 relay module in Vista and First Alert control panels. NOTE: Account information is provided by the central station administrator.
- Page 21 GSMX4G / GSMXCN4G Installation and Setup Guide PROMPTS ENTRY OPTIONS DESCRIPTION [Y], [N] Press [Y] to allow the end user to Remote Access access their system via a website. Y/N (N)_ Availability of this service is controlled by the dealer via the web-based programming tool on the AlarmNet Direct website.
- Page 22 GSMX4G / GSMXCN4G Installation and Setup Guide PROMPTS ENTRY OPTIONS DESCRIPTION [01-99] In the event the communicator GSM Flt Time detects a communication path [00] = not failure, enter the time delay (in used (00 mins)_ minutes) before the communica- tor notifies the control panel with a trouble message.
- Page 23 GSMX4G / GSMXCN4G Installation and Setup Guide PROMPTS ENTRY OPTIONS DESCRIPTION Enter the zone number to be used only 4204: [1-4] Open/ for open/close (arm/disarm) Close 4204 2-4204: reports. This zone assignment Zone (0) 2-4204 [1-8] must be unique from the Telco [0] = not zone selected in Prompt 22.
- Page 24 GSMX4G / GSMXCN4G Installation and Setup Guide PROMPTS ENTRY OPTIONS DESCRIPTION Reports alarms on zone 2 ONLY only [Y], [N] Rpt Zn2 if the conditional zone (zone 4 in ONLY if 4204 4204 mode; or zone 8 in 2-4204 Armed 2-4204 mode) is triggered (armed).
- Page 25 GSMX4G / GSMXCN4G Installation and Setup Guide PROMPTS ENTRY OPTIONS DESCRIPTION [01-15] only Defines the reporting delay in Delay Zn5 (secs) seconds for zone 5. 2-4204 [00] = no delay (00) Reports alarms on zone 5 ONLY only [Y], [N]...
-
Page 26: Ecp Status Codes
GSMX4G / GSMXCN4G Installation and Setup Guide PROMPTS ENTRY OPTIONS DESCRIPTION only [Y], [N] Enables restore reporting for Restore Zn8 Y/N zone 8. 2-4204 [01-15] only Defines the reporting delay in Delay Zn8 seconds for zone 8. (secs) 2-4204 [00] = no... -
Page 27: Exiting The Programming Mode
GSMX4G / GSMXCN4G Installation and Setup Guide • Module lost contact with AlarmNet. • Module is not registered; account not activated. Module shutdown. • In addition, the Contact ID codes for some of these conditions are reported by the control panel and sent by AlarmNet to the central station. -
Page 28: Registering The Communicator
GSMX4G / GSMXCN4G Installation and Setup Guide Registering the Communicator Once you have programmed the communicator, it must be registered to enable the AlarmNet account. Registering the communicator activates the account with AlarmNet and enables the security system's control panel to send reports. -
Page 29: Remote Services
GSMX4G / GSMXCN4G Installation and Setup Guide • MAC ID and MAC CRC number (located on the box and inside the communicator). After the communicator is registered, you may log out of the AlarmNet Direct website. Remote Services The dealer/installer will set up the customer account and define the events to be notified of. -
Page 30: Registering Using The 7720P Programming Tool
GSMX4G / GSMXCN4G Installation and Setup Guide Registering Using the 7720P Programming Tool The interactive registration feature allows the installer to register the communicator through a series of keyboard commands on the 7720P Programming Tool. This method of registration lets the installer monitor the registration process. -
Page 31: Registering By Phone
GSMX4G / GSMXCN4G Installation and Setup Guide If the PIN is valid, the new communicator is registered and Registration the old unit unregistered. Additionally, AlarmNet sends a SUCCESS substitution alarm to the central station. If you entered an invalid PIN, the appropriate message is... -
Page 32: Diagnostic Commands
GSMX4G / GSMXCN4G Installation and Setup Guide Diagnostic Commands The 7720P programming tool can be used to view the connectivity settings and options. To invoke diagnostic commands; such as [A], [B], [C], etc., the [shift] key MUST used. For example, [shift] + [A] displays the software revision. -
Page 33: Gsm Status Displays
GSMX4G / GSMXCN4G Installation and Setup Guide GSM Status Displays Operating with 3G/4G service Status Display Screen 1 PriRSSI 3/4G REG PriRSSI – Primary site RSSI level in dBm. -xxxdbm stat 3/4G – Communicator is on the 3G/4G network where “stat” can be: Good RSSI –20 to –90 dBm... - Page 34 GSMX4G / GSMXCN4G Installation and Setup Guide Press the [space] key to go to the next screen. Press the [backspace] key to go to the previous field. Status Display Screen 5 Second Site RSSI Secondary Site RSSI availability. Available Available or Not Available will be displayed.
- Page 35 GSMX4G / GSMXCN4G Installation and Setup Guide Status Display Screen 3 CNtry NetW LAC CNtry – Country Code xxxxx NetW – Network Code LAC – Local area code Press the [space] key to get to the next screen. Press the [backspace] key to go to the previous field.
-
Page 36: Central Station Messages
GSMX4G / GSMXCN4G Installation and Setup Guide [Shift] Registration Registering … [↑] Registers a programmed communicator with AlarmNet. arrow) Registration with PIN for Replacement [↓] Enter PIN# Module arrow) Registers a replacement communicator with AlarmNet, once programmed, using the existing PIN #. -
Page 37: Uploading And Downloading Of Panel Data
This allows site maintenance independent of central station monitoring, and modification to sites globally. Refer to the control panel's Installation and Setup Guide for detailed information. The GSMX4G cannot be used for Direct-Wire downloading. Glossary Refers to the fourth generation of cellular wireless standards. - Page 38 Notes...
-
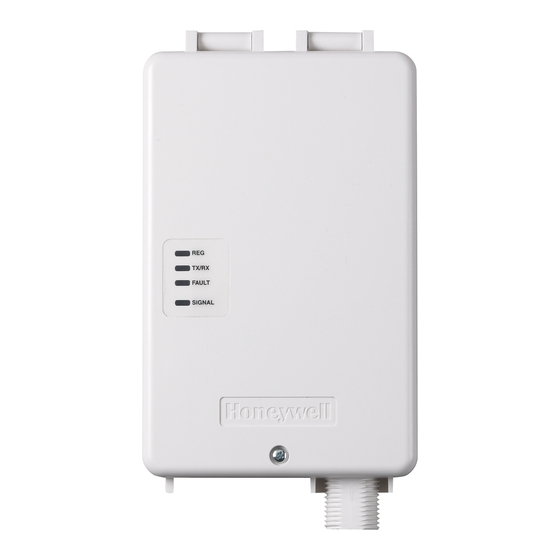
Page 39: Led And Wiring Information
LED and Wiring Information DESCRIPTION ON – Module is NOT registered with AlarmNet. (green) OFF – Module is registered with AlarmNet. FAST BLINK – Download session with Compass in progress. SLOW BLINK – In unison with yellow LED – Registration in progress. TX/RX ON –... - Page 40 (2) Cet appareil doit accepter toute interférence reçue y compris les interférences causant une réception indésirable. DOCUMENTATION AND ONLINE SUPPORT http://www.security.honeywell.com/hsc/resources/MyWebTech/ WARRANTY http://www.security.honeywell.com/hsc/resources/wa/ 2 Corporate Center Drive, Suite 100, P.O. Box 9040, Melville, NY 11747 Copyright 2012 Honeywell International Inc. www.honeywell.com/security Ê800-10938YŠ 800-10938 1/12 Rev. B...
Need help?
Do you have a question about the GSMX4G and is the answer not in the manual?
Questions and answers