Table of Contents
Advertisement
Quick Links
Advertisement
Table of Contents

Subscribe to Our Youtube Channel
Related Manuals for Kanomax 3300


Summary of Contents for Kanomax 3300
- Page 1 Portable Aerosol Mobility Spectrometer MODEL 3300 Operation Manual Read this manual carefully and understand the warnings described in this manual before operating the product. Keep this manual handy for future reference. KANOMAX JAPAN, INC. 02002 14.06...
- Page 2 Operation Manual ■Optional Extras ITEM MODEL Lithium-ion Battery 3910-09 Battery Charger 3910-10 ■Consumables ITEM MODEL Zero Filter 3300-60 Alcohol Cartridge 3300-61 Spare Felt/Wire Mesh 3300-62 For more detail about the consumables, please contact your distributor or the KANOMAX service center.
-
Page 3: Laser Classification
About the Laser Laser Classification This instrument is classified as a Class 1 Laser Product in accordance with the following standards: ● EN60825-1: 2007 ● I EC60825-1: 2007 CLASS 1 LASER PRODUCT EN60825-1: 2007 *Class 1 Laser: Lasers that are considered to be safe under reasonably foreseeable conditions of operation, including the use of optical instruments for intrabeam viewing. -
Page 4: Important Safety Information
○ If any abnormal noises, unusual odors or smoke is observed, or any liquid enters into the instrument, turn the power off immediately, remove the battery and disconnect the power cable. ……It may result in electric shock, fire, or damage to the instrument. Contact your distributor or the KANOMAX service center. -
Page 5: Power Cord
Important Safety Information WARNING Do not use this instrument in an ambient temperature of 35 ℃ or ○ greater. …… The performance may deteriorate significantly. Also, dielectric degradation may occur, which may result in short Prohibited installation circuit or fire. ○... - Page 6 iiii Important Safety Information ○ Do not move the main unit from a cold place to a warm place quickly; it will cause condensation. …… Even when the instrument is used in the specified operating temperature and humidity, a sudden temperature change may cause condensation. Condensation on the sensor may cause inaccurate measurements.
-
Page 7: Table Of Contents
5.2 Inlet (Cyclone) ................30 5.3 Maintenance Cycle ................31 6. Main Specifications ............32 7. Troubleshooting ............... 33 8. Warranty and After Service ..........35 KANOMAX Limited Warranty ..............35 After Service ..................36 Appendix: Storage Data ............37... -
Page 8: Part Names And Functions
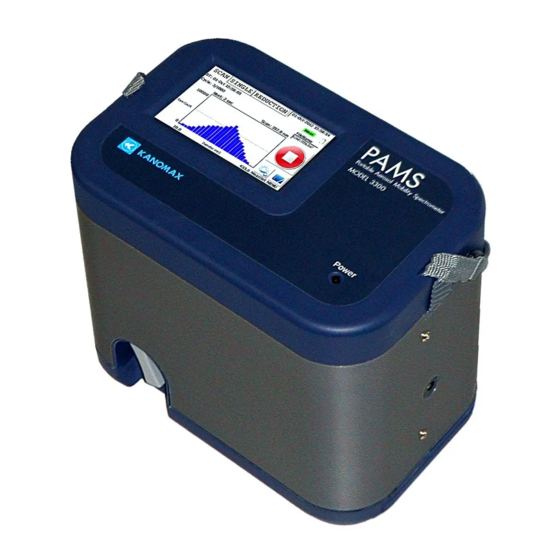
1. Part Names and Functions 1. Part Names and Functions 1.1 General Outline This instrument (Portable Aerosol Mobility Spectrometer)is designed to measure airborne particles in two (2) modes: SCAN mode to measure particle size distribution; SINGLE mode to measure the concentration change of the specific particle size. This instrument consists of the following three (3) components: ・Bipolar Charger to charge the particles drawn through the inlet (cyclone) ・Differential Mobility Analyzer (DMA) to classify particle sizes... -
Page 9: Main Unit
1. Part Names and Functions 1.2 Main Unit LCD Touch Panel --- This touch panel allows you to operate the instrument. POWER switch --- This switch allows you to turn the instrument off and on. Front Alcohol Cartridge Inlet --- You can refill the alcohol required for the internal CPC. - Page 10 1. Part Names and Functions Left Side AC Inlet --- This is an inlet to supply AC power to the instrument. Connect the provided AC adapter here. Bottom Battery Compartment Install a rechargeable battery here. Power Supply Refer installing the battery.
-
Page 11: Getting Started
2. Getting Started 2. Getting Started 2.1 Power Supply Turn the power on the main unit. There are two (2) ways to supply power; using the provided AC adapter or lithium-ion battery. - AC Adapter - Plug the AC adapter into an outlet. AC100-240V power supply should be used. -
Page 12: Refilling The Alcohol Cartridge With Alcohol
2. Getting Started 2.2 Refilling the Alcohol Cartridge with Alcohol Isopropyl Alcohol used for this instrument is a hazardous material. Danger Do not allow the alcohol to contact your eyes and skin. Refer to the Safety Data Sheet (SDS) for handling and storing the alcohol in the alcohol container. -
Page 13: Refilling The Alcohol Cartridge With Alcohol
2. Getting Started 2.2.2 Refilling the Alcohol Cartridge with Alcohol Do not leave the alcohol cartridge inlet open. Caution Failure to observe the above may cause contamination of the optical system or a malfunction. 1. Turn the instrument off. 2. Open the alcohol bottle by turning the storage cap (or the alcohol cartridge) about 45°... -
Page 14: Installing The Alcohol Cartridge
2. Getting Started 2.2.3 Installing the Alcohol Cartridge 1. Remove the alcohol cartridge from the alcohol bottle and gently shake off any excess alcohol solution. Failure to do this may cause the absorbed alcohol to clog the front of the alcohol cartridge. As a result, the flow of the drawn airborne particles and alcohol vapor will be disturbed, making it impossible to measure correctly. -
Page 15: Operation Procedures
3. Operation Procedures 3. Operation Procedures 3.1 Boot and Shutdown Press and hold the Power switch for about 2 seconds to turn on the instrument. The screen shown below will be displayed. Please wait for a few moments while the system is being initialized. [WARM-UP] After booting, the instrument will be in a process of warming up for 600... - Page 16 3. Operation Procedures To shut down the instrument, tap the [MENU] button and select [Shutdown]. To keep the inside of the instrument clean, attach the zero filter to the inlet (cyclone) after using the instrument and hold it for approximately CAUTION 5 minutes before turning the power off.
-
Page 17: Main Screen
3. Operation Procedures 3.2 Main Screen 3.2.1 Main Screen After the warm-up process is completed, the Main Screen shown below will be displayed. The main screen is composed of four (4) parts. (1) Data display Displays a graph. Displays the current status of the measurement. (2) Measurement status Displays the start time of the measurement;... - Page 18 3. Operation Procedures (3) Status Display Displays the conditions of the main unit and power source; corona current (in detail) and the current time. Indicates that the instrument is powered by an AC adapter or a battery. When the instrument is battery-operated, the remaining battery level will be also indicated.
-
Page 19: The Flow Of Screens
3. Operation Procedures 3.2.2 The Flow of Screens START STOP SINGLE SETTING SCAN REDUCTION Prev(SCAN) SETTING MENU Prev... -
Page 20: Measurement
3. Operation Procedures 3.3 Measurement 3.3.1 SCAN Mode Tap the SCAN tab on the main screen to display the SCAN screen and to configure the Tap the SETTING button at the lower right of the screen to measurement settings. display the Measure Settings window. SETTING button After setting the Parameters, tap the OK button to save the configured settings. - Page 21 3. Operation Procedures Wait Time Sets a wait time before starting a measurement. Settable range is from 0 to 600 seconds. Meas Time Sets a measurement time per channel (ch). Settable range is from 2 to 600 seconds/ch. No. of Scans Sets the number of scans.
- Page 22 3. Operation Procedures Tapping the START button starts an operation in SCAN mode according to the measurement settings. The START button will be replaced with the STOP button. After the Wait Time elapses, a measurement will be started. START button Charging Level of the Corona Current *When the charging level of the...
- Page 23 3. Operation Procedures When a measurement finishes, the screen will turn to the REDUCTION screen. In the REDUCTION screen, the results of the compensation calculation will be displayed. The unit of concentration is dN/dLogDp. Tap the graph to move the cursor to the desired position on the graph.
-
Page 24: Single Mode
3. Operation Procedures 3.3.2 SINGLE Mode In SINGLE mode, you can specify a particle size and obtain the chronological change of the concentration. Select the SINGLE tab on the main screen to display the SINGLE mode screen and set the Tap the SETTING button in the lower right of the screen to measurement conditions. - Page 25 3. Operation Procedures Diameter Sets a target diameter. Meas Time Sets each measurement time. The settable range is from 1 to 600 seconds. A result of one measurement is an average value within the measurement time. No. of Meas Sets the number of measurements. The settable range is from 1 to 20000.
- Page 26 3. Operation Procedures Charging level of Corona current *When the charging level of the corona current maximum, measurement cannot be started even if the START button is tapped. In the process of a measurement, the corrected results of raw data are displayed in the graph.
-
Page 27: In The Event Of Memerr
3. Operation Procedures Up to 100 data from the measurement results can be displayed per page. you set the number of measurements to more than 100 in the [No. of Meas] settings, the results will be displayed over multiple pages. When there are multiple graph pages, tap the page selection to display the page selection dialog box. -
Page 28: Menu
3. Operation Procedures 3.4 MENU On the SCAN-tab screen or SINGLE- tab screen of the Main screen, tap the [MENU] button. The screen shown on the left will be displayed. · Status In the Status window, the operating status of the main unit is numerically displayed. - Page 29 3. Operation Procedures ·File The File window displays the list of measurement data files. You can select a data file to display or delete. If the [Single] checkbox is not ticked, the SCAN mode data files will be displaced. If the checkbox is ticked, the SINGLE mode files will be displayed.
- Page 30 3. Operation Procedures · Maintenance The Maintenance window allows you to refresh the charger. Over time, deposits accumulate on the electrodes in the charger, making the corona current unstable and preventing a measurement from getting started. (Refer to 3.3.4 In the Event the Charger is Not Ready.) After turning the power ON, if the charger is not ready within...
- Page 31 3. Operation Procedures · Date, Time Setting In the Date, Time Settings window, you can set the date and time. Tap the item you wish to change. Except for the month, a numeric keyboard as shown on the left will appear.
- Page 32 3. Operation Procedures · System Settings In the System Settings window, you can configure the settings for the LCD backlight. [Brightness] allows you to set the brightness of the backlight. Set the brightness by moving the slider from side to side. [Power saver time-out] allows you to set the time that must elapse before the backlight will automatically turn...
- Page 33 3. Operation Procedures The Stylus Properties window will be displayed again. Tap the [OK] button in the window to save any changes and return to the System Settings window. Double Tap tab is not for use because there is no operation using a double tap.
-
Page 34: Charging The Battery
4. Charging the Battery 4. Charging the Battery 4.1 Charging the Battery When the battery charge runs out, the window shown below will appear and the instrument cannot measure. Connect the AC adapter to the main unit and charge the battery. It takes approximately 4 hours to fully charge the battery. -
Page 35: Maintenance
5. Maintenance The instrument requires routine maintenance according to the instruction below. In addition an annual calibration is required; please return the instrument to the KANOMAX service center or your distributor. This annual maintenance will ensure the instrument stays in good condition and performs accurate measurements. - Page 36 5. Maintenance ・Checking and Replacing the Felt and Mesh ①To remove the felt from the alcohol cartridge, hold the cartridge with both hands near the joint line and push the cap off the cylinder. The cartridge will be separated into two (2) parts and the white felt will be visible (See Figure ①...
-
Page 37: Inlet (Cyclone)
5. Maintenance 5.2 Inlet (Cyclone) If the instrument has been used in a contaminated environment or for a long-time, you should clean the cyclone. Remove the collector cap from the hole on the side of the main unit. Slide the collector cap up and pull it toward you to remove it. -
Page 38: Maintenance Cycle
5. Maintenance 5.3 Maintenance Cycle To operate this instrument correctly, please follow the recommended maintenance shown below. We highly recommend you refill the alcohol cartridge with alcohol every time before using the instrument. Conduct other maintenance, as necessary depending on the frequency of use and/or condition of the instrument. Items Maintenance Frequency... -
Page 39: Main Specifications
6. Main Specifications 6. Main Specifications Product Name Portable Aerosol Mobility Spectrometer Model Model 3300 Measurement Modes Single Mode/Scan Mode Particle Size Ranges 10.0nm to 433.7nm/14.5nm to 862.3nm Particle Size Channel 27CH/14CH Scan Time 81 sec to 270 min/42 sec to 140 min CPC Maximum 100,000 pcs./cc... -
Page 40: Troubleshooting
(Refer to 5.1 Alcohol Cartridge) Dust and/or alcohol got Contact your distributor or the into the optical system. KANOMAX service center (see the last page of this manual). The instrument requires a Contact your distributor or the calibration and/or service. - Page 41 If several refreshes do maximum, and a not work, contact your distributor measurement or the KANOMAX service center cannot be started. (see the last page of this manual). The message "Please do maintenance on the charger."...
-
Page 42: Warranty And After Service
8. Warranty and After Service KANOMAX Limited Warranty The limited warranty set below is given by KANOMAX JAPAN Inc. (hereafter referred to as “KJI") with respect to this instrument, its attachment parts and other accessories (hereafter referred to as “PRODUCT”) that you have purchased. -
Page 43: After Service
・During the warranty period, we will repair at no charge a product that proves to be defective due to material or workmanship under normal use (See the above "KANOMAX Limited Warranty). All return shipping charges are the responsibility of the customer. -
Page 44: Appendix: Storage Data
Appendix Appendix: Storage Data This appendix explains the format of the file names and the file contents of the storage files. The file name of a data file is based on the measurement start time, which is followed by the file extension (.dat). - Page 45 Appendix The data file format, which consists of the header part (e.g. measurement settings) and the data part, is as follows: [Header part] ;WaitTime,20 Wait time before starting a measurement (second) ;DelayTime,0000 (Not in use) ;MeasTime,0010 Measurement time per channel (second) ;DeadTime,0005 (Not in use) ;LoopWait,0020...
- Page 46 TEL: 81-6-6877-0183 FAX: 81-6-6877-5570 URL: http://www.kanomax.co.jp/ E-Mail: sales@kanomax.co.jp Copyright © Kanomax Japan Inc. All rights reserved. 2013-2014 No copying, distribution, publication, modification, or incorporation of this document, in whole or part, is permitted for commercial purposes without the express written permission of Kanomax.
Need help?
Do you have a question about the 3300 and is the answer not in the manual?
Questions and answers