Table of Contents
Advertisement
Available languages
Available languages
Quick Links
Advertisement
Table of Contents

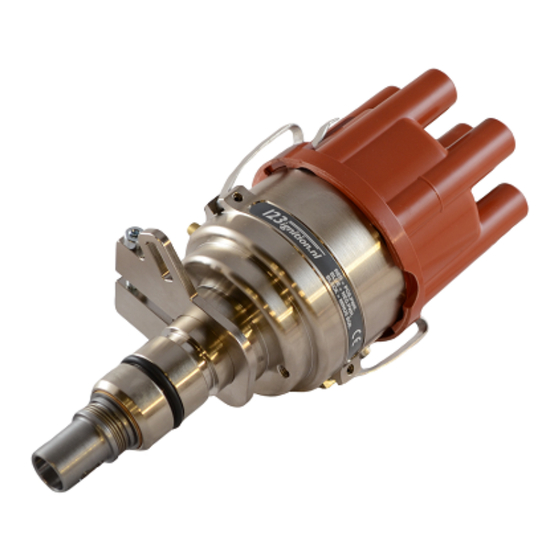
Related Manuals for 123ignition 123-TUNE-4-R-V

Summary of Contents for 123ignition 123-TUNE-4-R-V
-
Page 2: Installing The Software
INSTALLING THE SOFTWARE Important : Do not connect the 123\TUNE, until you have installed the software ! Go to the site www.123ignition.nl and download the latest version of the 123\TUNE-software. This software-package is designed for Windows XP and onwards. Run the software, and you will see an electronic dashboard. In the top-center you will see two grey tabs, with ‘DASHBOARD’... -
Page 3: How To Start
HOW TO START With the 123\TUNE connected, go to the ‘SETTINGS’-tab and press the “curve1”-button. The curve that is presently stored in the 123\TUNE will appear in the screen. ( Off course, you can select the “curve2”-button too, and see which curve is stored in your 123 ) Each curve consists of a maximum of 10 so called “points”... - Page 4 WIRING THE 123\TUNE The 123/TUNE-4-R-V and the 123\TUNE-6-R-V can be used on cars with ‘battery-minus’ connected to the body of the car( “NEG-EARTH” ), but also on cars with ‘battery-plus’ connected to the body of the car ( “POS-EARTH”) . The 8-cyl.
- Page 5 After having done all this, you can now put your 123\TUNE in the car and find a position where the cables, the USB-plug and the vacuum-nipple come out conveniently. Connect the wires according to the proper diagram, and for now, do not yet connect the black wire. Turn on the ignition.
- Page 6 parts, using tie-wraps or other suitable means. Connect the vacuum-tube ( if there is one ) from the carburetter to the nipple on the ‘123’. Older engines may have a screw-connection for the vacuum-advance diaphragm. In this case you can use a short length of rubber hose to connect to the 123, or remove the hard line to the carburetter and replace it completely with thick-walled rubber vacuum-hose.
- Page 7 The vacuum-curve is a little more complicated. The horizontal axis indicates the vacuum, but it does that relative to the atmospheric pressure, and millimeters-Hg. ( this is not a standardized value ; 123ignition uses the kP ( kiloPascal ) and absolute manifold pressure )
- Page 8 Example 3 This demonstrates how to set the unit in a real-life situation, using the original data from a Bosch- distributor 0.231.116.051 ( see the picture at the last pages of this manual ) This distributor was kind of special, because it had ‘negative vacuum’, e.g. the more vacuum the less advance.
- Page 9 to engine-brake or to shift gears. In both situations you don’t want to create thrust anymore..hence the removal of the ( in this example ) 10,0 degrees advance does exáctly that ! Example 5 This demonstrates how to set the unit in a real-life situation, using the original data from the Bosch- distributor 0.231.129.009 / 0.231.173.009 ;...
- Page 10 - Enable Tuning When the engine is running, you could press the ‘T’ to enable real-time ‘TUNING’ mode. ( the curve-indicator-light on the dashboard will blink ‘TUNE’, to indicate that the tuning-mode is active. By pressing ‘A’ ( advance ) you can increase the total amount of advance with a maximum of 5,0 degrees crankshaft, in steps of 0,1 degrees.
-
Page 11: Installation Du Logiciel
INSTALLATION DU LOGICIEL Important : Ne branchez pas 123\TUNE, jusqu’à ce que vous ayez installé le logiciel! Allez au site www.123ignition.nl et téléchargez la dernière version du logiciel 123\TUNE. Ce progiciel est conçu pour la version Windows XP et ultérieures. - Page 12 COMMENT DEMARRER Avec 123\TUNE connecté, allez à l’onglet « SETTINGS » et appuyez sur le bouton « curve1 ». La courbe qui est actuellement enregistrée dans 123\TUNE apparaîtra à l’écran. (Bien sûr, vous pouvez aussi sélectionner le bouton « curve2 » et voir quelle courbe est enregistrée dans votre 123) Chaque courbe se compose d’un maximum de 10 soi-disant «points»: pour la courbe supérieure, chaque point est constitué...
- Page 13 CÂBLAGE DU 123\TUNE 123\TUNE-4-R-V et 123\TUNE-6-R-V peuvent être utilisés sur les voitures équipées de «battery-minus » reliée à la carrosserie de la voiture « NEG-EARTH »), mais aussi sur les voitures équipées de « battery-plus » reliée à la carrosserie de la voiture (« POS-EARTH »). La version 8 cyl.
- Page 14 Après avoir fait tout cela, vous pouvez maintenant mettre votre 123TUNE dans la voiture et trouver une position où les câbles, le port USB et le raccord de dépression s’adaptent facilement. Branchez les fils selon le schéma proprement dit, et pour l’instant, ne branchez pas encore le fil noir. Mettez le contact. Si votre rotor tourne dans le sens horaire, faites pivoter l’appareil dans le sens antihoraire, la DEL verte s’allume.
- Page 15 chapeau au distributeur. Acheminez tous les fils, y compris USB (!), bien loin des fils haute tension et des pièces mobiles, à l’aide d’attaches ou autres moyens appropriés. Connectez le tube à vide (s’il y en a un) à partir du carburateur vers le raccord sur 123. Les moteurs plus anciens peuvent avoir une connexion à...
- Page 16 Le courbe de dépression est un peu plus compliquée. L’axe horizontal indique la dépression, mais par rapport à la pression atmosphérique, et en millimètres de mercure. (Ce n’est pas une valeur normalisée; 123ignition utilise le kilopascal (kP) et la pression d’admission absolue) Voici la table de conversion:...
- Page 17 Retour au 0.231.170.034: l’avance par dépression commence à 100 mmHg en dessous de la pression atmosphérique. Dans la liste, vous trouverez cela comme étant le point n° 3 (87; 0,0). Elle avance ensuite à un maximum de 5,0 degrés à 200 mmHg, ce qui correspond au point n° 2 (73; 10,0) et le point n° 1 (0;...
- Page 18 123\TUNE va maintenant produire 11,0 degrés d’avance, immédiatement après avoir démarré le moteur. C’est pourquoi, le démarrage MAP est défini à zéro hors course! L’avance commence alors à chuter de 100 mmHg, le point n° 4 (85; 11,0), à terme à 400 mmHg au point n°...
- Page 19 par sa mise statiquement à 7 degrés. De cette façon, elle s’établirait exactement à 28 degrés à 2600 tr / min. ; Au ralenti, elle montrera 5 et 7 degrés, soit 12 degrés. C’est un moyen sûr de commencer la procédure de réglage: l’avance au ralenti n’est pas vraiment importante.
- Page 20 Cette fonctionnalité vous sera utile, si vous avez votre voiture sur une route roulante, et que vous souhaitez optimiser le moteur de puissance. L’avance ou de retard constaté n’est pas stocké en aucun cas, vous devrez donc de rappeler à vos conclusions, et d’adapter l’avance active courbe en conséquence. - Chronomètre RPM Si vous n’avez pas de chemin de roulement disponible, il est également possible d’utiliser une portion plate de route.
-
Page 21: Installation Der Software
INSTALLATION DER SOFTWARE Wichtig : 123\TUNE nicht anschließen, bevor Sie die Software installiert haben! Gehen Sie auf www.123ignition.nl und laden Sie die neueste Version von der 123\TUNE-Software herunter. Dieses Softwarepaket wurde für Windows XP und neuere Versionen entwickelt. Starten Sie die Software, Sie sehen ein elektronisches Steuerfeld (Dashboard). In der Mitte oben sehen Sie zwei graue Registerkarten mit ‚DASHBOARD’... - Page 22 STARTEN Wenn der 123\TUNE angeschlossen ist, gehen Sie auf die Registerkarte ‚SETTINGS’ und klicken Sie auf die Schaltfläche „Curve1“. Auf dem Bildschirm erscheint die Kurve, die aktuell in den 123\TUNE gespeichert ist. (Sie können natürlich auch die Taste „Curve2“ betätigen und sehen, welche Kurven in Ihrem 123 gespeichert sind.) Jede Kurve besteht maximal aus 10 so genannten Punkten: für die obere Kurve besteht jeder Punkt aus zwei Nummern: „crankshaft-revolutions-per-minute“...
- Page 23 DEN 123\TUNE ANSCHLIESSEN Der 123\TUNE-4-R-V und der 123\TUNE-6-R-V können für Autos verwendet werden, bei denen ‚Batterie Minus‘ mit der Fahrzeugkarosserie verbunden ist („NEG-EARTH“ ), aber auch für Autos, bei denen ‚Batterie Plus‘ mit der Fahrzeugkarosserie verbunden ist („POS-EARTH“). Die 8-Zyl.-Version (123\TUNE-8-R-V) kann jedoch nur für Autos verwendet werden, bei denen ‚Batterie Minus‘...
- Page 24 Danach können Sie Ihren 123\TUNE im Auto so positionieren, dass alle Leitungen, der USB-Anschluss und der Vakuumanschluss leicht zugänglich sind. Schließen Sie die Leitungen entsprechend dem Schaltplan an; schließen Sie die schwarze Leitung noch nicht an. Drehen Sie den Zündschlüssel ein. Wenn Ihr Rotor sich in Uhrzeigerrichtung dreht: drehen Sie die Einheit entgegen der Uhrzeigerrichtung, bis die LED-Anzeige grün aufleuchtet (drücken Sie außerdem den Rotor entgegen der Uhrzeigerrichtung, um seine Position anzupassen).
- Page 25 die Kappe an den Verteiler an. Achten Sie darauf, dass alle Leitungen, auch die USB-Leitung (!), von der Starkstromleitung und von beweglichen Teilen entfernt liegen, verwenden Sie dazu Kabelbinder oder ähnliches. Schließen Sie den Vakuumschlauch (falls vorhanden) vom Carburetter an den Anschluss des ‚123‘ an. Ältere Motoren haben möglicherweise eine Schraubverbindung für das Vakuumdiaphragma.
- Page 26 U/Min. und bleibt danach konstant. Sie finden Punkt Nr. 4 (3500, 21,0) und Punkt Nr. 5 (8000; 21,0) Die Vakuumkurve ist etwas komplizierter. Die Horizontalachse zeigt das Vakuum an, aber dies in Bezug auf den Umgebungsdruck und Millimeter-Hg (dies ist kein standardisierter Wert; 123ignition verwendet kP (kiloPascal) und den absoluten Verteilerdruck...
- Page 27 Liste finden Sie dies als Punkt 3 (87; 0,0). Dann wird ein Maximum von 5,0 Grad bei 200 mmHg erreicht, was Punkt 2 (73; 10,0) und Punkt 1 (0; 10,0) entspricht! MAP-Start ist auf 1500 U/Min. eingestellt: Der Vakuumteil des Schubs kommt hier erst über 1500 U/ Min.
- Page 28 auch der Grund, weshalb der MAP-Start hier auf Null eingestellt ist! Der Schub beginnt dann, auf ungefähr 100 mmHg abzufallen, Punkt 4 (85; 11,0), bis schließlich 400 mmHg bei Punkt 2 (50; 0,0). Beispiel 4 Hier wird gezeigt, wie der zentrifugale Schub verwendet wird, um zur Leerlaufkontrolle zu gelangen; der Motor wird dann um 1100 U/Min.
- Page 29 Dies ist eine sichere Art und Weise, mit dem Tuningprozess zu beginnen: der Schub im Leerlauf ist nicht wirklich wichtig (ein Motor kann im Leerlauf nicht beschädigt werden). Zu viel Schub bei hohen Drehzahlen wird einen Motor letztlich beschädigen...achten Sie immer darauf! Dieses Beispiel zeigt auch, dass auch ( Teil ) der statische Fruezuendung in den 123\TUNE integriert werden kann.
- Page 30 - U/Min.-Stoppuhr Wenn Sie keine Rollenbank zur Verfuegung haben, können Sie auch eine ebene Straße verwenden. Dann sollten Sie Folgendes tun: fahren Sie, bis der Motor aufgewärmt ist, entfernen Sie den Vakuumschlauch und aktivieren Sie ‚RPM-Stopwatch‘ (U/Min.-Stoppuhr). Geben Sie die beiden Motordrehzahlen in Ihren Interessenbereich ein.
-
Page 31: Installeren Van De Software
INSTALLEREN VAN DE SOFTWARE Belangrijk : sluit de 123\TUNE nog niet aan, als de software nog niet is geinstalleerd ! Ga naar : www.123ignition.nl en haal de laatste versie van de 123\TUNE software op. Deze software is geschikt voor Windows-XP en latere versie. -
Page 32: Hoe Te Beginnen
HOE TE BEGINNEN Nu de 123\TUNE aangesloten is, ga naar de ‘SETTINGS’ en druk op de “curve1” knop. De curve die in de 123\TUNE is opgeslagen zal nu worden getoond. Natuurlijk kan je ook op de “curve2’-knop drukken, en bekijken welke curve daaronder zit. Elke curve bestaat uit een maximum van 10 zgn. - Page 33 waarvan de pluspool van de accu met het metaal van de auto verbonden is. ( “POS EARTH” ) De 8-cyl. versie ( 123\TUNE-8-R-V ) kan alleen gebruikt worden op auto’s met zgn. “NEG.EARTH”. Bekijk ook de tekeningen op de laatste pagina’s van deze manual voor een juiste bedrading. De 123\TUNE-8-R-V is alleen geschikt voor 12Volt systemen ;...
- Page 34 Als je rotor rechtsom draait: draai de ontsteking linksom totdat de LED nét aanspringt. (druk ook de rotor linksom, om speling in de aandrijving te elimineren ) Als je rotor linksom draait: draain de ontsteking rechtsom totdat de LED nét aanspringt. (druk ook de rotor rechtsom, om speling in de aandrijving te elimineren ) De LED schijnt door één van de gaatjes in de magneetschijf ( TUNE-4 TUNE-6 only ) Voor 8-cyl.
- Page 35 Als je vooraf een goede vervroegings-curve hebt geladen, kan je nu je auto starten ! HET LADEN VAN CURVES IN DE 123\TUNE Verbind de 123\TUNE met de computer, en start de 123\TUNE-software. Voorbeeld 1 Ga naar : ‘File’ ➔ ‘Import from file’ ➔ select “example1.xml” and “import” Dit voorbeeld toont de ( niet erg praktische ) curves, van maximaal 10 ‘points’.
- Page 36 vervroeging. Zo ook hier, en je moet je dus realiseren dat het toerental en de vervroeging moeten worden vermenigvuldigd met twee, omdat de krukas twee keer zo snel draait. Als we de VW-curve 0.231.170.034 bekijken, zien we dat de vervroeging start bij 500 rpm “distr.speed”.
- Page 37 Voorbeeld 3 Dit toont hoe om te gaan met een situatie als van de Bosch-verdeler nr. 0.231.116.051 aangegeven op de laatste pagina’s van deze manual. Deze stroomverdeler maakte namelijk gebruik van zgn. ‘negatief vacuum’, dus : des te meer vacuum, des te minder vervroeging.
- Page 38 in het spruitstuk onder de 37 kP komt, valt de ( vacuum ) vervroeging weg. Het resultaat is, dat als je het gas loslaat ( en de motor gaat hoog vacuum produceren ) wil je óf remmen op de motor, óf je wilt schakelen. In beide gevallen ben je juist niet op zoek naar trek-kracht, en het wegvallen van de in dit voorbeeld 10,0 graden vervroeging kan dan gunstig zijn.
- Page 39 TUNEN MET DE 123\TUNE - Schakelen van curve #1 naar curve #2 Een hele mooie en gemakkelijke manier, om interactief te vergelijken, is het omschakelen tussen twee curve’s met behulp van de gele draad. ( zie hiervoor ook de tekeningen aan het eind van deze manual ; let op de verschillen tussen NEG.EARTH en POS-EARTH auto’s.
- Page 40 de tijd wordt gemeten in stapjes van 0,1 seconden ) Na het wijzigen van de vervroegings-curve, kan je naar een kleinere tijd toewerken, hetgeen natuurlijk aangeeft dat je het optimale vermogen in het “interesse-gebied” gevonden hebt.
-
Page 41: Cómo Instalar El Software
CÓMO INSTALAR EL SOFTWARE Importante : ¡no conecte el 123TUNE hasta que haya instalado el software! Vaya a la página web www.123ignition.nl y descargue la última versión del software 123\TUNE. Este paquete de software se ha diseñado para Windows XP y siguientes. -
Page 42: Cómo Empezar
CÓMO EMPEZAR Con el 123\TUNE conectado, vaya a la pestaña de “SETTINGS” (configuración) y pulse el botón “curva 1”. En la pantalla aparecerá la curva que está guardada actualmente en el 123\TUNE. (Por supuesto, también podrá seleccionar el botón “curva2” y ver qué curva está guardada en su 123) Cada curva consta de un máximo de 10 “puntos”: para cada curva superior, cada punto consta de dos números: “revoluciones por minuto del cigüeñal”... - Page 43 CÓMO CONECTAR EL 123\TUNE El 123\TUNE-4-R-V y el 123\TUNE-6-R-V se pueden utilizar en coches con “batería negativa”, conectado a la carrocería del coche (“NEG.EARTH”), pero también en coches con “batería positiva”, conectado a la carrocería del coche (“POS.EARTH”). Sin embargo, la versión de 8 cilindros (123\TUNE-8-R-V) solo se podrá utilizar en coches con la “batería negativa”, conectados a la carrocería del coche.
- Page 44 Después de haber hecho todo esto, entonces podrá poner el 123\TUNE en el coche y encontrar una posición en la que los cables, el enchufe USB y el niple de vacío salgan convenientemente. Conecte los cables conforme al diagrama correcto y, de momento, no conecte aún el cable negro. Encienda el encendido.
- Page 45 piezas móviles usando bandas de sujeción u otros medios adecuados. Conecte el tubo de vacío (si hay) del carburador al niple del “123”. Los motores antiguos puede que tengan una conexión por tornillo para el diafragma de avance de vacío. En este caso, podrá usar una manguera de goma corta para conectarla al 123, o quite el tubo duro al carburador y sustitúyalo completamente por una manguera de vacío de goma de pared gruesa.
- Page 46 La curva de vacío es un poco más complicada. El eje horizontal indica el vacío, pero lo hace en relación con la presión atmosférica, y en milímetros-Hg. (no es un valor normalizado; 123ignition usa kPa (kilopascales) y la presión absoluta del colector) Aquí...
- Page 47 funcionamiento a más de 1500 rpm. El límite de rpm se ha fijado en 8000 rpm, lo que indica que no hay limitación de revoluciones activa. Ejemplo 3 demuestra cómo configurar la unidad en una situación de la vida real, usando datos originales del delco Bosch 0.231.116.051 (véase la figura de las últimas páginas de este manual) Este delco era algo especial, porque tenía un “vacío negativo”, es decir, que cuanto mayor era el vacío, menor el avance.
- Page 48 Ejemplo 4 Demuestra cómo usar el avance centrífugo para lograr un control del ralentí; el motor tenderá a permanecer en torno a 1100 rpm. En la curva de vacío podrá ver un ejemplo de cómo conseguir el llamado “retardo de cambio de marcha”… si la presión absoluta del colector se queda por debajo de 37 kP, el avance caerá...
- Page 49 PUESTA A PUNTO CON 123\TUNE - Cambie de la curva nº 1 a la curva nº 2 Una forma interesante y fácil de comprobar interactivamente es cambiar de la curva nº 1 a la curva nº 2 con el cable amarillo. (véanse los dibujos al final de este manual; tenga en cuenta la diferencia para los coches con TOMA TIERRA NEG.
- Page 50 “cronómetro de RPM”. Introduzca dos velocidades de motor en el área que le interese. Conduzca el coche a la potencia máxima (en una marcha) a lo largo de esa área, y mida el tiempo que se necesita. (este tiempo se mostrará en pasos de 0,1 segundos) Después de haber cambiado la curva de avance centrífugo, podrá...
-
Page 51: Installazione Del Software
INSTALLAZIONE DEL SOFTWARE Importante : Non collegate l’123\TUNE prima di avere installato il software ! Andate al sito www.123ignition.nl e scaricate l’ultima versione del software 123\TUNE. Questo pacchetto software è adatto per Windows XP e versioni successive. Eseguendo il software si vedrà un cruscotto elettronico. Nella parte centrale superiore si vedranno due schede di colore grigio con scritto ‘DASHBOARD’... -
Page 52: Come Iniziare
COME INIZIARE Con l’123\TUNE connesso, andare alla scheda ‘SETTINGS’ e premere il pulsante “curva1”. Verrà visualizzata la curva attualmente memorizzata in 123\TUNE. (Ovviamente, potete selezionare anche il pulsante “curva2” e vedere quale curva è memorizzata nel vostro 123) Ogni curva è formata da un massimo di 10 cosiddetti “punti”: per la curva superiore, ogni punto è... - Page 53 La versione a 8 cilindri tuttavia ( 123\TUNE-8-R-V ) può essere usata solo su auto con il “meno della batteria” collegato alla carrozzeria. ( questo viene anche chiamato ‘NEG.EARTH’ ) Per un cablaggio corretto, controllare gli schemi sull’ultima pagina di questo manuale. 123\TUNE-8-R-V è...
- Page 54 Se il vostro rotore gira in senso orario: ruotate l’unità in senso antiorario fino a quando si accenderà il LED verde. ( premere anche il rotore in senso antiorario, per rimuovere un eventuale gioco nella trasmissione ) Se il vostro rotore gira in senso antiorario: ruotate l’unità in senso orario fino a quando si accenderà il LED verde.
- Page 55 pezzo di tubo in gomma per collegarvi a 123, o rimuovere il tubo duro al carburatore e sostituirlo completamente con un tubo del vuoto in gomma spesso. Se prima avete caricato la curva di anticipo corretta, adesso potete avviare il vostro motore! CARICAMENTO DELLE CURVE IN 123\TUNE Collegate l’123\TUNE al vostro computer ed avviate il software 123\TUNE.
- Page 56 La curva del vuoto è un po’ più complicata. L’asse orizzontale indica il vuoto, ma lo fa in relazione alla pressione atmosferica, e millimetri-Hg. ( questo non è un valore standardizzato ; 123ignition usa il kP ( kiloPascal ) e la pressione assoluta sul collettore )
- Page 57 oltre i 1500 giri/min. Il limite di giri al minuto è impostato su 8000 giri/min, indicando che non è attivo alcun limite di giri. Esempio 3 Questo dimostra come impostare l’unità in una situazione di vita reale, usando i dati originali da un distributore Bosch 0.231.116.051 ( vedere l’immagine sulle ultime pagine di questo manuale ) Questo distributore era abbastanza speciale, perché...
- Page 58 Esempio 4 Questo dimostra come usare l’anticipo centrifugale per avere il controllo del folle; il motore tenderà a rimanere attorno ai 1100 giri/min. Nella curva del vuoto potete vedere un esempio di come ottenere un cosiddetto “ritardo cambio”...se la pressione assoluta nel collettore scende sotto i 37 kP, l’anticipo scenderà...
- Page 59 SINTONIZZARSI CON L’123\TUNE - Passare dalla curva #1 alla curva #2 Un modo molto pratico e semplice di verificare in modo interattivo, è quello di passare dalla curva 1 alla curva 2 con il cavo giallo. (vedere i disegni alla fine di questo manuale ; si prega di notar la differenza per auto con messa a terra POS &...
- Page 60 Guidate l’auto alla massima potenza (e in una marcia) attraverso quell’area, quindi misurate il tempo necessario. ( questo tempo verrà visualizzato con incrementi di 0,1 secondi ) Dopo aver cambiato la curva di anticipo centrifugale, potete puntare ad un tempo minimo, indicando che avete trovato la potenza ottimale in quest’area specifica.
- Page 61 20º 0.231.170.034 15º 10º 5º 0º distr. speed 1000 1500 2000 2500 ➔ vacuum mmHg ➔ 10º 20º 0.231.116.051 0.231.173.009 5º 15º 0º 10º -5º 5º -10º 0º distr. speed 1000 1500 2000 2500 distr. speed 1000 1500 2000 2500 ➔...
- Page 62 NEG. EARTH 6V/12V black black blue 123\TUNE-4 yellow yellow & 123\TUNE-8 123\TUNE-6 0 V➔CURVE #1 0 V➔CURVE #1 6V/12V➔CURVE #2 12V➔CURVE #2 Diagram for cars with NEG. EARTH...
- Page 63 POS. EARTH 6V/12V N.C. 123\TUNE-4 CURVE #1 & CURVE #2 123\TUNE-6 Diagram for cars with POS. EARTH...
- Page 64 Produced by: Moordrecht, The Netherlands...
Need help?
Do you have a question about the 123-TUNE-4-R-V and is the answer not in the manual?
Questions and answers