Intel R2000WF series Service Manual
Hide thumbs
Also See for R2000WF series:
- Technical product specification (167 pages) ,
- Configuration manual (127 pages) ,
- Configuration manual (142 pages)
Table of Contents
Advertisement
Quick Links
Advertisement
Table of Contents

Subscribe to Our Youtube Channel
Related Manuals for Intel R2000WF series


Summary of Contents for Intel R2000WF series
- Page 1 Intel® Server System R2000WF Product Family System Integration and Service Guide A guide providing instructions for the insertion and extraction of system components and available Intel accessories and spares Revision 1.0 July 2017 Intel® Server Products and Solutions...
- Page 2 Intel ® Server System R2000WF Product Family System Integration and Service Guide <This page is intentionally left blank.>...
-
Page 3: Document Revision History
Intel ® Server System R2000WF Product Family System Integration and Service Guide Document Revision History Revision Date Modifications Number July 2017 Production Release... - Page 4 Intel, the Intel logo, are trademarks of Intel Corporation in the U.S. and/or other countries. *Other names and brands may be claimed as the property of others.
-
Page 5: Safety Information
Consignes de sécurité Lisez attention toutes les consignes de sécurité et les mises en garde indiquées dans ce document avant de suivre toute instruction. Consultez Intel Server Boards and Server Chassis Safety Information sur le site http://www.intel.com/support/motherboards/server/sb/cs-010770.htm. Instrucciones de seguridad importantes Lea todas las declaraciones de seguridad y precaución de este documento antes de realizar cualquiera de las... - Page 6 Intel recommends the following steps be taken when performing any procedures described within this document or while performing service to any computer system.
-
Page 7: About This Document
BIOS Setup utility to configure various system settings. Chapter 5 – System Packaging Assembly – Provides package assembly instructions when re-using the Intel packaging the system was originally shipped in. -
Page 8: Table 1. Server System References
Intel ® Server System R2000WF Product Family Technical Product Specification Intel® Remote Management Module 4 (Intel® RMM4) and Integrated BMC User Guide For in-depth technical information about this product family Intel® Remote Management Module 4 Technical Product Specification ... -
Page 9: Table Of Contents
Prepare Chassis for Assembly ..........................19 1.3 System Assembly ................................21 1.3.1 8 x 2.5” Front Drive Bay Module Installation (Intel® Server Chassis R2000WFxxx and Intel® Server System R2208WFxxxx) ..............................22 1.3.2 Internal Cable Routing and Connections ......................24 1.3.3 ... - Page 10 RAID Maintenance Free Backup Unit (RMFBU) – Mounting Bracket Installation ..... 76 3.9 Intel® Omni-Path IFT Carrier Accessory Kit Installation ................. 77 3.9.1 Intel® Omni-path IFT Carrier Kit (iPC AWF1PFABKITM) – Installation ............. 77 3.9.2 Intel® Omni-path IFT Carrier Kit (iPC AWF1PFABKITP) – Installation ............79 3.10 ...
- Page 11 Intel ® Server System R2000WF Product Family System Integration and Service Guide 4.2.2 No Access to the BIOS Setup Utility ........................93 4.2.3 Navigating the BIOS Setup Utility ..........................94 5. System Packaging Assembly Instructions ......................96 6. System Service- System Features Overview ....................101 ...
- Page 12 Server System R2000WF Product Family System Integration and Service Guide List of Figures Figure 1. Intel® Server Chassis R2000WFxxx – No Installed Front Drive Accessory Kit Options ......18 Figure 2. Chassis Components ................................18 Figure 3. Chassis Cover Removal ................................ 19 ...
- Page 13 Figure 70. PCI Add-In Card Installation ............................58 Figure 71. Riser Card Bracket Installation ............................59 Figure 72. Installing the Intel® VROC Upgrade Key ........................61 Figure 73. Backplane Cabling from Two PCIe Sources ......................62 Figure 74. Power Supply Module Installation ..........................67 ...
- Page 14 Figure 114. 8 x 2.5" Drive Bay Configuration (Intel® Server System R2208WF….) ............102 Figure 115. 16 x 2.5" Drive Bay Configuration (Intel® Server System R2208WF…. + 8x2.5” drive option) ..103 Figure 116. 24 x 2.5" Drive Bay Configuration (Intel® Server System R2224WF…. – Storage System) ....103 ...
- Page 15 Intel ® Server System R2000WF Product Family System Integration and Service Guide Figure 124. System Configuration and Recovery Jumpers ....................107 Figure 125. System Fan Removal ..............................113 Figure 126. Replacing the Backup Battery ........................... 114 Figure 127. Standard Rack Handle Installation ......................... 115 ...
- Page 16 Intel ® Server System R2000WF Product Family System Integration and Service Guide List of Tables Table 1. Server System References ..............................8 Table 2. System Utility Software ................................8 Table 3. BIOS Setup: Keyboard Command Bar ..........................94 Table 4. System Status LED State Definitions ..........................126 ...
-
Page 17: 1 Server Building Block System Integration
Chapter 2 - Essential System Component Installation and Service to continue the system integration. In addition to the Intel Server building blocks defined above, the following system components (Sold Separately) will also be needed to complete the full system integration: ... -
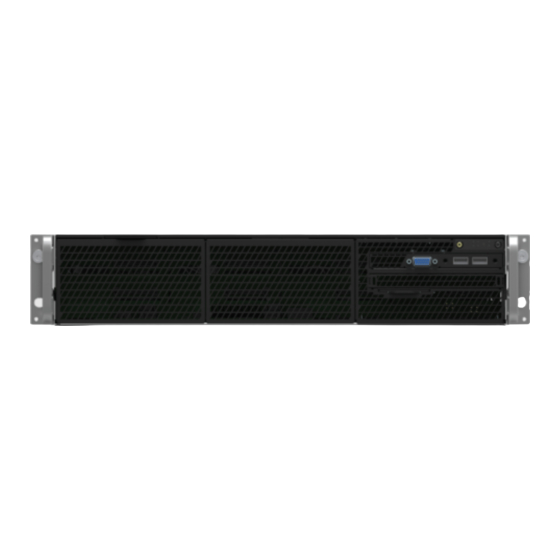
Page 18: Intel Server Chassis Identification
Intel ® Server Chassis Identification Figure 1. Intel® Server Chassis R2000WFxxx – No Installed Front Drive Accessory Kit Options 1.1.1 Chassis Component Identification Figure 2. Chassis Components... -
Page 19: Prepare Chassis For Assembly
® Server System R2000WF Product Family System Integration and Service Guide Prepare Chassis for Assembly As received, the Intel Server Chassis will include several components within a boxed accessory kit or placed within the chassis. Remove the System Cover Note: A non-skid surface or a stop behind the server system may be needed to prevent the server system from sliding on your work surface Figure 3. -
Page 20: Figure 4. System Fan Module Removal
Intel® Server System R2000WF Product Family System Integration and Service Guide Remove the System Fan Module Figure 4. System Fan Module Removal Lift the latches located on each end of the fan module until each latch is fully disengaged from the latch receivers on the chassis side wall. -
Page 21: System Assembly
Intel ® Server System R2000WF Product Family System Integration and Service Guide System Assembly Install the Server Board Figure 5. Server Board Installation Clear the area for server board placement by carefully moving aside any cables that may be taped to the chassis base. -
Page 22: X 2.5" Front Drive Bay Module Installation (Intel® Server Chassis R2000Wfxxx And Intel® Server System R2208Wfxxxx)
8 in/lbf torque for each screw. (See Letter “C”) 1.3.1 8 x 2.5” Front Drive Bay Module Installation (Intel® Server Chassis R2000WFxxx and Intel® Server System R2208WFxxxx) Continue with the instructions in this section for installation of several available 8 x 2.5” front drive bay accessory kits into the system. -
Page 23: Figure 8. Drive Bay Filler Panel Removal
Intel ® Server System R2000WF Product Family System Integration and Service Guide Remove the six (6) screws from the top front edge of the drive bay b) Pull the metal bracket straight out. Set aside the retention bracket and screws for re-installation at a later time. -
Page 24: Internal Cable Routing And Connections
Intel® Server System R2000WF Product Family System Integration and Service Guide Using two screws on the top back edge of the drive bay, secure the drive bay to the chassis. (8 in/lbf torque for each screw). d) Repeat steps 1-3 for the second drive bay module (if applicable). -
Page 25: Figure 11. Internal Cable Routing Channels
Intel ® Server System R2000WF Product Family System Integration and Service Guide Figure 11. Internal Cable Routing Channels Connect Internal Cables for Front Control Panel and Front I/O Module This system includes front panel USB, Video, Control Buttons, and various LED features that must be cabled to the appropriate connectors on the server board. -
Page 26: Figure 12. Front Control Panel And Front I/O Internal Cable Connections
Intel® Server System R2000WF Product Family System Integration and Service Guide Figure 12. Front Control Panel and Front I/O Internal Cable Connections Route the black round USB cable to the blue 20-pin connector on the server board labeled “FP_USB2_11_13”. The cable should be routed as close to the chassis side wall as possible. -
Page 27: Figure 13. Hot Swap Backplane Connectors
Intel ® Server System R2000WF Product Family System Integration and Service Guide Connect the Hot Swap Backplane Power Cable and I C Cables Figure 13. Hot Swap Backplane Connectors Locate the backplane power cable. Figure 14. 2.5” Drive Module Hot Swap Backplane Power Cable Figure 15. -
Page 28: Figure 16. I 2 C Cable
Intel® Server System R2000WF Product Family System Integration and Service Guide Route the backplane power cable along the chassis sidewall, to the area behind the drive bay. d) Connect the white 2x2 pin cable connector(s) (labeled ‘P#’) to the matching white 2x2 power connector(s) on the backplane (silk screened ‘PWR’). -
Page 29: Figure 18. Dual 8X2.5" Hot Swap Backplane I 2 C Jumper Cable Installation
Intel ® Server System R2000WF Product Family System Integration and Service Guide If more than one 8 x 2.5” backplane is being installed, locate the I C jumper cable and connect one end of the cable to the I C -OUT connector of backplane #1 and the other end of the cable to the I C - IN connector of backplane #2. -
Page 30: Pcie Nvme Support
Intel® Server System R2000WF Product Family System Integration and Service Guide Figure 20. Onboard Connectors for Embedded SATA Support (S2600WFT and S2600WF0 only) d) Attach the P2 end of the SATA Data cables to the on-board Mini-SAS HD connectors for embedded SATA support (see Figure 20). -
Page 31: Power Supply Installation
Intel ® Server System R2000WF Product Family System Integration and Service Guide Locate the screw from chassis accessory kit b) Locate and remove the riser card from its packaging Position the mounting key holes of the riser card over the riser bracket mounting studs (see letter “A”) and slide back (see letter “B”) -
Page 32: Essential System Component Installation And Service
Intel® Server System R2000WF Product Family System Integration and Service Guide Essential System Component Installation and Service Purpose This chapter provides instructions for the installation and removal of essential system components including processors, memory, storage devices, and add-in cards. If you are continuing the system integration from the previous chapter, you may skip ahead to section 2.5. -
Page 33: Internal Cable Routing Channels
Intel ® Server System R2000WF Product Family System Integration and Service Guide Internal Cable Routing Channels The system fan module must be removed when routing cables from front-to-back. All cables should be routed using the cable channels in between the chassis sidewalls and the air duct side walls, as shown in the following illustration. -
Page 34: System Cover Removal / Installation
Intel® Server System R2000WF Product Family System Integration and Service Guide System Cover Removal / Installation 2.2.1 System Cover Removal The server system must be operated with the system cover in place to ensure proper cooling. The top cover must be removed to add or replace components inside of the system. Before removing the top cover, power down the system and unplug all peripheral devices and the power cable(s). -
Page 35: Air Duct Removal / Installation
Intel ® Server System R2000WF Product Family System Integration and Service Guide Air Duct Removal / Installation Always operate your server system with the air duct in place. The air duct is required for proper airflow within the server system. -
Page 36: System Fan Module Removal / Installation
Intel® Server System R2000WF Product Family System Integration and Service Guide Press down on the back edge of the air duct so that the tabs at the end of each air duct post snaps underneath the top edge of the riser card assemblies. The air duct should lay/be flat and secure. -
Page 37: System Fan Module Installation
Intel ® Server System R2000WF Product Family System Integration and Service Guide To remove the system fan module: Lift the latches located on each end of the fan module until each latch is fully disengaged from the latch receivers on the chassis side wall. (see Letter ‘A’) Grasp each end of the fan module and pull straight up (see Letter ‘B’) -
Page 38: 2.5 Processor Assembly, Installation, And Replacement
Adequate ESD protective gear (wrist strap, ESD mat) This generation of Intel Server Systems requires that the processor be attached to the heat sink prior to installation on to the server board. The processor / heat sink assembly is referred to as the processor heat sink module, or PHM. -
Page 39: Phm Assembly
Intel ® Server System R2000WF Product Family System Integration and Service Guide 2.5.1 PHM Assembly 1. Remove the heat sink from its packaging. To avoid damage to the heat sink, grasp it by its narrower, top and bottom edges, as shown below. -
Page 40: Figure 33. Processor Carrier Clip Assembly
Intel® Server System R2000WF Product Family System Integration and Service Guide Figure 33. Processor Carrier Clip Assembly 6. Orient the processor, component side up, so that all alignment features match those of the processor clip as shown. Figure 34. Processor Carrier Clip Sub-Assembly 7. -
Page 41: Processor Installation
2.5.2 Processor Installation Intel server systems support the installation of 1 or 2 processors. For the server to be operational, CPU #1 must be installed. The installation of CPU #2 is optional, however, to ensure proper airflow when the server system is operational, the CPU #2 heat sink must be installed at all times. -
Page 42: Figure 37. Plastic Processor Socket Cover Removal
Intel® Server System R2000WF Product Family System Integration and Service Guide Remove the plastic cover from the processor socket on the server board Figure 37. Plastic processor socket cover removal Grasp the processor cover as shown (see Letter A) b) Carefully pull it up away from the processor socket, ensuring no contact is made with any of the pins within the socket. -
Page 43: Figure 39. Phm Alignment To Bolster Plate
Intel ® Server System R2000WF Product Family System Integration and Service Guide Install PHM assembly to the processor socket on the server board Figure 39. PHM Alignment to Bolster Plate Align the mounting holes of the PHM (located on diagonal corners) to the guide pins of the processor socket as shown in the following figure. -
Page 44: Processor Replacement
Intel® Server System R2000WF Product Family System Integration and Service Guide Figure 41. Installing the PHM CAUTION: Failure to tighten the heat sink screws in the specified order may cause damage to the processor socket assembly. Each heat sink screw should be fully tightened to 12 in-lb torque before securing the next screw in the sequence. -
Page 45: Figure 43. Plastic Processor Socket Cover Installation
Intel ® Server System R2000WF Product Family System Integration and Service Guide Using a T30 Torx bit screwdriver, loosen each heat sink fastener in the sequence shown on the label located on the top of the heat sink (see Letter A) -
Page 46: Memory Module (Dimm) Installation And Replacement
Intel® Server System R2000WF Product Family System Integration and Service Guide Figure 45. Releasing the Processor Carrier Clip from the Heat Sink Carefully lift the processor sub-assembly from the heat sink Remove the processor from the processor clip by carefully pushing back one of the latches located on the ends of the processor and rotating the processor up and out of the processor clip Figure 46. -
Page 47: Figure 47. Dimm Blank
Intel ® Server System R2000WF Product Family System Integration and Service Guide BLUE DIMM Slots identify DIMM 1 for each memory channel. To maintain required air flow within the system, certain memory slots MUST be populated with a DIMM or supplied DIMM blank. -
Page 48: Ddr4 Dimm Installation
Intel® Server System R2000WF Product Family System Integration and Service Guide o 9 DIMM, 10, DIMM, and 11 DIMM Configurations - NOT Recommended. These are an unbalanced configurations which will yield less than optimal performance o 12 DIMM Configurations – DIMMs are populated to ALL DIMM Slots Note: DIMM populations noted as “Not Recommended”... -
Page 49: Drive Carrier Extraction, Installation, And Assembly
Intel ® Server System R2000WF Product Family System Integration and Service Guide Drive Carrier Extraction, Installation, and Assembly The 2U server product family has front drive bay chassis options that support 2.5” form factor drives (Hard Disk Drives or Solid State Drives) or 3.5” form factor hard disk drives with the option to support 2.5” SSDs. -
Page 50: 2.5" Hdd / Ssd Drive Carrier Assembly
Intel® Server System R2000WF Product Family System Integration and Service Guide 2.7.3 2.5” HDD / SSD Drive Carrier Assembly Figure 54. 2.5” Drive Carrier Assembly – Drive / Drive Blank Removal 1. Remove the drive or drive blank from the carrier by gently rotating the top edge of a carrier rail outwards while at the same time pushing the drive or drive blank up from the bottom (as shown above). -
Page 51: 3.5" Hdd/Ssd Drive Carrier Assembly
Intel ® Server System R2000WF Product Family System Integration and Service Guide Note: The 2.5” drive blank and drive carrier each have an alignment feature (shown above) to ensure proper assembly. When re-installing a drive blank in to the drive carrier, ensure the features are aligned prior to installation. -
Page 52: 2.5" Ssd Into A 3.5" Drive Carrier Assembly
Intel® Server System R2000WF Product Family System Integration and Service Guide Figure 58. 3.5” Drive Carrier Assembly – Drive Installation to Carrier 2. With the rear drive connector positioned towards the back of the drive carrier, align and position the mounting holes on the left side of the drive over the mounting tabs located on the drive carrier side rail (See letter “A”) -
Page 53: Figure 60. 3.5" Drive Carrier To 2.5" Ssd Bracket - Tab Removal
Intel ® Server System R2000WF Product Family System Integration and Service Guide 1. Remove the drive blank from the carrier by holding the carrier assembly top side down in your right hand. Using your left hand, gently rotate the bottom edge of the left rail upwards (see Letter “A”) while at the same time pushing the drive blank down away from the carrier (see Letter “B”). -
Page 54: Figure 62. 3.5" Drive Carrier To 2.5" Ssd Bracket - Mount Bracket Assembly To Carrier
Intel® Server System R2000WF Product Family System Integration and Service Guide Figure 62. 3.5" Drive Carrier to 2.5” SSD Bracket – Mount Bracket Assembly to Carrier 4. With the rear drive connector positioned towards the back of the drive carrier, align and position the mounting holes on the left side of the drive bracket over the mounting tabs located on the drive carrier side rail (See letter “E”) -
Page 55: Internal Fixed Mount Sata Ssd - Installation / Removal
Intel ® Server System R2000WF Product Family System Integration and Service Guide Internal Fixed Mount SATA SSD – Installation / Removal The system has support for up to two internal fixed mounted SATA Solid State Devices (SSDs). SSD’s can be mounted to either of the two available air duct options (Standard or High Air Flow). -
Page 56: Internal Fixed Mount Solid State Drive Removal
Intel® Server System R2000WF Product Family System Integration and Service Guide Figure 66. Internal Fixed Mount SSD Placement Place the Solid State Drive onto the air duct (see Letter ‘A’). Secure the Solid State Drive with four screws (see Letter ‘B’). -
Page 57: Riser Card Bracket Assembly - Removal / Integration / Installation
Intel ® Server System R2000WF Product Family System Integration and Service Guide Riser Card Bracket Assembly - Removal / Integration / Installation The server system can support up to three (3) PCIe riser cards via the two riser card brackets. This section will provide instructions for the removal and installation of the riser card assemblies from/to the system, and installation of an add-in card into the riser assembly. -
Page 58: Pci Add-In Card Installation
Intel® Server System R2000WF Product Family System Integration and Service Guide 2.9.2 PCI Add-in Card Installation Remove the PCI riser assembly from the system. (see Section 2.9.1.) Figure 70. PCI Add-In Card Installation Remove the filler panel from the add-in card slot and remove the fastener screw (see Letter ‘A’). -
Page 59: Riser Card Bracket Installation
Intel ® Server System R2000WF Product Family System Integration and Service Guide 2.9.3 Riser Card Bracket Installation Figure 71. Riser Card Bracket Installation Note: Steps 1, 2, 5, 6, and 7 highlighted below are only needed when a full-length PCIe card is installed on the riser assembly. -
Page 60: 2.10 Pcie* Nvme Ssd Support
The following sections provide information necessary to support NVMe RAID and NVMe Management features. They include instructions for the installation of an Intel® VROC Upgrade Key accessory and associated drive population / support rules when VROC management features are enabled. -
Page 61: Installing The Intel® Vroc Upgrade Key
In order to support NVMe RAID and NVMe Management features, the optional Intel® VROC Key must be installed on to the server board. With the Intel VROC key installed, specific drive population rules exist and must be followed for proper support of the NVMe management features. -
Page 62: Figure 73. Backplane Cabling From Two Pcie Sources
PCIe source are applied to the drive set connected to it 2.10.3.1 Onboard PCIe OCuLink Connectors and / or Intel Tri-mode RAID module to 8 x 2.5” Combo Backplane The following information is applicable when PCIe signals to the 8x2.5” combo backplane are cabled from the PCIe OCuLink connectors located on the server board and/or an optionally installed Intel®... - Page 63 ALL other drive pairs on the backplane. The following illustrations identify supported and unsupported drive populations associated with any defined drive pair of the 8x2.5” combo backplane when Intel VROC is used for NVMe drive management. = Not Supported...
- Page 64 The following illustrations identify supported and unsupported drive populations associated with any defined drive set of the 8x2.5” combo backplane when an Intel® VROC key is installed to the server board and the PCIe source to the backplane is from an add-in PCIe Switch card.
- Page 65 NVMe Mixing of NVMe and SAS within a common drive set is not supported Note: The NVMe drive population rules defined above are only applicable when the Intel® VROC accessory option is installed and used to provide NVMe drive management.
-
Page 66: Configuration Options And Accessory Kit Integration And Service
Intel® Server System R2000WF Product Family System Integration and Service Guide Configuration Options and Accessory Kit Integration and Service Purpose This chapter provides instructions for the integration of system components within a server system that has the server board and other system components pre-installed. It includes installation instructions for supported system options, and other available accessory option kits. -
Page 67: Power Supply Module - Installation / Removal
Intel ® Server System R2000WF Product Family System Integration and Service Guide Power Supply Module – Installation / Removal 3.1.1 Power Supply Module Installation Figure 74. Power Supply Module Installation If installed, remove the insert from the chassis power supply bay. -
Page 68: Power Cord Retention Strap Installation
Intel® Server System R2000WF Product Family System Integration and Service Guide 3.1.3 Power Cord Retention Strap Installation To minimize the risk of someone accidentally pulling out a power cord from the power supply, it is highly recommended that the supplied power cord retention strap be installed. -
Page 69: Esrt2 Sata Raid 5 Upgrade Key - Installation / Removal
Intel ® Server System R2000WF Product Family System Integration and Service Guide ESRT2 SATA RAID 5 Upgrade Key – Installation / Removal 3.2.1 ESRT2 SATA RAID 5 Upgrade Key Installation Figure 78. SATA RAID 5 Upgrade Key Installation Remove the SATA 5 Upgrade Key from its packaging. -
Page 70: Intel Remote Management Module 4 Lite Key - Installation / Removal
Remove the Intel® RMM4 Lite key from its packaging. Locate the Intel® RMM4 Lite connector on the server board next to the front panel USB 2.0 connector. Place the Intel® RMM4 Lite key over the connector and match the orientation of the key to that of the connector. -
Page 71: Trusted Platform Module (Tpm) Installation
Intel ® Server System R2000WF Product Family System Integration and Service Guide Trusted Platform Module (TPM) Installation Figure 80. Trusted Platform Module (TPM) Installation Locate the TPM module connector on the server just below the PHM. Insert the plastic stand-off into the server board mounting hole (see Letter “A”). -
Page 72: M.2 Removal
Intel® Server System R2000WF Product Family System Integration and Service Guide Figure 82. M.2 Device Installation Screws for M.2 drives are pre-installed on the server board mounting standoffs. 1. Remove the pre-installed screw from the server board mounting standoff. 2. Insert the M.2 SSD into the M.2 socket (see Letter ‘A’). -
Page 73: Ocp Expansion Module - Installation / Removal
Intel ® Server System R2000WF Product Family System Integration and Service Guide OCP Expansion Module – Installation / Removal 3.6.1 OCP Expansion Module Installation Figure 84. OCP Expansion Module Installation 1. Remove the OCP bay filler insert from the chassis back panel. Squeeze the panels on each side of the filler and push it out from the chassis. -
Page 74: Ocp Expansion Module Removal
Intel® Server System R2000WF Product Family System Integration and Service Guide 3.6.2 OCP Expansion Module Removal Figure 85. OCP Expansion Module Removal 1. Power off the server and detach the power cable(s). 2. Detach all cables from the OCP Module. -
Page 75: Intel® Sas Raid Module Installation/Removal
3.7.1 Intel® SAS RAID Module Installation Figure 86. Intel® SAS RAID Module Installation Insert the four barrel standoffs into the matching holes in the server board (see Letter ‘A’). Align the module mounting holes over the four barrel standoffs (see Letter ‘B’). -
Page 76: Intel Raid Maintenance Free Backup Unit (Rmfbu) - Mounting Bracket Installation
Intel® Server System R2000WF Product Family System Integration and Service Guide Intel ® RAID Maintenance Free Backup Unit (RMFBU) – Mounting Bracket Installation Figure 87. Intel® RMFBU Installation Remove the RMFBU mounting bracket from the system accessory kit. Place the RMFBU bracket onto the air duct (see Letter ‘A’). -
Page 77: Intel® Omni-Path Ift Carrier Accessory Kit Installation
Intel® Omni-Path IFT Carrier Accessory Kit Installation The Intel® Server System R2000WF product family has support for 1 or 2 Intel® Xeon® processor Scalable family SKUs that include an Intel Omni-path Host Fabric Interface (HFI) connector. In support of these processor SKUs, one of two available Intel accessory kits is necessary to enable support for the fabric interface. -
Page 78: Figure 89. Ift Mezzanine Card Installation
Intel® Server System R2000WF Product Family System Integration and Service Guide Figure 89. IFT Mezzanine Card Installation 5. Remove the OCP bay filler from the chassis back panel. Squeeze the panels on each side of the filler and push it out from the chassis. -
Page 79: Intel® Omni-Path Ift Carrier Kit (Ipc Awf1Pfabkitp) - Installation
1 – Internal Omni-Path Sideband Cable 2 – Fabric Processor Carrier Clips Intel Cable Kit AXXCBL370IFPS1 required for dual fabric processor configurations. 1. Install Fabric processor(s) on to the server board. See Section 2.5 for fabric processor assembly and installation instructions. -
Page 80: Figure 92. Ift Carrier Add-In Card Assembly
Intel® Server System R2000WF Product Family System Integration and Service Guide Omni-path Sideband Cable Internal HFI Cable – IFT Card to CPU #1 - Optional Internal HFI Cable – IFT Card to CPU #2 Figure 92. IFT Carrier Add-in Card Assembly 2. -
Page 81: Figure 94. Fabric Processor Cable Installation
Intel ® Server System R2000WF Product Family System Integration and Service Guide Lock Cable Place and Insert Cable Figure 94. Fabric Processor Cable Installation 8. Place the HFI cable processor connector within the connector rails on the processor socket and slide processor and cable connectors together (See Letter A) 9. -
Page 82: X 2.5" Rear Mount Backplane Module Accessory Kit (Ipc- A2Urearhsdk1)
Intel® Server System R2000WF Product Family System Integration and Service Guide 3.10 2 x 2.5” Rear Mount Backplane Module Accessory Kit (iPC- A2UREARHSDK1) Figure 95. 2 x 2.5" Rear Mount Backplane Module Installation Remove the two screws securing the bay cover plate to the chassis (see Letter ‘A’). -
Page 83: Figure 98. Rear Hsbp Sata & Sgpio Cable Bundle
Intel ® Server System R2000WF Product Family System Integration and Service Guide 7-pin SATA to 7-pin SATA to rear backplane Server Board 5-pin SATA SGPIO to 5-pin SATA SGPIO Server Board to rear backplane Figure 98. Rear HSBP SATA & SGPIO Cable Bundle Figure 99. - Page 84 Intel® Server System R2000WF Product Family System Integration and Service Guide 10. Connect the 3-pin I C cable connector to the matching “HSBP_I2C” connector on the server board. 11. Match and connect the 7-pin SATA “Drive 0” and “Drive 1” cable connectors to the “Drive_0” and “Drive_1”...
-
Page 85: 3.11 Intel® Sas Expander Card Installation
3.11 Intel® SAS Expander Card Installation Depending on the front drive bay configuration, 2.5” or 3.5” drive support, and drive type (6Gb/s SAS/SATA or 12 Gb/s SAS), the 2U server system can support different Intel® SAS Expander card options. 3.11.1 2.5”... -
Page 86: Front Drive Bay Support
3.11.2 3.5” Front Drive Bay Support For the Intel® Server Systems supporting 3.5” drive carriers, an Intel® SAS Expander PCIe* add-in card option installs into any available PCIe* add-in card slot. See section 2.9 Intel product code - RES3FV288 (12Gb) 3.11.3... -
Page 87: 3.12 R2208Wf Upgrade To 16 Drive Configuration
8 x 2.5” Front Drive Bay Module accessory kit option. Below is an installation overview. Refer to Section 1.3.1 for complete installation instructions. Depending on the system configuration requirements, it may also be necessary to install an Intel® SAS expander card. See Section 3.11.1 for SAS Expander card installation instructions. -
Page 88: 3.13 24 Drive Upgrade Option
The “no drive” server chassis building block SKU and any 2.5” drive server system can be configured to support 24 drives. Upgrade In order to support 24 2.5” drives, the system must have all the following Intel accessory kits installed: Three (3) 8 x 2.5” Front Drive Bay Module Accessory Kit options (several kits available) •... -
Page 89: Figure 104. Drive Bay Disassemly - Retention Bracket Removal
Intel ® Server System R2000WF Product Family System Integration and Service Guide Remove the following from the chassis: drive bay retention bracket, drive bay modules (Storage and I/O) and/or drive bay inserts. Drive Bay Storage Module Drive Bay I/O Module Drive Bay Insert Figure 104. -
Page 90: Figure 105. Drive Bay Disassembly - Module Removal
Intel® Server System R2000WF Product Family System Integration and Service Guide Figure 105. Drive Bay Disassembly – Module Removal d) From the bottom of the chassis, remove three (3) screws from each installed drive bay module or insert (see Letter ‘C’’). -
Page 91: Figure 107. Server Board Usb 2.0 Header
Locate and remove the Left (with USB port) and Right (with Control Panel) storage rack handle assemblies from Intel Accessory Kit A2UHANDLKIT. b) Lay each rack handle assembly near the left and right chassis corners, then route the ribbon cable from each along the inside of the chassis side wall towards the back of the drive bay. -
Page 92: Figure 109. Installing Drive Bay Retention Bracket
Intel® Server System R2000WF Product Family System Integration and Service Guide Slide all 8x2.5” drive bay module(s) into the chassis (see Letter ‘E’). b) Secure the top side of each drive bay module with two fastener screws each (see letter ‘F’) (8 in/lb torque for each screw). -
Page 93: System Software Updates And Configuration
The FRUSDR utility is included in the platform’s System Update Package (SUP) which can be downloaded from the Intel web site referenced above. The SUP will include full system update instructions. -
Page 94: Navigating The Bios Setup Utility
Intel® Server System R2000WF Product Family System Integration and Service Guide 4.2.3 Navigating the BIOS Setup Utility The BIOS Setup Utility consists of several menu screens, each holding either informational fields and/or configurable system setup options. The bottom right portion of each menu screen provides a list of commands that are used to navigate through the Setup utility. - Page 95 Intel ® Server System R2000WF Product Family System Integration and Service Guide Option Description The plus key on the keypad is used to change the value of the current menu item to the next value. This key scrolls through...
-
Page 96: System Packaging Assembly Instructions
Intel® Server System R2000WF Product Family System Integration and Service Guide System Packaging Assembly Instructions The original Intel packaging in which the server system was delivered, is designed to provide protection to a fully configured system and was tested to meet ISTA (International Safe Transit Association) Test Procedure 3A (2008). - Page 97 Intel ® Server System R2000WF Product Family System Integration and Service Guide 3. Place the two pieces of side wall foam as shown. 4. Place three corrugated double wall cardboard pads onto the two bottom foam inserts as shown. 5. Carefully place the system into the shipping bag and tape the bag shut.
- Page 98 Intel® Server System R2000WF Product Family System Integration and Service Guide 7. Place the accesory box next to the foam located in the back of the box. 8. Place foam in front of the accessory box.
- Page 99 Intel ® Server System R2000WF Product Family System Integration and Service Guide 9. At the front of the system, between the front foam insert and system front panel, place the foam marked J36266-001. 10. Place two remaining foam inserts on top of the cardboard panels in the positions shown.
- Page 100 Intel® Server System R2000WF Product Family System Integration and Service Guide 11. Fold the top flaps of the inner box closed, end flaps first, followed by side flaps. a. By design, the two side flaps will not meet. Do not tape side flaps shut.
-
Page 101: System Service- System Features Overview
The intent of this chapter is to provide service personnel a reference to identify and locate the features associated with the Intel® Server System R2000WF product family. Additional information for this product family can be obtained from the following Intel documents which can be downloaded from the following Intel web site: http://www.intel.com/support... -
Page 102: Front Drive Bay Options
Figure 111. No Drives – Chassis only building block (Intel® Server Chassis R2000WFXXX) Figure 112. 8 x 3.5" Drive Bay Configuration (Intel® Server System R2308WF….) Figure 113. 12 x 3.5" Drive Bay Configuration (Intel® Server System R2312WF… – Storage System) Figure 114. 8 x 2.5" Drive Bay Configuration (Intel® Server System R2208WF….) -
Page 103: Control Panel Features
Server System R2000WF Product Family System Integration and Service Guide Figure 115. 16 x 2.5" Drive Bay Configuration (Intel® Server System R2208WF…. + 8x2.5” drive option) Figure 116. 24 x 2.5" Drive Bay Configuration (Intel® Server System R2224WF…. – Storage System) 6.1.2... -
Page 104: Front I/O Features (Non-Storage Systems)
Intel® Server System R2000WF Product Family System Integration and Service Guide 6.1.3 Front I/O Features (Non-Storage Systems) Figure 118. Front I/O Panel Features Figure 119. Hot Swap Drive Carrier LED Identification... -
Page 105: Back Panel Features
Intel ® Server System R2000WF Product Family System Integration and Service Guide 6.1.4 Back Panel Features Figure 120. Back Panel Features 6.1.5 Server Board Features Figure 121. Server Board Feature Identification... -
Page 106: Figure 122. Intel Light-Guided Diagnostic Leds - Server Board
Intel® Server System R2000WF Product Family System Integration and Service Guide Figure 122. Intel ® Light-Guided Diagnostic LEDs - Server Board... -
Page 107: System Configuration And Recovery Jumpers
Intel ® Server System R2000WF Product Family System Integration and Service Guide Figure 123. DIMM Fault LEDs System Configuration and Recovery Jumpers Figure 124. System Configuration and Recovery Jumpers The following sections describe how each jumper block is used. -
Page 108: Bios Default Jumper Block
Intel® Server System R2000WF Product Family System Integration and Service Guide 6.2.1 BIOS Default Jumper Block This jumper resets BIOS options, configured using the <F2> BIOS Setup Utility, back to their original default factory settings. Note: This jumper does not reset Administrator or User passwords. In order to reset passwords, the Password Clear jumper must be used 1. -
Page 109: Management Engine (Me) Firmware Force Update Jumper Block
This jumper should only be used if the ME firmware has gotten corrupted and requires re-installation. The following procedure should be followed. Note: System Update files are included in the System Update Packages (SUP) posted to Intel’s Download center web site. -
Page 110: Bios Recovery Jumper
This jumper is NOT used when the BIOS is operating normally and you need to update the BIOS from one version to another. The following procedure should be followed. Note: System Update Packages (SUP) can be downloaded from Intel’s download center web site. http://downloadcenter.intel.com 1. Turn off the system 2. -
Page 111: Serial Port 'A' Configuration Jumper
Intel ® Server System R2000WF Product Family System Integration and Service Guide 6.2.6 Serial Port ‘A’ Configuration Jumper Pin 7 of the RJ45 Serial A connector is configurable to support either a DSR (Default) signal or a DCD signal. Pin 7 signals are changed by moving the jumper on the jumper block labeled “J4A2”, located next to the... -
Page 112: System Service - Fru Replacement
Intel® Server System R2000WF Product Family System Integration and Service Guide System Service - FRU Replacement This chapter provides instruction for the removal and installation of system components considered as field replaceable. Components within the system can only be serviced after the system has been powered off and AC power cords have been disconnected from the server system. -
Page 113: System Fan Replacement
Server System R2000WF Product Family System Integration and Service Guide System Fan Replacement System fans used in the Intel Server System R2000WF product family are hot-swappable. CAUTION: To minimize possible performance degradation and other thermal related issues, system fan replacement while the system is operational should be performed as quickly as possible. -
Page 114: Replacing The System Battery
Intel® Server System R2000WF Product Family System Integration and Service Guide Replacing the System Battery The battery on the server board powers the Real Time Clock for up to 10 years in the absence of power. When the battery starts to weaken, it loses voltage, and stored server settings and system clock and date settings may be lost. -
Page 115: Standard Rack Handle - Installation / Removal
Note: The system should never be carried by the rack handles. Intel recommends carrying the system using two people supporting the system from the sides or to use a cart when moving the system from one location to another. -
Page 116: Standard Front Control Panel Replacement (R2308Wfxxx)
Intel® Server System R2000WF Product Family System Integration and Service Guide Standard Front Control Panel Replacement (R2308WFxxx) 7.4.1 Standard Front Control Panel Removal (R2308WFxxx) Power off the system and remove all power cords. Remove the system top cover (see Section 2.2.1). -
Page 117: Standard Front Control Panel Installation (R2308Wfxxx)
11. Remove the control panel board from the back of the drive bay module (see Letter ‘B’) 7.4.2 Standard Front Control Panel Installation (R2308WFxxx) Locate and remove the replacement control panel board from its packaging – (Intel Product Code – FXXFPANEL2). Connect the 30-pin ribbon cable to the new control panel. -
Page 118: Figure 132. 3.5"X8 Drive Bay Module Installation
Intel® Server System R2000WF Product Family System Integration and Service Guide Figure 132. 3.5”x8 Drive Bay Module Installation Slide the 8 x 3.5” Front Drive Bay module into the front of the chassis (see Letter ‘A’). Ensure the screw holes on the top of the drive bay are properly aligned. -
Page 119: Standard Front Control Panel Replacement (R2208Wfxxx)
Intel ® Server System R2000WF Product Family System Integration and Service Guide Standard Front Control Panel Replacement (R2208WFxxx) The following procedures apply to both 8 and 16 drive system configurations. 7.5.1 Standard Front Control Panel Removal (R2208WFxxx) Power off the system and remove all power cords. -
Page 120: Standard Front Control Panel Installation (R2208Wfxxx)
12. Remove Front Panel Board from the back of the I/O Bay Module. 7.5.2 Standard Front Control Panel Installation (R2208WFxxx) Locate and remove the replacement control panel board from its packaging – (Intel Product Code – FXXFPANEL2). Connect the 30-pin ribbon cable to the new control panel. -
Page 121: Figure 136. I/O Bay Module Installation
Intel ® Server System R2000WF Product Family System Integration and Service Guide Using a single screw, secure the control panel module to the drive bay module (8 in/lbf torque) (see Letter ‘B’). Ensure the control panel cable is securely attached to the control panel board. -
Page 122: Replacing The Server Board
Disconnect all cables attached to add-in PCIe add-cards and I/O modules. Remove riser card assemblies (see Section 2.9.1). 10. Remove all options installed onto the server board including (if installed): OCP module, Intel® SAS RAID Module, Intel® RAID 5 option key, Intel® RMM 4 Lite key, TPM Module, eUSB SSD. -
Page 123: Server Board Installation
Intel ® Server System R2000WF Product Family System Integration and Service Guide 7.6.2 Server Board Installation Note: Follow the ESD precautions outlined at the beginning of this manual Verify that all cables are clear of the area in which the server board will be installed. -
Page 124: Figure 140. Air Duct Sidewall Installation
Intel® Server System R2000WF Product Family System Integration and Service Guide Locate the two black plastic air duct sidewalls. Figure 140. Air Duct Sidewall Installation Fasten down the appropriate air duct side wall onto each side of the server board using 8 in/lbf torque for each screw (See Letter ‘C’). -
Page 125: Appendix A. Getting Help
— Server and chassis accessory parts list for ordering upgrades or spare parts — A searchable knowledgebase to search for product information throughout the support site If you are still unable to obtain a solution to your issue, send an email to Intel’s technical support center using the online form available at: http://www.intel.com/p/en_US/support/contactsupport... -
Page 126: Appendix B. System Status Led Operating States And Definition
Intel® Server System R2000WF Product Family System Integration and Service Guide Appendix B. System Status LED Operating States and Definition The server board includes a bi-color System Status LED. The System Status LED on the server board is tied directly to the System Status LED on the front panel. This LED indicates the current health of the server. - Page 127 Intel ® Server System R2000WF Product Family System Integration and Service Guide Color State Criticality Description In non-sparing and non-mirroring mode if the threshold of correctable • errors is crossed within the window Amber Solid on Critical, non- Fatal alarm – system has failed or shutdown: recoverable –...
-
Page 128: Appendix C. Post Code Diagnostic Led Decoder Table
Intel® Server System R2000WF Product Family System Integration and Service Guide Appendix C. POST Code Diagnostic LED Decoder Table As an aid to assist in trouble shooting a system hang that occurs during a system’s Power-On Self-Test (POST) process, the server board includes a bank of eight POST Code Diagnostic LEDs on the back edge of the server board as shown in the Figure below. -
Page 129: Table 6. Mrc Progress Codes
Intel ® Server System R2000WF Product Family System Integration and Service Guide Early POST Memory Initialization MRC Diagnostic Codes Memory Initialization at the beginning of POST includes multiple functions, including: discovery, channel training, validation that the DIMM population is acceptable and functional, initialization of the IMC and other hardware settings, and initialization of applicable RAS configurations. -
Page 130: Table 7. Mrc Fatal Error Codes
Intel® Server System R2000WF Product Family System Integration and Service Guide Table 7. MRC Fatal Error Codes Diagnostic LED Decoder 1 = LED On, 0 = LED Off Upper Nibble Lower Nibble Checkpoint Description (Amber - Read 1st) (Green - Read 2nd) -
Page 131: Table 8. Post Progress Codes
Intel ® Server System R2000WF Product Family System Integration and Service Guide BIOS POST Progress Codes The following table provides a list of all POST progress codes. Table 8. POST Progress Codes Diagnostic LED Decoder 1 = LED On, 0 = LED Off... - Page 132 Intel® Server System R2000WF Product Family System Integration and Service Guide Diagnostic LED Decoder 1 = LED On, 0 = LED Off Upper Nibble Lower Nibble Checkpoint Description (Amber - Read 1 (Green - Read 2 DXE ACPI Init DXE CSM Init...
- Page 133 Intel ® Server System R2000WF Product Family System Integration and Service Guide Diagnostic LED Decoder 1 = LED On, 0 = LED Off Upper Nibble Lower Nibble Checkpoint Description (Amber - Read 1 (Green - Read 2 DDR4 Channel Training Error:...
-
Page 134: Appendix D. Post Code Errors
The user needs to replace the faulty part and restart the system. Note: The POST error codes in the following table are common to all current generation Intel server platforms. Features present on a given server board/system will determine which of the listed error codes... -
Page 135: Table 9. Post Error Messages And Handling
Processor cache size mismatch detected Please use identical CPU type. Fatal 0194 Processor family mismatch detected Please use identical CPU type. Fatal 0195 Processor Intel(R) UPI link frequencies unable Fatal to synchronize 0196 Processor model mismatch detected Please use identical CPU type. Fatal 0197 Processor frequencies unable to synchronize Please use identical CPU type. - Page 136 Intel® Server System R2000WF Product Family System Integration and Service Guide Error Code Error Message Action message Response 84FF System event log full Please clear SEL through EWS or SELVIEW Minor utility. 8500 Memory component could not be configured in...
-
Page 137: Server System R2000Wf Product Family System Integration And Service Guide
Intel ® Server System R2000WF Product Family System Integration and Service Guide Error Code Error Message Action message Response 855B CPU2_DIMM_B1 disabled Please remove the disabled DIMM. Major 855C CPU2_DIMM_B2 disabled Please remove the disabled DIMM. Major 855E CPU2_DIMM_C1 disabled Please remove the disabled DIMM. - Page 138 Intel® Server System R2000WF Product Family System Integration and Service Guide Error Code Error Message Action message Response 85C7 CPU2_DIMM_F1 failed test/initialization Please remove the disabled DIMM. Major 85C8 CPU2_DIMM_F2 failed test/initialization Please remove the disabled DIMM. Major 85D1 CPU2_DIMM_D1 disabled Please remove the disabled DIMM.
-
Page 139: Table 10. Post Error Beep Codes
Codes that are common across all Intel server boards and systems that use same generation chipset are listed in the following table. Each digit in the code is represented by a sequence of beeps whose count is equal to the digit. - Page 140 Intel® Server System R2000WF Product Family System Integration and Service Guide NOTES __________________________________________________________________________________________________ __________________________________________________________________________________________________ __________________________________________________________________________________________________ __________________________________________________________________________________________________ __________________________________________________________________________________________________ __________________________________________________________________________________________________ __________________________________________________________________________________________________ __________________________________________________________________________________________________ __________________________________________________________________________________________________ __________________________________________________________________________________________________ __________________________________________________________________________________________________ __________________________________________________________________________________________________ __________________________________________________________________________________________________ __________________________________________________________________________________________________ __________________________________________________________________________________________________ __________________________________________________________________________________________________ __________________________________________________________________________________________________ __________________________________________________________________________________________________ __________________________________________________________________________________________________ __________________________________________________________________________________________________ __________________________________________________________________________________________________ __________________________________________________________________________________________________ __________________________________________________________________________________________________ __________________________________________________________________________________________________ __________________________________________________________________________________________________ __________________________________________________________________________________________________ __________________________________________________________________________________________________ __________________________________________________________________________________________________...
Need help?
Do you have a question about the R2000WF series and is the answer not in the manual?
Questions and answers