ASCOM d62 User Manual
Dect handset
Hide thumbs
Also See for d62:
- Quick reference manual (179 pages) ,
- User manual (97 pages) ,
- Configuration manual (76 pages)
Table of Contents
Advertisement
Quick Links
Advertisement
Table of Contents

Subscribe to Our Youtube Channel
Related Manuals for ASCOM d62


Summary of Contents for ASCOM d62
- Page 1 TD 92477EN User Manual Ascom d62 DECT Handset 8 April 2016 / Ver. M...
-
Page 2: Table Of Contents
1 Introduction........................1 1.1 Abbreviations and Glossary ...................... 1 1.2 Functions and Accessories ......................2 2 Descriptions ........................4 2.1 The Ascom d62 DECT Handset ....................5 2.2 Chargers ............................6 2.2.1 Desktop Charger ........................ 6 2.2.2 Charging Rack ........................6 2.2.3 Battery Pack Charger ...................... - Page 3 User Manual TD 92477EN Ascom d62 DECT Handset 3.10 Customizing the Menu Tree ....................21 4 Basic Operation ....................... 22 4.1 Switch the Handset On and Off .....................22 4.2 Log a Shared Phone On and Off .....................22 4.3 Turn the Audible Signal On or Off ..................23 4.4 Lock and Unlock the Keypad ....................23...
- Page 4 User Manual TD 92477EN Ascom d62 DECT Handset 5.4.16 DTMF ..........................32 5.4.17 DECT Info .........................33 5.4.18 Send Data ........................33 5.5 Loudspeaking Function ......................33 5.6 Call Diversion ..........................33 5.7 Emergency Calls .........................33 6 Messaging ........................34 6.1 Mini Messaging ..........................34 6.2 Message List ..........................34 6.3 Receive a Message ........................34...
- Page 5 User Manual TD 92477EN Ascom d62 DECT Handset 6.15.2 Check the Voicemail inbox ..................44 6.15.3 One Key Voicemail Access ...................44 7 Alarm Operation......................45 7.1 Push-button Alarm ........................45 7.2 Acoustic Location Signal ......................45 7.3 Test Alarm ...........................45 7.4 Alarm with Location Information ..................45 7.4.1 Alarm with Data .......................45...
- Page 6 User Manual TD 92477EN Ascom d62 DECT Handset 8.6 Profiles ............................63 8.7 Contacts ............................64 8.7.1 Call Contact ........................65 8.7.2 Add Contact ........................65 8.7.3 Edit Contact ........................66 8.7.4 Set Ring Signal for a Contact ..................66 8.7.5 Delete Contact ........................66 8.7.6 Central Phonebook ......................66 8.8 Settings ............................67...
- Page 7 User Manual TD 92477EN Ascom d62 DECT Handset 15.3 Attach the Hinge-type Clip ....................87 15.4 Attach the Swivel-type Clip ....................87 15.5 Attach Cover for No Clip ......................87 16. Energy Efficiency......................89 17 Related Documents....................... 90 18 Document History ......................91 Appendix A.
-
Page 8: Introduction
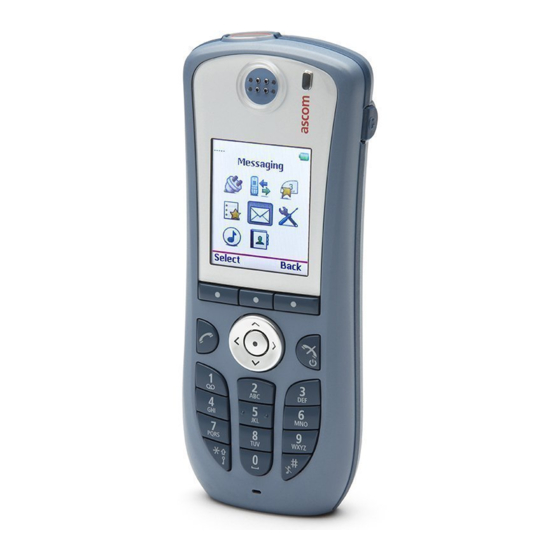
Ascom d62 DECT Handset Introduction This document describes features and settings available for the d62 handset. The handset is a feature-rich handset with color display, telephony, messaging, and Bluetooth as optional. It is designed to be used in medium demanding environment such as hospital environment, but also office environment. -
Page 9: Functions And Accessories
User Manual TD 92477EN Ascom d62 DECT Handset Functions and Accessories NOTE: Some functions are license/system dependent, or require configuration in handset via PDM/Device Manager. Functions Easy registration Enhanced DECT Security Contacts (250 contacts) Central phonebook Company phonebook (1000 contacts) - Page 10 User Manual TD 92477EN Ascom d62 DECT Handset Functions Shared phone Location, base stations DECT Location Bluetooth (optional) Bluetooth Barcode reader support Accessories Desktop charger Basic Desktop charger Advanced Charging rack Battery pack charger Leather case Belt Clip hinge-type swivel-type...
-
Page 11: Descriptions
This button can be used as a shortcut to functions; long or double press modes. In the d62 Protector, the button is used as a push button alarm only. In the d62 Messenger, the button may be configured as a PTT button. -
Page 12: The Ascom D62 Dect Handset
The headset connector is for connecting a headset. The connector is protected against dust by using the headset connector cover. Indicates incoming call, messaging, low battery, and charging. The Ascom d62 DECT Handset IMPORTANT: The handset may retain small metal objects around the mouthcap or earcap region. -
Page 13: Chargers
User Manual TD 92477EN Ascom d62 DECT Handset Battery The battery is a rechargeable Li-pol battery, placed under a battery cover. See 15.1.4 Replace the Battery on page 83. The battery is fully charged within four hours. See 15.1.2 Charge the Battery on page 83. -
Page 14: Icons And Text In The Display
User Manual TD 92477EN Ascom d62 DECT Handset Icons and Text in the Display All functions and settings available to the user are shown as icons and text in the display. The icons and text in the display indicate functions and settings to which you have access. - Page 15 User Manual TD 92477EN Ascom d62 DECT Handset Icons “Signal strength” icon is visible in the upper left corner. The staples shown in display depends on the signal strength. “Full battery” icon is displayed in upper right corner. "Low battery warning” icon is shown when the battery has 10% or less remaining capacity left.
- Page 16 User Manual TD 92477EN Ascom d62 DECT Handset "New colored message" icon indicates that a new coloured text message(s) has arrived. The messages can be labelled with different colours. "Read colored message" icon indicates that a coloured text message(s) has been read.
- Page 17 "PDM/Device Manager communication" icon is visible when handset is communicating with PDM/Device Manager via advanced charger. "Profile active" icon "Talker" icon indicates that the handset is a d62 Talker model. "Messenger" icon indicates that the handset has a d62 Messenger product license.
-
Page 18: Keys And Buttons
User Manual TD 92477EN Ascom d62 DECT Handset Keys and Buttons 2.4.1 Off-hook key This key is used for connecting calls. One short press in standby mode opens the call list. 2.4.2 On-hook and On/Off Key This key is used for disconnecting calls and returning to main screen. -
Page 19: Soft Keys
2.4.9 Multifunction Button Note: This feature is applicable for d62 Talker and d62 Messenger only. This button can be used as a shortcut to functions; long or double press modes. It is by default not used, but can be defined by the user of the handset. If the button is defined, it can be used in standby mode only. -
Page 20: Alphanumeric Keys
User Manual TD 92477EN Ascom d62 DECT Handset Alphanumeric Keys a b c à â ä æ ç 2 . , ? ! - ‘ ” 1 d e f é è 3 j k l 5 g h i î 4 m n o ñ... -
Page 21: Accessories
User Manual TD 92477EN Ascom d62 DECT Handset Accessories 2.6.1 Belt Clips Two belt clip options are available: • Hinge-type clip The clip on the back of the handset is used to fasten the handset to a belt or similar. The clip can also be changed to a swivel-type. -
Page 22: Menu Tree
User Manual TD 92477EN Ascom d62 DECT Handset Menu Tree Calls > —> • Call 7891 01:30 • Call list —> 7827 03:35 —> > • More • Time of call 7682 05:26 Edit number > • • Back 7845 20-Oct-03 >... -
Page 23: Contacts
User Manual TD 92477EN Ascom d62 DECT Handset Contacts • Call contact ——> • Search • From contact list > ——> • Add contact ——> • Name > • New • Work number > • From Call list > • Mobile number >... -
Page 24: Messaging
User Manual TD 92477EN Ascom d62 DECT Handset Messaging NOTE: This menu is applicable for d62 Messenger and d62 Protector only. ——> ——> • Enter text > —> Message List —> • Inbox • View • Reply • More ——>... -
Page 25: Shortcuts
*) For d62 Talker and d62 Messenger only Call PTT group***> Messaging** **) For d62 Messenger and d62 Protector only Services ***) Visible if defined in PDM/IMS3. For d62 Messenger and d62 Protector only Profiles Settings Absence* Call services Tip: When configuring the Phone call function, a variable or character U can be added to the Enter number field that allows the user to enter additional numerical character(s) before calling the number. -
Page 26: Connections
User Manual TD 92477EN Ascom d62 DECT Handset Connections —> • Enable / Disable • Bluetooth* • Headset —> • Add new > • Barcode reader** —> • Add new > • Headset —> • Mic on boom • Mic on cable •... -
Page 27: Settings
*Language ---> English, etc. > Owner ID Alarm** --> ---> Edit alarm data *) This menu is applicable for d62 Messenger and d62 Protector only. **) This menu is applicable for d62 Protector only. 8 April 2016 / Ver. M... -
Page 28: In Call
Additional In Call Functions Besides the default In Call functions, up to 10 extra system specific codes or general purposes can be defined. See Configuration Manual, Ascom d62 DECT Handset, TD 92639EN. 3.10 Customizing the Menu Tree The menu tree can be customized by hiding some of the functions that are available but for example not in use. -
Page 29: Basic Operation
NOTE: If configured in the PDM/Device Manager, an emergency call can be made from a handset that is logged off. See the Configuration Manual, Ascom d62 DECT Handset. Log on a Handset Prerequisite, the handset is switched on. -
Page 30: Turn The Audible Signal On Or Off
Press "Yes". Note: When the keypad is Iocked, the volume buttons and the mute button can be pressed during the call. If the d62 Protector is used, the alarm button can also be pressed. 8 April 2016 / Ver. M... -
Page 31: Lock And Unlock The Handset
22. NOTE: The handset can be configured with predefined emergency numbers that can be called while the handset is locked. See the handset’s Configuration Manual. For the d62 Protector, the Alarm button can also be used. Enter the “Settings” menu. -
Page 32: Calling
In addition, the headset button can be configured with a specific function, such as post-dial, dial last called number, or dial a predefined number. See Configuration Manual, Ascom d62 DECT Handset, TD 92639EN for more information. Other answering methods can also be set in the Settings menu, see 3.8 Settings... -
Page 33: Outgoing Call
5.3.3 Dial Using a Pre-programmed Number NOTE: The Multifunction button is applicable for d62 Talker and d62 Messenger only. A Navigation key, Hot key, Soft key or Multifunction button can be programmed with a handset number, as described in section 3.6 Shortcuts... -
Page 34: Dial The Sender Of A Message
User Manual TD 92477EN Ascom d62 DECT Handset 5.3.6 Dial the Sender of a Message You can call the sender of a message stored in the message list, from the Messaging menu. Open the menu by pressing the confirmation button, or the soft key "Menu". -
Page 35: During A Call
NOTE: Some of these functions are system dependent. The parameters are set up in the PDM/Device Manager, see the Configuration Manual for the Ascom d62 DECT Handset. When calling from a locked handset, there are limitations to what items in the In Call menu are visible. -
Page 36: Lock And Unlock The Keypad During A Call
Press Press "Yes". When the keypad is locked, the volume buttons and the mute button can be pressed during the call. If the d62 Protector is used, the alarm button can also be pressed. 5.4.6 Audio Transfer To transfer audio between the Bluetooth headset and the handset’s earpiece. -
Page 37: End A Call
User Manual TD 92477EN Ascom d62 DECT Handset 5.4.9 End a Call Prerequisite, a new call has been started during conversation, see 5.4.7 Start a New Call during Conversation on page 29. NOTE: This option is only visible if configured in the handset, see the Configuration Manual for more information. -
Page 38: Conference Call
User Manual TD 92477EN Ascom d62 DECT Handset 5.4.12 Conference Call Prerequisite, a new call has been started during conversation, see 5.4.7 Start a New Call during Conversation on page 29. NOTE: This option is only visible if configured in the handset, see the Configuration Manual for more information. -
Page 39: Answering Call Waiting
Press "Select". This enables DTMF signals to be used. TIP: The handset can also be configured to send DTMF when pressing and pressing releasing . See the handset’s Configuration Manual. This is not applicable for d62 Talker. 8 April 2016 / Ver. M... -
Page 40: Dect Info
NOTE: If both diversion and absence reason are set, the absence reason is used. Either can a Multifunction button (not applicable for d62 Protector), Soft key, or Hot key be preprogrammed with a shortcut to the diversion function or the absence reason/menu. See 8.3 Shortcuts... -
Page 41: Messaging
Mini Messaging NOTE: This feature is applicable for d62 Talker only. The d62 Talker can receive text messages with a maximum of 12 characters. When a text message is received, the LED starts flashing and the message alert signal sounds. The message is displayed in a popup window. -
Page 42: Read A Stored Message
User Manual TD 92477EN Ascom d62 DECT Handset 6.3.1 Read a Stored Message Enter “Messaging” in the menu, see 3.4 Messaging on page 17. Select “Inbox”. Select stored message from the list. Press "View" to read the message. 6.3.2 Reply to a Message To reply when receiving a message, do as follows: Press “Reply”. -
Page 43: Call A Number Included In A Message
"I am in a meeting" or "I am in the operating theatre". How to use the PDM/Device Manager to create store predefined messages the handset is described in the Message Templates section of the Configuration Manual, Ascom d62 DECT Handset, TD 92639EN. -
Page 44: Write And Send A Message
User Manual TD 92477EN Ascom d62 DECT Handset The Templates Menu To access a template and use it in one of the ways described above, perform the following steps: Open the "Templates" menu as described in the context in which the template is being used. -
Page 45: Send To Another Destination
To return to the message previously being read, press the "Back" soft key. Receive a Message with Request for Answer NOTE: This feature is applicable for d62 Messenger and d62 Protector only. In the status bar, a message with request for answer is indicated the same way as an ordinary message, see 6.3 Receive a Message... -
Page 46: Message Priority And Call Priority
Message Priority and Call Priority NOTE: This feature requires settings in the PDM/Device Manager, see Configuration Manual, Ascom d62 DECT Handset, TD 92639EN. This feature is applicable for d62 Messenger and d62 Protector only. On incoming calls, the call information dialog is always visible in front of a message by default. -
Page 47: Message Indication Repetition
6.3 Receive a Message on page 34. The alert repeats every seven seconds until the user reads the message or turns the alert off. See Configuration Manual, Ascom d62 DECT Handset, TD 92639EN for the appropriate message settings. Certain system-defined properties can be assigned to a message to give it a high priority, for example, an alarm priority message. -
Page 48: Decline A Call With A Predefined Message
User Manual TD 92477EN Ascom d62 DECT Handset read message, in the message inbox (left in the figure). The messages are indicated by a gradient colour bar behind the envelopes. In addition, a gradient colour bar is shown below the envelop when reading a coloured message (right in the figure). -
Page 49: Calling While Reading A Text Message
User Manual TD 92477EN Ascom d62 DECT Handset 6.12 Calling while Reading a Text Message A user can make a call while reading a text message to review and discuss the message with the called party. The called party may be either: •... -
Page 50: Mobile Data
6.13 Mobile Data NOTE: This is a system dependent feature for d62 Messenger and d62 Protector only. 6.13.1 Send Mobile Data User entered data can be sent from the handset by pressing a pre-programmed Hot key or Soft key, or selecting a Service. -
Page 51: Check The Voicemail Inbox
"Voicemail number not defined" is displayed. Note: Some systems require that the mailbox extension number is downloaded to the handset, see the Configuration Manual for the Ascom d62 DECT Handset. 8 April 2016 / Ver. M... -
Page 52: Alarm Operation
TD 92477EN Ascom d62 DECT Handset Alarm Operation NOTE: The following system dependent features are applicable for d62 Protector only, see the Configuration Manual for the Ascom d62 DECT Handset. IMPORTANT: If a shared phone is used, it must be logged in to the system to be able to send alarm. -
Page 53: Automatic Call After Alarm
Depending on the settings, the call can be established in the following modes; • Loudspeaking mode, or • Monitor mode, or • Normal mode See the Configuration Manual for the Ascom d62 DECT Handset for more information. 8 April 2016 / Ver. M... -
Page 54: Menu Operation
User Manual TD 92477EN Ascom d62 DECT Handset Menu Operation 13:00 Messaging Calls Connections Short cuts Services Settings Profiles Contacts Select Back Figure 8. The main menu. Connections Enter the menu by pressing the “Menu” Soft key, or the confirmation button on the Navigation key. -
Page 55: Headset
Tip: The headset button can be configured with a specific function, such as post-dial, dial last called number, or dial a predefined number. See Configuration Manual, Ascom d62 DECT Handset, TD 92639EN for more information. -
Page 56: System
User Manual TD 92477EN Ascom d62 DECT Handset 8.1.3 System The handset can subscribe up to eight different systems. Change System Select “Automatic” or a specific system. If the handset is set to “Automatic” it selects a system according to the priority list, see Priority on page 50. -
Page 57: In Charger Action When In Call
User Manual TD 92477EN Ascom d62 DECT Handset Press "Next". An information text "Protection on?" is displayed. Select "Yes" if the new system is to be protected. NOTE: A protected system cannot be unsubscribed via the System menu. The unsubscribtion must be made via the Admin menu or the DECT system. -
Page 58: In Charger Action When Not In Call
This function must be programmed in the PBX to be able to redirect calls and messages. NOTE: Additional "In charger" actions to those listed above can also be configured. For additional information, see the Configuration Manual, Ascom d62 DECT Handset, TD 92639EN. Calls Enter the menu by pressing the “Menu”... -
Page 59: Call List
User Manual TD 92477EN Ascom d62 DECT Handset 8.2.1 Call List The 25 last received, dialled or missed calls are stored in a call list. If a number occurs more than once the last time stamp, together with the total number of occurrences, is shown. -
Page 60: Missed Calls
PTT button to open the microphone. NOTE: The d62 Messenger handset multifunction button may also be configured to serve as the PTT button. This makes it easier for users who may have to wear gloves because of dress or other requirements. -
Page 61: Accept An Invitation
The microphone is muted again when is released. NOTE: In the d62 Messenge handset, the multifunction button may have also been configured to act as the button. Invitation Received as Incoming Call during an Ongoing Call... - Page 62 The microphone is muted again when is released. NOTE: In the d62 Messenger handset, the multifunction button may have also been configured to act as the button. Invitation Received as Message during an Ongoing Call...
-
Page 63: Decline A Ptt Invitation
- with or without automatic disconnection. The parameters are set up in the Portable Device Manager (PDM), see the Configuration Manual for the Ascom d62 DECT Handset, and the Installation and Operational Manual for the Portable Device Manager (PDM), Windows version. - Page 64 User Manual TD 92477EN Ascom d62 DECT Handset Select "Call services". Select "Absence". Select the applicable absence reason in the list. The number of absence reasons (for example “Lunch”, “Meeting”, “Trip” etc.) are configured in the PDM. NOTE: The code is defined when configuring the absence reason in the handset. See the Configuration Manual for more information.
-
Page 65: Shortcuts
User Manual TD 92477EN Ascom d62 DECT Handset Divert Calls When Busy Select "When busy". Select "Activate". Enter number (maximum 24 digits) to divert to, or press the soft key to open the phonebook. Press "OK" The handset sends a diversion reason code to the system by establishing a call. The code is defined when configuring the diversion reason in the handset. -
Page 66: Define Hot Keys
8.3.4 Define Multifunction The Multifunction button can only be defined for the d62 Talker and d62 Messenger. The Multifunction button can be defined with two different functions, a long press activates one function, and a double press activates another function. -
Page 67: Add Services
User Manual TD 92477EN Ascom d62 DECT Handset 8.4.1 Add Services Select "Add new" from the "Services" menu. Choose an appropriate name for the service and enter the name in the "Name" field. Press "OK". The "Function" menu is displayed. - Page 68 User Manual TD 92477EN Ascom d62 DECT Handset Reply to Sender Select "View". Select "Reply". Enter text. Select "Send". Delete Message Select "More". Select "Delete". Select "Yes" to delete the message. Forward Message Select "More". Select "Forward". Enter additional text if needed.
-
Page 69: Write New Messages
User Manual TD 92477EN Ascom d62 DECT Handset 8.5.2 Write New Messages Select "Write new message". Enter text, and press "Send". See also 6 Messaging on page 34. The message can be saved and sent later by pressing the soft key "Back" and selecting "Yes". -
Page 70: Profiles
However, they can be displayed when a system profile is activated in the handset. See 10 System Profiles on page 74. This feature is applicable for d62 Messenger and d62 Protector only. Enter the menu by pressing the “Menu” Soft key, or the confirmation button on the Navigation key. -
Page 71: Contacts
User Manual TD 92477EN Ascom d62 DECT Handset Activate Profile Enter the menu by pressing the “Menu” Soft key, or the confirmation button on the Navigation key. Select in the menu. Select profile from list. When a profile is activated, the icon and the name of the profile are displayed in idle mode. -
Page 72: Call Contact
User Manual TD 92477EN Ascom d62 DECT Handset Enter the menu by pressing the “Menu” Soft key, or the confirmation button on the Navigation key. Select in the menu, see 3.2 Contacts on page 16. 8.7.1 Call Contact Select "Call contact". -
Page 73: Edit Contact
User Manual TD 92477EN Ascom d62 DECT Handset 8.7.3 Edit Contact Select "Edit contact". Select contact, and press "Edit" twice. Enter new name/number, and press "OK". Tip: A variable or the character U can be added to the Work/Mobile/Other number field to allow the user to enter additional numerical characters before calling the number. -
Page 74: Settings
Instead, send a message to the handset to listen to the sound. Press "Back". TIP: By default, the message volume follows the ring volume setting. However, a different message volume can be set if required. See Configuration Manual, Ascom d62 DECT Handset, TD 92639EN. 8 April 2016 / Ver. M... -
Page 75: Keypad Lock Settings
The automatic key lock can be configured by the administrator in the PDM/Device Manager. For additional information, see the Configuration Manual for the Ascom d62 DECT Handset. The user may also configure the automatic key lock as described in the following sections. -
Page 76: Phone Lock Settings
3 minutes. NOTE: If configured in the PDM/Device Manager, any one of up to five emergency numbers can be called while the handset is locked. See the Configuration Manual for the Ascom d62 DECT Handset. Activate the Phone Lock The phone lock settings are activated from the handset "Settings"... -
Page 77: Display Settings
User Manual TD 92477EN Ascom d62 DECT Handset Select "On" or "On in charger" as required. Enter PIN code. Press "OK". Press the "Back" soft key twice to return to the "Locks". Select "Auto lock time". Select the required lock time. -
Page 78: Time And Date Settings
User Manual TD 92477EN Ascom d62 DECT Handset Brightness Select “Display”. Select “Brightness”. Select “Normal” or “Power save”. Press "Back". Contrast Select “Display”. Select “Contrast”. Increase/decrease the contrast by pressing on the Navigation key. Press "OK". Press "Back" 8.8.5 Time and Date Settings The time and date displayed in the handset cannot be changed by the user. -
Page 79: Answering
User Manual TD 92477EN Ascom d62 DECT Handset 8.8.6 Answering The default setting for the handset is to use the Off-hook key to answer a call. However, the handset can be configured to answer the call automatically, that is, without pressing a key and in loudspeaking mode if required. -
Page 80: Procedure Call
NOTE: The Call services and In call menu features require configuration in PDM/Device Manager. The "service" feature is applicable for d62 Messenger and d62 Protector only. See the following example for more information. Example of configuration: A user wants to create a service with the Phone call function. -
Page 81: System Profiles
For additional information, see the Configuration Manual, Ascom d62 DECT Handset, TD 92639EN. When the system profile is activated, its settings is not displayed in the handset’s menu. It can be shown that a system profile is active in the handset by showing its profile name in idle mode. -
Page 82: Advanced Functions
Advanced Functions 11.1 Admin Menu The handset has a hidden menu for system administrators. See the Configuration Manual, for the Ascom d62 DECT Handset. The Admin menu contains: • Software and hardware information, licence information, IPEI/IPDI, and User ID • DECT link and system information •... -
Page 83: System Handling
System Handling 12.1 Software Upgrade and Additional Features Software and parameters in the handset d62 can be upgraded by using the PDM or the IMS3/Unite CM. See the Installation and Operation Manual for the Portable Device Manager (PDM) Windows Version, or the Installation and Operation Manual for IMS3/Unite CM. - Page 84 User Manual TD 92477EN Ascom d62 DECT Handset When the update is complete, a "Handset is updated" message is displayed to indicate that the handset is available for use, as shown in figure 15. Select the "OK" soft key to close the message.
-
Page 85: Troubleshooting
User Manual TD 92477EN Ascom d62 DECT Handset Troubleshooting This section contains information on how to solve common operational problems, and warnings you may receive. Go through the following lists if you encounter any problems. If this checklist does not solve the problem, contact your system administrator. - Page 86 User Manual TD 92477EN Ascom d62 DECT Handset Fault Probable cause Action or comment 2) The handset is subscribed to a 2) Unsubscribe the handset system. and then subscribe it by following the instructions in Subscribe Handset in IP-DECT System Manually on page 49.
- Page 87 User Manual TD 92477EN Ascom d62 DECT Handset Error or Warning Messages Display shows Probable cause Action or comment No access The network is in range, but no Switch handset off and then access rights. switch it on again or contact system administrator.
- Page 88 User Manual TD 92477EN Ascom d62 DECT Handset 1) Unencrypted base station(s); 1) Disable the "Encryption and/or, Required" parameter in handset; and/or, 2) Unsupported base station(s). 2) Enable the encryption in the base station(s); and/or, Note: If Ascom’s base station(s) is used, the software version must be 3.1.x or greater.
-
Page 89: Operation Notice
User Manual TD 92477EN Ascom d62 DECT Handset Operation Notice 14.1 Accessibility and Voice Quality The base network is not always available. If you do not get in contact with your system, contact your system administrator. For best voice quality, avoid positioning near computer, radio or similar equipment. -
Page 90: Maintenance
User Manual TD 92477EN Ascom d62 DECT Handset Maintenance 15.1 Maintenance of Batteries 15.1.1 Battery Warnings The "Low battery" icon is displayed when the battery has 10% or less remaining capacity left. In addition; a warning signal sounds every minute, the LED flashing orange, and the dialog window "Battery low. -
Page 91: Easy Replacement Of Handset
However, a handset product license, or license dependent functions can be moved to another handset using the PDM/Device Manager. Check that the software of d62 is of version 2.8.19 or greater, by entering *#34# in idle mode. Use the PDM to check that the software of CR3 Rack Charger or DC4 Advanced Desktop Charger is of version 1.3.x or greater. -
Page 92: Easy Replacement Procedure
User Manual TD 92477EN Ascom d62 DECT Handset 15.2.2 Easy Replacement Procedure During the Easy Replacement procedure, the LEDs of the handset and the charger follow the same LED indications. This means that if the old handset has a broken display, the LED indications on the charger and on the handset can be used to follow the replacement procedure. - Page 93 The handset is automatically restarted. LED Indications during Easy Replacement The following table shows the LED indications that are used for the d62 and the charger during the easy replacement procedure. LED indication...
-
Page 94: Attach The Hinge-Type Clip
User Manual TD 92477EN Ascom d62 DECT Handset 15.3 Attach the Hinge-type Clip Attach the hinge-type belt clip as described in the illustration below. Figure 18. Screw the hinge-type clip into position. 15.4 Attach the Swivel-type Clip Attach the swivel-type belt clip as described in the illustration below. - Page 95 User Manual TD 92477EN Ascom d62 DECT Handset Figure 20. Screw the cover into position. 8 April 2016 / Ver. M...
-
Page 96: Energy Efficiency
User Manual TD 92477EN Ascom d62 DECT Handset 16. Energy Efficiency Recommendations on how to save energy: • Do not charge a battery when the ambient room temperature is above +40° C or below +5° C (above 104° F or below 41° F). Charging below +5° C will harm the battery and shorten the lifetime. -
Page 97: Related Documents
User Manual TD 92477EN Ascom d62 DECT Handset Related Documents Configuration Manual, Ascom d62 DECT Handset TD 92639EN Function Description, Interactive Messaging TD 92168GB Configuration Manual IMS3 TD 92762EN Installation and Operational Manual, IP-DECT TD 92579EN Installation and Operational Manual Portable Device Manager... -
Page 98: Document History
User Manual TD 92477EN Ascom d62 DECT Handset Document History Version Date Description 02 February 2009 First released version 18 Mars 2009 WSM replaced with IMS2 08 December 2009 Chapter 8.2.4 Push to Talk on page 53 added. Chapter Contrast on page 71 added. - Page 99 User Manual TD 92477EN Ascom d62 DECT Handset Version Date Description 12 December 2012 8.7 Contacts on page 64, 5.3.8 Dial a Name from the Central Phonebook on page 27 and 6.3.9 Write and Send a Message on page 37: possible to temporarily change input language.
- Page 100 User Manual TD 92477EN Ascom d62 DECT Handset Version Date Description 30 April 2013 Added 6.12 Calling while Reading a Text Message page 42. Added 6.3.8 Message Templates on page 36 to describe use cases of message templates, and described message template use in 6.10 Decline a Call with a...
- Page 101 User Manual TD 92477EN Ascom d62 DECT Handset Version Date Description 31 October 2013 The following sections have been updated to reflect the five emergency number availability: 1.2 Functions and Accessories on page 2 5.7 Emergency Calls on page 33 8.8.2 Keypad Lock Settings...
-
Page 102: Appendix A. Bluetooth Headset
User Manual TD 92477EN Ascom d62 DECT Handset Appendix A. Bluetooth Headset Introduction Bluetooth technology replaces the cord between the handset and the headset. This allows the user to move more freely and eliminates the risk of a headset cord getting stuck. - Page 103 Headsets A number of Bluetooth headsets for different work situations have been tested together with the handset. Refer to the Ascom Wireless Extranet Website for a list of verified Bluetooth headsets. Since the Bluetooth supports the Bluetooth 2.0 standard, other headsets may also work although not verified by Ascom.
- Page 104 User Manual TD 92477EN Ascom d62 DECT Handset A.5.5 Remove a Headset To remove a Bluetooth Headset enter in the handset menu, select "Bluetooth" > "Headset". Step with the navigation key, to the headset to be removed and press the soft key "More".
- Page 105 User Manual TD 92477EN Ascom d62 DECT Handset Transfer a call A.9.1 Transfer a Call to the handset To transfer a call to the handset from the Bluetooth headset, press the soft key "More" on the handset during the call, and select “Audio transfer”.
- Page 106 User Manual TD 92477EN Ascom d62 DECT Handset A.14 Troubleshooting Problem Reason Solution No headset found Headset is turned off Turn on headset Headset is out of battery Charge headset Move headset closer to handset Headset is out of range <...
-
Page 107: Appendix B. Bluetooth Barcode Reader
Bluetooth Barcode Readers A number of Bluetooth barcode readers for different work situations have been tested together with the handset. Refer to the Ascom Wireless Extranet Website for a list of verified Bluetooth barcode readers. Since the Bluetooth supports the Bluetooth 2.0 standard, other Bluetooth barcode reader may also work although not verified by Ascom. - Page 108 User Manual TD 92477EN Ascom d62 DECT Handset When barcode reader is found, press "Pair". If needed, enter PIN code, see user manual for the Bluetooth barcode reader. Press "OK". The dialog Successful pairing appears if the pairing process was successful. The...
- Page 109 User Manual TD 92477EN Ascom d62 DECT Handset Press the button of the barcode reader to scan a barcode. The barcode reader may give a beep to confirm that the barcode has been read and sends the information the handset.
- Page 110 User Manual TD 92477EN Ascom d62 DECT Handset Troubleshooting Problem Reason Solution No barcode reader found Barcode reader is turned Turn on barcode reader Barcode reader is out of Charge barcode reader battery Barcode reader is out of Move barcode reader closer to handset ...
Need help?
Do you have a question about the d62 and is the answer not in the manual?
Questions and answers