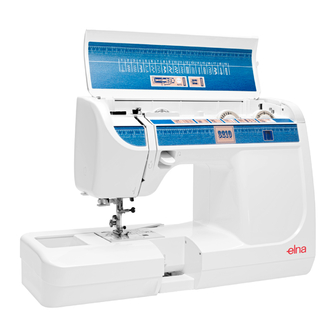
ELNA 3210 Instruction Manual
Hide thumbs
Also See for 3210:
- Instruction manual (51 pages) ,
- Service manual (31 pages) ,
- Manual (4 pages)
Table of Contents
Advertisement
Quick Links
Advertisement
Table of Contents

Related Manuals for ELNA 3210


Summary of Contents for ELNA 3210
- Page 1 3210 Instruction Manual | Mode d’emploi | Gebrauchsanleitung...
-
Page 2: Important Safety Instructions
1. Your sewing machine should never be left unattended when plugged in. Always unplug the machine from the electrical outlet immediately after using and before cleaning. 2. Always unplug before replacing light bulb. Replace bulb with same type and rating, Model 3210: 15W, Model 3230: 12V, 5W. - Page 3 IMPORTANTES RECOMMANDATIONS DE SÉCURITÉ Votre machine à coudre série Elna 3000 a été conçue et fabriquée pour un usage DOMESTIQUE uniquement. Lire attentivement toutes les instructions avant de l’utiliser. Cette machine n'est pas censée être utilisée par des personnes (y compris des enfants) ayant des capacités physiques, sensorielles ou mentales réduites ou un manque d'expérience et de connaissances, sauf si elles sont sous surveillance...
- Page 4 WICHTIGE SICHERHEITSVORSCHRIFTEN Ihre Elna Nähmaschine der Serie 3000 wurde ausschliesslich für eine Verwendung im HAUSHALT entworfen und hergestellt. Alle Sicherheitsbestimmungen aufmerksam durchlesen bevor die Maschine in Betrieb genommen wird. Diese Nähmaschine ist kein Spielzeug. Erlauben Sie Kindern nicht, mit der Maschine zu spielen.
-
Page 5: Table Of Contents
Straight Stitch ............50 NOTE: Information found in this instruction manual is Starting to Sew ............ 50 current at the time of printing. Elna reserves the right to Changing Sewing Direction ......... 50 change and update specifications and information as Finishing Off a Seam ........... - Page 6 REMARQUE: Les informations contenues dans ce Fronces ............... 53 manuel d’instruction sont valides à la date Pose de fermeture éclair – Fermeture éclair d’impression. Elna se réserve le droit de modifier rentrée ............55-57 des caractéristiques et d’effectuer des mises à jour Nervures .............. 59...
- Page 7 BEMERKUNG: die in dieser Gebrauchsanweisung Eine Naht beginnen ..........51 beschriebenen Informationen treten ab Datum der Nährichtung ändern ..........51 Druckausgabe in Kraft. Elna behaltet sich das Eine Naht beenden ..........51 Dicke Stoffe nähen ..........53 Recht vor, Aenderungen der technischen Daten Kräuseln ..............
-
Page 8: Section I - Machine Parts And Functions
37. Machine socket for foot control (Model 3230 only) 38. Fine adjustment screw for stretch stitches 39. Stitch selection knob 40. Flywheel (always turn towards you) 41. On/off switch (Model 3210 only) 42. Machine socket for power (Model 3210 only) -
Page 9: Section I - Pièces Essentielles Et Fonctions
15. Molette de longueur des points 15. Spannungsrad Stichlänge 16. Molette largeur des points/position d’aiguille 16. Spannungsrad Stichbreite/Nadelposition 17. Affichage de sélection des points (Modèle 3210 17. Anzeige der Stichwahl (nur Modell 3210) uniquement) 18. Bildschirm mit Flüssigkristallanzeige (nur Modell 18. -
Page 10: Standard Accessories
17. L: Quilt guide 18. Small spool holder 19. Spool stand 20. Needles 21. Foot control (depends on country and model) 22. Vinyl dust cover (Model 3210 only) 23. Hard cover (Model 3230 only) 24. Power supply cord (Model 3230 only) -
Page 11: Accessoires Standard
22. Housse de protection en Vinyl (Modèle 21. Fussanlasser (dem Land und dem 3210 uniquement) Modell entsprechend) 23. Cloche rigide de protection (Modèle 3230 22. Vinyl Schutzhülle (nur Modell 3210) uniquement) 23. Stabile Abdeckhaube (nur Modell 3230) 24. Cordon d’alimentation 24. Elektrisches Kabel (nur Modell 3230) -
Page 12: Presser Foot Definitions
Presser Foot Definitions A: Standard Metal Foot This foot comes attached to your machine. It is mainly used for straight stitches and zigzag stitches longer than 1.0. The button locks the foot in a horizontal position helping to sew over multiple layered seams. B. -
Page 13: Définitions Du Pied À Coudre
Définitions du pied à coudre Bezeichnung der Nähfüsse A: Standard-Metallfuss A: Pied standard en métal An der Maschine befestigt, verwendet man diesen Fuss Fixé à la machine, ce pied s’utilise principalement pour hauptsächlich für den Geradstich und die Zick-zackstiche les points droits et les points zigzag supérieurs à 1.0. Le über 1.0 eingestellt. -
Page 14: Extension Table And Free Arm
Extension Table and Free Arm Extension Table The extension table provides more sewing space to make sewing easier. The extension table can be easily removed for free arm sewing. Pull the end of the extension table away from the machine, as shown. Free arm sewing is good for circle areas like sleeves, waistbands and pant legs. -
Page 15: Pression Du Pied
Table de couture et bras libre Nähtisch und Freiarm Table de couture Nähtisch Avec la table de couture, la couture est plus aisée car on Mit dem Nähtisch wird das Nähen erleichtert, denn man dispose d’un plus grand espace de couture. Pour utiliser verfügt über eine grössere Nähfläche. -
Page 16: Presser Foot Lever And Additional Presser Foot Clearance
Presser Foot Lever and Additional Presser Foot Clearance Use this lever to raise and lower the presser foot. When the presser foot is raised, tension discs are open. When the presser foot is lowered, tension discs are closed and sewing can begin. You can raise the presser foot about 6mm (1/4”) higher than the normal up position for easy removal of the presser foot or to place heavy fabrics under the presser... -
Page 17: Levier De Pression Du Pied Et Espace Supplémentaire Sous Le Pied À Coudre
Levier de pression du pied et espace Nähfussdruckhebel und Zusatzspiel unter supplémentaire sous le pied à coudre dem Nähfuss Utiliser ce levier pour lever et baisser le pied à coudre. Diesen Hebel benützen um den Nähfuss in obere Lorsqu’il est levé, les disques de tension sont ouverts. oder untere Stellung zu bringen. -
Page 18: Thread Tension Dial
(Model 3210 only – Needle thread tension can range from 3-5 with setting mark usually on 4.) If you look at the top and bottom of the stitch, you will notice that there are no gaps;... -
Page 19: Réglage De La Tension Du Fil
Mitte zwischen den canette doivent se croiser au centre entre les deux beiden Lagen der Stoffe kreuzen. (Nur Modell 3210 - Die couches de tissu. (Modèle 3210 uniquement – La tension Nadelfaden-Spannung kann bis zu 3 bis 5 eingestellt du fil d’aiguille peut aller de 3 à... -
Page 20: Seam Allowance Lines
Seam Allowance Lines The lines on the needle plate and bobbin cover plate help measure seam width. The number shows the space between the center needle position (set stitch width/needle position dial at 0) and the line on the needle plate. The numbers at the front are in millimeters. -
Page 21: Lignes De Guidage
Lignes de guidage Führungslinien Die Linien auf der Stichplatte und dem Greiferdeckel Les lignes de la plaque aiguille et du couvercle crochet dienen dazu, die Nahtbreite abzumessen. vous permettent de mesurer la largeur de couture. Die Zahl gibt Ihnen die Distanz zwischen der zentralen Le chiffre vous indique la distance entre la position de Nadel-Position (Stichbreite/Nadel-Position auf 0), und der l’aiguille au centre (largeur de point/position aiguille sur... -
Page 22: Section Ii - Getting Ready To Sew
Do not modify the plug in any way. Switch ON the machine 3210 IMPORTANT: Before using your sewing machine the first time, place waste fabric under the presser foot and run the machine without thread for a few minutes. -
Page 23: Section Ii - Préparation De La Machine
SECTION II TEIL II Préparation de la machine Vorbereitung der Maschine Raccordement de la machine et de la pédale au Maschine und Fussanlassers am Stromnetz secteur anschliessen. Diese Maschine ist mit einem abnehmbaren, elektrischen Cette machine est équipée d’un cordon électrique Kabel versehen. -
Page 24: Language Selection (Model 3230 Only)
Language Selection (Model 3230 only) There are six languages built into the programming. Press and hold the language key until the desired language appears in the display. Choose from: English German Spanish French Dutch Italian Up/Down Needle Key (Model 3230 only) If the needle is up, it will go down to its lowest position when you press this key. -
Page 25: Choix De La Langue (Modèle 3230)
Choix de la langue (Modèle 3230 uniquement) Wahl der Sprache (nur Modell 3230) Six langues sont programmées dans la machine. Sechs Sprachen sind in der Maschine programmiert. Auf Appuyer sur la touche langue jusqu’à ce que la die Taste Sprache drücken, bis die gewünschte langue souhaitée s’affiche à... -
Page 26: Selecting The Correct Needle And Thread
Needle Weight Fabric Needle Type Size Very Chiffon, Fine Lace, Universal 9 (65) Light Organdy Ball Point 9 (65) Light Batiste, Lawn, Crepe de Stretch 11 (75) Chine, Challis Handkerchief Linen, 11 (75) Crepe, Taffeta, Satin Universal 12 (80) Single Knits, Jersey, Stretch 11 (75) Swimwear, Tricot... -
Page 27: Choix De L'aiguille Et Du Fil
Poids Tissu Type Taille Gewicht Stoff Nadelart Grösse d’aiguille Sehr Chiffon, Feinspitze, Universal 9 (65) Très Chiffon, dentelle fine, Universelle 9 (65) leicht Organdy Pointe à bille 9 (65) léger organdy Pointe à bille 9 (65) Batiste, Limon, China Stretch 11 (75) Batiste, limon, crêpe de Stretch... -
Page 28: Changing The Needle
Changing the Needle Hand turn the flywheel toward you to raise the needle. OR Press the Up/Down Needle key until the needle is in an up position (Model 3230 only). Lower the presser foot. Switch OFF the machine. Turn the needle clamp screw counterclockwise to loosen. -
Page 29: Changer L'aiguille
Changer l’aiguille Nadel auswechseln Tourner le volant vers soi afin de relever l’aiguille OU Das Schwungrad gegen sich drehen um die Nadel hochzuziehen ODER auf die Taste Nadel oben/unten appuyer sur la touche aiguille haut/bas jusqu’à ce que drücken bis die Nadel in oberster Position steht (Nur l’aiguille soit en position haute (Modèle 3230 Modell 3230). -
Page 30: Needle Definitions
Needle Definitions The illustration identifies the main parts of a sewing machine needle. Body Shaft Long groove (round side of needle) Short groove (flat side of needle) Point Universal – an all-purpose needle that handles most woven and knit fabrics. A universal needle size 14/90 comes inserted in your machine. -
Page 31: Définitions D'aiguille
Définitions d’aiguille Begriffsbestimmung der Nadel Ci-contre, illustration des différentes parties d’une aiguille Die Abbildung zeigt die verschiedenen Teile einer de machine à coudre. Nähmaschinen-Nadel. Rumpf Corps Stift Tige Lange Furche (runde Seite der Nadel) Sillon long (côté rond de l’aiguille) Kurze Furche (flache Seite der Nadel) Sillon court (côté... -
Page 32: Winding A Bobbin
Winding a Bobbin To remove bobbin, slide bobbin cover plate release button to the right and lift away the bobbin cover plate. Lift out the bobbin. 1. Lift up the spool pin. Place the spool of thread on the spool pin with the thread coming off the spool as shown. -
Page 33: Remplir La Canette
Remplir la canette Aufspulen des Spülchens Pour enlever la canette, glisser le bouton de Um das Spülchen herauszunehmen, den dégagement du couvercle crochet à droite et enlever Aussparungs-Knopf des Greiferdeckels nach rechts le couvercle. schieben und den Deckel wegnehmen. Enlever la canette. Die Spulenkapsel entfernen. -
Page 34: Additional Spool Pin
4. Push bobbin winder spindle to the right. (Model 3230 only - the LCD readout will display “Bobbin winding”.) 5. Holding the free end of the thread, press the foot control. Stop the machine when it has made a few turns and cut the thread tail close to the hole in the bobbin. -
Page 35: Tige Porte-Bobine Supplémentaire
4. Pousser la broche du bobineur vers la droite (Modèle 4. Den Spulenhalter nach rechts drücken (nur Modell 3230 uniquement – L’écran d’affichage à cristaux 3230 – Der Bildschirm mit Flüssig-kristallanzeige gibt liquides indique “Bobinage de la canette”.) “Aufspulen der Kapsel» an). 5. -
Page 36: Inserting The Bobbin
Inserting the Bobbin Place the bobbin in the bobbin case with the thread running counterclockwise. Guide the thread into first notch on the front side of the bobbin case. Hold the bobbin with your right hand and pull the thread to the left, through the tension spring blades. -
Page 37: Mise En Place De La Canette
Mise en place de la canette Spülchen einsetzen Mettre la canette dans sa capsule. Vérifier que le fil se Das Spülchen in die Spulenkapsel legen. Darauf achten, déroule dans le sens contraire des aiguilles d’une dass der Faden sich gegen den Uhr-zeigersinn montre. -
Page 38: Threading The Machine
Threading the Machine Hand turn the flywheel toward you to raise the needle. OR Press the Up/Down Needle key until the needle is in an up position (Model 3230 only). Raise the presser foot. Switch OFF the machine. Pull the thread under the hook and around the upper thread guide Guide the thread down the right side slot into the tension... -
Page 39: Enfiler La Machine
Enfiler la machine Einfädeln der Maschine Tourner le volant vers soi pour mettre l’aiguille en Das Schwungrad gegen sich drehen um die Nadel position haute. OU appuyer sur la touche aiguille haut/ hochzustellen ODER auf die Taste Nadel oben/unten bas jusqu’à ce que l’aiguille soit en position haute drücken bis die Nadel in der obersten Position steht (Nur (Modèle 3230 uniquement). -
Page 40: Built-In Needle Threader
Built-in Needle Threader Machine should remain switched OFF with needle in highest position. Lower the presser foot. Lower the needle threader lever as far as it will go. The hook automatically inserted into the needle eye. Bring the thread around threader guide and under the hook Release the lever and let the needle threader return to its... -
Page 41: Enfile-Aiguille Automatique
Enfile-aiguille automatique Automatischer Nadeleinfädler La machine doit être hors tension, l’aiguille doit être en Die Maschine muss abgestellt sein und die Nadel muss position haute. sich in der obersten Position befinden. Baisser le pied à coudre. Abaisser le levier de l’enfile- Den Nähfuss senken. -
Page 42: Drawing Up The Bobbin Thread
Drawing Up the Bobbin Thread Raise the presser foot and hold the needle thread lightly with your left hand. Switch ON the machine. Hand turn the flywheel toward you to lower the needle and continue turning until the needle has risen (take-up lever is at its highest position). -
Page 43: Remonter Le Fil De Canette
Remonter le fil de canette Unterfaden heraufholen Lever le pied à coudre et tenir le fil dans la main gauche Den Nähfuss anheben und den Nadelfaden mit der sans serrer. linken Hand ganz locker festhalten. Mettre la machine sous tension. Die Maschine einschalten. -
Page 44: How To Read The Machine Set-Up Information - Example: Straight Stitch
Set Thread Tension Dial (Model 3230 only) Set thread tension to “Auto”. See page 18. Set Thread Tension Dial (Model 3210 only) Set thread tension to 4. The fabric, thread and number of layers of fabric might change where tension should be set. -
Page 45: Comment Lire Le Système D'informations De La Machine - Exemple: Le Point Droit
Die Fadenspannung auf “Auto” einstellen. Siehe Seite 19. Régler la tension du fil sur “Auto”. Voir page 19. Fadenspannungsrad einstellen (Nur Modell Régler la molette de tension du fil (Modèle 3210 3210) uniquement) Die Fadenspannung auf 4 einstellen. Die Spannung, Régler la tension du fil sur 4. -
Page 46: Stitch Selection Knob
LCD Screen (Model 3230 only) or Stitch Selection Display (Model 3210 only). Model 3230 Only If the LCD Screen only shows arrows and no stitch information, the stitch selection knob is not positioned correctly. -
Page 47: Bouton De Sélection Des Points
(Modèle 3230 auf die Taste “Anzeige der Stichwahl” drücken (Nur uniquement) ou appuyer sur la touche Affichage de Modell 3210). sélection du point (Modèle 3210 uniquement). Nur Modell 3230 Modèle 3230 uniquement Wenn auf dem Bildschirm mit Flüssigkristall-anzeige nur Si l’écran d’affichage à cristaux liquides ne montre que Pfeile und keine Stichanzeigen auf-treten, will das des flèches et non des indications de points, cela veut... -
Page 48: Variable Needle Position
Variable Needle Position Straight Stitch and Triple Seam can sew from different needle positions: • center needle position – set dial at 0. • left needle position(s) – set dial between 0 and 6.5, with 6.5 being the farthest left. Stitch Length Dial The needle must be at a high position before changing stitch length. -
Page 49: Position D'aiguille Variable
Position d’aiguille variable Veränderliche Nadelposition Le point droit et la couture triple peuvent être effectués Der Geradstich und die Dreifachnaht können mit selon différentes positions d’aiguille: verschiedenen Nadelpositionen ausgeführt werden: • Position aiguille au centre – réglage sur 0. • Nadelposition Mitte –... -
Page 50: Section Iii - Sewing
SECTION III 0, 6.5 Sewing Straight Stitch 1.5 - 4 The straight stitch is used to sew a seam in woven fabrics and may also be used for gathering, basting, sewing in a zipper, pintucks, rolled hems and twin needle hems. -
Page 51: Section Iii - Principes De Couture
SECTION III TEIL III Principes de couture Grundregeln für das Nähen Point droit Geradstich Le point droit s’utilise pour effectuer une couture dans Den Geradstich benützt man für Nähte in gewebten des étoffes tissées. S’utilise aussi pour les fronces, le Stoffen. -
Page 52: Sewing On Heavy Fabrics
Sewing on Heavy Fabrics The black button on presser foot A locks the foot in a horizontal position when pushed in before lowering the presser foot. This ensures even feeding at the beginning of seams and helps when sewing many layers of fabric such as welt seams used to hem jeans. -
Page 53: Coudre Des Tissus Épais
Dicke Stoffe nähen Coudre des tissus épais Wenn er eingedrückt ist, blockiert der schwarze Knopf Lorsqu’il est enfoncé, le bouton noir du pied à coudre A des Nähfusses A den Fuss in horizontaler Lage bevor bloque le pied à l’horizontale avant d’abaisser le pied. der Fuss gesenkt wird. -
Page 54: Zipper Insertion - Lapped Application
Zipper Insertion Lapped Application Lapped zippers are usually inserted into a side seam of skirts or pants, for example. 1.5 - 4 3 - 5 Attach the pin on zipper foot E to the groove on the shank. • To sew the left side of the zipper, attach the zipper foot on the right-hand side. -
Page 55: Pose De Fermeture Éclair - Fermeture Éclair Rentrée
Pose de fermeture éclair Reissverschlüsse einnähen Verdeckter Reissverschluss Fermeture éclair rentrée Die verdeckten Reissverschlüsse werden haupt-sächlich Les fermetures éclair rentrées se posent généralement in die Naht von Jupes oder Hosen eingenäht. dans la couture des jupes ou des pantalons. Fixer la barrette du pied fermeture éclair E dans la Den Stift des Reissverschluss-Füsschens E in der Rille rainure de la bride semelle. - Page 56 Close zipper. Turn zipper face up (right seam allowance forms a small fold at basting line) and smooth zipper teeth away from seam. Attach foot with right side pin. Reset machine to normal straight stitch settings. Starting at the bottom, sew through the folded seam allowance and zipper tape.
-
Page 57: Reissverschluss
Fermer la fermeture. Tourner la fermeture, endroit vers le Den Reissverschluss schliessen. Die rechte Seite des haut (la réserve de couture droite doit former un petit pli Reissverschlusses nach oben drehen (die rechte sur la ligne de faufilage). Dégager les dents de la Nahtzugabe muss an der Heftnaht eine schmale Falte couture. -
Page 58: Pintucks
Pintucks 0, 6.5 Pintucks are a lovely accent for modern and heirloom fashions. They should be added to your fabric before cutting out the pattern piece. 1.5 - 3 1. Use a washable fabric marker and draw lines for pintucks on the fabric right side. 3 - 5 2. -
Page 59: Nervures
Biesen Nervures Biesen erzeugen in klassischen und modernen Les nervures donnent un bel effet aux ouvrages Näharbeiten ein wirkungsvolles Resultat. Es ist ratsam classiques ou modernes. Il est conseillé de réaliser les Biesen anzubringen, bevor die Teile des Schnittmusters nervures avant de découper les pièces du patron dans le endgültig im Stoff zugeschnitten werden. -
Page 60: Rolled Hem
Rolled Hem An easy professional way to sew hems. The spiral on the hemmer foot guides the fabric edge to create a rolled hem. Recommended for fine, sheer fabrics used in bridal wear. 1.5 - 4 3 - 5 Trim 6.5 mm (1/4”) by 8 mm (3/8”) from corners to reduce bulk. -
Page 61: Ourlet Étroit
Ourlet étroit Schmalsaum Eine einfache Methode um Konfektions-Säume zu Une méthode facile pour effectuer des ourlets confection. nähen. Die auf dem Fuss sich befindliche Spirale erlaubt La spirale située sur le pied permet de guider le bord du den Stoffrand so zu führen, dass ein Schmalsaum tissu et d’effectuer un ourlet étroit. -
Page 62: Twin Needle Hem (Optional Needle)
Twin Needle Hem (optional needle) A twin needle hem is quick and easy. This is an excellent hemming method for knit fabrics because the bobbin thread zigzags, allowing the hem to stretch with the 1.5 - 3 fabric. Be sure to use a stretch twin needle for knit fabrics. -
Page 63: Ourlet À L'aiguille Jumelée (Aiguille En Option)
Ourlet à l’aiguille jumelée Saum mit Doppelnadel (Nadel als Sonderzubehör) (aiguille en option) Schnell und einfach, der Saum mit Doppelnadel wird Rapide et facile, l’ourlet à aiguille jumelée convient hauptsächlich für Strickwaren empfohlen, denn der parfaitement aux tricots, car le fil de canette effectue un Unterfaden bildet ein Zickzack, womit sich der Saum zigzag, ce qui permet à... -
Page 64: Zigzag Stitch
Zigzag Stitch 1 - 6.5 The zigzag stitch is a very versatile stitch. Simply change its width and length. Use the zigzag to finish raw seam edges, sew narrow hems, sew satin stitch appliques, sew on buttons, etc. 0.5 - 3 3 - 5 Narrower width (lower number) Wider width (higher number) -
Page 65: Point Zigzag
Point zigzag Zickzack-Naht Der Zickzack ist ein vielfältiger Stich. Es genügt, die Le point zigzag est un point très versatile. Il suffit d’en Breite und die Länge abzuändern. Dieser Stich ist für changer la largeur et la longueur. Utiliser ce point pour la Kantenversäuberungen, Schmal-säume, Applikationen finition des bords, coudre des ourlets étroits, des mit dem Kordonstich und zum Verzieren von schönen... -
Page 66: Whip And Roll Hem
Whip and Roll Hem 3 - 4 This technique produces a beautiful edge on ruffles and hems. It should only be used for lightweight fabrics and is commonly used in heirloom sewing. 0.5 - 1 2 - 4 2 - 4 1. -
Page 67: Ourlet Étroit
Roulotté Rollsaum Mit dieser Technik, nur in leichten Stoffen anzu-wenden, Cette technique, à utiliser uniquement sur des tissus erzielt man schöne Rüschen- und Saumabschlüsse. Wird légers, donne un beau fini aux volants et ourlets. allgemein im traditionellen Nähen angewendet. Communément utilisée dans la couture tradition. 1. -
Page 68: How To Sew On A Button
How To Sew On a Button 2.5 - 4 Hand sewing buttons to a garment is very time- consuming. Sew them on in one quick, easy step. • Set the stitch width according to the position of the holes in the button. •... -
Page 69: Pose De Bouton
Pose de bouton Knöpfe annähen Knöpfe von Hand annähen nimmt viel Zeit in Anspruch. La pose de bouton à la main prend beaucoup de temps. Nichts geht leichter und schneller als Knöpfe in einem Vous pouvez les coudre rapidement et facilement en une Arbeitsgang anzunähen. -
Page 70: Automatic Buttonhole
Automatic Buttonhole 4 - 6.5 All buttonholes should use interfacing that is the same weight as the fabric. Interfacing is especially important when sewing on stretch fabrics. Always make a test buttonhole on extra fabric before sewing on your fabric. 0.5 - 1 Use a narrower stitch width (4) for a finer buttonhole, a wider stitch width(6.5) for a more... -
Page 71: Boutonnière Automatique
Boutonnière automatique Automatisches Knopfloch Für alle Knopflöcher sollte eine der Stoffdicke Toutes les boutonnières devraient être réalisées avec un entsprechende Verstärkung verwendet werden. Diese entoilage de même poids que le tissu. L’entoilage est Einlage ist bei dehnbaren Stoffen besonders wichtig. particulièrement important pour coudre des tissus stretch. -
Page 72: Fine Adjustment For Buttonholes
4. Mark the buttonhole area on the fabric. Place both threads to the left under the foot. Insert the fabric under the foot and turn the flywheel until the needle comes down into the fabric. The needle should go in exactly at the marked line for the buttonhole. -
Page 73: Réglage Fin Pour Boutonnières
4. Die Knopflochmittellinie auf dem Stoff einzeichnen. 4. Marquer l’emplacement de la boutonnière sur le Beide Fäden links unter den Fuss ziehen. Das tissu. Tirer les deux fils à a gauche sous le pied. Kleidungsstück unter den Fuss legen und das Disposer le vêtement sous le pied et tourner le Schwungrad so lange drehen bis sich die Nadel in volant jusqu’à... -
Page 74: Corded Buttonhole
Corded Buttonhole 4 - 6.5 Corded buttonholes are found on coats and other garments that require extra strong buttonholes. The cording reinforces and accentuates the buttonhole. Always make a test buttonhole on extra fabric before 0.5 - 1 sewing on your garment. •... -
Page 75: Boutonnière Cordonnet
Boutonnière cordonnet Verstärktes Knopfloch Das mit Bändchen verstärkte Knopfloch wird La boutonnière cordonnet s’utilise sur les manteaux et hauptsächlich bei Mänteln und anderen autres articles nécessitant de très solides boutonnières. Kleidungsstücken angewendet, bei welchen besonders Le cordonnet inséré renforce et accentue la boutonnière. solide Knopflöcher nötig sind. -
Page 76: Manual Buttonhole
Manual Buttonhole 4 - 6.5 Make a manual buttonhole to sew oversized buttonholes for novelty buttons or a decorative accent. Always make a test buttonhole on extra fabric before 0.5 - 1 sewing on your fabric. HINT: Sew slowly to make accurate manual buttonholes. Use a narrower stitch width (4) for a finer buttonhole, 2 - 4 a wider stitch width(6.5) for a more substantial... -
Page 77: Boutonnière À La Main
Boutonnière à la main Manuelles Knopfloch Das manuelle Knopfloch wird für grosse Phantasie- Effectuer une boutonnière à la main pour coudre les Knöpfe oder für dekorative Knopflöcher angewendet. grands boutons fantaisie ou pour les boutonnières déco. Immer auf einem Stoffresten ein Probeknopfloch nähen Toujours effectuer une boutonnière d’essai sur une chute de tissu avant de coudre vos vêtements. -
Page 78: 3-Step Zigzag
3-Step Zigzag 3 - 6.5 The 3-step zigzag (sometimes called a multiple zigzag) is used to finish raw seam edges. This stitch gives a flatter edge finish than the regular zigzag. It is also used for mending tears in fabric. 0.5 - 1.5 3 - 5 Place the fabric under the presser foot so the needle... -
Page 79: Zigzag Spécial
Zigzag spécial Spezial-Zickzack Spezial-Zickzack (oder manchmal Mehrfachzickzack Le point zigzag spécial (parfois appelé zigzag multiple) genannt), wird zum Versäubern von Stoffkanten est utilisé pour finir les bords. Il permet d’obtenir un bord angewendet. Er ergibt eine flachere Kantenversäuberung plus plat que le zigzag ordinaire. S’utilise également pour als der gewöhnliche Zickzack-Stich. -
Page 80: Stretch Blind Hem
Stretch Blind Hem 2.5 - 4 Use this stitch to sew a blind hem on either knit or woven fabrics. Elna invented the stretch blind hem in 1952. 1 - 3 3 - 5 Finish the raw hem edge with a zigzag or 3-step zigzag before sewing the blind hem. -
Page 81: Ourlet Invisible En Tissu Stretch
Elastischer Blindsaum L’ourlet invisible peut s’utiliser pour coudre un ourlet dans Blindsäume können in Stretch oder in einem gewobenen du jersey ou une étoffe tissée. Elna a inventé l’ourlet Stoff genäht werden. stretch invisible en 1952. Elna hat den elastischen Blindsaum im Jahre 1952 erfunden. -
Page 82: Shell Tuck
Shell Tuck 5 - 6.5 This is a pretty hem finish for lingerie and tricot fabrics. May also be used for decorative rows of stitching. 2 - 3 • Set the stitch width and length as you desire. • Tighten the top thread for best results. 6 - 8 Use a lightweight fabric such as tricot. -
Page 83: Point Cocotte
Point cocotte Muschelsaum Eine hübscher Saumabschluss für Lingerie- und Jersey- Une jolie finition pour la lingerie et le jersey. Näharbeiten. Peut s’utiliser également comme décoration en cousant Ist ebenfalls für dekoratives Nähen geeignet, indem plusieurs rangées de points. mehrere Stichlagen genäht werden. •... -
Page 84: Fagoting (Bridging)
Fagoting (Bridging) 5 - 6.5 Fagoting is a technique seen in heirloom sewing. Two folded edges are joined together by threads over an open area. Use linen, cotton or blend of linen/cotton. 0.5 - 1.5 3 - 5 1. Thread machine, needle and bobbin with fine embroidery thread (50 weight or finer). -
Page 85: Faux-Jour
Faux-jour Falschhohlsaum Der Falschhohlsaum ist eine weit verbreitete traditionelle Le faux-jour est une des techniques de couture Nähtechnik. Zwei gefaltete Stoffkanten werden durch traditionnelle. Deux bords pliés sont joints par des fils sur Fäden über einer offenen Zone miteinander verbunden. une zone ouverte. -
Page 86: Patchwork
Patchwork 4 - 6.5 Add a little something special to decorate your pieced fabrics. 0.5 - 2.5 3 - 5 Sew a straight stitch seam and press seam allowance open. Sew patchwork stitch on right side of fabric, centering it over the seam. Box Stitch 4 - 6.5 Choose the box stitch to attach elastic directly onto fabric... -
Page 87: Patchwork
Patchwork Patchwork Eine zusätzliche, heitere Note zum verschönern der La petite touche en plus pour décorer les pièces de tissu. Näharbeiten. Faire une couture droite et ouvrir au fer. Coudre le point Eine Geradnaht nähen und diese mit dem Bügeleisen patchwork sur l’endroit de l’ouvrage en le centrant sur la öffnen. -
Page 88: Satin Stitches
Satin Stitches 4 - 6.5 Express your creative talents by using one of the pretty satin stitches to add a decorative accent. 0.5 - 1 It is very important to use a stabilizer with your fabric or the stitch will not form correctly. The weight of the stabilizer should be the same as the fabric. -
Page 89: Points De Bourdon
Points de bourdon / Points satin Kordonstich Mit dem Kordonstich können Sie Ihre Kreativität voll zum Exprimer votre créativité avec un des jolis points de Ausdruck bringen und Ihre Näharbeiten mit hübschen bourdon qui donneront une touche déco à vos travaux. Dekorationen verzieren. -
Page 90: Stretch Stitches
Stretch Stitches 3 - 6.5 Decorative Stretch Stitches Choose a decorative stretch stitch to apply a hem to knit fabrics. • Set stitch width on 0 or 6.5 for Triple Seam. • Use any setting for stitch length. 3 - 5 1. -
Page 91: Points Stretch
Points stretch Stretch-Stiche Dekorativer Stretch-Stich Points stretch décoratifs Einen dekorativen Stretch-Stich auswählen um Säume in Choisir un point stretch décoratif pour faire un ourlet Jersey zu nähen. dans du jersey. • Für die Dreifachnaht, die Stichbreite auf 0 oder 6.5 •... -
Page 92: Overlock Stitch
Overlock Stitch 5 - 6.5 Create a straight seam and overcast at the same time. Elna invented this stitch in 1963. • Use any setting for stitch length. 3 - 5 Place the fabric edges together under the presser foot. -
Page 93: Overlock
Un point qui permet d’assembler et de surfiler à la fois. Dieser Stich eignet sich sehr gut zum gleich-zeitigen Zusammennähen und Umschlingen aller Art von Stoffen. Ce point a été inventé par Elna en 1963. Dieser Stich wurde von Elna im Jahre 1963 erfunden. •... -
Page 94: Smocking
Smocking 0, 6.5 Smocking is a delicate, decorative treatment on children’s clothing or women’s blouses. Choose a soft, lightweight fabric such as batiste, gingham or challis. Cut the fabric three times the finished width. 1 - 3 1 - 3 1. -
Page 95: Nid D'abeille
Nid d’abeille Wabenstich Ce point décoratif et raffiné est particulièrement indiqué Dieser dekorative, raffinierte Stich benützt man pour agrémenter des chemisiers ou des vêtements hauptsächlich um Arbeiten wie Damenblusen oder d’enfants. Utiliser un tissu léger, type batiste, vichy ou Kinderkleider zu verzieren. Es werden leichte Stoffe, wie coton Liberty. -
Page 96: Buttonhole Applique
Buttonhole Applique 1 - 6.5 A favorite method of applying small pieces of fabric to quilts for decoration. Use fine embroidery thread and needle appropriate for fabric. • Maximum stitch width is 3.5. The stitch width will vary 0 to 3.5 in proportion as setting the stitch width dial at 3 - 5 0 to 6.5 •... -
Page 97: Application Au Point Boutonnière
Application au point boutonnière Applizieren mit dem Knopflochstich Diese Methode eignet sich bestens zum Aufnähen von Cette méthode est bien adaptée à la pose de petites kleinen Stoffteilen um Quilts (Wattierungen) zu pièces de tissu pour décorer les quilts (matelassage). dekorieren. -
Page 98: Super Overlock Stitch
This industrial-inspired overlock stitch is excellent for assembling and finishing fabrics together in one step. Apply ribbing to knits and garment retains its shape. Elna invented this stitch in 1982. • Use any setting for stitch length. 3 - 5 Place the fabric edges together under the presser foot and sew. -
Page 99: Point Super Overlock
Eignet sich bestens für Halsausschnitte ohne dass z.B. déformer les vêtements en jersey. Jersey-Kleider aus der Form geraten. Ce point a été inventé en 1982 par Elna. Dieser Stich wurde von Elna im Jahre 1982 erfunden. Für die Stichlänge, die Gesamt-Einstellung benützen. -
Page 100: Section Iv - Taking Care Of Your Machine
SECTION IV Taking Care of Your Machine Your Elna machine has been meticulously designed and manufactured to give you a lifetime of sewing pleasure. Do not store the machine in a high humidity area, near a heat radiator or in direct sunlight. The machine is self-... -
Page 101: Section Iv - Entretien De La Machine
Entretien de la machine Unterhalt der Maschine Ihre Elna Maschine wurde sorgfältig ausgearbeitet und Votre machine Elna a été soigneusement conçue et hergestellt, so dass das Nähen ein Leben lang Freude fabriquée pour satisfaire au plaisir de coudre toute une bereitet. -
Page 102: Replacing The Bobbin Holder And Needle Plate
(B) To remove: Push up and twist to the left. To replace: Push up and twist to the right. Attach face plate and insert screw and screw cap. NOTE: Replace bulb with same type and rating, Model 3210: 15 W, Model 3230: 12V, 5W. -
Page 103: Remettre La Capsule Et La Plaque Aiguille
Attacher le couvercle latéral et mettre les cache-vis. Die seitliche Abdeckung aufsetzen und die Schraubenabdeckung anbringen. REMARQUE: Remplacer l’ampoule avec une ampoule de même type, Modèle 3210: 15W, BEMERKUNG: Durch eine Lampe von gleichem Modèle 3230: 12V, 5W. Typ,Modell 3120: 15W, Modell 3230: 12V, 5W esetzen. -
Page 104: Troubleshooting
TROUBLESHOOTING Condition Cause See page(s) The machine is noisy 1. Threads have been caught in the hook area. 100-102 and does not run 2. The feed dog is packed with lint. 100-102 smoothly. The needle thread 1. The needle is not threaded properly. breaks. -
Page 105: Petits Dérangements
PETITS DÉRANGEMENTS Dérangement Cause Voir page(s) 1. Des fils sont pris autour du crochet. La machine est 101-103 2. Des poussières sont accumulées autour de la griffe. bruyante et ne 101-103 fonctionne pas correctement. 1. Le fil d’aiguille n’est pas enfilé correctement. Le fil d’aiguille 2. -
Page 106: Kleine Stoerungen
KLEINE STOERUNGEN Störung Ursachen Siehe Seite(n) 1. Die Fäden haben sich im Greiferbereich verwickelt. Die Maschine ist 101-103 2. Der Stoffschieber ist voller Fusseln. 101-103 laut und läuft nicht einwandfrei 1. Die Nadel ist nicht richtig eingefädelt. Der Nadelfaden 2. Die Oberfadenspannung ist zu hoch. reisst 3. -
Page 107: Index
INDEX Needle Position ..........46, 48 Accessories ............10 Needles ............. 28-30 Accessory Storage Box ........8, 10 Applique ............66, 96 Automatic Buttonhole ........70-72 Overcasting ............64, 92 Bobbin Part Names .............. 8 Drawing Up Bobbin Thread ......42 Patchwork .............. -
Page 108: Index
INDEX Accessoires ............11 Nervures .............. 59 Aiguilles ............29-31 Nettoyage Ampoule ............3, 103 Capsule et crochet ......101-103 Application au point de bourdon ......67 Griffe de transport ....... 101-103 Applications ........... 67, 97 Machine ..........101-103 Nid d’abeille ............95 Bouillonné... - Page 109 INHALTSVERZEICHNIS Nählampe ............4, 103 Abdeckung seitlich ........9, 103 Nährichtung ........... 51, 97 Applizieren mit dem Knopflochstich ....97 Nähtisch ............9, 15 Applizieren mit dem Kordonstich ......67 Automatisches Knopfloch ....... 71-73 Overlock .............. 93 - Superoverlock ..........99 Bauschfalten ............
- Page 112 506-800-193 (E/F/G) Printed in Taiwan...
Need help?
Do you have a question about the 3210 and is the answer not in the manual?
Questions and answers