Table of Contents
Advertisement
Advertisement
Table of Contents

Related Manuals for ELNA 3004


Summary of Contents for ELNA 3004
- Page 1 INSTRUCTION BOOK MANUAL DE INSTRUCCIONES Model/Modelo 3004...
-
Page 2: Important Safety Instructions
IMPORTANT SAFETY INSTRUCTIONS INSTRUCCIONES IMPORTANTES DE SEGURIDAD Cuando se utiliza un aparato eléctrico es necesario tomar ciertas precauciones básicas de When using an electrical appliance, basic safety precautions should always be followed, including seguridad, como lassiguientes: Lea todas las instrucciones antes de utilizar este aparato. followings: Read all instructions before using this appliance. -
Page 3: Table Of Contents
ÍNDICE TABLE OF CONTENTS SECCIÓN 1. PIEZAS ESENCIALES SECTION 1. ESSENTIAL PARTS Nombre de las piezas ............2 Name of Parts ................ 2 SECCIÓN 2. PREPARACIÓN PARA COSER SECTION 2. GETTING READY TO SEW Mesa supletoria ..............3 Extension Table ..............3 Accesorios Standard Accessories ............ -
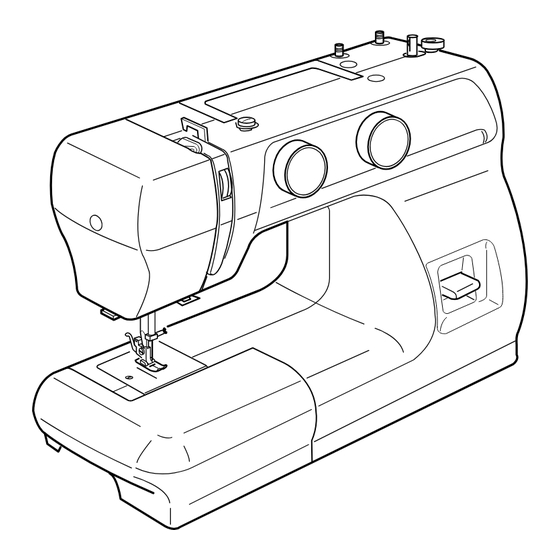
Page 4: Section 1. Essential Parts Name Of Parts
SECTION 1. ESSENTIAL PARTS SECCIÓN 1. PIEZAS ESENCIALES Name of Parts Nombre de las Piezas Tecla de cosido hacia atrás Reverse stitch button Selector de puntada Pattern selector dial Selector de longitud de puntada Stitch length dial Freno del devanador de canillas Bobbin winder stopper Eje del devanador de canillas Bobbin winder spindle... -
Page 5: Section 2. Getting Ready To Sew Extension Table
SECTION 2. GETTING READY TO SEW SECCIÓN 2. PREPARACIÓN PARA COSER Extension Table Mesa supletoria The extension table provides added sewing surface and can La mesa supletoria proporciona una superficie de costura be easily removed for free arm sewing. adicional fácilmente extraíble para coser con brazo libre. Detaching the table: Desmontaje de la mesa supletoria: Pull the table away from the machine. -
Page 6: Connecting The Machine To The Power Supply
Connecting the Machine to the Power Supply Conexión de la Máquina a la Fuente de Before connecting the power cord, make sure the voltage and Alimentación Eléctrica frequency shown on the machine conform to your electrical power. Antes de enchufar el cable de alimentación, asegúrese 1. -
Page 7: Presser Foot Lifter
Presser Foot Lifter Palanca de elevación del prensatelas La palanca de elevación del pie prensatelas sube y baja el pie The presser foot lifter raises and lowers your presser foot. prensatelas. Puede elevarlo unos 0,6 cm. (1/4") por encima de You can raise it about 0.6 cm (1/4") higher than the normal up la posición elevada normal para extraer fácilmente el pie position for easy removal of the presser foot or to help you to... -
Page 8: Changing Needle
Changing Needle Cambio de la aguja Levante la aguja girando el volante hacia usted y baje el Raise the needle by turning the handwheel toward you and prensatelas. lower the presser foot. Suelte el tornillo de sujeción de la aguja girándolo en el sentido Loosen the needle clamp screw by turning it counterclockwise. -
Page 9: Setting Spool Pins
Setting Spool Pins Preparación de los Pasadores Portacarretes The spool pins are used for holding the spool of thread in order Los pasadores portacarretes se utilizan para sujetar el carrete to feed thread to the machine. de hilo con objeto de alimentar hilo a la máquina. To use, pull up the spool pin. -
Page 10: Winding The Bobbin
Winding the Bobbin Devanado de la Canilla Saque el volante hacia fuera. Pull the handwheel out. Draw the thread from spool. Suelte hilo del carrete. Guide the thread around the bobbin winder thread guide. Guíe el hilo alrededor del guiahilos del canillero. Insert the thread through the hole in the bobbin from Inserte el hilo a través del agujero de la canilla, de the inside to the outside. -
Page 11: Threading The Machine
Threading the Machine Enhebrado de la máquina Raise the take–up lever to its highest position by turning the Sitúe el tirahilos en su posición más elevada girando el volante handwheel toward you. hacia usted. Raise the presser foot. Levante el prensatelas. Place a spool on the spool pin as shown, with thread coming Coloque un carrete en el portacarretes como se muestra, con from back of the spool. -
Page 12: Drawing Up Bobbin Thread
Drawing Up Bobbin Thread Extracción del hilo de la canilla Raise the presser foot and hold the needle thread Levante el pie prensatelas y sujete el hilo de la aguja lightly with your left hand. ligeramente con la mano izquierda. Gire el volante lentamente hacia usted con la mano derecha Turn the handwheel slowly toward you with your right hasta que baje la aguja y continúe girando el volante hasta... -
Page 13: Balancing Needle Thread Tension
Balancing Needle Thread Tension Compensación de la Tensión del Hilo de la Aguja Tensión Correcta Correct tension La tensión del hilo se ajusta según los materiales de The thread tension is adjusted depending on the costura, las capas de tela y el método de costura. sewing materials, layers of fabric and sewing method. -
Page 14: Pattern Selector Dial
Selector de Puntada Pattern Selector Dial Raise the needle and presser foot. Turn the pattern selector Levante la aguja y el pie prensatelas. Gire el selector de puntada dial to set the symbol corresponding to the desired pattern at para ajustar el símbolo correspondiente al modelo deseado en the setting mark. -
Page 15: Stitch Length Dial
Stitch Length Dial Selector de Longitud de Puntada Gire el selector de longitud de puntada para ajustar la longitud Turn the stitch length dial to set the desired stitch length at the setting mark. de puntada deseada en la marca de ajuste. The higher the number, the longer the stitch length Cuando más alto sea el número, más larga será... -
Page 16: Reverse Stitch Button
Reverse Stitch Button Tecla de Cosido hacia Atrás Mientras mantenga pulsada la tecla de cosido hacia atrás, la As long as you keep the reverse stitch button depressed, the máquina coserá hacia atrás. machine sews backwards. Descenso del Corretelas(Dientes de Dropping the Feed Dog transporte) Abra la tapa de la lanzadera. -
Page 17: Section 3. Basic Sewing Straight Stitch Sewing
SECTION 3. BASIC SEWING SECCIÓN 3. COSTURA BÁSICA Straight Stitch Sewing Costura de Puntada Recta Selector de puntada: A o B Pattern selector: A or B Prensatelas: Prensatelas para zigzag Presser foot: Zigzag foot Tensión del hilo: Thread tension: 2–6 Longitud de puntada: 1.5 - 4 Stitch length:... -
Page 18: Using The Seam Guides On The Needle Plate
Using the Seam Guides on the Needle Plate Utilización de las Guías de Costura de la Placa de The seam guides on the needle plate help you to measure Aguja seam width. Las guías de costura de la placa de aguja le ayudan a medir el * The numbers indicate the distance between the center ancho de la costura. -
Page 19: Zigzag Stitching
Zigzag Stitching Puntadas en Zigzag Pattern selector: Selector de puntada: Presser foot: Zigzag foot Prensatelas: Prensatelas para zigzag Thread tension: 2–5 Tensión del hilo: Stitch length: 0.5–4 Longitud de puntada: 0.5 - 4 Simple zigzag stitching is widely used for overcasting, sewing La costura simple en zigzag se utiliza con gran frecuencia para on buttons etc. -
Page 20: Tricot Stitch
Tricot Stitch Zigzag en Punto Selector de puntada: Pattern selector: Prensatelas: Prensatelas para zigzag Presser foot: Zigzag foot Tensión del hilo: Thread tension: 1–4 Longitud de puntada: 0, 5 - 1,5 Stitch length: 0.5–1.5 Esta puntada se utiliza para terminar el margen de la costura This stitch is used to finish the seam allowance on synthetics en géneros sintéticos y de otro tipo que tienden a fruncirse. -
Page 21: Sewing On Buttons
Sewing on Buttons Coser Botones Pattern selector: Selector de puntada: Presser foot: Zigzag foot Prensatelas: Prensatelas para zigzag Thread tension: 1–3 Tensión del hilo: Stitch length: Longitud de puntada: Cualquiera Feed dog: Dropped Corretelas: Bajado Ajuste el ancho de puntada y gire el volante para comprobar Adjust the stitch width, and turn the handwheel to check if the needle enters into each hole in the button. -
Page 22: Buttonhole
Buttonhole Ojales Selector de puntada: Pattern selector: (BH) Prensatelas: Prensatelas para ojales deslizante Presser foot: Sliding buttonhole foot Tensión del hilo: Thread tension: 1–5 Longitud de puntada: (0.5 – 1) Stitch length: (0.5–1) * Haga un ojal de prueba en una muestra con la misma tela, * Make a test buttonhole on a sample duplicating the entretela y costuras que la prenda verdadera. -
Page 23: Corded Buttonhole
Corded Buttonhole Ojales acordonados Pattern selector: (BH) Selector de puntada: Presser foot: Sliding buttonhole foot Prensatelas: Prensatelas para ojales deslizante Thread tension: 1 – 5 Tensión del hilo: Stitch length: (0.5 – 1) Longitud de puntada: (0.5 – 1) Con el prensatelas para ojales levantado, enganche el With the buttonhole foot raised, hook the cord on the cordón en la espuela situada en la parte posterior del cord spur at the back of the buttonhole foot. -
Page 24: Zipper Application
Zipper Application Aplicación de cremalleras Pattern selector: Selector de puntada: Presser foot: Zipper foot Prensatelas: Prensatelas para cremalleras Thread tension: 3 – 6 Tensión del hilo: Stitch length: 1.5 – 4 Longitud de puntada: 1.5 – 4 Prenda con alfileres o hilvane la cinta de la cremallera a la tela Pin or baste zipper tape to fabric and place it under the foot. -
Page 25: Blind Stitch Hemming
Blind Stitch Hemming Dobladillo con Puntada Invisible Selector de puntada: Pattern selector: F (sólo en el modelo de 6 F (6-stitch model only) puntadas) Presser foot: Zigzag foot Prensatelas: Prensatelas para zigzag Thread tension: 2–4 Tensión del hilo: 2-4 Stitch length: 1–3 Longitud de puntada: Hem guide... -
Page 26: Rolled Hem
Rolled Hem Dobladillo enrollado Pattern selector: Selector de puntada: Presser foot: Hemmer foot Prensatelas: Prensatelas para dobladillos Thread tension: 2–6 Tensión del hilo: Stitch length: 1.5–4 Longitud de puntada: 1.5 – 4 Trim off the corner of the fabric 0.5 cm (3/16") by Recorte en la esquina de la tela 0,5 cm. -
Page 27: Section 5. Decorative Stitching Shell Tuck (6-Stitch Model Only)
SECTION 5. DECORATIVE STITCHING SECCIÓN 5. COSTURA DECORATIVA Puntada de Ondas (Sólo en el modelo de 6 puntadas) Shell Tuck (6-stitch model only) Pattern selector: Selector de puntada: Presser foot: Zigzag foot Prensatelas: Prensatelas para zigzag Thread tension: 6–8 Tensión del hilo: 6-8 Stitch length: 2–3 Longitud de puntada: 2-3... -
Page 28: Section 6. Care Of Your Machine Dismantling And Assembling Hook Race Unit
SECCIÓN 6. CUIDADO DE LA MÁQUINA SECTION 6. CARE OF YOUR MACHINE Desmontaje y Montaje de la Pista de la Lanzadera Dismantling and Assembling Hook Race Unit Note : Turn off the power switch and/or unplug the machine. Nota: Apague el interruptor y/o desenchufe la máquina. To dismantle hook race unit: Desmontaje de la pista de la lanzadera: Raise the needle to its highest position and open the hook cover. -
Page 29: Sewing Light
Sewing Light Lámpara de Coser La lámpara de coser está situada debajo de la chapa lateral. The sewing light is located behind the face plate. Para cambiar la bombilla, extraiga la chapa lateral de la máquina To change the bulb, take the face plate off the sewing machine de coser soltando el tornillo de fijación. -
Page 30: Troubleshooting
Troubleshooting Identificación y resolución de problemas Situación Causa Probable Referencia Cause Reference Condition El hilo de la aguja se rompe. 1. El hilo de la aguja no se ha enhebrado correctamente. Véase la Página 9 1. The needle thread is not threaded properly. See Page 9 The needle thread 2. - Page 31 AV. COYOACAN No. 1878-1403 COL. DEL VALLE C.P. 03100 DELEGACION BENITO JUAREZ TEL. 55 24 74 88 FAX 55 24 74 87 01 800 90 80 757 120 V ~ 60 Hz CORRIENTE 0,6 A LAMPARA 15 W MODELO 3004 306-800-175 (E/S) Printed in Thailand...
Need help?
Do you have a question about the 3004 and is the answer not in the manual?
Questions and answers