ELNA eXplore 320 Instruction Manual
Hide thumbs
Also See for eXplore 320:
- Reference manual (14 pages) ,
- Instruction manual (96 pages) ,
- Service manual (21 pages)
Table of Contents
Advertisement
Quick Links
Advertisement
Table of Contents

Related Manuals for ELNA eXplore 320


Summary of Contents for ELNA eXplore 320
- Page 1 320-340 Instruction Manual | Uputstvo za upotrebu | Gebrauchsanleitung...
-
Page 2: Important Safety Instructions
IMPORTANT SAFETY INSTRUCTIONS T his appliance is no t in t ended f or use by persons (including children) wi t h reduced physical , sensory o r mental capabilities, or lack of experience and knowledge, unless they have been given supervision o r instruction concerning use of the appliance by a person responsible for their safety. - Page 3 VAŽNA SIGURNOSNA UPUTSTVA Ovaj uredjaj nije namenjen osobama (uključujući i decu) sa smanjenim fizičkim ili menatalnim sposobnostima, niti osobama koje nemaju iskustva ni znanja, osim ukoliko su pod nadzorom osobe odgovorne za njihovu bezbednost. Posebnu pažnju treba obratiti na decu jer mašina za šivenje nijeigračka i ne treba da služi toj svrsi. Prilikom korišćenja bilo kog električnog uredjaja treba uvek odgovorno pratiti sigurnosna uputstva, kao što su: Mašina zašivenje napravljena je isključivo za kućnu upotrebu.
- Page 4 WICHTIGE SICHERHEITSHINWEISE Diese Nähmaschine eignet sich nur für den Hausgebrauch. Diese Nähmaschine ist kein Spielzeug. Erlauben Sie Kindern nicht, mit der Maschine zu spielen. Die Maschine darf nicht von Kindern oder geistig behinderten Personen ohne geeignete Aufsicht benutzt werden. Bei der Benutzung eines elektrischen Geräts sind stets grundlegende Sicherheitsvorkehrungen zu treffen, darunter: Lesen Sie vor Inbetriebnahme dieses Geräts alle Anweisungen.
-
Page 5: Table Of Contents
Seam guides on the needle plate ........44 Turning a square corner ..........44 NOTE : Information found in this instruction manual is current at the time of printing. Elna reserves the right to change and update specifications and information as needed. - Page 6 Namotavanje špulne ............27 NAPOMENA : Informacije date u ovom uputstvu aktuelne su Postavljanje špulne ............29 u vreme štampanja. Elna zadržava pravo promene i dodavanja Uvođenje konca u mašinu.......... 31 specifikacija i informacija u slučaju promene. Uvođenje konca u iglu ..........33 Uvođenje konca špulne ...........
- Page 7 INHALTSVERZEICHNIS TEIL 5. ZIERSTICHE TEIL 1. IHRE MASCHINE Teilebezeichnungen............9 Dekorative Federstiche ..........77 Serienmäßiges Zubehör ..........11 Dekorative Stretchstiche ..........77 Smoken ................79 Zubehörfach..............11 Wattierungsführer ( nur für Mod. 340)......81 Anschiebetisch............... 13 Biesen ................83 Freiarmnähen..............13 Nähen eines Muschelsaums ..........83 Hohlsaum ...............85 TEIL 2.
-
Page 8: Section 1. Know Your Machine
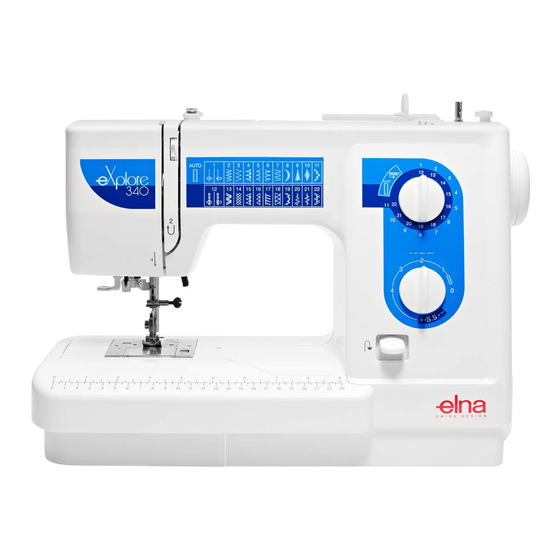
SECTION 1. KNOW YOUR MACHINE N ames of Parts Bobbin winder stopper Bobbin winder spindle Hole for additional spool pin Spool holder Spool pin Bobbin winder thread guide Thread take-up lever Foot pressure dial Face plate Thread cutter Needle threader Needle plate Extension table (Accessory storage) Hook cover plate... -
Page 9: Deo 1. Upoznavanje Mašine Delovi Mašine
DEO 1. UPOZNAJTE MAŠINU Nazivi delova Teilebezeichnungen Spuleranschlag Zaustavljač namotača špulne Kalem namotača špulne Spuler Rupa za iglu dodatnog kalema Anbringung für zweiten Garnrollenhalter Držač kalema Fadenabziehscheibe Igla kalema Garnrollenhalter Vođica konca namotača špulne Spulerfadenführung Fadenhebel Ručkica za podizanje konca Brojčanik za podešavanje pritiska stopice Fußdruckregler Prednja ploča... -
Page 10: Standard Accessories
Standard Accessories q Overlock foot C (Model 340 only) w Zipper foot E e Blind hem foot G r Satin stitch foot F t Automatic buttonhole foot R (Model 340 only) y Sliding buttonhole foot J (Model 320 only) u Needles i Bobbins o Screwdriver !0 Lint brush... -
Page 11: Standardni Pribor
Standardni dodaci Serienmäßiges Zubehör Stopica za overlok C (samo model 340) Overlock Fuss C (nur für Mod.340) Stopica za rajsfešlus E Reißverschlussfuß E Stopica za nevidljivi porub G Blindstichfuß G Stopica za satenski bod F Satinstich Fuss F Stopica za automatsko šivenje rupice (samo model340) Automatik-Knopflochfuss R (nur für Mod.340) Stopica za klizno šivenje rupice (samo model 320) Sohle für 4-Stufen Knopflöcher (nur für Mod.320) -
Page 12: Extension Table
Extension Table To detach: Pull the extension table to the left. To attach: Insert the pin into the hole and push the extension table to snap it in place. Hole Free Arm sewing Free arm sewing is used for stitching sleeves, waistbands, pant legs or any other tubular garment. -
Page 13: Produženi Sto
Produženi sto Anschiebetisch Odvojiti: Abnehmen: Povucite produženi sto u levo. Anschiebetisch nach links ziehen. Postaviti: Anbringen: Postavite iglu u rupu i gurnite produženi sto dok Führen Sie den Stift in die Öffnung und schieben Sie den ne čujete da je legao na svoje mesto. Anschiebetisch ein, bis er einrastet. -
Page 14: Section 2. Getting Ready To Sew
SECTION 2. GETTING READY TO SEW Connecting the Power Supply Turn the power switch off. Insert the machine plug into the machine socket. Insert the power supply plug into the wall outlet. Turn the power switch on. Power switch Machine plug Machine socket Power supply plug Wall outlet... -
Page 15: Deo 2. Priprema Za Šivenje
DEO 2. PRIPREMA ZA ŠIVENJE TEIL 2. VORBEREITUNGEN FÜR DAS NÄHEN Povezivanje mašine se strujom Anschluss an den Netzstrom Isključite glavni prekidač Utičnicu mašine uključite u utikač na mašini Schalten Sie den Netzschalter aus. Stecken Sie den Maschinenstecker in die Utikač... -
Page 16: Reverse Stitch Lever
Reverse Stitch Lever Push the reverse stitch lever down to sew in reverse. The machine will sew in reverse while the lever is pushed. Foot Pressure Dial Turn the foot pressure dial to adjust the foot pressure. The foot pressure dial should be set at “3” for regular sewing. -
Page 17: Ručkica Za Šivenje Unazad
Ručkica za promene pravca šivenja Rückwärtstaste Pritisnite ručkicu za promenu pravca šivenja na dole Zum Rückwärtsnähen drücken Sie die Rückwärtstaste kako biste promenili pravac šivenja. Sve dok je ručkica herunter. pritisnuta mašina će šiti u tom pravcu. Die Maschine näht rückwärts, solange die Rückwärtstaste gedrückt wird. -
Page 18: Raising And Lowering The Presser Foot
Raising and Lowering the Presser Foot The presser foot lifter raises and lowers the presser foot. You can raise the foot about 1/4" (0.6 cm) higher than the normal up position for easy removal of the presser foot, or to help you place heavy fabric under the foot. Lowered position Normal up position Extra up position... -
Page 19: Podizanje I Spuštanje Stopice
Spuštanje i podizanje stopice Heben und Senken des Nähfußes Der Nähfußhebel hebt und senkt den Nähfuß. Sie können den Fuß etwa 0,6 cm über die normale Podizač stopice q podiže i spušta stopicu . gehobene Stellung heben, damit der Nähfuß leichter Stopica se može podići oko 0,6 cm iznad standardne entfernt werden kann, oder wenn Sie dicken Stoff unter gornje pozicije w za lakše otklanjanje stopice, ili kako bi... -
Page 20: Changing Needles
Changing Needles CAUTION: Always make sure to turn the power switch off and disconnect the machine from power supply before changing the needle. Turn off the power switch. Raise the needle by turning the handwheel and lower the presser foot. Loosen the needle clamp screw by turning it counterclockwise. -
Page 21: Zamena Igle
Zamena igle Auswechseln der Nadeln PAŽNJA: VORSICHT: Isključite glavni prekidač mašine i iskljućite zidnu Schalten Sie die Maschine immer am Netzschalter aus utičnicu prilikom zamene igle. und ziehen Sie den Stecker ab, bevor Sie die Nadel auswechseln. Isključite glavni prekidač. Drehen Sie das Handrad, um die Nadel anzuheben, und Podignite iglu u njen najviši položaj okretanjem senken Sie den Nähfuß. - Page 22 Odabir igle u odnosu na tkaninu DEBLJINA TKANINA VRSTA IGLE VELICINA IGLE Veoma tanka Šifon, žoržet, fina čipka, organdin Univerzalna 9 (65) zaobljena 9 (65) Tanka Batist, Lawn, Čista svila, Kineski krep, čist krep, , Univerzalna; igla sa 11 (75) Tanki lan, Gingam, Ćallis, Perkal, vuneni krep, plavim vrhom 11 (75)
-
Page 23: Faden- Und Nadeltabelle
Faden- und Nadeltabelle GEWICHT STOFF NADELART NADELGRÖSSE 9 (65) Sehr leicht Chiffon, Georgette, Spitzengewebe, Organdy, Tüll Universal-Kugelspitze 9 (65) Nadel mit blauer Spitze Batist, Voile, Linon, reine Seide, Crèpe de Chine, 11 (75) Leicht (Universal) durchscheinender Crèpe, Chambray, Taschentuchleinen, 11 (75) 12 (80) Gingham, Challis, Perkal, Wollkrepp, reinseidene Atlasware, Taft, Baumwollsatin, Surahseide, mit... -
Page 24: Winding The Bobbin
Winding the Bobbin Setting the spool Place a spool of thread on the spool pin with the thread coming off the spool as illustrated. A: Press the large spool holder firmly against the spool of thread. Large spool holder B: For a small spool, use the small spool holder. Small spool holder Additional spool pin The additional spool pin is for bobbin winding without... -
Page 25: Namotavanje Špulne
Namotavanje špulne Spulen Postavljanje špulne Einsetzen der Garnrolle Postavite kalem konca na nosač kalema sa koncem Stecken Sie eine Garnrolle auf den Garnrollenhalter, koji se odmotava kao što je prikazano na slici. wobei der Faden wie dargestellt abläuft. A: Pritisnite čvrsto veliki držač kalema A: Drücken Sie die große Fadenabziehscheibe fest držač... -
Page 26: Winding The Bobbin
Winding the bobbin Pull out the flywheel to disengage the clutch. flywheel Draw the thread from the spool. Guide the thread around the bobbin winder thread guide. Bobbin winder thread guide Thread through the hole in the bobbin from the inside to the outside. -
Page 27: Namotavanje Špulne
Namotavanje špulne Spulen Okrenite zamajac kako biste otpustili Ziehen Sie das Handrad heraus, um die Kupplung kočnicu auszulösen. Handrad Zamajac Povucite konac sa kalema. Vodite konac oko vođice Ziehen Sie Faden von der Garnrolle. Führen Sie den konca namotača špulne. Faden um die Spulerfadenführung. -
Page 28: Inserting The Bobbin
Inserting the bobbin Place the bobbin in the bobbin case with the thread running off as illustrated. Thread Guide the thread into the front notch on the front side of the bobbin case. Draw the thread to the left, sliding it between the tension spring blades. Front notch Tension spring blade Continue to draw the thread lightly until the thread... -
Page 29: Postavljanje Špulne
Postavljanje špulne Einsetzen der Spule Postavite špulnu u nosač špulne tako da se Legen Sie die Spule in das Spulengehäuse ein, konac odmotava kao što je prikazano na slici. wobei das Garn wie dargestellt abläuft. Konac Faden Vodite konac do prednjeg zareza, koji se nalazi na Führen Sie den Faden durch die vordere Kerbe an der prednjoj strani nosača špulne. -
Page 30: Threading The Machine
Threading the Machine To set the needle thread: Raise the thread take-up lever to the highest position by turning the handwheel. Raise the presser foot. WARNING: Turn OFF the power switch before threading the needle. Draw the thread from the spool and pass it under the thread guide. -
Page 31: Uvođenje Konca U Mašinu
Uvođenje konca u mašinu Einfädeln der Maschine Podignite ručkicu za podizanje konca u najvišu poziciju Oberfaden einfädeln: okretanjem zamajca. Podignite stopicu. Bringen Sie den Fadenhebel durch Drehen des Handrads in seine höchste Stellung. Heben Sie den Nähfuß an. PAŽNJA: Isključite glavni prekidač na mašini pre uvođenja konca. Povucite konac sa kalena i provucite ga ispod vođice Ziehen Sie Faden von der Garnrolle und führen Sie konca. -
Page 32: Needle Threader
Needle threader Raise the needle to its highest position and lower the presser foot. Push down the needle threader lever as far as it will go. Threader lever Draw the thread from the left around the guide and under the hook. Guide Hook Release the lever slowly while holding the thread end... -
Page 33: Uvođenje Konca U Iglu
Uvođač konca Nadeleinfädler Podignite iglu u najviši položaj i spustite stopicu. Drehen Sie das Handrad, um die Nadel in ihre höchste Pritisnite ručkicu uvođača konca na dole dokle god Position anzuheben, und senken Sie den Nähfuß. može. Drücken Sie den Nadeleinfädler ganz nach unten. Der Einfädelhaken schiebt sich von hinten durch das Ručkica uvođača Nadelöhr. -
Page 34: Drawing Up The Bobbin Thread
Drawing up the Bobbin Thread Raise the presser foot and hold the needle thread lightly with your left hand. Needle thread Turn the flywheel slowly toward you one complete turn. Bring the bobbin thread up by pulling the needle thread as illustrated. Needle thread Bobbin thread Pull 4”... -
Page 35: Uvođenje Konca Špulne
Izvlačenje donjeg konca Heraufholen des Unterfadens Podignite stopicu i lagano pridržavajte gornji konac Heben Sie den Nähfuß an und halten Sie den levom rukom. Oberfaden leicht in der linken Hand. Gornji konac Oberfaden Polako okrenite zamajac ka sebi, napravite ceo krug. Drehen Sie das Handrad um eine vollständige Podignite donji konac tako što ćete povući gornji Umdrehung langsam auf sich zu. -
Page 36: Selecting The Stitch Pattern
Selecting a Stitch Raise the needle to its highest position. Model 340 Model 320 Stitch selector dial To select a stitch, turn the stitch selector dial until the setting mark points to the stitch. Stitch selector dial Setting mark CAUTION: Do not turn the stitch selector dial while the needle is in the fabric;... -
Page 37: Odabir Boda
Odabir boda Wahl des Stichmusters Podignite iglu do najviše pozicije. Bringen Sie die Nadel in ihre höchste Stellung. Brojčanik za odabir boda Musterauswahlregler Kako biste odabrali željeni bod, okrenite brojčanik sve Drehen Sie den Musterauswahlregler und stellen Sie das dok zarez na brojčaniku pokaže željeni bod. Symbol des gewünschten Musters auf die Einstellmarke. -
Page 38: Adjusting Stretch Stitch Balance
Fine Tuning Stretch Stitches To select the stretch stitches, set the stitch length dial at S.S. If the stretch stitches are uneven when you sew on a particular fabric, correct them by turning the stitch length dial. If the stitches are drawn out, correct them by setting the dial to the “–”... -
Page 39: Podešavanje Rastegljivosti Šava
Feine Einstellungen der Stretschstiche Fino usklađen streč bod Kako biste odabrali streč bod, podesite dužinu boda Wenn die Stretchstichmuster beim Nähen auf einem na S.S. bestimmten Stoff ungleichmäßig sind, kann dies mit dem Stichlängen-Ausgleich reguliert werden. Ukoliko su streč bodovi neravni na nekoj vrsti materijala, ispravite ih tako što ćete promeniti dužinu boda. -
Page 40: Balancing Needle Thread Tension
Balancing Needle Thread Tension The thread tension should be adjusted depending on the sewing materials, layers of fabric and sewing method. To adjust the thread tension, turn the thread tension dial. Thread tension dial Balanced tension: The ideal straight stitch has threads locked between two layers of fabric, as illustrated. -
Page 41: Određivanje Napetosti Konca Igle
Podešavanje napetosti gornjeg konca Einstellen der Oberfadenspannung Napetost konca treba da bude podešena u zavisnosti od Die Spannung sollte je nach den genähten Stoffen, materijala na kome se šije, broja slojeva kroz koje se Stofflagen und der Nähart eingestellt werden. šije i načina šivenja. -
Page 42: Straight Stitch Sewing
SECTION 3. BASIC SEWING Straight Stitch Sewing Machine setting: Stitch pattern: 1 Stitch width: 0 or 5 Stitch length: 1.5 – 4 Thread tension: 2 – 6 Presser foot: Zigzag foot A Starting to sew Raise the presser foot and place the fabric under the foot. -
Page 43: Deo 3. Osnove Šivenja
DEO 3.OSNOVNO ŠIVENJE TEIL 3. EINFACHES NÄHEN Geradstichnähen Ravan bod Maschineneinstellung: Podešavanje mašine : Stich: Bod: Stichbreite: 0 oder 5 Širina boda: 0 ou 5 Stichlänge: 1.5 – 4 Dužina boda: 1.5 – 4 Fadenspannung: 2 – 6 Napetost konca: 2 –... -
Page 44: Seam Guides On The Needle Plate
Seam guides on the needle plate The seam guides on the needle plate help you to measure seam allowance. The numbers indicate the distance between the center needle position and the seam guide. Seam guides Number 4/8 5/8 6/8 Spacing (cm) 1.5 2.0 1.3 1.6 1.9 Spacing (inch) (5/8) (3/4) 1/2 5/8 3/4... -
Page 45: Vođice Za Štep Na Ubodnoj Ploči
Vođice na ubodnoj ploči Nahtführungslinien auf der Stichplatte Vođice na ubodnoj ploči pomažu nam da izmerimo Die Nahtführungslinien auf der Stichplatte helfen Ihnen veličinu poruba. dabei, die Nahtzugabe zu messen. Broj označava razdaljinu između središnje ubodne Die Zahlen geben den Abstand zwischen mittlerer pozicije igle i vođice. -
Page 46: Section 4. Utility Stitches
SECTION 4. UTILITY STITCHES Basic Zigzag Machine setting Stitch: Stitch width: 1 – 5 Stitch length: 0.5 – 3 Thread tension: 2 – 5 Presser foot: Simple zigzag stitching is widely used for overcasting, sewing on buttons etc. Adjust the stitch length to suit your sewing needs. NOTE: Use a stabilizer for stretch fabrics such as tricot and knits to prevent puckering. -
Page 47: Deo 4. Osnovni Bodovi
DEO 4. OSNOVNI BODOVI TEIL 4. PRAKTISCHE STICHE Osnovni cik-cak bod Zick-Zack-Stich Podešavanje mašine : Maschineneinstellung Bod: Stich: Širina boda: 1 do 5 Stichbreite: 1 – 5 Dužina boda: 0.5 – 3 Stichlänge: 0.5 – 3 Napetost konca: 2 - 5 Fadenspannung: 2 –... -
Page 48: Super Stretch Stitch
Super Stretch Stitch q 17/15 Machine setting Stitch: 17 (Model 340) 15 (Model 320) Stitch width: Stitch length: S.S. Thread tension: 3 – 7 Presser foot: C (Model 340) A (Model 320) Model 340: This stitch is ideal for finishing edges of stretch fabrics. It seams and finishes the fabric edges simultaneously. -
Page 49: Extra Rastegljivi Bod
Super rastegljivi bod Superstretch Stich Maschineneinstellung Podešavanje mašine : Stich: 17 (nur für Mod. 340) Bod: 17 (model 340) Stich: 15 (nur für Mod. 320) 15 (model 320) Stichbreite: Širina boda: Stichlänge: S.S. Dužina boda: S.S. Fadenspannung: 3 – 7 Napetost konca: 3 -7 Nähfuß: C (nur für Mod. -
Page 50: Triple Seam
Triple Seam Machine setting Stitch pattern: 12 (Model 340) 10 (Model 320) Stitch width: 0 or 5 Stitch length: S.S. Thread tension: 2 – 5 Presser foot: Zigzag foot A The triple seam is sewn with two stitches forward and one stitch backward, forming a seam that does not rip easily. -
Page 51: Trostruki Porub
Trostruki štep Dreifachnaht Podešavanje mašine Maschineneinstellung Stich: 12 (nur für Mod. 340) Bod: 12 (model 340) Stich: 10 (nur für Mod. 320) 10 (model 320) Stichbreite: 0 oder 5 Širina boda: 0 ili 5 Stichlänge: S.S. Dušina boda: S.S. Fadenspannung: 2 –... -
Page 52: Button Sewing
Button Sewing Machine setting q Stitch: w Stitch width: Adjust as necessary e Stitch length: r Thread tension: 3 – 7 t Presser foot: y Feed dog: Lowered Adjust the stitch width to match it with the span of the holes in the button. -
Page 53: Našivanje Dugmića
Ušivanje dugmića Annähen von Knöpfen Maschineneinstellung Stich: Podešavanje mašine Stichbreite: Nehmen Sie entsprechende Bod: Einstellungen vor. Širina boda: podesiti po potrebi Stichlänge: Beliebig Dušina boda: bilo koja Fadenspannung: 3 – 7 Napetost konca: 3 – 7 Nähfuß: Stopica: Stoffschieber: Gesenkte Stellung y Zupci transportera: Spušteni Podesite širinu boda tako da odgovara razmaku rupica Anpassen Sie die Stichbreite, so dass sie dem Abstand... -
Page 54: Automatic Buttonhole (Model 340)
Automatic Buttonhole (Model 340) Machine setting Stitch pattern: Stitch width: 4 – 5 Stitch length: 0.5 – 1 Thread tension: 1 – 5 Presser foot: NOTES: The size of buttonhole is automatically determined by placing the button in the automatic buttonhole foot. The button holder of the foot takes a button size up to 1"... -
Page 55: Automatska Rupica Za Dugme (Model 340)
Automatsko šivenje rupice za dugme Automatische Knopflöcher (nur für Mod.340) (model 340 Maschineneinstellung Bod: Stich: Širina boda: 4 – 5 Stichbreite: 4 – 5 Dužina boda: 0.5 – 1 Stichlänge: 0.5 – 1 Napetost konca: 1 – 5 Fadenspannung: 1 – 5 Stopica: Nähfuß: HINWEISE:... - Page 56 Pull the buttonhole lever down as far as it will go. Buttonhole lever Raise the foot and pass the needle thread through the opening in the foot. Draw both needle and bobbin threads to the left. Insert the fabric under the foot and lower the needle into the fabric at the starting point.
- Page 57 Povucite ručku rupice na dole što više Ziehen Sie den Knopflochhebel so weit wie möglich možete. nach unten. Ručka za rupicu Knopflochhebel Podignite stopicu i provucite iglu kroz otvor na stopici. Stellen Sie den Nähfuß hoch und führen Sie den Povucite i gornji i donji konac u levo.
-
Page 58: Adjusting The Buttonhole Stitch Density
To sew another buttonhole, turn the stitch selector to “RESET”, then back to “ ” again. Move fabric and sew another buttonhole. When buttonhole sewing is finished, push the buttonhole lever up as far as it will go. Adjusting the buttonhole stitch density Turn the stitch length dial within the range of “... -
Page 59: Podešavanje Gustine Boda Rupice
Da biste napravili novu, istu, rupicu samo okrenite Wenn Sie ein weiteres Knopfloch nähen möchten, drehen bojčanik za odabir boda na “RESET”, potom ponovo Sie die Stichprogrammauswahlscheibe auf “RESET” und na“ ”, . dann wie abgebildet wieder auf “ ”. Pomerite tkaninu i sašijte novu rupicu za dugme. -
Page 60: 4-Step Buttonhole (Model 320)
4-Step Buttonhole (Model 320) Machine setting Stitch: Stitch width: 4 – 5 Stitch length: 0.5 – 1 Thread tension: 1 – 5 Presser foot: Sliding buttonhole J or Buttonhole foot B (optional) Set the pattern selector dial at “ ”. Carefully mark buttonhole length on fabric. -
Page 61: Rupica U 4 Koraka (Model 320)
Knopflochnähen in 4 Schritten (Modell 320) Šivenje rupice za dugme u 4 faze (model 320) Maschineneinstellung Podešavanje mašine Stich: Bod: Stichbreite: 4 – 5 Širina boda: 4 – 5 Stichlänge: 0.5 – 1 Duđina boda: 0.5 – 1 Napetost koncal: 1 –... -
Page 62: Corded Buttonhole (Model 340)
Corded Buttonhole (Model 340) Machine setting Stitch: Stitch width: 4 – 5 Stitch length: 0.5 – 1 Thread tension: 1 – 5 Presser foot: With the buttonhole foot raised, hook the filler cord on the spur at the back of the foot. Bring the ends toward you under the foot, clearing the front end. -
Page 63: Okasta Rupica (Model 340)
Okasta rupica (model 340) Mit Bünden verstärkte Knopflöcher (nur für Mod. 340) Podešavanje mašine Maschineneinstellung Stich: Širina boda: 4 – 5 Stichbreite: 4 – 5 Dužina boda: 0.5 – 1 Stichlänge: 0.5 – 1 Napetost konca: 1 – 5 Fadenspannung: 1 –... -
Page 64: Corded Buttonhole (Model 320)
Corded Buttonhole (Model 320) Machine setting Stitch: Stitch width: 4 – 5 Stitch length: 0.5 – 1 Thread tension: 1 – 5 Presser foot: J or optional B With the buttonhole foot raised, hook the filler cord on the spur at the back of the foot. Bring the ends toward you under the foot, clearing the front end. -
Page 65: Okasta Rupica (Model 320)
Okasta rupica (model 320) Knopflöcher mit Einlauffaden (Model 320) Maschineneinstellung Podešavanje mašine Bod: Stichmuster: Širina boda: 4 – 5 Stichbreite: 4 – 5 Dužina boda: 0.5 – 1 Stichlänge: 0.5 – 1 Napetost konca: 1 – 5 Fadenspannung: 1 – 5 Stopica: J ili B Nähfuß: J order B (optional) -
Page 66: Manual Buttonhole (Model 340)
Manual Buttonhole (Model 340) Machine setting q Stitch: w Stitch width: 4 – 5 e Stitch length: 0.5 – 1 r Thread tension: 1 – 5 t Presser foot: F or optional B If the diameter of the button is more than 1" (2.5 cm), buttonholes must be made manually. -
Page 67: Ručno Šivena Rupica (Model 340)
Ručno šivenje rupice (model 340) Manuelles Knopfloch (nur für mod. 340) Maschineneinstellung Podešavanje mašine Stich: Bod: Stichbreite: 4 – 5 Širina boda: 4 – 5 Stichlänge: 0.5 – 1 Dužina boda: 0.5 – 1 Fadenspannung: 1 – 5 Napetost konca: 1 –... -
Page 68: Zipper Application
Zipper Application Machine setting Stitch: Stitch width: 5 (center needle poston) Stitch length: 1.5 – 4 Thread tension: 3 – 6 Presser foot: Attaching the zipper foot A: To sew the left side of the zipper, attach zipper foot with the right side pin. B: To sew the right side of zipper, attach the zipper foot with the left side pin. - Page 69 Rajsfešlus Reißverschlüsse Podešavanje mašine Maschineneinstellung Bod: Stich: Širina boda: Stichbreite: Dužina boda: 1.5 – 4 Stichlänge: 1.5 – 4 Napetost konca 3 – 6 Fadenspannung: 3 – 6 Stopica: Nähfuß: Postavljanje stopice za šivenje rajsfešlusa Anbringen des Reißverschlussfußes A: Da biste zašili levu stranu rajsfešlusa postavite stopicu A: Bringen Sie den Reißverschlussfuß...
- Page 70 To sew Attach zipper foot with the right side pin. Fold back the upper layer seam allowance. Fold back the lower layer seam allowance to leave a 1/8" (0.4 cm) margin of fabric. Lower layer End of the opening Zipper teeth 1/8”...
-
Page 71: Našivanje Rajsfešlusa
Šivenje Nähen Postavite stopicu za šivenje rajsfešlusa sa desne Bringen Sie den Reißverschlussfuß mit dem Stift auf strane igle. Savijte unazad gornji sloj poruba. Savijte der rechten Seite an. donji sloj poruba tako da ostane 0.4cm margina na Falten Sie die obere Nahtzugabe um. Falten Sie die tkanini. - Page 72 Raise the foot and detach it. Re-attach it with the left side pin. Starting just below zipper bottom stop, sew across fabric to about 3/8" (1 cm) distance from the basting line. Turn fabric 90 degrees and sew a seam the entire length of the zipper tape.
- Page 73 Heben Sie den Fuß an, lösen Sie ihn und bringen Sie Podignite stopicu i skinite je. Ponovo je postavite ali ovaj put tako da igla bude sa leve strane. ihn wieder mit dem Stift auf der linken Seite an. Počevši tik ispod dna rajsfešlusa, šijte preko tkanine Nähen Sie den Stoff etwa 1 cm von der Heftlinie oko 1cm udaljeno od linije fircanja.
-
Page 74: Blind Hemming
Blind Hemming Machine setting Stitch: 4 or 5 Stitch width: 2 – 3 Stitch length: 2 – 3 Thread tension: 1 – 4 Presser foot: On heavy weight fabrics that ravel, the raw edge should be overcast first. Fold the hem under the fabric as illustrated for fine or medium fabrics. -
Page 75: Nevidljivi Porub
Nevidljivi porub Blindsaum Podešavanje mašine Maschineneinstellung Bod: 4 ili 5 Stich: 4 oder 5 Širina boda: 2 – 3 Stichbreite: 2 – 3 Dužina boda: 2 – 3 Stichlänge: 2 – 3 Napetost konca 1 – 4 Fadenspannung: 1 – 4 Stopica: Nähfuß: Na teškim tkaninama koje imaju tendenciju da se... -
Page 76: Section 5. Decorative Stitches
SECTION 5. DECORATIVE STITCHES Decorative Satin Stitches Machine setting Model 340 q Stitch: 8 – 11 (Model 340) 9 (Model 320) w Stitch width: 3 – 5 e Stitch length: 0.5 – 1 Model 320 r Thread tension:1 – 4 t Presser foot: Determine the appropriate stitch density by test sewing. -
Page 77: Deo 5.Dekorativni Bodovi
DEO 5.DEKORATIVNI BODOVI TEIL 5. ZIERSTICHE Dekorativni satenski bodovi Dekorativer Federstich Maschineneinstellung Podešavanja Bod: 8 – 11 (model 340) Stich: 8 – 11 (nur für Mod. 340) 9 (model 320) Stich: 9 (nur für Mod. 320) Širina boda: 3 – 5 Stichbreite: 3 –... -
Page 78: Smocking
Smocking Machine setting Stitch: 14 (Model 340) 12 (Model 320) Stitch width: 3 – 5 Stitch length: S.S. Thread tension: 1 – 4 Presser foot: Step 1: Choose a soft and lightweight fabric such as batiste, gingham or challis. Cut the fabric three times wider than the finished width. -
Page 79: Smoking
Smoking Smoken Podešavanja mašine Maschineneinstellung Bod: Stich: 14 (nur für Mod. 340) 14 (model 340) 12 (model 320) Stich: 12 (nur für Mod. 320) Širina boda: 3 – 5 Stichbreite: 3 – 5 Dužina boda: S.S. Stichlänge: S.S. Napetost konca: 1 –... -
Page 80: Quilting (Model 340)
Quilting (Model 340 only) Machine setting Stitch: Stitch width: 0 or 5 Stitch length: 1.5 – 4 Thread tension: 3 – 6 Presser foot: Quilting guide (Model 340 only) The quilting guide will help keep the seam spacing constant. Insert the quilting guide into the opening and set the quilting guide at the desired seam spacing. -
Page 81: Kućni Tekstil (Model 340)
Kućni tekstil (samo model 340) Wattierungsführer (nur für Mod. 340) Podešavanje mašine Maschineneinstellung Bod: Stich: Širina boda: 0 ou 5 Stichbreite: 0 oder 5 Dužina boda: 1.5 – 4 Stichlänge: 1.5 – 4 Dužina stopice: 3 – 6 Fadenspannung: 3 – 6 Stopicu: Nähfuß: Vođica za tekstil... -
Page 82: Pin Tucking
Pintucks Machine setting q Stitch: w Stitch width: 0 or 5 e Stitch length: 1.5 – 3 r Thread tension:2 – 6 t Presser foot: Fold fabric with wrong sides together. Lower the needle into the fabric 0.1 – 0.2 cm inside the folded edge. Lower the foot and turn the screw to align the guide on the foot with the folded edge. -
Page 83: Falte I Nabori
Falte i nabori Biesen Podešavanje mašine Maschineneinstellung Bod: Stich: Stichbreite: 0 oder 5 Širina boda: 0 ili 5 Stichlänge: 1.5 – 3 Dužina boda: 1.5 – 3 Fadenspannung: 2 – 6 Napetost konca: 2 – 6 Nähfuß: Stopica: Presavijte tkaninu na naličju da napravite nabor. Spustite Legen Sie den Stoff auf der linken Seite zusammen und iglu u tkaninu 0.1-0.2cm u samu savijenu ivicu. -
Page 84: Fagoting
Fagoting Machine setting Stitch: Stitch width: 3 – 5 Stitch length: 1 – 3 Thread tension: 1 – 4 Presser foot: Use this stitch to join two pieces of fabric to create an open work appearance, and to add design interest. Fold under each fabric edge 1/2"... -
Page 85: Sastavljanje
Sastavljanje Fagottechnik Podešavanje mašine Maschineneinstellung Bod: Stich: Širina boda: 3 – 5 Stichbreite: 3 – 5 Dužina boda: 1 – 3 Stichlänge: 1 – 3 Napetost konca: 1 – 4 Fadenspannung: 1 – 4 Stopica: Nähfuß: Koristite ovaj bod kako biste spojili dva dela tkanine, Benutzen Sie diesen Stich, um zwei Stoffstücke napravili otvor ili dodali neki dizajn. -
Page 86: Appliqué
Satin Stitch Appliqué Machine setting q Stitch: w Stitch width: 3 – 5 e Stitch length: 0.5 – 1 r Thread tension:1 – 4 t Presser foot: y Foot pressure: “2” NOTE: Apply stabilizer to the fabric for the stitch to form correctly. -
Page 87: Aplikacije
Aplikacija satenskim bodom Applizieren mit dem Kordonstich Podešavanje mašine Maschineneinstellung Bod: Stich: Širina boda: 3 – 5 Stichbreite: 3 – 5 Dužina boda: 0.5 – 1 Stichlänge: 0.5 – 1 Napetost konca: 1 – 4 Fadenspannung: 1 – 4 Stopica: Nähfuß: Pritisak stopice: Fußdruck:... -
Page 88: Section 6. Care And Maintenance
SECTION 6. CARE AND MAINTENANCE WARNING: Turn the power switch off and unplug the machine before cleaning. NOTE: Do not dismantle the machine in any way other than what is explained in this section. Clean the outside of the machine with a soft cloth and mild soap. -
Page 89: Deo 6. Čišćenje I Održavanje Čišćenje Grajfera I Zubaca Transportera
TEIL 6. PFLEGE UND WARTUNG DEO 6. ČIŠĆENJE I ODRŽAVANJE UPOZORENJA: WARNHINWEIS: • Isključite glavni prekidač i isključite mašinu iz struje pre Schalten Sie die Maschine am Netzschalter aus und čišćenja. • Ne rukujte mašinom na drugačije od onoga što je ziehen Sie den Stecker ab, bevor Sie die Maschine prikazano u uputstvu. -
Page 90: Replacing The Bobbin Holder
Replacing the Bobbin Holder Insert the bobbin holder into the hook race. Make sure the knob of the bobbin holder fits next to the stopper on the race. Knob Stopper Replace the bobbin. Attach the needle plate, inserting the two guide pins into the holes in the needle plate. -
Page 91: Zamena Držača Špulne
Zamena držača špulne Widerreinstzen des Spulengehäuses Postavite držač špulne u grajfer. Setzen Sie den Spulenkorb in die Greiferbahn. Pazite da se čvor na držaču špulne tačno uklopi uz Achten Sie darauf, dass sich der Knopf des zaustavljač grajfera. Spulenkorbes neben dem Anschlag an der Greiferbahn befindet. -
Page 92: Troubleshooting
Troubleshooting Reference Page 30 The needle thread The needle thread is not threaded properly. Page 40 breaks. 2. The needle thread tension is too tight. Page 20 3. The needle is bent or blunt. Page 20 4. The needle is incorrectly inserted. 5. -
Page 93: Mogući Problemi
Problemi Problem Uzrok Strana Konac nije pravilno uveden u iglu. Pucanje gornjeg konca 2. Konac iz igle je previše zategnut. 3. Igla je tupa ili savijena. 4. Igla nije pravilno umetnuta. 5. Konac iz igle i konac iz špulne nisu dobro namešteni pred početak šivenja. -
Page 94: Problemlösungen
Problemlösungen Problem 1. Oberfaden nicht richtig eingefädelt. Page 31 Oberfaden reißt. 2. Oberfadenspannung zu stark. Page 41 3. Nadel verbogen oder stumpf. Page 21 4. Nadel falsch eingesetzt. Page 21 5. Ober- und Unterfaden bei Nähbeginn nicht zur Rückseite des Nähfußes gezogen und nicht richtig unter Nähfuß... -
Page 95: Optional Accessories
Many standard accessories are provided with your machine but your unique creations may require something more. Therefore, Elna offerts a vast array of optional accessories. Please contact your authorized Elna dealer or service center to leam more about all the possibilities OR visit us at our website : www.elna.com ACCESSOIRES Votre machine est fournie avec de nombreux accessoires. - Page 96 507-800-749 (E/F/G)
Need help?
Do you have a question about the eXplore 320 and is the answer not in the manual?
Questions and answers