Table of Contents
Advertisement
Quick Links
Advertisement
Table of Contents

Related Manuals for Swisscom Top E604 ISDN


Summary of Contents for Swisscom Top E604 ISDN
- Page 1 ISDN Top E604 User guide...
-
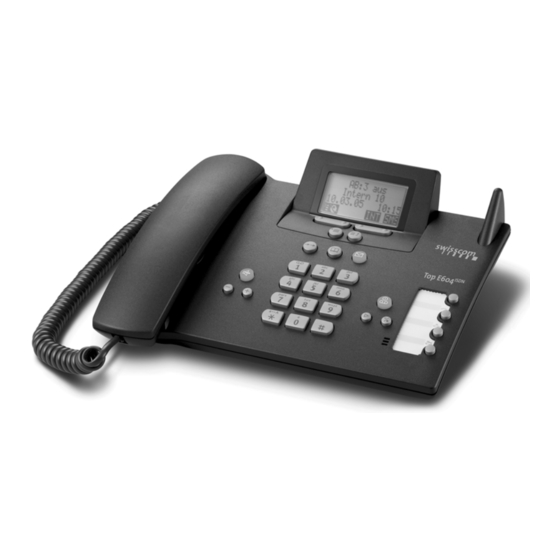
Page 3: Brief Overview Of Base Station
Brief overview of base station Brief overview of base station... -
Page 4: Table Of Contents
Contents Contents Brief overview of base station ....1 Safety precautions ......6 Display explanation . - Page 5 Setting the answering machine (on Top E604 ISDN) ......74 Setting a different language ..........74 Assigning a receive MSN .
- Page 6 Contents Locking the answering machine, defining AM PIN ......78 Setting time control ........... 79 Activating/deactivating automatic call screening on a handset .
- Page 7 Contents Operating with other devices ....116 Registering handsets ..........116 De-registering handsets .
-
Page 8: Safety Precautions
Safety precautions Safety precautions Only use the power supply unit supplied, as indicated on the underside of the telephone. The operation of medical appliances may be affected. Be aware of the technical conditions within the particular environment (e.g. doctor's practice). Do not install the telephone in bathrooms or shower rooms (see page 9 and page 125). -
Page 9: Display Explanation
A table below a heading specifies the base station or handsets on which the function is available. Example: Phonebook or speed dial list: Sending a single entry or complete list to a handset To handset: Top S328/S326i/E6x4i Example: Set answering machine in network for fast access On Base: Top E604 ISDN... -
Page 10: Preparing The Base Station For Use
Preparing the base station for use Preparing the base station for use Pack contents The pack contains: one base station, ◆ one handset and a coiled handset cord, ◆ one power supply unit with power cord, ◆ one ISDN connection cable, ◆... -
Page 11: Connecting The Base Station
Preparing the base station for use Connecting the base station Note the specified sequence Socket for Socket for ISDN power cord connection cable Socket for coiled receiver cord Schematic illustration Insert the plug on the long end of the coiled receiver cord into the socket on the ◆... - Page 12 Preparing the base station for use Outlet Cable recess Underside of base station Power supply unit (enlarged view) with power cord Insert the small jack on the power cord into the socket on the base station ◆ Position cable in the cable recess ◆...
-
Page 13: Operating The Base Station - Menu System
Preparing the base station for use Operating the base station – menu system Display keys The display keys are the horizontal rocker keys just below the display. Their function changes depending on the particular operating situation. The current function is shown in the display directly above the key to which it relates. - Page 14 For pre-configured fields with a fixed number of digits, position the cursor on the wrong digit and overwrite it using the display keys. Idle status Display in idle status (example) Top E604 ISDN Two lines with situation specific system information Internal 11 (Date and time have already 20.09.03...
-
Page 15: Using The Base Station Via Handset
The user guide for the handsets is included. The user guide can be found on the internet under www.swisscom.com/eShop/Alle Bedienungsanleitungen. For "Assigning an MSN a ringer melody" a comfort handset is used for illustration in the following examples of operating the base station. -
Page 16: Preparing The Base Station For Use - Getting Started Wizard
Preparing the base station for use Preparing the base station for use – Getting started wizard A few settings are necessary before using your base station. The Getting started wizard is designed to help you with this. It can be opened at any time using the display of your base station (page 16) or a comfort handset (see user guide of handset). - Page 17 Preparing the base station for use Potential internal parties are: Handsets which can be assigned the internal call numbers 11 to 16. ◆ The integrated answering machines, which are assigned the internal phone ◆ numbers 91 to 93. Example of how to assign an MSN: You have applied for four MSN's, two for business use (MSN1, MSN2) and two for private purposes (MSN3, MSN4).
- Page 18 Preparing the base station for use Launching the Getting started wizard and setting the basic settings You can operate the Getting started wizard of your base station either directly using the base station or via the handsets. Launching the Getting started wizard: Open the menu.
- Page 19 An answering machine can only be hidden if there are no messages/ memos stored in it (page 75). Entering your phone numbers (MSNs) and names for MSNs: The feature Find own numbers (MSN)? is not supported by Swisscom ISDN network. Programming the MSN. Press the display key to confirm the prompt.
- Page 20 Preparing the base station for use Setting the receive MSN The display shows: Set incoming MSN? The receive MSN is used to answer incoming calls. The MSNs allocated to your ISDN connection can be allocated to various end devices according to your preferences. You can assign an end device multiple receive MSNs.
- Page 21 Preparing the base station for use Using with a PABX: Only carry out the following steps if you want to connect your telephone to a private PABX (not directly to a NT2a/b). The display shows: Operate behind PABX? Press the display key to confirm the prompt. [RRRRRRRRRRRRRRRRRRRRRRRRRR] Press the display key to confirm the Set access [RRRRRRRRRRRRRRRRRRRRRRRRRR]...
-
Page 22: Making Calls
Making calls Making calls Making external calls and ending a call External calls are calls using the public telephone network. Two external calls can be made at the same time on your base station. either ... Immediate dialling: Lift the receiver. Enter the telephone number. -
Page 23: Answering A Call
Making calls Calling a specific handset Lift the receiver. Press the display key to initiate the internal call. [RRRRRRRRRRRRRRRRRRRRRRRRRR] either ... Enter the number of the internal user you want. or ... Press the display key. [RRRRRRRRRRRRRRRRRRRRRRRRRR] LIST Select and confirm the internal number you want, Int.11 e.g. -
Page 24: Withholding Calling Line Identification
Making calls Withholding Calling Line Identification Precondition: The "Withhold Calling Line Identification" feature is supported by your network provider. When supplied, your phone number is displayed on the phone of the person you are calling (CLIP – for outgoing connections) and a caller's phone number is displayed on your handset (COLP –... -
Page 25: Activating/Deactivating Handsfree And Open Listening
Making calls After the call, the setting is reset again. Your phone number will be identified to your next caller. When you call the selected phone number from the last number redial list again, this call is also not anonymous. Withholding or permitting identification of your phone number for all calls: When the phone is supplied Withhold no. -
Page 26: Picking Up A Call During Ring Delay (Call Pickup)
Making calls Picking up a call during ring delay (Call PickUp) You can pick up a call despite any set ring delay (page 105). Preconditions: The party picking up must be authorised with at least Incoming only status ◆ (page 90). Both parties must be assigned the same receive MSN (page 95). -
Page 27: Defining The Send Msn For The Next Call
Making calls Defining the send MSN for the next call Even if you have defined an individual send MSN for the base station (page 96), you can select another MSN as the send MSN before each call, e.g. for individual recording of charges. - Page 28 Making calls Checking and deleting a callback Deleting the callback while it is incoming The base station rings and the display shows the callback number. Press the display key. The callback function is [RRRRRRRRRRRRRRRRRRRRRRRRRRR] DELETE cancelled. Checking or deleting the callback before it is incoming Open the menu.
-
Page 29: Functions During A Call
Functions during a call Functions during a call Muting the base station You can mute your base station during a call, e.g. if you wish to talk confidentially to another person in the room. Your party on the line cannot hear your conversation during this time. - Page 30 Functions during a call Make a call to the second external user: Enter the second user's telephone number. You can also make a call via the Phonebook or other lists (page 33). If the second external user you have dialled is busy: Press the display key to return to the first party.
- Page 31 Functions during a call Make a call to the internal user: either ... Enter the number of the internal user you want. or ... Press the display key. [RRRRRRRRRRRRRRRRRRRRRRRRRR] LIST Select the required internal number, Int.11 e.g. Int.11 , and confirm. The connection to the internal user is established.
-
Page 32: Forwarding An Incoming Call - Cd (Call Deflection)
Functions during a call Conference call Precondition: You have established an enquiry call (page 27 and page 28). There is both an active call (the one established with an enquiry call) and a held call (the first). In a conference call you can speak to both other callers at the same time. You can make a conference call with two external users or ◆... -
Page 33: Working With Call Waiting For An External Call - Cw (Call Waiting)
Functions during a call Working with call waiting for an external call – CW (Call Waiting) Precondition: CW (Call Waiting) set up, see page 106. You hear the call waiting tone (short beep) if you receive an external call while conducting another call (internal or external). -
Page 34: Call Hold
Functions during a call Call hold Hold external party You are conducting an external call. Press the display key . The external caller is put on hold. The waiting external party hears the waiting melody (page 107), when the connection is on hold internally (page 106). -
Page 35: Using The Phonebook And Other Lists
Using the Phonebook and other lists Using the Phonebook and other lists Phonebook and speed dial list You can store up to 100 phone numbers in the Phonebook. You can store up to 10 phone numbers in the speed dial list. The Phonebook makes dialling easier for you. - Page 36 Using the Phonebook and other lists Storing a telephone number in the speed dial list The maximum number of entries in the speed dial list is dependent on the number of entries in the directory. Ÿ Open the speed dial list. Confirm.
- Page 37 Using the Phonebook and other lists Viewing and editing an entry in the Phonebook/speed dial list Ÿ Open the Phonebook or speed dial list. Scroll to the entry. either ... Display the entry: Select the menu item and confirm. Display entry Press the display key to exit the display.
- Page 38 Using the Phonebook and other lists Selecting a phone number from the Phonebook If you are prompted to enter an external phone number while you are operating your telephone, you can use the Phonebook from your base station to do this. Precondition: The input field for external telephone numbers is displayed.
-
Page 39: Display Available Memory
Using the Phonebook and other lists Display available memory The memory is divided between the Phonebook and the speed dial list (page 33). The available memory of all these lists is displayed. Open the Phonebook. Select any entry and open the menu. Select the menu item and confirm. -
Page 40: Opening Lists With The Message Key
1. List of missed calls Missed calls (page 39) 2. Answering machine lists AM1 , AM2 , AM3 (to base station Top E604 ISDN, page 65) These lists display the calls and messages belonging to the receive MSNs assigned to the base station. -
Page 41: Caller Lists
Using the Phonebook and other lists Caller lists There are two caller lists: the list of missed calls ◆ It contains all calls that have not been answered or have been rejected and all calls answered by an answering machine for which there is no message. the list of answered calls ◆... -
Page 42: Displaying An Entry
Using the Phonebook and other lists Calling back a caller Precondition: The caller's number has been identified (page 22). Open the list of missed or answered calls (page 39). Now: Select entry. either ... Dial after line seizure Lift the receiver or press the handsfree key. Open the menu. - Page 43 Using the Phonebook and other lists Adding an entry to the Phonebook from the caller list Open the list of missed or answered calls (page 39). Now: Select entry and open the submenu. Select the menu item and confirm. Copy to dir. Enter names in the line marked by <Name>...
-
Page 44: Making Cost-Effective Calls
Making cost-effective calls Making cost-effective calls You can manage entries in the speed dial list in exactly the same way as entries in the Phonebook. You will find instructions on storing, editing and deleting entries starting on page 33. Displaying the call duration Charges are transmitted automatically by the central office. - Page 45 Making cost-effective calls Activating/deactivating the charges of the last call You can display the total charges and the charges of the last call for this handset on the terminal. By factory default, Last charge is deactivated. Open the menu. Select the menu item and confirm. Costs ‰...
-
Page 46: Sms (Text Messages)
The mobile phone is delivered with the access number (062 210 00 00) of the Swisscom SMS Center already pre-programmed. Before you can send and receive text messages Calling Line Identification may not be permanently deactivated for the MSN used ◆... -
Page 47: Managing Sms Service Centres
Text messages can be received via all SMS centres entered, assuming you are registered with these SMS centres as an SMS recipient (for information about registering, see page 48). The mobile phone is delivered with the access number (062 210 00 00) of the Swisscom SMS Center already pre-programmed. -
Page 48: Entering, Editing Or Deleting Phone Numbers For Sms Centres
SMS (text messages) Entering, editing or deleting phone numbers for SMS centres You can enter up to ten SMS centres. Before entering or editing the number, please obtain information about special features and what the SMS service provider offers. Open the menu. Select the menu item and confirm. -
Page 49: Activating/Deactivating Sms Send Centre
SMS (text messages) Activating/deactivating SMS send centre To send an SMS you must activate the phone number for the required SMS centre as the send centre. By doing this you determine via which SMS centre the text message is to be sent. -
Page 50: Registering/De-Registering With An Sms Centre
SMS (text messages) Registering/de-registering with an SMS centre In order to be able to receive text messages on your phone you must first register your phone number with an SMS service provider. You can find out from the service provider concerned which information you need to send to register and de-register. - Page 51 SMS (text messages) Writing text messages A text message can be up to 160 characters long. Remember that the service provider cannot deliver a text message that contains Greek or Cyrillic characters. Write text messages as follows: Open the menu. Confirm.
- Page 52 SMS (text messages) Enter the recipient's number (with prefix). Dest.call no. 089123456 < > or ... Select a number from the Phonebook: Press the display key to open the submenu. Open the Phonebook. No.from dir. Select entry and confirm. The number appears in the display.
- Page 53 SMS (text messages) Opening the outgoing message list The outgoing message list shows you: Text messages which you saved before you sent them (page 49). ◆ Text messages you could not send, e.g. you were interrupted by an incoming call ◆...
-
Page 54: Sending A Text Message To An E-Mail Address
SMS send centre. Varies according to the network provider. Not yet possible in the Swisscom network. Entering the e-mail address at the start of the text message Enter the recipient's e-mail address at the start of your text message. Separate the email address from the text of the message by a space or a colon (this depends on the provider). -
Page 55: Receiving Text Messages, Incoming Message List
SMS (text messages) Entering the text of the message Enter the SMS text. Email address, space, SMS mustermann@name.ch text (example) Hello Peter < > Press the display key to open the submenu. Confirm. Send Sending a text message as an e-mail You must send the text messages to the number for the e-mail service of your send centre. - Page 56 SMS (text messages) The message list is displayed, e.g. follows: Number of new text messages in the list Inbox 2/ 5 Number of old, read text messages in the list Opening with the message key Precondition: There is at least one new message in the list. Press the message key.
- Page 57 SMS (text messages) Reading and deleting text messages in the incoming message list Precondition: You have opened the incoming message list (page 53). Select SMS. Open the submenu. either ... Read SMS: Confirm. Use s to view the continuation of the text Read textmessage message in the display.
- Page 58 SMS (text messages) Replying to or forwarding text messages While you read a text message you can use the following functions: Press the display key to open the submenu. either ... Reply to an incoming message: Confirm. You can reply to the message immediately Reply in the input field.
- Page 59 SMS (text messages) Calling back the text message sender Open the SMS incoming message list (page 53). Now: Select entry. either ... Press the talk key. or ... Press the display key to open the submenu. Select. Dial number or ... Dial using network provider's prefix: Press the display key to open the submenu.
-
Page 60: Text Messages To A Pabx
SMS (text messages) Press display key to open menu. Select the menu item and confirm. Copy to dir. Go to the Name line and enter the name (max. 16-digits) (for entering text, see page 130). Press display key to open menu. Confirm. -
Page 61: Errors When Sending And Receiving A Text Message
SMS (text messages) Errors when sending and receiving a text message Errors when sending a text message Text messages that cannot be sent are assigned an error status e .g. FD error: and are stored in the incoming message list. The following error codes are displayed: Error code Description... - Page 62 SMS (text messages) Self-help with error messages Error Message Possible Cause Remedy You cannot send messages. The "Calling Line Identification" Permit Calling Line (CLIP) is permanently withheld. Identification (CLIP) again (page 23). Message transmission was Re-send the message. interrupted (e.g. by an incoming call).
-
Page 63: Operating The Answering Machine
Operating the answering machine Operating the answering machine The device has three answering machines (AB1, AB2, AB3), which can be used independently of each other. You can operate the answering machines either directly via the base station, a registered handset or by remote control (internal or external call to the answering machine, see page 70). -
Page 64: Activating/Deactivating The Answering Machine
Operating the answering machine Activating/deactivating the answering machine You can only activate/deactivate an answering machine when time control is not active (page 79). Precondition: You have selected an answering machine (page 61). either ... Activate the answering machine: Select the menu item and confirm. Activate? or ... -
Page 65: Recording/Changing Announcements
Operating the answering machine The answering machine switches automatically from recording mode to announce only mode when the memory is full. As soon as memory space is made available (e.g., because you have deleted some messages) the answering machine automatically switches back to answer and record mode. -
Page 66: Recording Memos
Operating the answering machine Recording memos Memos are "spoken notes" recorded, for example, for members of your family. A memo is played back, saved and deleted in the same way as a message. If there is a new memo, the message key f flashes on all handsets assigned to the answering machine. You can also record memos when the answering machine is deactivated. -
Page 67: Picking Up A Call From The Answering Machine
Operating the answering machine Picking up a call from the answering machine You can pick up a call, even if the answering machine has already switched itself on (the ö key is flashing), your announcement is running or the caller is already leaving a message. -
Page 68: Returning A Call During Playback
Operating the answering machine Jumping to the next or previous message during playback Go to the next message. Jump to the previous message. Ï Repeat the last 5 seconds of the current message. If less than 5 seconds have elapsed, the current message is played back from the beginning. -
Page 69: Playing A Message To Another Caller
Operating the answering machine Playing a message to another caller During an external call you can play messages from the answering machine to the person you are calling. Precondition: The same receive MSN is assigned to the handset and the answering machine. -
Page 70: Setting The Playback Speed
Operating the answering machine Setting the playback speed You can set the playback speed of messages/memos in four levels: Slow Normal speed, Fast or Very fast. When the phone is supplied Normal speed is set for all answering machines. During playback: Press the display key to open the submenu. -
Page 71: Marking An Old Message Or Memo As "New
Operating the answering machine Deleting all old messages/memos Precondition: You have selected an answering machine (page 61). either ... Delete all old messages: Confirm. Message playback begins. Messages Press the display key to open the submenu. Select the menu item and confirm. Del.old messages Confirm. -
Page 72: Remote Control
Operating the answering machine Remote control You can control your answering machine remotely from a registered handset or any external connection or mobile telephone, e.g., to play back and delete messages. Apart from the first step, the procedure is the same for both kinds of remote control. Precondition: Remote control from an external connection is only possible if you have defined an ◆... - Page 73 Operating the answering machine Introduction to remote operation while you are away from home For remote control you need a telephone that transmits DTMF tones (tone dialling). It is important to enter the AM PIN immediately while the announcement is being played. In addition Remote control and, if required, Remote delete must be activated.
- Page 74 Operating the answering machine Key sequences for remote control Once you have initiated remote control of the answering machine, the functions of the keys are the same for all telephones. Pause/Stop Record Announcemen On/Off Operating mode Delete Status/Help Playing back messages and memos All messages New messages only Pause/Stop...
- Page 75 Operating the answering machine Recording an announcement F G A Announcement 1 F G B Announcement 2 F G 3 Announcement F G D Concluding announcement Playing back an announcement Announcement 1 Announcement 2 Announcement Concluding announcement Selecting an announcement Announcement 1 Announcement 2 Announcement...
-
Page 76: Setting The Answering Machine (On Top E604 Isdn)
Setting the answering machine (on Top E604 ISDN) Setting the answering machine (on Top E604 ISDN) Once you have connected your telephone your answering machine is ready for use. Answering machine AM1 is set to be shown and activated. It records all messages (on all receive MSNs). -
Page 77: Hiding/Showing An Answering Machine
Setting the answering machine (on Top E604 ISDN) Select the receive MSN and confirm, e.g. MSN1: Anna. Only the MSN's that are still not assigned to an answering machine are offered. Repeat this process for all receive MSNs you want to assign to the answering machine (‰... -
Page 78: Specifying The Number Of Rings Before The Answering Machine Starts
Setting the answering machine (on Top E604 ISDN) Specifying the number of rings before the answering machine starts You can set when you want the answering machine to activate (after how many rings). The options are: 1 ring tone, 2 ring tone, ..., 9 ring tone. Instead of a set number of rings, you can also choose the cost saving setting Automatic 2/4 (factory default). -
Page 79: Setting The Recording Time And Recording Quality
Setting the answering machine (on Top E604 ISDN) Setting the recording time and recording quality You can set the maximum length of a message and its recording quality. The recording quality determines the total recording time of your answering machine. -
Page 80: Activating/Deactivating Automatic Pause
Setting the answering machine (on Top E604 ISDN) Activating/deactivating automatic pause If automatic pause is activated the answering machine switches to pause mode after playing back a message or memo. The next message will not be played back until you Ð... -
Page 81: Setting Time Control
Setting the answering machine (on Top E604 ISDN) Setting time control You can set the answering machine so that it is activated or deactivated depending on the time of day, as well as using different announcements depending on the time of day. - Page 82 Setting the answering machine (on Top E604 ISDN) Select the menu item and confirm. Start time Enter the start time (4-digit). The start time specifies the end of the previous time section. Press the display key to open the submenu.
-
Page 83: Activating/Deactivating Automatic Call Screening On A Handset
Setting the answering machine (on Top E604 ISDN) Activating/deactivating automatic call screening on a handset You can set your answering machine to switch a handset assigned to it automatically to listen in when a message is recorded. By default, automatic listen in is deactivated. -
Page 84: Activating/Deactivating Automatic Pick Up
Setting the answering machine (on Top E604 ISDN) Activating/deactivating automatic pick up With automatic call pick up, you can pick up the call from the answering machine directly (announcement or call recording is running) on any handset that has been assigned the same incoming MSN as the answering machine. -
Page 85: Date And Time
Date and Time Date and Time Setting the date and time The first time you make a call on your phone, the date and time are transmitted by the exchange. You can choose between the 12 hour and the 24 hour display (factory setting) for the time (a.m. -
Page 86: Setting Appointments
Date and Time Setting appointments You can use your base station to remind yourself of an appointment. To do this, you have to save the times. Setting an appointment Open the menu. Select the menu item and confirm. Reminder Press the display key to open the submenu. Select the menu item and confirm. -
Page 87: Night Service
Sun all day), automatically for all incoming calls to an external call number, to another internal subscriber, or via Top E604 ISDN to an answering machine. For example, when a business is closed (from 6:00 p.m. to 8:00 a.m.) all calls from the office can be diverted to a private number. - Page 88 Date and Time Setting the forward destination Precondition: Night service is deactivated (page 88). Open the menu. Select the menu item and confirm. Set base Select the menu item and confirm (‰ = Night Night service service is activated). The list of MSNs is displayed. Select MSN and confirm, e.g.
- Page 89 Date and Time Entering the start and end time for Night service By default, the Start time is pre-set to 20:00 or 8:00 pm, and 08:00 or 8:00 am for the End time Open the menu. Select the menu item and confirm. Set base Select the menu item and confirm.
- Page 90 Date and Time Activating/deactivating Night service You can only activate Night service when you have entered a forward destination for the incoming MSN and when there is no forward destination currently activated for it. Open the menu. Select the menu item and confirm. Set base Select the menu item and confirm.
-
Page 91: Security Settings
Repeat the new system PIN and confirm. Hold down (back to idle status). Memorise the new system PIN! If you forget it, the device will require technical intervention (there is a charge for this). If this happens, contact the Swisscom Hotline. -
Page 92: Defining Authorisation
Security settings Defining authorisation You can set different authorisations for all registered devices: Unrestricted (set as factory default) ◆ All devices can answer incoming calls and make internal/external calls. ◆ Incoming only The devices can only answer incoming calls. External calls are not possible. Internal calls can be made. - Page 93 Security settings Setting up, editing, reading and deleting personal emergency numbers Open the menu. Select the menu item and confirm. Set base Select the menu item and confirm. Settings If required, enter the PIN and confirm (page 89). Confirm. Security Select.
- Page 94 Security settings Dialling emergency numbers Precondition: The base station is blocked for external dialling (page 90). Lift the receiver. Press the display key. [RRRRRRRRRRRRRRRRRRRRRRRRRRR] EMERG..then Dial the emergency number: Enter the emergency number. If the dialled number does not match the emergency number entered, the call is rejected with the display "Number is not emergency no.".
-
Page 95: System Settings
System settings System settings The abbreviations in brackets after the titles indicate the ISDN service concerned. Some features may only be used if they have been authorised by the network provider (there may be an extra charge). Changing the name for an internal user By factory default, all internal numbers are given the names Int.11 , Int.12 , etc., according to their numbering. - Page 96 System settings Setting up an ISDN phone number (MSN) / changing the name If you have not saved all the phone numbers with the Getting started wizard (page 16), you can enter them now. All phone numbers that are subsequently stored are automatically assigned to all registered terminals.
-
Page 97: Assigning A Phone Number (Msn)
System settings Assigning a phone number (MSN) You can assign particular individual phone numbers (MSN's) to registered terminals. When doing this determine which phone number makes a registered terminal ring (receive MSN), ◆ under which number an internal user dials (send MSN). ◆... -
Page 98: Setting Up The List Of Send Msns For The Next Call
System settings Assigning a send MSN When the phone is supplied no send MSN has been entered. The telephone exchange adds the send MSN. You can define one send MSN per internal user. This MSN is shown to the person you call and the call is also charged to this MSN. -
Page 99: Setting Up A Busy Signal When The Msn Is Being Used (Busy On Busy)
System settings Setting up a busy signal when the MSN is being used (Busy on Busy) This setting allows callers to get a busy signal immediately when an external call is already being made on this MSN, independent of the setting Call waiting. By factory default, the function is not set. -
Page 100: Setting Up Rejecting For The Entire Msn Group
System settings Setting up rejecting for the entire MSN group You can reject an external call not only on your base station, but for all members of an MSN group. Pressing will give the caller a busy signal instead of a ringing tone. REJECT The entire group will no longer be called. - Page 101 System settings Activating/deactivating internal call diversion Requirement: Internal call diversion can only be activated if a destination has been set Open the menu. Select the menu item and confirm. Set base Select the menu item and confirm. Int. call forw. Enter system PIN if required (page 89).
- Page 102 System settings Setting up the forward destination Open the menu. Select the menu item and confirm. Set base Select the menu item and confirm. Ext. call forw. Enter system PIN if required (page 89). The list of set-up call diversions is displayed. Press the display key to open the submenu.
- Page 103 System settings Editing an entry Open the menu. Select the menu item and confirm. Set base Select the menu item and confirm. Ext. call forw. Enter system PIN if required (page 89). Select call diversion and open the submenu. Select the menu item and confirm. Edit entry You will be notified if you have selected a call divert that another internal user has already set up.
-
Page 104: Activating/Deactivating Handsfree Dialling
System settings Switching external call divert internal/external Your ISDN connection offers you two telephone lines (B channels) that you can use at the same time. You can set up your base station so that: call divert is carried out at the telephone exchange (external), so that your second ◆... -
Page 105: Pre-Assigning The Call Diversion Destination - Cd (Call Deflection)
System settings Pre-assigning the call diversion destination – CD (Call Deflection) The call diversion destination for incoming calls is pre-set here. This destination number is offered as a preset for manual forwarding (page 30). Open the menu. Select the menu item and confirm. Set base Select the menu item and confirm. -
Page 106: Setting Up An Internal Group Call Group
System settings Setting up an internal group call group You can make a group call from any telephone registered on the base station to all other registered internal users (page 21). By default, all registered users with the device type Telephone or Neutral are set up in the group call group. -
Page 107: Setting Up Ring Delay
System settings Setting up ring delay Ring delay can be used to individually set up a party per incoming MSN to ring later. During this ring delay time, the terminal can take the call using the function Accept? without hearing a ring. The ring delay time is given in rings. There are 5 seconds between rings. -
Page 108: Activating/Deactivating Call Waiting - Cw
System settings Activating/deactivating call waiting – CW This function can be set up separately for each user. When call waiting is activated the caller will hear the ringing tone if you are already making a call. This call is indicated both acoustically and visually on your base station display. -
Page 109: Setting Up The Waiting Melody
System settings Initiating an enquiry call see page 27 or page 28. Open the menu. Select the menu item and confirm. Set base Select the menu item and confirm. Settings Enter system PIN if required (page 89). Select the menu item and confirm. ISDN settings either ... -
Page 110: Changing The Long Distance Prefix
System settings Changing the long distance prefix Long distance prefixes are the first few digits required when dialling another city (national) or to another country (international). The default settings for Switzerland are as follows: For connections to other towns (national) For connections abroad (international) Otherwise, you would not be able to make some calls, e.g. -
Page 111: Checking The Status
System settings Open the menu. Select the menu item and confirm. Set base Select the menu item and confirm. Settings Enter system PIN if required (page 89). Select the menu item and confirm. System settings Select the menu item and confirm. Spec. -
Page 112: Setting The Volume, Display And Keys
Setting the volume, display and keys Setting the volume, display and keys Your base station has default settings. You can change these settings as required. Setting the display Changing the display language You can view the display texts in different languages. Open the menu. -
Page 113: Adjust Volume
Setting the volume, display and keys Setting the display contrast You can set the contrast of the display. Open the menu. Select the menu item and confirm. Settings Select the menu item and confirm. Contrast Set the display contrast and confirm. Hold down (back to idle status). -
Page 114: Changing The Ringer Tone
Setting the volume, display and keys Changing the ringer tone A range of options is available: Six volume levels: ◆ – Five volume levels (1–5; e.g. volume level 2 = ˆ), – "Crescendo" call (6; the volume increases with each ring = ‰). Ten melodies (1–10;... -
Page 115: Activating/Deactivating Advisory Tones
Setting the volume, display and keys Activating/deactivating advisory tones Your handset uses "advisory tones" to tell you about different activities and statuses. The following advisory tones can be activated and deactivated individually (the default setting is on). Key click: every key press is confirmed ◆... - Page 116 Setting the volume, display and keys Assigning a phone number to a function key You can use a function key with a phone number assigned to it for targeted dialling of a particular party. Precondition: You have assigned the function key (page 113)..
- Page 117 Setting the volume, display and keys Assigning a send MSN to a function key You can use the send MSN to specify which phone number you want to use for the next call. Dialling this send MSN using the function key only applies to the next outgoing call. Precondition: You have assigned the function key (page 113).
-
Page 118: Operating With Other Devices
Operating with other devices Operating with other devices On your base station, you can register up to six cordless devices (including the Gigaset Repeater V2 (page 120)). You must initiate registration of a cordless device on the base station and on the cordless device itself. - Page 119 Operating with other devices Registering the Top S328/S326i/E6x4i handset manually Open the menu. ì Select the menu item and confirm. Select the menu item and confirm. Register H/Set Select base (1–4) and confirm, e.g. Base 1. Base 1 Enter the system PIN of the base (the default is 0000) and confirm.
- Page 120 Operating with other devices Registering the handset Comfort Top E304/Top E414i/E514i − Press and hold to switch on the handset. either ... Confirm the prompt. or ... Open the menu. Select the menu item and confirm. Stations Select base (1–4) and open the submenu. Station 1 Select the menu item and confirm.
- Page 121 Operating with other devices Registering handset Pronto 210 C, Top E401 Press to switch on the handset. Open the menu. Select the menu item and confirm. Settings Select the menu item and confirm. Register Select base (1–4) and confirm. Station 1 Open the submenu.
-
Page 122: De-Registering Handsets
Operating with other devices De-registering handsets Open the menu. Select the menu item and confirm. Set base Select the menu item and confirm. Settings Enter system PIN if required (page 89). Select the menu item and confirm. Setup user Select the menu item and confirm. De-reg. - Page 123 Operating with other devices Registering a repeater V2 Precondition: Gigaset Repeater V2 has been deactivated (mains cable unplugged). 1. Prepare the base station for registration: Open the menu. Select the menu item and confirm. Set base Select the menu item and confirm. Settings Enter system PIN if required (page 89).
-
Page 124: Operating When Connected To A Pabx
Operating when connected to a PABX Operating when connected to a PABX If you are operating your base station on a PABX, special characteristics for receiving text messages should be noted (page 58). Access code Precondition: If your phone is connected to a PABX you may have to enter an access code (outside line code) for external calls when first getting started, depending on the PABX. -
Page 125: Setting Options
Operating when connected to a PABX Setting options You can switch between the settings Standard dial (factory setting), Auto keypad and Dial * and #. Standard dial Once Standard dial has been activated, * and # are not transmitted during dialling, and if * and # are entered it is not possible to switch to the keypad. - Page 126 Operating when connected to a PABX Activating the keypad for the next connection All dialling characters (0–9, *, #) will be sent as a string of keypad characters with the next connection (dial and call). In the connection status, the keypad is retained and is not automatically switched over to tone dialling (DTMF).
-
Page 127: Appendix
Appendix Appendix Care Wipe the base station and handset with a damp cloth (do not use solvent) or an antistatic cloth. Never use a dry cloth. This can cause static. Contact with liquid If the handset should come into contact with liquid, on no account switch the device on. - Page 128 Appendix What has happened Possible Cause Possible solution when … … there are no incoming Call diversion Immediately has Deactivate call diversion calls? been activated. Immediately (page 99). The MSN has not been assigned Determine the receive MSN to the internal user. (page 95).
-
Page 129: Guarantee/Maintenance/Repair/Approval
(Gigaset CX253isdn) If you have any general enquiries about our products or services please contact the Swisscom information helpline (Freephone 0800 800 135). An exception are damages to wearing parts (cable, labels, batteries, etc.) and due to improper handling (damage from dropping, infiltrated fluids, etc.). -
Page 130: Approval And Conformity
The Declaration of Conformity can be found on the following web site: www.swisscom.com under the rubric eShop, Phone, Declaration of Conformity or can be ordered from the following postal address: Swisscom Fixnet AG Retail business Customer Premises Equipments (CPE) 3050 Bern... -
Page 131: Specifications
Appendix Specifications General specifications Feature Value DECT standard is supported GAP standard is supported No. of channels 120 duplex channels Radio frequency range 1880–1900 MHz Duplex method Time multiplex, 10 ms frame length Channel grid 1728 kHz Bit rate 1152 kbit/s Modulation GFSK Language code... -
Page 132: Character Set Chart
Appendix Character set chart Standard characters Either press the relevant key several times, or hold down. 2 x 3 x 4 x 5 x 6 x 7 x 8 x 9 x 10 x 11 x 12 x 13 x 14 x £... -
Page 133: Compatibility
Compatibility If you want to circumvent the alphabetical order of the entries in the directory, insert a space before the name. This entry then goes to the first position (example: "sKarla") You can also number the entries with digits (e.g. "1Jane", "2Mary", "3John"). Names prefixed with a star (e.g. -
Page 134: Menu Tree
Menu Tree Menu Tree Main menu In base station idle status press i (Open menu: Write message Inbox 2/5 Outbox 2 Reminder Appointment editor Audio Ringer Volume Ringer melody Handset Volume Vol.Loudspeaker Advisory tones Key Beeps Confirm. Beep Error Beep Costs Cost overview Type of calcul. -
Page 135: Set Base" Submenu
Menu Tree "Set base" submenu To begin: with the base station in idle status press v Set base or i N: Status Callback Withhold no. Call forwarding ‰ Ext.occupations = on AM1 on AM2 on AM3 on Missed calls (phone number list) -> Caller list menu (page 39) Accepted calls (phone number list) ->... - Page 136 Menu Tree Int. call forw. Activate? or Deactivate? – if call divert is activated Forward. dest. List of Internal users No. of rings (enter the number) Night service Activate? Deactivate? List of MSNs – if night service is activated Forward. dest. External Number editor Internal...
- Page 137 Menu Tree Spec. function Factory setting Operational Reset all Dial properties Standard dial Auto keypad Dial * and # Repeater SW version Ext.room monit. Change number 'Call to' number display Delete number ISDN settings Set up MSN Edit entry List of all set up MSNs Ringer melody Delete entry...
-
Page 138: Answering Mach." Submenu
Menu Tree "Answering mach." submenu To begin: with the base station in idle status press i Answering mach. or i O, select an answering machine, e .g. AM1 , and confirm with Messages Continue List of all messages AMx Delete message Call back NET list Repeat... - Page 139 Menu Tree Settings Message/Memo Message length 1 minute 2 minutes 3 minutes Maximum Time stamp Time control Activate? Deactivate? – if time control is activated Mon - Fri List of four Select ann. Announceme nt 1 adjustable Announceme time nt 2 periods Announcem.
-
Page 140: Phonebook Key And Last Number Redial Key
Menu Tree Phonebook key and last number redial key Press the Phonebook key h or the last number redial key k, select an entry with sand press to open the corresponding menu. The following menu functions are available: For an entry in the Phonebook list: Dial number Display Number New entry... -
Page 141: Accessories
Accessories Accessories All accessories and batteries are available from your mobile phone retailer. Or you can order direct online via the online shop: www.swisscom.com/eshop. The Online Shop also has the latest product information. Handsets Upgrade your Gigaset to a cordless PABX:... - Page 142 Accessories Features Your base Top E604 ISDN with handset offers you a multitude of features. The following table shows which features can be used with which handset. The table is organised according to the Contents of the user guide for the handsets.
- Page 143 Accessories Feature Top S328/ 326i/E6x4i Replying to or forwarding text messages Calling back the text message sender Copying a phone number from a text message to the directory Adding a text message sender's telephone number to the direc- tory Using new ringer tones and logos for the handset Using several handsets Using a handset as a room monitor Setting the Walk and Talk mode...
- Page 144 Accessories Feature Top S328/ 326i/E6x4i Individual handset settings Changing the display language Activating/deactivating auto answer Changing the name of the base station Adjusting the loudspeaker volume Ringer echo Changing ringtones Activating/deactivating the ringtone Activating/deactivating the alert tone Vibration alarm Activating/deactivating advisory tones Resetting a handset to the default settings Operation with other devices Specifying the device type...
-
Page 145: Glossary
Glossary Glossary AM PIN Abbreviation for answering machine PIN AOC-D Advice of Charge: During the Call. Transfers the charge information during the connection. AOC-E Advice of Charge: At the End of the Call. Transfers the charge information at the end of the connection. - Page 146 Glossary Call diversion during the call phase CD, Call Deflection. Must be explicitly enabled by the network provider for each ISDN connection. CD enables an incoming call to be forwarded to any phone number while it is ringing, without having to answer the call. Because the caller has no affect on where it is forwarded (for example, to a mobile phone), you will pay the resulting charges.
- Page 147 Glossary Caller list Depending on the setting, the caller list contains callers you haven't reached, or those you have spoken to. The last 20 missed calls and the last 20 answered calls are stored with their phone number, date and time. If you wish, you can call back these callers directly from the list.
- Page 148 Glossary D channel Control channel for an ISDN connection. See "Channel". Digital exchange Computer controlled switching units allow quick connection and the activation of such additional services as => enquiry calls, => call waiting, => three-way conference, => call diversion etc. Direct call Block the telephone for all phone numbers except for an individually entered number.
- Page 149 Each terminal is addressed separately, e.g., a separate number for a fax machine. Up to ten MSN's can be assigned to one ISDN connection. Multiline The ISDN multiple connection from Swisscom. There are 3 MSN in the basic price. Additional numbers (max 7) must be ordered and incur a charge.
- Page 150 Glossary Notebook function During a phone call you can enter a phone number in the phone's temporary memory to be dialled later. NT/NTBA (NT2 a/b) Network terminating device (NT = Network Terminator and NTBA = Network Terminator Basic Access). The public ISDN network is terminated with the NT. The NT acts as a bridge to the existing telephone outlet.
- Page 151 Glossary Plugging to bus TP, Terminal Portability. Also called parking. An incoming call can be held at the local exchange for up to three minutes to then be answered, for example, by another phone, a fax machine or a PC. In the meanwhile the caller hears an appropriate announcement.
- Page 152 Glossary Two-way recording of phone calls Answering machine feature which allows you to record a conversation during a phone call. Waiting melody Music on hold. During an enquiry call or when a call is being transferred, a melody is played which the waiting person can hear. Withhold own number (CLIR) Stops your personal phone number being transferred.
-
Page 153: Index
Index Index Message ....Number of rings before AM starts Access code ....Phone numbers in the Phonebook Accessories . - Page 154 Index Connecting Activating ........Installation Checking the .
- Page 155 Index CNIP Direct call ..........COLP Display .
- Page 156 Index Exchange Internal ....External Call ......Call Calls .
- Page 157 Index maintenance Night service ........Making calls Activate/deactivate .
- Page 158 Index Send an entry to a handset Rejecting ..Sorting order Call ........Storing a number Setting up for the MSN group .
- Page 159 Index Read ......Authorisation Receiving ....
- Page 160 Index From the SMS text into the Phonebook ....Into the Phonebook (SMS) ..Managing numbers for SMS centres 46 Storing in the Phonebook .
Need help?
Do you have a question about the Top E604 ISDN and is the answer not in the manual?
Questions and answers