
Subscribe to Our Youtube Channel
Related Manuals for Sanremo OPERA The Revolution


Summary of Contents for Sanremo OPERA The Revolution
- Page 1 OPERA Libretto Istruzioni Instruction Booklet Bedienungsanleitung Livret D’Instructions Libro De Instructiones...
- Page 3 CAP. 0 Indice - Index OPERA COSTRUTTORE BUILDER SANREMO s.r.l. Via Bortolan, 52 31050 Vascon di Carbonera (Treviso) ITALY Tel. +39.0422.498900 - Fax. +39.0422.448935 www.sanremomachines.com - E-mail: info@sanremomachines.com SUMMARY DATA DATI RIEPILOGATIVI We recommend transcribe the data in Si consiglia di trascrivere nella tabella sot-...
- Page 4 CAP. 0 Indice - Index OPERA 0 - 2 / 3 02-2014...
- Page 5 CAP. 0 Indice - Index OPERA Italiano ............(istruzioni originali). English ........(Translation of original instructions) 0 - 3 / 3 02-2014...
- Page 7 ITALIANO Gentile Signora, Egregio Signore, ci complimentiamo con Lei per aver scelto una macchina per caffè SANREMO. La sua nuova macchina, dotata dei componenti più innovativi, garantiti dal Know-how e dalla esperienza di anni, è costruita e collaudata con i metodi più avanzati della ricerca e della tecnica moderna, per garantirLe qualità, affidabilità, nel rispetto più...
- Page 8 CAP. 0 Indice OPERA 2 / 1 02-2014...
-
Page 9: Table Of Contents
CAP. 1 Norme e avvertenze generali OPERA NORME E AVVERTENZE GENERALI INDICE 1.1 - AVVERTENZE GENERALI................2 1.2 - RIFERIMENTI NORMATIVI................3 1.3 - DESCRIZIONE SIMBOLOGIE ................. 3 1.4 - PREDISPOSIZIONI A CARICO DELL’ACQUIRENTE ........4 1.5 - OPERAZIONI DI EMERGENZA IN CASO DI INCENDIO........ 4 1.6 - RISCHIO DI ESPLOSIONE ................ -
Page 10: Avvertenze Generali
CAP. 1 Norme e avvertenze generali OPERA l’alimentazione elettrica alla macchina 1.1 - AVVERTENZE GENERALI durante l’intervento dell’operatore. - Il presente manuale è parte integrante della - L’impianto di alimentazione elettrica, macchina e deve essere conservato con cura per ogni ulteriore consultazione. dell’acquirente, deve essere provvisto di In caso di smarrimento o di richiesta di un sistema di sgancio automatico a monte... -
Page 11: Riferimenti Normativi
CAP. 1 Norme e avvertenze generali OPERA - In caso di malfunzionamenti della macchina 1.2 - RIFERIMENTI NORMATIVI o danni ai componenti contattare il conces- - La macchina e i suoi dispositivi di sicurezza sionario di zona o il costruttore. sono stati costruiti in conformità... -
Page 12: Operazioni Di Emergenza In Caso Di Incendio
CAP. 1 Norme e avvertenze generali OPERA 1.5 - OPERAZIONI DI EMERGENZA IN CASO DI INCENDIO IMPORTANTE a) In caso di incendio togliere tensione alla Questo simbolo è usato per precauzioni macchina disinserendo l’interruttore gene- che bisogna prendere per evitare opera- rale. - Page 13 CAP. 2 Dati tecnici - Trasporto - Disimballo OPERA DATI TECNICI TRASPORTO - DISIMBALLO INDICE 2.1 - DIMENSIONI DI INGOMBRO................2 2.2 - DATI TECNICI....................2 2.3 - DESCRIZIONE MACCHINA ................3 2.4 - TRASPORTO ....................3 2.4.a - Spedizione ..................... 3 2.4.b - Sollevamento imballo ................
-
Page 14: Dimensioni Di Ingombro
CAP. 2 Dati tecnici - Trasporto - Disimballo OPERA 2.1 - DIMENSIONI DI INGOMBRO 745 mm 1040 mm 645 mm 654 mm 440 mm 440 mm 2.2 - DATI TECNICI Gruppi 2 GR 3 GR Capacità caldaia litri Capacità caldaia pre-riscaldo litri Capacità... -
Page 15: Dati Tecnici
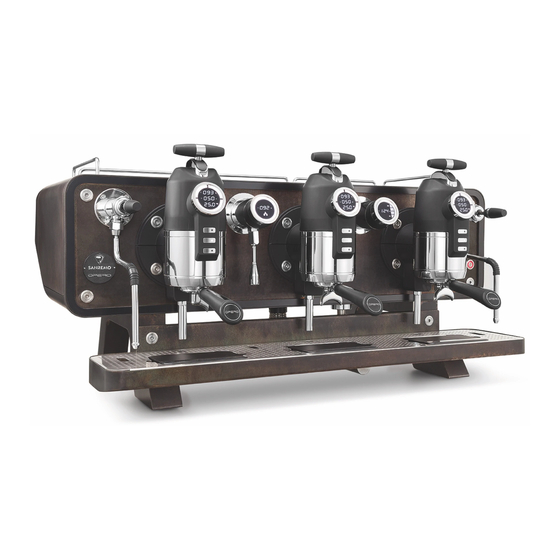
CAP. 2 Dati tecnici - Trasporto - Disimballo OPERA 2.3 - DESCRIZIONE MACCHINA Macchina da caffè espresso per uso professionale a 2 o 3 gruppi. Nuovo sistema multiboiler con controllo PID. Brew ratio con (CDS) Controlo Delivery System: permette di ottenere una perfetta estrazione bilanciata per ogni tipo di caffè. -
Page 16: C - Stoccaggio
CAP. 2 Dati tecnici - Trasporto - Disimballo OPERA 2.4.c - Stoccaggio IMPORTANTE La cassa contenente la macchina deve essere stoccata al coperto dagli agenti atmosferici ed è assolutamente vietato posizionare sopra di essa scatole, casse o materiali vari. 2.5 - CONTROLLO AL RICEVIMENTO Al ricevimento della fornitura, verificare che l’imballo sia integro e visivamente non danneggiato. -
Page 17: Identificazione Dei Componenti
CAP. 2 Dati tecnici - Trasporto - Disimballo OPERA 2.7 - IDENTIFICAZIONE DEI COMPONENTI (Fig. 3) Fig. 3 Made Italy mod. type Macchina caffè Portafiltro singolo Manuale istruzioni Filtro doppio (4/6 pezzi) Dichiarazione di conformità Filtro singolo Tubo di scarico L= 2 m Filtro impurità... -
Page 18: Cap. 2 Dati Tecnici - Trasporto - Disimballo Opera
CAP. 2 Dati tecnici - Trasporto - Disimballo OPERA 6 / 6 02-2014... - Page 19 CAP. 3 Sicurezze OPERA SICUREZZE INDICE 3.1 - USO PREVISTO....................2 3.2 - USO SCORRETTO................... 2 3.3 - DICHIARAZIONE PER I MATERIALI IN CONTATTO CON ALIMENTI ..2 3.4 - TARGHETTE DI SICUREZZA ................. 2 3.5 - SICUREZZE ..................... 2 3.5.a - Sicurezze meccaniche ................
- Page 20 3.3 - DICHIARAZIONE PER I MATE- 3.1 - USO PREVISTO RIALI IN CONTATTO CON ALIMEN- IMPORTANTE Con la presente il costruttore SANREMO s.r.l. dichiara La macchina per caffè è stata realizzata che i materiali impiegati nei suoi prodotti sono conformi e progettata unicamente per l’erogazione al regolamento CE n°1935/2004.
- Page 21 CAP. 3 Sicurezze OPERA 3.5.a - Sicurezze meccaniche (Fig. 1) Fig. 1 Le sicurezze meccaniche sono le seguenti: pannellatura (1) che racchiude i componenti elettri- ci/elettronici e la caldaia completamente chiusi da viti; piano di lavoro (2) dotato di griglia con bacinella per la raccolta dei liquidi;...
- Page 22 CAP. 3 Sicurezze OPERA 4 / 4 02-2014...
- Page 23 CAP. 4 Installazione e collegamento OPERA INSTALLAZIONE E COLLEGAMENTO INDICE 4.1 - SOLLEVAMENTO MACCHINA............... 2 4.2 - POSIZIONAMENTO MACCHINA..............3 4.3 - MONTAGGIO BACINELLA ................4 4.4 - COLLEGAMENTO IDRICO ................4 4.4.a - Scarico ....................4 4.4.b - Carico ..................... 5 4.5 - COLLEGAMENTO ELETTRICO.
- Page 24 CAP. 4 Installazione e collegamento OPERA PERICOLO Tutte le operazioni descritte in questo capitolo devono essere effettuate da un tecnico specializzato ed abilitato. 4.1 - SOLLEVAMENTO MACCHINA Fig. 1 (Fig. 1) Il sollevamento della macchina deve essere effettuato da quattro o più persone poste ai lati opposti della macchina che la sollevano manualmente prendendola da sotto il basamento sul telaio macchina / piedi di appoggio.
-
Page 25: Posizionamento Macchina
CAP. 4 Installazione e collegamento OPERA e la sua altezza deve essere dimensionata 4.2 - POSIZIONAMENTO MACCHI- in modo che il piano superiore della mac- NA (Fig. 2) china (scaldatazze) non deve superare i 150 cm. Se necessario praticare due fori nel piano ATTENZIONE di appoggio per il passaggio dei tubi di ca- La macchina per caffé... -
Page 26: Montaggio Bacinella
CAP. 4 Installazione e collegamento OPERA 4.3 - MONTAGGIO BACINELLA (Solo per versione senza celle di carico) (Fig. 3) • Montare la bacinella (1) in macchina e fissarla avvitando le due viti a brugola (2). Fig. 3 4.4 - COLLEGAMENTO IDRICO •... -
Page 27: B - Carico
CAP. 4 Installazione e collegamento OPERA • Collegare il tubo di carico (1) ad un addolcitore (2) 4.4.b - Carico (Fig. 5) interponendo il filtro per le impurità (3) in dotazione • Installare prima dell’addolcitore (2) un rubinetto di parzializzazione (4) per separare l’impianto idrico ATTENZIONE dalla macchina e collegarlo all’addolcitore (2) tramite È... -
Page 28: Collegamento Elettrico
CAP. 4 Installazione e collegamento OPERA 4.5 - COLLEGAMENTO ELETTRICO PERICOLO (Fig. 6) Prima di effettuare il collegamento elettri- co, assicurarsi che il SEZIONATORE di LI- PERICOLO NEA sia disinserito (linea non in tensione). • La linea elettrica di alimentazione deve essere provvista di un adeguato SEZIONATORE di LINEA onnipolare IMPORTANTE... -
Page 29: A - Collegamento Equipotenziale
CAP. 4 Installazione e collegamento OPERA 4.5.a - Collegamento equipotenziale Fig. 7 (se presente) (Fig. 7) Questo collegamento previsto da alcune norme, ha la funzione di evitare le differenze di potenziale elettrico tra le masse delle apparecchiature installate nello stesso locale. Le macchine predisposte per questo allacciamento hanno un’apposito morsetto (1) posizionato sul telaio sotto la macchina. -
Page 30: Messa In Funzione
CAP. 4 Installazione e collegamento OPERA 4.6 - MESSA IN FUNZIONE Verificare che il rubinetto di alimentazione idrica sia aperto. 4.6.a - Primo avviamento (Fig. 8 - 9) • Aprire il rubinetto di alimentazione idrica posto a • Alla fine del riempimento effettuare alcune erogazioni monte della macchina. - Page 31 CAP. 4 Installazione e collegamento OPERA • Posizionare sotto l’erogatore (10) un’apposito bricco Fig. 9 con manico ed erogare acqua premendo il pulsante (9) controllando la corretta erogazione; l’erogazio- ne dell’acqua finisce automaticamente alla fine del tempo stabilito. • Posizionare un bricco con dell’acqua e introdurre il beccuccio (8) all’interno.
-
Page 32: B - Regolazione Del Macinadosatore
CAP. 4 Installazione e collegamento OPERA 4.9 - REGOLAZIONI FUNZIONI 4.6.b - Regolazione del macinadosatore IMPORTANTE Installare, regolare e preparare il maci- ATTENZIONE nadosatore come indicato nel relativo Le regolazioni di alcune funzioni della manuale istruzione. macchina (temperature, lingua, ecc...) de- vono essere effettuate da un tecnico spe- cializzato ed autorizzato, con macchina 4.7 - PROVE DI EROGAZIONE... -
Page 33: Uso Della Macchina
CAP. 5 Uso della macchina OPERA USO DELLA MACCHINA INDICE 5.1 - DESCRIZIONE COMPONENTI............... 3 5.2 - GRUPPO EROGAZIONE CAFFÈ..............4 5.2.a - Display ....................4 5.2.b - Pulsantiera ..................... 4 5.2.c - Leva ....................... 4 5.3 - GRUPPO EROGAZIONE ACQUA CALDA “Opera 3 gruppi”......5 5.2.a - Display .................... - Page 34 CAP. 5 Uso della macchina OPERA INDICE 5.9 - PREPARAZIONE DEL CAPPUCCINO ............11 5.10 - PREPARAZIONE DEL THE, CAMOMILLA ECC........11 5.11 - RISCALDAMENTO DI UNA BEVANDA ............12 5.12 - PROGRAMMAZIONE .................. 12 5.12.a - Programmazione manuale dosi caffè ..........12 5.12.b - Programmazione manuale dosi acqua ..........
-
Page 35: Descrizione Componenti
CAP. 5 Uso della macchina OPERA 5.1 - DESCRIZIONE COMPONENTI (Fig. 1) Fig. 1 2 Gruppi 3 Gruppi Legenda componenti 8. Lancia acqua 1. Piano scaldatazze con elemento riscaldante 9. Interruttore di linea On/Off 2. Leva rubinetto vapore 10. Bilancia (se presente) 3. -
Page 36: C - Leva
CAP. 5 Uso della macchina OPERA 5.2 - GRUPPO EROGAZIONE CAF- Fig. 2 FÈ (Fig. 2) Sui gruppi di erogazione è posizionato un’apposito display (1), una pulsantiera (2) e una leva (3) per il comando dell’erogazione caffè. 5.2.a - Display (1) (Fig. 3) Il display è... -
Page 37: B - Pulsante Erogazione
CAP. 5 Uso della macchina OPERA Fig. 5 5.3 - GRUPPO EROGAZIONE AC- QUA CALDA “Opera 3 gruppi” (Fig. 5) °C °F Sul gruppo di erogazione è posizionato un display (1) e un pulsante (2). 5.3.a - Display (1) Sul display (1), al centro, è indicata la temperatura dell’acqua. -
Page 38: Gruppo Erogazione Vapore
CAP. 5 Uso della macchina OPERA scadere del tempo impostato. Fig. 7 5.5 - DISPLAY LIVELLO ACQUA E TEMPERATURA O PRESSIONE VAPORE “Opera 3 gruppi” (Fig. 7) Il display è diviso in 2 zone distinte: Zona “A” °F °C Indica la temperatura o la pressione del vapore in caldaia a seconda della programmazione. -
Page 39: Operazioni Preliminari Giornaliere
CAP. 5 Uso della macchina OPERA 5.7 - OPERAZIONI PRELIMINARI Fig. 9 GIORNALIERE 2 Gruppi 5.7.a - Avviamento della macchina (Fig. 9-9a) • Controllare che il rubinetto di alimentazione idrica °F posto a monte della macchina sia aperto. °C °F •... -
Page 40: B - Preparazione Della Postazione Di Lavoro
CAP. 5 Uso della macchina OPERA 5.7.b - Preparazione della postazione di Fig. 10 lavoro (Fig.10) • Collocare i cucchiaini in un contenitore metallico (1) e posizionarlo sul piano scaldatazze. • Preparare i bricchi (2) per il latte e posizionarli adiacenti alla macchina. -
Page 41: Preparazione Del Caffé
CAP. 5 Uso della macchina OPERA 5.8 - PREPARAZIONE DEL CAFFÉ (Fig. 11-12-13-14) 5.8.a - Norme generali per la preparazione di un buon caffé • La tazzina deve essere calda quindi prenderla dallo scaldatazze o, se fredda, risciacquarla con acqua calda. Se la tazzina è fredda il brusco cambiamento di temperatura dell’espresso ne modificherà il gusto. - Page 42 CAP. 5 Uso della macchina OPERA • Pulire il bordo (8) del portafiltro; lasciare della polvere Fig. 12 di caffé sul bordo del filtro compromette la tenuta della guarnizione con conseguente perdita di acqua e fondi di caffé. Fig. 13 • Agganciare il portafiltro (1) sul gruppo ruotandolo nel senso della freccia fino a finecorsa. • Posizionare sotto il portafiltro la tazzina o le tazzine di caffé. • Scegliere il tipo di caffè voluto Fig.
-
Page 43: Preparazione Del Cappuccino
CAP. 5 Uso della macchina OPERA 5.9 - PREPARAZIONE DEL CAP- Fig. 15 PUCCINO (Fig. 15) Per preparare un cappuccino in modo professionale occorre “montare” latte fresco (± 65 ÷ 70 °C Max) fino ad ottenere una schiuma che verrà versata su di un caffé espresso precedentemente erogato. PERICOLO Fare attenzione che la lancia (1) è calda e può ustionare la mano. Per spostarla prenderla esclusivamente nella zona (3) rivestita in gomma. -
Page 44: Riscaldamento Di Una Bevanda
CAP. 5 Uso della macchina OPERA Fig. 17 5.11 - RISCALDAMENTO DI UNA BEVANDA (Fig. 17) • Posizionare la lancia (1) sulla griglia e tramite la leva (2) erogare vapore per uno/due secondi per scaricare l’acqua contenuta nella lancia vapore. •... -
Page 45: B - Programmazione Manuale Dosi Acqua
CAP. 5 Uso della macchina OPERA Fig. 19 5.12.b - Programmazione manuale “Dose acqua” (Fig. 19) • Posizionare sotto il beccuccio (1) un contenitore. • Sul primo gruppo di sinistra premere il pulsante (2) per 10 secondi fino al lampeggio del relativo led (3). • Entro 30 secondi premere il pulsante (4) per erogare acqua calda; al raggiungimento della quantità voluta ripremere il pulsante (4) per fermare l’erogazione. -
Page 46: D - Programmazione Barista Tramite Tablet
Italiana, in Inglese per tutte le altre lingue. • Sulla schermata iniziale avviare l’applicazione “Sanremo Opera Bar” verrà visualizzata la videata principale; Tramite questa funzione si può programmare l’avvio, lo spegnimento della macchina e il giorno di chiusura. - Page 47 CAP. 5 Uso della macchina OPERA “Connesso a SANREMOXXXX” e si visualizzerà la videata iniziale. Lettura dati Tramite questa funzione è possibile impostare il fun- • Prima di fare qualsiasi operazione è necessario zionamento del piano scaldatazze e il valore della leggere le impostazioni macchina premendo il tasto potenza resistenza.
- Page 48 CAP. 5 Uso della macchina OPERA • Abilitando la funzione “Nessun giorno” tutti i giorni Spegnimento • Con la funzione “Spegnimento” è possibile impostare all’ora impostata, se è impostato l’avvio automatico, la macchina si avvierà; abilitando uno dei giorni della l’ora di spegnimento della macchina. settimana per quel giorno l’applicazione non abiliterà • Premendo sulla freccia “>” sulla parte destra dello l’avvio automatico.
- Page 49 CAP. 5 Uso della macchina OPERA • Premere sul tasto “OK” per azzerare i contatori par- • Tramite la tastiera digitare la % di potenza voluta ziali. della resistenza del piano scaldatazze, quindi pre- mere il tasto “OK” per confermare il dato impostato Scaldatazze ritornando alla videata principale “Scaldatazze”.
- Page 50 CAP. 5 Uso della macchina OPERA • Impostare tramite la tastiera i “ml” di acqua che verranno erogati dalla macchina e la pressione di erogazione voluta, è possibile, se è presente la bilancia impostare il peso espresso in grammi del caffè...
-
Page 51: Allarmi
CAP. 5 Uso della macchina OPERA Premere sul campo “OK” per confermare il dato impostato e ritornare alla videata principale “Dosi”. Fig. 22 • Agire in egual modo per tutti i tipi di erogazione e per tutti i gruppi presenti in macchina. Scrivi macchina • Alla fine della programmazione della macchina pre- mere il tasto “... -
Page 52: Spegnimento
CAP. 5 Uso della macchina OPERA 5.14 - SPEGNIMENTO (Fig. 23) Fig. 23 ATTENZIONE Si consiglia di spegnere la macchina solo se non la si utilizza per più di 8 ore, così fa- cendo si limita il deposito di sali di calcare e si limita il consumo di energia elettrica. -
Page 53: Malfunzionamenti Cause - Soluzioni
CAP. 5 Uso della macchina OPERA 5.15 - MALFUNZIONAMENTI CAUSE - SOLUZIONI Di seguito elenchiamo alcuni degli inconvenienti che possono verificarsi durante l’uso della macchina. Per tutti gli inconvenienti non compresi nelle presente tabella, rivolgersi al Servizio di Assistenza Tecnica. PROBLEMI CAUSE SOLUZIONI Display Temperatura caldaia Il rubinetto della rete idrica o i rubi- Aprire il rubinetto lampeggia. - Page 54 CAP. 5 Uso della macchina OPERA PROBLEMI CAUSE SOLUZIONI Il caffè fuoriesce dai bordi del Nella sede del portafiltro ci sono Pulire portafiltro residui di sporco che impediscono la fuoriuscita del caffè dal beccuc- Guarnizione del gruppo consu- Sostituire mata Doccette ostruite Pulire o sostituire Il caffè...
-
Page 55: Pulizia E Manutenzione
CAP. 6 Pulizia e manutenzione OPERA PULIZIA E MANUTENZIONE INDICE 6.1 - MANUTENZIONE ORDINARIA (UTENTE)............. 2 6.1.a - Lavaggio automatico gruppi ..............2 6.1.b - Pulizia macchina ..................3 6.2 - MANUTENZIONE PROGRAMMATA (TECNICO)..........5 6.3 - MANUTENZIONE SECONDO NECESSITÁ (TECNICO) ........ 5 6.4 - ASSISTENZA TECNICA E RICAMBI. -
Page 56: Manutenzione Ordinaria
CAP. 6 Pulizia e manutenzione OPERA 6.1 - MANUTENZIONE ORDINARIA (UTENTE) Raggruppa tutti gli interventi che devono essere ese- guiti sulla macchina quotidianamente a fine servizio. PERICOLO Le operazioni di manutenzione devono essere effettuate con macchina spenta e fredda, e con l’interruttore generale disin- serito in posizione “... - Page 57 CAP. 6 Pulizia e manutenzione OPERA • Sganciare il portafiltro e scaricare lo sporco conte- nuto nel filtro cieco lavandolo in acqua corrente. Rimontare il filtro nel gruppo, entrare in programma- zione e ripetere la fase di lavaggio senza introdurre nel filtro cieco il detergente;...
- Page 58 CAP. 6 Pulizia e manutenzione OPERA • Rimuovere la griglia (1), sollevandola dalle appo- Fig. 4 site asole laterali e lavarla con acqua corrente e detergenti specifici. Dopo averla lavata asciugarla completamente con un panno morbido e rimontarla. • Controllare le lance vapore (2) che non siano in- Fig.
- Page 59 CAP. 6 Pulizia e manutenzione OPERA 6.2 - MANUTENZIONE PROGRAMMA- TA (TECNICO) Elenca tutte le operazioni che devono essere effettuate con scadenza fissa per garantire il corretto funziona- mento della macchina. IMPORTANTE Tutte le operazioni di manutenzione pro- grammate devono essere effettuate dal centro di assistenza tecnica.
- Page 60 CAP. 6 Pulizia e manutenzione OPERA 6 / 6 02-2014...
-
Page 61: Messa Fuori Servizio
CAP. 7 Messa fuori servizio OPERA MESSA FUORI SERVIZIO INDICE 7.1 - MESSA FUORI SERVIZIO TEMPORANEA............ 2 7.2 - VERIFICHE E CONTROLLI DOPO UNA LUNGA INATTIVITÀ....... 3 7.4 - DEMOLIZIONE DELLA MACCHINA ............... 3 7.5 - SMALTIMENTO DELLE SOSTANZE NOCIVE ..........4 1 / 4 02-2014... - Page 62 CAP. 7 Messa fuori servizio OPERA 7.1. - MESSA FUORI SERVIZIO Fig. 1 TEMPORANEA (Fig. 1) Se si prevede di non utilizzare la macchina per un lungo periodo è necessario effettuare le seguenti operazioni: • Staccare l’alimentazione idrica e elettrica. •...
- Page 63 CAP. 7 Messa fuori servizio OPERA 7.2 - VERIFICHE E CONTROLLI DOPO UNA LUNGA INATTIVITÀ ------- PERICOLO Le verifiche e i controlli dopo una lunga inattività devono essere effettuate da un tecnico specializzato. ATTENZIONE Prima di utilizzare la macchina è necessario effettuare i seguenti controlli: Pulire accuratamente la macchina.
- Page 64 CAP. 7 Messa fuori servizio OPERA 4 / 4 02-2014...
- Page 65 ENGLISH Dear Sir, Dear Madam Congratulations for choosing a SANREMO coffee machine. Your new machine, fitted with the most innovative components, guaranteed by years of know-how and experience, is built and tested with the most advanced research and technical methods, to ensure quality, reliability and respect for the environment, allowing you to operate with maximum efficiency and functionality.
- Page 66 CAP. 0 Index OPERA 2 / 1 02-2014...
- Page 67 CAP. 1 General warnings and regulations OPERA GENERAL WARNINGS AND REGULATIONS INDEX 1.1 - GENERAL WARNINGS................... 2 1.2 - STANDARD REFERENCES................3 1.3 - DESCRIPTION OF SYMBOLS ................ 3 1.4 - PREPARATION BY THE PURCHASER ............4 1.5 - EMERGENCY OPERATIONS IN CASE OF FIRE..........4 1.6 - RISK OF EXPLOSION ..................
- Page 68 CAP. 1 General warnings and regulations OPERA upstream of the machine main switch, as 1.1 - GENERAL WARNINGS well as a suitable grounding system meet- - This manual is an integral part of the ing all requirements of injury prevention machine and must be stored carefully for standards.
- Page 69 CAP. 1 General warnings and regulations OPERA - The manufacturer will not be held liable for any accident or damage to persons or things arising from failure to observe safety standards and instructions of this manual. HAZARD Any use other than the use described This symbol is used in the safety messag- in this manual must be considered as es of the manual, when potential danger...
- Page 70 CAP. 1 General warnings and regulations OPERA 1.4 - PREPARATION BY THE PUR- 1.7 - SOUND PRESSURE LEVEL CHASER The machine is manufactured so as to main- tain the continuous equivalent weighed sound a) Preparation of the installation area. pressure level A(dB) below the maximum - The purchaser must prepare a support allowed value (70dB).
-
Page 71: Technical Data
CAP. 2 Technical Data - Transportation - Unpacking OPERA TECHNICAL DATA TRANSPORTATION - UNPACKING INDEX 2.1 - DIMENSIONS....................2 2.2 - TECHNICAL DATA................... 2 2.3 - MACHINE DESCRIPTION ................3 2.4 - TRASPORTATION ................... 3 2.4.a - Shipment ....................3 2.4.b - Lifting the package ................. - Page 72 CAP. 2 Technical Data - Transportation - Unpacking OPERA 2.1 - DIMENSIONS UNITS UNITS 745 mm 1040 mm 645 mm 654 mm 440 mm 440 mm 2.2 - TECHNICAL DATA Units 2 UNITS 3 UNITS Boiler capacity litres Pre-heating boiler capacity litres Independent unit capacity litres...
-
Page 73: Machine Description
CAP. 2 Technical Data - Transportation - Unpacking OPERA 2.3 - MACHINE DESCRIPTION Professional espresso coffee machine with 2 or 3 units. New multiboiler system with PID control. Brew ratio with (CDS) Controlo Delivery System: this allows perfectly balanced brewing for any type of coffee. Automatic water loading in the boiler. -
Page 74: C - Storage
CAP. 2 Technical Data - Transportation - Unpacking OPERA 2.4.c - Storage IMPORTANT The crate containing the machine must be stored covered from the weather and no other crate, box or other material must be placed on top of it. 2.5 - CHECK UPON RECEIPT When the shipment is received, check that the package is in good conditions and not visibly damaged. -
Page 75: Unpacking
CAP. 2 Technical Data - Transportation - Unpacking OPERA 2.7 - IDENTIFICATION OF COMPONENTS (Fig. 3) Fig. 3 Made Italy mod. type Single filter holder Coffee machine Double filter (4/6 pieces) Instruction manual Single filter Declaration of conformity Impurity filter Drain pipe L= 2 m Blind filter Intake pipe L= 2 m... - Page 76 CAP. 2 Technical Data - Transportation - Unpacking OPERA 6 / 6 02-2014...
-
Page 77: Safety Devices
CAP. 3 Safety devices OPERA SAFETY DEVICES INDEX 3.1 - EXPECTED USE....................2 3.2 -IMPROPER USE....................2 3.3 - DECLARATION FOR MATERIALS COMING INTO CONTACT WITH FOOD . 2 3.4 - SAFETY LABELS .................... 2 3.5 - SAFETY DEVICES ..................2 3.5.a -Mechanical safety devices .............. -
Page 78: Expected Use
3.1 - EXPECTED USE ALS COMING INTO CONTACT WITH FOOD IMPORTANT The manufacturer SANREMO s.r.l. hereby declares The coffee machine is manufactured and that materials used in its products are compliant with designed only to dispense espresso cof- EC regulation no. 1935/2004. - Page 79 CAP. 3 Safety devices OPERA 3.5.a - Mechanical safety devices (Fig. 1) Fig. 1 The mechanical safety devices are as follows: panel (1) enclosing all electrical/electronic compo- nents and the boiler, fully closed by screws; - working surface (2) fitted with grille and tray to collect fluids;...
- Page 80 CAP. 3 Safety devices OPERA 4 / 4 02-2014...
- Page 81 CAP. 4 Installation and connection OPERA INSTALLATION AND CONNECTION INDEX 4.1 - LIFTING THE MACHINE................. 2 4.2 - MACHINE POSITIONING................. 3 4.3 - TRAY ASSEMBLY .................... 4 4.4 - WATER CONNECTION ................... 4 4.4.a - Drain ....................... 4 4.3.b - Intake .....................
- Page 82 CAP. 4 Installation and connection OPERA HAZARD All operations described in this chapter must be performed by a specialised and authorised technician. 4.1 - LIFTING THE MACHINE (Fig. Fig. 1 The machine must be lifted by four or more people located on opposite sides of the machine, lifting it manually while holding it from under the machine frame base/support feet.
- Page 83 CAP. 4 Installation and connection OPERA heating plate) is no higher than 150 cm 4.2 - MACHINE POSITIONING (Fig. from the floor. If necessary, drill two holes on the working surface to let through the intake and drain pipes and the power cable. ATTENTION The coffee machine must be installed at a •...
- Page 84 CAP. 4 Installation and connection OPERA 4.3 - TRAY ASSEMBLY (Only for the version without loading cells) (Fig. 3) • Assemble the tray (1) on the machine and fasten it with the two Allen screws (2). Fig. 3 4.4 - WATER CONNECTION (Fig. 4) •...
- Page 85 CAP. 4 Installation and connection OPERA • Before the softener (2), install a shuttering tap (4) to 4.4.b - Intake (Fig. 5) separate the water system from the machine, and connect it to the softener (2) by means of pipe (5). ATTENTION IMPORTANT The machine must be connected to a water...
- Page 86 CAP. 4 Installation and connection OPERA 4.5 -ELECTRIC CONNECTION (Fig. HAZARD Before performing the electrical connec- tion, ensure that the LINE DISCONNEC- HAZARD TOR is tripped (line is not live). • The power supply line must be fitted with a suitable omnipolar LINE DISCON- NECTOR (automatic magnetothermal or IMPORTANT differential breaker) located upstream...
- Page 87 CAP. 4 Installation and connection OPERA 4.5.a - Equipotential connection Fig. 7 (if present) (Fig. 7) This connection, required by some standards, prevents differences in electrical potential between the grounds of the devices installed in the same room. The machines prepared for this connection are fitted with the relevant terminal (1) located on the frame of the machine.
- Page 88 CAP. 4 Installation and connection OPERA 4.6 - COMMISSIONING Check that the water supply tap is open. 4.6.a - First start-up (Fig. 8 - 9) • When filling is completed, dispense water from the • Open the water supply tap upstream of the machine. units by operating on levers (4), without fitting the filter holders. • Power on the machine power supply bringing the •...
- Page 89 CAP. 4 Installation and connection OPERA • Position a jug with handle under dispenser (10) and Fig. 9 dispense water by pressing button (9), checking that dispensing is correct; water dispensing will stop automatically at the end of the set time. •...
-
Page 90: Instruction Manual
CAP. 4 Installation and connection OPERA 4.9 - ADJUSTING THE FUNCTIONS 4.6.b - Adjustment of the grinder/dosing machine IMPORTANT ATTENTION Install, adjust and prepare the grinder/dos- Some machine functions (temperature, ing machine as described in the relevant language, etc.) must be adjusted by a spe- instruction manual. - Page 91 CAP. 5 Operation of the machine OPERA OPERATION OF THE MACHINE INDEX 5.1 - DESCRIPTION OF COMPONENTS..............3 5.2 - COFFEE DISPENSING UNIT ................4 5.2.a - Display ....................4 5.2.b - Button panel ................... 4 5.2.c - Lever ..................... 4 5.3 - HOT WATER DISPENSING UNIT “Opera 3 units”.
- Page 92 CAP. 5 Operation of the machine OPERA INDEX 5.9 - PREPARING CAPPUCCINO ................. 11 5.10 - PREPARING TEA, CAMOMILE, ETC............11 5.11 - HEATING A DRINK ..................12 5.12 - PROGRAMMING ..................12 5.12.a - “Coffee doses” manual programming ..........12 5.12.b - “Water dose”...
-
Page 93: Description Of Components
CAP. 5 Operation of the machine OPERA 5.1 - DESCRIPTION OF COMPONENTS (Fig. 1) Fig. 1 2 Units 3 Units Component key 8. Water tap 1. Cup heating plate with heating element 9. On/Off line switch 2. Steam tap lever 10. - Page 94 CAP. 5 Operation of the machine OPERA 5.2 - COFFEE DISPENSING UNIT Fig. 2 (Fig. 2) A display (1), button panel (2) and a lever (3) are locat- ed on the dispensing units, to control coffee dispensing. 5.2.a - Display (1) (Fig. 3) The display is divided into 3 separate areas: Zone “A”...
- Page 95 CAP. 5 Operation of the machine OPERA 5.3 - HOT WATER DISPENSING Fig. 5 UNIT “Opera 3 units” (Fig. 5) A display (1) and a button (2) are located on the dis- °C pensing unit. °F 5.3.a - Display (1) The middle display (1) shows the water temperature.
-
Page 96: Steam Dispensing Unit
CAP. 5 Operation of the machine OPERA 5.5 - WATER LEVEL AND TEMPER- Fig. 7 ATURE OR STEAM PRESSURE DISPLAY “Opera 3 units” (Fig. 7) The display is divided into 2 separate areas: Zone “A” This shows the temperature or pressure of steam in °F °C the boiler, according to the programming. -
Page 97: Daily Preliminary Operations
CAP. 5 Operation of the machine OPERA 5.7 - DAILY PRELIMINARY OPERA- Fig. 9 TIONS 2 Units 5.7.a - Starting the machine (Fig. 9-9a) • Check that the water supply tap upstream of the machine is open. °F • Check that the thermal breaker upstream of the °C machine is set to "ON". - Page 98 CAP. 5 Operation of the machine OPERA 5.7.b - Preparing the work station (Fig.10) Fig. 10 • Place the teaspoons in a metal container (1) and place it on the cup heating plate. • Prepare the milk jugs (2) and place them near the machine.
-
Page 99: Preparing Coffee
CAP. 5 Operation of the machine OPERA 5.8 - PREPARING COFFEE (Fig. 11-12-13-14) 5.8.a - General information on preparing good coffee • The cup must always be hot, therefore take it from the cup heating plate or heat it with hot water if cold. If the cup is cold, the sudden change of temperature of the espresso will change its taste. - Page 100 CAP. 5 Operation of the machine OPERA • Clean the edge (8) of the filter holder; if coffee powder Fig. 12 is left on the edge of the filter, the gasket seal will be compromised, therefore water and coffee will leak. Fig. 13 • Attach the filter holder (1) to the unit, turning it in the direction of the arrow until it stops. • Place the coffee cup(s) under the filter holder. • Choose the desired type of coffee Button 9 = Short black (60%) Button 10 = Espresso coffee (50%) Fig.
- Page 101 CAP. 5 Operation of the machine OPERA 5.9 - PREPARING CAPPUCCINO Fig. 15 (Fig. 15) To prepare a professional cappuccino, fresh milk must be “frothed” (± 65 ÷ 70 °C Max) until froth is achieved, which then is poured onto a previously dispensed coffee.
- Page 102 CAP. 5 Operation of the machine OPERA Fig. 17 5.11 - HEATING A DRINK (Fig. 17) • Position the tap (1) over the grille and use the lever (2) to dispense steam for one/two seconds to drain the water contained in the steam tap. •...
- Page 103 CAP. 5 Operation of the machine OPERA Fig. 19 5.12.b - “Water dose” manual program- ming(Fig. 19) • Position a container under spout (1). • Press button (2) on the first unit on the left for 10 seconds, until its LED flashes (3). • Within 30 seconds, press button (4) to dispense hot water, when the desired quantity is reached, press button (4) again to stop dispensing.
- Page 104 Italian if the Italian language is set or in English if any other language is set. • Start the “Sanremo Opera Bar” app on the initial screen, which will display the main screen; Use this function to program starting and shutting down the machine and the closing day.
- Page 105 CAP. 5 Operation of the machine OPERA button ; the message “Reading” appears in the middle of the screen; when all data have been fully transferred from the machine to the software, the The operation of the cup heating plate and the power “Reading Completed”...
- Page 106 CAP. 5 Operation of the machine OPERA • Enable the “No day” function to start the machine Shut down • The “Shut down” function can be used to set the time automatically every day at the set time, if automatic start is set;...
- Page 107 CAP. 5 Operation of the machine OPERA • Press “OK” to reset partial counters. • Use the keyboard to type the desired % of power of the heating element of the cup heating plate, then Cup heating plate press “OK” to confirm and return to the main “Cup heating plate” screen. •...
- Page 108 CAP. 5 Operation of the machine OPERA • Use the keyboard to set the water “ml” that will be dispensed by the machine and the desired dispens- ing pressure; furthermore, if scales are present, the weight (in g) of dispensed coffee can also be set. Press “OK” to confirm and return to the main “Doses”...
- Page 109 CAP. 5 Operation of the machine OPERA Press “OK” to confirm and return to the main “Doses” screen. Fig. 22 • Operate in the same way for all types of dispensing and all units on the machine. Write machine • When programming is concluded, press the “Write machine” button to send the new settings to the machine software.
- Page 110 CAP. 5 Operation of the machine OPERA 5.14 - SHUT DOWN (Fig. 23) Fig. 23 ATTENTION We recommend shutting down the ma- chine only if it is not going to be used for more than 8 hours; this will limit calcium salt deposition and power consumption.
- Page 111 CAP. 5 Operation of the machine OPERA 5.15 - MALFUNCTIONS CAUSES - SOLUTIONS The following are some of the issues that may occur when using the machine. For all issues not included in this table, see the Technical Support. ISSUES CAUSES SOLUTIONS Boiler temperature display flash-...
- Page 112 CAP. 5 Operation of the machine OPERA ISSUES CAUSES SOLUTIONS Coffee overflows from the edges Dirt residues are present in the Clean of the filter holder seat of the filter holder, preventing coffee from flowing through the spout Unit gasket worn out Replace Clogged heads Clean or replace Coffee is too cold Machine not ready Wait for the temperature to be reached Coffee is not dispensed or is dis- Insufficient water supply...
-
Page 113: Cleaning And Maintenance
CAP. 6 Cleaning and maintenance OPERA CLEANING AND MAINTENANCE INDEX 6.1 - SCHEDULED MAINTENANCE (USER)............2 6.1.a - Unit automatic washing ................2 6.1.b - Cleaning the machine ................3 6.2 - SCHEDULED MAINTENANCE (TECHNICIAN)..........5 6.3 - MAINTENANCE ACCORDING TO NEEDS (TECHNICIAN) ......5 6.4 - TECHNICAL SUPPORT AND SPARE PARTS.......... - Page 114 CAP. 6 Cleaning and maintenance OPERA 6.1 - SCHEDULED MAINTENANCE (USER) This includes all operations to be performed on the machine daily at the end of operation. HAZARD Maintenance operations must be per- formed with the machine off and cold and with the main switch set to “0”...
- Page 115 CAP. 6 Cleaning and maintenance OPERA • Remove the filter holder and clean the blind filter, washing it under running water. Refit the filter to the unit, enter the programming screen and repeat the washing stage without pour- ing detergent in the blind filter; a rinsing stage is then performed. • After rinsing, remove the filter holder, replace the blind filter with the normal filter, then dispense one coffee to get rid of any unpleasant taste. IMPORTANT All units of the machine must be washed. 6.1.b - Cleaning the machine (Fig.
- Page 116 CAP. 6 Cleaning and maintenance OPERA • Remove the grille (1), lifting it from its side slots, Fig. 4 and wash it under running water and with specific detergents. After washing it, dry it fully with a soft cloth and reassemble it. • Check that the steam taps (2) are not built-up and Fig. 5 clean them with specific detergents if necessary. • Clean the bottom of the unit with a sponge and the gasket (3) with a soft brush.
- Page 117 CAP. 6 Cleaning and maintenance OPERA 6.2 - SCHEDULED MAINTENANCE (TECHNICIAN) This lists all operations that must be performed peri- odically to ensure proper operation of the machine. IMPORTANT All scheduled maintenance operations must be performed by the Technical Sup- port.
- Page 118 CAP. 6 Cleaning and maintenance OPERA 6 / 6 02-2014...
- Page 119 CAP. 7 Decommissioning OPERA DECOMMISSIONING INDEX 7.1 - TEMPORARY DECOMMISSIONING............... 2 7.2 - CHECKS AND INSPECTIONS AFTER PROLONGED INACTIVITY....3 7.3 - DISMANTLING THE MACHINE ..............3 7.4 - DISPOSAL OF HARMFUL SUBSTANCES ............. 4 1 / 4 02-2014...
- Page 120 CAP. 7 Decommissioning OPERA 7.1. - TEMPORARY DECOMMIS- Fig. 1 SIONING (Fig. 1) If the machine is not going to be used for a long period, perform the following operations: • Disconnect water and power supply. • Drain the water contained in the boiler as follows: HAZARD Before performing this operation, ensure that the coffee machine is off (power supply up-...
- Page 121 CAP. 7 Decommissioning OPERA 7.2 - CHECKS AND INSPECTIONS AFTER PROLONGED INACTIVITY HAZARD Checks and inspections after prolonged inactivity must be performed by a specialised technician. ATTENTION Before shutting down the machine, perform the following checks: Clean the machine thoroughly. Dispense water from the shuttering tap located upstream of the machine to eliminate any residue from the pipe.
- Page 122 CAP. 7 Decommissioning OPERA 4 / 4 02-2014...
Need help?
Do you have a question about the OPERA The Revolution and is the answer not in the manual?
Questions and answers