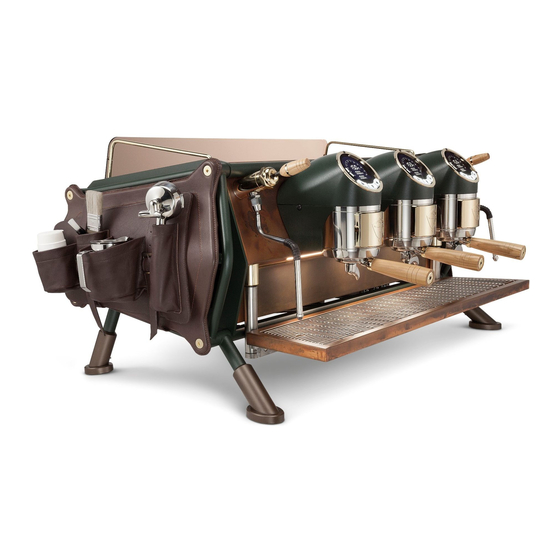
Sanremo Cafe Racer Technical Manual
Hide thumbs
Also See for Cafe Racer:
- Manual for technical use (124 pages) ,
- Instruction booklet (44 pages) ,
- Installation & quick start manual (8 pages)
Table of Contents
Advertisement
Advertisement
Table of Contents

Related Manuals for Sanremo Cafe Racer


Summary of Contents for Sanremo Cafe Racer
- Page 1 CAFE RACER Manuale per il Tecnico Manual for Technical...
- Page 2 Manual for technical CAFE RACER INDEX 1. Introduction ......................3 1.1 General safety warnings ................3 2. Removing the tray ....................4 3. Removing the cup heating plate ................ 6 4. Removing the panels ..................7 4.1 Removing the profile side ................7 4.2 Removing the rear panel ................8 4.3 Removing the coffee unit guard ..............
- Page 3 Manual for technical CAFE RACER 8. Programming by the technician ............... 45 8.1 Language ....................46 8.2 Name ......................46 8.3 Service tel....................46 8.4 Number of units ..................46 8.5 Chrono function ..................47 8.6 Inta e coffee ................... 47 8.7 Watt ......................
-
Page 4: Introduction
Manual for technical CAFE RACER 1. INtRoDuctIoN - This manual was written only to be used by authorised technicians of the manufactur- 1.1 General safety warnings - When operating on the machine, ma e sure that the main switch and the machine switch are in oFF position and that the water supply tap is closed. - When some operations ad ustments need to be carried out with the power on, operate with extreme care. -
Page 5: Removing The Tray
Manual for technical CAFE RACER 2. REmovING tHE tRAy - Remove the grille (1). - Lift and remove the tray (2). ndo the four Allen screws (3). 4 / 56-EN 04-2017... - Page 6 Manual for technical CAFE RACER - Loosen the screw (4) and remove the tray support (5). When reassembling the tray (5) check the conditions of the oR gaskets (6) and grease them. 5 / 56-EN 04-2017...
-
Page 7: Removing The Cup Heating Plate
Manual for technical CAFE RACER REmovING tHE cuP HEAt- ING PLAtE nscrew screw (1) on both sides. - Remove the grilles (2). - Lift the cup heating plate (3). - Disconnect the connector (4) of the probe. - Disconnect the heating element connector (5). - Remove the cup heating plate (3). -
Page 8: Removing The Panels
Manual for technical CAFE RACER 4. REmovING tHE PANELS Remove the side panels and the cup heat- ing plate to access all the internal ma- chine components. 4.1 Removing t e profile side - Unscrew the screws (1). - Remove the profile side (2). - Unscrew the screws (3) fastening the panel (4). -
Page 9: Removing The Rear Panel
Manual for technical CAFE RACER 4.2 Removing the rear panel nscrew the two side screws (1). - Remove the pipe (2) connecting the two shoulders. - Unscrew the three screws (3). - Loosen the three screws (4). 8 / 56-EN 04-2017... -
Page 10: Removing The Coffee Unit Guard
Manual for technical CAFE RACER - Remove the rear panel (5). 4.3 Removing the coffee unit guard nscrew the screws (1) on both sides. - Widen the two guards (2) and remove them. - Pull out the guard (3) with the display toward the front. 9 / 56-EN 04-2017... -
Page 11: Removing The Lower Front Panel
Manual for technical CAFE RACER - Disconnect the connectors (4) and (5). 4.4 Removing the lower front panel - Loosen the two Phillips screws (1). - Pull out panel (2). 10 / 56-EN 04-2017... -
Page 12: Layout Of Main Components
Manual for technical CAFE RACER 5. LAyout oF mAIN comPoNENtS 5.1 top view 1)Unit “1” boiler 2)Unit “2” boiler 3)Unit “3” boiler 4) nit “1” displacement counter 5) nit “2” displacement counter 6) nit “3” displacement counter 7) nit “1” pre-infusion solenoid valve 8) nit “2” pre-infusion solenoid valve 9) nit “3” pre-infusion solenoid valve 10) RH steam tap shut-off tap... -
Page 13: Rear View
Manual for technical CAFE RACER 5.2 Rear view 1) Service boiler 2) Drain manifold 3) Cooling cycle solenoid valve (boiler water regen- eration) 4) Steam boiler drain tap 5) Mixed water solenoid valve 12 / 56-EN 04-2017... - Page 14 Manual for technical CAFE RACER 5.3 LH side view 1) Loading flange 2) Pump pressure transducer 3) Water loading solenoid valve 4) LED plate 5) Main electronic control unit 6) Pre-infusion expansion board 7) Front and side LED on off switch 13 / 56-EN 04-2017...
- Page 15 Manual for technical CAFE RACER 5.4 RH side view 1) “Purge” drain connections 2) “Purge” button 3) “Purge” solenoid valve 4) Expansion valve 5) LED plate 6) Boiler heating elements 14 / 56-EN 04-2017...
-
Page 16: Removing The Electrical Panel
Manual for technical CAFE RACER 5.5 Removing the electrical panel Remove the lower front panel as described in the rel- evant paragraph nscrew the two nobs (1) located under the front of the machine. - Pull out the electrical panel (2). 5.6 Layout of the electrical panel 1) Power relay 2) Triac board (unit heating and small boiler pre-heat- ing) 3) High voltage self-centring connector... -
Page 17: Bleeding The Air From The Circuit
Manual for technical CAFE RACER 6. ADJuStmENtS AND RESEtS 6.1 Adjusting mixed water - Act on the screw (1) of the mixed water solenoid valve located in the left rear lower part, to ad ust the amount of cold water that is mixed with hot water during water dispensing. 6.2 Bleeding the air from the circuit - Press button (1), located in the right front lower part, to energise the coils and bleed any air from the circuit. -
Page 18: Resetting The Small Boiler Safety Thermostat
Manual for technical CAFE RACER 6.4 Resetting the small boiler safety thermostat - Remove the cup heating plate as described in the relevant paragraph. - Press the safety thermostat (1) to reset it. If the thermostat trips again when the machine is restarted after re- setting safety thermostat,... -
Page 19: Replacing The Cup Heating Plate Heating Element
Manual for technical CAFE RACER 7. REmovAL AND REPLAcEmENt 7.1 Replacing the cup heating plate heating ele- ment - Remove the cup heating plate as described in the relevant paragraph. nscrew the nut (1) connecting the ground wire. se a spatula to remove the adhesive heating ele- ment (2). - Clean the surface of glue residues. - Screw the ground nut bac in and gradually place the heating element (2) on the surface so that there are no air bubbles between the surface and the heating element. - Page 20 Manual for technical CAFE RACER 7.3 Replacing the boiler heating element cut the power to the machine by setting the upstream main switch to oFF. - Remove the unit guard as described in the rele- vant paragraph. - Remove the lower front panel as described in the relevant paragraph.
- Page 21 Manual for technical CAFE RACER - Unscrew the screws (6) fastening the boiler cover. - Use a plastic hammer to tap the cover (7) to facili- tate its removal. - Remove the cover (7). nscrew the nuts (8) and replace the heating ele- ment (9). 20 / 56-EN...
-
Page 22: Replacing The Boiler Thermostat
Manual for technical CAFE RACER Refit ever t ing operating in reverse or- der from removal checking the condition of the gasket (10) and replacing it if it is worn. check proper electrical connection of the heating element and of the safety thermostat. - Page 23 Manual for technical CAFE RACER - Disconnect the boiler electrical connections (2). (3). - Disconnect the probe connector (4). - Unscrew the two water connection tubes (5). - Loosen the nuts (6), lift it and detach it from the support brac et (7).
-
Page 24: Replacing The Coffee Boiler Heating Element
Manual for technical CAFE RACER - Disconnect the connectors (8) of the heating ele- ment and unscrew the nut (9) connecting the drain tap. - Replace the boiler by operating in inverse order of removal, reconnecting the electrical cables ac- cording to the attached wiring diagram. -
Page 25: Replacing The Pump
Manual for technical CAFE RACER 7.7 Replacing the pump - Remove the cup heating plate as described in the relevant paragraph. - Disconnect the pump from tubes by unscrewing nuts (1) and (2). - Loosen the strap (3). - Remove complete pump (4): When reassembling, pay attention to properly fit the pump pin onto the cran shaft. -
Page 26: Replacing The Pump Motor
Manual for technical CAFE RACER 7.8 Replacing the pump motor - Remove the cup heating plate and the L side panel as described in the relevant paragraphs. - Remove the pump as described in the relevant paragraph without disconnecting the inta e and delivery pipes. nscrew the two screws (1) and move the LED plate (2) with the relevant brac et (3). -
Page 27: Replacing The Led Plate
Manual for technical CAFE RACER 7.9 Replacing the LED plate - Remove the side panel as described in the relative paragraph. - Unscrew the two screws (1). - Disconnect the connector (2) from the unction box and replace the complete plate (3). .1 Replacing t e boiler filling solenoid valve - Remove the L side panel as described in the rel- evant paragraph. - Disconnect the two Faston connectors (1) from the coil (2). - Page 28 Manual for technical CAFE RACER - Unscrew the nut (3) of coil (2). ndo the four screws (4) and remove the core (5) of the solenoid valve. - When reassembling, pay attention to properly con- nect the Faston connectors to the coil. When reassembling the core, pay atten- tion to properly reassemble the gasket, core and spring.
-
Page 29: Replacing The Hot Water Solenoid Valve
Manual for technical CAFE RACER - Remove the left shoulder (3). nscrew the screws (4) fastening the solenoid valve (5) to the brac et (6). - Disconnect the two Teflon tubes (7). - Disconnect the two Faston connectors (8). - Remove the clip (9) to replace the coil or replace the entire solenoid valve (5). - When reassembling, pay attention to properly con- nect the Faston connectors to the coil. -
Page 30: Replacing The Cooling Cycle Solenoid Valve
Manual for technical CAFE RACER 7.13 Replacing the cooling cycle solenoid valve - Remove the cup heating plate as described in the relevant paragraph. - Disconnect the Faston connectors (1). nscrew the nut (2) and remove the coil (3). ndo the four screws (4) and remove the core (5). - When reassembling, pay attention to properly con- nect the Faston connectors to the coil. When reassembling the core, pay atten- tion to properly reassemble the gasket, core and spring. - Page 31 Manual for technical CAFE RACER - Cut the strap (4). - Disconnect the tube (5). - Loosen the nut (6) fastening the flange (7) to the brac et. - Disconnect the Faston connectors (8). 30 / 56-EN 04-2017...
-
Page 32: Replacing The Pre-Infusion Solenoid Valve
Manual for technical CAFE RACER - Position a spanner on the solenoid valve body (9) and unscrew it from the flange (7). - When reassembling, pay attention to properly con- nect the Faston connectors to the coil and place the strap bac in its original position. 7.15 Replacing the pre-infusion solenoid valve. - Remove the cup heating plate as described in the relevant paragraph. - Disconnect the Faston connectors (1). -
Page 33: Replacing The Displacement Counter
Manual for technical CAFE RACER - Open the wire strap (2) and disconnect the tube (3). ndo the four screws (4) and remove the core with coil (5). - When reassembling, pay attention to properly con- nect the Faston connectors to the coil. When reassembling the core, pay atten- tion to properly reassemble the gasket, core and spring. -
Page 34: Replacing The Pump Pressure Transducer
Manual for technical CAFE RACER 7.18 Replacing the pump pressure transducer - Remove the left panel as described in the relevant paragraph. - Cut the straps (1) fastening the transducer cable to the machine wiring. nscrew the transducer (2). nscrew screw (3) and disconnect contacts (4) from transducer (2). 7.19 Replacing the service boiler pressure trans- ducer - Remove the cup heating plate as described in the relevant paragraph. -
Page 35: Replacing The Pre-Infusion Expansion Board
Manual for technical CAFE RACER 7.20 Replacing the pre-infusion expansion board - Remove the cup heating plate and the L side panel as described in the relevant paragraphs. se a long Phillips screwdriver (1) to unscrew the fastening screw of the expansion board - Disconnect the connectors (2). - Pull out the board (3) and disconnect the rear con- nector (4). mark the position of connectors so that they are inserted in the relevant seat when the board is reassembled. -
Page 36: Replacing The Electrical Panel Components
Manual for technical CAFE RACER ndo the two screws (4) and remove the cover (5) of the electronic board. - Disconnect all connectors of board (6), unscrew the three flanged nuts (7) and remove the board. 7.22 Replacing the electrical panel components to perform this check, the electrical con- nection must be inserted, therefore the electrical panel components (4) are pow- ered up. -
Page 37: Replacing The Display Board
Manual for technical CAFE RACER - If the plate (5) is removed, assemble the connec- tors as shown in the figure, paying attention to po- sition the guide (6), for both connectors, as posi- tioned in the figure. 7.23 Replacing the display board - Remove the cup heating plate as described in the relevant paragraph. - Loosen the four nuts (1), two on each side. - Disconnect the connector (2). 36 / 56-EN 04-2017... -
Page 38: Replacing The Unit Display
Manual for technical CAFE RACER - Pull out the display board (3). ndo the screw (4) and remove the frame (5). nscrew the two screws (6) and remove the dis- play board (7) from brac et (8). 7.24 Replacing the unit display - Remove the coffee unit guards as described in the relevant paragraph. - Disconnect the two connectors (1) and (2) and re- move the sponge (3). - Unscrew the three front screws (1). 37 / 56-EN 04-2017... - Page 39 Manual for technical CAFE RACER - Remove the external frame (2). - Remove the internal frame (3). nscrew the two screws (4) and remove the dis- play (5). - After replacing the display, set the dip-switch (6) according to the fact that unit “1”, “2” or “3” is in- stalled; see the figure to ad ust the dip-switch. 1st unit 2nd unit 2 3 4 2 3 4 3rd unit...
-
Page 40: Removing The Service Boiler
Manual for technical CAFE RACER 7.25 Removing the service boiler - Remove the cup heating plate and the R side panel as described in the relative paragraphs. - Disconnect the heating element (2) electrical con- nection cables (1). nscrew the nut (3) and remove the ground wire (4). nscrew the nut (5) and disconnect the right steam tap connection tube (6). -
Page 41: Replacing The Steam Tap
Manual for technical CAFE RACER nscrew the nut (18) of the boiler drain tube. - Cut the strap (19) and remove the safety valve drain tube (20). - Pull out the boiler upwards. 7.26 Replacing the steam tap - Remove the cup heating plate as described in the relevant paragraph. - Close the tap (1) pertaining to the steam tap to be replaced. -
Page 42: Replacing The Safety Thermostat
Manual for technical CAFE RACER - Remove the tap (5) from the front. 7.27 Replacing the safety thermostat. - Remove the RH side panel as described in the rel- ative paragraph. - Unscrew the two screws (1), disconnect the ther- mostat (2) from the support square and disconnect the Faston connectors. -
Page 43: Replacing The Led Bar
Manual for technical CAFE RACER - Loosen the screws (3) and disconnect the wires (4). - When reassembling, properly reconnect the wires (4). 7.29 Replacing the LED bar - Remove the left panel with shoulder and the low- er front panel as described in the relevant para- graphs. -
Page 44: Replacing The Main Switch
Manual for technical CAFE RACER 7.30 Replacing the main switch. make sure that the main switch upstream of the machine is in oFF position, then post a sign on the main switch saying "maintenance in progress" so that no one... - Page 45 Manual for technical CAFE RACER 7.31 Removing the head and gaskets - Leverage with a screwdriver to remove the head (1) and relevant gas et (2). - Insert the new gas et (2) on the head (1). - The bevel corners “A” of the gas et must be facing upward. - Remove the filter from the filter holder (3) and as- semble the head with gas et on the filter holder (3).
-
Page 46: Programming By The Technician
Manual for technical CAFE RACER 8. PRoGRAmmING By tHE tEcH- NIcIAN - To access the programming mode, bring the ma- chine to the electronic OFF and eep the central button (1) pressed, then press button (2), the dis- play shows “oFF” and button (2) flashes. - Press and eep pressed button (1) until PASS- WORD appears on the display (3); press button (1) five times to enter the programming mode; the... -
Page 47: Language
Manual for technical CAFE RACER 8.1 Language In this section, you can set the language for the mes- sages shown on the display. - press the button “ ” or “ ” to change lan- guage; press button “ ” to confirm and move to the next section. The available languages are: Italian, English, French, German, Spanish. -
Page 48: Chrono Function
Manual for technical CAFE RACER 8.5 chrono function The Chrono function allows displaying the number of seconds the coffee is dispensed for on the unit dis- play. - Press button “ ” to enable or disable the func- tion. - Press the button “ ” to confirm the selection and go to the next section. 8.6 Intake + coffee In this section, you can enable or disable loading wa- ter while coffee is being dispensed; - to eep the pressure constant, set this to “DISA- BLED”... -
Page 49: Pump Pressure Offset
Manual for technical CAFE RACER 8.9 Pump pressure offset This function displays the difference between the set pressure and the actual pump pressure. This is set to “0.8” and must not be changed. - Press the button “ ” to go to the next section. 8.10 Program doses With this function, you can enable or disable pro- gramming doses by means of the buttons. Leave it ENABLED in this case. - Press the button “... -
Page 50: Sensitivity
Manual for technical CAFE RACER 8.13 Sensitivity This section is used to select the type of sensitivity of the boiler water level probe: - Use button “ ” or button “ ” to set the sensi- tivity to “Low” - “Average” - “ igh” according to the water acidity; with high water acidity, a low sensi- tivity must be set for the probe, while a high sensi- tivity must be set with low water acidity. -
Page 51: Boiler Temperature
Manual for technical CAFE RACER 8.17 Boiler temperature Chec that the service boiler temperature is set to 124°C / 255°F in this section. - Press the button “ ” to go to the next section. 8.18 unit 1-2-3 temperature offset If there are discrepancies between the set temper-... -
Page 52: Filling Timeout
Manual for technical CAFE RACER 8.20 Filling timeout The water filling solenoid valve opening time can be set in this section; when this time has elapsed the machine stops if filling has not yet occurred. - Press the button “ ” or “ ” to set the value (normally 120 seconds is set). - Press the button “ ” to confirm the selection and go to the next section. ater filter In this section, you can set after how many litres of water used to dispense coffee, the water filter needs to be replaced. -
Page 53: Password
Manual for technical CAFE RACER 8.24 Password In this section, you can change the password to ac- cess the technician section. - Use the button “ ” to set “NO” to leave the cur- rent password or “ ES” to change it: - If you have selected “NO”, press the button “ ” to exit the technician menu; - If you have selected “ ES”, press the button “ ” to confirm the selection and go to the next section where the blin ing number is the modifiable one. se the buttons of the first two units on the left to set the password. Button (a) to enter number “1”... -
Page 54: Hydraulic Diagram
Manual for technical CAFE RACER 9. HyDRAuLIc DIAGRAm 10 EV11 EV10 BO1 / BO2 OWV1 OWV1 SCHEMA IDRAULICO CR 2-3GR 10/01/17 LEGEND Ev1) Bleed solenoid valve Ev2) Dispensing unit solenoid valve Water grid supply Ev5) Solenoid valve for automatic filling Softener Ev6) Mixed cold water solenoid valve Water inlet tap Ev7) Steam inta e solenoid valve Water outlet tap... -
Page 55: Wiring Diagram
Manual for technical CAFE RACER 10. WIRING DIAGRAm 54 / 56-EN 04-2017... - Page 56 Manual for technical CAFE RACER 55 / 56-EN 04-2017...
- Page 57 Manual for technical CAFE RACER 56 / 56-EN 04-2017...
- Page 59 SANREMO s.r.l. Via Bortolan, 52 31050 Vascon di Carbonera (TV) ITALIA tel. +39 0422 448900 fax +39 0422 448935 p.iva /c.f. 03239750262 www.sanremomachines.com info@sanremomachines.com...
Need help?
Do you have a question about the Cafe Racer and is the answer not in the manual?
Questions and answers