Sign In
Upload
Manuals
Brands
Roland Manuals
Music Mixer
VS-2000
Roland VS-2000 Manuals
Manuals and User Guides for Roland VS-2000. We have
6
Roland VS-2000 manuals available for free PDF download: Owner's Manual, Appendices, Owner's Manual Addendum, Manual, Block Diagram, Supplementary Manual
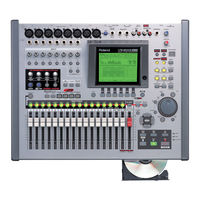
ROLAND VS-2000 Owner's Manual (444 pages)
digital studio workstation
Brand:
ROLAND
| Category:
Musical Instrument
| Size: 16.02 MB
Table of Contents
Table of Contents
9
Important Notes
5
Memory Backup
5
Power Supply
5
Repairs and Data
5
Additional Precautions
6
About the License Agreement
8
Step-By-Step Instruction Finder
21
Table of Contents
22
1 Welcome
29
About this Manual
29
How the VS-2000 Owner's Manual Is Organized
29
Names
30
Note, Tip, Glossary and Warning Icons
30
Other Documents in the VS-2000 Box
31
Getting more Help
31
Roland US Product Support
31
The Roland Internal Web Site
31
The Roland US Faxback System
31
The Roland US Web Site
31
2 Getting Around
33
The Top Panel of the VS-2000
33
Analog Input Jacks
33
Mixer Area
35
Display Area
39
Control Area
41
Navigation Tools
44
The Rear Panel of the VS-2000
47
3 Introduction to the VS-2000
51
What's Inside the VS-2000
51
Input Jacks and Connectors
51
The Mixing Console
52
The Internal Effects
55
The Hard Disk Recorder
56
Output Jacks and Connectors
57
Rhythm Track
57
Tuner
57
Signal Flow
57
Projects
58
Busses in the VS-2000
58
What's a Bus
58
About Direct Paths
59
Achieving Perfect Levels
59
What's "Clipping
59
How Do I Get Good Levels
60
The Importance of Backing up
61
Roland VS-2000 Owner's Manual Www.rolandus.com
61
4 Setting up and Basic Operations
63
Things You'll Need
63
A Way to Listen to the VS-2000
63
Power
63
Getting Ready
63
Powering up
65
What Happens During the VS-2000'S Power-Up
65
Configuring the VS-2000
66
Setting up the VGA Monitor, Mouse and Keyboard
66
Setting the VS-2000'S Clock
67
A few Fundamental Concepts
67
Selection
67
Parameters and Values
68
Switches
68
Tools You'll Use All the Time
68
The Cursor/Zoom Buttons
68
The F Buttons
68
The Time/Value Dial
69
The ENTER/YES and EXIT/NO Buttons
70
The SHIFT Button
70
Using a Mouse
70
UNDO and REDO
72
Using an ASCII Keyboard
72
Undoing a Track Recording or Editing Operation
73
Entering a New Name from a Keyboard
74
Entering a New Name Using the Vs-2000 Controls
74
Naming
74
Adjusting Your Listening Level
75
If You're Using DS-Series Monitors
75
Setting up for Roland's DS-Series Digital Monitors
75
Playing the Factory Demos
76
U Wanna Play Me
76
With Me
76
The VS-2000'S Built-It Tuner
79
Tuning to a Non-Standard Pitch
80
Tuning to Recorded Tracks
80
Caution When Using USB Storage Mode
81
Connecting the VS-2000 to a Computer Via USB
81
Establishing a Connection to Your Computer (Entering USB Storage Mode)
82
Terminating the Connection to Your Computer (Exiting USB Storage Mode)
84
Turning off the VS-2000
85
5 Understanding Effects
87
Harnessing the VS-2000'S Effects
87
Dry and Wet
87
Effect Routings
87
Insert Effects
88
Loop Effects
88
Master Effects
89
Native and Plug-In Effects
89
External Effects
90
Getting the most from Your Effect Processors
90
6 Understanding the Hard Disk Recorder
93
VS-2000 Hard Disk Drives
93
How a VS-2000 Hard Drive Organizes Data
93
What's a Hard Drive
93
Preparing a Hard Drive for Use
94
How Audio Is Recorded on a VS-2000 Hard Drive
94
How Recordings Are Played Back
94
Random Access
94
What's Pointer-Based Playback
94
Non-Destructive, Pointer-Based Editing
95
Pointer-Based Editing
95
What Is a VS-2000 Track
97
The Power of V-Tracks
97
Track Editing Basics
98
About Editing Phrases
98
About Editing Regions
98
7 Project and Drive Operations
99
Navigating the PROJECT Menu Screens
99
Working with the PROJECT LIST
99
About "Store Current?" Messages
100
Selecting an Item in the Project List
100
To Display the Projects on a Drive
100
About F6 (MARK)
101
Loading a Project
101
Marking a Project
101
Project Operations
101
Select
101
New
102
Setting the Project Recording Mode
102
Creating a New Project
103
Name
103
Entering a Project Comment
104
Locking and Un-Locking a Project on Your Hard Drive
104
Protect
104
Re-Naming a Project
104
Destination Drive Selection
105
Optimize
105
Optimizing a Project
105
Copy
106
Copying a Project
106
Selecting a New Destination Drive
106
Erase
107
Erasing a Project
107
Split
107
Splitting a Project
108
Combine
109
Combining Two Projects
109
Backing up a Project
110
Backup
110
Recover
111
Import
112
Importing a Song from an Earlier V-Studio
112
Export
113
Exporting a Vs-2000 Project
114
Disk Maintenance
115
Drive Operations
115
Fragmentation
115
Format Drive
117
Formatting a Hard Drive
117
Clear Partition
119
Clearing a Drive/Partition
119
Drive Check
120
Running Drive Check
121
8 The Home Screen
123
Elements of the Home Screen
123
Display Pop-Up Menu Button
123
Current Channel Display
124
Meters Display
124
PAN Knobs
124
Position Bar
126
The Playlist
126
Zooming in and out on the Playlist
127
Meter Switches
128
Current Time Location Display
130
Input Peak Indicators
130
Changing Your Current Location in a Project
131
Clock, Calendar
131
The F/P Switches
131
Using the Fader/Pan Display
131
About the ID Buttons
132
9 Working with Input Signals
133
Analog Input Signals
133
Making Analog Connections
133
Phantom Power
134
Setting Analog Input Levels
134
To Set an Analog Input Level
134
Digital Input Signals
135
Digital Connections
135
Digital Considerations
135
The Master Clock
135
Designating the Master Clock for Digital Audio Input
136
Recording Digital Input Signals
137
10 Using the Digital Mixer
139
Channel Selection
139
Selecting a Track Channel for Editing
139
Selecting an Input Channel for Editing
139
Selecting an FX Return Channel for Editing
140
The MASTER Fader
140
To Reset a Channel's Fader and Pan
140
Muting and Soloing Channel Signals
141
Mute Mode
141
Muting Channels in Mute Mode
141
Solo Mode
142
Scenes
142
Soloing Channels in solo Mode
142
Basic Scene Operations
143
Changing Scene Banks
143
Clearing a Scene
143
Leaving Scene Mode
143
Recalling a Scene
143
Storing a Scene
143
Editing Scenes
144
Protecting a Channel's Settings When a Scene Is Recalled
145
Recalling a Scene in Safe Mode
145
Scenes in Safe Mode
145
Turning on Scene Safe Mode
145
Resetting Mixer Parameters
146
Clearing a Scene in Safe Mode
146
Storing a Scene in Safe Mode
146
11 Input and Track Channel Tools
147
Viewing a CH EDIT Screen
147
Changing Ch Edit Screens
147
Displaying a Track Channel's Ch Edit Screen
147
Displaying an Input Channel's Ch Edit Screen
147
Introduction to the CH EDIT Screens
148
How the CH EDIT Screens Are Organized
148
The CH EDIT Screens
149
The CH EDIT VIEW Screen
149
Roland VS-2000 Owner's Manual Www.rolandus.com
155
The DYN Screen
156
The EQ Screen
160
The FX ins Screen
163
The Rsspan Screen
163
Parameter View
164
The CH EDIT ASSIGN Screen
164
Assorted CH EDIT Tools
166
The CH EDIT VIEW Cpyprm Button
166
The DYN and EQ Screen RESET Buttons
166
The FADER Button
166
CH PARAMETERS Controls
167
Using the Ch Parameters Knobs
167
12 Working with Input Channels
169
Introduction to Input Channel Routing
169
Routing Linked Stereo Input Channels
169
Routing an Input Channel Signal to a Track
170
Quick-Routing Input Channels to Tracks
170
Input Signal Routing on the EZ ROUTING VIEW Screen
172
Input Channel Signals and the Main MIX
172
Removing Input Channel Signals from the Main MIX
172
Adding an Input Channel's Signal to the Main MIX
173
Routing an Input Channel Signal to a Direct Path
173
Sending an Input Channel's Signal into the Main MIX
173
13 Operating the Hard Disk Recorder
175
The Transport Buttons
175
Special Transport Buttons
175
The Main Transport Buttons
175
The TRACK/STATUS Buttons
176
How the TRACK/STATUS Buttons Work
176
Recording
176
Before Recording a Track
176
Recording a New Track
177
Playback
177
Basic Playback Procedure
177
Playing Back Recorded Tracks
177
Looped Playback
178
Moving through a Project
178
Setting Loop Points When a Project Isn't Playing
178
Setting Loop Points While a Project Is Playing
178
Using Jump
178
Clearing Loop Points
179
Setting Loop Points Using Locators
179
Setting Loop Points Using Markers
179
Editing Loop from and to Points Manually
179
Activating Looped Playback
180
Preview
180
Scrub
181
Locators
182
Basic Locator Operations
182
Storing a Locator
183
Recalling a Locator
183
Changing Locator Banks
183
Clearing a Locator
183
Editing Locators
184
Locators in Safe Mode
184
Other Locator Operations
184
Remaining in Locator Mode
184
Turning on Locator Safe Mode
185
Recalling a Locator in Safe Mode
185
Storing a Locator in Safe Mode
185
Clearing a Locator in Safe Mode
185
Markers
186
Placing a Marker
186
Clearing Markers
187
Moving the Now Line to a Marker
187
Editing Markers
188
Punching
188
Before You Punch
189
Monitoring During Punching
189
Punching in and out Manually
189
Auto-Punching
190
Clearing Auto Punch Points
190
Setting Auto Punch Points When a Project Isn't Playing
190
Setting Auto Punch Points While a Project Is Playing
190
Editing Auto Punch in and out Points Manually
191
Setting Auto Punch Points Using Locators
191
Setting Auto Punch Points Using Markers
191
Performing an Auto Punch
192
14 Working with Track Channels
193
Bouncing
193
First Things
194
Mono and Stereo Bouncing
194
The Mechanics of Bouncing
194
Link the Destination Tracks for a Stereo Bounce
195
Routing Tracks for a Bounce
195
Listening as You Bounce
198
Mixing the Bounce
198
Performing the Bounce
199
Sending a Track Channel's Signal to a Direct Path
200
Routing a Track to a Direct Path
200
Mixing
200
The Mechanics of Mixing
200
15 FX and aux Busses and Direct Paths
203
Aux and FX Busses
203
FX and aux Bus Overview
203
Sending a Signal to an FX or aux Bus
204
Stereo FX and aux Busses
204
When Would You Use an aux Bus
204
When Would You Use an FX Bus
204
Adjusting an Fx or aux Bus's Master Level
205
FX and aux Bus Levels
205
Metering Fx and aux Bus and Direct Path Levels
205
Configuring an FX or aux Bus
206
Configuring an Fx or aux Bus from the Master Edit Screen
206
Creating a Headphone MIX Using an aux Bus
207
Direct Paths
207
Direct Path Levels
208
Sending a Signal to a Direct Path
208
When Would You Use a Direct Path
208
External Insert-Like Effects
208
Configuring a Direct Path
209
16 Using Effects
211
Using Loop Effects
211
Setting up an Internal Loop Effect
211
Setting up an External Loop Effect
213
Inserting an Effect
214
About Insert Effects
214
Input and Track Channel Insert Effects
214
Inserting Effects on an Input or Track Channel
215
MASTER Bus Insert Effects
217
Inserting Effects on the Master Bus
217
Selecting, Editing and Saving Effect Patches
218
The EFFECT VIEW Screen
218
Selecting Effect Patches
219
The Algorithm View Screen
219
Editing Effect Patches
221
Selecting an Effect Patch
221
Editing an Effect Patch
222
Saving an Effect Patch
223
Saving Effect Patches
223
Microphone Modeling
224
Speaker Modeling
224
Using Microphone Modeling
224
Using Speaker Modeling
224
Rss Pan
225
17 Working with FX Return Channels
227
FX Return CH EDIT Tools
227
Displaying an Fx Return Channel's Ch Edit Screen
227
The Main FX Return CH EDIT Screen
228
Roland VS-2000 Owner's Manual Www.rolandus.com
229
The FX Return Parameter View Screen
231
Routing Effects to Tracks
232
Quick Routing an FX Return Channel
232
FX Return Routing on the EZ Routing VIEW Screen
233
Adding Effects to a Headphone MIX
234
18 Editing Tracks
235
Editing Concepts and Overview
235
Phrases and Regions
235
Edit Points
236
Placing Edit Points Using the In, Out, from and to Buttons
237
Using the IN, OUT, from and to Buttons
237
Performing Edits
238
The Appearance of Selected Tracks, Phrases and Regions
238
Configuring the Behavior of the In, Out, from and to Buttons
238
Where Editing Takes Place
239
Selecting Phrase or Region Editing
240
Edit Messages
241
Editing Methods
241
Editing with an Optional Mouse
242
Placing Edit Points with Your Mouse
243
Selecting a Track with Your Mouse
243
Selecting Destination V-Tracks with Your Mouse
244
Selecting Phrases by Clicking or Dragging Your Mouse
244
Selecting Phrases from the Select Phrase Pop-Up Menu
244
Selecting Regions by Dragging Your Mouse
245
Selecting Regions from the Select Track Pop-Up Menu
245
Moving Data by Dragging with Your Mouse
246
Copying Data by Dragging with Your Mouse
246
Snapping to Grid
247
Performing an Edit Operation from the Edit Pop-Up Menu
248
Editing from the TRACK Menu
249
Performing an Edit Operation from the Track Menu
250
Placing Edit Points on a Track Menu Operation Screen
250
Quick-Selecting from the Track Menu
251
Selection Using the Track Menu's Onscreen Selection Tools
252
19 Phrase Editing Operations
255
Copy
255
Move
257
Trim in
257
Trim out
258
Delete
258
Split
258
New
259
Normalize
260
Divide
260
Name
261
Take Mngr
262
20 Region Editing Operations
263
Copy
263
Move
265
Insert
265
Cut
266
Erase
267
Comp/Exp
267
Import
269
Exchange
270
Arrange
270
Name
272
21 Working with the VS-2000 Outputs
273
The VS-2000 Outputs
273
Analog Output Jacks
273
Digital Output Connectors
273
Output Pairs
273
Output Signal Routing
274
Bus Routing
274
Routing a Pair of Busses to a Pair of Outputs
274
Routing a Pair of Busses to the Stereo Monitor Bus
275
22 EZ Routing
277
The EZ ROUTING Screens
277
Navigating the EZ ROUTING Screens
277
EZ ROUTING VIEW Screen
278
Making Connections on the Ez Routing View Screen
278
The EZ ROUTING OUTPUT ASSIGN Screen
278
The EZ ROUTING LOOP EFFECT ASSIGN Screen
279
Making Connections on the Ez Routing Output Assign Screen
279
EZ Routing Tools
280
Saving and Loading EZ Routing Templates
280
Saving an EZ Routing Template
281
Loading an EZ Routing Template
282
23 MIDI and Synchronization
283
MIDI Operations
283
VS-2000 MIDI Basics
283
Turning Fader Control on or off
284
Remote Control of the Vs-2000 with Sysex Messages
285
Remote MIDI Control of the VS-2000
285
Changing Effect Patches Via MIDI
286
Changing Scenes Via MIDI
286
Remote Control of the Vs-2000 with Control Change Messages
286
Remote MIDI Storage of VS-2000 Settings
287
Sending Sysex Bulk Dump Data
288
MIDI Metronome
289
Receiving Sysex Bulk Dump Data
289
Setting up a MIDI Metronome
289
Basic Synchronization Concepts
291
Synchronization
291
Why Sync the VS-2000
291
Roland VS-2000 Owner's Manual Www.rolandus.com
293
Creating a Sync Track Automatically
295
Generating a Sync Track from Markers
295
Recording a Sync Track from an External Device
295
Working with a Sync Track
295
Working with a Tempo Map
296
Shaping a Tempo Map by Hand
297
Converting a Sync Track to a Tempo Map
298
Creating a Tempo Map from Markers
298
Syncing an External Device to the VS-2000
298
Setting up the Vs-2000 as a Sync Slave
299
Setting up the Vs-2000 as the Sync Master
299
Starting Synchronized Playback with the Vs-2000 as Master
299
Syncing the VS-2000 to an External Device
299
Shifting the Project Start Time
300
Starting Synchronized Playback with the Vs-2000 as Slave
300
Switching V-Link Mode on
301
Synchronizing the VS-2000 and Video Equipment
301
Connecting the Vs-2000 and the DV-7Pr
302
Switching V-Link Mode off
302
Exchanging Digital Audio Data During Synchronization
304
24 Using the Rhythm Track
305
Rhythm Track Basics
305
About Rhythm Track Sounds and Drum Kits
305
About Track 17/18
305
About Rhythm Arranges
306
About Rhythm Patterns
306
The Rhythm Track and the Tempo Map
306
Playing a Rhythm Track
307
The Rhythm Track Metronome
308
Selecting, Editing and Creating a Rhythm Arrange
309
Creating or Editing a Rhythm Arrange
309
Selecting a Rhythm Arrange
309
Rhythm Arrange Tools
310
Removing a Pattern from a Rhythm Arrange
310
Adding a Pattern to a Rhythm Arrange
310
Quick-Entering Rhythm Arrange Patterns
310
Saving a Rhythm Arrange
311
Copying a Rhythm Arrange
312
Rhythm Arrange Copying
312
Deleting a Rhythm Arrange
313
Working with Rhythm Patterns
313
About the RHYTHM PATTERN SETUP Screen
313
Working on the Rhythm Pattern Setup Screen
314
Copying a Pattern
315
Creating or Editing a Rhythm Pattern
315
Recording a Rhythm Pattern in Realtime
315
Creating a Pattern in Step Time
317
Micro-Editing a Rhythm Pattern
319
Rhythm Pattern Micro Editing
319
Saving a Rhythm Pattern
319
Deleting a Pattern
320
Entering Rhythm Pattern Notes Via MIDI
321
Playing External Rhythm Track Sounds
321
The Rhythm Track and MIDI
321
Backing up a User Rhythm Arrange or Rhythm Pattern
322
Muting the Rhythm Track
322
Recovering a User Rhythm Arrange or Rhythm Pattern
322
Rhythm Track Backup and Recovery
322
Turning off the Rhythm Track
323
25 Harmony
325
The Harmony Source
325
The Harmony Module
325
Harmonization
326
The Harmony Sequencer
326
Harmony and Effects
326
Starting Harmony
327
HARMONY ASSIGN Screen
327
HARMONY ALGORITHM Screen
328
Selecting Pre or Post Harmonies
328
Selecting the Harmony Source and Processors
328
Harmony Patch Loading
329
Customizing the Harmony Module
329
Displaying the Harmony Module Parameters
329
Enabling MIDI Control
329
Loading Harmony Patches
329
Turning on the Harmony Sequencer
329
Harmony Patch Storage
331
Entering Harmony Notes
331
Saving Harmony Patches
331
Single Note and Chord Entry
331
Using the TRACK/STATUS Buttons
332
The TRACK/STATUS Buttons in Chrd Mode
333
The TRACK/STATUS Buttons in Chrd Mode, Con't
334
The TRACK/STATUS Buttons in Chrd Mode, Con't
335
Part(Y) of the First Part
336
Using a MIDI Controller
336
Moving in and out of Harmony Mode
336
Recording in the Harmony Sequencer
337
Sequencing Harmonies in Realtime
337
Sequencing Harmonies in Step Time
338
Editing a Harmony Sequence
339
Harmony Snapshots
339
Recording Harmonies on Hard Disk Recorder Tracks
340
Turning the Harmony Feature off
340
Capturing a Harmony Snapshot
340
26 Automix
341
The Benefits of Automix
341
How Automix Works
341
The AUTOMIX Screen
342
Activating Automix Mode
344
Recording Automix Data
344
Realtime Automix Recording
345
Realtime Punching of Automix Data
345
Snapshot Recording of Parameter Values
346
Playing Back Automix Data
346
Taking a Snapshot
346
Editing Automix Data
347
Automix Editing Concepts
347
Targeting Automix Data
347
The Automix Edit Screen
347
Automix Editing Methods
348
Automix Editing Operations
349
Creating a New Automix Event
353
Deleting an Automix Event
353
Micro-Editing Automix Data
353
Automix and V-Link
354
27 Mastering and CD-R/RW Operations
355
Mastering
355
Important Mastering Concepts
355
Mixing for Mastering
355
Roland VS-2000 Owner's Manual Www.rolandus.com
355
Navigating to the Mastering Room
359
Selecting the Mastering Room Operating Mode
359
Selecting the Mastering Tracks' Recording Mode
359
Turning on the Mastering Room
359
Working in the VS-2000 Mastering Room
359
Selecting the Mastering V-Tracks
360
Building Mastering Tracks Selection-By-Selection
360
Using the Mastering Tool Kit
361
Editing Mastering Tracks
362
Placing CD Track Markers
362
Recording Mastering Tracks
362
CD-R/RW Operations
364
Creating an Audio CD
364
Making Sure You Have Enough Space
365
Burning an Audio CD
366
Erasing a CD-RW Disk
368
If You Encounter Error Messages During CD Burning
368
The CD Player Feature
368
Playing an Audio CD
369
WAV File Importing
369
Importing a Wav File
371
Exporting Tracks and Phrases as WAV Files
372
Exporting Tracks as Wav Files
372
Exporting Phrases as Wav Files
373
Burning Exported Wav Files to CD
374
CD Capture
374
To Capture Audio from an Audio CD
375
Backing up VS8F-3 Plug-Ins
376
Installing VS8F-3 Plug-Ins
376
Removing VS8F-3 Plug-Ins
376
28 Utility Menu Parameters
377
The Main UTILITY Menu Screen
377
System
378
Shift Lock
379
Operation Display
380
Ps/2 Mouse, Ps/2 Keyboard
381
Vga
381
Digital
382
Display
382
Playrec
383
MIDI
384
Sync
384
Auto Punch/Loop
384
Marker
384
Locate
385
Scene
385
Automix
385
Date/Time
385
Parameter Initialization
385
Resetting Mixer and UTILITY Parameters
385
Rss Pan Setup
386
V-Link
386
29 Expanding the VS-2000
389
Installing a VS8F-2/VS8F-3 Effect Expansion Board
389
Installation Procedure
390
Installation de la Carte D'extension D'effets (French Language for Canadian Safety Standard)
392
Replacing the VS-2000'S Battery
395
Remplacement de la Pile du VS-2000.Fs (French Language for Canadian Safety Standard)
397
Supplemental Information
399
SHIFT Operations
399
Factory EZ Routing Templates
400
Recording Template
400
Bouncing Template
401
Mixdown Template
402
Mastering Template
403
VS-2000 Tick Resolution Table
404
MIDI Channels and Control Change Maps
405
Automix Parameter List
408
V-Studio Song/Vs-2000 Project Compatibility
410
Parameter Translations
410
Recording Mode Tables
410
Glossary
413
Hard Drive
415
Sample Rate
418
Index
421
Information
442
Federal Communications Commission
443
Advertisement
Roland VS-2000 Owner's Manual Addendum (88 pages)
Digital Studio Workstation
Brand:
Roland
| Category:
Musical Instrument
| Size: 5.09 MB
Table of Contents
Table of Contents
3
1 Welcome to Version Two
7
About the VS-2000 Version Two Addendum
7
Procedure Descriptions
7
To Get the most from Version Two
8
VGA Terminology: the Mixers and the Master Block
8
2 Version Two Enhancements
9
Importing Rhythm Patterns from SMF (SMF Import)
9
Cautions Concerning Import of SMF Data
9
The SMF IMPORT Screen
9
Importing Rhythm Patterns from SMF
10
Backing up and Recovering a Project Via USB
11
Data Structure of the VS-2000'S Internal Hard Disk
11
Backing up a Project on Your Computer
13
Recovering a Backed-Up Project from Your Computer
14
Backing up and Recovering User Rhythm Arranges or Rhythm Patterns
14
Added Parameters and Shortcuts
15
UTILITY Menu System Parameter
15
UTILITY Menu Playrec Parameter
15
The METRONOME Screen
15
The MASTER EDIT Screen
16
CH PARAMETER LEVEL Knob
16
New Shortcuts
16
Change in Editing Method for Rhythm Arrange
17
Creating or Editing a Rhythm Arrange
17
Using the Mouse to Input a Rhythm Pattern
18
The Procedure for Editing Harmony Has Changed
19
The HARMONY ASSIGN Screen
19
B/# Indications Have Been Added
19
Sequencing Harmonies in Step Time
20
Audio Data Waveform Display
20
The HARMONY MICRO EDIT Screen
21
3 Version Two VGA Overview
23
The Main Display and the Info Display
23
Setting the Operation Target
23
About the Main Display
24
The LCD as Main Display
24
The VGA as Main Display
24
About the Info Display
26
When the VGA Is Designated as the Info Display
26
When the LCD Is Designated as the Info Display
28
4 VGA Main Display Universal Elements
29
VGA Menus
29
The PROJECT Menu
29
The TRACK Menu
30
The EFFECT Menu
30
The UTILITY Menu
31
MIXER Menu
32
EZROUTING Menu
32
CD-RW MASTERING Menu
32
RYHTHM TRACK Menu
34
VGA Control Bar
35
PAN Knob Strip
39
The VGA Input Clipping Indicators
39
VGA F Buttons
39
Status Strip
40
VGA Remaining Space Status Strip
40
5 VGA Main Display Home Screen
41
The Meters Strip
41
Working with the Meters Strip
42
The Playlist Area
44
Operating the VGA Playlist
44
VGA Playlist Track Controls
46
The Playlist's Measure Bar
50
Editing VGA Playlist Track Audio
51
The VGA Playlist Control Panel
53
The VGA Wave Display
55
6 VGA Main Display CH VIEW Screens
57
Displaying CH EDIT Parameters on the VGA
57
Universal CH VIEW Elements
58
Input/Output Control Strip
58
AUX and FX Send Controls
59
DIR (DIRECT) 1-8 Selector
60
Channel-Specific Parameter Strips
60
Input Channel Parameter Strip
60
Track Channel Parameter Strip
61
FX Return Channel Parameter Strip
62
Input and Track Channel CH VIEW Elements
63
Track/V-Track Info
63
Dynamics and EQ Controls
63
Roland VS-2000 Owner's Manual, Version Two Addendum Www.rolandus.com
65
EFFECT INSERT Controls
66
FX Return Channel CH VIEW Elements
67
Loop Fx Assign
67
Effect Algorithm Display
67
7 Mixer Views
69
Shared Elements
69
Shared MASTER Fader Strip
69
AUX and FX Send Sliders
70
Input Mixer/Master Block View
71
Input Channel Strips
71
Master Block Strips
72
Track Mixer/Fx Return Mixer View
74
Track Channel Strips
74
FX Return Channel Strips
76
8 VGA Main Display EZ ROUTING Screen
77
Making Connections
77
Routing on the VGA Using a Mouse
77
Recording Bus Attenuation
78
9 VGA Main Display Automix Editing
79
Editing Automix Data on the VGA
79
Targeting Automix Tracks and Data for Editing
80
Index
81
Roland VS-2000 Owner's Manual, Version Two Addendum Www.rolandus.com
85
Roland VS-2000 Appendices (108 pages)
Digital Studio Workstation
Brand:
Roland
| Category:
Musical Instrument
| Size: 3.16 MB
Table of Contents
Table of Contents
2
About MIDI
3
Troubleshooting
4
Error Messages
9
Glossary
12
Shortcut Key Operations
14
Effect Preset Patch List
16
Algorithm List
21
MIDI Implementation
58
Track Sheet
101
About the Demo Performances
103
Specifications
104
Index
106
Advertisement
Roland VS-2000 Manual (2 pages)
Digital Recording Studio
Brand:
Roland
| Category:
Recording Equipment
| Size: 0.08 MB
Roland VS-2000 Block Diagram (1 page)
Roland VS-2000 Digital Studio Workstation: Network Guide
Brand:
Roland
| Category:
Music Mixer
| Size: 0.45 MB
Roland VS-2000 Supplementary Manual (1 page)
Roland VS-2000 Digital Studio Workstation: Supplementary Guide
Brand:
Roland
| Category:
Recording Equipment
| Size: 0.01 MB
Advertisement
Related Products
Roland V-studio VS-2480
Roland SONAR V-STUDIO VS-100
Roland Sonar V-Studio VS-700
Roland VS-880EX_OM
Roland Edirol V-8
Roland VR-5
Roland V-Mixer VM-C7100
Roland V-Mixer VM-C7200
Roland V-Bass VB-99
Roland V-mixing station VM-3100
Roland Categories
Musical Instrument
Synthesizer
Recording Equipment
Drums
Electronic Keyboard
More Roland Manuals
Login
Sign In
OR
Sign in with Facebook
Sign in with Google
Upload manual
Upload from disk
Upload from URL