Sign In
Upload
Manuals
Brands
Roland Manuals
Music Mixer
V-Mixer VM-C7200
Roland V-Mixer VM-C7200 Manuals
Manuals and User Guides for Roland V-Mixer VM-C7200. We have
5
Roland V-Mixer VM-C7200 manuals available for free PDF download: Owner's Manual, Quick Start Manual, Software Manual, Frequently Asked Questions
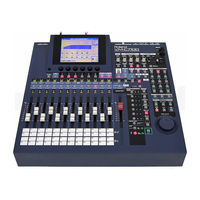
Roland V-Mixer VM-C7200 Owner's Manual (313 pages)
Brand:
Roland
| Category:
Music Mixer
| Size: 61.79 MB
Table of Contents
Important Safety Instructions
2
Grounding
2
Using the Unit Safely
3
Important Notes
4
Power Supply
4
Placement
4
Maintenance
4
Table of Contents
5
Introduction
10
Main Features
10
Names of Things
11
Dispaly Area
11
Monitor Area
11
Memory Recall Area
11
Display Area
12
Memory/Recall Area
15
Transport Area
16
Fader Parameter/Section Select Area
17
Channel Fader Area
19
Rear Panel
20
Before Operation
21
Connections
21
Precautions on Connection
21
Front Panel on the Processor
22
Rear Panel on the Console
22
Turning the Power On/Off
24
Turning the Power off
24
Precautions on Turning the Power on
24
Adjusting the Display's Contrast
25
Adjusting Internal Clock
25
How to Replace the Battery
26
If You Get Lost
28
Preparing a Memory Card
28
Formatting a Memory Card
28
Creating New Project
28
Internal Signal Flow
29
Input Channels
29
Input
29
Multi in
29
Buses/Output Routes
30
Main out
30
Flex Buses
30
Cue
30
About Digital Connections and the Master Clock
31
Digital Sound Device and Master Clock
31
Digital a and B Terminals and Reception of Word Clocks
32
Word Clock Connector
32
Checking the Overall System
32
Settings on the Digital I/O Screen
32
Restoring the Original Factory Settings
33
Factory Reset Procedure
33
Basic Operations
34
Screen Descriptions
34
Setting Parameters
35
Moving the Cursor
35
Changing Values
35
Level Meter Settings
36
Settings for the Panel
37
Pan Curve Type
37
Preamp Gain Adjust Mode
37
Shift Lock
37
Talkback Button
38
LED Type
38
What Is GPI?
38
Connection Setting of Processor and Console
39
Connection Status of the Console Itself
39
When Using Two Consoles
40
Audio through Function of the Console
40
Settings Related to Cascade Connection
41
Cautions on Cascade Connection
42
Data Storage and Retrieval
43
Internal Memory
43
Memory Card
43
Copying Libraries Containing Various Settings
44
Calling up and Saving a Library Screen
44
How to Call up the Copy/Save Screen for each Library
45
Saving the Current Settings Int Oa Library
45
Naming a Library as It Is Saved
46
Storing a Mixing State
47
Storing and Recalling a Scene
47
Clearing a Scene
47
Selecting Which Parameters will be Recalled
48
Scene Active Channel Page
48
Current Scene Name Edit Page
49
Storing and Recalling All Mixer Settings
50
About the Write Protect Function of the Memory Card
50
Preparing a Memory Card for Project Storage
51
Creating a New Project
52
Storing a Project
52
Updating a Project
52
Re-Naming/Erase-Protecting a Project
53
Naming and Adding Comments to a Project
53
Erase-Protecting a Project
53
Selecting a Project
54
Copying a Project
55
Erasing a Project from a Memory Card
55
Copying Data To/From a Memory Card
56
Moving and Returning a Set of Libraries in a Console
56
Backing up a Memory Card
57
Useful Functions
58
Storing Frequently Used Screens
58
Storing a Screen as a Macro
58
Recalling a Screen
58
Calling up Stored Connections
59
Routing Template
59
Selecting a Template
59
Virtual Patchbay
60
Saving the Current Connections as a Template
60
Changing Connections Using the Virtual Patchbay
60
Directly Calling up a Screen for each Channel
62
CD EDIT Operation
62
Directly Jumping to a Parameter's Screen
63
Quick Channel Edit
63
Simultaneously Setting Several Channel's Parameters
64
Determining a Parameter Setting to Change
64
Preamp Gain
65
Ch Pan/Ch Level
65
Surround Depth
65
Cue Pan/Cue Level
65
How to Set Parameters
66
Separating Screen from Fader State
66
Mixing Procedure 1
67
Basic Settings by Input Channel
67
Selecting an Input Channel's Signal Source
67
Gain, Phantom Power Supply, Phase and Attenuator
68
Correcting a Signal's Time Delay
69
Setting up a Channel's PHASE DELAY
69
Setting up On/Off, Send Level and PAN for a Channel
70
Switching the Send Point to the Cue Bus
71
Setting a Channel's Send Level and Send Point to Flex Buses
72
PAN and DEPTH for Using SURROUND
73
Setting Surround Panning in CHANNEL EDIT Mode
74
Setting up Direct-Output Channels
75
Linking a Channel to Its Adjacent Offevent Partner
75
Fine Adjustment of Surround Output Level Balance
75
Setting the Send Level and Point to a MULTI out
76
Switching the Status of a Channel
77
Muting a Channel
77
Adjusting Various Channel Settings
78
Listen to a Chanel by Itself
78
Using the STATUS Button to Enter solo Mode
78
Adjusting Frequency Characteristics
78
Setting up Equalizers by Band
79
Cutting Unwanted Low Frequencies
81
Setting up a High-Pass Filter
81
Adding an Delay-Based Echo
81
Naming Input Channels
83
Creating Channel Names
83
EZ Naming Function
83
Mixing Procedure 2
84
Setting Master MIX Levels and Stereo Balance
84
Reducing Signal Distortion
85
Setting the Main out Attenuator
85
Setting the Cue Bus Attenuator
85
A Flex Bus and Its Output
86
Outputting Signals Directly from a Flex Bus
86
What Is a Flex Bus?
86
Selecting a Flex Bus's Output
87
Sending Flex Bus Signals to Internal Destinations
87
Sending Signals to MAIN out or Cue Bus
88
Naming a Flex Bus Channel
89
Routing a Flex Bus to a Surround System Output
89
Calling up te Channel Edit
90
Surround Output
91
The Surround Function
91
Surround System Playing Environment
91
Surround Output Connections
91
Setting up Surround Outputs
92
Surround Panning
92
Routing Signals to Multi Outs and Assignable out Jacks
93
Selecting an Output's Signal Source
93
MULTI out CHANNEL EDIT Screen
93
Naming each Output Channel
94
Setting an Output's Level
94
Digital Connection
94
Setting up Dithering
94
Setting up Monitor Sends for Studio or Stange
95
Setting up a Monitor for the Mixing Engineer
96
Turning the Monitor Send to each Output Jack on or off
97
Calling up Stored Level and Monitor Output Presets
97
Specifying a Signal to Monitor
98
Setting the Monitor Volume
98
Selecting a Monitor Source
98
To Instanteously Lower the Monitoring Volume
99
Pre-Setting the DIM Level
99
Setting the Monitor Stereo Balance
99
Monitoring in Mono
99
Talkback and Slate to Player
100
Selecting a Talkback/Slate Microphone
100
Turning Talkback/Slate on and Adjusting Its Volume
100
Turning the Talkback and Slate Features on and off Independently
101
Simultaneously Controlling the Signals of Multiple Channels
102
Pairing One Channel with Another
102
Muting Several Channels
103
Turning Mute Group 1 to 9 On/Off
103
Registering and Deleting a Channel in or from a Mute Group
103
Simultaneously Changing Multiple Channels' Levels
104
Registering and Deleting a Fader Group
105
Naming a Fder-Group Master
105
Controlling the Mute/Solo State of each Fader-Group Master Fader
106
Registering a Fader-Group Master in a Mute Group
106
Mute and Solo-Related Settings
107
Solo Volume and Setting the Channel Signal-Flow Location
107
How to Set up the solo Feature
107
Linking Stereo-Link-To Destination
108
Using the Internal Effects
109
How the Internal Effects Are Organized
109
Using the Speaker Modeling Function
109
Operation for Producing an Effect
110
Determining the Effect Position
110
Other Restrictions
112
Setting Input/Output Levels
113
Selecting the Effect Library
113
Selecting a Library
113
Editing Effects
115
Determining the Algorithm
115
Invoking the Edit Screen
115
Settings Within the Edit Effect Screen
116
Saving an Effect State
117
Effect Library
117
Saving Edited Effects as Used Libraries
117
Naming Effects Libraries
118
Calling up the Screen for Setting Effect Library Names
118
Algorithm List
119
Reverb
120
Sound Types
120
Relationship between Sound and Time
120
Reverb Sound Quality
120
Delay
122
Delay Sounds and the Spread of Sound
122
Delay Repetition
122
Stdly-Chorus
124
How Feedback Works for Delay and Chorus
124
Stps Delay
126
Stereo Pitch Shifter Delay
126
Setting up Pitch
126
Vocoder
128
Tips for Using Vocoder
128
2Ch RSS
129
What Is RSS?
129
Precautions for Using RSS
130
Labeling on RSS Product Package
130
Delay RSS
131
Chorus RSS
132
Guitarmulti 1-3
133
Usage of Guitar Multi 1 through 3
133
Adding Wah Effect by Changing Input Volume
133
Selecting Guitar Amplifier
133
Vocal Multi
136
Cutting Distortion in Vocals
136
Rotary
138
Guitarampsim
138
Pre-Amplifier
139
Speaker Simulator
139
Recomended Combinations of Pre-Amplifier and Speaker
139
Stereo Phaser
141
Phaser and Flanger
141
Stereo Flanger
142
Dual Compressor/Limiter
144
Difference between
144
Using as Limiter
144
Using as Compressor
144
Gate Reverb
146
Reverb Applications
146
Multitapdly
148
Stereo Multi
150
Reverb 2
152
Reverb Types
152
Selecting Gate Type
152
Space Chorus
154
Lo-Fi Process
154
Creating Lo-Fi Sounds
154
Lo-Fi Processor
154
Parametriceq
156
Cutting Noise
156
Controlling Channels a and B Separately
156
Graphic EQ
157
Removing Hum
158
Hum Canceler
158
Noise Suppressor
158
Vocal Canceler
159
Cancelling the Vocals Alone
159
Voice Transformer
161
Vocoder 2
162
Envelope for Defining Sound Characteristics
162
Sound Location
162
Sounding Instrumental Sounds with the Format Fixed
162
Micsimulator
164
Microphone Simulator
164
Selecting the Microphone Used for Recording
164
Microphone Types that Can by Simulated
164
3Bndisolater
166
3-Band Isolator
166
Muting the Bass
166
Muting Vocals
166
Tapeecho201
167
About Replay Head
167
Analogfinger
168
Analog Flanger
168
Types of Flanger Effect
168
Analogphaser
169
Number of Stages of Phaser
169
Speaker Modeling
170
Speaker Types Applicable for Modeling
170
Selecting Speakers that Actually Generate Sounds
170
Mastering Tool Kit
172
Detect Time under Input
172
Splitting into Frequency Bands
172
31 Band Graphic Equalizer
175
Stereo 2-Band Dynamics
176
Dual Mono Dynamics
178
Master Effect
180
What Is Master Effect?
180
10-Band Parametric Equalizer
180
3-Band Dynamics
182
Using the Spectrum Analyzer
184
Basic Configuration and Operation
184
Specifying an Effect to Used by the Analyzer
185
Selecting a Signal to Analyze
185
Changing the Analyzer Display Format
185
Using a Test Signal
186
Selecting and Generating a Reference Signal
186
Fine-Tuning of the Sine Wave Frequency
186
Specifying the Bus to Which Reference Signals Are Sent
187
Specifying the Output Reference Signal Output
187
Checking the Frequency Characteristics of a Signal
187
Using the Built-In Noise Generator in a Concert Hall
187
Correcting Acoustic Problems Using an Equalizer
188
Measuring Outputs Using the Talkback Microphone
189
Combining Recorders
190
Remotely Controlling a Recorder
190
Notes on Connection
190
Selecting Recorder Type
190
Preparations for Remote Control
191
Playing or Stopping Recorders
191
Changing Track Status
192
Registering/Cancelling Points in a Song
192
Registering and Recalling Locate Points
192
Clearing Registered Locate Points
192
Naming a Locate Point
193
Call a Naming Screen for Locate Points
193
Editing Locate Points
193
Specifying a Point by Direct Entry of Time
194
Locating by Entering Time Code
194
Loop and Auto Punch In/Out
195
Specifying Lopo and Punch In/Out Point
195
Turning Loop and Punch In/Out on or off
195
Setup for Synchronized Operation
196
Selecting the Outgoing MIDI Sync Signals
196
MIDI Clock and Tempo
196
What Is the Automix Function?
197
Setting up the Automix Function
200
Automix and Channel Statuses
201
Statuses of Automix
201
Statuses of Channels
202
Confirming Channel Statuses at a Glance
202
Recording Auto-Mixing
203
To Synchronize with External Devices
203
Clearing the Memory
203
Recording to Modify
205
Re-Recording the Specified Section
206
Specifying the Region by Using the Locator
206
Playing Back Auto-Mixing
207
To Synchronize with an External Device
207
Editing Auto-Mixing
208
Confirming Data
208
Changing the Current Position
210
Displaying Scaled-Up/Down VIEWER Area
210
Confirming All Types of Data
210
Changing Data One by One
211
Defining
211
Copying
212
In/Out
212
From
212
To
212
Moving
214
Erasing a Section no Longer Needed
216
Erasing an Unneeded Portion
217
Bringing Forward What Follows
217
Gradually Shifting Values in a Specified Region
218
Marker
218
Source
218
Gradation Curve
218
Add Dynamics
220
Shift
220
Rate
220
Threshold
220
Using with MIDI Devices
222
Settings Related to MIDI
222
Program Change
222
Settings Related to Tempo/Metronome
223
Tempo/Beat
223
MIDI Metronome
223
Settings Related to Synchronization
224
Sync Master
224
Sync Offset
224
Error Level
224
Examples of Connections
225
Receiving or Transmitting Level/Pan Using Fader or Knobs
225
To Synchronize with an External MIDI Device
225
To Make an External MIDI Device Synchronize with the Console
226
Controlling a MIDI Device from the Console
228
Controlling Volume
228
Recording Parameter Settings on a Sequencer
229
Controlling the Console from a MIDI Device
230
Changing Parameter Settings from an External MIDI Device
231
Glossary
232
Parameter List
248
Troubleshooting
261
No Sounds Are Heard
261
No Sounds Are Heard on some Channels
261
Sounds Contain Noise or Are Distorted
261
Intended Operation Is Not Available from the Fader
262
Writing to the Memory Card Is Not Possible
262
The Effects Are Unusable
262
Others
263
Auto-Mixing Data Have Been Lost
263
Q & a
264
Basic Setup and Structure
264
How Is the Mixer Operated?
264
Why Are the Mixing Processor and Console Separate?
264
Hardware
266
Other Matters
269
MIDI Implementation
270
Transmitted Data and Recognized Receive Data
270
Channel Voice Message
270
Polyphonic Key Pressure
270
System Realtime Message
271
Song Position Pointer
271
Timing Clock
271
Start
271
Universal System Exclusive Message
272
Data Transfer
272
MIDI Data
273
Mixer EQ Freq Table
273
Mixer EQ Gain Table
273
EXP/CMP Ratio Table
273
VM-7X00 System Block
274
MIDI Joystick Support
300
Appendices
300
Decimal and Hexadecimal Table
300
Specifications
302
Index
304
Advertisement
Roland V-Mixer VM-C7200 Owner's Manual (312 pages)
V-Mixing Console
Brand:
Roland
| Category:
Music Mixer
| Size: 5.43 MB
Table of Contents
Important Safety Instructions
2
Important Notes
4
Power Supply
4
Memory Backup
4
Using Memory Cards
4
Table of Contents
5
Chapter 1 Introduction
10
Main Features
10
Names of Things and What They Do
11
A: Display Area
12
Contrast Knob
12
Fader Utility Button
12
Cursor Buttons
12
V1–V6 Knobs
12
Page Buttons
12
Level Meter Button
12
F1–F6 Buttons
12
Analyzer/Osc/Gen Button
12
Ez Routing Button
12
B: Monitor Area
13
Source/Studio2 Button
13
Studio 1 Level Knob
13
Line out Level Knob
13
Phones Level Knob
13
MIC Level Knob
13
Input Select Switch
14
Send to Analyzer Button
14
Talkback/Slate Button
14
DIM Button
14
Output Preset A/B/C Button
14
C: Memory/Recall Area
15
Clear Button
15
Enter Button
15
D: Transport Area
16
Zero Button
16
Rew/Prev Button
16
Ff/Next Button
16
Stop Button
16
Play Button
16
Rec Button
16
Copy/Library Button
16
Undo/Redo Button
16
Auto-MIX Button
16
E: Fader Parameter/Section Select Area
17
Preamp Gain Button
17
On Display Button
17
Param View on Fader Buttons
17
Nd Unit Select Button
17
Multi out 1–24 Button
18
Flex Bus Master 1–12 Button
18
Fader Group Master 1–24 Button
18
Multi in Ch 1–24 Button
18
Input Ch 1–24 Button
18
Ch Flip Button
18
Shift Button
18
F: Channel Fader (Button) Area
19
Status Buttons
19
Mode Select Buttons
19
Channel Faders
19
Rear Panel
20
Memory Card Slot
20
MIDI/Meter Bridge Connectors
20
VM-Link Connector
20
Ext Sw Jack
20
Ac in
20
Before Operation
21
Connections
21
Turning the Power On/Off
24
Adjusting the Display's Contrast
25
Adjusting Internal Clock
25
If You Get Lost
28
Preparing a Memory Card
28
Internal Signal Flow
29
About Digital Connections and the Master Clock
31
Digital Sound Device and Master Clock
31
DIGITAL a and B Terminals and Reception of Word Clocks
32
Word Clock Connector
32
Checking the Overall System
32
Restoring the Original Factory Settings (Factory Reset)
33
Factory Reset Procedure
33
Chapter 2 Basic Operations and Their Settings (System/Project)
34
Basic Operations
34
Screen Descriptions
34
Setting Parameters
35
Level Meter Settings
36
Settings for the Panel (Knobs and Display)
37
Connection Setting of Processor and Console
39
Checking the Overall System
39
When Using Two Consoles
40
Settings Related to Cascade Connection
41
Chapter 3 Data Storage and Retrieval
43
Copying Libraries Containing Various Settings
44
Calling up and Saving a Library Screen
44
Storing a Mixing State (Scene)
47
Storing/Recalling/Erasing a Scene
47
Selecting Which Parameters will be Recalled
48
Storing and Recalling All Mixer Settings (Project)
50
Preparing a Memory Card for Project Storage
51
Storing a Project
52
Re-Naming/Erase-Protecting a Project
53
Selecting a Project
55
Copying a Project
56
Erasing a Project from a Memory Card
56
Copying Data To/From a Memory Card
57
Moving and Returning a Set of Libraries in a Console to and from a Memory Card
57
Backing up a Memory Card
58
Chapter 4 Useful Functions
59
Storing Frequently Used Screens (Macro Function)
59
Storing a Screen as a Macro
59
Recalling a Screen (Macro)
59
Clearing a Stored Macro
59
Calling up Stored Connections (EZ Routing)
60
Routing Template
60
Virtual Patchbay
61
Directly Calling up a Screen for each Channel (Quick Channel Edit)
63
Directly Jumping to a Parameter's Screen (Quick Channel Edit)
64
Simultaneously Setting Several Channels' Parameters (Parameter View on Fader)
65
Chapter 5 Mixing Procedure 1 (Input Channel)
68
Basic Settings by Input Channel
68
Selecting an Input Channel's Signal Source
68
Gain, Phantom Power Supply, Phase and Attenuator
69
Correcting a Signal's Time Delay (PHASE DELAY)
70
Setting up ON/OFF, SEND LEVEL and PAN for a Channel
71
SEND LEVEL and PAN to the Main MIX and the Cue Bus
71
Setting a Channel's Send Level and Send Point to Flex Buses
73
PAN and DEPTH for Using SURROUND
74
Setting up Direct-Output Channels
76
Switching the Status of a Channel
78
Muting a Channel (MUTE)
78
Listen to a Channel by Itself (SOLO)
79
Adjusting Various Channel Settings (Equalizer, Etc.)
79
Adjusting Frequency Characteristics (Channel Equalizer)
79
Cutting Unwanted Low Frequencies (HIGH PASS FILTER)
82
Adding an Delay-Based Echo (Feedback Delay)
82
Naming Input Channels
84
Chapter 6 Mixing Procedure 2 (Output and Monitor)
85
Setting Master MIX Levels and Stereo Balance
85
Setting the Master Levels for the MAIN Outs and Cue Bus
85
Reducing Signal Distortion (Attenuator)
86
A Flex Bus and Its Output
87
Outputting Signals Directly from a Flex Bus
87
Sending Flex Bus Signals to Internal Destinations
88
Naming a Flex Bus Channel
90
Routing a Flex Bus to a Surround System Output
90
Surround Output
92
Enabling the Surround Function and Selecting the Desired Mode
92
Routing Signals to MULTI Outs and ASSIGNABLE out Jacks
94
Selecting an Output's Signal Source
94
Naming each Output Channel
95
Setting an Output's Level
95
Digital Connection Output Processing (Dithering)
95
Setting up Monitor Sends for Studio or Stage (STUDIO 1 or 2)
96
Setting up a Monitor for the Mixing Engineer
97
Turning the Monitor Send to each Output Jack on or off
98
Calling up Stored Level and Monitor Output Presets
98
Specifying a Signal to Monitor (Source Select)
99
Setting the Monitor Volume (Line, Headphones, Digital)
99
To Instantaneously Lower the Monitoring Volume (DIM)
100
Setting the Monitor Stereo Balance
100
Monitoring in Mono
100
Talkback and Slate to Player
101
Selecting a Talkback/Slate Microphone
101
Turning Talkback/Slate on and Adjusting Its Volume
101
Turning the Talkback and Slate Features on and off Independently
102
Chapter 7 Mixing Procedure 3 (Settings Common to Input and Output)
103
Simultaneously Controlling the Signals of Multiple Channels (Link and Group)
103
Pairing One Channel with Another (Stereo Linking)
103
Muting Several Channels (Mute Group)
104
Simultaneously Changing Multiple Channels' Levels (Fader-Group Master)
105
Mute- and Solo-Related Settings
108
Solo Volume and Setting the Channel Signal-Flow Location to be Soloed
108
Linking Stereo-Link-To Destination
109
Chapter 8 Using the Internal Effects
110
How the Internal Effects Are Organized
110
Using the Speaker Modeling Function
110
Operation for Producing an Effect
111
Determining the Effect Position
111
Setting Input/Output Levels
114
Selecting the Effect Library
114
Editing Effects
116
Determining the Algorithm
116
Saving an Effect State (Effect Library)
118
Naming Effects Libraries
119
Algorithm List
120
Stdly-Chorus (Stereo Delay Chorus)
125
Stps-Delay (Stereo Pitch Shifter Delay)
127
Ch Rss
130
Delay Rss
132
Chorus Rss
133
Vocal Multi
137
Guitarampsim (Guitar Amplifier Simulator)
139
Stereo Phaser
142
Stereo Flanger
143
Dual Compressor/Limiter
145
Multitapdly (Multi-Tap Delay)
149
Stereo Multi
151
Space Chorus
155
Lo-Fi Process (Lo-Fi Processor)
155
Parametriceq (4-Band Parametric Equalizer)
157
Graphic Eq (10-Band Graphic Equalizer)
158
Voice Transformer
162
Micsimulator (Microphone Simulator)
165
Bndisolater (3-Band Isolator)
167
Mastering Tool Kit
173
Band Graphic Equalizer
176
Stereo 2-Band Dynamics
177
Dual Mono Dynamics
179
Master Effect
181
Band Parametric Eqalizer
181
Band Dynamics
183
Chapter 9 Using the Spectrum Analyzer
185
Basic Configuration and Operation
185
Specifying an Effect to Used by the Analyzer
186
Selecting a Signal to Analyze
186
Changing the Analyzer Display Format (Peak-Hold, Etc.)
186
Using a Test Signal (Generator/Oscillator)
187
Specifying the Bus to Which Reference Signals Are Sent
188
Checking the Frequency Characteristics of a Hall or a Signal
188
Checking the Frequency Characteristics of a Signal
188
Measuring and Correcting the Characteristics of an Acoustic Space
188
Measuring Outputs Using the Talkback Microphone
190
Chapter 10 Combining Recorders
191
Remotely Controlling a Recorder
191
Preparations for Remote Control (MMC Settings)
192
Playing or Stopping Recorders
192
Changing Track Status (Audio Status)
193
Registering/Canceling Points in a Song (Locate)
193
Naming a Locate Point
194
Editing a Locate Point and Pre-Rolling
194
Specifying a Point by Direct Entry of Time
195
Loop and Auto Punch In/Out
196
Chapter 11 Recording/Playing Back Fader or Knob Actions
197
Setup for Synchronized Operation with Recorder
197
Selecting the Outgoing MIDI Sync Signals
197
MIDI Clock and Tempo, Metronome
197
Recording Mixing Operations as the Song Develops (Automix Function)
198
What Is the Automix Function
198
Settings (Data Types) that Can be Recorded/Played Back
199
Setting up the Automix Function (SET UP)
201
Automix and Channel Statuses
202
Recording Auto-Mixing
204
Clearing the Memory (CLEAR)
204
Recording to Modify (RELATIVE REC)
206
Re-Recording the Specified Section (PUNCH IN)
207
Playing Back Auto-Mixing
208
Editing Auto-Mixing
209
Confirming Data (VIEW)
209
Changing Data One by One (MICRO EDIT)
212
Defining the Region Subject to Editing
212
Copying (COPY)
213
Moving (MOVE)
215
Erasing a Section no Longer Needed (ERASE)
217
Erasing an Unneeded Portion—Bringing Forward What Follows (CUT)
218
Gradually Shifting Values in a Specified Region (GRADATION)
219
Add Dynamics (EXPAND)
221
Settings Related to MIDI
223
Settings for MIDI Transmission/Reception and Level Meter Bridge (MB-24)
223
Chapter 12 Using with MIDI Devices
223
Settings Related to Tempo/Metronome
224
Settings Related to Synchronization
225
Receiving or Transmitting Level/Pan Using Fader or Knobs
226
Example of Connections
226
To Synchronize with an External MIDI Device (the Console Is Used as a Slave)
226
Controlling a MIDI Device from the Console
229
Controlling the Console from a MIDI Device
231
Glossary
233
Nd Unit
233
Absolute Recording
233
Active Sensing
233
Automix Function
233
Ad Converter
233
Auto Wah
233
Balanced Connection
233
Bulk Dump
234
Cascade Connection
234
Bass Cut Filter
234
Blank Parameter Chart
234
Comb Filter
234
Channel Link
234
Channel Message
234
Condenser Microphone
235
Data Entry
235
Effect Patch
236
Digital I/O Connector
236
Drop Format
236
DIM Function
236
Dynamic Microphone
236
Direct Box (DI)
236
Discrete Circuit
236
Effect Expansion Board
236
Effect Processor
236
Feedback Delay
237
Feedback Level
237
Flash Memory
237
Graphic Equalizer
238
Frame Rate
238
Flex Bus
238
Frequency-Independent Compressor
238
Goose-Neck Microphone
238
Guitar Amp Simulator
239
Insertion Effect
239
Guitar Amp Modeling
239
Insertion Jack
239
High Frequency Damp
239
High Frequency Trimmer
239
Lithium Battery
239
Master Effects
240
Meter Bridge
240
Master Tape
240
Low Frequency Damp
240
Low Frequency Trimmer
240
Manual Punch-In
240
MIC Converter
240
Motor Faders
241
Micro Edit
241
Multitrack Recording
241
Noise Generator
241
Noise Suppressor
241
Parametric Equalizer
242
Non-Drop Format
242
Output Assign
242
Note Number
242
Pal Format
242
Panning Delay
242
Ntsc Format
242
Phantom Power
243
Phase Delay
243
Peaking Type
243
Pink Noise
243
Pitch Shifter
243
Pre-Fader Listen
244
Realtime Modify Filter
244
Region Set
244
Relative Recording
244
Sample Rate
245
Return Level
245
Send Level
245
Shelving Type
245
Sine Wave
245
Stereo Link
246
Spectrum Analyzer
246
Smpte Time Code
246
Sound Modeling
246
Sub Frame
246
Timing Clock
247
Xlr Connector
248
White Noise
248
Word Clock
248
VM Link
248
Word Length
248
Zero Return
248
Parameter List
249
Auto Punch
253
Overall Operations
262
Troubleshooting
262
The Internal Effects
263
MIDI-Related Problems
263
Others
264
Basic Setup and Structure
265
Hardware
267
Effects
268
Connecting with Other Devices
269
Other Matters
270
MIDI Implementation
271
Timing Clock
272
MIDI Machine Control
299
MIDI Implementation Chart
302
Specifications
303
VM-C7200: 94 Ch V-MIXING CONSOLE
303
VM-C7100: 94 Ch V-MIXING CONSOLE
304
Index
305
Roland V-Mixer VM-C7200 Quick Start Manual (100 pages)
V-Mixing Console
Brand:
Roland
| Category:
Music Mixer
| Size: 8.32 MB
Table of Contents
Quick Start
1
Table of Contents
2
Getting Started
4
How to Use the QUICK START
4
Installing the VM-C7100/C7200 Digital Mixing System
5
Connections
7
Turning on the Power
10
To Adjust the Brightness of the Display
12
If You're Confused about What's Being Displayed or What's Going on
12
Restoring the Original Factory Settings
13
Setting the Internal Clock
14
Preparing a Memory Card
16
To Format a Memory Card
16
To Create a New Project
19
Turning off the Power
20
Before Mixing Operations
22
Internal Signal Flow
22
Input Channels
22
Busses / Output Routes
23
How to Operate this System
24
The Display (Example)
24
To Change Parameters
25
Mixing Operations
26
Setting the Input Gain
26
Setting the Channel Levels and L/R Pans
28
Setting the Master Level and Master Stereo Balance
30
Adjusting a Signal's Tone (Equalizer)
32
Setting up a Monitor
34
Coupling Adjacent Channels
36
Muting a Channel
38
Storing a Project
39
Using Sub Outputs
40
Setting up Monitor Sends for Studio or Stage
40
To Select Signals for Studio Monitors
40
To Talk to Someone on a Stage or out in a Studio (Talkback)
42
Flex Bus
43
Flex Bus Output (MULTI OUT/ASSIGNABLE OUT)
44
Flex Bus Output (Internal)
46
Sending Signals to a Flex Bus
48
Using On-Board Effects
50
Send-Return Loop Effect
51
Setting the Onboard Effect Position and Value
54
Selecting the Effects
58
Using a Channel's Feedback Delay (Channel Delay)
60
Other Important Features
62
Storing a Mixing State (Scene)
62
To Store a Scene
62
To Recall a Scene
64
Setting Signal Routings on the Display (Virtual Patchbay)
66
Simultaneously Adjusting the Levels of Multiple Channels
68
To Create a Group of Channel Faders (Fader Group Master)
68
To Mute a Group of Multiple Channels (Mute Group)
70
Some Special Features
72
The Spectrum Analyzer
72
5.1 Surround
73
Speaker Modeling
74
Using EZ Routing Templates
75
Track MDM with MIDI Sound Module Recording
76
Live Jazz Ensemble with 8 Track Digital Recording
82
Advanced Operations - 8 Track Analog Recording
86
Connection Samples
88
Connection Samples Using the TASCAM da Series
88
Track Recording System (TASCAM DA-88 X 6)
88
Track Recording System (TASCAM DA-88 X 6 + RC-848)
89
Track Recording System (TASCAM DA-88 X 3)
90
Track Recording System (TASCAM DA-88 X 1)
91
Connection Samples Using the Alesis ADAT Series
92
Track Recording System (Alesis ADAT X 6)
92
Track Recording System (Alesis ADAT X 6 and BRC)
93
Track Recording System (Alesis ADAT X 3)
94
Track Recording System (Alesis ADAT X 1)
95
Connection Sample Using Digidesign Protools
96
Advertisement
Roland V-Mixer VM-C7200 Software Manual (16 pages)
Libraries
Brand:
Roland
| Category:
Music Mixer
| Size: 0.19 MB
Roland V-Mixer VM-C7200 Frequently Asked Questions (5 pages)
V-Mixing Console
Brand:
Roland
| Category:
Music Mixer
| Size: 0.04 MB
Advertisement
Related Products
Roland V-Mixer VM-C7100
Roland V-mixing station VM-3100
Roland VM-7000 Series
Roland Edirol V-8
Roland VR-5
Roland VS-2000
Roland SONAR V-STUDIO VS-100
Roland Sonar V-Studio VS-700
Roland V-Bass VB-99
Roland VS-880EX_OM
Roland Categories
Musical Instrument
Synthesizer
Recording Equipment
Drums
Electronic Keyboard
More Roland Manuals
Login
Sign In
OR
Sign in with Facebook
Sign in with Google
Upload manual
Upload from disk
Upload from URL