Sign In
Upload
Manuals
Brands
Konica Minolta Manuals
All in One Printer
bizhub PRESS C70hc
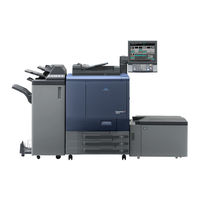
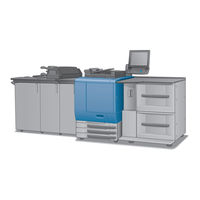
Konica Minolta bizhub PRESS C70hc Manuals
Manuals and User Guides for Konica Minolta bizhub PRESS C70hc. We have
7
Konica Minolta bizhub PRESS C70hc manuals available for free PDF download: User Manual, Scanner Manual, Safety Information Manual, Setup Instructions
Konica Minolta bizhub PRESS C70hc User Manual (279 pages)
IC-601 Color Centro User Guide
Brand:
Konica Minolta
| Category:
Software
| Size: 8.78 MB
Table of Contents
Table of Contents
2
1 Introduction
8
Welcome
9
Composition of User's Guide
9
User's Guide
9
Conventions Used in this Manual
10
Symbols Used in this Manual
10
Original and Paper Indications
11
Paper Size
11
Paper Indication
11
2 Overview of the Color Centro
12
Color Centro
13
Roles of Color Centro
13
Main Body
14
Control Panel Layout
15
Operating Environment
17
Connectable Computers and Operating System
17
Interfaces Used for Connection
17
Setup Procedure
18
3 Precautions for Installation
19
Introduction
20
Installer
20
Operating Environment of the Installer
20
Settings of this Machine
21
4 Installation of Color Centro
22
Introduction
23
Installing Color Centro
23
5 Basic Information
26
Launch Color Centro
27
Login
27
Cannot Start Color Centro
28
Screens of Color Centro
29
Launcher] Screen
29
Function Screens
30
Exit from Color Centro
35
6 How to Use Color Centro
36
Color Setting of the Main Body
37
Color Settings
37
Daily Management
38
Calibration on Color Centro
38
Adjustment for Individual Hues
39
Tone Curve Adjustment
39
Spot Color
39
Alternative Color
39
Color Setting Workflows by Color Centro
40
Color Settings by Using Default Profile
40
Color Settings by Using the Color Configuration Management Function
41
Color Settings by Using Functions of both Profile Management and Color Default Settings
41
7 Calibration
42
Outline of Calibration
43
Calibration] Screen
43
Menu of [Calibration] Screen
44
Basic Operation of [Calibration] Screen
45
Select the Calibration Method
46
Select the Instrument
47
Print the Chart
48
Chart Measurement
49
Remeasurement
50
Confirm Measurement Result
51
Register the Calibration Data
53
Reset the Calibration Data
54
8 Tone Curve Adjustment
55
Outline of Tone Curve Adjustment
56
Tone Curve Adjustment] Screen
56
Menu of [Tone Curve Adjustment] Screen
58
Basic Operation of [Tone Curve Adjustment] Screen
59
Select Sample Image
60
Sample Picture] Screen
60
Menu of [Sample Picture] Screen
61
Select Sample Image
61
Confirm Sample Image
62
Load the Tone Curve
63
Tone Curve Management] Screen
63
Menu of [Tone Curve Management] Screen
64
Load the Tone Curve
65
Create the New Tone Curve
66
Adjust the Brightness/Contrast
67
Brightness/Contrast] Tab
67
Brightness/Contrast Adjustment
68
Adjust the each Color
69
Adjust each Color] Tab
69
Basic Operation of [Adjust each Color] Tab
70
Confirmation Print
72
Save the Tone Curve
73
Tone Curve Management
74
Reset the Tone Curve
77
9 Spot Color
78
Outline of Spot Color
79
Spot Color] Screen
79
Menu of [Spot Color] Screen
80
Basic Operation of [Spot Color] Screen
81
Load the Spot Color Table
82
Spot Color Table Management] Screen
82
Menu of [Spot Color Table Management] Screen
83
Load the Spot Color Table
84
Create the New Spot Color Table
85
Select the Spot Color / Add the New Spot Color
86
Adjust the Spot Color Manually
87
Adjustment of Spot Color with the Printed Chart
88
Save the Spot Color Table
90
Change the Priority of the Spot Color Table
91
Spot Color Table Management
92
Initialize the Spot Color Screen
98
10 Alternative Color
99
Outline of Alternative Color
100
Alternative Color Management] Screen
100
Menu of [Alternative Color Management] Screen
102
Basic Operation of [Alternative Color Management] Screen
103
Select the Alternative Color / Add the New Alternative Color
104
Adjust the Input Color
106
Adjust the Output Color
107
Change the Priority of the Alternative Color
109
Register the Alternative Color
110
Alternative Color Management
111
11 Profile Management
113
Outline of Profile Management
114
Profile Management] Screen
114
Menu of [Profile Management] Screen
116
RGB Source Profile Management
117
Copy from the Image Controller
117
Delete
118
Change the Information
119
Export from the Image Controller
120
Import (Register) to the Image Controller
121
CMYK Target Profile Management
122
Copy from the Image Controller
122
Delete
122
Change the Information
123
Export from the Image Controller
124
Import (Register) to the Image Controller
124
Create the CMYK Target Profile
126
Launch Color Centro Profiler
127
Set the Profile Name and the Destination
128
Select the Measurement Method
129
Chart Measurement
130
Select UCR/GCR Setting
131
Enter the Comment
131
Confirm and Complete the Profile
132
Printer Profile Management
133
Copy from the Image Controller
133
Delete
134
Change the Information
135
Export from the Image Controller
136
Import (Register) to the Image Controller
137
Create the Printer Profile
138
Launch Color Centro Profiler
139
Set the Profile Name and the Destination
140
Select Measurement Method / Paper Setting
141
Chart Measurement
142
Select UCR/GCR Setting
143
Enter the Comment
144
Confirm and Complete the Profile
145
RGB-CMYK Device Link Profile Management
146
Copy from the Image Controller
146
Delete
147
Change the Information
148
Export from the Image Controller
149
Import (Register) to the Image Controller
150
Create the RGB-CMYK Device Link Profile
151
Launch Color Centro Profiler
152
Set the Profile Name and the Destination
153
Determine the Profiles
154
Customize the Color Conversions
155
Enter the Comment
156
Confirm and Complete the Profile
157
Edit the RGB-CMYK Device Link Profile
158
Launch Color Centro Profiler
159
Set the Profile Name and the Destination
160
Adjust the Point Color / Profile Curve
161
Complete the Profile
165
CMYK-CMYK Device Link Profile Management
166
Copy from the Image Controller
166
Delete
167
Change the Information
168
Export from the Image Controller
169
Import (Register) to the Image Controller
170
Create the CMYK-CMYK Device Link Profile
171
Launch Color Centro Profiler
172
Set the Profile Name and the Destination
173
Determine the Profiles
174
Customize the Color Conversions
175
Confirm the Calculation Result
177
Enter the Comment
177
Select the Task
178
Execute the Measurement Feedback
179
Complete the Profile
182
Edit the CMYK -CMYK Device Link Profile
183
Launch Color Centro Profiler and Select the Task
184
Confirm the Procedure
185
Set the Profile Name and the Destination
185
Execute the Measurement Feedback
186
Adjust the Point Color / Profile Curve
187
Complete the Profile
191
12 Color Default Settings
193
Outline of Color Default Settings
193
Color Default Settings] Screen
193
Menu of [Color Default Settings] Screen
196
Basic Operation of [Color Default Settings] Screen
196
Confirm the Name of Default Color Configuration
197
Default Manual Settings
198
Set the Default Settings of the RGB-CMYK Conversion
198
Set the Default Settings of the CMYK-CMYK Conversion
198
Set the Other Default Settings
199
Set Color Verification
200
Return to Factory Default
201
Color Default Settings
202
Outline of Color Configuration Management
204
Outline of Profile Set
204
Outline of Color Configuration
205
Color Configuration Management] Screen
207
Menu of [Color Configuration Management] Screen
209
Create the New Color Configuration
210
Set the Name of Color Configuration
210
Select the Profile Set
210
Set the Default Profile Set Setting / Paper Type Default Setting
211
Set the Color Conversion Option
212
Register the Color Configuration
212
Edit the Color Configuration
213
13 Color Configuration Management
214
Change the Default Color Configuration
214
Copy the Color Configuration
214
Delete the Color Configuration
214
Import (Register) / Export the Color Configuration
215
Reset the Default Color Configuration
216
Create the Profile Set
217
Specify the Profile Set Name
218
Launch Color Centro Profiler
218
Determine the Profiles
219
Customize the Color Conversions
220
Enter the Comment
222
Confirm the Calculation Result
222
Select the Task
223
Execute the Measurement Feedback
223
Complete the Profile Set
224
Edit the Component Profile of Profile Set
225
Launch Color Centro Profiler
226
Set the Profile Set Name and the Destination
227
Determine the Profiles
228
Recalculate Profile Set
229
Customize the Color Conversions
230
Enter the Comment
232
Confirm and Complete the Profile
232
Improve the Accuracy of the Profile Set
234
Launch Color Centro Profiler
235
Set the Profile Set Name and the Destination
236
Execute the Measurement Feedback
237
Complete the Profile Set
240
Adjust the Color Conversions of Profile Set
241
Launch Color Centro Profiler
242
Set the Profile Set Name and the Destination
243
Adjust the Point Color / Profile Curve
244
Complete the Profile Set
248
Profile Set Management
249
Export Profiles
249
Copy the Profile Set
250
Refresh the List (Reload)
252
Confirm the Detail Info
252
Change the Profile Set Information
253
Export the Profile Set
254
Environmental Setting
255
14 Other Functions
257
Re-Login on Connection Switching
257
List Operation
258
Sorting by List Item
258
Move of Row
258
Display/Non-Display List Item
258
Print Set up Information
259
Suspend and Restart
260
Suspend the Operation
260
Restart the Suspended Operation
261
VIVID Mode for Bizhub PRESS C70Hc
262
Preparation of VIVID Mode
262
RGB VIVID Mode
262
CMYK VIVID Mode
262
15 Troubleshooting
266
Cannot Start Color Centro
266
Cannot Adjust Color
267
16 Appendix
269
Scan Calibration
269
Glossary
274
Index
278
Advertisement
Konica Minolta bizhub PRESS C70hc User Manual (200 pages)
Brand:
Konica Minolta
| Category:
All in One Printer
| Size: 12.11 MB
Table of Contents
Table of Contents
2
1 Introduction
6
Welcome
7
Composition of User's Guide
7
User's Guide
9
Conventions Used in this Manual
10
Symbols Used in this Manual
10
Original and Paper Indications
11
2 Overview
12
What Is the Image Controller
13
Role of the Image Controller
13
Print Flows
14
Control Panel Layout
15
Operating Environment
17
Supported Computers and Oss
17
Interfaces Used for Connection
18
Setup Procedure
19
For Network Connection
19
For Local Connection
19
3 Before Installing the Printer Driver
20
Introduction
21
Printer Drivers Compatible with Respective Operating Systems
21
Connection Methods Selectable in each Operating System
23
Windows Vista/Server 2008/7
23
Windows 2000/Xp/Server 2003
24
Netware
25
Mac os X 10.4/10.5/10.6
25
4 Installing the Windows Printer Driver
26
About Installer
27
Operating Environment of the Installer
27
Easy Installation Procedure Using the Installer
28
Settings for the Machine
28
Installing the Printer Driver (PS Plug-In Driver)
29
5 Manual Installation Using the Add Printer Wizard
32
Windows Vista/Server 2008/7
33
For Network Connection (Lpr/Port 9100/SMB)
33
Installing the Printer Driver by Creating a Printer Port
36
For Network Connection (IPP/IPPS)
38
For Network Connection (Web Service Print)
40
Installing the Printer Driver by Specifying the Ip Address Using the Add Printer Wizard
41
For Local Connection
43
Updating the Driver after Connecting this Machine
44
Windows Xp/Server 2003
46
For Network Connection (Lpr/Port9100)
46
For Network Connection (SMB)
49
For Network Connection (IPP/IPPS)
51
For Local Connection
53
Windows 2000
54
6 Installation on Macintosh Computers
59
Installing the Printer Driver (PS Plug-In Driver)
60
Mac os X 10.4/10.5/10.6
60
Selecting and Connecting a Printer (os X 10.4/10.5/10.6)
61
Configuring the Appletalk Settings
62
Configuring the Lpr Settings
64
Configuring the Ipp Settings
66
7 Installation When Using Netware
69
Network Settings
70
Configuring the Windows Client
70
8 Uninstalling the Printer Driver
71
Windows
72
Uninstalling the Driver Manually (PS Plug-In Driver/Ppd Driver)
72
Macintosh
74
For Mac os X
74
9 Basic Printing Methods and Printer Functions
75
Print Operations
76
Setting Paper
78
Printer Functions
78
Setting a Paper Tray
79
Setting a Paper Tray
80
Printing a Number of Sets of an Original
81
Printing more than One Page
82
Setting a Front Cover, Back Cover, Interleaf, and Cover
85
Setting Finishing
86
Setting Transparent
88
Setting an Image
89
Saving and Reprinting a Job
90
10 Print Functions of PS Plug-In Driver
91
Default Settings of the Printer Driver
92
Displaying the Configure Screen
92
Common Setting
94
Parameter Details
95
Basic] Tab
95
Layout] Tab
96
Finishing] Tab
97
Paper] Tab
99
Cover] Tab
100
Page Settings] Tab
101
Tabs] Tab
103
Tab Settings] Tab
104
Color Mode] Tab
105
10.3.10 [Color Management] Tab
106
10.3.11 [Imaging] Tab
108
10.3.12 [Forms] Tab
109
10.3.13 [Print Position] Tab
110
10.3.14 [Stamp] Tab
111
10.3.15 [Workflow] Tab
112
10.3.16 [Configure] Tab
113
10.3.17 [Version] Tab
114
10.3.18 [Advanced] Tab
115
11 Print Functions of PPD Driver for Windows
116
Default Settings of the Printer Driver
117
Displaying the Properties Window
117
Device Settings] Tab
117
Registering the Default Settings
118
Common Setting
119
Parameter Details
120
Layout] Tab
120
Paper/Quality] Tab
120
Advanced Options] Window
121
12 Function Details
126
Secure Print
127
Setting the Printer Driver
127
Calling a Job from the Control Panel
128
Storing in the Hard Disk
130
Setting the Printer Driver
130
Calling a Job
132
Printing a Document on the Machine for Which User Authentication Is Specified
133
Printing a Document on the Machine for Which Account Track Function Is Enabled
134
13 Settings on the Control Panel
135
Controller Machine Setting
136
Displaying the Controller Screen
136
Controller Machine Setting Menu Screen
137
Report Type
138
Select Printer Setting
142
Spool Print Jobs in Hdd before Rip
144
Scan Setting
146
Job List
146
Basic Operations of User Settings
148
Displaying the User Settings Screen
148
Printer Setting
149
Basic Operations in Administrator Settings
150
Displaying the Administrator Settings Screen
150
Administrator Setting Screen
151
Controller Administrator Setting Menu
152
Displaying the Controller Administrator Setting Menu Screen
152
Controller Administrator Setting Menu Screen
153
14 Pagescope Web Connection
155
Using Pagescope Web Connection
156
Operating Environment
156
Accessing Pagescope Web Connection
156
Web Browser Cache
157
Online Help Function
157
Login and Logout
158
Login and Logout Flows
158
Logout
160
Login
161
Logging in as a Public User
162
Logging in as a Registered User
162
Logging in to the Administrator Mode
163
Structure of
164
Overview of the User Mode
166
Information
166
Job
167
Direct Print
168
Administrator Mode Overview
169
Maintenance
169
Security
170
Printer Setting
171
Scan
172
Network
173
15 Utility Tool
174
Font Management Utility
175
16 Troubleshooting
176
Cannot Print
177
Cannot Configure the Settings/Cannot Print According to the Settings
179
The Printer Driver Settings Have no Effect
179
Others
180
Error Message
180
17 Product Specification/Report
181
Product Specifications
182
Printing Reports
184
Color Setting
184
Network Settings
185
Machine Setting
186
PS Demo
187
PS Font List
188
18 Appendix
189
PPD Driver (for Linux and Applications)
190
PPD Driver Types
190
PPD Driver for Linux
190
PPD Driver for Applications
191
Glossary
192
19 Index
196
Index by Item
197
Index by Button
199
Konica Minolta bizhub PRESS C70hc User Manual (92 pages)
IC-601 Job Centro User Guide
Brand:
Konica Minolta
| Category:
Software
| Size: 3.2 MB
Table of Contents
Table of Contents
2
1 Introduction
5
Welcome
6
Composition of User's Guide
6
User's Guide
6
Conventions Used in this Manual
7
Symbols Used in this Manual
7
Safety Information
7
Procedural Instruction
7
Key Symbols
8
Original and Paper Indications
8
Paper Size
8
Paper Indication
8
2 Overview of the Job Centro
9
Job Centro
10
Roles of Job Centro
10
Control Panel
11
Operating Environment
13
Connectable Computers and Operating System
13
Windows
13
Interfaces Used for Connection
14
Connection Diagram
14
Setup Procedure
15
3 Precautions for Installation
16
Introduction
17
Installer
17
Operating Environment of the Installer
17
Settings of the Image Controller
18
TCP/IP Setting
18
JSP Setting
18
4 Installation of Job Centro
19
Introduction
20
Installing Job Centro
20
5 Basic Information
23
Launch Job Centro
24
General Login
24
User Authentication/Account Track
25
Screens of Job Centro
26
Printer]
26
Device Status]
27
Consumables]
27
Paper Tray]
28
Device Information]
28
Job List]
28
[Active Job] Screen
29
[Image Controller Hold]
29
[Main Body Hold/Hdd] Screen
29
[Job History] Screen
29
Close]
29
Layout Settings
30
How to Display [Layout Settings] Screen
30
Settings of the Default Tab
30
Settings of the List Items
31
Settings of the Date Style
31
Settings of the Time Style
32
Reset of the Layout
32
Exit from Job Centro
33
6 How to Manage Job with Job Centro
34
Job Management of the Printing System
35
Overview of the Job Management by Job Centro
35
Function of [JOB LIST]
36
Job Management of each Screen
36
Available Menu of each Screen
36
Other Functions of each Screen
37
Management
38
[Active Job] Screen
38
Status of Active Job
39
Change the Active Job Priority
39
[Increase Priority]
39
[Change Priority]
40
Delete Active Job
41
Job Operation in the Image Controller (Image Controller Hold)
42
[Image Controller Hold] Screen
42
Sorting of List
43
Search of Job in the Image Controller
43
Search by File Name
43
Search by Condition
44
Clearing Search Conditions
45
Print Job in the Hold Queue of the Image Controller and Copy It to the Hold Queue of the Main Body
45
Print Job
45
Copy Job to the Hold Queue of the Main Body
46
Copy/Delete Job In/From the Image Controller
46
Copy Job
46
Delete Job
47
Operate Job File
47
Rename File Name
47
Import Job
48
Backup Job
50
Restore Job
51
Edit Job in the Image Controller
52
Configuration of the Print Setting Screen
52
[Tray Settings] Screen
53
[Basic Setting] Screen
54
[Custom Size Settings] Screen
56
[Layout] Screen
57
[Finishing] Screen
58
[Cover Sheet/Insert Sheet] Screen
59
[Per Page Setting] Screen
60
[Crop Mark] Screen
61
[Stamp] Screen
62
[Image Quality] Screen
63
[Color Management] Screen
64
Favorite Setting
65
Edit Page of the Job in the Image Controller
66
Edit Page Screen
66
Move Page
67
Copy Page
67
Copy Page from Other Job
67
Delete Page
68
Rotate Page
68
Insert Blank Page
68
Insert Tab Paper
69
Insert Separator
69
Job Operation in the Main Body (Main Body Hold/Hdd)
70
[Main Body Hold/Hdd] Screen
70
Sorting of List
71
Print Job in the Hold Queue of the Main Body and Copy/Delete It To/From HDD of the Main Body
71
Reprint Job
72
Copy Job to the HDD of the Main Body
72
Delete Job
73
Unlock the Secure Print Job
74
Print Job in HDD of the Main Body and Copy/Delete It To/From the Hold Queue of the Main Body
74
Reprint Job
75
Copy Job to the Hold Queue of the Main Body
76
Delete Job
76
Unlock the Secure Print Job
77
Create/Delete Folder In/From HDD of the Main Body
77
Create New Folder
77
Delete Folder
78
Job Confirmation (Job History)
79
[Job History] Screen
79
Sorting of List
79
Result
80
Export Job History
80
7 How to Use Utilities
81
Launch Color Centro
82
Launch Pagescope Web Connection
83
8 Troubleshooting
84
Cannot Start Job Centro
85
9 Appendix
86
Glossary
87
Index
91
Advertisement
Konica Minolta bizhub PRESS C70hc Scanner Manual (119 pages)
Network Scanner (IC-601) guide
Brand:
Konica Minolta
| Category:
All in One Printer
| Size: 8.92 MB
Table of Contents
Table of Contents
2
1 Introduction
4
Welcome
5
Composition of User's Guide
5
User's Guide
6
Conventions Used in this Manual
7
Symbols Used in this Manual
7
Original and Paper Indications
8
About this Manual
9
Manual Composition
9
Conventions Used in this Manual
9
Utility Tools of this Product
9
2 Overview of the Scanning Features
11
Overview of Features and Connection Modes
12
Network Scanner Features
13
Product Specifications
14
3 Preparation for Use
15
Control Panel Layout
16
How to Operate the Touch Panel
18
How to Input Characters
20
How to Search
21
Ldap Search
22
4 About the Network Scanner Features
26
Overview of the Network Scanner Features
27
Send by an E-Mail
28
Items to be Configured
28
Storing in Hard Disk
29
Items to be Configured
29
Sending to the FTP Server
30
Items to be Configured
30
Sending to the SMB Server
32
Items to be Configured
32
Sending to a Group
33
The Flow of Operation of the Network Scanner
34
Sending Using Web Service (WS Scan)
35
Settings Required to Use the Web Service
35
5 Registering (Adding) an Address for the Network Scanner Features
37
Registering (Adding) an Address
38
Registering an E-Mail Address
40
Registering a User Box
42
Creating a User Box (Controller)
42
Registering a User Box as Destination (SCAN Screen)
46
Registering the FTP Server
48
Registering the SMB Server
51
Registering a Group
54
Changing/Deleting Registered Information
57
6 Using the Network Scanner Features
60
Keys on the Select Addresses Screen
61
Transmission to an E-Mail Address
63
Storing in the Hard Disk
69
Transmission to the FTP Server
73
Transmission to the SMB Server
79
Transmission to a Group
89
Transmission Using Web Service (WS Scan)
91
About the Scan Settings Screen
93
Original Setting
94
Scan Size
96
File Type
98
Scan Setting in Controller
99
Auto Delete Document
100
File Name
100
Color Space
101
Frame Erase
101
Z-Folded
102
Thickness
102
E-Mail Initial Setting
103
New User Box Reg
103
Job List
104
Displaying the Job List Screen
104
7 Utility Menu
106
Displaying the Utility Menu Screen
107
Scan Address Register
108
Scan Initial Setting
110
Scan Setting
111
8 Troubleshooting
112
Cannot Connect to the Scanner
113
When an Error Message Appears
114
9 Appendix
115
Glossary
116
Index
118
Konica Minolta bizhub PRESS C70hc Safety Information Manual (44 pages)
bizhub PRESS C70hc Safety Information Guide
Brand:
Konica Minolta
| Category:
Printer
| Size: 2.67 MB
Table of Contents
Table of Contents
3
1 Introduction
5
Welcome
6
Composition of User's Guide
6
Forgery Preventention Function
6
2 Precautions for Installation and Use
7
Safety Information
8
Disassemble and Modification
9
Power Cord
9
Power Source
9
Power Plug
10
Grounding
10
Installation
10
Ventilation
11
Actions in Response to Troubles
11
Consumables
11
When Moving the Machine
12
Before Successive Holidays
12
Paper
12
Paste Pellet
12
Perfect Binder
13
Authentication Unit (IC Card Type) AU-201
13
Regulation Notices
14
Laser Safety
14
Ozone Release
15
Electromagnetic Interference
15
Warning and Caution Labels
17
Caution Label on Fusing Part of Fixing Conveyance Unit
17
Caution Label on Fixing Conveyance Unit
18
Caution Label on Toner Recovery Box
19
Caution Label on Perfect Binder PB-503
20
Caution Label on Finisher FS-531/Finisher FS-612
21
Caution Label on Large Capacity Unit LU-202
22
Caution Labels on Multi Punch GP-501
23
Installation Space
24
Operation Precautions
37
Power Source
37
Operating Environment
37
Storage of Printed Materials
37
Ozone Release
37
Direct Sunlight
37
Precaution for Use of Folding Unit and Finisher
38
Konica Minolta bizhub PRESS C70hc User Manual (42 pages)
bizhub PRESS C70hc Security User Guide
Brand:
Konica Minolta
| Category:
Printer
| Size: 8.65 MB
Table of Contents
Table of Contents
2
1 Introduction
3
Welcome
4
Composition of User's Guide
4
User's Guide
4
Conventions Used in this Manual
5
Symbols Used in this Manual
5
Original and Paper Indications
6
2 Security Functions
7
Control Software
8
Control Software Version
8
About the ROM Version Display Function
8
Security Functions
8
Security Mode
9
Environment
9
Normal Mode
9
Description of Enhanced Security Mode
10
Enhanced Passwords
10
Machine Nic Settings
10
Blocking External Accesses
10
Administrator Setting Mode
10
Data Protected by the Enhanced Security Mode
11
IC Card
11
Usb Port Functions
11
Turning Enhanced Security Mode On/Off
11
User Authentication in Enhanced Security Mode
12
Adding and Changing User Data
12
Deleting User Data
23
Changing Password by User
26
Administrator Security Functions
29
Turning the Enhanced Security Mode ON/OFF
29
HDD Lock Password
31
Printing Audit Log
34
Analyzing Audit Log
36
Table of Items Saved in Audit Log
37
3 Index
39
Index by Item
40
Index by Button
41
Konica Minolta bizhub PRESS C70hc Setup Instructions (22 pages)
Brand:
Konica Minolta
| Category:
Printer
| Size: 1.74 MB
Table of Contents
Table of Contents
2
Administrative Requirements Prior to MFP HTTP Setup
3
MFP Specific Requirements
3
Setting MFP Date/Time Settings
4
Verifying the Machines Network Settings
5
Entering the User Name and Password in HTTP Settings
5
Enabling Vcare Settings in Service Mode
6
Setting Vcare Settings in Service Mode
8
Heart Beat Setting
11
Setting Vcare Date/Time Settings
13
Periodical Transmission Setting
14
Data Collection Setting
15
First Call to the Vcare System
16
Troubleshoot Communication Issues
16
Saving Vcare Communication Log Onto USB (Memory) Flash Drive
19
Printing a Vcare Communication Log
21
Advertisement
Related Products
Konica Minolta bizhub press c71hc
Konica Minolta bizhub press c7000
Konica Minolta bizhub press C7000P
Konica Minolta Bizhub C759
Konica Minolta bizhub C764
Konica Minolta bizhub C750i
Konica Minolta bizhub C550 Series
Konica Minolta bizhub C552DS Series
Konica Minolta bizhub C554e
Konica Minolta bizhub C658
Konica Minolta Categories
All in One Printer
Printer
Digital Camera
Measuring Instruments
Copier
More Konica Minolta Manuals
Login
Sign In
OR
Sign in with Facebook
Sign in with Google
Upload manual
Upload from disk
Upload from URL