Sign In
Upload
Manuals
Brands
Roland Manuals
Printer Accessories
VersaCamm VP-540i
Roland VersaCamm VP-540i Manuals
Manuals and User Guides for Roland VersaCamm VP-540i. We have
2
Roland VersaCamm VP-540i manuals available for free PDF download: User Manual, Setup Manual
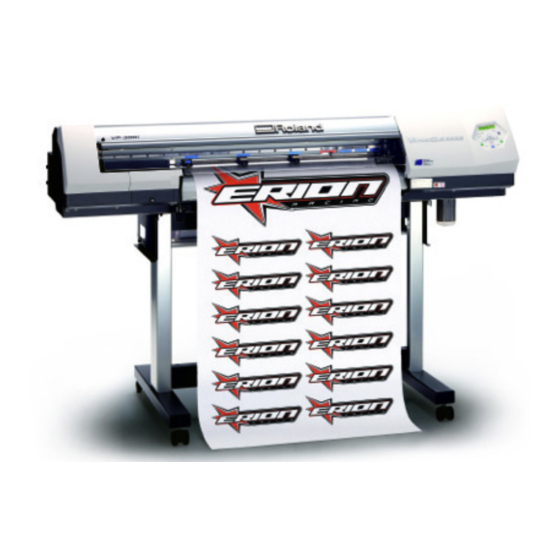
Roland VersaCamm VP-540i User Manual (136 pages)
a signmaking machine for ECO-SOL MAx & Aqueous Pigment ink models
Brand:
Roland
| Category:
Printer Accessories
| Size: 7.04 MB
Table of Contents
Table of Contents
4
Chapter 4 Feature Reference
5
To Ensure Safe Use
7
Pour Utiliser en Toute Sécurité
14
Important Notes on Handling and Use
21
Printer Unit
21
Ink Cartridges
22
Chapter 1 Introduction
24
Introduction
25
Machine Features
25
About the Notation Used in this Manual
25
Part Names and Functions
26
Printer Unit
26
Operation Panel
28
Chapter 2 Operation
30
Switching the Power on and off
31
The Power-Saving Feature
32
Loading and Cutting off Media
33
Loading Media
33
Cutting off the Media
39
Settings for the Media Heating System
40
Making the Temperature Setting for the Media Heating System
40
What Is the Media Heating System
40
General Guide for the Preset Temperatures
41
Starting Output
42
Getting Ready to Receive Data from a Computer
42
Printing Tests and Cleaning
43
If Ink Runs out
44
Checking for Remaining Ink
44
If Ink Runs out
45
Performing Cutting
46
To Perform Cutting
46
Performing a Cutting Test
47
Making the Setting for Blade Force
48
Chapter 3 Maintenance and Adjustment
50
Daily Care and Maintenance
51
Disposing of Discharged Ink
51
Cleaning
53
Care and Maintenance of the Print Heads
53
When Head Cleaning Is Not Effective
54
Performing more Powerful Cleaning
54
When Powerful Cleaning Is Not Effective
54
Cleaning the Heads Using the Cleaning Kit
55
How to Perform Cleaning
55
When the Cleaning Kit Becomes Necessary
55
Replacing Consumable Parts
59
Replacing the Wipers
59
Replacing the Blade
62
Replacing the Separating Knife
65
When Not in Use for a Prolonged Period
67
Keep Performing Maintenance
67
Chapter 4 Feature Reference
68
Pausing or Canceling Output
69
Canceling Output before It Finishes
69
Setting the Location for Starting Output
70
Setting the Output-Start Location
70
Saving the Printer Settings to Match the Media
71
Saving Optimized Media Settings as Preset Values
71
Loading a Saved Preset
72
Assigning a Name to a Preset
72
Optimizing Printing or Cutting to Match Media Thickness
73
Adjusting Head Height to Match Media Thickness (54-Inch Model Only)
73
Correcting for Misalignment in Bidirectional Printing
74
Correcting for Misalignment in Bidirectional Printing more Precisely
75
Performing Feed Correction to Alleviate Horizontal Bands and the Like
77
Performing Distance Correction During Cutting
78
Accommodating Various Kinds of Media
79
Using Transparent Media
79
Printing Hard-To-Dry Media
79
Preventing Media from Coming Loose
80
Speeding up Output for Narrow Media
80
Preventing Soiling of the Media and Dot Drop-Out During Printing
81
Printing Media that Warps Easily
82
How to Load Sheet Media
83
Changing How the Printer Operates
85
Executing Environment Matching Automatically
85
Determining What Happens When Ink Runs out
85
Setting the Interval until Activation of the Sleep Mode
86
Deactivating the Sleep Mode
86
Changing the Menu Language and the Units of Measurement
87
Returning All Settings to Their Initial Values
87
Changing the Ink-Drying Method
88
Switching off the Print Heater and Dryer
88
Determining How the Media Heating System Operates
88
Drying the Trailing Edge of the Printing Area on the Dryer
89
Making Various Adjustments for Cutting
90
Making the Cutting Conditions Set on the Machine Take Precedence
90
Fine-Tuning the Cutting Conditions
90
Accurately Adjusting the Cutting-In Amount
92
Preventing Pulling of the Media with Undue Force When Performing Cutting Only
92
Correcting Misalignment of the Printing and Cutting Positions
93
Performing Printing and Cutting Separately
96
To Perform Printing and Cutting Separately
96
Printing with Crop Marks
96
Aligning Automatically and Cutting
97
Aligning Manually and Cutting
98
Correcting Misalignment for Printing and Cutting When Using Crop Marks
99
Making the Network Settings
102
Setting the IP Address, Subnet Mask, Etc
102
Viewing Information about the Media and the System
103
Displaying the Amount of Media Remaining
103
Verifying the Setting for the Amount Remaining Every Time the Media Is Changed
103
Printing the Amount of Remaining Media
104
Viewing the Serial Number, Firmware Version, and Other Information
105
Viewing the Network Settings
105
Printing a System Report
106
Draining Ink and Performing Internal Washing
107
Draining Ink Remaining Inside the Machine
107
Performing Maintenance
107
Main Menu
109
Menu List
109
Language and Unit Menu
113
Function Menu
114
Chapter 5 What to Do if
116
The Machine Doesn't Run
117
The Printer Unit Doesn't Run
117
The Media Heating System Doesn't Warm up
117
Attractive Printing or Cutting Is Impossible
118
Colors Are Unstable or Uneven
118
Printed Results Are Coarse or Contain Horizontal Stripes
118
Cutting Is Misaligned or Skewed
119
The Media Becomes Soiled When Printed
119
The Media Jams
120
Media Wrinkles or Shrinks, or Feed Is Unstable
121
Media Feed Is Not Smooth
121
Media Feed Is Not Straight
121
Media Wrinkles or Shrinks
121
The Print Heads Stopped Moving
122
If the Heads Still Do Not Move
122
What to Do First
122
If a Message Appears
123
If an Error Message Appears
124
Chapter 6 Specifications
126
Usable Media
127
Conditions for Usable Media
127
Printing/Cutting Area
128
Maximum Area
128
Maximum Area When Using Crop Marks
128
The Media-Cutoff Location During Continuous Printing
129
About the Blade
130
Locations of the Power Rating and Serial Number Labels
131
Specifications
132
Advertisement
Roland VersaCamm VP-540i Setup Manual (50 pages)
for eco-sol max & aquenous pigment ink models
Brand:
Roland
| Category:
Printer
| Size: 5.42 MB
Table of Contents
Table of Contents
4
To Ensure Safe Use
5
Warning Labels
11
Pour Utiliser en Toute Sécurité
12
Setup Guide
20
1 Included Items
21
2 Installation Environment
22
Deciding on an Installation Site
22
Temperature and Humidity
23
Installation Space
23
3 Assembling and Installing
24
Assembling the Stand
24
Installing the Shafts
25
Installing the Drain Bottle
27
Attaching the Ink-Cartridge Tray
28
Removing the Packing Materials
30
4 Connect the Cables
31
Connecting the Cables
31
5 AQUEOUS PIGMENT Ink (FPG2): Installing the Ink Cartridges
32
Affixing the Label for AQUEOUS PIGMENT Ink (FPG2) Models
32
6 ECO-SOL MAX Ink: Installing the Ink Cartridges
35
ECO-SOL MAX Ink: Filling with Ink for the First Time
35
7 Installing the Blade
39
8 Network Settings
41
Introduction
41
Step 1: Make the Network Settings for the Computer
41
Step 2: Make the Network Settings on the Printer
43
Step 3: Make the Port Settings for the Software RIP
44
9 When Not in Use for a Prolonged Period
45
Keep Performing Maintenance
45
Alarm Feature (ECO-SOL MAX Ink Models Only)
45
Important Note on Draining Ink
45
10 When Moving the Unit
46
Procedures from Preparing to Move through Reinstalling
46
Advertisement
Related Products
Roland VersaCamm VP-300i
Roland VersaCAMM ECO-SOL MAX3
Roland VP-550
Roland VersaCamm VP-540
Roland VP-770
Roland VP-7 5100012850-01
Roland VP-7 VP-7
Roland VP-9000
Roland V-Piano
Roland VP-70
Roland Categories
Musical Instrument
Synthesizer
Recording Equipment
Drums
Electronic Keyboard
More Roland Manuals
Login
Sign In
OR
Sign in with Facebook
Sign in with Google
Upload manual
Upload from disk
Upload from URL