Sign In
Upload
Manuals
Brands
Roland Manuals
Synthesizer
JUNO-Gi
Roland JUNO-Gi Manuals
Manuals and User Guides for Roland JUNO-Gi. We have
11
Roland JUNO-Gi manuals available for free PDF download: Owner's Manual, Reference Manual, Workshop, Workshop Manual, Quick Start Manual, Stuff To Know
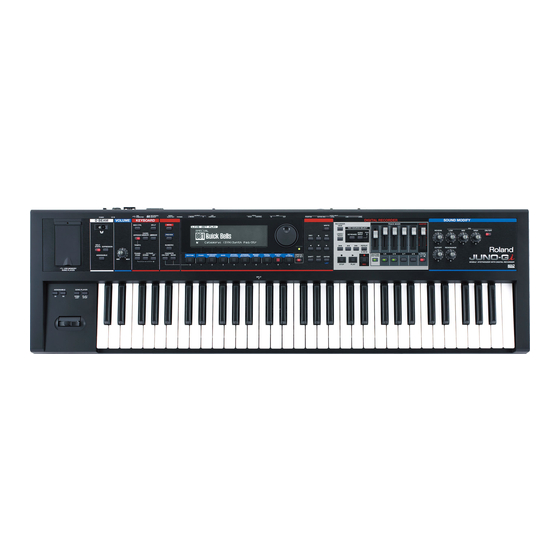
Roland JUNO-Gi Owner's Manual (152 pages)
mobile Synthesizer With digital recorder
Brand:
Roland
| Category:
Synthesizer
| Size: 41.57 MB
Table of Contents
Table of Contents
3
Features
2
Table of Contents
3
Overview
7
Overview of the JUNO-Gi
8
About the Synthesizer
8
Live Sets and Tones
8
About the Digital Recorder
9
About the Recorder Tempo
9
Insert Effects
9
Rhythm Pattern
9
Tracks and V-Tracks
9
About the USB Memory Song Player
9
SD Cards and USB Memory
9
Panel Descriptions
10
Front Panel
10
Rear Panel Connections
12
Sd Card Slot
13
About Batteries
14
Installing Batteries
14
Removing Batteries
14
When to Replace the Batteries (BATTERY Indicator)
14
About SD Cards
15
Removing an SD Card
15
Turning the Power on
16
About the Display
17
Adjusting the Display Contrast ([LCD CONTRAST] Knob)
17
Turning the Display Backlight On/Off
17
Basic Operation of the JUNO-Gi
18
About the Function Buttons
18
The [SHIFT] Button Functions
18
Editing a Value
18
Changing a Value
18
Moving the Cursor
18
Entering a Value ([NUMERIC] Button)
19
The [MENU] Button Function
19
Assigning a Name
19
Listening to the Demo Song
20
Synthesizer 1 (Selecting Sounds)
22
Selecting Live Sets
22
About the LIVE SET PLAY Screen
22
Selecting Live Sets from the List
22
Using the VALUE Dial to Select a Live Set
23
Selecting Live Sets by Number ([NUMERIC] Button)
23
Selecting Special Live Sets ([SPECIAL LIVE SET] Button)
23
Auditioning a Live Set ([PREVIEW] Button)
23
Registering and Calling up Favorite Live Sets (FAVORITE)
24
Registering a Favorite Live Set
24
Calling up a Favorite Sound
24
Registering, Calling Up, or Editing Favorites in a List
24
Selecting Tones (LAYER/SPLIT)
25
Selecting Tones or Rhythm Sets
25
Dividing the Keyboard into Two Areas to Play Separate Tones (SPLIT)
26
Changing the Tone or Volume in the LAYER/SPLIT Screen
26
Changing the Split Point
26
Synthesizer 2 (Performance Functions)
27
Changing the Keyboard Settings
27
Changing the Pitch in One-Octave Steps
27
(OCTAVE [DOWN] [UP] Button)
27
Transposing the Pitch in Semitone Steps ([TRANSPOSE] Button)
27
Adjusting the Keyboard Touch
27
Changing the Temperament to an Arabian or Other Scale
27
Scale Tune
27
Controlling Your Performance
28
D Beam Controller
28
D Beam Controller Settings
28
[S1] [S2] Buttons
28
Pitch Bend/Modulation Lever
29
[SOUND MODIFY] Knob
29
([CUTOFF]/[RESONANCE] Knobs)
29
Adding Reverberation ([REVERB] Knob)
29
Adjusting the Level of the Low, Middle and High Frequency Ranges (EQ [LOW]/[MID]/[HIGH] Knobs)
29
Modifying the Tonal Character
29
Using Pedals
30
Adding Expression to Your Performance (CONTROL Pedal)
30
CONTROL Pedal Settings
30
Holding Notes (HOLD Pedal)
30
Performing with a Microphone (Vocoder)
30
Changing the Vocoder Settings
30
Using the Vocoder
30
Using the Chord Memory Function
31
About the Chord Memory Function
31
Performing with the Chord Memory Function
31
Chord Memory Settings
31
Playing Arpeggios (ARPEGGIO)
32
About Arpeggio
32
Playing by Using Arpeggios
32
Determining the Tempo for Arpeggio Performances
32
Holding an Arpeggio
32
Turning Arpeggio on and off
32
Arpeggio Settings
32
Saving Arpeggio Settings (WRITE)
33
Importing SMF on Your Computer to an Arpeggio Style
33
Synthesizer 3 (Editing/Effects)
34
Editing a Live Set (LIVE SET EDIT)
34
Basic Operations in the LIVE SET EDIT Screen
34
Copying/Exchanging Layers
35
Initializing a Live Set
35
Saving a Live Set (WRITE)
35
LIVE SET EDIT Parameter
36
LIVE SET EDIT 1 Screen
36
(Keybord)
36
(Lv&Pan)
36
(Output)
36
(Pitch)
36
(Tone)
36
LIVE SET EDIT 2 Screen
37
(Key Mod)
37
(Offset)
37
(Rx Fltr)
37
(Velocity)
37
(Vibrato)
37
LIVE SET EDIT 3 Screen
38
(Common)
38
(Control)
38
PRO EDIT Screen
39
General
39
Pitch Env
39
Tvf Parameter
40
Tvf Envelope
41
Tva Envelope
42
Tva Parameter
42
Lfo1/8. Lfo2
43
Applying Effects (EFFECT EDIT)
44
Turning Effects On/Off (Effect Switch)
44
Making Effect Settings
44
Signal Flow and Parameters (EFFECT ROUTING)
45
Multi-Effect Settings (MFX1, 2)
46
(Mfx Structure)
46
Controlling a Multi-Effect Via MIDI (MFX1, 2 CTRL)
46
Specifying How Multi-Effects Are Combined
46
Chorus Settings (CHORUS)
47
Reverb Settings (REVERB)
47
Effects Parameters
48
Multi-Effects Parameters (MFX1, 2)
48
01: Equalizer
50
Equalizer
50
02: Spectrum
50
Isolator
50
04: Low Boost
50
Low Boost
50
05: Super Filter
51
Spectrum
50
03: Isolator
50
Enhancer
51
08: Auto Wah
52
Step Filter
51
07: Enhancer
51
Super Filter
51
06: Step Filter
51
Auto Wah
52
09: Humanizer
52
Humanizer
52
10: Speaker Simulator
52
Speaker Simulator
52
11: Phaser
53
Multi Stage Phaser
53
14: Infinite Phaser
54
Phaser
53
12: Step Phaser
53
Step Phaser
53
13: Multi Stage Phaser
53
Infinite Phaser
54
15: Ring Modulator
54
Ring Modulator
54
16: Step Ring Modulator
54
Step Ring Modulator
54
17: Tremolo
54
Tremolo
54
18: Auto Pan
55
Auto Pan
55
19: Step Pan
55
Slicer
55
21: Rotary
56
Step Pan
55
20: Slicer
55
Chorus
56
24: Flanger
57
Rotary
56
22: Vk Rotary
56
Vk Rotary
56
23: Chorus
56
Flanger
57
25: Step Flanger
57
Step Flanger
57
26: Hexa-Chorus
58
Hexa-Chorus
58
27: Tremolo Chorus
58
Space-D
58
29: 3D Chorus
59
30: 3D Flanger
59
31: 3D Step Flanger
59
Tremolo Chorus
58
28: Space-D
58
3D Chorus
59
3D Flanger
59
3D Step Flanger
59
32: 2 Band Chorus
60
33: 2 Band Flanger
60
34: 2 Band Step Flanger
60
2Band Chorus
60
2Band Flanger
60
2Band Step Flanger
60
35: Overdrive
61
Distortion
61
37: Vs Overdrive
61
Overdrive
61
36: Distortion
61
Vs Distortion
61
39: Guitar Amp Simulator
62
Vs Overdrive
61
38: Vs Distortion
61
Compressor
62
41: Limiter
63
Guitar Amp Simulator
62
40: Compressor
62
Delay
63
DELAY (13 Types)
63
44: Long Delay
64
Gate
63
43: Delay
63
Limiter
63
42: Gate
63
Long Delay
64
45: Serial Delay
64
Modulation Delay
64
47: 3Tap Pan Delay
65
48: 4Tap Pan Delay
65
49: Multi Tap Delay
65
Serial Delay
64
46: Modulation Delay
64
3Tap Pan Delay
65
50: Reverse Delay
66
Multi Tap Delay
65
Delay
66
53: Time Ctrl Delay
67
Reverse Delay
66
51: Shuffle Delay
66
Shuffle Delay
66
52: 3D Delay
66
Long Time Ctrl Delay
67
55: Tape Echo
68
Time Ctrl Delay
67
54: Long Time Ctrl Delay
67
Lofi Noise
68
57: Lofi Compress
69
Tape Echo
68
56: Lofi Noise
68
Lofi Compress
69
58: Lofi Radio
69
Lofi Radio
69
59: Telephone
69
Phonograph
69
61: Pitch Shifter
70
Telephone
69
60: Phonograph
69
2Voice Pitch Shifter
70
64: Reverb
71
Pitch Shifter
70
62: 2Voice Pitch Shifter
70
63: Step Pitch Shifter
70
Step Pitch Shifter
70
Gated Reverb
71
66: OVERDRIVE G CHORUS
71
OVERDRIVE G CHORUS
71
Reverb
71
65: Gated Reverb
71
REVERB (2 Types)
71
67: OVERDRIVE G FLANGER
72
DISTORTION G CHORUS
72
70: DISTORTION G FLANGER
72
DISTORTION G DELAY
72
72: ENHANCER G CHORUS
73
DISTORTION G FLANGER
72
71: DISTORTION G DELAY
72
OVERDRIVE G DELAY
72
69: DISTORTION G CHORUS
72
OVERDRIVE G FLANGER
72
68: OVERDRIVE G DELAY
72
CHORUS G DELAY
73
76: FLANGER G DELAY
74
ENHANCER G CHORUS
73
73: ENHANCER G FLANGER
73
ENHANCER G DELAY
73
75: CHORUS G DELAY
73
ENHANCER G FLANGER
73
74: ENHANCER G DELAY
73
CHORUS G FLANGER
74
78: Sympathetic Resonance
75
FLANGER G DELAY
74
77: CHORUS G FLANGER
74
Sympathetic Resonance
75
79: Vocoder
75
Vocoder
75
VOCODER (1 Type)
75
Chorus Parameters
76
Reverb Parameters
77
Synthesizer 4 (Other Settings)
78
Utility (UTILITY)
78
Displaying the UTILITY MENU
78
Backing up JUNO-Gi Settings to SD Card (User Backup)
78
Restoring JUNO-Gi Settings from SD Card (User Restore)
78
Returning to the Factory Settings (Factory Reset)
78
Formatting USB Memory (USB Memory Format)
79
Formatting SD Card (SD Card Format)
79
Backing up SD Card Data to Your Computer
79
Restoring Backed up Data to an SD Card
79
System Settings (SYSTEM)
80
Making System Settings
80
Saving the System Settings (WRITE)
80
System Parameters
80
System Menu [1] (GENERAL)
80
System Menu [2] (KBD/CTRL)
81
System Menu [3] (MIDI/SYNC)
82
System Menu [4] (CLICK/PLAYER)
83
System Menu [5] (D BEAM)
83
System Menu [6] (INFORMATION)
84
Digital Recorder 1 (Recording/Playing/Editing)
86
Displaying the Digital Recorder Screen
86
Displaying the RECORDER Screen
86
About the RECORDER Screen
86
Playing a Song
87
Selecting and Playing a Song (Song Select)
87
Changing the Current Position
87
Muting Tracks
88
Adjusting the Volume of the Tracks
88
Adjusting the Pan, Reverb, and EQ (TRACK SETTING)
89
Controlling the Parameters of Two Tracks Simultaneously (Stereo Link)
89
Switching V-Tracks (V-Track)
89
Playing Back Repeatedly (REPEAT)
90
Region
90
Specifying the A-B Region
90
Using the A-B SETTING Screen to Specify the Repeat
90
Recording
91
Song Production Flow
91
Creating a New Song (Create New Song)
91
Connecting the Equipment to Record and Adjusting the Input
92
Level
93
Selecting an Instrument to Record (REC SOURCE SELECT)
93
Selecting the Sound of the External Audio Input (AUDIO INPUT)
93
Selecting the Sound of the Synthesizer (KEYBOARD)
93
Recording
94
Re-Recording over a Mistake (Punch-In/Out)
95
Auto Punch-In/Out
95
Manual Punch-In/Out
95
Repeatedly Recording the same Region (Loop Recording)
96
Canceling a Recording/Editing (Undo/Redo)
96
Canceling the Undo (Redo)
96
Reverting to the Previous State (Undo)
96
Putting Multiple Tracks Together (BOUNCE Mode)
97
Bounce-Recording
97
Listening the Result of the Bounce-Recording
97
Editing
98
Selecting the RECORDER MENU
98
SONG EDIT Menu
98
TRACK EDIT Menu
98
TRACK EDIT Menu (Editing a Track)
98
Track Copy (Copying Data)
98
Track Move (Moving Data)
99
Track Erase (Erasing Data)
100
Track Exchange (Exchanging Data)
100
Track Import (Importing an Audio File)
101
Track Export (Exporting Track Data to an Audio File)
102
SONG EDIT Menu
103
Create New Song
103
Information
103
Song Copy
103
Song Name Edit
103
Song Remove
103
Song Select
103
Song Optimize (Saving Space on the SD Card)
104
Song Protect
104
Saving the Current Settings to the Song (Song Write)
104
Igital Recorder 2 (Effects)
105
Effects in the Recorder Section
105
Insert Effect Banks and Patches
105
Using Insert Effects
106
Displaying the Recorder's Effects Screen
106
Turning each Effect On/Off (SWITCH)
106
Selecting an Insert Effect
106
Turning the Insert Effect Algorithms On/Off
106
Editing the Insert Effects Settings (EDIT)
107
Saving Insert Effects Settings (WRITE)
107
Changing the Location of the Insert Effects (LOCATION)
108
Insert Effects Parameters
109
Algorithm
109
GUITAR Bank
109
LINE Bank
109
MIC Bank
109
Amp
110
Equalizer
111
Noise Suppressor
111
Od/Ds
112
Wah
113
Ac.pro
113
Compressor
113
Limiter
113
Octave
113
Flanger
114
Pan
114
Phaser
114
Rotary
114
Tremolo
114
Uni-V
114
Delay
115
Chorus
115
Reverb
115
Compressor
116
Enhancer
116
Limiter
116
Using Reverb Effect
117
Selecting the Reverb Effect
117
Adjusting the Reverb Depth for the Tracks, Rhythm, and External Input
117
Reverb Parameters
117
Mastering (MASTERING Mode)
118
Mastering Procedure
118
Editing the Mastering Tool Kit Settings (EDIT)
119
Saving the Mastering Tool Kit Settings (WRITE)
119
Mastering Tool Kit Parameters
120
Algorithm
120
3Band Comp
120
Input
120
Limiter
120
Mixer
120
Output
120
Digital Recorder 3 (Rhythm Pattern)
121
Playing a Rhythm Pattern
121
About Patterns and Arrangements
121
Turning the Rhythm Pattern On/Off
121
Editing the Pan, Reverb, and EQ of the Rhythm Pattern
121
Displaying the RHYTHM PATTERN Screen
122
About the RHYTHM PATTERN Screen
122
Selecting a Pattern
122
Selecting Drum Sounds (Rhythm Set)
122
Setting the Recorder Tempo
122
Switching between Pattern Mode and Arrangement Mode
122
Placing Patterns to Create an Arrangement (ARRANGE EDIT)
123
Displaying the ARRANGE EDIT Screen
123
About the ARRANGE EDIT Screen
123
Switching Patterns
123
CLEAR ALL (Clear All Steps)
123
Delete Step
123
Insert Step
123
WRITE (Saving the Arrangement)
123
Editing a Pattern (PATTERN EDIT)
124
Displaying the PATTERN EDIT Screen
124
(Specify the Note's Type, Duration, and Velocity)
124
About the PATTERN EDIT Screen
124
INIT (Initializing a Pattern)
124
Note Setup
124
SCALE (Specify the Scale of the Grid)
124
SETUP (Specify the Time Signature and Length)
124
Entering Notes
125
Deleting a Note
125
WRITE (Saving a Pattern)
125
Importing SMF on Your Computer to a Rhythm Pattern (IMPORT)
126
USB Memory Song Player
127
Playing Song Files from USB Memory
128
Copying Song Files from Your Computer to Usb Memory
128
Song Files that Can be Played
128
Insert the USB Memory
128
Playing Along with an Song File from USB Memory
128
Adjusting the Volume of the Song Player
129
Center Cancel/Minus-One
129
Detailed Settings for Center Cancel
129
Detailed Settings for Minus-One
129
Using the Included USB Memory Protector
130
Appendix
131
Connecting to Your Computer Via USB
132
Connecting the JUNO-Gi to Your Computer
132
Connecting an External MIDI Device
133
About MIDI
133
About MIDI Connectors
133
Using the JUNO-Gi as a Master Keyboard (MIDI Controller Mode)
133
Detailed Settings in MIDI Controller Mode
133
Specifying the Transmit Channel
133
Playing the JUNO-Gi from an External MIDI Device
134
Setting the Program Change Receive Switch
134
Setting the Receive Channel
134
Synchronizing with an External MIDI Device
134
Transmitting Synchronization Data
134
Using the Keyboard to Control Images (V-LINK)
135
What Is V-LINK
135
Turning the V-LINK ON/OFF
135
V-LINK Settings
135
Chord Memory List
136
Error Message List
138
Troubleshooting
140
Specifications
143
MIDI Implementation Chart
144
Index
145
Using the Unit Safely
147
Important Notes
148
Declaration of Conformity
150
Advertisement
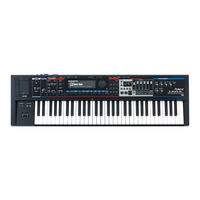
Roland JUNO-Gi Workshop (26 pages)
Brand:
Roland
| Category:
Synthesizer
| Size: 10.7 MB
Table of Contents
About the JUNO-Gi Workshop Booklets
2
The Four Sides of the JUNO-Gi
2
Understanding the Symbols in this Booklet
2
Hot Links
2
Getting Ready
3
Listening to the JUNO-Gi
3
Connecting the JUNO-Gi for Using AC Power
3
Installing Batteries in the JUNO-Gi
3
Turning on the JUNO-Gi
4
The JUNO-Gi Synthesizer
5
Live Set Selection
5
Live Set Groups
5
Live Set Categories
5
Selecting a Live Set
6
Using a Live-Set List
6
Numeric Selection of Live Sets
6
Rhythm and Special Live Sets
6
Favorites
7
The JUNO-Gi’s Preview Feature
7
Listening to Live Sets
7
Exploring the JUNO-Gi Live Sets
8
Pianos and Electric Pianos
8
Shaping Sounds in Realtime
9
Listening to Rhythm Live Sets
9
Other Categories’ Live Sets
9
Special Live Sets
10
A Short Detour to Talk about the JUNO-Gi Soft Buttons
10
Back to Quickbells
10
Special Live Set Splits
11
The JUNO-Gi Digital Recorder
12
Where Do JUNO-Gi Digital Recorder Songs Go?
12
8 Playback Tracks Vs 64 Recording V-Tracks
12
Mono and Stereo Tracks
12
The RECORDER Screen
13
Listening to the Main JUNO-Gi Demo
13
To Display the RECORDER Screen
13
Mixing Your Eight Playback Tracks, 4-By-4
14
The TRACK SETTING Screen
14
Loading Songs in the Digital Recorder
15
Recording Your Own Song
15
Creating a New Song
16
Naming Your New Song
16
Rhythms
16
To Finish Naming Your Song
16
Meet the Beat
17
Building Your Own Patterns
17
Setting a Song’s Tempo
17
To Set the Song’s Tempo
17
Chaining Rhythm Patterns in Arrange Mode
18
Getting Ready to Record a Track
18
Preparing to Record the JUNO-Gi Itself
18
Preparing to Record Live Audio
19
Recording a Track
20
Recording the First Track
21
The JUNO-Gi and Your Computer
22
MIDI Controller Mode
22
Drive(R) Time
22
Recording more Tracks
22
The JUNO-Gi as Your Daw’s Audio Interface
23
The JUNO-Gi’s USB Song Player
24
How the USB Song Player Works
24
Roland JUNO-Gi Reference Manual (32 pages)
Mobile synthesizer with digital recorder
Brand:
Roland
| Category:
Synthesizer
| Size: 0.98 MB
Table of Contents
Table of Contents
2
Live Set List
3
Special
3
Piano
3
Keyboard/Organ
4
Bass
6
Guitar/Plucked
7
Brass/Wind
8
Vocal/Choir
8
Synth/Pad
9
Fx/Others
14
Rhythm
15
Tone List
16
Preset
16
Gm.(Gm2)
23
Rhythm Set List
26
Preset
26
Gm.(Gm2)
26
Advertisement
Roland JUNO-Gi Workshop Manual (18 pages)
Mobile Synthesizer and Digital Recorder
Brand:
Roland
| Category:
Synthesizer
| Size: 3.45 MB
Table of Contents
About this Booklet
2
Installing a Memory Card
3
What You Need
4
Song Select
7
Create New Song
7
Song Remove
8
Song Name Edit
8
Song Copy
8
Song Protect
9
Track Copy
9
Song Optimize
9
Track Move
10
Track Erase
10
Track Exchange
11
Track Import
11
Performing the Bounce
14
Roland JUNO-Gi Workshop Manual (19 pages)
Mobile Synthesizer and Digital Recorder Using with a Computer
Brand:
Roland
| Category:
Synthesizer
| Size: 5.46 MB
Roland JUNO-Gi Workshop (9 pages)
Mobile Synthesizer and Digital, RecorderRealtime Control
Brand:
Roland
| Category:
Synthesizer
| Size: 3.05 MB
Roland JUNO-Gi Workshop Manual (9 pages)
Mobile Synthesizer with Digital Recorder Working with BOSS Insert Effects
Brand:
Roland
| Category:
Synthesizer
| Size: 2.14 MB
Roland JUNO-Gi Quick Start Manual (7 pages)
Mobile Synthesizer and Digital Recorder
Brand:
Roland
| Category:
Synthesizer
| Size: 2.24 MB
Roland JUNO-Gi Workshop Manual (4 pages)
Mobile Synthesizer and Digital Recorder Using the JUNO-Gi’s Live Audio Inputs and BOSS Effects
Brand:
Roland
| Category:
Synthesizer
| Size: 1.84 MB
Roland JUNO-Gi Quick Start Manual (4 pages)
Brand:
Roland
| Category:
Synthesizer
| Size: 6.04 MB
Roland JUNO-Gi Stuff To Know (2 pages)
High Quality Live Performance Synthesizer
Brand:
Roland
| Category:
Synthesizer
| Size: 0.04 MB
Advertisement
Related Products
Roland JUNO-G
Roland Juno-GJ
Roland JUNO-D
Roland Juno-6
Roland JUNO-106
Roland Alpha Juno-2
Roland JUNO-DS
Roland JUNO-DS88
Roland JUNO-X
Roland juno-ds61
Roland Categories
Musical Instrument
Synthesizer
Recording Equipment
Drums
Electronic Keyboard
More Roland Manuals
Login
Sign In
OR
Sign in with Facebook
Sign in with Google
Upload manual
Upload from disk
Upload from URL