Sign In
Upload
Manuals
Brands
Roland Manuals
Synthesizer
JUNO-Di
Roland JUNO-Di Manuals
Manuals and User Guides for Roland JUNO-Di. We have
2
Roland JUNO-Di manuals available for free PDF download: Owner's Manual, Workshop
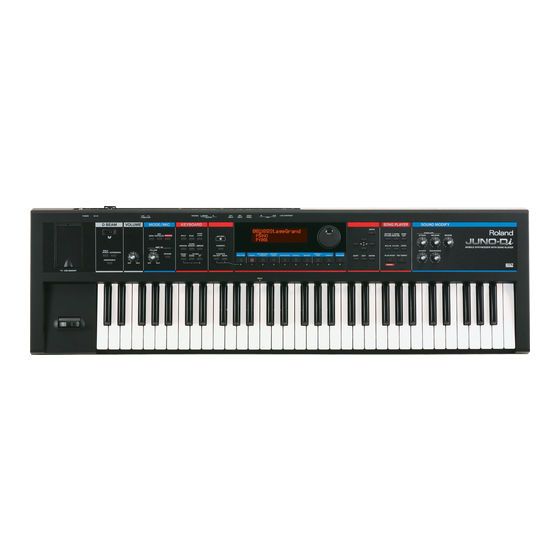
Roland JUNO-Di Owner's Manual (136 pages)
Mobile Synthesizer with song player
Brand:
Roland
| Category:
Synthesizer
| Size: 13 MB
Table of Contents
Conventions Used in this Manual
2
Using the Unit Safely
3
Important Notes
6
Maintenance
6
Additional Precautions
6
Main Features
8
Table of Contents
9
Introduction
13
Panel Descriptions
14
Front Panel
14
Song Player
15
Rear Panel
16
Getting Ready
17
Connecting the AC Adaptor
17
Installing Batteries (Sold Separately)
17
Removing Batteries
18
When to Replace the Batteries (BATTERY Indicator)
18
Connecting the External Equipment
18
Connecting Speakers or Headphones
18
Connecting a Microphone
19
Connecting a Portable Audio Device
19
Connecting Pedal
19
Turning On/Off the Power
20
Turning off the Power
20
Adjusting the Volume Level ([VOLUME] Knob)
20
Adjusting the Display Contrast ([LCD CONTRAST] Knob)
20
Turning the Display Backlight On/Off
21
Using the Included USB Memory Protector
21
Listening to the Demo Songs
21
Application Guide
23
Playing Ballads
24
Pedal-HOLD PEDAL
24
Adding Reverb-[REVERB] Knob
25
Operation
25
Listening to the Tone-[PREVIEW] Button
25
Selecting a Tone
25
Playing Jazz Electric Piano
26
Adding an Effect
27
Playing Rock Organ
28
Rotary Effect + Modulation Lever
29
Pitch Bend/Modulation Lever
29
Playing Pops
30
Layering Different Tones-[DUAL] Button
31
Playing with Multiple Tones-[PERFORM (Performance)] Button
31
Playing R&B
32
Playing with a Different Tone for each Hand-[SPLIT] Button
33
Changing the Point Where the Keyboard Is Divided (the Split Point)
33
Changing the Pitch in One Octave Steps-OCTAVE [DOWN]/[UP] Buttons
34
Playing Rhythm Patterns
34
Playing Rhythm Patterns-[RHYTHM PATTERN] Button
35
Switching Rhythm Styles (Rhythm Pattern Group)
35
Playing Bossa Nova
36
Playing a Chord with a Single Key-[CHORD MEMORY] Button
37
Playing Arpeggios-[ARPEGGIO] Button
37
Playing Techno Sounds
38
Varying the Tone-[CUTOFF]/[RESONANCE] Knobs
39
Varying the Tone-D Beam Controller/[Solo SYNTH] Button
39
Playing Drums
40
Playing Synthesizer Sounds
41
Thickening a Single Tone-[SUPER LAYER] Button
41
Singing Along While You Play
42
Using the Vocoder
42
Changing Vocoder Settings
43
Using a Microphone-MIC in [VOLUME] Knob/[Reverb] Button
43
Shifting the Key Range in Semitone Steps-[TRANSPOSE] Button
44
Transposing
44
Playing Live
45
Invoking Registered Tones
45
Registering Frequently Used Tones
45
Registering and Switching to Frequently Used Tones or Settings -FAVORITE [ON/OFF] Button/[Bank] Button
46
Switching Favorite Banks
46
Connecting Portable Audio Players and Playing Back
49
Playing Back a Song-[SONG LIST] Button
49
Selecting Tones by Numbers-[NUMERIC] Button
49
Saving Your Settings-[WRITE] Button
52
Reference
53
Overview
54
How the JUNO-DI Is Organized
54
Controller Section
54
Sound Generator Section
54
Keyboard Settings for Playing the JUNO-DI
54
About the Effects
55
Rhythm Sets
55
About Memory
56
Non-Rewritable Memory
56
Temporary Memory
56
Basic Operation of the JUNO-DI
57
Editing a Value
57
Entering a Value ([NUMERIC] Button)
57
The [SHIFT] Button's Function
57
Assigning a Name
58
Changing the Tempo
58
Main Screen
58
Detailed Tone Settings
59
Tone Settings
59
Editing a Tone's Volume, Portamento, Mono/Poly, or Bend Range (Patch Edit)
59
Editing a Rhythm Set's Volume (Rhythm Edit)
60
Editing the Volume of each Part in a Split, Dual, or Super Layer (Part Edit)
60
Editing the Effects (Mfx/Chorus/Reverb) (Effect Edit)
61
Specifying the Tone that will be First Selected by a Tone Button
62
Saving Your Settings
62
Detailed Settings for Performance Functions
63
Using the D Beam Controller to Modify the Sound
63
D Beam Controller Settings
63
Using the Knobs to Modify the Sound (SOUND MODIFY)
65
Split Settings
66
Changing the Split Point
66
Exchanging the Two Tones in Split/Dual Mode
66
Making the Selected Tone the Lower Tone of a Split
66
Octave Shift Settings
67
Arpeggio Settings
67
Selecting Ascending/Descending Variations (Motif)
68
Chord Memory Settings
69
Favorite Settings
69
Viewing or Removing a Favorite
69
Using the Keyboard to Control Images ([V-LINK] Button)
70
Connection Example
70
Turning the V-LINK ON/OFF
70
V-LINK Settings
70
What Is V-LINK
70
Song Player Settings
71
Playing Back Music Files (SONG PLAYER)
71
Creating a Playlist
71
Smf/Audio Files that Can be Played
71
Adjusting the Volume of the Song Player
72
Changing the Tempo of the Song (SMF)
72
Moving the Playback Location
72
Selecting and Playing a Song ([SONG LIST] Button)
72
Performing Along with a Song ([C. CANCEL/MINUS ONE] Button)
73
Selecting and Playing a Playlist
73
Playing Rhythm Patterns ([RHYTHM PATTERN] Button)
74
Adjusting the Volume of the Rhythm Pattern
74
Changing the Style or Rhythm Set of the Rhythm Pattern
74
Playing Rhythm Patterns
74
Other Settings
75
Making Settings that Are Common to the Entire JUNO-DI (SYSTEM)
75
Procedure for Making System Settings
75
System Parameters
75
Backing up or Initializing Data (UTILITY)
77
Restoring Saved Data from USB Memory Back into the JUNO-DI (RESTORE)
77
Saving Data to USB Memory (BACKUP)
77
Types of Data that Can be Saved
77
Initializing USB Memory (USB MEMORY FORMAT)
78
Returning to the Factory Settings (FACTORY RESET)
78
Playing the Demo Songs (DEMO PLAY)
79
Viewing the Version (VERSION INFO)
79
Connecting an External MIDI Device
80
About MIDI
80
About MIDI Connectors
80
MIDI Channels and Multitimbral Sound Generators
80
Using the JUNO-DI as a Master Keyboard (MIDI Controller Mode)
81
Detailed Settings in MIDI Controller Mode
81
Specifying the Transmit Channel
81
Using the JUNO-DI as a MIDI Sound Module
82
Playing the JUNO-DI from an External MIDI Device
82
Setting the Receive Channel
82
Soft through On/Off
83
Using Your Computer for Music Production
83
Connecting the JUNO-DI to Your Computer
84
Installing the USB Driver in Your Computer
84
Specifying the USB Driver
84
Using JUNO-DI Editor/Librarian/Playlist Editor
85
Installing JUNO-DI Editor/Librarian/Playlist Editor in Your Computer
85
Appendices
87
Troubleshooting
88
Issues Related to Saving Data
90
Issues Related to Effects
90
Issues Related to MIDI and External Devices
91
Error Messages
92
Effects List
93
Low Boost
94
Speaker Simulator
95
Step Ring Modulator
96
Auto Pan
96
Infinite Phaser
96
33: 2 Band Flanger
98
32: 2 Band Chorus
98
Modulation Delay
100
Chorus Parameters
104
Reverb Parameters
104
Tone List
105
Rhythm Set List
116
Performance List
123
Rhythm Pattern Group List
124
Chord Memory List
125
MIDI Implementation Chart
127
Specifications
128
Index
129
Shortcut List
131
Federal Communications Commission Radio Frequency Interference Statement
133
Declaration of Conformity
133
Compliance Information Statement
133
Advertisement
Roland JUNO-Di Workshop (17 pages)
Mobile Synthesizer with Song Player
Brand:
Roland
| Category:
Synthesizer
| Size: 4 MB
Table of Contents
Using Batteries
3
Installing Batteries
3
Combining Sounds
5
Selecting Sounds
6
Transposing the Keyboard
7
Chord Memory
11
The Arpeggiator
11
MIDI Controller Mode
12
Using the Playlist Editor
14
Advertisement
Related Products
Roland JUNO-D
Roland JUNO-DS
Roland juno-ds61
Roland JUNO-DS88
Roland JUNO-D6
Roland JUNO-D7
Roland JUNO-D8
Roland Juno-GJ
Roland JUNO-X
Roland Alpha Juno-2
Roland Categories
Musical Instrument
Synthesizer
Recording Equipment
Drums
Electronic Keyboard
More Roland Manuals
Login
Sign In
OR
Sign in with Facebook
Sign in with Google
Upload manual
Upload from disk
Upload from URL