Sign In
Upload
Manuals
Brands
Nikon Manuals
Microscope
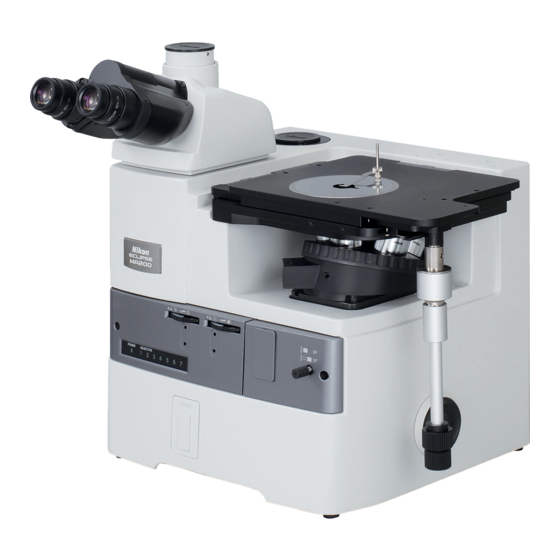
ECLIPSE MA200
Nikon ECLIPSE MA200 Manuals
Manuals and User Guides for Nikon ECLIPSE MA200. We have
1
Nikon ECLIPSE MA200 manual available for free PDF download: Instructions Manual
Nikon ECLIPSE MA200 Instructions Manual (107 pages)
Inverted Metallurgical Microscope
Brand:
Nikon
| Category:
Microscope
| Size: 7 MB
Table of Contents
Introduction
3
Safety Precautions
4
Warning and Caution Symbols Used in this Manual
4
Meaning of Symbols Used on the Product
4
Warning
5
Caution
7
Table of Contents
9
1 Part Name and Function
12
2 Microscopy
16
Bright-Field Microscopy under the Episcopic Illumination
18
Dark-Field Microscopy under the Episcopic Illumination
21
Polarization Microscopy under the Episcopic Illumination (Simplified/Sensitive Color)
22
Differential Interference Contrast Microscopy under the Episcopic Illumination
23
Epi-Fl Microscopy
24
Bright-Field Microscopy under the Diascopic Illumination
26
Polarization Microscopy under the Diascopic Illumination (Simplified/Sensitive Color)
30
3 Operation Details
31
Power ON/OFF
31
Power of the Microscope
31
Power Supply of the Lamp
31
Illumination
32
Brightness Control and Illumination ON/OFF
32
Switching the Internal/External Brightness Control
32
Displaying the POWER LED
33
Selecting the Microscopy Method
33
Eyepiece Tube
35
Selecting Optical Path
35
Adjusting the Eyelevel Risers
36
Adjusting the Interpupillary Distance
36
Adjusting the Diopters
37
Adjusting the Focus (for Focus Operation)
38
Using the Coarse/Fine Focus Knob
38
Adjusting the Torque for the Coarse Focus Ring
38
Placing the Sample and Operating the Stage
39
Placing the Sample
39
Changing the Observation Position
40
Operating the Revolving Nosepiece and the Objective
41
Revolving Nosepiece in Combination with the Objective
41
Changing the Objectives
41
Displaying the Address for the Revolving Nosepiece
41
Filter
42
Adjusting the Field Diaphragm (for the Episcopic Illumination)
43
Adjusting the Aperture Diaphragm (for the Episcopic Illumination)
44
Using the Polarizer/Analyzer Unit (MA2-PA/MA2-UPA)
45
Inserting/Removing the Polarizer/Analyzer from the Optical Path
45
Adjusting the Polarizer Direction
46
Using the Λ Plate (MA2-Λp)
47
Inserting/Removing the Λ Plate
47
Using the DIC Slider (L-DIHC/L-DIC)
48
Inserting/Removing the DIC Prism from the Optical Path
48
Setting the DIC Prism
48
Interference Color
49
Using the DIC Slider (LV-DIHC/LV-DIC)
49
Selecting the DIC Slider
49
Inserting/Removing the DIC Slider from the Optical Path
49
Interference Color
50
Using the Analyzer Slider (D-DA)
50
Inserting/Removing the Analyzer from the Optical Path
50
Using the Λ Plate (D-LP)
51
Inserting/Removing the Λ Plate from the Optical Path
51
Using the Fluorescent Unit (MA2-FL)
52
Inserting/Removing the Fl Filter from the Optical Path
52
Excitation Light Filter (EX Filter)
53
Barrier Filter (BA Filter)
54
Using the Scale Slider (MA2-GR/MA2-MR)
55
Grain Scale Slider (MA2-GR)
55
Scale Slider (MA2-MR)
56
Using the Intermediate Magnification Unit (MA2-MC)
57
Using the HG Precentered Fiber Illuminator (C-HGFI/C-HGFIE)
58
Procedure for Turning on the Power Switch
58
Using the Supporting Pillar for Dia-Illuminator 100W (MA2-DP)
59
Procedure for Turning on the Power Switch
59
Focusing and Centering the Condenser
60
Adjusting the Field Diaphragm (for the Diascopic Illumination)
61
Adjusting the Aperture Diaphragm (for the Diascopic Illumination)
62
Diascopic Illumination Filter
62
Condenser Refocusing Clamp
63
Condenser Mount Rotation
63
Polarizer Slider (T-P2), Λ Plate (TI-DIC)
64
Using the Supporting Arm (MA2-MP)
66
Using the DS Camera Control Unit (DS-L2)
67
Procedure for Turning on the Power
67
Displaying the Microscope Info Menu
67
Measurement Corresponding to the Magnification Value of the Microscope
68
Recording the Microscope Info While Saving the Image
68
Connecting with the DS Camera Head Switcher (DS-SW: Camera Switch BOX, Optional)
69
4 Assembly
70
About the System
72
Combination List for the Unit
73
Network Connection
75
Unit System Capable of Establishing Network
75
Viewing User Control Options and Status Displays on a PC or the DS-L2
76
Registering Information on the Objective
78
Procedure for Turning on the Power Switch
78
The LV-LH50PC Lamphouse and the Lamp
79
Attaching the Lamphouse
79
Replacing the Lamp
80
Revolving Nosepiece
80
Attaching the Nosepiece
80
Cable Connection for the Manual Revolving Nosepiece and the MA200
81
Connecting the Motorized Nosepiece and the Nosepiece Controller 2
81
Stage
82
Sample Holder
82
Objectives
83
Eyepiece Tube
83
Eyepieces
83
Grain Scale Slider/Scale Slider
84
Filters
84
Various Sliders Available for Attaching the Revolving Nosepiece
85
L-DIC/L-DIHC Slider (Single NR Method)
85
LV-DIC/LV-DIHC Slider (Senarmont Method)
86
D-DA Analyzer Slider, D-LP Λ Plate
86
Polarizer/Analyzer Unit and Fluorescent Unit
87
MA2-Λp Λ Plate
87
Intermediate Magnification Unit
88
External Light Source
89
C-HGFI/C-HGFIE HG Precentered Fiber Illuminator
89
Attaching the MA2-DP Supporting Pillar for Dia-Illuminator 100W
90
Supporting Arm (for DS-L2)
96
Eyelevel Risers
98
Camera Adapter
99
Power Cord
99
5 Troubleshooting
100
Viewing Problems and Control Problems
100
Electrical System Problems
103
6 Care and Maintenance
104
Cleaning the Lenses and Filters
104
Cleaning the Painted Parts, Plastic Parts, and Printed Parts
104
Storage
105
Regular Inspections (Fee Charged)
105
7 Specifications
106
Advertisement
Advertisement
Related Products
Nikon Microphot-FXA
Nikon ECLIPSE TE2000-U
Nikon ECLIPSE TE2000-S
Nikon ECLIPSE TE2000-E
Nikon ECLIPSE Ni-E
Nikon Eclipse Ni-U
Nikon ECLIPSE 80i
Nikon eclipse fn1
Nikon eclipse Ci-L
Nikon eclipse Ci-S
Nikon Categories
Digital Camera
Camera Lens
Camera Accessories
Microscope
Measuring Instruments
More Nikon Manuals
Login
Sign In
OR
Sign in with Facebook
Sign in with Google
Upload manual
Upload from disk
Upload from URL