Sign In
Upload
Manuals
Brands
KTM Manuals
Motorcycle
Freeride 250 R EU
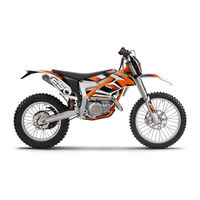
KTM Freeride 250 R EU Manuals
Manuals and User Guides for KTM Freeride 250 R EU. We have
4
KTM Freeride 250 R EU manuals available for free PDF download: Repair Manual, Owner's Manual
KTM Freeride 250 R EU Repair Manual (222 pages)
Brand:
KTM
| Category:
Motorcycle
| Size: 10.75 MB
Table of Contents
Table of Contents
4
1 Means of Representation
7
Symbols Used
7
Formats Used
7
2 Safety Advice
8
Repair Manual
8
Degrees of Risk and Symbols
8
Work Rules
8
3 Important Notes
9
Guarantee, Warranty
9
Operating and Auxiliary Substances
9
Spare Parts, Accessories
9
Figures
9
4 Serial Numbers
10
Chassis Number
10
Type Label
10
Key Number
10
Engine Number
10
Fork Part Number
10
Shock Absorber Part Number
11
5 Motorcycle
12
Raising the Motorcycle with the Lift Stand
12
Removing the Motorcycle from the Lift Stand
12
Starting
12
Starting the Motorcycle to Make Checks
13
6 Fork, Triple Clamp
14
Adjusting the Compression Damping of the Fork
14
Adjusting the Rebound Damping of the Fork
14
Bleeding the Fork Legs
14
Cleaning the Dust Boots of the Fork Legs
15
Removing the Fork Protector
15
Installing the Fork Protector
15
Removing the Fork Legs
16
Installing the Fork Legs
16
Performing a Fork Service
17
Disassembling the Fork Legs
17
Disassembling the Cartridge
20
Disassembling the Compression Holder
22
Checking the Fork Legs
22
Assembling the Compression Holder
24
Assembling the Cartridge
24
Assembling the Fork Legs
26
Greasing the Steering Head Bearing
30
Removing the Lower Triple Clamp
30
Installing the Lower Triple Clamp
31
Checking the Steering Head Bearing Play
32
Adjusting the Play of the Steering Head Bearing
33
7 Handlebar, Controls
34
Handlebar Position
34
Adjusting the Handlebar Position
34
Adjusting the Basic Position of the Clutch Lever
34
Checking the Throttle Cable Routing
35
Checking the Play in the Throttle Cable
35
Adjusting the Play in the Throttle Cable
36
8 Frame
37
Removing the Engine Guard
37
Installing the Engine Guard
37
9 Shock Absorber, Swingarm
38
Adjusting the High-Speed Compression Damping of the Shock Absorber
38
Adjusting the Low-Speed Compression Damping of the Shock Absorber
38
Adjusting the Rebound Damping of the Shock Absorber
39
Measuring Rear Wheel Sag Unloaded
39
Checking the Static Sag of the Shock Absorber
40
Checking the Riding Sag of the Shock Absorber
40
Adjusting the Spring Preload of the Shock Absorber
40
Adjusting the Riding Sag
41
Removing the Shock Absorber
42
Installing the Shock Absorber
42
Servicing the Shock Absorber
42
Removing the Spring
43
Disassembling the Damper
43
Disassembling the Piston Rod
44
Disassembling the Seal Ring Retainer
46
Replacing the Pilot Bushing
46
Checking the Damper
47
Removing the Heim Joint
48
Installing the Heim Joint
49
Assembling the Seal Ring Retainer
50
Assembling the Piston Rod
50
Assembling the Damper
52
Bleeding and Filling the Damper
54
Filling the Damper with Nitrogen
56
Installing the Spring
57
10 Exhaust
59
Removing the Main Silencer
59
Installing the Main Silencer
59
Changing the Glass Fiber Yarn Filling of the Main Silencer
59
11 Air Filter
61
Removing the Air Filter Housing
61
Installing the Air Filter Housing
61
Removing the Air Filter
61
Installing the Air Filter
62
Cleaning the Air Filter and Air Filter Housing
62
12 Fuel Tank, Seat, Trim
63
Opening the Filler Cap
63
Refueling
63
Closing the Filler Cap
64
Folding the Seat up
64
Locking the Seat
64
Removing the Seat
65
Mounting the Seat
65
Taking off the Spoiler
65
Mounting the Spoiler
66
Removing the Fuel Tank
67
Installing the Fuel Tank
67
Fuel Tap
68
13 Mask, Fender
69
Removing the Front Fender
69
Installing the Front Fender
69
Removing the Headlight Mask with the Headlight
69
Refitting the Headlight Mask with the Headlight
70
14 Wheels
71
Checking the Tire Air Pressure
71
Checking the Tire Condition
71
Checking the Brake Discs
72
Checking the Spoke Tension
72
Front Wheel
73
Removing the Front Wheel
73
Installing the Front Wheel
73
Removing the Brake Disc of the Front Brake
74
Installing the Brake Disc of the Front Brake
74
Rear Wheel
74
Removing the Rear Wheel
74
Installing the Rear Wheel
75
Removing the Brake Disc of the Rear Brake
76
Installing the Brake Disc of the Rear Brake
76
Checking the Chain Tension
77
Adjusting the Chain Tension
77
Checking the Chain, Rear Sprocket, Engine Sprocket and Chain Guide
78
Checking for Chain Dirt Accumulation
79
Cleaning the Chain
79
15 Wiring Harness, Battery
81
Changing the Main Fuse
81
Changing the Fuses of Individual Power Consumers
81
Removing the Battery
82
Installing the Battery
83
Recharging the Battery
83
Checking the Charging Voltage
84
Checking the Quiescent Current
85
Checking the Starter Relay
85
16 Brake System
86
Checking the Front Brake Linings
86
Changing the Front Brake Linings
86
Checking the Free Travel of the Hand Brake Lever
88
Adjusting the Free Travel of the Handbrake Lever
88
Checking the Brake Fluid Level of the Front Brake
88
Adding Front Brake Fluid
89
Changing the Front Brake Fluid
89
Checking the Rear Brake Linings
91
Changing the Rear Brake Linings
91
Checking the Free Travel of Foot Brake Lever
93
Adjusting the Basic Position of the Foot Brake Lever
93
Checking the Rear Brake Fluid Level
93
Adding Rear Brake Fluid
94
Changing the Rear Brake Fluid
95
17 Lighting System, Instruments
97
Setting the Speedometer
97
Setting Kilometers or Miles
98
Setting the Clock
98
Setting the Wheel Circumference
98
Setting the Service Display
99
Checking the Headlight Setting
99
Adjusting the Headlight Range
100
Changing the Turn Signal Bulb
100
Changing the Headlight Bulb
100
Changing the Speedometer Battery
101
18 30/Engine
103
30/Engine
103
Removing the Engine
103
Installing the Engine
106
Engine Disassembly
110
Clamping the Engine into the Engine Work Stand
110
Draining the Gear Oil
111
Removing the Clutch Push Rod
111
Removing the Shift Lever
111
Removing the Spacer
111
Removing the Starter Motor
112
Removing the Cylinder Head
113
Removing the Cylinder
114
Removing the Piston
114
Removing the Water Pump Cover
115
Removing the Clutch Cover
115
Removing the Clutch Discs
115
Removing the Clutch Basket
116
Removing the Shift Shaft
117
Removing the Shift Drum Locating Unit
117
Removing the Locking Lever
117
Removing the Rotor
117
Removing the Reed Valve Housing
118
Removing the Left Engine Case Section
118
Removing the Shift Rails
119
Removing the Shift Drum
119
Removing the Shift Forks
119
Removing the Transmission Shafts
119
Removing the Crankshaft
119
Work on Individual Parts
120
Work on the Right Section of the Engine Case
120
Work on the Left Section of the Engine Case
121
Removing the Crankshaft Bearing Inner Race
121
Installing the Crankshaft Bearing Inner Race
122
Changing the Connecting Rod, Conrod Bearing, and Crank Pin
122
Checking the Crankshaft Run-Out at the Bearing Pin
123
Checking/Measuring the Cylinder
123
Cylinder - Nikasil ® Coating
124
Checking/Measuring the Piston
124
Checking the Piston Ring End Gap
125
Piston/Cylinder - Measuring the Mounting Clearance
125
Checking the Reed Valve Housing, Reed Valve, and Intake Flange
125
Work on the Clutch Cover
126
Checking the Clutch
127
Preassembling the Shift Shaft
128
Checking the Shift Mechanism
129
Disassembling the Main Shaft
130
Disassembling the Countershaft
131
Checking the Transmission
131
Assembling the Main Shaft
132
Assembling the Countershaft
133
Checking the Electric Starter Drive
135
Engine Assembly
136
Installing the Crankshaft
136
Installing the Transmission Shafts
136
Installing the Shift Forks
137
Installing the Shift Drum
137
Installing the Shift Rails
137
Installing the Left Engine Case Section
137
Installing the Reed Valve Housing
138
Installing the Rotor
138
Installing the Locking Lever
139
Installing the Shift Drum Locating Unit
139
Installing the Shift Shaft
139
Installing the Clutch Basket
139
Installing the Clutch Discs
140
Installing the Clutch Cover
141
Installing the Water Pump Cover
141
Installing the Piston
142
Installing the Cylinder
142
Checking the X-Distance
143
Adjusting the X-Distance
143
Installing the Cylinder Head
144
Installing the Starter Motor
144
Installing the Spacer
146
Installing the Shift Lever
146
Installing the Clutch Push Rod
147
Installing the Gear Oil Drain Plug
147
Removing the Engine from the Work Stand
147
19 Carburetor
148
Choke
148
Carburetor - Adjusting Idle
148
Emptying the Carburetor Float Chamber
149
Removing the Carburetor
149
Installing the Carburetor
150
Checking/Setting the Carburetor Components
151
Disassembling the Carburetor
151
Checking the Choke Slide
153
Checking the Jet Needle
153
Checking the Throttle Slide
153
Checking the Float Needle Valve
154
Assembling the Carburetor
154
Checking/Adjusting the Float Level
155
20 Clutch
157
Checking Fluid Level of the Hydraulic Clutch
157
Correcting the Fluid Level of the Hydraulic Clutch
157
Changing the Hydraulic Clutch Fluid
157
21 Water Pump, Cooling System
159
Checking the Antifreeze and Coolant Level
159
Checking the Coolant Level
159
Draining the Coolant
160
Refilling Coolant
160
22 Lubrication System
162
Changing the Gear Oil
162
Draining the Gear Oil
162
Filling in Gear Oil
163
Checking the Gear Oil Level
163
Adding Gear Oil
163
23 Ignition System
165
Checking the Ignition System
165
Ignition Coil - Checking the Primary Winding
166
Ignition Coil - Checking the Secondary Winding
166
Checking the Spark Plug Connector
167
Alternator - Checking the Charging Coil of the Ignition
167
Alternator - Checking the Battery Winding
167
Alternator - Checking the Light Winding
168
Checking the Ignition Pulse Generator
168
Removing the Stator and Crankshaft Position Sensor
169
Installing the Stator and Crankshaft Position Sensor
169
Cleaning the Alternator
170
24 Electric Starter
171
Checking the Starter Motor
171
Advertisement
KTM Freeride 250 R EU Owner's Manual (115 pages)
Brand:
KTM
| Category:
Motorcycle
| Size: 5.63 MB
Table of Contents
Table of Contents
4
1 Means of Representation
7
Symbols Used
7
Formats Used
7
2 Safety Advice
8
Use Definition - Intended Use
8
Degrees of Risk and Symbols
8
Tampering Warning
8
Safe Operation
9
Protective Clothing
9
Work Rules
9
Environment
9
Owner's Manual
9
3 Important Notes
10
Guarantee, Warranty
10
Operating and Auxiliary Substances
10
Spare Parts, Accessories
10
Service
10
Figures
10
Customer Service
10
4 View of Vehicle
11
View of Vehicle, Front Left (Example)
11
View of Vehicle, Rear Right (Example)
12
5 Serial Numbers
13
Chassis Number
13
Type Label (EU/AU)
13
Key Number
13
Engine Number
13
Fork Part Number
13
Shock Absorber Article Number
14
6 Controls
15
Clutch Lever
15
Hand Brake Lever
15
Throttle Grip
15
Kill Switch
15
Horn Button
15
Light Switch
16
Turn Signal Switch (EU/AU)
16
Emergency off Switch (AU)
16
Electric Starter Button (EU/US)
16
Electric Starter Button (AU)
16
Overview of Indicator Lamps (EU/AU)
17
Overview of Indicator Lamps (US)
17
Opening the Filler Cap
17
Closing the Filler Cap
18
Fuel Tap
18
Choke
18
Shift Lever
18
Foot Brake Lever
19
Side Stand
19
Steering Lock
19
Locking the Steering
20
Unlocking the Steering
20
7 Speedometer
21
Overview
21
Activation
21
Message on the Speedometer
21
Setting the Speedometer
21
Setting Kilometers or Miles
22
Setting the Clock
23
Setting the Service Display
23
Speed, Time, and DST Distance 1
24
Speed, Time, and DST2 Distance 2
24
AVG Average Speed, ART Operating Hours, and ODO Total Distance Covered
24
8 Preparing for Use
25
Advice on First Use
25
Running in the Engine
26
9 Riding Instructions
27
Checks and Maintenance Work When Preparing for Use
27
Starting
27
Starting off
28
Shifting, Riding
28
Applying the Brakes
28
Stopping, Parking
29
Transport
29
Refueling
30
10 Service Schedule
31
Service Work (as Additional Order)
32
11 Tuning the Chassis
33
Checking the Basic Chassis Setting with the Rider's Weight
33
Compression Damping of the Shock Absorber
33
Adjusting the Low-Speed Compression Damping of the Shock Absorber
33
Adjusting the High-Speed Compression Damping of the Shock Absorber
34
Adjusting the Rebound Damping of the Shock Absorber
34
Measuring Rear Wheel Sag Unloaded
35
Checking the Static Sag of the Shock Absorber
35
Checking the Riding Sag of the Shock Absorber
36
Adjusting the Spring Preload of the Shock Absorber
36
Adjusting the Riding Sag
37
Checking the Basic Setting of the Fork
37
Adjusting the Compression Damping of the Fork
38
Adjusting the Rebound Damping of the Fork
38
Handlebar Position
39
Adjusting the Handlebar Position
39
12 Service Work on the Chassis
40
Raising the Motorcycle with the Lift Stand
40
Removing the Motorcycle from the Lift Stand
40
Bleeding the Fork Legs
40
Cleaning the Dust Boots of the Fork Legs
41
Removing the Fork Legs
41
Installing the Fork Legs
42
Removing the Fork Protector
42
Installing the Fork Protector
43
Removing the Lower Triple Clamp
43
Installing the Lower Triple Clamp
44
Checking the Steering Head Bearing Play
45
Adjusting the Play of the Steering Head Bearing
46
Greasing the Steering Head Bearing
46
Removing the Shock Absorber
47
Installing the Shock Absorber
47
Removing the Front Fender
47
Installing the Front Fender
48
Folding the Seat up
48
Locking the Seat
48
Removing the Air Filter Housing
48
Installing the Air Filter Housing
49
Removing the Air Filter
49
Installing the Air Filter
49
Cleaning the Air Filter and Air Filter Housing
50
Removing the Main Silencer
50
Installing the Main Silencer
51
Changing Glass Fiber Yarn Filling in the Main Silencer
51
Removing the Fuel Tank
51
Installing the Fuel Tank
52
Checking for Chain Dirt Accumulation
53
Cleaning the Chain
53
Checking the Chain Tension
54
Adjusting the Chain Tension
54
Checking the Chain, Rear Sprocket, Engine Sprocket and Chain Guide
55
Checking the Frame
56
Checking the Swingarm
57
Checking the Throttle Cable Routing
57
Checking the Rubber Grip
57
Additionally Securing the Rubber Grip
58
Adjusting the Basic Position of the Clutch Lever
58
Checking Fluid Level of the Hydraulic Clutch
58
Correcting the Fluid Level of the Hydraulic Clutch
58
Changing the Hydraulic Clutch Fluid
59
Removing the Engine Guard
60
Installing the Engine Guard
60
13 Brake System
61
Checking the Free Travel of the Hand Brake Lever
61
Adjusting the Free Travel of the Handbrake Lever
61
Checking the Brake Discs
61
Checking the Brake Fluid Level of the Front Brake
62
Adding Front Brake Fluid
62
Checking the Front Brake Linings
63
Changing the Front Brake Linings
63
Checking the Free Travel of Foot Brake Lever
65
Adjusting the Basic Position of the Foot Brake Lever
65
Checking the Rear Brake Fluid Level
66
Adding Rear Brake Fluid
66
Checking the Rear Brake Linings
67
Changing the Rear Brake Linings
67
14 Wheels, Tires
70
Removing the Front Wheel
70
Installing the Front Wheel
70
Removing the Rear Wheel
71
Installing the Rear Wheel
71
Checking the Tire Condition
72
Checking the Tire Air Pressure
73
Checking the Spoke Tension
73
15 Electrical System
74
Removing the Battery
74
Installing the Battery
74
Recharging the Battery
75
Changing the Main Fuse
76
Changing the Fuses of Individual Power Consumers
77
Removing the Headlight Mask with the Headlight
77
Refitting the Headlight Mask with the Headlight
78
Changing the Headlight Bulb
79
Changing the Turn Signal Bulb (EU/AU)
80
Checking the Headlight Setting
80
Adjusting the Headlight Range
80
Changing the Speedometer Battery
81
16 Cooling System
82
Checking the Antifreeze and Coolant Level
82
Checking the Coolant Level
83
Draining the Coolant
83
Refilling Coolant
84
17 Tuning the Engine
85
Checking the Play in the Throttle Cable
85
Adjusting the Play in the Throttle Cable
85
Carburetor - Idle
86
Carburetor - Adjusting Idle
86
Emptying the Carburetor Float Chamber
87
Checking the Basic Position of the Shift Lever
88
Adjusting the Basic Position of the Shift Lever
88
18 Service Work on the Engine
89
Cleaning the Alternator
89
Checking the Gear Oil Level
90
Changing the Gear Oil
90
Draining the Gear Oil
90
Filling in Gear Oil
91
Adding Gear Oil
91
19 Cleaning, Care
93
Cleaning the Motorcycle
93
Checks and Maintenance Steps for Winter Operation
94
20 Storage
95
Preparing for Use after Storage
95
21 Troubleshooting
96
KTM Freeride 250 R EU Owner's Manual (111 pages)
Brand:
KTM
| Category:
Motorcycle
| Size: 3.98 MB
Table of Contents
Table of Contents
4
1 Means of Representation
6
Symbols Used
6
Formats Used
6
2 Safety Advice
7
Use Definition - Intended Use
7
Degrees of Risk and Symbols
7
Tampering Warning
7
Safe Operation
8
Protective Clothing
8
Work Rules
8
Environment
8
Owner's Manual
8
3 Important Notes
9
Guarantee, Warranty
9
Operating and Auxiliary Substances
9
Spare Parts, Accessories
9
Service
9
Figures
9
Customer Service
9
4 View of Vehicle
10
View of Vehicle, Front Left (Example)
10
View of Vehicle, Rear Right (Example)
11
5 Serial Numbers
12
Chassis Number
12
Type Label (EU/AU)
12
Key Number
12
Engine Number
12
Fork Part Number
12
Shock Absorber Part Number
13
6 Controls
14
Clutch Lever
14
Hand Brake Lever
14
Throttle Grip
14
Kill Switch
14
Horn Button
14
Light Switch
15
Electric Starter Button (EU/US)
15
Electric Starter Button (AU)
15
Turn Signal Switch (EU/AU)
15
Emergency off Switch (AU)
15
Overview of Indicator Lamps (EU/AU)
16
Overview of Indicator Lamps (US)
16
Opening the Filler Cap
16
Closing the Filler Cap
17
Fuel Tap
17
Choke
17
Shift Lever
17
Foot Brake Lever
18
Side Stand
18
Steering Lock
18
Locking the Steering
19
Unlocking the Steering
19
7 Speedometer
20
Overview
20
Activation
20
Message on the Speedometer
20
Setting the Speedometer
20
Setting Kilometers or Miles
21
Setting the Clock
22
Setting the Service Display
22
Speed, Time, and DST Distance 1
23
Speed, Time, and DST2 Distance 2
23
AVG Average Speed, ART Operating Hours, and ODO Total Distance Covered
23
8 Preparing for Use
24
Advice on First Use
24
Running in the Engine
25
9 Riding Instructions
26
Checks and Maintenance Work When Preparing for Use
26
Starting
26
Starting off
27
Shifting, Riding
27
Applying the Brakes
27
Stopping, Parking
28
Transport
28
Refueling
29
10 Service Schedule
30
Service Work (as Additional Order)
31
11 Tuning the Chassis
32
Checking the Basic Chassis Setting with the Rider's Weight
32
Compression Damping of the Shock Absorber
32
Adjusting the Low-Speed Compression Damping of the Shock Absorber
32
Adjusting the High-Speed Compression Damping of the Shock Absorber
33
Adjusting the Rebound Damping of the Shock Absorber
33
Measuring Rear Wheel Sag Unloaded
34
Checking the Static Sag of the Shock Absorber
34
Checking the Riding Sag of the Shock Absorber
35
Adjusting the Spring Preload of the Shock Absorber
35
Adjusting the Riding Sag
36
Checking the Basic Setting of the Fork
36
Adjusting the Compression Damping of the Fork
37
Adjusting the Rebound Damping of the Fork
37
Handlebar Position
37
Adjusting the Handlebar Position
38
12 Service Work on the Chassis
39
Raising the Motorcycle with the Lift Stand
39
Removing the Motorcycle from the Lift Stand
39
Bleeding the Fork Legs
39
Cleaning the Dust Boots of the Fork Legs
40
Removing the Fork Legs
40
Installing the Fork Legs
41
Removing the Fork Protector
41
Installing the Fork Protector
42
Removing the Lower Triple Clamp
42
Installing the Lower Triple Clamp
43
Checking the Steering Head Bearing Play
44
Adjusting the Play of the Steering Head Bearing
45
Greasing the Steering Head Bearing
45
Removing the Shock Absorber
46
Installing the Shock Absorber
46
Removing the Front Fender
46
Installing the Front Fender
47
Folding the Seat up
47
Locking the Seat
47
Removing the Air Filter Housing
47
Installing the Air Filter Housing
48
Removing the Air Filter
48
Installing the Air Filter
48
Cleaning the Air Filter and Air Filter Housing
49
Removing the Main Silencer
49
Installing the Main Silencer
50
Changing the Glass Fiber Yarn Filling of the Main Silencer
50
Removing the Fuel Tank
50
Installing the Fuel Tank
51
Checking for Chain Dirt Accumulation
52
Cleaning the Chain
52
Checking the Chain Tension
53
Adjusting the Chain Tension
53
Checking the Chain, Rear Sprocket, Engine Sprocket and Chain Guide
54
Checking the Frame
55
Checking the Swingarm
56
Checking the Throttle Cable Routing
56
Checking the Rubber Grip
56
Additionally Securing the Rubber Grip
57
Adjusting the Basic Position of the Clutch Lever
57
Checking Fluid Level of the Hydraulic Clutch
57
Correcting the Fluid Level of the Hydraulic Clutch
57
Changing the Hydraulic Clutch Fluid
58
Removing the Engine Guard
59
Installing the Engine Guard
59
13 Brake System
60
Checking the Free Travel of the Hand Brake Lever
60
Adjusting the Free Travel of the Handbrake Lever
60
Checking the Brake Discs
60
Checking the Brake Fluid Level of the Front Brake
61
Adding Front Brake Fluid
61
Checking the Front Brake Linings
62
Changing the Front Brake Linings
62
Checking the Free Travel of Foot Brake Lever
64
Adjusting the Basic Position of the Foot Brake Lever
64
Checking the Rear Brake Fluid Level
65
Adding Rear Brake Fluid
65
Checking the Rear Brake Linings
66
Changing the Rear Brake Linings
66
14 Wheels, Tires
69
Removing the Front Wheel
69
Installing the Front Wheel
69
Removing the Rear Wheel
70
Installing the Rear Wheel
70
Checking the Tire Condition
71
Checking the Tire Air Pressure
72
Checking the Spoke Tension
72
15 Electrical System
73
Removing the Battery
73
Installing the Battery
73
Recharging the Battery
74
Changing the Main Fuse
75
Changing the Fuses of Individual Power Consumers
76
Removing the Headlight Mask with the Headlight
77
Refitting the Headlight Mask with the Headlight
77
Changing the Headlight Bulb
78
Changing the Turn Signal Bulb
79
Checking the Headlight Setting
79
Adjusting the Headlight Range
79
Changing the Speedometer Battery
80
16 Cooling System
81
Checking the Antifreeze and Coolant Level
81
Checking the Coolant Level
82
Draining the Coolant
82
Refilling Coolant
83
17 Tuning the Engine
84
Checking the Play in the Throttle Cable
84
Adjusting the Play in the Throttle Cable
84
Carburetor - Idle
85
Carburetor - Adjusting Idle
85
Emptying the Carburetor Float Chamber
86
Checking the Basic Position of the Shift Lever
87
Adjusting the Basic Position of the Shift Lever
87
18 Service Work on the Engine
88
Cleaning the Alternator
88
Checking the Gear Oil Level
88
Changing the Gear Oil
89
Draining the Gear Oil
89
Filling in Gear Oil
90
Adding Gear Oil
90
19 Cleaning, Care
91
Cleaning the Motorcycle
91
Checks and Maintenance Steps for Winter Operation
92
20 Storage
93
Preparing for Use after Storage
93
Advertisement
KTM Freeride 250 R EU Owner's Manual (110 pages)
2014
Brand:
KTM
| Category:
Motorcycle
| Size: 3.89 MB
Table of Contents
Table of Contents
4
1 Means of Representation
6
Symbols Used
6
Formats Used
6
2 Safety Advice
7
Use Definition - Intended Use
7
Degrees of Risk and Symbols
7
Tampering Warning
7
Safe Operation
8
Protective Clothing
8
Work Rules
8
Environment
8
Owner's Manual
8
3 Important Notes
9
Guarantee, Warranty
9
Operating and Auxiliary Substances
9
Spare Parts, Accessories
9
Service
9
Figures
9
Customer Service
9
4 View of Vehicle
10
View of Vehicle, Front Left (Example)
10
View of Vehicle, Rear Right (Example)
11
5 Serial Numbers
12
Chassis Number
12
Type Label
12
Key Number
12
Engine Number
12
Fork Part Number
12
Shock Absorber Part Number
13
6 Controls
14
Clutch Lever
14
Hand Brake Lever
14
Throttle Grip
14
Kill Switch
14
Horn Button
14
Light Switch
15
Electric Starter Button (Freeride 250 R EU)
15
Electric Starter Button (Freeride 250 R AUS)
15
Turn Signal Switch
15
Emergency off Switch (Freeride 250 R AUS)
15
Overview of Indicator Lamps
16
Opening the Filler Cap
16
Closing the Filler Cap
16
Fuel Tap
17
Choke
17
Shift Lever
17
Foot Brake Lever
18
Side Stand
18
Steering Lock
18
Locking the Steering
18
Unlocking the Steering
19
7 Speedometer
20
Overview
20
Activation
20
Message on the Speedometer
20
Setting the Speedometer
20
Setting Kilometers or Miles
21
Setting the Clock
22
Setting the Service Display
22
Speed, Time, and DST Distance 1
23
Speed, Time, and DST2 Distance 2
23
AVG Average Speed, ART Operating Hours, and ODO Total Distance Covered
23
8 Preparing for Use
24
Advice on First Use
24
Running in the Engine
25
9 Riding Instructions
26
Checks and Maintenance Work When Preparing for Use
26
Starting
26
Starting off
27
Shifting, Riding
27
Applying the Brakes
27
Stopping, Parking
28
Transport
28
Refueling
29
10 Service Schedule
30
Service Work (as Additional Order)
31
11 Tuning the Chassis
32
Checking the Basic Chassis Setting with the Rider's Weight
32
Compression Damping of the Shock Absorber
32
Adjusting the Low-Speed Compression Damping of the Shock Absorber
32
Adjusting the High-Speed Compression Damping of the Shock Absorber
33
Adjusting the Rebound Damping of the Shock Absorber
33
Measuring Rear Wheel Sag Unloaded
34
Checking the Static Sag of the Shock Absorber
34
Checking the Riding Sag of the Shock Absorber
35
Adjusting the Spring Preload of the Shock Absorber
35
Adjusting the Riding Sag
36
Checking the Basic Setting of the Fork
36
Adjusting the Compression Damping of the Fork
37
Adjusting the Rebound Damping of the Fork
37
Handlebar Position
37
Adjusting the Handlebar Position
38
12 Service Work on the Chassis
39
Raising the Motorcycle with the Lift Stand
39
Removing the Motorcycle from the Lift Stand
39
Bleeding the Fork Legs
39
Cleaning the Dust Boots of the Fork Legs
40
Removing the Fork Legs
40
Installing the Fork Legs
41
Removing the Fork Protector
41
Installing the Fork Protector
42
Removing the Lower Triple Clamp
42
Installing the Lower Triple Clamp
43
Checking the Steering Head Bearing Play
44
Adjusting the Play of the Steering Head Bearing
45
Greasing the Steering Head Bearing
45
Removing the Shock Absorber
46
Installing the Shock Absorber
46
Removing the Front Fender
46
Installing the Front Fender
47
Folding the Seat up
47
Locking the Seat
47
Removing the Air Filter Housing
47
Installing the Air Filter Housing
48
Removing the Air Filter
48
Installing the Air Filter
48
Cleaning the Air Filter and Air Filter Housing
49
Removing the Main Silencer
49
Installing the Main Silencer
50
Changing the Glass Fiber Yarn Filling of the Main Silencer
50
Removing the Fuel Tank
50
Installing the Fuel Tank
51
Checking for Chain Dirt Accumulation
52
Cleaning the Chain
52
Checking the Chain Tension
53
Adjusting the Chain Tension
53
Checking the Chain, Rear Sprocket, Engine Sprocket and Chain Guide
54
Checking the Frame
55
Checking the Swingarm
56
Checking the Throttle Cable Routing
56
Checking the Rubber Grip
56
Additionally Securing the Rubber Grip
57
Adjusting the Basic Position of the Clutch Lever
57
Checking Fluid Level of the Hydraulic Clutch
57
Correcting the Fluid Level of the Hydraulic Clutch
57
Changing the Hydraulic Clutch Fluid
58
Removing the Engine Guard
59
Installing the Engine Guard
59
13 Brake System
60
Checking the Free Travel of the Hand Brake Lever
60
Adjusting the Free Travel of the Handbrake Lever
60
Checking the Brake Discs
60
Checking the Brake Fluid Level of the Front Brake
61
Adding Front Brake Fluid
61
Checking the Front Brake Linings
62
Changing the Front Brake Linings
62
Checking the Free Travel of Foot Brake Lever
64
Adjusting the Basic Position of the Foot Brake Lever
64
Checking the Rear Brake Fluid Level
65
Adding Rear Brake Fluid
65
Checking the Rear Brake Linings
66
Changing the Rear Brake Linings
66
14 Wheels, Tires
69
Removing the Front Wheel
69
Installing the Front Wheel
69
Removing the Rear Wheel
70
Installing the Rear Wheel
70
Checking the Tire Condition
71
Checking the Tire Air Pressure
72
Checking the Spoke Tension
72
15 Electrical System
73
Removing the Battery
73
Installing the Battery
73
Recharging the Battery
74
Changing the Main Fuse
75
Changing the Fuses of Individual Power Consumers
76
Removing the Headlight Mask with the Headlight
77
Refitting the Headlight Mask with the Headlight
77
Changing the Headlight Bulb
78
Changing the Turn Signal Bulb
79
Checking the Headlight Setting
79
Adjusting the Headlight Range
79
Changing the Speedometer Battery
80
16 Cooling System
81
Checking the Antifreeze and Coolant Level
81
Checking the Coolant Level
82
Draining the Coolant
82
Refilling Coolant
83
17 Tuning the Engine
84
Checking the Play in the Throttle Cable
84
Adjusting the Play in the Throttle Cable
84
Carburetor - Idle
84
Carburetor - Adjusting Idle
85
Emptying the Carburetor Float Chamber
86
Checking the Basic Position of the Shift Lever
86
Adjusting the Basic Position of the Shift Lever
86
18 Service Work on the Engine
88
Cleaning the Alternator
88
Checking the Gear Oil Level
88
Changing the Gear Oil
89
Draining the Gear Oil
89
Filling in Gear Oil
90
Adding Gear Oil
90
19 Cleaning, Care
91
Cleaning the Motorcycle
91
Checks and Maintenance Steps for Winter Operation
92
Advertisement
Related Products
KTM 250 XC EU/USA 2010
KTM 250 EXC-W USA
KTM 250 EXC EU 2012
KTM 250 EXC-F 2018
KTM 250 SX-F 2016
KTM 250 XC-F 2016
KTM 250 SX-F PRADO 2020
KTM 250 XC-F US 2017
KTM 250 SX-F USA 2014
KTM 250 SX-F MUSQUIN REPLICA EU 2011
KTM Categories
Motorcycle
Motorcycle Accessories
Offroad Vehicle
Engine
Bicycle Accessories
More KTM Manuals
Login
Sign In
OR
Sign in with Facebook
Sign in with Google
Upload manual
Upload from disk
Upload from URL