Sign In
Upload
Download
Table of Contents
Contents
Add to my manuals
Delete from my manuals
Share
URL of this page:
HTML Link:
Bookmark this page
Add
Manual will be automatically added to "My Manuals"
Print this page
×
Bookmark added
×
Added to my manuals
Manuals
Brands
HP Manuals
Switch
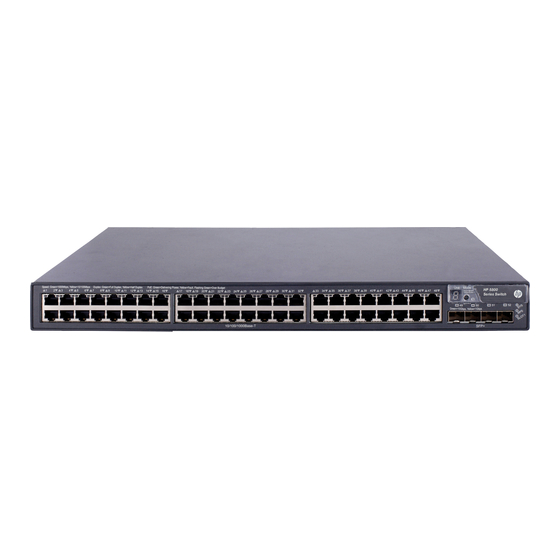
5800-48G with 2 Slots
Installation manual
HP 5800-48G Installation Manual
5820x & 5800 switch series
Hide thumbs
Also See for 5800-48G
:
Quickspecs
(36 pages)
,
Quickspecs
(53 pages)
1
2
Table Of Contents
3
4
5
6
7
8
9
10
11
12
13
14
15
16
17
18
19
20
21
22
23
24
25
26
27
28
29
30
31
32
33
34
35
36
37
38
39
40
41
42
43
44
45
46
47
48
49
50
51
52
53
54
55
56
57
58
59
60
61
62
63
64
65
66
67
68
69
70
71
72
73
74
75
76
77
78
79
80
81
82
83
84
85
86
87
88
89
90
91
92
93
94
95
96
97
98
99
100
101
102
103
104
105
106
107
108
109
110
111
112
113
114
115
116
117
118
119
120
121
122
123
124
125
126
page
of
126
Go
/
126
Contents
Table of Contents
Troubleshooting
Bookmarks
Table of Contents
Installation Guide
Table of Contents
Preparing for Installation
Safety Recommendations
Examining the Installation Site
Temperature/Humidity
Cleanness
Emi
Laser Safety
Installation Tools
Installing the Switch
Installing the Switch in a 19-Inch Rack
Installation Prerequisites
Mounting Bracket and Cable Management Bracket Kits
Rack Mounting Rail Kit
Rack-Mounting Procedures at a Glance
(5800Af-48G/5820Af-24Xg)
Rack-Mounting a 5800AF-48G/5820AF-24XG Switch
Rack-Mounting a 5800/5820X Switch Except the 5800AF-48G/5820AF-24XG
Mounting the Switch on a Workbench
Grounding the Switch
Grounding the Switch with a Grounding Strip
Grounding the Switch by Using the AC Power Cord
Installing/Removing a Fan Tray
Installing a Fan Tray
Removing a Fan Tray
Installing/Removing a Power Supply
5800Af-48G/5820Af-24Xg
Slot)/All the 5820X Switches but the 5820AF-24XG
Connecting the Power Cord
Connecting an AC Power Cord to the Switch
Connecting the Switch to a -54 VDC Output RPS
Connecting the Switch to a 12 VDC Output RPS
Connecting the PSR150-A/PSR150-A1 Power Supply
Connecting the PSR150-D/PSR150-D1 Power Supply to a -48 VDC Power Source
Connecting the PSR150-D/PSR150-D1 Power Supply to a -54 VDC Output RPS
Connecting the PSR300-12A/PSR300-12A2 Power Supply
Connecting the PSR300-12D1/PSR300-12D2 Power Supply to a -48 VDC Power Source
Connecting the PSR300-12D1/PSR300-12D2 Power Supply to a -54 VDC Output RPS
Connecting the PSR750-A Power Supply
Connecting the 650 W AC/300 W AC Power Supply
Connecting the 650 W DC/300 W DC Power Supply
Installing/Removing an Interface Card
Installing an Interface Card
Removing an Interface Card
Installing/Removing an OAP Card
Installing an OAP Card in the OAP Card Slot
Removing the OAP Card in the OAP Card Slot
Installing an OAP Card in an Expansion Interface Card Slot
Removing the OAP Card in an Expansion Interface Card Slot
Installing/Removing a Poe Module
Installing a Poe Module
Removing the Poe Module
Verifying the Installation
Accessing the Switch for the First Time
Setting up the Configuration Environment
Connecting the Console Cable
Setting Terminal Parameters
Powering on the Switch
Setting up an IRF Fabric
IRF Fabric Setup Flowchart
Planning IRF Fabric Setup
Planning IRF Fabric Size and the Installation Site
Identifying the Master Switch and Planning IRF Member Ids
Planning IRF Topology and Connections
Identifying Physical IRF Ports on the Member Switches
Planning the Cabling Scheme
Configuring Basic IRF Settings
Connecting the Physical IRF Ports
Verifying the IRF Fabric Setup
Maintenance and Troubleshooting
Password Loss
Console Login Password Loss
Boot ROM Password Loss
Power Supply Failure
Built-In Power Supply Failure
Hot Swappable Power Supply Failure
OAP Card Failure
Failure of the OAP Card in the OAP Card Slot
Failure of the OAP Card in an Expansion Interface Card Slot
Hot Swappable Poe Module Failure
Fan Failure
Built-In Fan Failure
Hot Swappable Fan Tray Failure
Configuration Terminal Problems
Support and Other Resources
Contacting HP
Subscription Service
Related Information
Documents
Websites
Conventions
Command Conventions
Appendix A Chassis Views and Technical Specifications
Chassis Views
5800-48G-Poe+ (2 Slots)/5800-48G-Poe+ TAA (2 Slots)
5800-48G (1 Slot)/5800-48G TAA (1 Slot)
5800-48G-Poe+ (1 Slot)/5800-48G-Poe+ TAA (1 Slot)
5800Af-48G
5800-24G/5800-24G Taa
5800-24G-Poe+/5800-24G-Poe+Taa
5800-24G-SFP (1 Slot)/5800-24G-SFP TAA (1 Slot)
5820Af-24Xg
5820X-24Xg-Sfp+/5820X-24Xg-Sfp+ Taa
5820X-14XG-SFP+ (2 Slots)/5820X-14XG-SFP+ TAA (2 Slots)
Physical Specifications
Chassis Dimensions and Weights
Ports and Slots (5800 Switches)
Ports and Slots (5820X Switches)
Environmental Specifications
Power Specifications
AC-Input Power Specifications
DC-Input Power Specifications
RPS DC-Input Power Specifications
Appendix B Frus and Compatibility Matrixes
Hardware Compatibility Matrixes
Power Supply Compatibility Matrix
Fan Tray Compatibility Matrix
Interface Card Compatibility Matrix
Poe Module Compatibility Matrix (Only for the 5800 Switches)
OAP Card Compatibility Matrix
RPS Compatibility Matrix
Hot Swappable Power Supplies
Hot Swappable Fan Trays
Interface Cards
OAP Cards
Hot Swappable Poe Modules
Appendix C Ports and Leds
Ports
Console Port
Management Ethernet Port
USB Port
10/100/1000Base-T Ethernet Port
100/1000Base-X SFP Port
SFP+ Port
Leds
System Status LED
Power Supply Status LED
RPS Status LED
Port Mode LED
Seven-Segment LED
10/100/1000Base-T Ethernet Port LED
100/1000Base-X SFP Port LED
SFP+ Port LED
Management Ethernet Port Leds
OAP Card Status LED
Poe Module Status LED
Interface Card Status LED
Appendix D Cooling System
5800-48G-Poe+ (2 Slots)/5800-48G-Poe+ TAA (2 Slots)
5800-48G (1 Slot)/5800-48G TAA (1 Slot)
5800-48G-Poe+ (1 Slot)/5800-48G-Poe+ TAA (1 Slot)
5800Af-48G
5800-24G/5800-24G Taa
5800-24G-Poe+/5800-24G-Poe+Taa
5800-24G-SFP (1 Slot)/5800-24G-SFP TAA (1 Slot)
5820Af-24Xg
5820X-24Xg-Sfp+/5820X-24Xg-Sfp+ Taa
5820X-14XG-SFP+ (2 Slots)/5820X-14XG-SFP+ TAA (2 Slots)
Index
Advertisement
Quick Links
1
Installation Guide
2
Accessing the Switch for the First Time
Download this manual
HP 5820X & 5800 Switch Series
Installation Guide
Part number: 5998-1609
Document version: 6W103-20140619
Table of
Contents
Previous
Page
Next
Page
1
2
3
4
5
Advertisement
Table of Contents
Need help?
Do you have a question about the 5800-48G and is the answer not in the manual?
Ask a question
Questions and answers
Related Manuals for HP 5800-48G
Network Router HP HP 5800 Quickspecs
5800 switch series (53 pages)
Switch HP A5800-48G Quickspecs
5800 series (36 pages)
Switch HP JC106A Specification
5820 series (40 pages)
Switch HP A5820X-24XG-SFP+ Quickspecs
A5820 series (14 pages)
Switch HP 5820X series Configuration Manual
(244 pages)
Switch HP 5800 series Command Reference Manual
Commands and command syntax options (396 pages)
Switch HP 5800 Series Configuration Manual
(200 pages)
Switch HP 5810-48G Quickspecs
(14 pages)
Switch HP 5810-48G Datasheet
(6 pages)
Switch HP HP 5800-24G-SFP Installation Manual
5820x & 5800 switch series (126 pages)
Switch HP 5830 Series Configuration Manual
(170 pages)
Switch HP 5830 Series Configuration Manual
Acl and qos (82 pages)
Switch HP 5830AF-96G Series Disassembly Instructions
Product end-of-life disassembly, switch chassis (4 pages)
Switch HP 5830AF-96G Series Compliance And Safety Manual
(54 pages)
Switch HP 5830AF-48G Series Product End-Of-Life Disassembly Instructions
(4 pages)
Switch HP FlexFabric 5930 Series Command Reference Manual
(87 pages)
This manual is also suitable for:
Hp 5800-24g-sfp
5820af-24xg
5820x-24xg-sfp+
Hp 5820x-14xg-sfp+
5800-24g
5800-24g-poe+
...
Show all
5800-48g-poe
5800-48g-poe+ taa 2 slots
5800-48g taa
5800-48g-poe+ 1 slot
5800-24g taa
5800-24g-poe+taa
5800-24g-sfp (1 slot)
5800af-48g
Table of Contents
Print
Rename the bookmark
Delete bookmark?
Delete from my manuals?
Login
Sign In
OR
Sign in with Facebook
Sign in with Google
Upload manual
Upload from disk
Upload from URL


Need help?
Do you have a question about the 5800-48G and is the answer not in the manual?
Questions and answers