Table of Contents
Advertisement
Quick Links
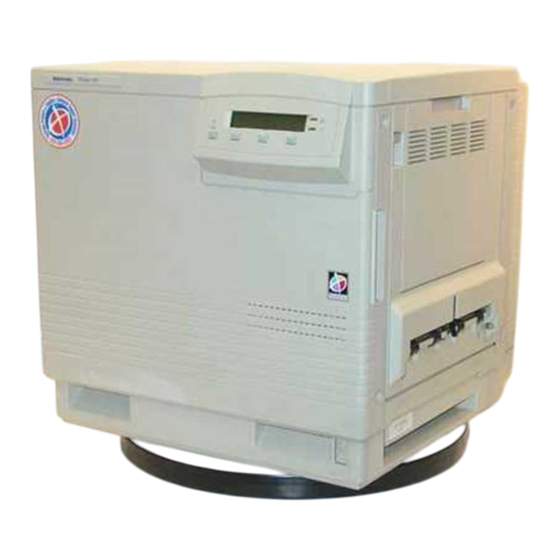
Phaser 540 Plus
Color Printer
®
The Phaser
540 Plus Color Printer is Tektronix' second generation
color laser printer. This addendum provides an overview of the new
features available in the 540 Plus and the changes that apply to the
Phaser 540 User Manual .
The Phaser 540 Plus provides all the features, print modes, and color
matching capabilities of the Phaser 540, and uses the same convenient
customer replaceable components. New features in the Phaser 540 Plus
include:
Legal-size printing capability
Faster throughput
New print-quality mode
Improved troubleshooting tools
User Manual Addendum
1
Advertisement
Table of Contents
Troubleshooting

Related Manuals for Tektronix Phaser 540 Plus


Summary of Contents for Tektronix Phaser 540 Plus
- Page 1 540 Plus and the changes that apply to the Phaser 540 User Manual . The Phaser 540 Plus provides all the features, print modes, and color matching capabilities of the Phaser 540, and uses the same convenient customer replaceable components.
- Page 2 Phaser 540 Plus Color Printer Legal-size printing The Phaser 540 Plus supports a new paper tray that accommodates legal-size paper. The printable area used by an application is determined by selecting Legal or Legal Short in the driver (the physical page size is the same for both;...
- Page 3 36 Mbytes Enhanced 52 Mbytes (maximum configuration) The optional legal-size tray can be ordered from your local Tektronix authorized reseller or directly from Tektronix; the order number is 436-0314-00. The addition of the legal-size paper tray affects references in Chapter 2, Chapter 3, and Chapter 5 of the Phaser 540 User Manual .
- Page 4 Phaser 540 Plus Color Printer Faster throughput The Phaser 540 Plus incorporates several enhancements that provide faster throughput: Faster recovery from EnergyStar mode (when the printer has been idle for more than one hour) saves nearly two minutes in the time the printer takes to make the first print.
- Page 5 Phaser 540 Plus Color Printer Print-quality The Phaser 540 Plus incorporates a new print-quality mode for presentations and improved Copystation color matching. Print-quality modes Presentation mode has been added; it is suitable for creating presentation materials such as overhead transparencies or presentation handouts with a color sweep in the background.
-
Page 6: Troubleshooting Tools
The Phaser 540 Plus Quick Reference Card (order number 063-2185-01) reflects the changes in the Test Print and Service Prints. When attempting to identify print quality symptoms and solutions, use the new Phaser 540 Plus Quick Reference Card . Phaser 540 Plus Color Printer... -
Page 7: User Manual
User Manual Phaser™ 540 Color Printer First printing February 1995 070-9008-01... - Page 8 ® Tektronix is a registered trademark of Tektronix, Inc. TekColor™ is a trademark of Tektronix, Inc. Phaser™ is a trademark of Tektronix, Inc. for color printers and related products. Adobe™, PostScript™, and IntelliSellect™ are trademarks of Adobe Systems, Incorporated which may be registered in certain jurisdictions.
- Page 9 Phaser 540 Warranty Tektronix warrants that the Phaser 540 will be free from defects in materials and workmanship for a period of one (1) year from the date of shipment and that Customer Replaceable Components (CRCs)* in the Phaser 540 will be free from defects in materials and workmanship for a period of ninety (90) days from the date of shipment or six months where longer periods are required by law.
-
Page 10: Users Safety Summary
Users safety summary Terms in manual: CAUTION Conditions that can result in damage to the product. WARNING Conditions that can result in personal injury or loss of life. Power source: Do not apply more than 250 volts RMS between the supply conductors or between either supply conductor and ground. - Page 11 This product is certified under IEC 825 as a Class 1 Laser Product: WARNING: For your protection, do not defeat any interlocks. CAUTION: This product utilizes a laser. Use of control or adjustments or performance of procedures other than those specified herein may result in hazardous radiation exposure. Do not open covers and do not repair yourself.
- Page 12 FOR USERS IN NORWAY VARNING! OM APPARATEN ANVANDS PÅ ANNAT SÄTT ÄN I DENNA BRUKSANVISNING SPECIFICERATS, KAN ANVÄNDAREN UTSÄTTAS FOR OSYNLIG LASERSTRÅLING, SOM ÖVERSKRIDER GRÄNSEN FOR LASERKLASS 1. Tekniska specifikationer för lasern Uteffekt: 5 mW max. KLASS 1 LASER APPARAT Våglångd: 780 nm Effektgrad för stråining: Kontinuerlig...
-
Page 13: Table Of Contents
Contents Introduction Getting Set Up At a glance 2-1 Setting up the printer 2-2 What you get with your printer 2-2 Printer box 2-2 Standard accessories box 2-2 Optional accessories 2-4 Registering your printer 2-5 Removing the packing material 2-5 Installing the optional Lower Tray Assembly 2-6 Installing the toner cartridges 2-8 Installing the fuser 2-10... - Page 14 Printing Which platform? 3-1 Printing from a PC: Windows 3-2 Printing from a PC: DOS 3-3 Printing from a Unix or VMS workstation 3-4 Printing from a Macintosh 3-6 Using the Phaser 540 driver 3-6 Using the Phaser 540 GX driver 3-7 Printing from specific applications 3-7 Selecting print features 3-8 Print-quality modes 3-9...
- Page 15 Printing hints 3-27 Application hints 3-27 Tektronix supplies and drivers 3-27 Getting the largest printed picture 3-27 Relative port speed 3-27 Fastest print time 3-28 Caring for Your Printer Overview 4-1 User-replaceable components 4-2 When to replace or clean components 4-3...
- Page 16 Supplies and Accessories Tektronix supplies: the mark of quality 5-1 Ordering information 5-1 Supplies and accessories 5-2 Troubleshooting If you need help Customer Support Hotline 6-1 Printer service 6-1 The Tektronix Bulletin Board Service 6-1 Using the automated fax systems 6-3...
- Page 17 Front and Rear Panels Front panel 7-1 Front panel indicators 7-1 Front panel buttons 7-2 Two-line display 7-3 Protected mode for the front panel menu 7-4 Front panel menu map Rear panel 7-6 Technical Notes Printing Help Pages A-1 Printing the test print A-2 Printing the demonstration page A-3 Printing the startup page A-4 Enabling and disabling the startup page A-5...
- Page 18 Moving Your Printer Repacking your printer C-1 Regulatory Information Canadian EMC (Electromagnetic Compatibility) regulatory standards D-1 Declaration of conformity D-2 FCC Class B device (for 115 VAC equipment) D-3 Material Safety Data Sheets D-4 MSDS for toner D-5 MSDS for silicone oil D-8 Index Phaser 540 Color Printer...
-
Page 19: Introduction
Chapter Introduction The Phaser 540 Color Printer is the first continuous-tone desktop color laser printer. It provides high-quality color printing on plain paper, plus the ease of operation and high performance you expect from a laser printer. Some of its features include: High quality User-selectable 600 x 600 or 300 x 300 dots per inch (dpi) resolution with continuous-tone quality in color or black-and-white. - Page 20 The Phaser CopyStation accessory enables your printer to be used as a color copier. TekColor™ Dynamic Correction Tektronix’ exclusive color control technology makes it easy to print the colors you want. The Phaser 540 has 39 resident PostScript fonts. Additionally, it accepts Adobe Type 1, Type 3, and TrueType downloadable fonts as well as a variety of user-defined fonts.
-
Page 21: Getting Set Up
Connecting power and interface cables Selecting a language for the front panel Installing a software driver on your computer Using the Tektronix Phaser 540 drivers and utilities diskettes to install a driver on either a Macintosh or a PC running Windows. Note To add a hard disk to your printer, see “Adding a hard disk for... -
Page 22: Setting Up The Printer
Getting Set Up Setting up the printer What you get with your printer The printer and its accessories are shipped in two boxes. If you ordered an optional Lower Tray Assembly or Phaser CopyStation, each is shipped separately. Printer box The following items are shipped in the printer box: Quick-Start Installation Instructions Phaser 540 Color Printer User Manual... - Page 23 Getting Set Up Printer box 9008-01 Standard accessories box 9008-62 User Manual...
-
Page 24: Optional Accessories
Getting Set Up Optional accessories Lower Tray Assembly, paper tray and transparency tray Phaser CopyStation e t t A / L 9008-63 Phaser 540 Color Printer... -
Page 25: Registering Your Printer
(U.S. or international versions). Fill out the card and mail it. By registering your printer with Tektronix, you are validating the product warranty and ensuring that you will be sent information about upgrades, service, and accessories as it becomes available. -
Page 26: Installing The Optional Lower Tray Assembly
Getting Set Up Installing the optional Lower Tray Assembly An optional Lower Tray Assembly is available with the Phaser 540 (allowing you to print from three trays). Follow these steps to install it. Warning The printer weighs about 39 kg. (85 lbs.) and the Lower Tray Assembly weighs about 14 kg (31 lbs.). - Page 27 Getting Set Up 9008-02 User Manual...
-
Page 28: Installing The Toner Cartridges
Getting Set Up Installing the toner cartridges Open the printer’s right side door to install the toner cartridges. (Make sure that the power is always off when installing the user-replaceable components.) 9008-91 Note Instructions for loading each toner cartridge are the same except for the slot into which you insert each cartridge. - Page 29 Getting Set Up Insert the toner cartridge in the slot labeled for its color. B la ll o l l o 9008-10 Repeat Steps 2-4 for each toner cartridge. From top to bottom, the order of the color toner cartridges is Black, Yellow, Magenta, Cyan.
-
Page 30: Installing The Fuser
Getting Set Up Installing the fuser Open the front door and the right side door to install the fuser. (Make sure that the power is always off when installing the user-replaceable components.) 9008-30 Remove the fuser from its packaging. Save all packing material in case you need to return the fuser for repair or replacement. - Page 31 Getting Set Up Slide the fuser into the printer. 9008-04 Lock the fuser by turning the small blue screw clockwise several turns. 9008-05 Close the right side door. 2-11 User Manual...
-
Page 32: Installing The Imaging Unit
Getting Set Up Installing the imaging unit Open the printer’s front door to install the imaging unit. (Make sure that the power is always off when installing the user-replaceable components.) Note The imaging unit weighs approximately 6.8 kg (15 lbs.); always use the handles when lifting it. - Page 33 Getting Set Up Remove the imaging unit from its box and plastic bag, but leave the protective cover on until immediately before you insert the unit into the printer. Caution The imaging unit is extremely light-sensitive; make sure that it is not exposed to light for more than 45 seconds or it may damage the unit.
- Page 34 Getting Set Up Remove the protective plastic sheet from the imaging unit, taking care not to touch the right side or the underside. Insert the imaging unit into the printer, holding it by the blue handles. Release the left handle and slide the unit in until it stops. 9008-07 Caution Be careful not to touch the underside or right side of the...
- Page 35 Getting Set Up Turn the center blue knob clockwise to insert the imaging unit completely and to lock it. The lock icon should align with the black triangle. 9008-08 Close the printer’s front door. 2-15 User Manual...
-
Page 36: Installing The Output Tray
Getting Set Up Installing the output tray Insert one side of the plastic output tray into the opening on the printer. Press the opposite side to insert it into its opening on the printer. 9008-12 2-16 Phaser 540 Color Printer... -
Page 37: Adding Paper Or Transparencies
Getting Set Up Adding paper or transparencies Unpack the media tray(s). Be sure to remove all adhesive tape and protective foam. The printer uses four different trays: Tray Size A/Letter Paper 8.5 x 11 in. standard A/Letter Transparency 8.5 x 11 in. optional A4 Paper 210 x 297 mm... - Page 38 Getting Set Up Caution To keep your printer in good working order, always use clean, unused media. Fan the paper or transparencies, but be careful not to leave fingerprints, which can result in a smudged print. 9014-36 Place paper or transparencies in the tray under the hooks. Load transparencies so that the notched corner is placed closest to the load level label ( You can load approximately 250 sheets of paper or 100 sheets of...
- Page 39 Getting Set Up If you have a single media tray Slide the paper tray completely into the slot. e t t A / L 9008-15 If you have a Lower Tray Assembly Install a media tray into each of the three slots. e t t A / L e t t...
-
Page 40: Connecting The Printer
Getting Set Up Connecting the printer Printer ports The printer is shipped standard with a bi-directional parallel port and a SCSI port for interfacing to the optional Phaser CopyStation or an external hard disk for font storage. In addition, the printer can be configured with optional networking and serial ports. - Page 41 Getting Set Up The Phaser Share User Manual contains all the information necessary for configuring and using the optional connections. Parallel SCSI 9008-89 Note See “Supplies and accessories” on page 5-2 about ordering cables for connecting the printer. 2-21 User Manual...
-
Page 42: Parallel Connection
Getting Set Up Parallel connection The printer supports a standard (uni-directional) parallel port. The parallel port can also be set for bi-directional communications. Refer to Phaser 540 Drivers and Utilities Printing Reference for instructions on changing parallel communications. For information on cables and adapters, see “Supplies and accessories”... -
Page 43: Phaser Share Network And Serial Connections
Print jobs are processed on a first-come, first-served basis. To order the optional hardware, contact your local Tektronix reseller or call Tektronix toll-free in the United States at 1-800-835-6100. For detailed information on configuring and using the printer on networks, refer to the Phaser Share User Manual. -
Page 44: Turning On The Printer
Getting Set Up Turning on the printer After you have connected all the interface cables, you are ready to connect the power cord and turn on the printer. Caution To protect your printer from a power surge, make sure that the power switch on the printer is in the off position before plugging in the cord. -
Page 45: What Happens At Power-Up
Getting Set Up What happens at power-up Both status indicators (power and error ) on the printer’s front panel light briefly, messages appear in the display panel (LCD), and the printer goes through a series of self-tests. The printer takes approximately 5 minutes to warm up and complete the self-tests (depending on the amount of memory installed). -
Page 46: Selecting A Language For The Front Panel
Getting Set Up Selecting a language for the front panel Messages that appear in the front panel window are in English. To change the language to French, German, Spanish, Italian, or Japanese, follow these steps. When the printer is on and the Ready message appears, press the Menu button. -
Page 47: Making A Demonstration Print
Getting Set Up Making a demonstration print You can print a demonstration page to check that your printer is set up and operating correctly. When the printer is on and the Ready message appears, press the Menu button. You see this message: Help Pages <--- --->... -
Page 48: Installing A Driver On Your Computer
The Windows 3.1 Driver and Printer Utilities diskette includes a Microsoft Windows 3.1 driver for this printer. To use Microsoft Windows applications with this printer, install the Tektronix windows driver onto your PC. Start Windows on your PC. Insert the Tektronix Windows 3.1 Printer Driver diskette into your computer’s disk drive. - Page 49 Getting Set Up Assign the printer to a port: Select the printer from the list of Installed Printers. Select the Set As Default Printer button if you want this printer to be the default. Select the Connect button to display the Connect dialog box. In the Connect dialog box, set the Transmission Retry value to 850.
-
Page 50: Pc: Dos And Setting Up Ports
Check the list of supported printers in your DOS application for support of a Phaser 540 printer. If the list does not include this printer, check to see if other Tektronix Phaser series printers are listed and choose one of those. Otherwise, use a generic color PostScript driver. Refer to the Phaser 540 Drivers and Utilities Printing Reference for more information. - Page 51 Getting Set Up Setting up the parallel port If you are using the printer’s parallel port, disable timeouts on your computer’s parallel port to ensure that large files will print, even if data transmission is slow. Use the DOS MODE command to disable timeouts on your computer’s parallel port.
-
Page 52: Macintosh Drivers
TekColor color corrections for a Phaser 540 printer. Use the Phaser 540 driver if you are using System Software 6.0.7, or 7.0 and later. The Phaser 540 driver is a Tektronix-modified version of Apple’s LaserWriter 7.1.2 printer driver. If you are using System Software 7.5 and QuickDraw GX, you must disable... -
Page 53: Installing The Phaser 540 Driver
System 6.0.7 users: the driver is installed in the System Folder. System 6.0.7 users: LaserWriter 7.1.2 software is required to use the Tektronix driver with system 6.0.7. If you need this software, do the following steps: Open the Old System Items folder on the Macintosh Driver and Printer Utilities diskette. -
Page 54: Installing The Phaser 540 Gx Driver
Getting Set Up Installing the Phaser 540 GX driver Make sure that your Macintosh has QuickDraw GX installed and is running System Software version 7.5. Insert the Macintosh Driver and Printer Utilities diskette into the disk drive. When the diskette appears on the desktop, it should be open, showing the icons inside. -
Page 55: Workstation Users
PC floppy diskette. Refer to the Phaser 540 Drivers and Utilities Printing Reference manual for information on mounting PC diskettes. Refer to the Chapter 6 in this manual for information on accessing Tektronix’ Bulletin Board Service or Color Printer Information Server. -
Page 56: What Next
Getting Set Up What next? When you have set up all the hardware and connections, turned on the power, and installed the software on your computer, you are ready to print. Chapter 3, “Printing,” contains useful information on basic printing features such as color correction, fonts, and printing hints. -
Page 57: Printing
Macintosh To print from a Macintosh or a PC running Windows, you should have first installed the Tektronix driver for your computer, as described in Chapter 2. For information on using the drivers, refer to the Phaser 540 Drivers and Utilities Printing Reference. -
Page 58: Printing From A Pc: Windows
If the Printer Features button does not appear in the Options dialog box, the Tektronix Windows driver probably is not installed or the printer has not been selected. For details on the Tektronix driver, refer to the Phaser 540 Drivers and Utilities Printing Reference. Phaser 540 Color Printer... -
Page 59: Printing From A Pc: Dos
Make sure that the PC communication ports have been set up correctly. Refer to “PC: DOS and setting up ports” on page 2-30 for instructions. Select the printer driver for the Phaser 540, a Tektronix Phaser printer, or a generic color PostScript driver. Note Generic PostScript printer drivers do not have information about your Phaser 540, for example, its page sizes and image area size. -
Page 60: Printing From A Unix Or Vms Workstation
If you did not receive a demonstration CD but would like one, or if you would like to purchase a licensed version of Phaser Print, contact your dealer, local Tektronix office, or in the United States or Canada, call 1-800-835-6100. - Page 61 Printing For information on printing from workstations and setting up spooling systems, you can contact HAL, the Tektronix automated fax system by calling direct (503) 682-7450 or, in the United States or Canada, by calling toll-free 1-800-835-6100. Refer to “Using the automated fax systems” on page 6-3 for details on using the HAL system.
-
Page 62: Printing From A Macintosh
Printing from a Macintosh requires that an optional Phaser Share card be installed in the printer. Using the Phaser 540 driver Install the Tektronix printer driver for the Macintosh if needed. Refer to “Installing a driver on your computer” on page 2-28 for instructions. -
Page 63: Using The Phaser 540 Gx Driver
Printing Using the Phaser 540 GX driver Install the Tektronix printer driver for the Macintosh if needed. Refer to “Installing a driver on your computer” on page 2-28 for instructions. Select a desktop printer. Print from the driver using one of these methods:... -
Page 64: Selecting Print Features
Sending a PostScript utility file to the printer Printer settings downloaded to the printer’s front panel are only used when printing from a non-Tektronix driver. Refer to the Phaser 540 Drivers and Utilities Printing Reference. Note For network setup protection, the front panel access to setup parameters may be limited. -
Page 65: Print-Quality Modes
Printing Print-quality modes Standard The default setting, at 600 x 600 dpi, bi-level. This is the best general-purpose mode for full color printing. This selection produces about 1.8 pages per minute, depending on the size and complexity of the image. You can get faster throughput with more memory loaded. -
Page 66: Selecting Print-Quality Modes From The Front Panel
Printing Selecting print-quality modes from the front panel Use the following steps to change the print quality mode through the printer’s front panel menu. When the printer is on and the Ready message appears, press the Menu button. The printer displays the first selection in the menu: Help Pages <--- --->... -
Page 67: Color Correction
To access this information, click on the Help button (for a Macintosh, in the TekColor Options dialog box; for Windows, in the Tektronix Printer Features dialog box). You can view an example output of four of the color correction modes at the bottom of the Startup page. -
Page 68: Selecting Tekcolor Corrections From The Front Panel
Printing Selecting TekColor corrections from the front panel Use the following steps to change the color correction mode through the printer’s front panel menu. When the printer is on and the Ready message appears, press the Menu button. The printer displays the first selection in the menu: Help Pages <--- --->... -
Page 69: Using Color Sampler Charts
Printing Using color sampler charts The Phaser 540 diskettes contain color sampler charts for the following color methods: CMYK Cyan, magenta, yellow, and black Red, green, and blue Hue, saturation, and brightness PANTONE® Colors The charts consist of colored rectangles and coordinate values. Print the appropriate chart for your application, and use the coordinate values to select colors within an application. -
Page 70: All About Media
Printing All about media Make sure that the media trays are free of dust. Dust and dirt in a media tray can be transferred to the paper or transparency, resulting in poor print quality. Handle paper and transparencies with both hands at the edges to avoid creases and fingerprints, which can result in poor print quality. -
Page 71: Margins And Print Area
You may need to adjust the page margins in your application software to match the print area. Note To assure the correct page margins, use the Tektronix software drivers. The following table and illustration show the page sizes, the largest print areas, and the margins for the media sizes supported on this printer. -
Page 72: Media Trays
Printing Media trays The printer is shipped with a paper tray, either A/Letter Paper (U.S.) or A4 Paper (Metric), depending on the order option. Optional transparency trays (either A/Letter Transparency or A4 Transparency) are also available. Media Trays Media size A/Letter Paper 8.5 x 11 in. -
Page 73: Selecting A Media Tray By Location Or Media Type
Printing Selecting a media tray by location or media type When your printer has a Lower Tray Assembly, it accommodates three media trays at once. You can make a selection in the printer driver, from the front panel, or using a PostScript utility file. Regardless of which method you use, you can select media by choosing the location (tray or manual feed) or the type of media;... -
Page 74: Autoselect
Printing AutoSelect You can also choose AutoSelect from the front panel or with a utility file. With AutoSelect, the printer picks media from the default tray (if it is filled and loaded) or any tray in the printer that has media loaded. When that tray is empty, the printer automatically picks from another tray if it is the same type of media tray. -
Page 75: Image Orientation
Printing Image orientation Orientation refers to how the image appears on a print. You specify the image orientation through your software application or printer driver. Portrait Landscape 8344-42A 3-19 User Manual... -
Page 76: Using Manual Feed
Printing Using manual feed Use manual feed for printing on a media other than what is installed in the media tray. When the printer senses media in the manual feed tray, it picks that media. You can also select manual feed in the front panel;... -
Page 77: Insert The Paper
Printing Insert the paper Adjust the guides to the width of the paper. Insert a piece of paper until it stops. Wait 5 seconds after the first sheet enters the printer before inserting a second sheet. 9008-61 3-21 User Manual... -
Page 78: Insert The Transparency
Printing Insert the transparency Adjust the guides to the width of a transparency. Tektronix transparency film is stored in its box with the printable side facing up and the notched end at the upper right side of the box. Place the transparency in the manual feed tray with the printable side up: the end that is notched enters the printer first with the... -
Page 79: Making Transparencies
Printing Making transparencies Follow these guidelines when you make transparencies: Use only Tektronix transparencies. When using the transparency tray ( ), load transparencies with the printable side down (the notched end is placed closest to the load level label inside the transparency tray). -
Page 80: Fonts: Resident Typefaces
Printing Fonts: resident typefaces Courier Courier Bold Courier Oblique Courier Bold Oblique ITC Avant Garde Gothic Book ITC Avant Garde Gothic Book Oblique ITC Avant Garde Gothic Demi ITC Avant Garde Gothic Demi Oblique ITC Bookman Light ITC Bookman Light Italic ITC Bookman Demi ITC Bookman Demi Italic Helvetica... -
Page 81: Resident Typefaces (Pcl5)
Printing Resident typefaces (PCL5) For PCL5 (Printer Command Language) printing (HP Laserjet III emulation), the printer supports Courier, Times, and Universe typefaces in medium, bold, italic medium, and italic bold. Downloading fonts The printer accepts PostScript Type 1, Type 3, and TrueType downloadable fonts. -
Page 82: Printer Languages: Postscript, Hp-Gl, Pcl5
Printing Printer languages: PostScript, HP-GL, PCL5 The printer supports PostScript Level 1 and Level 2, HP-GL (Hewlett-Packard Graphics Language), and monochrome PCL5 (Printer Command Language) printer languages. The default language for the parallel port is PostScript. For information on default language for other interface ports, refer to the Phaser Share User Manual. -
Page 83: Printing Hints
“Using the automated fax systems” on page 6-3. Tektronix supplies and drivers Always use Tektronix supplies to ensure the highest quality prints and printer performance. Tektronix print drivers provide the best access to printer features. See Chapter 5 for order information. -
Page 84: Fastest Print Time
Printing Fastest print time The total print time depends on the following: Image complexity Image size Type of port used and network traffic Printer’s memory configuration (a 52-Mbyte configuration is fastest) Resolution selected (300 x 300 dpi is twice as fast as 600 x 600 dpi) Type of media (paper or transparencies) Of these elements, only the time contributed by the printer’s paper-marking speed (the time it takes the printer to put the colored toner on the paper once... -
Page 85: Caring For Your Printer
Overview To ensure the best print quality and the most reliable printer operation, follow these simple guidelines: Always use high-quality laser paper and only Tektronix transparencies. To maintain print quality, use the troubleshooting information on the Quick Reference Card and in Chapter 6; also use the Test Print in the front panel’s Help Pages menu to diagnose symptoms. -
Page 86: User-Replaceable Components
Caring for Your Printer User-replaceable components This printer is designed modularly so that it is easy to maintain: several of the components are replaceable. What this means to you is that scheduled cleaning is not necessary. These are the replaceable components: Transfer kit (transfer roller and waste bin) Imaging unit (includes the filter and corona wire) Fuser... -
Page 87: When To Replace Or Clean Components
Caring for Your Printer When to replace or clean components The following table lists the replaceable components and what symptoms to look for when they need to be replaced or cleaned. Printer Average Symptom component life* Toner cartridges Change the color 6,500 pages Front panel message: <color>:low toner soon. -
Page 88: Replacing A Toner Cartridge
Caring for Your Printer Replacing a toner cartridge Replace a toner cartridge soon after the front panel reads <color> low. After the message appears, the cartridge may still yield about 500 pages, depending on the complexity of your prints. Replace the used toner cartridge Caution Do not leave the right side door open for more than 45 seconds when a toner cartridge has been removed;... - Page 89 Caring for Your Printer Slide out the used toner cartridge and dispose of it as normal office waste. 9008-45 Remove the new toner cartridge from its packaging. Remove the shipping cover from the new toner cartridge. Insert the new toner cartridge into the printer. Note The cartridge and printer labels are color-coded for easy installation.
-
Page 90: Replacing The Imaging Unit
Caring for Your Printer Replacing the imaging unit Replace the imaging unit when the front panel reads Imaging Unit: replace. Refer to “Troubleshooting and print quality quick reference” on page 6-8 for more information on diagnosing print quality symptoms. The kit consists of these items: Imaging unit (including the corona wire) Filter Blower/brush cleaning tool... - Page 91 Caring for Your Printer To unlock the imaging unit, turn the large blue knob counterclockwise. Holding the blue front handle, pull out the imaging unit until it stops. Lift up the blue handle on the left side of the imaging unit to release the catch.
-
Page 92: Unpack The New Imaging Unit
Caring for Your Printer Unpack the new imaging unit Remove the filter, the blower/brush cleaning tool, and the new imaging unit from the packaging, but leave the protective cover on the imaging unit until you insert it into the printer. Save all packing material in case moving or subsequent shipment is necessary. -
Page 93: Clean The Sensor
Caring for Your Printer Clean the sensor Using the blower/brush cleaning tool that was included in the imaging unit packaging, clean the sensor inside the printer. 4676-9-01 Replace the filter Pull out the used filter and dispose of it as normal office waste. Insert the new filter. -
Page 94: Insert The New Imaging Unit
Caring for Your Printer Insert the new imaging unit Turn the two small blue knobs clockwise to align the triangles. Remove the protective plastic sheet. 9008-38 Insert the new imaging unit into the printer, holding it by the blue handles. Release the left handle and slide the unit in until it stops. -
Page 95: Reset The Copy Count
Caring for Your Printer Reset the copy count To reset the copy count for the imaging unit (and the corona wire, which is included with the new imaging unit), complete these steps. Ready Menu Exit 9008-20 Press the Menu button to enter the front panel menu. You will see this message in the display: Help Pages <---... -
Page 96: What To Do With The Used Imaging Unit
Caring for Your Printer What to do with the used imaging unit Once you determine that the new imaging unit takes care of whatever print quality symptom you observed, dispose of the used imaging unit as normal office waste. If the new imaging unit did not take care of the symptom, put the original unit back into the printer and repack the new unit so that it is protected from any exposure to light, and save it for future use as needed. -
Page 97: Replacing The Fuser
Caring for Your Printer Replacing the fuser Replace the fuser when the front panel reads Fuser: replace. Refer to “Troubleshooting and print quality quick reference” on page 6-8 for more information on diagnosing print quality symptoms. Remove the used fuser Turn the power off. - Page 98 Caring for Your Printer To unlock the fuser, turn the small blue screw that is above the large knob counterclockwise (about four turns) until it is loose. Holding the blue tab on the right, pull the fuser until the safety catch stops it.
-
Page 99: Insert The New Fuser
Caring for Your Printer Insert the new fuser Remove the new fuser from its packaging. Note Save all packing material in case moving or subsequent shipment is necessary. Using both hands, slide the new fuser into the printer. Push firmly to seat the fuser in place. -
Page 100: Reset The Copy Count
Caring for Your Printer Reset the copy count To reset the copy count for the fuser, complete these steps. Ready Menu Exit 9008-20 Press the Menu button to enter the front panel menu. You will see this message in the display: Help Pages <--- --->... -
Page 101: Replacing The Transfer Kit
Caring for Your Printer Replacing the transfer kit Replace the transfer kit (consisting of the transfer roller and the waste bin) when the front panel reads Transfer Kit: replace. Refer to “Troubleshooting and print quality quick reference” on page 6-8 for more information on diagnosing print quality symptoms. - Page 102 Caring for Your Printer Use the blue handle to pull out the paper feeder. Turn the blue screws counterclockwise about four turns to unlock the cover. Lift the cover until it catches and stays open. 9008-24 Hold the transfer roller by its blue handles; rotate the handles toward the printer.
-
Page 103: Insert The New Transfer Roller
Caring for Your Printer Insert the new transfer roller Holding the new transfer roller by its blue handles, place the roller into the paper feeder. Rotate the handles away from the printer to seat the roller securely. Close the cover and tighten the two blue screws (clockwise). 9008-26 4-19 User Manual... -
Page 104: Replace The Waste Bin
Caring for Your Printer Replace the waste bin With the paper feeder still out, pinch the waste bin’s handle; press the safety catch to release it and remove the waste bin. Place the used waste bin in the plastic bag provided in the kit; close the plastic bag securely and dispose of it as normal office waste. -
Page 105: Reset The Copy Count
Caring for Your Printer Reset the copy count To reset the copy count for the transfer kit, complete these steps. Ready Menu Exit 9008-20 Press the Menu button to enter the front panel menu. You will see this message in the display: Help Pages <--- --->... -
Page 106: Cleaning The Corona Wire
Caring for Your Printer Cleaning the corona wire When your prints show vertical light streaks that are wavy and appear in all colors, the corona wire needs to be cleaned. If cleaning doesn’t take care of the problem, the corona wire may be worn out and need to be replaced. Separate replacement of the corona wire should not be required often, since each new imaging unit includes a new corona wire already installed, and the average life of these two components is similar. - Page 107 Caring for Your Printer Pinch the handle of the corona wire to remove it. 9008-75 Remove the cleaning tool from inside the printer. 9008-70 4-23 User Manual...
- Page 108 Caring for Your Printer Insert the cleaning tool on the underside of the corona wire housing, as shown. Wipe the corona wire with a back and forth motion. 9008-71 4-24 Phaser 540 Color Printer...
- Page 109 Caring for Your Printer Replace the cleaning tool inside the printer. 9008-90 Replace the corona wire in the printer. 9008-97 Close the front door and turn the power on. 4-25 User Manual...
-
Page 110: Reset The Copy Count
Caring for Your Printer Reset the copy count If you replace the corona wire, reset its copy count by completing these steps. Ready Menu Exit 9008-20 Press the Menu button to enter the front panel menu. You will see this message in the display: Help Pages <--- --->... -
Page 111: Tektronix Supplies: The Mark Of Quality
Ordering information For specific product information, refer to the next page or the supplies information sheet that is shipped with the printer. To order supplies, contact your local Tektronix reseller or, in the U.S.A., call Tektronix at 1-800-835-6100. User Manual... -
Page 112: Supplies And Accessories
Supplies and Accessories Supplies and accessories Phaser 540 Supplies and Accessories Order Description number Supplies Toner 016-1319-00 Black cartridges 016-1320-00 Cyan 016-1321-00 Magenta 016-1322-00 Yellow Fuser 016-1323-00 110 volt 016-1354-00 220 volt Imaging kit 016-1316-00 Transfer kit 016-1318-00 Paper 016-1368-00 A/Letter (U.S.) 500 sheets 016-1369-00... - Page 113 Supplies and Accessories Phaser 540 Supplies and Accessories (cont'd.) Order Description number Accessories (cont’d.) Cables and 012-1468-00 Parallel/Centronics 36-pin high-density plug to adapters 25-pin DSUB plug; 3 meters (9.84 feet) Connects the Phaser 540 to a PC or workstation parallel port. 012-1465-00 SCSI-2 HD to SCSI-1 50-pin high-density plug to...
-
Page 115: Troubleshooting
Tektronix dealer or local Tektronix office. Printer service If your printer needs service, call 1-800-835-6100 in the United States, from 6:00 am to 5:00 pm PST. Outside the U.S., contact your Tektronix dealer or local Tektronix office. The Tektronix Bulletin Board Service The Tektronix Bulletin Board Service (BBS) is available for direct downloading of the latest versions of printer drivers, utilities, and files. - Page 116 For a detailed instruction guide on system requirements, terminal settings, protocol, modem, how to connect to our BBS, and how to download files, request a document catalog from HAL, the Tektronix automated fax system. Refer to “Using the automated fax systems” on page 6-3 for instructions on using HAL.
-
Page 117: Using The Automated Fax Systems
Using the automated fax systems As an alternative to the Customer Support Hotline, and to provide up-to-date information quickly, Tektronix has set up HAL (Highly Automated Library) and EuroHAL, two interactive, automated fax systems. These automated fax systems provide Macintosh, PC, and workstation users... - Page 118 Troubleshooting Use EuroHAL to order a catalog or individual documents in Europe EuroHAL includes many documents, some in English and some in other European languages. If a local version of the document you want is available, EuroHAL will send it in your language. Otherwise, it will send English documents.
- Page 119 Troubleshooting EuroHAL answers and asks which language you want to use. Press 1 For English Press 2 For French Press 3 For German The first time you use EuroHAL, you should order a catalog. This lists all the documents that are available and is constantly updated.
-
Page 120: Symptoms And Solutions
Troubleshooting Symptoms and solutions Diagnostic tools The Phaser 540 provides several tools for diagnosing and solving various types of problems, from print quality to media jams. These tools include the following: “Troubleshooting and print quality quick reference” table Describes several printing problems by symptom (including an example), then lists the possible causes and solutions. -
Page 121: Maintaining Print Quality
Troubleshooting Maintaining print quality If you notice a problem with the quality of your prints, the probable solution is replacing one of the consumable components (toner cartridges, imaging unit, fuser or transfer kit) or cleaning the corona wire. To help you diagnose the problem, print the test print from the front panel: Press the Menu button. - Page 122 Media is wrinkled or curled. Change the media. Media is too thick or too thin. Use recommended laser paper and Tektronix transparencies. Refer to Chapter 3 for more information. Front panel reports: Paper is installed in the transparency Load only paper in the paper tray and tray or transparencies are installed in transparencies in the transparency tray.
- Page 123 Troubleshooting Troubleshooting and print quality quick reference (cont’d.) Symptom Possible Causes Solution Front panel reports: Indicated color toner cartridge is low. Replace the indicated color toner cartridge when the print quality becomes <color>:low unacceptable. If you don’t already have one, order a new toner cartridge. Front panel reports: Printer is in standby mode.
- Page 124 Troubleshooting Troubleshooting and print quality quick reference (cont’d.) Symptom Possible Causes Solution Print shows a small, The roller in the color toner cartridge is Replace the color toner cartridge. repeating light spot in a single damaged. color. Print shows light horizontal The roller in the color toner cartridge is Replace the color toner cartridge.
- Page 125 Troubleshooting Troubleshooting and print quality quick reference (cont’d.) Symptom Possible Causes Solution Light and wavy vertical The corona wire is dirty. Clean the corona wire. See page 4-22. streaks appear in all colors. If several cleaning attempts do not show improvement, check the test print for the Print Quality Test Page imaging unit’s system count: if it is near or...
- Page 126 Troubleshooting Troubleshooting and print quality quick reference (cont’d.) Symptom Possible Causes Solution A single, wide, light horizontal The imaging unit was exposed too Wait overnight and print the test print. If band appears in one place on long to light. print quality hasn’t changed, replace the the page or the entire image imaging unit.
- Page 127 Troubleshooting Troubleshooting and print quality quick reference (cont’d.) Symptom Possible Causes Solution Large, uneven and repeating An internal belt on the imaging unit is Replace the imaging unit. streaks appear on the page. slipping. Print Quality Test Page Cyan Magenta Yellow Black Count...
- Page 128 Troubleshooting Troubleshooting and print quality quick reference (cont’d.) Symptom Possible Causes Solution One dark, horizontal band The media “stalled” for a few seconds appears on the print in the fuser. The cause: approximately 241 mm Media is installed wrong side up. Turn over the media in the media tray.
-
Page 129: If You Can't Make A Print
When you have checked all possible causes and your printer is still not operating, you can call for service at 1-800-835-6100 in the U.S. and Canada, or call your nearest Tektronix reseller. To verify that your computer can communicate with the printer, use one of... - Page 130 Troubleshooting If you have a PC Type this DOS command: echo %! > port echo showpage [Ctrl-D] > port Where [CTRL-D] indicates pressing the key while holding down CTRL key. Substitute the name of the printer port (for example :) for the variable port in this COM1 COM2 LPT1...
-
Page 131: Printer Doesn't Appear In The Chooser (Macintosh)
Troubleshooting Printer doesn’t appear in the Chooser (Macintosh) Make sure that the printer is turned on and the cables are correctly attached. Check the termination (refer to the documentation for your network adapter or connector for information on termination). Make sure that you have the correct zone selected in the Chooser before looking for the printer’s name in the list of printers. -
Page 132: Print Job Does Not Finish (The Printer Times Out)
Troubleshooting Print job does not finish (the printer times out) If you are using the serial or parallel port from a PC, make sure that you used the command to set the PC’s communication parameters. For MODE example: MODE LPT1:,,P > NUL MODE COM1:9600,N,8,1,P parameter in these commands sets the port timeout to Infinite Retry and must be part of the command. -
Page 133: Media Problems
(16-32 lb. ) paper with manual feed. Refer to “All about media” on page 3-14 for more information. Use only Tektronix transparencies that are listed on the supplies information sheet. Tektronix does not guarantee the results of non-Tektronix transparencies in Tektronix printers. -
Page 134: Problems With Image Size And Position
Troubleshooting Problems with image size and position Off-set images Check your application for correct image sizing. Cut-off images Check your application for image sizing. Make sure that you are using a Phaser 540 driver and have selected the correct page size. If you select the incorrect page size, the image may be cut off. -
Page 135: Print Quality Problems
(16-32 lb. ) paper with manual feed. Refer to “All about media” on page 3-14 for more information. Use only Tektronix transparencies that are listed on the supplies information sheet. Tektronix does not guarantee the results of non-Tektronix transparencies in Tektronix printers. -
Page 136: Streaks Or Spots
Troubleshooting Streaks or spots Most spots are caused by fingerprints or dust introduced into the printer while installing the imaging unit or loading media. Make sure that the surface where you unpack the imaging unit, paper, and transparencies is free of dust. Keep supplies in a covered area or a closed box. -
Page 137: Black-And-White Prints Instead Of Color
Reference. Make sure that you have not selected Monochrome in the Tektronix Printer Features dialog box. If you are not using a driver, make sure that you have not sent the monochrome snippet; make sure that the front panel is not set for Monochrome. -
Page 138: Startup Page Prints Even Though It Is Disabled
Troubleshooting Startup page prints even though it is disabled The printer’s power-up self-test can detect problems that do not necessarily make the printer completely inoperable. Examples of these non-fatal errors include faulty printer ports and some memory failures. If the printer detects a non-fatal error at power-up, the startup page prints, even if you have disabled it. -
Page 139: Clearing A Media Jam
Clearing a media jam Note If you get frequent media jams, make sure that you are using high-quality laser paper and Tektronix transparencies. Order from the supplies information sheet that is shipped with your printer. If a media jam occurs, the front panel reports Jam at <Location>. The <Locations>... - Page 140 Troubleshooting Jam at A Open the left side door corresponding to the Remove the selected media tray. selected media tray. Remove the jammed media from inside the printer. 9008-100 Remove the jammed media. 9008-49 9008-48 Note If you have an optional Lower Tray Assembly, Jam A can occur at any of the three media trays, whichever tray you selected for the current print job.
- Page 141 Troubleshooting Jam at B Open the left side door corresponding to the selected media tray. Pull out the paper feeder; the jammed media is visible. Pull the media toward the inside of the printer. 9008-50 6-27 User Manual...
- Page 142 Troubleshooting Jam at C Open the left side door. Open the front door and the right side door to access the fuser. Pull out the paper feeder. The media is on top of the paper feeder. Pull the media out toward the inside of the printer.
- Page 143 Troubleshooting Jam at D Open the front door to access the fuser. Open the front door and the right side door to access the fuser. Pull open the access door (above the plastic output tray). The media is visible. Turn the fuser’s large blue knob counterclockwise to release the jammed media.
- Page 144 Troubleshooting Jam at E Remove the jammed media from the output Pull open the access door (above the plastic tray. output tray) and remove the media. 9008-98 9008-57 Jam at Manual Feed Remove the jammed media from the manual feed tray. 9008-58 6-30 Phaser 540 Color Printer...
-
Page 145: Front And Rear Panels
Chapter Front and Rear Panels Front panel The front panel provides a display of two lines of 24-characters each for messages, button labels, and user-adjustable parameter settings. Front panel indicators The front panel also includes two indicator lights: Power (green LED) Error (red LED) Exit 9008-34... -
Page 146: Front Panel Buttons
Front and Rear Panels Front panel buttons button allows you to perform the following menu Exit functions: Back up a level of the menu without making a selection. Exit the menu. Button 2 is inactive during normal printer operation. However, you can perform this menu function when you enter the front panel menu: Scroll backward through the available selections. -
Page 147: Two-Line Display
Front and Rear Panels Two-line display The two lines of the display have the following functions: Line 1 Displays status messages such as Ready and Printing. Displays operation errors and warnings such as <color>:low. Displays the names of menus and parameters you can set. Line 2 Displays button labels such as <--- for previous and --->... -
Page 148: Protected Mode For The Front Panel Menu
To learn more about locking and unlocking the front panel menus, refer to the Phaser 540 Driver and Utilities Printing Reference manual or call the Tektronix Customer Support Hotline at 1-800-835-6100 (from 6:00 am to 5:00 pm PST). Use the following key sequence to access the entire menu when the front panel is “locked:”... -
Page 149: Front Panel Menu Map
Front and Rear Panels Front panel menu map Phaser 540 Menu Map scrolls backward through available selections <--- scrolls forward through available selections ---> Press Menu enters the next sub-menu Menu exits without making a change Exit accepts the displayed value as the new setting Help Pages Test Print Configuration Page... -
Page 150: Rear Panel
Front and Rear Panels Rear panel Parallel connector SCSI connector (to add a Phaser CopyStation or a hard disk for font storage) Optional Phaser Share card with serial and network connectors Test print button Parallel SCSI 9008-17 Phaser 540 Color Printer... -
Page 151: Technical Notes
Appendix Technical Notes Printing Help Pages The printer has several Help Pages that you can print to learn more about the printer. Test Print: Provides a test pattern to diagnose and correct print quality problems. Demonstration Page: Provides a colorful way of learning more about the printer while demonstrating its printing quality. -
Page 152: Printing The Test Print
Technical Notes Printing the test print The test print provides an easy-to-use tool to diagnose and resolve print quality symptoms. The Phaser 540 Quick Reference Card and Chapter 6 of this manual provide examples of symptoms as well as the information necessary to correct the problem. -
Page 153: Printing The Demonstration Page
Technical Notes Printing the demonstration page You can print a demonstration page anytime you want to examine the printing quality of the printer. The demonstration page prints in the currently selected print mode. When the printer is on and the Ready message appears, press the Menu button. -
Page 154: Printing The Startup Page
Technical Notes Printing the startup page By default, printing of the startup page is enabled on power up. However, you can print the startup page anytime when you need to learn the number of pages that have been printed, the amount of installed memory, the number of fonts in memory, and installed interface ports. -
Page 155: Enabling And Disabling The Startup Page
Technical Notes Enabling and disabling the startup page You can enable and disable printing of the startup page in three ways: On a PC, send a PostScript language utility file to the printer. For more information, refer to the Phaser 540 Drivers and Utilities Printing Reference manual. - Page 156 Technical Notes Printing the configuration page The configuration page contains a variety of information especially useful for network installation and troubleshooting. There are two ways to print the configuration page: Use the printer’s front panel menu. While the Ready message is displayed, press the Menu button.
-
Page 157: Printing The Front Panel Menu Map
Technical Notes Printing the front panel menu map The front panel menu map provides a convenient navigation aid for quickly determining the location of menu items. The menu map can be printed from the front panel; it is also available in Chapter 7. While the Ready message is displayed, press the Menu button. -
Page 158: Energy Star Mode
Technical Notes Energy Star mode When the printer is idle for the time set in the Energy Star front panel menu (1 hour default), it cools down completely. When the printer exits the Energy Star cool-down mode, it is ready to print in about 5 minutes. Refer to the menu map in Chapter 7 to locate the Energy Star Timeout setting in the front panel submenu. -
Page 159: Changing The Energy Star Timeout
Technical Notes Changing the Energy Star timeout The default value for the Energy Star timeout is 1 hour. You can change the default timeout value when you want the printer to more quickly reach the Energy Star energy-saving standby mode. When the printer is on and the Ready message appears, press the Menu button. -
Page 160: Parallel Port
Technical Notes Parallel port The printer has an asynchronous parallel port that lets you interface with PCs. The parallel port supports uni-directional and bi-directional communications (refer to the Phaser 540 Drivers and Utilities Printing Reference for instructions on setting the port to bi-directional communications). - Page 161 Technical Notes The table shows the parallel port’s connected pins. Other pins are not connected. Parallel port signal descriptions Pin Signal mode names: Return Signal Description Compatibility/Nibble source Busy/PtrBusy Printer C mode: Positive true = not ready for data N mode: Data bits 3 then 7, then busy status Select/Xflag...
- Page 162 Technical Notes Parallel port signal descriptions (cont’d.) Pin Signal mode names: Return Signal Description Compatibility/Nibble source Data 6 Host C mode: Positive true data input N mode: Not used Data 7 Host C mode: Positive true data input N mode: Not used Data 8 Host...
- Page 163 Technical Notes Specifications Temperature Operating: 10 C to 32.5 C (50 F to 90.5 Non-operating: 0 C to 40 C (32 F to 104 Storage: (without paper, transparencies, or consumables): –20 C to +60 (–4 F to +140 Humidity Operating: 10% to 80% Relative Humidity, non-condensing Non-operating: 10% to 90% Relative Humidity, non-condensing Altitude Operating: 0 to 2,500 m (8,000 ft.).
- Page 164 Technical Notes Power Consumption Meets Energy Star power conservation requirements. State Average power Continuous printing 208 W Idle 130 W Energy Star 23 W or under Dimensions of standard unit (without Lower Tray Assembly) Height: 454 mm (18 in.) Depth: 492 mm (19.5 in.) Width: 489 mm (19* in.) *712 mm (27.4 in.) with the output tray Dimensions with Lower Tray Assembly...
- Page 165 Technical Notes Printing speed The speeds and rates listed in the following table represent the time it takes the printer to produce a print ( ) and the rate at which the printer 1st print produces multiple prints ( ). The continuous Continuous throughput rate throughput rate is sometimes referred to as the printer’s paper-marking speed: the time it takes the printer to put the colored toner on the paper,...
- Page 166 Technical Notes Safety and emissions standards FCC Part 15, Subpart J “Class B” verified Vfg 243 Class B CISPR 22 Class B, verified UL 1950, listed. CSA 220, certified. EN60950/IEC 950, TUV licensed EN55022 A-16 Phaser 540 Color Printer...
-
Page 167: Expanding Your Printing System
Lower Tray Assembly with one paper tray and one transparency tray. For metric trays, order 4676FTA Option 01. 4540 Phaser CopyStation accessory adds color copying capability to your Tektronix Phaser printer. 4676FP1 Ethernet networking card upgrade kit; includes EtherTalk and Novell NetWare protocols (for Option P1). 4676FP2 TCP/IP Protocol upgrade kit;... -
Page 168: Advantages Of Adding Memory
Expanding Your Printing System Advantages of adding memory The following table summarizes the memory configurations for the Phaser 540 printer: Memory configurations for the Phaser 540 printer Memory Total Performance / Benefit memory Standard 20 Mbytes Fast and Standard print modes. Add one 16-Mbyte SIMM 36 Mbytes Doubles the size of the frame buffers to... -
Page 169: Phaser Share Cards
Note To order a Phaser CopyStation, use Tektronix order number 4540. For instructions on connecting a Phaser CopyStation to your printer or printer network, and for operating instructions, refer to the Phaser CopyStation User Manual. -
Page 170: Phaser Print
Expanding Your Printing System Phaser Print For printing in Unix and VMS environments, Tektronix offers Phaser Print. Phaser Print provides fast raster screen copy printing to Tektronix color printers. Phaser Print also provides a graphical user interface for push-button control of Tektronix printer features. Phaser Print works with the workstation’s native spooling system to print PostScript files and raster... -
Page 171: Adding A Hard Disk For Font Storage
Expanding Your Printing System Adding a hard disk for font storage With the Phaser 540, you can connect one or more Small Computer System Interface (SCSI) external hard disks to the printer and use them for additional font storage. Once you download a font to the external disk, the font remains there until you remove it. - Page 172 Expanding Your Printing System Initialization Unless the disk is already formatted for operation with a PostScript printer, you have to initialize (format) the disk after connecting it to the printer. The Phaser 540 diskettes contain utilities to help you initialize the disk and download fonts to it.
-
Page 173: Connecting One Disk
Expanding Your Printing System Connecting one disk Make sure that the computer, printer, and external disk are turned off before you connect or disconnect a SCSI cable. Phaser 540 printer with a built-in SCSI terminator SCSI port External disk SCSI port Terminator (not required if the disk has a built-in terminator or if you have a Phaser CopyStation connected at the other end of the chain). -
Page 174: Connecting Multiple Disks
Expanding Your Printing System Connecting multiple disks Make sure that the computer, printer, and external disks are turned off before you connect or disconnect a SCSI cable. Phaser 540 printer with a built-in SCSI terminator SCSI port External disks Terminator (not required if the end disk has a built-in terminator or if you have a Phaser CopyStation connected at the other end of the chain). -
Page 175: Moving Your Printer
Appendix Moving Your Printer Repacking your printer Turn off the printer; remove the power cord. Remove the media tray(s). Repack them for shipping or storage in their original shipping boxes. e t t A / L e t t A / L e t t n c y A / L... - Page 176 Moving Your Printer With the front and right side doors open, remove the fuser and imaging unit; immediately repack them for shipping or storage in their original shipping boxes. Caution The imaging unit is extremely light sensitive; keep its light exposure to a minimum (less than 45 seconds).
- Page 177 The printer weighs about 39 kg. (85 lbs.) and the Lower Tray Assembly weighs 14 kg (31 lbs.). Observe standard precautions for lifting heavy objects. Repack the Lower Tray Assembly in its original shipping box. 9008-67 Repack any other accessories in the original Tektronix shipping box. User Manual...
- Page 178 Moving Your Printer Repack the printer in the original Tektronix shipping box. Make sure that you keep the printer level when moving. Note To keep your warranty valid, you must first remove the fuser, toner cartridges, and imaging unit, then ship the printer in its Tektronix shipping box with the appropriate packing materials.
-
Page 179: Regulatory Information
Appendix Regulatory Information Canadian EMC (Electromagnetic Compatibility) regulatory standards This digital apparatus does not exceed the Class B limits for radio noise emissions from digital apparatus set out in the Radio Interference Regulations of the Canadian Department of Communications. Le présent appareil numérique n’émet pas de bruits radioélectriques dépassant les limits applicables aux appareils numériques de la classe B prescrites dans le Règlement sur le brouillage radioélectrique édicté... -
Page 180: Declaration Of Conformity
Regulatory Information Declaration of conformity (for 220-230VAC equipment) Tektronix, Inc. Color Printing and Imaging Division P.O. Box 1000 Wilsonville, Oregon 97070-1000 U.S.A. declares, under our sole responsibility, that the product Phaser 540 (4676A) to which this declaration relates, is in conformity with the following... -
Page 181: Fcc Class B Device (For 115 Vac Equipment
The equipment described in this manual generates and uses radio frequency energy. If it is not installed and used properly in strict accordance with Tektronix’ instructions, it may cause interference with radio and television reception. This equipment has been tested and verified to comply with the limits for a Class B digital device, pursuant to Part 15 of the FCC Rules. -
Page 182: Material Safety Data Sheets
Tektronix establishes and maintains sound environmental management practices to accomplish this goal and to assure compliance with the laws, regulations, and orders of the responsible governmental authorities wherever Tektronix and its subsidiaries operate. Tektronix, Incorporated is complying with government regulations by providing Material Safety Data Sheets for this product. -
Page 183: Msds For Toner
Regulatory Information MSDS for toner Section I – Product identification Trade name and Tektronix part number: Black Toner Cartridge 016-1319-00 Cyan Toner Cartridge 016-1320-00 Magenta Toner Cartridge 016-1321-00 Yellow Toner Cartridge 016-1322-00 Product use: Used in the Phaser 540 color printers. - Page 184 Regulatory Information Section VI – Accidental release measures Spill Or Leak: Not applicable. Section VII – Handling and storage Handling: None. Storage: Avoid high temperatures. Section VIII – Exposure control – personal protection Exposure Guidelines: No special protection indicated when used as intended.
- Page 185 RCRA: TCLP below hazardous waste levels set by EPA. CERCLA: No reportable quantity for this material. California Prop. 65: Not listed. Section XVI – Other information Original preparation date: September 16, 1994 R.C. Tektronix, Incorporated P.O. Box 500 Chemical Documentation Mail stop 55-769 Beaverton, Oregon 97077...
-
Page 186: Msds For Silicone Oil
Section I – Product identification Trade name and Tektronix part number: Silicone Fluid 006-7959-00 Product use: Used in Tektronix Phaser 540 color printers. Section II – Information on ingredients Ingredients Polydimethylsiloxane Hazardous Ingredients: None. This is not a hazardous material as defined by the OSHA Hazard Communication Standard. - Page 187 Handling: No special requirements. Storage: No special requirements. Section VIII – Exposure control – personal protection Exposure Guidelines: None established. Engineering Controls: None needed when used as intended in Tektronix printers. Eye Protection: None needed. Skin Protection: None should be needed.
- Page 188 OSHA: Not considered a hazardous material as defined by 29CFR1910.1200 Hazard Communication. Section XVI – Other information Original preparation date: October 28, 1994 R.C. Tektronix, Incorporated P.O. Box 500 Chemical Documentation Mail stop 55-769 Beaverton, Oregon 97077...
- Page 189 Index color correction 3-11 CMYK color sampler chart 3-13 accessories Help button 3-11 Phaser CopyStation B-3 HSB color sampler chart 3-13 Phaser Print B-4 PANTONE Color sampler chart 3-13 PhaserSym B-4 RGB color sampler chart 3-13 accessories, ordering 5-2, 5-3 sampler charts 3-13 cables and adapters 5-3 selecting from front panel 3-12...
- Page 190 demonstration page 2-27, A-3 fastest printing available 3-28 diagnosing print quality 6-6 filter, replacing 4-9 disable timeouts 2-31 font disk, see hard disk disk, see hard disk fonts 1-2, 3-24 diskettes downloading 3-25 drivers 2-1 Macintosh screen fonts 3-25 PostScript utility files 3-17 resident typefaces 1-2, 3-25 utilities 2-1 TrueType 1-2...
- Page 191 indicators at power-up 2-25 getting help 6-1 error 2-25, 6-8, 6-18, 7-1 power 2-25, 6-8, 6-17, 7-1 installation 2-28 HAL — Highly Automated driver 2-28 Library 3-5, 3-7, 6-1, 6-3 fuser 2-10 handling media 3-14 imaging unit 2-12 hard disk B-5 inventory 2-2 connecting multiple B-8 Lower Tray Assembly 2-6...
- Page 192 LocalTalk 2-20 media selection 3-17 problems 6-17 media trays Lower Tray Assembly 3-17 Lower Tray Assembly 3-17 cable C-3 selecting 3-17 installing 2-6 using three trays 3-17 ordering 5-1, B-1 media, about 3-14 repacking C-3 memory, adding B-2 using three media trays 3-17 Menu button 7-2 LPT port, setting up 2-31 menu map 7-5...
- Page 193 Phaser Share 3-2, 3-6 cards 2-20, 7-6, B-3 packing material connections 2-23 removing 2-5 Phaser Share networking 2-20 PANTONE Colors 3-13 PhaserSym 3-4, B-4 paper 1-1 portrait orientation 3-19 handling 3-14 ports 2-20 jams 6-26, 6-30 parallel A-10 loading 2-18 selecting 3-3 ordering 5-2 setting up 2-30...
- Page 194 printing user-replaceable components 4-3 configuration page A-6 waste bin 4-20 from a Macintosh 3-6 Reset button 7-2 from a PC (DOS) 3-3 resetting the copy from a PC (Windows) 3-2 count 4-11, 4-16, 4-21, 4-26 from a workstation 3-4 resident fonts 3-24 from specific applications 3-7 RGB color sampler chart 3-13 front panel menu map A-2, A-7...
- Page 195 3-6 clearing media jams 6-25 TekColor options color streaks 6-10 descriptions 3-11 configuration page A-6 Tektronix Bulletin Board Service cut off images 6-20 (BBS) 2-35, 3-5, 6-1 dark, horizontal band 6-14 Tektronix Color Printer Information dark, vertical line 6-13 Server 2-35, 3-5, 6-2 fine-line detail missing 6-11...
- Page 196 troubleshooting (cont’d.) upgrades media problems 6-19 adding memory B-2 off-set images 6-20 Use Printer Settings 3-11 paper-picking errors 6-19 user-replaceable components 4-2 power light blinks, but file doesn't using EuroHAL 6-4 print 6-17 using the automated fax systems 6-3 print job does not finish 6-18 utilities diskettes 2-1 print quality problems 6-21 utility files 2-35...
Need help?
Do you have a question about the Phaser 540 Plus and is the answer not in the manual?
Questions and answers