Table of Contents
Advertisement
Advertisement
Table of Contents

Related Manuals for Steinberg MR816CSX


Summary of Contents for Steinberg MR816CSX
-
Page 2: Introduction
Introduction Introduction Thank you for purchasing the ADVANCED INTEGRATION DSP STUDIO MR816 CSX/MR816 X. This comprehensive audio inter- face allows you to transfer the sound of your instruments (keyboards, guitars, microphones) to the DAW software (such as Cubase) on your computer, as well as process and monitor the DAW sound—all through a single IEEE1394 cable. Moreover, the sophisticated Link function provides seamless operation and convenient studio-like monitoring options. -
Page 3: Table Of Contents
Sweet Spot Morphing Channel Strip (MR816 CSX only) ..27 personal use. How to call up the window......... 27 • Steinberg and Cubase are the registered trademarks of Steinberg Media Parameter functions ..........28 Technologies GmbH. • Windows is a registered trademark of Microsoft ® Corporation in the United Control Panel .............. -
Page 4: The Controls And Connectors
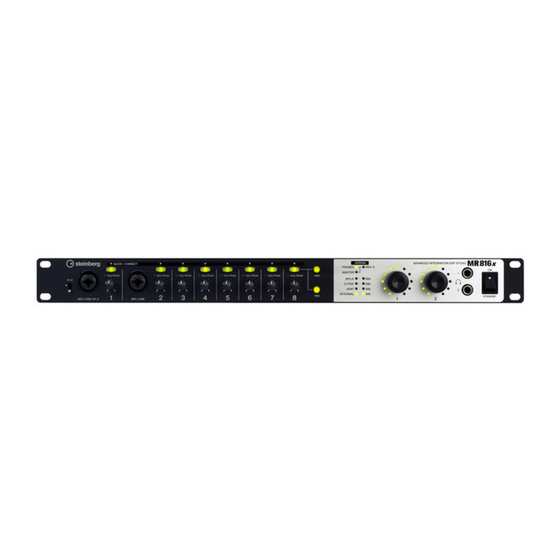
The Controls and Connectors The Controls and Connectors This section provides an overview of the panel controls and connectors of the MR816 CSX/MR816 X. Front Panel 4 6 8 1 [HI-Z] switch 3 [QUICK CONNECT] buttons (with LED lamps) This switch enables use of a high-impedance instrument These buttons enable assignment of the analog input (electric guitar, bass, etc.) connected to the MIC/LINE/HI- jacks (MIC/LINE/HI-Z jack labeled “1”... - Page 5 (or powered speakers) IN jack will be used as the clock source. before turning phantom power on or off. Steinberg/Yamaha When this lamp lights, the word clock input also recommends that you turn all output levels to minimum...
- Page 6 Adjusts the return set the Word Clock Source parameter on the Control time of the internal level from the inter- REV-X Panel of Yamaha Steinberg FW Driver or the MR Editor Reverb effect unit nal Reverb effect on the computer. (REV-X).
-
Page 7: Rear Panel
MR816 CSX/MR816 X (or a device compatible other device connected to INSERT I/O jack 1 then with the Yamaha Steinberg FW Driver) for daisy-chain returned to INSERT I/O jack 1. Likewise, the audio signal connection. If your computer has a 4-pin IEEE1394 jack,... -
Page 8: Internal Structure Of The Mr816 Csx/Mr816 X
Internal Structure of the MR816 CSX/MR816 X Internal Structure of the MR816 CSX/MR816 X The MR816 CSX/MR816 X is equipped with a digital mixer supported by DSP technology. This mixer lets you adjust various parameters, including volume and pan of the input signals for each output channel consisting of adjacent odd and even chan- nels. -
Page 9: Using The Mr816 Csx/Mr816 X With Cubase
Link function (including Cubase AI). For the most recent information on Cubase versions compatible with the Link function, refer to the following website. http://service.steinberg.de/goto.nsf/show/supportupdates_mr816_gb/ · To take the full advantage of the MR816 CSX/MR816 X’s functions, you should use Cubase 4.5.1 or later (instead of Cubase AI 4.5.1 or later). -
Page 10: Start Your Recording Session
Using the MR816 CSX/MR816 X with Cubase Start your recording session! In this section, you’ll learn how to transfer the input chan- NOTE nel signals of the MR816 CSX/MR816 X to Cubase then record them on the audio tracks. · When turning the power off, follow the opposite order (monitor ➝... -
Page 11: Setting Up On The Computer
· Note that the Clock Source lamps and Sampling Rate lamps flash while Yamaha Steinberg FW Driver is performing setup of the MR816 CSX/MR816 X. These lamps continue flashing if the setup is not completed properly. - Page 12 Setup dialog. or not “Yamaha Steinberg FW ASIO”/“Yamaha After setting, click [OK] to close the dialog. According Steinberg FW” is selected from the ASIO Driver to the setting made here, the Sample Rate of the column. MR816 CSX/MR816 X will be changed automatically.
-
Page 13: Setting Up For Recording
4 to audio track 1, using an example in dow (called up via [Devices] ➝ [VST Connections]) will which “Steinberg MR816CSX multi channel recording” or be assigned to the selected track(s). “Steinberg MR816X multi channel recording” is selected as a Project template. - Page 14 Using the MR816 CSX/MR816 X with Cubase While playing the instrument or singing into the When you select the audio track to which the audio sig- microphone, gradually adjust the volume of the nal of the analog input jacks 1 – 8 has been assigned master output and headphones.
- Page 15 Using the MR816 CSX/MR816 X with Cubase Select [Devices] ➝ [Mixer] to call up the For each of the created Studios, assign “Yamaha Steinberg FW ASIO” / “Yamaha Steinberg FW” to Extended Mixer window. the Audio Device and assign your desired output If the Extended Mixer window is not shown, click the jack to the Device Port.
- Page 16 Using the MR816 CSX/MR816 X with Cubase Applying REV-X to the monitor signals Call up the MR816 CSX/MR816 X Hardware Setup window (page 23) by selecting [Devices] ➝ The REV-X effect unit built into the MR816 CSX/MR816 X [Audio Hardware Setup]. is connected to the Send and Return of the internal mixer.
- Page 17 Using the MR816 CSX/MR816 X with Cubase Applying the Sweet Spot Morphing Channel NOTE Strip to the monitor signals (MR816 CSX only) · For instructions on calling up the window when using Cubase AI 4.5.1 or later, refer to page 21. The built-in Sweet Spot Morphing Channel Strip (“Channel Strip”...
-
Page 18: Try Recording
Using the MR816 CSX/MR816 X with Cubase ■ Try recording NOTE Now that you’ve completed the necessary settings, try · For information about how to call up the above window when recording. using Cubase AI 4.5.1 or later, refer to page 21. From the Transport window of Cubase, click the Perform the following operations as required. -
Page 19: Using The Built-In Effect Of The Mr816 As A Vst Plug-In Of Cubase
4 stereo channels can be NOTE applied to the audio channels as a plug-in effect. · You can also switch to external mode in the MR816CSX/ MR816X Hardware Setup window (page 23), which is dis- When this is selected, the Sweet ➝... - Page 20 Using the MR816 CSX/MR816 X with Cubase Call up the Mixer window then make sure that the Extended Mixer window is shown. If the Extended Mixer window is not shown, click the arrow button (“Show Extended Mixer”) to call it up. Click the “Show All Inserts”...
-
Page 21: Dedicated Windows For The Mr816 Csx/Mr816 X In Cubase
Dedicated windows for the MR816 CSX/MR816 X in Cubase Dedicated windows for the MR816 CSX/ MR816 X in Cubase If both “TOOLS for MR” and Cubase have been installed to your computer, dedicated windows for the Link functions between the MR816 CSX/MR816 X and Cubase are available in Cubase, as described here. MR816 CSX/MR816 X Input Settings window This window lets you make various settings for the internal mixer of the MR816 CSX/MR816 X. -
Page 22: Parameter Functions
Dedicated windows for the MR816 CSX/MR816 X in Cubase ■ Parameter functions 6 MORPH (only for MR816 CSX) Adjusts the Channel Strip Sweet Spot Data (page 28). Specific, pre-programmed compressor and equalizer set- tings are assigned to each of several points of this knob, letting you morph the selected Sweet Spot data by rotat- ing this knob. -
Page 23: Mr816 Csx/Mr816 X Hardware Setup Window
Dedicated windows for the MR816 CSX/MR816 X in Cubase MR816 CSX/MR816 X Hardware Setup window From this window, you can make the settings related to the output signal of the headphone jacks, reverb (REV-X), master levels, and routing. This window consists of four pages which can be called up via each of four tabs at the top of the win- dow. - Page 24 Dedicated windows for the MR816 CSX/MR816 X in Cubase 1 Headphones/Reverb Routing/Master Levels/Set- the Control Room function or using Cubase AI 4.5.1 or later, only the output buses set in the VST Connection win- tings tab dow are indicated here. Calls up the desired page by clicking the respective tab.
-
Page 25: Rev-X
Dedicated windows for the MR816 CSX/MR816 X in Cubase REV-X The REV-X effect built into the MR816 CSX/MR816 X is a complex reverb algorithm developed by Yamaha. It provides a high-density, richly reverberant sound quality, with smooth attenuation, spread and depth that work together to enhance the original sound. - Page 26 Dedicated windows for the MR816 CSX/MR816 X in Cubase 7 LPF (Low Pass Filter) Determines the cutoff frequency of the low pass filter. The low pass filter passes signals only below the specified cutoff frequency. Range: 1.0 kHz – 20.0 kHz 8 DIFFUSION Determines the spread of the reverberation.
-
Page 27: Sweet Spot Morphing Channel Strip (Mr816 Csx Only)
Dedicated windows for the MR816 CSX/MR816 X in Cubase Sweet Spot Morphing Channel Strip (MR816 CSX only) This effect has been developed by using Yamaha’s Sweet Spot Morphing Technology. This technology lets you simply rotate the knob to adjust compressor and equalizer effects and easily call up appropriate, professional-level settings that would otherwise be difficult for recording novices to discover. -
Page 28: Parameter Functions
[OK] to actually load the settings. For information when the signal falls below the threshold level until com- about the available data, refer to the following page: pression is removed). The larger the value, the longer the http://service.steinberg.de/goto.nsf/show/ release time. supportupdates_mr816_gb/ 3 MORPH knob Range: 9.3 –... - Page 29 Dedicated windows for the MR816 CSX/MR816 X in Cubase 8 RATIO * LOW G Adjusts the compression ratio (the ratio at which the input Adjusts the gain of the low band. signal will be compressed when the signal exceeds the Range: -18.0dB –...
-
Page 30: Control Panel
· From the Device filed on the Device Setup window (called up via [Device] ➝ [Device Setup...]) of Cubase, select “Yamaha Steinberg FW” then select “Control Panel.” · Select [System Preference...] ➝ [Yamaha Steinberg FW] · Select the Application folder ➝ Utility folder ➝ Audio MIDI Setup ➝ Set “Properties” to “Yamaha Steinberg FW”, then click [Configure Device] NOTE ·... - Page 31 · The port name (device name) of the WDM Audio driver is will be used, meaning that the current Internal “Yamaha Steinberg FW WDM Audio.” MR816 CSX/MR816 X works as the master device. 8 Place Icon In the taskbar (Windows only)
- Page 32 Dedicated windows for the MR816 CSX/MR816 X in Cubase About window NOTE · If audio signals that cannot be synchronized with the Word Clock Source are sent to the MR816 CSX/MR816 X, the Word Clock Source lamps flash. In this state, make sure to send appropriate audio signals to the jack specified as the Word Clock Source.
-
Page 33: Mr Editor
The MR Editor can be called up via the following operations. Windows: · Select [Start] ➝ [All Programs] ➝ [Steinberg MR] ➝ [MR Editor] · From the driver icon indicated on the Taskbar Notification area, right-click this icon then select “MR Editor.”... - Page 34 MR Editor Main window for “EXT FX” in the External Effect mode: Scene section DEVICE section Output section VIEW section SETUP section Effect Control section The window above can be viewed when using the MR816 CSX and the “External FX Type” (page 41) is set to “6 x Mono + REV- X”...
- Page 35 MR Editor 3 STORE Scene section Click this to call up the STORE window. From this window, Up to 20 mixer settings created on the MR Editor can be the current mixer settings can be stored as a Scene. This stored as scenes and these 20 scenes (mixer settings) operation will also store the settings to internal memory of can be saved as a single file to a computer.
- Page 36 MR Editor VIEW section Input Mixer section This section lets you change the view format of the Mixer This section lets you adjust various mixing parameters section. such as the volume, pan and effect send level of the audio signal input via the analog/input jacks for each input channel.
- Page 37 ! Pan/Balance You can select analog or digital input channels on the Setup window (page 41) or Yamaha Steinberg FW Driver window When the channel link (1) is set to off, this control deter- (page 30).
- Page 38 MR Editor # Solo Effect Control section Turns solo on/off for each channel. When the MR816 CSX/MR816 X is set to External Effect NOTE mode, clicking [EXT FX] at the Output section of the main window will call up the dedicated effect window shown on ·...
- Page 39 MR Editor 5 TIME (Reverb time) Master/Headphone section Adjusts the reverb time. This parameter can be set This section lets you set the overall parameters such as regardless of the currently selected output channel. master volume level, the REV-X effect on/off and head- 6 RTN (Return Level) phone related settings.
- Page 40 MR Editor Output section This section lets you select the desired output for mixing. Clicking one of the outputs (tabs) will call up the settings for the selected output in the Input Mixer section. If the MR816 CSX/MR816 X is set to the External Effect mode, “EXT FX”...
-
Page 41: Setup Window
The input channels are stereo channels. The output channels are six consecutive channels from the ste- reo channels set in the output port setting. · The port name (device name) of the WDM Audio driver is “Yamaha Steinberg FW WDM Audio.” Operation Manual... -
Page 42: Using A Daw Other Than Cubase
Using a DAW other than Cubase Using a DAW other than Cubase When using a DAW software other than Cubase, you can use the MR816 CSX/MR816 X simply as an audio interface having up to 16 input/output channels. Link-related functions such as quickly routing the input channel to an audio track of Cubase (page 9) are not available, but the following additional functions are available with the use of the MR Editor. -
Page 43: Using Multiple Mr816 Csx/Mr816 Xs
MR816 Xs to the computer in the desired order. · In addition to the MR816 CSX/MR816 X, another audio inter- face compatible with the Yamaha Steinberg FW Driver can be Turn on the power of the first device connected connected to an already connected device via an IEEE1394 directly to the computer. -
Page 44: Using The Mr816 Csx/Mr816 X Without A Computer
Using the MR816 CSX/MR816 X without a computer Using the MR816 CSX/MR816 X without a computer Using the MR Editor on a computer enables you to store mixing balance and other related settings to the MR816 CSX/ MR816 X. This settings are available even if the power of the MR816 CSX/MR816 X is turned off and then back on again. Accordingly, you can use the MR816 CSX/MR816 X as a standalone mixer or D/A - A/D converter without the use of a com- puter after the necessary settings on the MR Editor or Cubase have been completed. -
Page 45: Appendix
Appendix Appendix Hints when using audio data (Windows) For optimum use of the audio functions, we recommend you make the following settings. These settings minimize possible audio problems, such as drop outs, glitches and noise. ● Set the DMA mode (high-speed transfer mode) of ●... -
Page 46: Troubleshooting
If you do · Make sure to set the volume settings within your application not plan to use the Yamaha Steinberg FW Driver, you can turn to appropriate levels. these applications on again. - Page 47 Appendix · Try increasing the latency value of the Yamaha Steinberg FW · There may be multiple IEEE1394 interfaces installed on the Driver. computer and each of the multiple IEEE1394 devices may be · (For Windows) Refer to “Hints when using audio data (Win- connected to different interfaces.
-
Page 48: Specifications
Appendix Specifications Electrical Characteristics Internal 44.1kHz, 48kHz, 88.2kHz, 96kHz Sample Rate External 44.1kHz, 48kHz, 88.2kHz, 96kHz (± 0.1% respectively) 0.004% or less (1 kHz @ +18 dB, into 600 Ω) Total Harmonic Distortion GAIN: Minimum 20 Hz–20 kHz, +1, -3 dB @ +4 dB, into 600 Ω fs = 48 kHz Frequency Response (CH IN to LINE OUT) -
Page 49: Error Messages
Audio interface 16-ch input/16-ch output * Specifications and descriptions in this Operation Manual are for information purposes only. Steinberg/Yamaha reserves the right to change or modify products or specifications at any time without prior notice. Since specifications, equipment or options may not be the same in every locale, please check with your Steinberg/Yamaha dealer. -
Page 50: Block Diagrams
Appendix Block Diagrams ■ MR816 X · When setting the MR816 X to the normal mode: 8Analog In/Out, 8Digital In/Out, 16DAW In/Out ...... Select Output ............................ REVERB REVERB SELECT SELECT ... - Page 51 Appendix · When setting the MR816 X to “External FX” (REV-X): 8Analog In/Out, 10DAW In/Out ...... Select Output ............................ REVERB REVERB SELECT SELECT ......... Select Input Operation Manual...
-
Page 52: Mr816 Csx
Appendix ■ MR816 CSX · When setting the MR816 CSX to the normal mode: 8Analog In/Out, 8Digital In/Out, 16DAW In/Out ...... Select Output ............................ REVERB REVERB SELECT SELECT ... - Page 53 Appendix · When setting the MR816 CSX to “External FX” (Sweet Spot Morphing Channel Strip): 8Analog In/Out, 16DAW In/Out ...... Select Output ............................ REVERB REVERB SELECT SELECT ......
- Page 54 Appendix · When setting the MR816 CSX to “External FX” (Sweet Spot Morphing Channel Strip + REV-X): 8Analog In/Out, 16DAW In/Out ...... Select Output ............................ REVERB REVERB SELECT SELECT ...
- Page 55 Steinberg Web Site http://www.steinberg.net U.R.G., Pro Audio & Digital Musical Instrument Division, Yamaha Corporation © 2008-2009 Yamaha Corporation...