Table of Contents
Advertisement
Quick Links
Advertisement
Table of Contents

Related Manuals for Raise3D Forge1


Summary of Contents for Raise3D Forge1
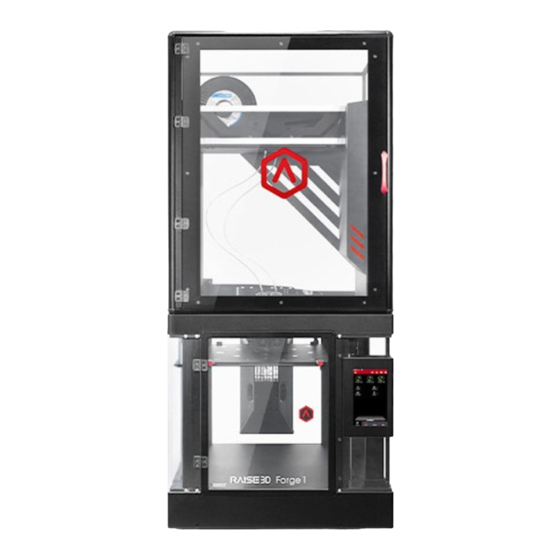
- Page 1 Forge1 3D Printer User Manual * Please review this entire guide before operating the printer. WARNING This is a class A product. In a domestic environment this product may cause radio interference in which case the user may be required to take adequate measures.
-
Page 2: Table Of Contents
Raise3D Forge1 User Manual CONTENT Safety Precautions ........................... 1 Marks................................ 6 Declarations and Safety Statements ....................7 Technical Specification ........................10 C. List of Parts ............................. 12 D. Hardware Installation ........................15 ideaMaker for Metal Installation ...................... 22 Using ideaMaker for Metal ......................24 G. -
Page 3: Safety Precautions
Raise3D Forge1 User Manual Safety Precautions Safety Precautions Please read the safety information to ensure that you use the appliance safely. General information You can find general information about this instruction manual here. Read this instruction manual carefully. Only this will ensure you use the appliance safely and efficiently. - Page 4 Raise3D Forge1 User Manual Safety Precautions resulting dangers. Children must not play with the appliance. Keep children and pets away from the appliance. Safe installation Take note of the safety instructions when installing the appliance. WARNING ‒ Risk of electric shock! ...
- Page 5 Raise3D Forge1 User Manual Safety Precautions If you have any questions, please consult a professional electrician. WARNING ‒ Risk of fire! It is dangerous to use an extended power cord and non-approved adapters. Do not use extension cables or multiple socket strips.
- Page 6 Raise3D Forge1 User Manual Safety Precautions Safe use Follow these safety instructions when using the appliance. WARNING ‒ Risk of electric shock! If the appliance or the power cord is damaged, this is dangerous. Never operate a damaged appliance.
- Page 7 Raise3D Forge1 User Manual Safety Precautions Some parts in the printer are sharp and may cause injury. When removing the printing model, please refer to the Chapter L. CAUTION ‒ Risk of burns! When operating or printing at high temperatures, the shell of the appliance becomes hot.
-
Page 8: Marks
Raise3D Forge1 User Manual Marks Marks Hot Surface: The hot surface sign indicates the presence of devices with high temperatures. Always use extra care when working around heated components. Burned fingers when handling the parts, please wait one-half hour after switching off before handling parts. -
Page 9: Declarations And Safety Statements
Raise3D Forge1 User Manual Declarations and Safety Statements Declarations and Safety Statements FCC Statement This equipment has been tested and found to comply with the limits for a Class A digital device, pursuant to part 15 of the FCC Rules. - Page 10 User Manual Declarations and Safety Statements Electromagnetic Compatibility-EMC Simplified EU Declaration of Conformity Raise3D declares that this device is in compliance with the essential requirements and other relevant provisions of Directive 2014/53/EU. Full text of the EU declaration of conformity is available at https://www.raise3d.com.
- Page 11 The printer can be stored at room temperature for 4-6 hours before operating. Filament and Electrical Precautions It is strongly recommended to use Raise3D official filaments and/or default settings for better performance. The Raise3D printer is designed with strong compatibility with filaments. However, please be very careful when using unverified filaments and settings.
-
Page 12: Technical Specification
Raise3D Forge1 User Manual Technical Specification Technical Specification ITEM Forge1 Build Volume (W×D×H) Single Extruder Print 300 × 300 × 300 mm/ 11.8 × 11.8 × 11.8 inch Dual Extruder Print 255 × 300 × 300 mm/ 10 × 11.8 × 11.8 inch CONSTRUCTION Machine Size (W×D×H) - Page 13 Raise3D Forge1 User Manual Technical Specification Logic Controller NXP ARM Cortex-A9 Quad 1 GHz Memory 1 GB Onboard Flash 16 GB Embedded Linux Ports USB2.0×2, Ethernet×1...
-
Page 14: List Of Parts
Raise3D Forge1 User Manual List of Parts List of Parts Front View A. Top Cover B. Spool Holder C. Filament Run-out Sensor D. Door E. Holder Frame F. Filament Guide Tube G. Extruder H. Fans I. Hot End K. Print Bed J. - Page 15 Raise3D Forge1 User Manual List of Parts A. Top Cover The upper cover of the printer. The filament can be placed here, which can accommodate 2 rolls of 3kg filaments at the same time. B. Spool Holder Filament holder with wheels to allow filament spool rolling free when feeding.
- Page 16 Raise3D Forge1 User Manual List of Parts P. Electric Control System Stores the motion controller board. Q. Ethernet Port RJ45 port to connect the printer to a network. R. Power Inlet The place to connect power cable. S. Switch Power switch to turn on or off the printer.
-
Page 17: Hardware Installation
Raise3D Forge1 User Manual Hardware Installation Hardware Installation Remove Remove (× 24) Locate the four shipping zip ties, and remove Peel off the yellow stickers and remove the 24 them. security spacers. It is recommended to unclip these as opposed to These clips are designed to hold the extruder cutting them. - Page 18 Raise3D Forge1 User Manual Hardware Installation (× 8) (× 8) Remove Remove Loose 8 screws on top of printer with 2.5mm hex Loose 8 screws on left panel of holder fame with wrench. 2.5mm hex wrench. Take off the cover of left panel.
- Page 19 Raise3D Forge1 User Manual Hardware Installation Place top cover on top of printer with all 4 screw holes on each piece are aligned. Tighten 4 M4x25 screws with 3mm hex wrench through the screw holes to fix the top cover on printer.
- Page 20 Once the unit is powered on, the printer will go through a start-up sequence. Your Raise3D printer will take approximately 60 seconds to boot up. When the touch screen displays the "Home" screen, the printer is ready.
- Page 21 Raise3D Forge1 User Manual Hardware Installation After removing the starter box, keep following the start-up wizard to finish the network connection, printer settings and RaiseCloud settings. After the start-up wizard, the printer will carry out 5-steps Offset Calibration, and the whole process takes about 1 hour.
- Page 22 Raise3D Forge1 User Manual Hardware Installation Adjust the flatness of the build plate. Precise flatness helps to get a better bottom surface of the model, avoiding warping or the model detaching from the build surface. Adjust the matching gap between the left and right nozzles to ensure that the model will not be staggered in dual color printing.
- Page 23 Raise3D Forge1 User Manual Hardware Installation Raise3D Supplies and Accessories Power Cable Hex Wrenches Filament Filament Guide Tube (x 5) (x2) (x2) USB Storage Heat Resistant Gloves Filament Holder Spatula (x 2) Nozzle Clean Kit Tweezers Thumb Screws 0.3 mm Feeler Gauge &...
-
Page 24: Ideamaker For Metal Installation
Raise3D Forge1 User Manual ideaMaker for Metal Installation ideaMaker for Metal Installation The slicing software, ideaMaker for Metal, is available on the USB storage device included with your printer. Additional downloads and versions are available online at: https://www.raise3d.com/download/ WINDOWS Install ideaMaker for Metal, and click "Next". - Page 25 Raise3D Forge1 User Manual ideaMaker for Metal Installation Click "Finish" and ideaMaker for Metal is installed...
-
Page 26: Using Ideamaker For Metal
Raise3D Forge1 User Manual Using ideaMaker for Metal Using ideaMaker for Metal Insert the USB key before lunching ideaMaker for Metal and keep it connecting with the computer running ideaMaker for Metal. Don’t unplug the USB key during running, otherwise software will freeze and pop up hint window. - Page 27 Raise3D Forge1 User Manual Using ideaMaker for Metal Confirm that the selected printer type and material are correct, then select the standard slicing template. Click "Edit" to select the type of Platform Addition and the type of Support. Select your type of Platform Addition and Support in the "Edit" window. Click "Save and Close" to return to the previous menu.
-
Page 28: Dual Extruder Printing-Loading
Raise3D Forge1 User Manual Dual Extruder Printing-Loading Dual Extruder Printing-Loading Open the door, put the transparent panel down. Place filament spools on rolling wheels in the spool holders, with open end of filaments facing towards the metal quick connector next to spool holder. - Page 29 Complete the feeding operation according to the instructions on the screen. NOTE: This document's instructions are based on the properties of Raise3D PLA filament. This is the standard filament included with your product and it is advised to use Raise3D PLA for testing and initial setup.
-
Page 30: Dual Extruder Printing-Slicing
Raise3D Forge1 User Manual Dual Extruder Printing-Slicing Dual Extruder Printing-Slicing Choose one of the models and set its designated extruder as Left Extruder from the left side "Model Info" window. Choose the other model and set extruder as the Right Extruder using the "Model Info" window. - Page 31 Raise3D Forge1 User Manual Dual Extruder Printing-Slicing Click the "Start" or " " button to begin slicing the model. Confirm your printer type and materials for both extruders, then select the standard slicing template. Click "Edit" to select the type of Platform Addition and the type of Support.
- Page 32 Raise3D Forge1 User Manual Dual Extruder Printing-Slicing Save the sliced files (.gcode and .data) to your USB storage device. NOTE: File names that do not conform to the Western Latin character set may not display properly. Confirm that the files are saved and eject the USB storage device.
-
Page 33: Dual Extruder Printing- Gluing
Raise3D Forge1 User Manual Dual Extruder Printing- Gluing Dual Extruder Printing- Gluing Find the Magigoo Pro Metal glue from accessory box. Shake the Magigoo bottle. Magigoo is best applied on a cold glass print surface. Dab the applicator 3-6 times on the surface to... -
Page 34: Dual Extruder Printing- Starting Printing
Raise3D Forge1 User Manual Dual Extruder Printing- Starting Printing Dual Extruder Printing- Starting Printing Insert the USB device that contains your sliced model files (.gcode or .data) into the USB slot on the side of the touchscreen. Open the "Print" tab, and choose "USB Storage"... -
Page 35: Dual Extruder Printing-Advanced Slicing
Raise3D Forge1 User Manual Dual Extruder Printing-Advanced Slicing Dual Extruder Printing-Advanced Slicing To perform higher-level dual-color printing and carry out offset calibration at the same time, please do the following. Load your filament type for both the left and right extruders. - Page 36 Raise3D Forge1 User Manual Dual Extruder Printing-Advanced Slicing The "Align Together" feature can align multiple models to their original relative position (as defined during modeling) with each other. It can be located in the "Position" pop-up menu. Select the "Start" button, select your printing template, then open the "Per-Model Extruder " tab to set the nozzle settings per extruder.
- Page 37 Raise3D Forge1 User Manual Dual Extruder Printing-Advanced Slicing You can specify a nozzle to print support structure under Support tab. ideaMaker is not able to detect when a floating model is being supported by the opposite extruder and will prompt the user to add supports. The user should select not to add support structure as it will not be needed.
-
Page 38: Removing Prints
Raise3D Forge1 User Manual Removing Prints Removing Prints Make sure the printer is idle, and that there is at least a 10 cm gap between the prints’ top and the nozzle. > 10 cm Wait for the build plate and nozzles to cool down to room temperature before removing any prints. - Page 39 Raise3D Forge1 User Manual Removing Prints Wait for the cooling of glass, spill water on glass print plate around part to dissolve the glue. Part should be easy to take off. You can refer to user guide of Magigoo Pro Metal Glue: https://magigoo.com/products/magigoo-pro-...
-
Page 40: User Interface
Raise3D Forge1 User Manual User Interface User Interface ꞏ Status Bar, EVE ꞏ Menu title, Settings button ꞏ Hot End and heated bed temperatures ꞏ Current model name, total print time, current printing status and height ꞏ Visual display of current model ꞏ... - Page 41 Raise3D Forge1 User Manual User Interface ꞏ Moving step distance ꞏ Disable Motor button ꞏ Load and unload Utilities ꞏ Choose where to load the print job from ꞏ Check uploading list, recovery task list, printing statistics Print...
- Page 42 Experiencing Difficulties/Contact Information If you run into any issues during this guided setup, please contact our expert technicians by creating a ticket at support.raise3d.com. Customers outside of the US, please contact your local Raise3D distributor or reseller. For sales information please contact us at sales@raise3d.com.
- Page 43 US Office 43 Tesla, Irvine, CA 92618, USA Netherlands Office Stationsplein 45 Unit A4.004, Rotterdam 3013AK, the Netherlands China Office Floor 4 B5, 1688 North Guoquan Road, Yangpu District Shanghai 200438 400 6367 888 (For the Mainland China Only)
Need help?
Do you have a question about the Forge1 and is the answer not in the manual?
Questions and answers