
Related Manuals for Branson 2000 Series


Summary of Contents for Branson 2000 Series
- Page 1 2000 Series Installation Guide EDP 100-214-226 Rev. 10 Software Version 9.x BRANSON Ultrasonics Corporation 41 Eagle Road Danbury, Connecticut 06813-1961 U.S.A. (203) 796-0400 http://www.bransonultrasonics.com...
- Page 2 Manual Change Information At Branson, we strive to maintain our position as the leader in ultrasonics plas- tics joining, cleaning and related technologies by continually improving our cir- cuits and components in our equipment. These improvements are incorporated as soon as they are developed and thoroughly tested.
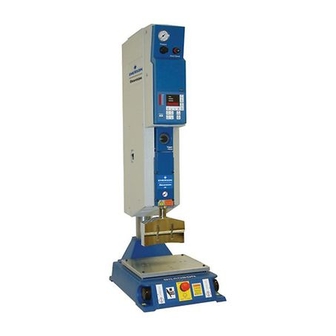
- Page 3 Congratulations on your choice of a Branson Ultrasonics Corporation system! The Branson 2000-Series system is process equipment for the joining of plastic parts using ultra- sonic energy. It is the newest generation of product using this sophisticated technology for a vari- ety of customer applications.
-
Page 5: Table Of Contents
2000 Series Installation Guide Table of Contents About this Installation Guide - - - - - - - - - - - - - - - - - - - - 1 Safety First - - - - - - - - - - - - - - - - - - - - - - - - - - - - - 2... - Page 6 40 kHz Stacks - - - - - - - - - - - - - - - - - - - - - - - - - 46 Mounting the Fixture on the Branson Base - - - - - - - - - - - - 47...
-
Page 7: About This Installation Guide
2000 Series Installation Guide About this Installation Guide About this Installation Guide This installation guide is to help the installer with the basic installation and setup of your new 2000- series welder. You will still need the product’s manuals. This guide will bring the reader to the point at which the system is functionally “ready to weld”. -
Page 8: Safety First
Safety First Safety First Branson is concerned for your safety and for the successful installation and operation of this sys- tem. Please read and heed all safety symbols listed in this guide and heed all safety signs on the products. -
Page 9: Handling And Unpacking
2000 Series Installation Guide Handling and Unpacking Handling and Unpacking If there are any visible signs of damage to the shipping containers or the product, or you later dis- cover hidden damage, NOTIFY YOUR CARRIER IMMEDIATELY. Save the packing material. -
Page 10: Stand (Actuator On A Base)
Handling and Unpacking Depending on which one of the following options applies to you, unpack the Branson actuator assembly: Stand (actuator on a base) CAUTION Heed the “This End Up” arrows and the “Open Top First” instructions. The packaging is designed to be removed from the assemblies from an upright orientation only. -
Page 11: Stand (Actuator On A Hub)
2000 Series Installation Guide Handling and Unpacking Cut the two packing straps around the base and pallet. Pry off the two wooden shipping blocks (to the rear of the base) which prevent the base from sliding on the pallet. The stand can now be moved into its desired location by sliding it off the pallet. Stands have a lifting hook for the use of overhead hoists to lift the assembly in place. -
Page 12: Actuator (Alone)
Handling and Unpacking Cut the packing strap securing the actuator support to the pallet. CAUTION Column and support are under spring tension. Do NOT disassemble the column from the stand. Always keep the column support clamped together. NOTE When making height adjustments, carefully and slowly release the clamps to control the motion, and hold the stand to prevent sudden movements or injury. -
Page 13: Take Inventory Of Small Parts
2000 Series Installation Guide Handling and Unpacking Figure 4 Ultrasonic Converter and Booster Converter Booster Table 1 Actuator Weights, Approximate (lbs) Actuator Model Actuator on a Base Actuator on a Hub Actuator Alone Take Inventory of Small Parts Table 2... -
Page 14: Cables
Handling and Unpacking Cables Two cables connect the power supply and actuator: the actuator interface cable, and the RF cable. If the system is to be automated, you may also need a J911 start cable and a user I/O cable. Check your invoice for cable types and cable lengths. -
Page 15: Installation Requirements
2000 Series Installation Guide Installation Requirements Installation Requirements Location The actuator or stand may be installed in a variety of positions. The stand (mounted on a base) is often manually operated, using its base-mounted start switches, and so is installed at a safe (being... -
Page 16: Electrical Input Power Ratings
Installation Requirements Electrical Input Power Ratings Plug the Power Supply into a single-phase, grounded, 3-wire, 50 or 60 Hz power source. Table 5 lists the current, fuse ratings and Plugs for the various models. Table 5 Input Power and Plug Requirements For 15 kHz models 3300 W 200V - 240V 19 Amp Max. - Page 17 2000 Series Installation Guide Installation Requirements Figure 5 VFD 4 Line Display Power Supply Dimensional Drawing 5.0” (127mm) Desired Clearance Air Intake 20.6” 522.9mm Air outlet is under 1.7” front panel 43.6mm 0.45” 13.4” 11.4mm 340.1mm 17.55” 445.8mm 5.2” 5.7”...
- Page 18 Installation Requirements Figure 6 Touch Screen Power Supply Dimensional Diagram 5.0” (127mm) Desired Clearance Air Intake 20.6” 522.9mm Air outlet is under 1.7” front panel 43.6mm 0.45” 13.4” 11.4mm 340.1mm 17.55” 445.8mm 100 % 80 % 60 % 5.2” 5.7” 132.4mm 144.8mm 40 %...
- Page 19 2000 Series Installation Guide Installation Requirements Figure 7 ae/aed Actuator Dimensional Drawing 43.0 1092m m m achined m ounting surfaces (3 places)** **T hese three m ounting surfaces are flat w ithin 0.004 in. (0.1m m ) TIR , in a tolerance zone of 16 x 3.5 in.
- Page 20 Installation Requirements Figure 8 aef Actuator Dimensional Drawing 51.0 1295mm machined mounting surfaces (3 places)** 48" **These three mounting surfaces are flat within 0.004 in. (0.1mm) TIR, in a tolerance zone of 16 x 3.5 in. (410 x 90 mm). The surface to which the actuator is mounted must also have the same flatness tolerance.
- Page 21 2000 Series Installation Guide Installation Requirements Figure 9 ao/aod Actuator Dimensional Drawing 43.0 1092mm machined mounting surfaces (3 places)** **These three mounting surfaces are flat within 0.004 in. (0.1mm) TIR, in a tolerance zone of 16 x 3.5 in. (410 x 90 mm). The surface to which the actuator is mounted must also have the same flatness tolerance.
- Page 22 Installation Requirements Figure 10 Remote Pneumatics Box Dimensional Drawing 4.50 0.63 1.50 M4x0.7 THREADED MOUNTING HOLES SAME HOLE PATTERN TOP & BOTTOM 2.50 2.97 3.00 8.47 1.46 12.92 inches 12.00 BRANSON 2000 0.11 3.77 3.99 100-214-226 Rev. 10...
-
Page 23: Factory Air
2000 Series Installation Guide Factory Air Factory Air The factory compressed air supply must be “clean (to a 5 micron level), dry and unlubricated” air with a regulated maximum pressure of 100 psig (690 kPa). The actuator* requires between 35- 100 psi, depending on your application. -
Page 24: Pneumatic Connections To Actuator Ae/Aed/Aef
Factory Air Pneumatic Connections to Actuator ae/aed/aef Air connection to the actuator is made to the AIR INLET connector on the top rear of the actuator, with plastic pneumatic tubing. For installations using actuator-alone assemblies, you must provide an air filter assembly* which will support to at least 100 psig and remove particulate matter of 5 microns or larger. -
Page 25: Leveling Fixture Setup
2000 Series Installation Guide Factory Air Mount the base to your workbench using four socket-head cap screws (customer provided, 3/8 inch (US bases) or M10 (metric bases)). Use flat washers against the metal casting to prevent gouging. The use of nylon lock nuts with your cap screws is suggested, to reduce loosening due to vibration and movement. - Page 26 Factory Air Table 6 Installing the Leveling Fixture Step Action Shut off the line power, disconnect the AC power plug, and disconnect the air supply. Install the flat washer and spherical-head pivot pin into the center of the Base Fixture surface. Refer to Figure 11. Install the four Leveling screws into the holes as shown in Figure 12.
- Page 27 2000 Series Installation Guide Factory Air Figure 13 Installing a Leveling Screw Figure 14 Securing the Leveling Fixture Leveling screw Leveling fixture (4 places) Locking Screws (4 places) CAUTION Be careful not to over-tighten the Locking screws. This can distort the Leveling Fixture sur- face.
-
Page 28: Setup
Install the converter-booster-horn stack. Adjust the Leveling screws (in a pattern similar to the one shown in Figure 14) using the Branson T-handle wrench or equivalent. The screws should be close to, but NOT touching the Actuator Base at this time, Install the part and fixture on the center of the Leveling Fixture. -
Page 29: Horn, Part, And Fixture Alignment
2000 Series Installation Guide Factory Air Table 8 Secure Attachment and Precision Alignment of the Leveling fixture Tighten the locking screws to 50 in-lbs/5.65 newton-meters (in a pattern similar to the one shown in Figure 14). When finished, make sure the Leveling Fixture is level and secure on the Base Fixture surface. -
Page 30: Mounting The Stand (Actuator On Hub-Mounted Column)
Factory Air Place a piece of carbon paper face down on top of the white paper (Figure 15). Set the welder for minimum weld time. Weld the part. Examine the resulting weld footprint on the piece of white paper (Figure 16). Adjust the Leveling Screws until achieving a precise alignment of the horn, part, fixtures Leveling Fixture. -
Page 31: Actuator (Alone)
2000 Series Installation Guide Factory Air Figure 18 Mounting bolt pattern for the Hub (for Stand on Hub) 10.50 in / 267 mm Front of Hub 3/8 inch or 6.00 in / 152 mm M10 bolts (4 places) 3.94 in / 100mm 5.25 in / 133 mm... - Page 32 Factory Air CAUTION The actuator support bolts for the 2000-Series actuators are metric, M10 x 1.5 thread pitch, 25mm long. The support pin and mounting bolts must not extend more than 0.40 in (10 mm) into the actuator, otherwise, binding or damage to the carriage may occur. Use of a guide pin is suggested.
-
Page 33: Mount The Power Supply
2000 Series Installation Guide Factory Air Mount the Power Supply The power supply is designed to be placed on a workbench (rubber feet on bottom) within cable- length limits of the actuator, or it may be rack-mounted in a standard 19-inch Rack (using an optional rack mount handle kit). -
Page 34: Input Power (Main)
RF cable is crushed, pinched, damaged or modified. Contact your Branson Representative if you have special cable requirements. In some cases, remote oper- ation from a User I/O or a Host Computer can be used to solve a distance limitation. -
Page 35: Output Power (Rf Cable)
Supply and the Actuator: the RF Cable and the Actuator Interface cable. A 37-pin cable is used for Power and Control Signalling between the 2000 Power Supply and a Branson Actuator. The cable connects to the rear of the Power Supply and the rear of the Actuator. Refer to Figure 14 for clarification of connections on rear of power supply. -
Page 36: Start Switch Connection (Automation)
Start Switch Connection (Automation) Start Switch Connection (Automation) A Branson actuator requires 2 start switches and emergency stop connection. Stands on a base include this connection (factory installed and connected from the base) while the stand on a hub and actuator (alone) -
Page 37: Serial (Rs-232) Port Connector
Branson representative for recommendations for your specific needs. The printers listed in Table 6 have been fully tested to confirm compatibility with Branson products. Print- ers that were tested and are NOT compatible are the Panasonic 1091 and Epson LX300. -
Page 38: User I/O Interface
Start Switch Connection (Automation) User I/O Interface The user I/O is a standard interface for automation, provided on the power supply. It provides the ability for the customer to make their own interface for their automation or special control or reporting needs. The interface cable has an HD44 female D-shell connection on the rear of the power supply. - Page 39 2000 Series Installation Guide Start Switch Connection (Automation) J3_8_OUTPUT 24V True Output 0/24V, 100mA User definable outputs. Refer to Grn/Wht Table 4.7 to view available J3_22_OUTPUT 24V True Output 0/24V, 100mA Blk/Red/Grn selections. J3_36_OUTPUT 24V True Output 0/24V, 100mA Orn/Red Grn...
-
Page 40: Input Power Plug
Start Switch Connection (Automation) Input Power Plug If you must add or change the input power plug, use the following color code for the conductors found in the international harmonized line cord. Add the plug that is appropriate for your input power receptacle. CAUTION The power supply can be permanently damaged if it is connected to the incorrect line voltage, or if the wiring connection is mis-wired. -
Page 41: User I/O Dip Switch (Sw1)
2000 Series Installation Guide Start Switch Connection (Automation) User I/O DIP Switch (SW1) DIP switch SW1, for the user I/O is located next to the J3 on the back of the 2000-series power supply, as shown in Figure 20 on page -27. -
Page 42: Guards And Safety Equipment
The 2000 Series control system has been designed to conform to the safety requirements of NFPA 79, EN 60204-1 and CFR 1910.212. Two Hand Control of the 2000 Series control system has been designed to comply with Type 3 of NFPA, and Type III of EN 60204-1 which require: •... - Page 43 2000 Series Installation Guide Guards and Safety Equipment • Where this time limit is exceeded, both control devices must be released before operation can be initiated; • Continuous concurrent actuation during the hazardous condition; • .Machine operation ceases upon the release of either one or both of the control devices (start switches) when the hazardous condition is still present - both control devices must be released before operation can be initiated again.
-
Page 44: Rack Mount Installation
Rack Mount Installation Rack Mount Installation If the system is Rack Mounted, you need to order the Rack Mount handle kit. The kit includes two rack mounting handles and two corner pieces, which support the handles and provide the rack mount interface. - Page 45 2000 Series Installation Guide Rack Mount Installation Figure 25 Detail of Rack Mount Handle Kit Assembly Insert two flat-head screws through the bracket and into each handle, as shown Rack Mount bracket (right side shown) Right-side Rack Mount handle CAUTION The Rack Mount handle kit does NOT support the power supply in the rack.
-
Page 46: Assemble The Acoustic Stack
Assemble the Acoustic Stack Assemble the Acoustic Stack This section describes and indicates the steps for assembling the acoustic stack. The steps are organized around the 20 kHz, 30 kHz and 40 kHz stack types as listed in the sub paragraphs below. -
Page 47: For A 15 Khz System
2000 Series Installation Guide Assemble the Acoustic Stack For a 15 kHz System Step Action Clean the mating surfaces of the converter, booster, and horn. Remove any foreign material from the threaded holes. Install the threaded stud into the top of the booster. Torque to 450 in-lbs, 50.84Nm. -
Page 48: For A 40Khz System
Assemble the Acoustic Stack CAUTION If ring is not oriented properly, it is possible to damage the converter or cause actuator failure. (booster must be installed to converter with ring facing converter, refer to Figure 27.) Install a single Mylar washer (matching the size of the washer to the stud) to each interface. -
Page 49: Stack Assembly Torque Tables
(shown with rectangular horn secured in the vise.) Stack Assembly Torque Tables NOTE The use of a Branson torque wrench or the equivalent is recommended. P/N 101-063-617 for 20kHz systems, and 101-063-618 for 40kHz systems. Table 14 Stud Torque Values... -
Page 50: Connecting Tip To Horn
Assemble the Acoustic Stack Connecting Tip to Horn 1.Clean the mating surfaces of the horn and tip. Remove foreign matter from the threaded stud and hole. 2.Hand assemble the tip to the horn. Assemble dry. Do not use any silicone grease. 3.Use the spanner wrench and an open-end wrench (Refer to Figure 23) and tighten to the follow- ing Torque tip specifications: Figure 27 Connecting Tip to Horn... - Page 51 6.Align the horn by rotating it, if necessary. Torque the carriage door to 20 in.-lbs to secure the stack. Figure 28 Installing the CA-30 Stack in a Branson Actuator Verify that the ring/screw head orientation is as shown below, before installing stack in the actuator.
-
Page 52: 40 Khz Stacks
40 kHz Stacks Make sure that the system power is turned off by disconnecting the power plug. Place the converter / booster in the sleeve. Figure 29 Installing the 40kHz Stack in a Branson Actuator Adapter Sleeve Carriage Door Adapter Sleeve... -
Page 53: Mounting The Fixture On The Branson Base
The base provides mounting holes for your fixture. Mounting holes are also provided for the optional Branson leveling plate kit. The base is tapped for metric M10-1.5 hardware (indicated by an “M” on the base). The mounting holes are arranged in three concentric bolt circles with the fol- lowing dimensions. -
Page 54: Converter Duty Cycle And Cooling
Additional heat will be generated if the converter-booster-horn interfaces need reconditioning. Be sure the stack is in good condition and properly assembled. Two types of converters are normally used with Branson equipment: • R-type equipped with a barbed cooling nipple that accommodates 1/16 in. I.D. flexible tubing to direct cooling air to the interior of the converter assembly. - Page 55 2000 Series Installation Guide Assemble the Acoustic Stack Table 16 Converter Duty Cycle and Cooling Max Power % Duty Cycle Duty Cycle Ambient Conditions 20 kHz 100% at 2000 W 4000 W 10 seconds Cooling air of 30 C @ 80cfh...
-
Page 56: Testing The Installation, 4 Line Display
Testing the Installation, 4 Line Display Testing the Installation, 4 Line Display Turn on the air supply connections. For the 2000f system, include the pneumatic dump valve and verify that the air pressure indicator light in the actuator is lit. Ensure there are no leaks in the air supply connections. -
Page 57: Testing The Installation, Touch Screen
2000 Series Installation Guide Testing the Installation, Touch Screen Testing the Installation, Touch Screen Turn on the air supply connections including the pneumatic dump valve and verify that the air pres- sure indicator light in the actuator is lit. Ensure there are no leaks in the air supply connections. - Page 58 Testing the Installation, Touch Screen Still Need Help? or Parts? Have Questions? Branson is pleased that you chose our product and we are here for you! If you need assistance with your 2000-series system, call your local Branson representative or contact Branson by call-...
- Page 59 2000 Series Index Actuator Mounting Bolts - - - - - - - - - - - - - - - - - - - - - - - - - - - - 7 Actuator Weights- - - - - - - - - - - - - - - - - - - - - - - - - - - - - - - - 7...
- Page 60 Emergency Stop Button reset - - - - - - - - - - - - - - - - - - - - - - - - - - - - - - - - - - - - 36 Emergency Stop Connection - - - - - - - - - - - - - - - - - - - - - - - - - - 30 Emergency Stop Control - - - - - - - - - - - - - - - - - - - - - - - - - - - - 36 Emergency Stop Switch Connections- - - - - - - - - - - - - - - - - - - - - - 30...
- Page 61 Mount the Power Supply - - - - - - - - - - - - - - - - - - - - - - - - - - - - 27 Mounting the Fixture on the Branson Base (hardware and mounting holes- - - - 47...
- Page 62 Output Power (RF Cable) - - - - - - - - - - - - - - - - - - - - - - - - - - - 29 Output Signal - - - - - - - - - - - - - - - - - - - - - - - - - - - - - - - - - 35 Parallel Printer Connector - - - - - - - - - - - - - - - - - - - - - - - - - - - 31 Pneumatic Connections to Actuator ae/aed/aef - - - - - - - - - - - - - - - - - 18 Pneumatic Connections to Actuator ao/aod/rp - - - - - - - - - - - - - - - - - 18...
- Page 63 2000 Series Testing the Installation, 4 Line Display - - - - - - - - - - - - - - - - - - - - - 50 Testing the Installation, Touch Screen - - - - - - - - - - - - - - - - - - - - - 51...
Need help?
Do you have a question about the 2000 Series and is the answer not in the manual?
Questions and answers