Table of Contents
Advertisement
Quick Links
Operating Manual
BD (E3.1)
|
Incubators Avantgarde.Line with natural convection
BF (E3.1)
|
Incubators Avantgarde.Line with forced convection
ED (E3.1)
|
Drying and heating ovens Avantgarde.Line with natural convection
FD (E3.1)
|
Drying and heating ovens Avantgarde.Line with forced convection
FED (E3.1) |
Drying and heating ovens Avantgarde.Line with forced convection
and enhanced timer functions
with microprocessor temperature controller
Model
Model version
BD056-230V
BD 56
BD056UL-120V
BD115-230V
BD 115
BD115UL-120V
BD260-230V
BD 260
BD260UL-120V
BD720-230V
BD 720
BD720UL-240V
BF056-230V
BF 56
BF056UL-120V
BF115-230V
BF 115
BF115UL-120V
BF260-230V
BF 260
BF260UL-120V
BF720-230V
BF 720
BF720UL-240V
ED056-230V
ED 56
ED056UL-120V
ED115-230V
ED 115
ED115UL-120V
BINDER GmbH
Address: Post office box 102, 78502 Tuttlingen, Germany Phone: +49 7462 2005 0
Fax: +49 7462 2005 100 Internet: http://www.binder-world.com
E-mail: info@binder-world.com Service Hotline: +49 7462 2005 555
Service Fax: +49 7462 2005 93 555 Service E-Mail: service@binder-world.com
Service Hotline USA: +1 866 885 9794 or +1 631 224 4340 x3
Service Hotline Asia Pacific: +852 390 705 04 or +852 390 705 03
Service Hotline Russia and CIS: +7 495 988 15 16
Issue 03/2019
Art. No.
Model
9010/ 9110-0323
ED 260
9010/ 9110-0324
9010/ 9110-0325
ED 720
9010/ 9110-0326
FD 56
9010/ 9110-0329
9010/ 9110-0330
FD 115
9010/ 9110-0331
9010/ 9110-0332
FD 260
9010/ 9110-0313
9010/ 9110-0314
FD 720
9010/ 9110-0315
FED 56
9010/ 9110-0316
9010/ 9110-0319
FED 115
9010/ 9110-0320
9010/ 9110-0321
FED 260
9010/ 9110-0322
9010/ 9110-0333
FED 720
9010/ 9110-0334
9010/ 9110-0335
9010/ 9110-0336
Model version
Art. No.
ED260-230V
9010/ 9110-0339
ED260UL-240V
9010/ 9110-0340
ED720-400V
9010/ 9110-0341
FD056-230V
9010/ 9110-0303
FD056UL-120V
9010/ 9110-0304
FD115-230V
9010/ 9110-0305
FD115UL-120V
9010/ 9110-0306
FD260-230V
9010/ 9110-0309
FD260UL-240V
9010/ 9110-0310
FD720-400V
9010/ 9110-0311
FED056-230V
9010/ 9110-0295
FED056UL-120V
9010/ 9110-0296
FED115-230V
9010/ 9110-0293
FED115UL-120V
9010/ 9110-0294
FED260-230V
9010/ 9110-0299
FED260UL-240V
9010/ 9110-0300
FED720-400V
9010/ 9110-0301
FED720UL-208V
9010/ 9110-0302
Art. No. 7001-0292
Advertisement
Table of Contents

Subscribe to Our Youtube Channel
Related Manuals for Binder 9010-0323


Summary of Contents for Binder 9010-0323
- Page 1 Fax: +49 7462 2005 100 Internet: http://www.binder-world.com E-mail: info@binder-world.com Service Hotline: +49 7462 2005 555 Service Fax: +49 7462 2005 93 555 Service E-Mail: service@binder-world.com Service Hotline USA: +1 866 885 9794 or +1 631 224 4340 x3 ...
-
Page 2: Table Of Contents
Content SAFETY ........................5 Legal considerations ........................... 5 Structure of the safety instructions ...................... 5 1.2.1 Signal word panel ........................5 1.2.2 Safety alert symbol ........................6 1.2.3 Pictograms ..........................6 1.2.4 Word message panel structure ....................7 Localization / position of safety labels on the chamber ..............7 Type plate............................ - Page 3 13.2.1 Cleaning ..........................62 13.2.2 Decontamination ........................63 13.3 Sending the chamber back to BINDER GmbH ................. 64 14. DISPOSAL......................65 14.1 Disposal of the transport packing ...................... 65 14.2 Decommissioning ..........................65 14.3 Disposal of the chamber in the Federal Republic of Germany ............65 14.4 Disposal of the chamber in the member states of the EU except for the Federal Republic of...
- Page 4 16.7 FD technical data ..........................75 16.8 FED technical data ..........................76 16.9 Equipment and options (extract) ....................... 78 16.10 Accessories and spare parts (extract) ....................79 16.11 Dimensions size 56 ........................... 81 16.12 Dimensions size 115 ......................... 83 16.13 Dimensions size 260 ......................... 85 16.14 Dimensions size 720 .........................
-
Page 5: Safety
Understanding and observing the instructions in this operating manual are prerequisites for hazard-free use and safety during operation and maintenance. In no event shall BINDER be held liable for any dam- ages, direct or incidental arising out of or related to the use of this manual. -
Page 6: Safety Alert Symbol
WARNING Indicates a potentially hazardous situation which, if not avoided, could result in death or serious (irreversible) injury CAUTION Indicates a potentially hazardous situation which, if not avoided, may result in moderate or minor (reversible) injury CAUTION Indicates a potentially hazardous situation which, if not avoided, may result in damage to the product and/or its functions or of a property in its proximity. -
Page 7: Word Message Panel Structure
Prohibition signs Do NOT touch Do NOT spray with water Information to be observed in order to ensure optimum function of the product. 1.2.4 Word message panel structure Type / cause of hazard. Possible consequences. ∅ Instruction how to avoid the hazard: prohibition. ... -
Page 8: Type Plate
Keep safety labels complete and legible. Replace safety labels that are no longer legible. Contact BINDER Service for these replacements. Type plate The type plate is located on the left-hand side of the chamber, bottom right-hand. Nominal temp. 300 °C 1,30 kW / 5,7 A 572 °F... -
Page 9: General Safety Instructions On Installing And Operating The Chambers
213-850 on safe working in laboratories (formerly BGI/GUV-I 850-0, BGR/GUV-R 120 or ZH 1/119, issued by the employers’ liability insurance association) (for Germany). BINDER GmbH is only responsible for the safety features of the chamber provided skilled electricians or qualified personnel authorized by BINDER perform all maintenance and repair, and if components relat- ing to chamber safety are replaced in the event of failure with original spare parts. - Page 10 The chambers do not dispose of any measures of explosion protection. DANGER Explosion hazard. Danger of death. ∅ Do NOT introduce any substance into the chamber which is combustible or explosive at working temperature. ∅ NO explosive dust or air-solvent mixture in the inner chamber. Any solvent contained in the charging material must not be explosive or inflammable.
-
Page 11: Intended Use
Observing the instructions in this operating manual and conducting regular maintenance work (chap. 13) is part of the intended use. WARNING: If customer should use a BINDER chamber running in non-supervised continu- ous operation, we strongly recommend in case of inclusion of irrecoverable specimen or samples to split such specimen or samples and store them in at least two chambers, if this is feasible. -
Page 12: Chamber Description
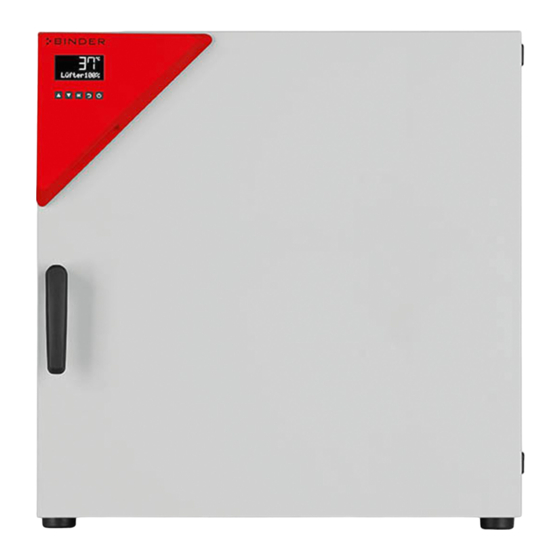
Chamber description BINDER incubators BD and BF and drying and heating ovens ED, FD and FED are equipped with an electronic PID-controller with digital display. The incubators BD and BF indicate the temperature with an accuracy of a tenth of a degree. -
Page 13: Triangular Instrument Panel
Figure 5: Overview, open chamber with glass door (chamber with single door) (BD, BF) Triangular instrument panel with controller R4 and USB interface Door handle Outer door Glass door handle (BD and BF) Glass door (BD and BF) Rack Triangular instrument panel Figure 6: Triangular instrument panel Controller display Functional controller buttons... -
Page 14: Main Power Switch Ed, Fd, Fed 720
Note on second-hand chambers (Ex-Demo-Units): Second-hand chambers are chambers that have been used for a short time for tests or exhibitions. They are thoroughly tested before resale. BINDER ensures that the chamber is technically sound and will work flawlessly. Second-hand chambers are marked with a sticker on the chamber door. Please remove the sticker before commissioning the chamber. -
Page 15: Guidelines For Safe Lifting And Transportation
• Permissible ambient temperature range during transport: -10 °C to +60 °C / 14 °F to 140 °F. You can order transport packing and pallets for transportation purposes from BINDER Service. Storage Intermediate storage of the chamber is possible in a closed and dry room. Observe the guidelines for temporary decommissioning (chap. - Page 16 • Permissible ambient temperature range during operation: +18 °C up to +40 °C / 64.4 °F to 104 °F. At elevated ambient temperature values, fluctuations in temperature can occur. The ambient temperature should not be substantially higher than the indicated ambient temperature of +25 °C / 77 °F to which the specified technical data relate.
-
Page 17: Installation
Installation Mounting the tilt protection holders (chambers with window) For chambers equipped with the option „door with window“ it is recommended to install the supplied tilt protection. Scope of delivery of tilt protection kit (Art.no. 8009-0870): • 2 screws • 2 tilt protection holders Preparing the tilt protection holders •... -
Page 18: Electrical Connection
Electrical connection The chambers are supplied ready for connection and come with an IEC connector plug. Power plug of the Nominal voltage +/- 10% at the Current Chamber Model power cable indicated power frequency type fuse 230 V at 50 Hz BD056-230V Shockproof plug 6,3 A... -
Page 19: Connection To An Exhaust/Ventilation System (Optional)
VDE directives (for Germany). We recommend the use of a residual current circuit breaker. • Only use original connection cables from BINDER. • BF, FD, FED: Do not place the power cable over the door gap when the chamber is hot after operati- •... -
Page 20: Inserting The Racks
Inserting the racks Observe the correct orientation of the racks: Standard rack: The lateral brackets must be above the rack surface when inserting the rack. Optional heavy load rack: The lateral brackets must be below the rack surface when inserting the rack. Standard rack Optional heavy load rack Figure 9: Correct orientation when inserting the racks... -
Page 21: Start Up
Start up Insert the plug into a suitable socket (chap. 4.2). BF, FD, FED size 720: Turn the chamber at the main power switch (chap. 2.3). If there is no other indication on the controller than the standby symbol, press the standby button until the display lights up. -
Page 22: Overview And General Settings On The R4 Controller
Overview and general settings on the R4 controller Controller overview Buttons on the controller The arrow buttons serve to navigate and to enter the values The OK button serves to select the parameters and to confirm the entered values The Back button serves to reach the preceding level If the Standby button is pressed down for approx. -
Page 23: Setting The Menu Language
Setting the menu language From Normal display without fan with the arrow-up button to the user menu with fan Confirm with OK. Enter the password (factory setting: 00 00) and confirm each entry with OK. with the arrow-up button to the language setting menu. The current menu language is shown. -
Page 24: Setting Date And Time
Setting date and time From Normal display without fan with the arrow-up button to the user menu with fan Confirm with OK. Enter the password (factory setting: 00 00) and confirm each entry with OK. The current date is shown. Press OK to set the year. - Page 25 Press OK to set the day. The setting flashes. Enter the day with arrow buttons (1 to 31) and confirm with OK. Press OK to set the hour. The setting flashes. Enter the hour with arrow buttons (0 to 23) and confirm with OK.
-
Page 26: Selecting The Temperature Unit
Selecting the temperature unit You can chose between degrees Celsius °C and degrees Fahrenheit °F. If the unit is changed, the temperature set-point and limits are converted accordingly. Also when specifying the ramp function (see chap. 9) this setting is accordingly taken as the basis. C = degrees Celsius 0 °C = 31°F... -
Page 27: Set-Point Entry For Temperature And Fan Speed
Set-point entry for temperature and fan speed From Normal display with the arrow-up button to the Set-point entry menu. The current temperature set-point is displayed. Press OK to enter the temperature set-point. The temperature set-point flashes. Enter the temperature set-point with arrow buttons with an accuracy of a tenth of a degree (BD, BF) or of one degree (ED, FD, FED) and confirm with OK. -
Page 28: Set-Point Entry For Temperature In Two-Door Chambers (Ed, Fd, Fed 720)
6.6.1 Set-point entry for temperature in two-door chambers (ED, FD, FED 720) With two-door chambers (ED, FD, FED 720) the maximum adjustable temperature set-point depends on the ambient temperature: • Range from 18 °C up to 26 °C: maximum temperature set-point: 300 °C •... -
Page 29: Adjusting The Air Flap Position
Adjusting the air flap position Opening the air flap in the exhaust duct serves to adjust the air change. The position of the air flap in the exhaust duct serves to adjust the fresh air entry. With the open the air flap, fresh air can enter through the fresh air tube. -
Page 30: Changing The Passwords For User Level And General Controller Functions
Changing the passwords for user level and general controller functions In this menu you can change the passwords for access to the user menu and to all controller functions. You can set two passworts for different access levels: L1 (level 1): The password enables access control to the user level L2 (level 2): The password enables access control to all controller functions Factory setting for both passwords is 00 00 (no password assigned). - Page 31 The right two digits of the password are flashing. Enter the desired numbers with arrow buttons and confirm with OK. The modified password (L1 or L2 depending on the selection) is shown (example: L1). If you want to change beween L1 and L2, confirm with OK. Thereaf- ter you can change to the other password level and also modify the password.
-
Page 32: Overtemperature Protection
Overtemperature protection Overtemperature protective device (class 1) The chambers are regularly equipped with an overtemperature protective device (safety device class 1 acc. to DIN 12880:2007). It serves to protect the chamber, its environment and the contents against ex- ceeding the maximum permissible temperature. When a defined temperature is reached, which is approx. by 20 °C to 30 °C above the chamber’s nominal temperature, the overtemperature protective device turns off the heating. -
Page 33: Safety Controller
Safety controller The chambers are regularly equipped with an adjustable electronic safety controller. It serves to protect the chamber, its environment and the contents against exceeding the maximum permissible temperature. Please observe the DGUV guidelines 213-850 on safe working in laboratories (formerly BGI/GUV-I 850-0, BGR/GUV-R 120 or ZH 1/119, issued by the employers’... -
Page 34: Setting The Safety Controller Set-Point
Setting the safety controller set-point A limit temperature is entered as the safety controller set-point , i.e. the absolute maximum permitted temperature value. Example: Temperature set-point 45 °C, safety controller set-point 50 °C. Regularly check the safety controller setting relating to the entered temperature set-point Set the safety controller set-point by approx. -
Page 35: Alarm Message And Proceeding In Case Of An Alarm
Alarm message and proceeding in case of an alarm The alarm icon flashes in the display. In case of the option audible alarm with activated buzzer (chap. 7.6) the buzzer sounds. • Safety controller class 2 (“temperature limiter”) The alarm icon flashes in the display. In case of the option audible alarm with activated buzzer (chap. 7.6) the buzzer sounds. -
Page 36: Disconnectable Audible Over-Temperature Alarm (Option)
Disconnectable audible over-temperature alarm (option) This option permits activating an audible signal: If the buzzer is activated, an audible signal sounds when the limit temperature set at the safety controller is exceeded. This happens in addition to the alarm message on the controller display. Turning off the audible alarm does not influence the safety controller’s function. -
Page 37: Timer Functions
Timer functions Selecting the timer function There are up to three 3 timer functions: Timer function “Delayed Off” The selected timer run-time immediately starts running down. When the timer expires the heating turns off. Chambers with fan: The fan may continue working according to the selections made. -
Page 38: Timer Function "Delayed Off
General information on the setting: In the setting menus of the timer functions, it is always required to confirm all parameters with OK, other- wise all entries made will be lost. Timer run-time is set in days, hours, and minutes. If days have been entered, they are shown in the controller display preceded by an underscore: Setting: Setting:... - Page 39 The minute value flashes. Enter the minutes of the timer run-time (0 up to 59) and confirm with OK. Chambers without fan (BD, ED): The timer function “Delayed Off” is activated Back to Normal display. Chamber with fixed fan speed (FD): Select whether the fan shall operate or not after the timer has expired The current setting of the fan operation is shown Select fan operation: On (100 %) or Off (0 %)
-
Page 40: Turning Off The Timer Function Or Changing The Settings
Chambers with adjustable fan speed (BF, FED): Enter the fan speed set-point valid for the time after the timer has expired. The current fan speed set-point is shown Enter the fan speed in steps of 10 % 0 % and 40 % up to 100 % and confirm with OK. - Page 41 Turning off the timer function when the timer has expired In Normal display press the OK button. Alternatively you can set the time to zero: From Normal display with the arrow-down button to the Timer function “Delayed Off” menu (with connected USB device: press the arrow-down button twice) Chambers without fan (BD, ED): Timer function “Delayed Off”, the timer has expired.
-
Page 42: Timer Function "Temperature Dependent Delayed Off" (Bf, Fed)
Timer function “Temperature dependent Delayed Off” (BF, FED) 8.3.1 Entry and activation of the timer run-time, fan setting and set-point entry From Normal display with the arrow-down button to the Timer function “Temperature dependent Delayed Off” menu (with connected USB device: press the arrow-down button 4 times) Current Timer function “Temperature dependent Delayed Off”... - Page 43 The temperature set-point flashes. When the set-point is reached, the timer starts running down. Enter the temperature set-point, confirm with OK and go on to enter the fan speed set-point valid for the time after the timer has expired The current fan speed is shown Enter the fan speed in steps of 10 % 0 % and 40 % up to 100 % and confirm with OK.
-
Page 44: Turning Off The Timer Function Or Changing The Settings
8.3.2 Turning off the timer function or changing the settings To turn off the timer function “Temperature dependent Delayed Off” during the time when it is still running, set all time values (days, hours, minutes) to zero in the according menu (terminating the timer function). As long as the timer is running, the timer function settings can be subsequently modified in this menu. -
Page 45: Timer Function "Delayed On" (Bf, Fed)
Timer function “Delayed On” (BF, FED) 8.4.1 Entry and activation of the timer run-time and fan setting From Normal display with the arrow-down button to the Timer function “Delayed On” menu (with connected USB device: press the arrow-down button 3 times) Current timer function “Delayed On”... - Page 46 The minute value flashes. Enter the minutes of the timer run-time (0 up to 59) confirm with OK and go on to enter the temperature set-point The temperature set-point flashes. Enter the temperature set-point, confirm with OK and go on to enter the fan speed set-point valid for the time after the timer has expired The current fan speed set-point is shown Enter the fan speed in steps of 10 % -...
-
Page 47: Changing The Settings
8.4.2 Changing the settings After the timer expired, the timer function „Delayed On“ deactivates, therefore turning the function off is not required. As long as the timer is still running, the timer function settings can be subsequently modified in this menu. To terminate the timer function, all time values (days, hours, minutes) must be set to zero in the according menu. -
Page 48: Ramp Function
Ramp function General information You can program temperature ramps in order to extend heating up times. This may be necessary in some cases to prevent temperature stress in the material during the heating up phase. Temperature ramps should only be used if required. Using them may result in considerably slowing down the heating up times. -
Page 49: Setting And Displaying The Ramp Function
Setting and displaying the ramp function From Normal display without fan with the arrow-up button to the Ramp function menu. with fan Ramp function (not programmed) Press OK to enter the gradient in degree per minute. The gradient flashes. Enter the gradient (0 up to 9) confirm with OK and go on toenter the target ramp set-point The target ramp set-point value flashes. -
Page 50: Displaying The Effective Ramp Set-Point And Changing The Target Ramp Set-Point
Displaying the effective ramp set-point and changing the target ramp set- point From Normal display showing the actual temperature (example: 27 °C), the gradient (example: 1) and the target ramp set-point (example: 40 °C) to the display of the effective ramp set-point The effective ramp set-point is displayed Press OK to set the target ramp set-point The target ramp set-point value flashes. -
Page 51: Turning Off The Ramp Function
Turning off the ramp function To turn off the ramp function, the gradient must be set to zero in the according menu. The set-point can be entered as desired. From Normal display without fan with the arrow-up button to the Ramp function menu with fan Ramp function with programmed gradient and target ramp set-point Press OK to enter the gradient in degree per minute. -
Page 52: Data Recording Via Usb Interface
Data recording via USB interface The USB interface located in the triangular instrument panel serves to read out the measured values, which are put out in real time. Following data is recorded: Timer, actual temperature value, temperature set-point, Object temperature sensor (chambers with option Object temperature display), Fan (chambers with fan), air flap position, safety controller, analog output (option), heating regulation ratio. -
Page 53: Terminating Data Recording
The current state of data recording (started) flashes Confirm with OK. Data recording is running. Back to Normal display. Data recording continues also during stand-by mode of the chamber. Disconnecting the power supply interrupts data recording, which continues after the power returns. To terminate data recording, stop it via the menu (chap. -
Page 54: Network Configuration For Chambers With Ethernet Interface
Network configuration for chambers with Ethernet interface The settings of this submenu are used for networking chambers with an Ethernet interface, e.g. to con- nect them with BINDER’s APT-COM™ 4 Multi Management Software (option, chap. 12.1). This menu subsequently offers the following settings: •... - Page 55 Continue with OK to switching on and off the DHCP state The current DHCP state is displayed (on). The setting flashes. Select the setting with the arrow buttons. There are the following options: DHCP switched on: DHCP switched off: To configure the network settings, the DHCP state must be switched off. Otherwise, the DHCP- server would assign the network configuration..
- Page 56 Confirm with OK and go on to enter the subnet mask. The first digits of the current subnet mask are shown. The setting flashes. Enter the desired values with the arrow buttons and confirm with OK. The next digits of the subnet mask are shown. Enter the desired values accordingly.
-
Page 57: Options
The chamber is regularly (FED) or optionally equipped with an Ethernet interface on the chamber rear that can connect the BINDER APT-COM™ 4 Multi Management Software. The actual temperature value is given at adjustable intervals. Programming can be performed graphically via PC. Up to 100 chambers can be cross-linked. -
Page 58: Analog Output For Temperature (Option)
12.4 Analog output for temperature (option) With this option the chamber is equipped with an analog output 4-20 mA for temperature. This output permits transmitting data to external data registration systems or devices. The connection is carried out as a DIN socket at the rear of the chamber as follows: ANALOG OUTPUT 4-20 mA DC PIN 1: Temperature –... -
Page 59: Hepa Fresh Air Filter (Option For Fd, Fed)
Controller shutdown by the standby button has no effect on the internal socket. WARNING Internal socket switched on even though controller is shut down. Electrical hazard. Turn off the internal socket separately, when not in use, by the switch in the triangular instrument panel 12.6 HEPA fresh air filter (option for FD, FED) With this option, the introduced fresh air is cleaned by means of a high efficiency submicron particulate air... - Page 60 Connection Observe the legal requirements and relevant standards and regulations for the safe handling of gas cylin- ders and inert gases. General information for safe handling of gas cylinders: • Store and use gas cylinders only in well ventilated areas. •...
-
Page 61: Maintenance, Cleaning, And Service
The warranty becomes void if maintenance work is conducted by non-authorized personnel.. Replace the door gasket only when cold. Otherwise, the door gasket may become damaged. We recommend taking out a maintenance agreement. Please consult BINDER Service. BINDER telephone hotline:... -
Page 62: Cleaning And Decontamination
We recommend using the neutral cleaning agent Art. No. 1002-0016 for a thorough cleaning. Any corrosive damage that may arise following use of other cleaning agents is excluded from liability by BINDER GmbH. Any corrosive damage caused by a lack of cleaning, is excluded from liability by BINDER GmbH. CAUTION Danger of corrosion. -
Page 63: Decontamination
For chemical disinfection, we recommend using the disinfectant spray Art. No. 1002-0022. Any corrosive damage that may arise following use of other disinfectants is excluded from liability by BINDER GmbH. With every decontamination method, always use adequate personal safety controls. -
Page 64: Sending The Chamber Back To Binder Gmbh
13.3 Sending the chamber back to BINDER GmbH If you return a BINDER product to us for repair or any other reason, we will only accept the product upon presentation of an authorization number (RMA number) that has previously been issued to you. An authorization number will be issued after receiving your complaint either in writing or by telephone prior to your sending the BINDER product back to us. -
Page 65: Disposal
According to Annex I of Directive 2012/19/EU of the European Parliament and of the Council on waste electrical and electronic equipment (WEEE), BINDER devices are classified as “monitoring and control instruments” (category 9) only intended for professional use“. They must not be disposed of at public col- lecting points. -
Page 66: Disposal Of The Chamber In The Member States Of The Eu Except For The Federal Republic Of Germany
(Elektro- und Elektronikgerätegesetz, ElektroG from 20 October 2015, BGBl. I p. 1739) or contact BINDER service who will organize taking back and disposal of the chamber according to the German national law for electrical and electronic equipment (Elektro- und El- ektronikgerätegesetz, ElektroG from 20 October 2015, BGBl. -
Page 67: Disposal Of The Chamber In Non-Member States Of The Eu
14.5 Disposal of the chamber in non-member states of the EU CAUTION Alteration of the environment. For final decommissioning and disposal of the chamber, please contact BINDER Ser- vice. Follow the statutory regulations for appropriate, environmentally friendly disposal. -
Page 68: Troubleshooting
Sensor rupture between sen- Contact BINDER service. display sor and controller. Only qualified service personnel authorized by BINDER must perform repair. Repaired chambers must comply with the BINDER quality standards. BD / BF / ED / FD / FED (E3.1) 03/2019 page 68/106... -
Page 69: Technical Description
(certified since December 1996 by TÜV CERT). All test equipment used is subject to the administration of measurement and test equipment that is also constituent part of the BINDER QM DIN EN ISO 9001 sys- tems. They are controlled and calibrated to a DKD-Standard at regular intervals. -
Page 70: Bd Technical Data
16.4 BD technical data Chamber size BD 56 BD 115 BD 260 BD 720 Exterior dimensions mm / inch 560 / 22.01 710 / 27.95 815 / 32.09 1165 / 45.87 Width, net mm / inch 625 / 24.60 735 / 28.94 965 / 37.99 1590 / 62.60 Height, gross (incl. -
Page 71: Bf Technical Data
+22 °C +/- 3°C / 71.6 °F +/- 5.4 °F and a power supply voltage fluctuation of +/-10%. Technical data is determined in accordance to BINDER Factory Standard Part 2:2015 and DIN 12880:2007. All indications are average values, typical for chambers produced in series. We reserve the right to change technical specifications at any time. - Page 72 Chamber size BF 56 BF 115 BF 260 BF 720 Interior dimensions (continued) Interior volume l / cu.ft. 59 / 2.08 114 / 4.03 257 / 9.08 Steam space volume l / cu.ft. 66 / 2.33 127 / 4.49 279 / 9.85 Racks Quantity of racks (regular) Quantity of racks (max.)
-
Page 73: Ed Technical Data
+22 °C +/- 3°C / 71.6 °F +/- 5.4 °F and a power supply voltage fluctuation of +/-10%. Technical data is determined in accordance to BINDER Factory Standard Part 2:2015 and DIN 12880:2007. All indications are average values, typical for chambers produced in series. We reserve the right to change technical specifications at any time. - Page 74 +22 °C +/- 3°C / 71.6 °F +/- 5.4 °F and a power supply voltage fluctuation of +/-10%. Technical data is determined in accordance to BINDER Factory Standard Part 2:2015 and DIN 12880:2007. All indications are average values, typical for chambers produced in series. We reserve the right to change technical specifications at any time.
-
Page 75: Fd Technical Data
16.7 FD technical data Chamber size FD 56 FD 115 FD 260 FD 720 Exterior dimensions mm / inch 560 / 22.01 710 / 27.95 815 / 32.09 1165 / 45.87 Width, net mm / inch 625 / 24.60 735 / 28.94 965 / 37.99 1590 / 62.60 Height, gross (incl. -
Page 76: Fed Technical Data
+22 °C +/- 3°C / 71.6 °F +/- 5.4 °F and a power supply voltage fluctuation of +/-10%. Technical data is determined in accordance to BINDER Factory Standard Part 2:2015 and DIN 12880:2007. All indications are average values, typical for chambers produced in series. We reserve the right to change technical specifications at any time. - Page 77 Chamber size FED 56 FED 115 FED 260 FED 720 Interior dimensions Width mm / inch 400 / 15.75 550 / 21.65 650 / 25.59 1000 / 39.37 Height mm / inch 440 / 17.32 550 / 21.65 780 / 30.71 1300 / 51.18 Depth mm / inch 345 / 13.58...
-
Page 78: Equipment And Options (Extract)
If the chamber is fully loaded, the specified heating up times may vary according to the load. 16.9 Equipment and options (extract) To operate the chamber, use only original BINDER accessories or accessories / components from third-party suppliers authorized by BINDER. The user is responsible for any risk arising from using unauthorized accessories. Standard equipment Microprocessor temperature controller √... -
Page 79: Accessories And Spare Parts (Extract)
√ 16.10 Accessories and spare parts (extract) BINDER GmbH is responsible for the safety features of the chamber only, provided skilled electricians or qualified personnel authorized by BINDER perform all maintenance and repair, and if components relating to chamber safety are replaced in the event of failure with original spare parts. - Page 80 (27 measuring points) Measurement of air ventilation acc. to ASTM DL330000 DL330000 DL330000 D 5374, including certificate For information on components not listed here, please contact BINDER Service. BD / BF / ED / FD / FED (E3.1) 03/2019 page 80/106...
-
Page 81: Dimensions Size 56
16.11 Dimensions size 56 BD / BF / ED / FD / FED (E3.1) 03/2019 page 81/106... - Page 82 BD / BF / ED / FD / FED (E3.1) 03/2019 page 82/106...
-
Page 83: Dimensions Size 115
16.12 Dimensions size 115 BD / BF / ED / FD / FED (E3.1) 03/2019 page 83/106... - Page 84 BD / BF / ED / FD / FED (E3.1) 03/2019 page 84/106...
-
Page 85: Dimensions Size 260
16.13 Dimensions size 260 BD / BF / ED / FD / FED (E3.1) 03/2019 page 85/106... - Page 86 BD / BF / ED / FD / FED (E3.1) 03/2019 page 86/106...
-
Page 87: Dimensions Size 720
16.14 Dimensions size 720 BD / BF / ED / FD / FED (E3.1) 03/2019 page 87/106... - Page 88 BD / BF / ED / FD / FED (E3.1) 03/2019 page 88/106...
- Page 89 BD / BF / ED / FD / FED (E3.1) 03/2019 page 89/106...
-
Page 90: Certificates And Declarations Of Conformity
Certificates and declarations of conformity 17.1 EU Declaration of Conformity for BD BD / BF / ED / FD / FED (E3.1) 03/2019 page 90/106... - Page 91 BD / BF / ED / FD / FED (E3.1) 03/2019 page 91/106...
-
Page 92: Eu Declaration Of Conformity For Bf
17.2 EU Declaration of Conformity for BF BD / BF / ED / FD / FED (E3.1) 03/2019 page 92/106... - Page 93 BD / BF / ED / FD / FED (E3.1) 03/2019 page 93/106...
-
Page 94: Eu Declaration Of Conformity For Ed
17.3 EU Declaration of Conformity for ED BD / BF / ED / FD / FED (E3.1) 03/2019 page 94/106... - Page 95 BD / BF / ED / FD / FED (E3.1) 03/2019 page 95/106...
-
Page 96: Eu Declaration Of Conformity For Fd
17.4 EU Declaration of Conformity for FD BD / BF / ED / FD / FED (E3.1) 03/2019 page 96/106... - Page 97 BD / BF / ED / FD / FED (E3.1) 03/2019 page 97/106...
-
Page 98: Eu Declaration Of Conformity For Fed
17.5 EU Declaration of Conformity for FED BD / BF / ED / FD / FED (E3.1) 03/2019 page 98/106... - Page 99 BD / BF / ED / FD / FED (E3.1) 03/2019 page 99/106...
-
Page 100: Product Registration
Product registration BD / BF / ED / FD / FED (E3.1) 03/2019 page 100/106... -
Page 101: Contamination Clearance Certificate
Contamination clearance certificate 19.1 For chambers located outside the USA and Canada Declaration with regard to safety and health Erklärung zur Sicherheit und gesundheitlichen Unbedenklichkeit The German Ordinance on Hazardous Substances (GefStofV), and the regulations regarding safety at the workplace, require that this form be filled out for all products that are returned to us, so that the safety and health of our employees can be warranted. - Page 102 Transport by (means and name of transport company, etc.) Versendung durch (Name Spediteur o.ä.) ___________________________________________________________________________________ Date of dispatch to BINDER GmbH / Tag der Absendung an BINDER GmbH: ___________________________________________________________________________________ BD / BF / ED / FD / FED (E3.1) 03/2019...
- Page 103 We are aware that, in accordance with Article 823 of the German Civil Code (BGB), we are directly liable with regard to third parties, in this instance especially the employees of BINDER GmbH, who have been entrusted with the handling / repair of the chamber / component. / Es ist uns bekannt, dass wir gegenüber...
-
Page 104: For Chambers Located In The Usa And Canada
Please complete this form and the Customer Decontamination Declaration (next 2 pages) and attach the required pictures. E-mail to: IDL_SalesOrderProcessing_USA@binder-world.com After we have received and reviewed the complete information we will decide on the issue of a RMA number. Please be aware that size specifications, voltage specifications as well as performance specifi- cations are available on the internet at www.binder-world.us... - Page 105 Customer (End User) Decontamination Declaration Health and Hazard Safety declaration To protect the health of our employees and the safety at the workplace, we require that this form is com- pleted by the user for all products and parts that are returned to us. (Distributors or Service Organizations cannot sign this form) NO RMA number will be issued without a completed form.
- Page 106 4.5 Shipping laws and regulations have not been violated. I hereby commit and guarantee that we will indemnify BINDER Inc. for all damages that are a consequence of incomplete or incorrect information provided by us, and that we will indemnify and hold harmless BINDER Inc.
Need help?
Do you have a question about the 9010-0323 and is the answer not in the manual?
Questions and answers
where can I install a wired temp probe our facility uses to monitor temp?