Table of Contents
Advertisement
Quick Links
Advertisement
Table of Contents

Related Manuals for cytiva Sepax C-Pro


Summary of Contents for cytiva Sepax C-Pro
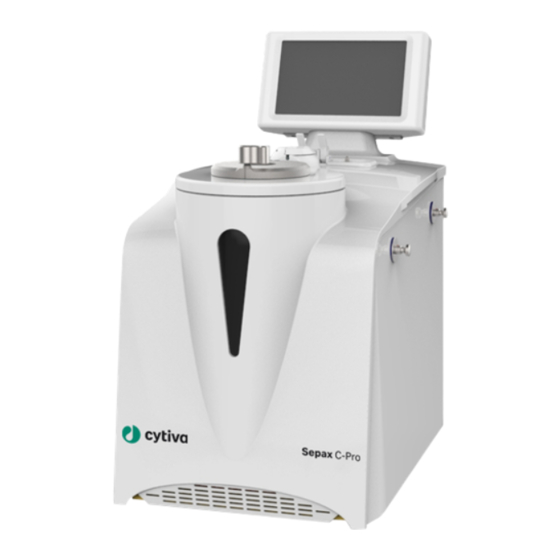
- Page 1 Sepax™ C-Pro Operating Instructions Original instructions cytiva.com...
-
Page 2: Table Of Contents
Running a procedure ............................ 92 5.6.1 Overview ................................93 5.6.2 Select an application ........................... 94 5.6.3 Edit parameters ............................95 5.6.4 Set up traceability IDs ..........................99 Working with data files ..........................101 Sepax C-Pro Operating Instructions 29350570 AE OM-3074... - Page 3 Eurasian Economic Union (Евразийский экономический союз) .......... 167 9.4.6 North America ............................... 169 9.4.7 Regulatory statements ..........................170 9.4.8 Declaration of Hazardous Substances (DoHS) ................171 Health and Safety Declaration Form ...................... 173 Sepax C-Pro Operating Instructions 29350570 AE OM-3074...
-
Page 4: Introduction
This chapter contains information about this manual and associated user documenta- tion, important user information and intended use of the product. In this chapter Section See page Important user information About this manual Associated documentation Sepax C-Pro Operating Instructions 29350570 AE OM-3074... -
Page 5: Important User Information
The Sepax C-Pro is not intended for any therapeutic or diagnostic use in humans. Only for use with compatible Sepax C-Pro software applications and cell processing kits. -
Page 6: About This Manual
Scope of this manual The Sepax C-Pro Operating Instructions covers the Sepax C-Pro instrument only. For how to use an application with the Sepax C-Pro instrument, see the separate Operator Manual supplied with the application. Notes and tips... -
Page 7: Associated Documentation
Documentation Main Contents Sepax C-Pro Operating Instructions Instructions needed to prepare and (29350570) operate the Sepax C-Pro instrument in a correct and safe way. (this document) System overview, site requirements, and instructions for moving the system within the same building. - Page 8 1 Introduction 1.3 Associated documentation Documentation Main Contents SpinOculation C-Pro Operator Manual Information needed to run the SpinOcu- (29367191) lation C-Pro application on the Sepax C- Pro instrument. Sepax C-Pro Operating Instructions 29350570 AE OM-3074...
-
Page 9: Safety Instructions
All users must read and understand the entire contents of this general safety chapter, and the specific safety precau- tions information in each subsequent chapter of this manual to become aware of the hazards involved. Sepax C-Pro Operating Instructions 29350570 AE OM-3074... -
Page 10: Safety Precautions
2 Safety instructions 2.1 Safety precautions Safety precautions Introduction Sepax C-Pro is powered by mains voltage and handles materials that can be hazardous. Before installing, operating or maintaining the system, you must be aware of the hazards described in this manual. Definitions This user documentation contains safety notices (WARNING, CAUTION, and NOTICE) concerning the safe use of the product. - Page 11 Do not expose the instrument to equipment that contains magnets or generates magnetic or electromagnetic fields. This includes devices such as mobile phones NOTICE Only use chemicals proven not to be harmful to the system. Sepax C-Pro Operating Instructions 29350570 AE OM-3074...
-
Page 12: Labels And Symbols
Degree of protection provided by the enclosure. Fuse rating: number of fuses, type F (fast), trip current (A), Fuse rating maximum voltage (V) Symbols on the kit The following symbols may be present on the kit: Sepax C-Pro Operating Instructions 29350570 AE OM-3074... - Page 13 Sterilized using Ethylene oxide. Use-by-date. Do not re-use. Product number. Batch number in alphanumeric format. Do not use in case the package is damaged. Non-pyrogenic. Kit ID in barcode format that forms a unique traceability number. Sepax C-Pro Operating Instructions 29350570 AE OM-3074...
- Page 14 2 Safety instructions 2.2 Labels and symbols Label Meaning Serial number. Sepax C-Pro Operating Instructions 29350570 AE OM-3074...
-
Page 15: Emergency Procedures
2.3 Emergency procedures Emergency procedures Introduction This section describes how to shut down the Sepax C-Pro instrument or abort an on- going procedure in an emergency situation, and how to restart the Sepax C-Pro instru- ment. The section also describes the result in the event of power failure. - Page 16 Refer to the troubleshooting procedures in the application Operator Manual to recover the cellular product. Power failure In the event of a power failure to the Sepax C-Pro instrument, the procedure is inter- rupted immediately. To prevent any leakage, close all clamps on the single-use kit.
- Page 17 Sepax C-Pro instrument automatically performs a hardware start-up test to verify the functionality of the hardware. If the hardware start-up test is a success, the user interface on the Sepax C-Pro instru- ment returns to the Home menu.
-
Page 18: System Description
3 System description System description About this chapter This chapter gives an overview of the Sepax C-Pro system. In this chapter Section See page System overview Touchscreen user interface Data privacy and security Applications and kits Peripherals Sepax C-Pro Operating Instructions 29350570 AE OM-3074... -
Page 19: System Overview
3.1 System overview System overview Overview Sepax C-Pro processes cellular product and directs it into dedicated kit bags, at the end of the procedure. The instrument core technology includes the following features: • An electric centrifugation motor to concentrate, separate, and wash cellular product via the separation chamber of the single-use kit. - Page 20 Pressure sensor. Monitors the pressure within the tubing during a procedure. Drip chamber holder. Bag pole. Bag hooks. Two hooks for hanging, for example, the initial product bag. NOTICE Do not exceed a total load of 2 kg. Sepax C-Pro Operating Instructions 29350570 AE OM-3074...
- Page 21 3 System description 3.1 System overview Stopcock holder Part Description Rotating pins. Position the stopcocks of the kit. Standard holder with two clips. Holds the stopcock manifold. Rear panel components Sepax C-Pro Operating Instructions 29350570 AE OM-3074...
- Page 22 Support for bag pole. Ethernet ports ETH1 and ETH2. Ports for network connectivity. Fan (air outlet). Cools the instrument. The fan is operating when- ever the instrument is powered ON. Clamp for bag pole. Sepax C-Pro Operating Instructions 29350570 AE OM-3074...
-
Page 23: Touchscreen User Interface
This section describes the available user roles and the user interfaces for GMAP soft- ware versions 5.5 and 6.0. In this section Section See page 3.2.1 User roles 3.2.2 GMAP 5.5 user interface 3.2.3 GMAP 6.0 user interface Sepax C-Pro Operating Instructions 29350570 AE OM-3074... -
Page 24: User Roles
3 System description 3.2 Touchscreen user interface 3.2.1 User roles 3.2.1 User roles The Sepax C-Pro has three user roles: • User (GMAP 5.5)/Operator (GMAP 6.0) • Administrator • Service The following table describes the available user roles. Activity User/Operator... - Page 25 View and use Service menu Execute Maintenance / test application Application activation Configure Serial Number Edit SepaxNet/Chronicle Settings (GMAP 5.5 only) Edit traceability settings (GMAP 6.0 only) Monitor Hardware Calibrate hardware Edit Specific Settings Configure Hardware Sepax C-Pro Operating Instructions 29350570 AE OM-3074...
- Page 26 3 System description 3.2 Touchscreen user interface 3.2.1 User roles Activity Service only Delete user data View full system information Sepax C-Pro Operating Instructions 29350570 AE OM-3074...
-
Page 27: Gmap 5.5 User Interface
The following illustration shows the Sepax start menu that is shown after start-up. Part Description LogOn. For user login. About. Displays system information. Shutdown. Shuts down the system. Sepax main menu The following illustrations show the Sepax main menu that is shown after login. Sepax C-Pro Operating Instructions 29350570 AE OM-3074... - Page 28 Next. Goes to the next menu screen, if applicable. Logout button. Logs out from Sepax C-Pro and returns to the Sepax start menu. The logout button is always shown unless an application is selected and running.
- Page 29 Data. Access to save or print data files and to delete user data. Settings. Access to change the following general settings of the Sepax C-Pro: • Traceability setup • Authentication setup • System setup Note: Settings is only accessible to Administrator users. Sepax C-Pro Operating Instructions 29350570 AE OM-3074...
- Page 30 GMAP version. Data menu The Data menu is accessible from the Menu screen. The images below show the Data menu screens for an Administrator user. Part Description Back arrow. Returns to the Menu screen. Sepax C-Pro Operating Instructions 29350570 AE OM-3074...
- Page 31 • Instrument settings • List of installed applications • Configured parameters (for each application) • User accounts Save system logs. Saves a PDF document listing the history of instrument operations. Sepax C-Pro Operating Instructions 29350570 AE OM-3074...
- Page 32 Authentication setup. Access to change authentication settings. System setup. Access to change system settings. Traceability setup The Traceability setup menu is only accessible to Administrator users, from the Settings menu. The image below shows the Traceability setup menu. Sepax C-Pro Operating Instructions 29350570 AE OM-3074...
- Page 33 SepaxNet Host. Connects the instrument to SepaxNet/ Chronicle. Auto print data. Automatically prints the report after each procedure. Next arrow. Goes to the next menu screen. Screen 2 Sepax C-Pro Operating Instructions 29350570 AE OM-3074...
- Page 34 Max login attempts. Sets the number of login attempts before suspending a user. System setup menu The System setup menu is only accessible to Administrator users, from the Settings menu. The image below shows the System setup menu screen. Sepax C-Pro Operating Instructions 29350570 AE OM-3074...
- Page 35 The image below shows the Users menu screen. Part Description Back arrow. Returns to the Menu screen. User status button. Activates or suspends the selected user account. Delete user button. Deletes the selected user. Sepax C-Pro Operating Instructions 29350570 AE OM-3074...
- Page 36 Only the most recent 100 events are shown. Part Description Back arrow. Returns to the Menu screen. Select Category. Filters system logs by category. Select User. Filters system logs by user. Sepax C-Pro Operating Instructions 29350570 AE OM-3074...
- Page 37 Uninstall. Uninstalls the application. Only customer applications can be uninstalled by an Administrator user. Previous arrow. Goes to the previous page of the package manager. Next arrow. Goes the next page of the package manager. Sepax C-Pro Operating Instructions 29350570 AE OM-3074...
-
Page 38: Gmap 6.0 User Interface
The following illustration shows the Sepax start menu that is shown after start-up. Part Description Log in. For user login. About. Displays system information. Shutdown. Shuts down the system. Home menu The following illustration shows the Home menu that is shown after login. Sepax C-Pro Operating Instructions 29350570 AE OM-3074... - Page 39 The Logout button is always available unless an application is selected and running. Menu screen The Menu screen is accessible from the Home menu. The image below shows the Menu screen for an Administrator user. Sepax C-Pro Operating Instructions 29350570 AE OM-3074...
- Page 40 Package Manager. Displays all installed applications, applica- tions ready to be installed, and current GMAP version. Data menu The Data menu is accessible from the Menu screen. The image below shows the Data menu for an Administrator user. Sepax C-Pro Operating Instructions 29350570 AE OM-3074...
- Page 41 Admin user and password. Note: Delete user data is only accessible to Administrator users. A maximum of 50 files can be stored on the instrument. Once this limit is reached, new files overwrite older files. Sepax C-Pro Operating Instructions 29350570 AE OM-3074...
- Page 42 Authentication. Access to change authentication settings. System. Access to change system settings. Traceability menu The Traceability menu is accessible only for Administrator users, from the Settings menu. The image below shows the Traceability menu. Sepax C-Pro Operating Instructions 29350570 AE OM-3074...
- Page 43 Auto print data. Automatically prints the report after each procedure. Page format. Access to choose the page format for the printed reports (i.e., A4 or Letter). Next arrow. Goes to the next screen of the menu. Sepax C-Pro Operating Instructions 29350570 AE OM-3074...
- Page 44 Max login attempts. Sets the number of login attempts before suspending a user. System menu The System menu is only accessible to Administrator users, from the Settings menu. The image below shows the System menu. Sepax C-Pro Operating Instructions 29350570 AE OM-3074...
- Page 45 Language. Changes the language of the system. Users menu The Users menu is accessible only for Administrator users, from the Menu screen. The image below shows the Users menu. Part Description Back arrow. Returns to the Menu screen. Sepax C-Pro Operating Instructions 29350570 AE OM-3074...
- Page 46 Only the most recent 100 events are shown. Part Description Back arrow. Returns to the Menu screen. Category. Filters the system logs by category. User. Filters the system logs by user. Date. Filters the system logs by date. Sepax C-Pro Operating Instructions 29350570 AE OM-3074...
- Page 47 Install. Installs system software and applications. Repair. Repairs the GMAP software. Uninstall. Uninstalls the selected applications. Remove. Removes the selected software. Navigation arrows to move between the list of software and appli- cations. Sepax C-Pro Operating Instructions 29350570 AE OM-3074...
-
Page 48: Data Privacy And Security
The information system stores the first name, middle name and last name of a user as part of its workflow. Cytiva does not use this information for any other purpose . Use your own discretion when providing information for a user account. It is advised to take both respect for personal privacy and any need for uniquely identifying a user into account. - Page 49 Information collected for system diagnostics and support is not used by Cytiva for any other purpose. However, the user is responsible for ensuring the privacy of sensitive data, such as donor IDs in logs. The user is advised to collaborate with Cytiva in order to prevent any disclosure of sensitive information.
-
Page 50: Applications And Kits
3 System description 3.4 Applications and kits Applications and kits In this section Section See page 3.4.1 Applications 3.4.2 Cell processing kits 3.4.3 Application and kit combinations 3.4.4 Pneumatic kit for manual purge Sepax C-Pro Operating Instructions 29350570 AE OM-3074... -
Page 51: Applications
Applications are software applications that allow the instrument to perform various cell processing functions such as: cell concentration, cell isolation, washing, bead incu- bation, viral vector incubation, dilution, and splitting. For each application, a dedicated single-use kit is used. Sepax C-Pro Operating Instructions 29350570 AE OM-3074... -
Page 52: Cell Processing Kits
The separation chamber is the main component of each kit. It is a rotating syringe with a pressure driven piston. Instructions for use Each box of kits includes relevant Instructions for Use (IFU) for that kit. Read these carefully before opening the blister pack. Sepax C-Pro Operating Instructions 29350570 AE OM-3074... -
Page 53: Application And Kit Combinations
Only use applications and kits in the below combinations. Note: Cytiva is not responsible for any consequences of using any kit other than those specified in this document. The tick mark (√ ) indicates an application and kit combination that is allowed. -
Page 54: Pneumatic Kit For Manual Purge
Instructions for use are included with each application Operator Manual. The following illustration shows the pneumatic kit: Sepax C-Pro Operating Instructions 29350570 AE OM-3074... -
Page 55: Peripherals
6080 Power cable C13 (IEC 60320-1) North America 3.0 m 6081 Power cable C13 (IEC 60320-1) U.K. 2.0 m 6082 Power cable C13 (IEC 60320-1) China 2.0 m 6104 Ethernet cable 3.0 m Sepax C-Pro Operating Instructions 29350570 AE OM-3074... -
Page 56: Installation
Sepax C-Pro system. About the installation The initial installation will be done by Service personnel or Application Specialists from Cytiva, or other staff who are authorized by Cytiva to install Sepax C-Pro. In this chapter Section... -
Page 57: Safety Precautions
NOTICE Do not expose the system to direct sunlight or strong light sources. NOTICE It is recommended to connect the instrument to an uninterruptible power supply (UPS) Sepax C-Pro Operating Instructions 29350570 AE OM-3074... -
Page 58: Site Preparation
This section describes the site planning and preparation that should be performed before the product is installed. In this section Section See page 4.2.1 Delivery, storage and unpacking 4.2.2 Room requirements 4.2.3 Site environmental requirements 4.2.4 Power requirements Sepax C-Pro Operating Instructions 29350570 AE OM-3074... -
Page 59: Delivery, Storage And Unpacking
Delivery The Sepax C-Pro system is shipped inside a single cardboard box. Cytiva local representatives will install and verify the system for the first time. Receiving the package WARNING Heavy object. The delivery box weighs about 20 kg. At least two people are required to lift the box. - Page 60 4.2.1 Delivery, storage and unpacking Illustration Description Cardboard box with opened flaps. • Packing list • Certificates and EU Declara- tion of Conformity • Boxes with application soft- ware on USB flash drivers • Boxes with accessories Sepax C-Pro Operating Instructions 29350570 AE OM-3074...
- Page 61 Tools for unpacking Use a side cutter or scissors to unpack the system. Instructions for unpacking Follow the instructions below to unpack the Sepax C-Pro system. Note: Save all the original packing material. If the system has to be repacked, for transportation or otherwise, it is important that the system can be safely packed using the original packing material.
- Page 62 Remove the documents and boxes containing accessories or USB flash drives for application software. Remove the bag pole (1) and the USB flash drive for the instrument (2). Grab the Sepax C-Pro by its handles and lift the instrument out of the box together with the packing material. NOTICE Do not lift the foam cushions, use the handles on both sides of the instrument.
- Page 63 If you need to move the system, follow the requirements for the room, site environ- ment, and power described in Section 4.2 Site preparation, on page For transport over longer distances, pack the instrument securely in a protective box. Use the original packing material if possible. Sepax C-Pro Operating Instructions 29350570 AE OM-3074...
-
Page 64: Room Requirements
This section describes the requirements for the room where the instrument is placed. Dimensions and weight The following illustration shows the dimensions of the instrument. Parameter Value 27 cm 40 cm 46 cm 96 cm Weight 17 kg Sepax C-Pro Operating Instructions 29350570 AE OM-3074... - Page 65 There must be sufficient space to access the rear panel and for ventilation purposes. Parameter Specification Minimum bench area for operating the 47 x 70 cm instrument (W x D) Load capacity 980 N (100 kg) or higher Sepax C-Pro Operating Instructions 29350570 AE OM-3074...
- Page 66 4 Installation 4.2 Site preparation 4.2.2 Room requirements Parameter Specification Inclination of bench surface Horizontal ± 2° Sepax C-Pro Operating Instructions 29350570 AE OM-3074...
-
Page 67: Site Environmental Requirements
• The room must have exhaust ventilation. • The instrument should not be exposed to sources of heat such as direct sunlight. • Dust in the atmosphere should be kept to a minimum. Sepax C-Pro Operating Instructions 29350570 AE OM-3074... -
Page 68: Power Requirements
4 Installation 4.2 Site preparation 4.2.4 Power requirements 4.2.4 Power requirements Introduction This section describes the electrical power requirements for the Sepax C-Pro instru- ment. WARNING Protective ground. The instrument must be connected to a grounded power outlet. WARNING Access to power switch and power cord with plug. Do not block access to the power switch and power cord. -
Page 69: Electrical Connections
Protective ground. To reduce the risk of electric shock, this equipment must always be connected to a grounded power outlet. Connect the power cord from the Sepax C-Pro instrument to a grounded wall outlet. Recommended use of the USB ports NOTICE Observe the below configuration when installing peripherals. - Page 70 NOTICE Only use the recommended printers, barcode readers, USB flash drive, and USB WiFi adapters (if applicable) Follow the instructions below to connect network and accessories to the Sepax C-Pro instrument. Sepax C-Pro Operating Instructions 29350570 AE OM-3074...
- Page 71 Connect the network cable to ETH1 or ETH2. Connect the barcode reader to the USB1 port (1). Connect the printer (optional) to USB2 port (2). Note: The printer must be set up first by an authorized local representative. Sepax C-Pro Operating Instructions 29350570 AE OM-3074...
- Page 72 4 Installation 4.3 Electrical connections Step Action Sepax C-Pro Operating Instructions 29350570 AE OM-3074...
-
Page 73: Operation Gmap 5.5
5 Operation GMAP 5.5 Operation GMAP 5.5 About this chapter This section gives instructions for basic operation of the Sepax C-Pro instrument and how to operate the system running GMAP version 5.5. In this chapter Section See page Safety precautions... -
Page 74: Safety Precautions
USB port. NOTICE When transferring files from a computer to the USB flash drive supplied with the instrument, scan it with an antivirus prior to inserting it into the instrument. Sepax C-Pro Operating Instructions 29350570 AE OM-3074... -
Page 75: Start-Up And Shutdown
This section gives instructions on how to start-up and shut down the Sepax C-Pro instrument. In order to use the Sepax C-Pro instrument, a user profile is required. An Adminis- trator must define user profiles with appropriate user roles. See Section 5.4 Managing... - Page 76 • LogOn to access the Sepax main menu. • About for information about the system. • Shutdown to shut down the system. Log in Follow the steps below to log in. Step Action On the start menu, tap LogOn. Sepax C-Pro Operating Instructions 29350570 AE OM-3074...
- Page 77 Tap to continue. Log out To log out from the Sepax C-Pro instrument, tap the logout button from the main menu. The user is logged out and the Sepax start menu is shown. Shut down the instrument Follow the steps below to shut down the instrument.
- Page 78 In the Sepax main menu or Start menu, tap Shutdown. Result: The screen turns black when the shutdown is complete. Once the shutdown is complete, press the power switch to the OFF (O) posi- tion. Sepax C-Pro Operating Instructions 29350570 AE OM-3074...
-
Page 79: Changing Settings
Changing settings Introduction This section provides instructions for changing the settings related to traceability, authentication, and system setup. In this section Section See page 5.3.1 Traceability settings 5.3.2 Authentication settings 5.3.3 System settings Sepax C-Pro Operating Instructions 29350570 AE OM-3074... -
Page 80: Traceability Settings
The table below describes the connectivity status if SepaxNet/Chronicle is selected. Icon Description The connection between the system and SepaxNet/Chronicle is established. There is a connection issue between the system and SepaxNet/Chronicle. Data is being sent to SepaxNet/Chronicle. Sepax C-Pro Operating Instructions 29350570 AE OM-3074... - Page 81 5 Operation GMAP 5.5 5.3 Changing settings 5.3.1 Traceability settings Icon Description There is an issue sending data to SepaxNet/Chronicle. Sepax C-Pro Operating Instructions 29350570 AE OM-3074...
-
Page 82: Authentication Settings
Inactivity timeout has passed. Follow the steps below to set the Inactivity timeout. Step Action From the Sepax main menu, tap Menu →Settings →Authentication setup →Inactivity timeout. Enter a value between 30 and 9999 seconds. Sepax C-Pro Operating Instructions 29350570 AE OM-3074... - Page 83 Follow the steps below to set the Max login attempts. Step Action From the Sepax main menu, tap Menu →Settings →Authentication setup →Max login attempts. Enter a value between 1 and 50. Sepax C-Pro Operating Instructions 29350570 AE OM-3074...
-
Page 84: System Settings
Set the volume level, where 1 is the lowest and 4 is the highest. to save the changes. Change the language Follow the steps below to change the system language. Step Action From the Sepax main menu, tap Menu →Settings →System setup. Tap Language. Sepax C-Pro Operating Instructions 29350570 AE OM-3074... - Page 85 5 Operation GMAP 5.5 5.3 Changing settings 5.3.3 System settings Step Action Select a language. Note: The following languages can be selected: Chinese, English, German, Italian, and Spanish. Sepax C-Pro Operating Instructions 29350570 AE OM-3074...
-
Page 86: Managing Users
Note: The information system stores the First name, Middle name and Last name of a user. Cytiva does not use this information for any other purpose. Use your own discretion when providing information for a user account. It is advised to take both respect for personal privacy and any need for uniquely identifying a user into account. - Page 87 The following user information can be edited: • First name • Middle name • Last name • User role Follow the steps below to edit user information. Step Action From the Sepax main menu, tap Menu →Users. Sepax C-Pro Operating Instructions 29350570 AE OM-3074...
- Page 88 • Creator of user account • Date and time of last login Follow the steps below to view user information: Step Action From the Sepax main menu, tap Menu →Users. Select a user in the list. Sepax C-Pro Operating Instructions 29350570 AE OM-3074...
- Page 89 • The password must start with a letter • The password must contain at least one digit • The password must contain at least one special character • The password must be at least 6 characters long Sepax C-Pro Operating Instructions 29350570 AE OM-3074...
-
Page 90: Managing Applications
It is not possible to uninstall Test Applications and the Purge Mode appli- cation since they are part of the system software. Step Action From the Sepax main menu, tap Menu →Package Manager. Tap Uninstall. Result: A confirmation prompt appears showing application name and version. Sepax C-Pro Operating Instructions 29350570 AE OM-3074... - Page 91 Software repair It is possible to repair the system software, for instance in the case of a corrupted configuration. If the issue persists after software repair, contact Cytiva. Follow the steps below to repair the existing GMAP version. Step Action Insert a USB flash drive into one of the USB ports of the instrument.
-
Page 92: Running A Procedure
5 Operation GMAP 5.5 5.6 Running a procedure Running a procedure In this section Section See page 5.6.1 Overview 5.6.2 Select an application 5.6.3 Edit parameters 5.6.4 Set up traceability IDs Sepax C-Pro Operating Instructions 29350570 AE OM-3074... -
Page 93: Overview
Remove the single-use kit from the instrument. See the application Oper- ator Manual. Disposal of the single-use kit according to the user inter- See the application Oper- nally validated Standard Operating Procedures (SOP) ator Manual. and local regulations. Sepax C-Pro Operating Instructions 29350570 AE OM-3074... -
Page 94: Select An Application
The displayed application groups depend on the applications installed. Select an application. Result: The application menu is shown. Refer to the application Operator Manual for instructions on how to run an application and install a kit. Sepax C-Pro Operating Instructions 29350570 AE OM-3074... -
Page 95: Edit Parameters
See the application Operator Manual for more information about the specific parameters. Edit a parameter Follow the steps below to edit a parameter. Step Action From the application menu, tap Change parameters. Result: The Change parameters menu is displayed. Sepax C-Pro Operating Instructions 29350570 AE OM-3074... - Page 96 Make sure you are logged in as an Administrator user and follow the steps below to set up protect parameters. Step Action On the application menu, tap Protected parameters. Note: Not all applications have protected parameters. Sepax C-Pro Operating Instructions 29350570 AE OM-3074...
- Page 97 Parameter groups are protected parameters. Only Administrator users can enable or disable parameter groups. Follow the steps below to enable or disable parameter groups. Step Action From the application menu, tap Protected Parameters. Sepax C-Pro Operating Instructions 29350570 AE OM-3074...
- Page 98 Enable the parameter groups, as needed. Tap the back arrow to return to application menu. Tap Main Menu. Select the application. Result: The activated parameter groups are displayed. Select the parameter group and edit the parameters. Sepax C-Pro Operating Instructions 29350570 AE OM-3074...
-
Page 99: Set Up Traceability Ids
From the application menu, tap Configure trace ID. In the Configure trace ID menu, tap the IDs to enable or disable them, as shown below. Note: By default, all traceability IDs are enabled. Sepax C-Pro Operating Instructions 29350570 AE OM-3074... - Page 100 Select the desired traceability ID and edit via the on-screen keyboard, or use the barcode reader. Note: After scanning a barcode make sure that the displayed information is correct. Tap Input done, continue when done. Sepax C-Pro Operating Instructions 29350570 AE OM-3074...
-
Page 101: Working With Data Files
Remove the USB flash drive from the instrument. Print data files Report files and configuration reports can be printed if the system is connected to a printer. Sepax C-Pro Operating Instructions 29350570 AE OM-3074... - Page 102 Follow the steps below to delete user data. Step Action From the Sepax main menu, tap Menu →Data. On the Data menu, tap Delete user data. Result: A confirmation prompt appears. to delete the user data. Sepax C-Pro Operating Instructions 29350570 AE OM-3074...
-
Page 103: Working With System Logs
• User deletion • Password changes • Password reset • User name changes • User role changes • User account status Settings • Traceability setup changes (red) • Authentication setup changes • System setup changes Sepax C-Pro Operating Instructions 29350570 AE OM-3074... - Page 104 System logs can be filtered by category, user, and date. Note: A combination of filters can be used, but it is not possible to select several options per filter. Follow the steps below to filter the system logs. Sepax C-Pro Operating Instructions 29350570 AE OM-3074...
- Page 105 Export system logs To export the system logs, take one of the following actions: • From the System logs menu, tap the export button. • From the Data menu, tap Save system logs. Sepax C-Pro Operating Instructions 29350570 AE OM-3074...
-
Page 106: Operation Gmap 6.0
This chapter gives instructions on how to operate the system running GMAP version 6.0. In this chapter Section See page Safety precautions Start-up and shutdown Changing settings Managing users Managing applications Running a procedure Working with data files Working with system logs Sepax C-Pro Operating Instructions 29350570 AE OM-3074... -
Page 107: Safety Precautions
USB port. NOTICE When transferring files from a computer to the USB flash drive supplied with the instrument, scan it with an antivirus prior to inserting it into the instrument. Sepax C-Pro Operating Instructions 29350570 AE OM-3074... -
Page 108: Start-Up And Shutdown
This section gives instructions on how to start-up and shut down the Sepax C-Pro instrument. In order to use the Sepax C-Pro instrument, a user profile is required. An Adminis- trator must define user profiles with appropriate user roles. See Section 6.4 Managing... - Page 109 • Log in to access the Home menu. • About for information about the system. • Shutdown to shut down the system. Log in Follow the steps below to log in. Step Action On the Start menu, tap Log in. Sepax C-Pro Operating Instructions 29350570 AE OM-3074...
- Page 110 If applicable, read the End User License Agreement and tap the check box to confirm that you accept all the terms. Tap OK to continue. Log out Follow the steps below to log out from the Sepax C-Pro instrument: Step Action Tap your user ID at the bottom left of the screen .
- Page 111 On the Home menu or Start menu, tap Shutdown. Result: The screen turns black when the shutdown is complete. Once the shutdown is complete, press the power switch to the OFF (O) posi- tion. Sepax C-Pro Operating Instructions 29350570 AE OM-3074...
-
Page 112: Changing Settings
Changing settings Introduction This section provides instructions for changing the settings related to traceability, authentication, and system setup. In this section Section See page 6.3.1 Traceability settings 6.3.2 Authentication settings 6.3.3 System settings Sepax C-Pro Operating Instructions 29350570 AE OM-3074... -
Page 113: Traceability Settings
The table below describes the connectivity status if Chronicle is selected. Icon Description The connection between the system and Chronicle is estab- lished. There is a connection issue between the system and Chronicle. Data is being sent to Chronicle. Sepax C-Pro Operating Instructions 29350570 AE OM-3074... - Page 114 6 Operation GMAP 6.0 6.3 Changing settings 6.3.1 Traceability settings Icon Description There is an issue sending data to Chronicle. Sepax C-Pro Operating Instructions 29350570 AE OM-3074...
-
Page 115: Authentication Settings
Enter a value between 30 and 9999 seconds. Tap Save. Max login attempts The Max login attempts option determines the maximum number of attempts for the login of a user after which the user account is suspended. Sepax C-Pro Operating Instructions 29350570 AE OM-3074... - Page 116 6.3.2 Authentication settings Follow the steps below to set the Max login attempts. Step Action From the Home menu, tap Menu →Settings →Authentication →Max login attempts. Enter a value between 1 and 50. Tap Save. Sepax C-Pro Operating Instructions 29350570 AE OM-3074...
-
Page 117: System Settings
Follow the steps below to change the system language. Step Action From the Home menu, tap Menu →Settings →System. Tap Language. Select a language. Note: The following languages can be selected: Chinese, English, German, Italian, and Spanish. Sepax C-Pro Operating Instructions 29350570 AE OM-3074... -
Page 118: Managing Users
Note: The information system stores the First name, Middle name and Last name of a user. Cytiva does not use this information for any other purpose. Use your own discretion when providing information for a user account. It is advised to take both respect for personal privacy and any need for uniquely identifying a user into account. - Page 119 Tap Save when ready. Delete user accounts Note: It is not possible to delete all Administrator accounts. One Administrator account must always exist. Follow the steps below to delete user accounts. Sepax C-Pro Operating Instructions 29350570 AE OM-3074...
- Page 120 Follow the steps below to reset a user´s password. Step Action From the Home menu, tap Menu →Users. Select a user from the list and tap Edit. Tap Reset Password. Result: A new temporary password is displayed. Sepax C-Pro Operating Instructions 29350570 AE OM-3074...
- Page 121 • The password must contain at least one digit • The password must contain at least one special character • The password must be at least 6 characters long • The password is not case-sensitive. Sepax C-Pro Operating Instructions 29350570 AE OM-3074...
-
Page 122: Managing Applications
Step Action From the Home menu, tap Menu →Package manager. Select the application of choice and tap Uninstall. Result: A confirmation prompt appears showing the application name and version. Sepax C-Pro Operating Instructions 29350570 AE OM-3074... - Page 123 Tap OK to uninstall the application. Software repair It is possible to repair the system software, for instance in the case of a corrupted configuration. If the issue persists after software repair, contact Cytiva. Follow the steps below to repair the existing GMAP version. Step Action Insert a USB flash drive into one of the USB ports of the instrument.
-
Page 124: Running A Procedure
6 Operation GMAP 6.0 6.6 Running a procedure Running a procedure In this section Section See page 6.6.1 Overview 6.6.2 Select an application 6.6.3 Edit parameters 6.6.4 Set up traceability IDs Sepax C-Pro Operating Instructions 29350570 AE OM-3074... -
Page 125: Overview
Remove the single-use kit from the instrument. See the application Oper- ator Manual. Disposal of the single-use kit according to the user inter- See the application Oper- nally validated Standard Operating Procedures (SOP) ator Manual. and local regulations. Sepax C-Pro Operating Instructions 29350570 AE OM-3074... -
Page 126: Select An Application
Follow the steps below to select an application. Step Action On the Home menu tap Applications Result: The Applications menu appears. Select an application. Refer to the application Operator Manual for instruc- tions. Sepax C-Pro Operating Instructions 29350570 AE OM-3074... -
Page 127: Edit Parameters
See the application Operator Manual for more information about the specific parameters. Edit a parameter Follow the steps below to modify the value of a parameter. Step Action On the application menu, tap Change parameters. Result: The Change parameters menu is displayed. Sepax C-Pro Operating Instructions 29350570 AE OM-3074... - Page 128 Note: An Administrator can enable or disable individual parameter. Set up protected parameters Make sure you are logged in as an Administrator user and follow the steps below to set up protect parameters. Sepax C-Pro Operating Instructions 29350570 AE OM-3074...
- Page 129 Enable the parameter you want to make visible and editable. Note: By default, the parameters in the Protected parameters menu are protected and set to the default value. Note: The value of each parameter is shown below the name of the parameter Sepax C-Pro Operating Instructions 29350570 AE OM-3074...
- Page 130 Enable the parameter groups, as needed. Tap the back arrow to return to application menu. Tap Home. Select the application. Result: The activated parameter groups are displayed. Select the parameter group and edit the parameters. Sepax C-Pro Operating Instructions 29350570 AE OM-3074...
-
Page 131: Set Up Traceability Ids
Configure traceability ID Follow the steps below to configure traceability ID. Step Action On the application menu, tap Configure trace ID. Result: The Configure trace ID menu is displayed. Sepax C-Pro Operating Instructions 29350570 AE OM-3074... - Page 132 You can only edit a traceability ID if it has been enabled in the Configure trace ID menu. Follow the steps below to edit a traceability ID value at the beginning of a procedure. Step Action On the application menu, tap Start procedure. Sepax C-Pro Operating Instructions 29350570 AE OM-3074...
- Page 133 Edit the ID using the on-screen keyboard or the barcode reader and tap Save. Note: After scanning a barcode make sure that the displayed information is correct. Tap Validate and continue when done. Sepax C-Pro Operating Instructions 29350570 AE OM-3074...
-
Page 134: Working With Data Files
For other file types, a screen containing a list of files appears. To preview a report file, select the file and tap Preview. To save files, select a specific file, multiple files, or tap Select all to select all available files, and tap Save. Sepax C-Pro Operating Instructions 29350570 AE OM-3074... - Page 135 Action From the Home menu, tap Menu →Data. Tap Delete user data. Result: A confirmation prompt appears. • Tap OK to delete user data • Tap Cancel to return to the Data menu. Sepax C-Pro Operating Instructions 29350570 AE OM-3074...
-
Page 136: Working With System Logs
• User account status Settings • Traceability setup changes (red) • Authentication setup changes • System setup changes File Creation • Logfile creation (turquoise blue) • Summary file creation • Report file creation Sepax C-Pro Operating Instructions 29350570 AE OM-3074... - Page 137 System logs can be filtered by category, user, and date. Note: A combination of filters can be used, but it is not possible to select several options per filter. Follow the steps below to filter the system logs. Sepax C-Pro Operating Instructions 29350570 AE OM-3074...
- Page 138 Yesterday is selected, the log entries from yesterday and today are shown. To reset the filters, tap Export system logs To export the system logs, tap the export button from the System logs menu. Sepax C-Pro Operating Instructions 29350570 AE OM-3074...
-
Page 139: Maintenance
7 Maintenance Maintenance About this chapter This chapter provides instructions for cleaning the Sepax C-Pro instrument. In this chapter Section See page Safety precautions Cleaning Cleaning before planned maintenance/service Sepax C-Pro Operating Instructions 29350570 AE OM-3074... -
Page 140: Safety Precautions
Do not spray or pour liquids or cleaning agents directly onto any part of the system. NOTICE Do not use acetone, corrosive agents, solvents, or strong deter- gents to clean the product. These can cause damage to the system and cause it to malfunction. Sepax C-Pro Operating Instructions 29350570 AE OM-3074... -
Page 141: Cleaning
7 Maintenance 7.2 Cleaning Cleaning Introduction Sepax C-Pro requires minimal maintenance. Service the instrument once per year at a minimum. Contact your local authorized representative for more information about service contracts. Clean the instrument on a regular basis: • weekly, or •... - Page 142 Let the cleaned surfaces dry completely before using the instrument. Follow your internally validated SOP to discard any waste. Cleaning peripherals Clean printers, barcode readers, USB, USB WiFi keys, and associated power cables with an anti-static cloth. Sepax C-Pro Operating Instructions 29350570 AE OM-3074...
-
Page 143: Cleaning Before Planned Maintenance/Service
Complete the checklist in the On Site Service Health and Safety Declaration Form or the Health and Safety Declaration Form for Product Return or Servicing, depending on whether the instrument is going to be serviced on site or returned for service, respec- tively. Sepax C-Pro Operating Instructions 29350570 AE OM-3074... -
Page 144: Troubleshooting
8 Troubleshooting Troubleshooting In this chapter Section See page Overview Warning and error messages Sepax C-Pro Operating Instructions 29350570 AE OM-3074... -
Page 145: Overview
Retrieving and submitting files for support The support files and logfiles record data that allow Cytiva representatives to diagnose malfunctions or low performance procedures. If an incident occurs during a procedure, submit the relevant files with a description of the problem you encountered. -
Page 146: Warning And Error Messages
4. Stop using the instru- ment and contact Cytiva. 10103 Centrifuge opened Centrifuge covers were 1. Close all the clamps. opened during centrifu- 2. Follow instructions gation. on screen. 3. Resume procedure Sepax C-Pro Operating Instructions 29350570 AE OM-3074... - Page 147 Pressure startup error The line pressure is incor- 1. Remove the air filter rect at start-up. (if installed) and vali- date the error message. 2. If error message persists, shut down and restart the instrument. Sepax C-Pro Operating Instructions 29350570 AE OM-3074...
- Page 148 Chamber overpres- The pressure under the 1. Close all clamps. sure piston is too high. 2. Follow instructions on the screen. 3. Resume procedure 4. If error persists, save the kit and contact Cytiva. Sepax C-Pro Operating Instructions 29350570 AE OM-3074...
- Page 149 3. Open the centrifuge covers. 4. Verify that the sepa- ration chamber is well inserted into the centrifuge pit. 5. Close the centrifuge covers. 6. Resume the proce- dure 7. If the error persists, contact Cytiva. Sepax C-Pro Operating Instructions 29350570 AE OM-3074...
- Page 150 1. Verify that the rear ture fan is neither obstructed nor stopped. 2. Switch OFF the instrument. 3. Wait 30 minutes to let the instrument cool down before starting a new run. 4. Verify air circulation. Sepax C-Pro Operating Instructions 29350570 AE OM-3074...
- Page 151 1. Follow the on-screen heating. instructions. 2. Wait 30 minutes before restarting the procedure. Make sure product is stored properly during this time. 3. If available, you can alternatively use another instrument to resume proce- dure Sepax C-Pro Operating Instructions 29350570 AE OM-3074...
- Page 152 Media access error The USB flash drive is not 1. Remove USB flash inserted correctly. drive and insert it again correctly. 2. Wait around 30 seconds before trying to save the data again. Sepax C-Pro Operating Instructions 29350570 AE OM-3074...
- Page 153 2. Make sure there are no clots in the product or kinks on the lines. 3. Close all clamps. 4. Resume the proce- dure Sepax C-Pro Operating Instructions 29350570 AE OM-3074...
- Page 154 1. Verify the parameters are correctly set in the application. 2. Make sure the tube is well inserted in the optical line sensor. 3. Restart the proce- dure. Sepax C-Pro Operating Instructions 29350570 AE OM-3074...
- Page 155 Server not responding The instrument can Wait a few seconds. The temporarily not connect message will disappear to the server of the and the instrument network or internal starts normally. acquisition board. Sepax C-Pro Operating Instructions 29350570 AE OM-3074...
- Page 156 30 minutes before starting a new run. Verify air circu- lation. Follow the recovery scenario for the relevant application. See the application Operator Manual for more details. Sepax C-Pro Operating Instructions 29350570 AE OM-3074...
-
Page 157: Reference Information
9 Reference information Reference information In this chapter Section See page Get Help Specifications Recycling information Regulatory information Health and Safety Declaration Form Sepax C-Pro Operating Instructions 29350570 AE OM-3074... -
Page 158: Get Help
9.1 Get Help Get Help Introduction You can submit your case online by creating an account on the Cytiva Web Portal at cytiva.com. To directly report the event, click on My Account and select Support Cases. The following sections list the information that should be always reported in case of any event. -
Page 159: Specifications
Power consumption 200 VA Fuse 2x T2A H 250 V Maximum voltage fluctuation ± 10% from the nominal voltage Transient overvoltages Overvoltage category II Noise levels Specification Parameter Noise 70 dB (A) or lower Sepax C-Pro Operating Instructions 29350570 AE OM-3074... - Page 160 Max speed 8000 rpm Speed range 1700 to 8000 rpm Overspeed protection 8800 rpm Environmental conditions Operate, store, and transport the Sepax C-Pro within the following conditions: Specification Parameter Allowed location Indoor use only Temperature (operation) +15°C to +27°C Temperature (storage and transport) 0°C to +50°C...
-
Page 161: Recycling Information
Disposal of the processing kit After a procedure, follow your internally validated standard operating procedures to dispose of remaining parts of the processing kit. Observe all applicable national and local environmental requirements. Sepax C-Pro Operating Instructions 29350570 AE OM-3074... -
Page 162: Regulatory Information
Contact information 9.4.2 Regulatory support 9.4.3 European Union and European Economic Area 9.4.4 Great Britain 9.4.5 Eurasian Economic Union (Евразийский экономический союз) 9.4.6 North America 9.4.7 Regulatory statements 9.4.8 Declaration of Hazardous Substances (DoHS) Sepax C-Pro Operating Instructions 29350570 AE OM-3074... -
Page 163: Contact Information
The table below summarizes the required manufacturing information. Requirement Information Name and address of the legal manu- Biosafe S.A. facturer Route du Petit-Eysins 1 1262 Eysins Switzerland Telephone number of the legal manu- + 41 22 365 27 27 facturer Sepax C-Pro Operating Instructions 29350570 AE OM-3074... -
Page 164: Regulatory Support
Cytiva Regulatory support portal. The Regulatory support portal provides access to, for example, the following docu- ments: • Change Control Notifications • Regulatory Support Files • Validation Guides • Validation Support Files • Extractables Information Sepax C-Pro Operating Instructions 29350570 AE OM-3074... -
Page 165: European Union And European Economic Area
• used according to the Operating Instructions or user manuals, and • used in the same state as it was delivered, except for alterations described in the Operating Instructions or user manuals. Sepax C-Pro Operating Instructions 29350570 AE OM-3074... -
Page 166: Great Britain
• used according to the Operating Instructions or user manuals, and • used in the same state as it was delivered, except for alterations described in the Operating Instructions or user manuals. Sepax C-Pro Operating Instructions 29350570 AE OM-3074... -
Page 167: Eurasian Economic Union (Евразийский Экономический Союз)
Telephone: +7 985 192 75 37 E-mail: rucis@cytiva.com Информация о производителе и импортере В следующей таблице приводится сводная информация о производителе и импортере, согласно требованиям Технических регламентов Таможенного союза и (или) Евразийского экономического союза. Sepax C-Pro Operating Instructions 29350570 AE OM-3074... - Page 168 Member States of the Customs Union of the Eurasian Economic Union Данный знак о Евразийском соответствии указывает, что изделие одобрено для использования на рынках государств-членов Таможенного союза Евразийского экономического союза Sepax C-Pro Operating Instructions 29350570 AE OM-3074...
-
Page 169: North America
Note: The user is cautioned that any changes or modifications not expressly approved by Cytiva could void the user’s authority to operate the equip- ment. This equipment has been tested and found to comply with the limits for a Class A digital device, pursuant to part 15 of the FCC Rules. -
Page 170: Regulatory Statements
When used in a residential environment, there is a concern of radio interference. 유의사항 A급 기기 (업무용 방송통신 기자재) 이 기기는 업무용환경에서 사용할 목적으로 적합성평가를 받 은 기기 로서 가정용 환경에서 사용하는 경우 전파간섭의 우려가 있습 니다. Sepax C-Pro Operating Instructions 29350570 AE OM-3074... -
Page 171: Declaration Of Hazardous Substances (Dohs)
EFUP shall be done in accordance with the Product Maintenance Procedures. This product must not be disposed of as unsorted municipal waste, and must be collected separately and handled properly after decommissioning. Sepax C-Pro Operating Instructions 29350570 AE OM-3074... - Page 172 Indicates that this hazardous substance contained in at least one of the homogeneous materials used for this part is above the limit requirement in GB/T 26572 • Data listed in the table represents best information available at the time of publication. Sepax C-Pro Operating Instructions 29350570 AE OM-3074...
-
Page 173: Health And Safety Declaration Form
Service Ticket #: To make the mutual protection and safety of Cytiva service personnel and our customers, all equipment and work areas must be clean and free of any hazardous contaminants before a Service Engineer starts a repair. To avoid delays in the servicing of your equipment, complete this checklist and present it to the Service Engineer upon arrival. - Page 174 To make sure the mutual protection and safety of Cytiva personnel, our customers, transportation personnel and our environment, all equipment must be clean and free of any hazardous contaminants before shipping to Cytiva. To avoid delays in the processing of your equipment, complete this checklist and include it with your return.
- Page 175 Page intentionally left blank...
- Page 176 Cytiva and the Drop logo are trademarks of Life Sciences IP Holdings Corp. or an affiliate doing business as Cytiva. Chronicle and Sepax are trademarks of Global Life Sciences Solutions USA LLC or an affiliate doing business as Cytiva.
Need help?
Do you have a question about the Sepax C-Pro and is the answer not in the manual?
Questions and answers