Table of Contents
Advertisement
Advertisement
Table of Contents

Related Manuals for cytiva BPG Columns


Summary of Contents for cytiva BPG Columns
- Page 1 BPG Columns Operating Instructions Original instructions cytiva.com...
-
Page 2: Table Of Contents
Replacements in the adapter ........................81 6.2.2 Replacements in the column ........................87 Replacement sealing washer ........................98 Fitting a packing extension tube ......................99 Disassemble and assemble the adapter ....................101 Leakage test ..............................113 Cleaning ................................115 BPG Columns Operating Instructions 29193223 AB... - Page 3 Abbreviations ..............................135 Recycling information ..........................136 Regulatory information ..........................137 8.5.1 Contact information ............................ 138 8.5.2 European Union and European Economic Area ................139 Health and Safety Declaration Form ...................... 140 Index ........................... 142 BPG Columns Operating Instructions 29193223 AB...
-
Page 4: Introduction
1 Introduction Introduction About this chapter This chapter contains important user information, descriptions of safety notices, and the intended use of BPG columns. In this chapter Section See page About this manual Important user information BPG Columns Operating Instructions 29193223 AB... -
Page 5: About This Manual
Specific configuration information can be found in the product documenta- tion provided with each column and on the column label. Detailed information regarding process systems, media and buffer tanks is not covered in this document. BPG Columns Operating Instructions 29193223 AB... -
Page 6: Important User Information
BioProcess media in ion exchange, hydrophobic interaction, affinity and gel filtration chromatography. BPG columns are intended for production use only and should not be used for diag- nostic purposes in any clinical or in vitro procedures. - Page 7 Notes and tips Note: A note is used to indicate information that is important for trouble-free and optimal use of the product. Tip: A tip contains useful information that can improve or optimize your proce- dures. BPG Columns Operating Instructions 29193223 AB...
-
Page 8: Safety Instructions
Before installing, operating or maintaining the product, all users must read and understand the entire contents of this chapter to become aware of the hazards involved. In this chapter Section See page Safety precautions Symbols and abbreviations Emergency procedures BPG Columns Operating Instructions 29193223 AB... -
Page 9: Safety Precautions
Do not use any accessories not supplied or recommended by Cytiva. WARNING Pressure may remain in the column and tubing for an extended period after shutdown. Make sure the system is depressurized before opening or disconnecting. BPG Columns Operating Instructions 29193223 AB... - Page 10 MUST be properly grounded to avoid static discharge. WARNING EXPLOSION HAZARD! When connecting the grounding cable, make sure that there is no explosive atmosphere present. Static electricity discharge could occur when connecting the grounding cable. BPG Columns Operating Instructions 29193223 AB...
- Page 11 Even if the safety instructions in the user documentation are followed, it is the customers' responsibility to guarantee the safety of the personnel working with BPG columns. WARNING Move transport crates. Make sure that the lifting equipment has the capacity to safely lift the crate weight.
- Page 12 The working pressure of the column should never exceed its design pressure, otherwise there is a risk of personal injury and damage to the column. Always use appropriate safety equipment, for example pressure relief valve or rupture discs. BPG Columns Operating Instructions 29193223 AB...
- Page 13 For continued protection against injury risks due to fluid jets, burst pipes or explosive atmosphere, the piping system must be tested for leakage at maximum pressure when the following situations apply: • After assembly or maintenance • Before operation or Cleaning-In-Place (CIP) BPG Columns Operating Instructions 29193223 AB...
- Page 14 After assembly, check that the column is tight and not leaking. CAUTION Removing the top plate and adapter often causes spillages and splashing. Remove any spillage on the floor immediately to mini- mize the risk for slipping accidents. BPG Columns Operating Instructions 29193223 AB...
-
Page 15: Symbols And Abbreviations
Pressure Equipment Directive fluid group and category classification. Warning! Read the user documentation before using the system. The equipment complies with applicable European direc- tives. Applicable to BPG 200/950, 300/500, 300/750, 300/950, 450/500, 450/750 and 450/1000. BPG Columns Operating Instructions 29193223 AB... - Page 16 2 Safety instructions 2.2 Symbols and abbreviations Placement of system label The system label is placed on the flange on the column. BPG Columns Operating Instructions 29193223 AB...
-
Page 17: Emergency Procedures
Make sure the system is depressurized before opening or disconnecting. Emergency shutdown The operation of BPG columns is controlled by the equipment that is connected to the column. All operations are therefore stopped by stopping the operation of the connected equipment. -
Page 18: Column Descriptions
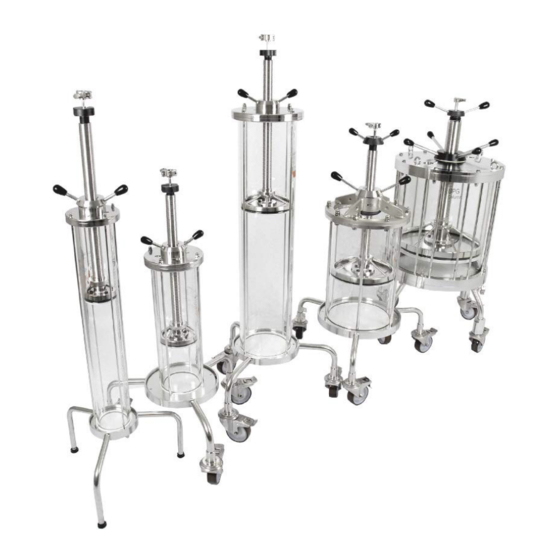
3 Column descriptions Column descriptions About this chapter This chapter contains a general description of BPG columns and illustrations of the BPG models. In this chapter Section See page Overview BPG 100, 140 and 200 columns BPG 300 column BPG 450 column... -
Page 19: Overview
For detailed specifications of the BPG columns, refer to Column specifications, on page 125. All BPG columns are equipped with wheels with brakes, except the BPG 100 column, for which wheel with brakes are an option. BPG Columns Operating Instructions 29193223 AB... - Page 20 Recommended net sizes, on page Connections BPG columns can be connected to different types of tubing and systems. To protect the packed bed it is advisable to have isolation valves on both the inlets and outlets of the column. BPG Columns Operating Instructions 29193223 AB...
- Page 21 Implement the risk reduction measures needed, including use of personal protective equipment. If potentially explosive liquids will be used with BPG columns consult local authorities regarding local rules and regulations before installing or operating.
-
Page 22: Bpg 100, 140 And 200 Columns
3 Column descriptions 3.2 BPG 100, 140 and 200 columns BPG 100, 140 and 200 columns BPG parts The image below shows the parts in BPG column 100, 140 or 200. BPG Columns Operating Instructions 29193223 AB... - Page 23 Part Description Seal adjuster knob Adapter tube, outer Adapter height adjuster Domed nut Adapter top plate Flange Column glass tube Support rod Adapter plate O-ring adapter Net (adapter) O-ring bottom Net (column) End-piece Stand BPG Columns Operating Instructions 29193223 AB...
- Page 24 3 Column descriptions 3.2 BPG 100, 140 and 200 columns Column and adapter Part Description Column Adapter BPG Columns Operating Instructions 29193223 AB...
-
Page 25: Bpg 300 Column
3 Column descriptions 3.3 BPG 300 column BPG 300 column BPG parts The image below shows the parts in BPG 300 column. BPG Columns Operating Instructions 29193223 AB... - Page 26 Seal adjuster knob Adapter tube, outer Adapter height adjuster Lifting grip Domed nut Adapter top plate Flange Column glass tube Support rod Adapter plate O-ring adapter Net (adapter) O-ring bottom Net (column) End-piece Stand BPG Columns Operating Instructions 29193223 AB...
- Page 27 3 Column descriptions 3.3 BPG 300 column Column and adapter Part Description Column Adapter BPG Columns Operating Instructions 29193223 AB...
-
Page 28: Bpg 450 Column
3 Column descriptions 3.4 BPG 450 column BPG 450 column BPG parts The image below shows the parts in BPG 450 column . Part Description Seal adjuster knob Adapter tube, outer Adapter height adjuster BPG Columns Operating Instructions 29193223 AB... - Page 29 3 Column descriptions 3.4 BPG 450 column Part Description Eyebolt Adapter top plate Flange Column glass tube Support rod Adapter plate O-ring adapter Net (adapter) O-ring bottom Net (column) End-piece Stand BPG Columns Operating Instructions 29193223 AB...
- Page 30 3 Column descriptions 3.4 BPG 450 column Column and adapter Part Description Column Adapter BPG Columns Operating Instructions 29193223 AB...
-
Page 31: Accessories
Accessories Packing extension tube Packing extension tubes are available for all BPG columns. The packing tubes are made of glass for BPG 100 to 300, and of stainless steel for BPG 450. The illustration below shows two examples of extension tubes. - Page 32 (earthed). For this purpose, a suitable grounding kit is available as an accessory and a grounding connection terminal is provided. The equipment must be grounded when it is to be used in a potentially explosive atmosphere. BPG Columns Operating Instructions 29193223 AB...
-
Page 33: Installation
4 Installation Installation About this chapter This chapter contains information about BPG installation, site requirements, unpacking, transport and how to set up the BPG columns for use. In this chapter Section See page Site requirements Transport Unpacking How to level the column... -
Page 34: Site Requirements
Equipment requirements When transporting and maneuvering BPG columns and adapters the following equip- ment is recommended: • Suitable lifting equipment (crane or hoist) for the larger BPG columns, see Moving the adapter BPG 300 and BPG 450, on page • Lifting eyebolts. -
Page 35: Transport
Check the delivery On receipt of the crate check to see if there is any apparent damage to the crate and the equipment. When unpacking BPG columns check that all equipment is enclosed in the transport crate according to the packing list. -
Page 36: Unpacking
4.3 Unpacking Unpacking Tools required for crate unpacking The following tools are recommended when removing larger BPG columns from the transport crate: • Suitable lifting equipment, such as a crane or hoist • Round slings or lifting chains with the capacity to safely lift the weight of the column •... - Page 37 Before beginning to prepare the column for operation it is recommended that any surface residues acquired during transport or removal of the column from the packing crate are removed using warm water and/or 20% ethanol. BPG Columns Operating Instructions 29193223 AB...
-
Page 38: How To Level The Column
NOTICE Make sure that the column is located on a level even surface. Lock the wheels of BPG columns After positioning the column in its operational location, lock the wheels as illustrated below. BPG Columns Operating Instructions 29193223 AB... - Page 39 • If the column must be lowered, turn the column leg level adjustor counter-clock- wise. Check if the column is level after adjusting each leg. Adjust the column legs in turn until the column is level. BPG Columns Operating Instructions 29193223 AB...
-
Page 40: Grounding Kit
To ground the column, connect one end of the grounding cable to an earth terminal in the plant grounding network and the other end to the ground terminal located on the column stand. The column ground terminal has an M6 thread. BPG Columns Operating Instructions 29193223 AB... - Page 41 4 Installation 4.5 Grounding kit Illustration A grounding kit is available as an accessory for BPG columns and a grounding connec- tion terminal is provided on the column stand as shown below. Part Function Grounding terminal/cable on BPG 100, 140, 200 and 450 columns.
-
Page 42: Setup
The bottom outlet should be above the top of the column to elimi- nate any chance of a siphon. NOTICE A pressure relief valve or rupture disc shall be connected between the pump and column inlet. BPG Columns Operating Instructions 29193223 AB... - Page 43 • The bottom valve is equipped with tubing on a port perpendicular to the column outlet that will be directing flow to waste, or recycling water back to the tank. Flow Description From pump Pressure gauge 4-port, 4-way valve Drain 4-port, 2-way valve Drain Return BPG Columns Operating Instructions 29193223 AB...
- Page 44 4 Installation 4.6 Setup Four-port valve positions Flow Valve position Description A to C Mobile phase from pump to waste A to B Mobile phase to column B to C Column to waste BPG Columns Operating Instructions 29193223 AB...
-
Page 45: Operation
Operation About this chapter BPG columns can be used to perform a number of different chromatographic purifica- tions, depending on the chromatography media and specific methods selected for use. This chapter provides general instructions on how to prepare and operate BPG columns. - Page 46 NOTICE Use a harmless fluid in the beginning of the process. This will make it possible to detect leakage with minimized consequences and the risk for potential leakage of hazardous fluids is avoided. BPG Columns Operating Instructions 29193223 AB...
-
Page 47: Preparation
5 Operation 5.1 Preparation Preparation About this section This section contains information how to prepare the BPG columns before column packing. Information and support related to optimal column packing can be obtained from your Cytiva representative. In this section Section See page 5.1.1... - Page 48 If a packing extension tube is used it will either remain in place for very long bed heights, or be removed during the packing procedure when the media is below the top of the column tube. BPG Columns Operating Instructions 29193223 AB...
-
Page 49: Column Flow Packing Method
2. In the second step, the flow rate is increased to a predetermined optimal value to obtain the desired packing density. When flow is stopped, the proximity of the adapter to the bed minimizes the time necessary to successfully reposition the adapter to stabilize the packed bed. BPG Columns Operating Instructions 29193223 AB... -
Page 50: Slurry Preparation
Compression Factor CF = (gravity settled bed height)/(packed bed height) Compression factor should read for most Cytiva media, between 1.10 and 1.15. Amount of media and slurry volume The amount of media required for packing the column can be calculated using the following formula: A = (π... - Page 51 Amount of media per cm of packed bed (g) media per factor liter of (PF) packed column Sephadex G-25 1.15 l 22.6 43.9 90.3 202.4 C and M grades Sephadex G-25 1.15 l 22.6 43.9 90.3 202.4 grade SF BPG Columns Operating Instructions 29193223 AB...
- Page 52 Follow the instructions below to mix the slurry for column packing: Step Action Make sure that the slurry is homogeneous. Pour the slurry into a suitable container for pouring into the column. Check the slurry concentration. BPG Columns Operating Instructions 29193223 AB...
-
Page 53: Column Packing
5 Operation 5.2 Column packing Column packing About this section This sections describes the steps that must be taken in order to pack the BPG columns. In this section Section See page 5.2.1 Preparing the column 5.2.2 Preparing the adapter 5.2.3... -
Page 54: Preparing The Column
Section 4.5 Grounding kit, on page Wet the column net with 20% ethanol and pour 2 to 3 cm of packing buffer into the column with the bottom valve closed and the outlet to drain. BPG Columns Operating Instructions 29193223 AB... - Page 55 Connect a pipe to a pump, or a vacuum line, and lower the pipe down onto the surface of the bottom net. Start the suction to remove any remaining air from under or on the surface of the bottom net. BPG Columns Operating Instructions 29193223 AB...
- Page 56 5 Operation 5.2 Column packing 5.2.1 Preparing the column Step Action Continue until there is only 1 cm of buffer in the column. Result: The column tube is now ready for packing. BPG Columns Operating Instructions 29193223 AB...
-
Page 57: Preparing The Adapter
Position the valve from pump to waste (A to C) to purge air and start the pump. Stop the pump once all air is removed. Position the valve from adapter to waste (B to C). BPG Columns Operating Instructions 29193223 AB... - Page 58 Carefully pour the homogenous slurry into the column. Make sure that no air bubbles are trapped within the slurry and the bottom outlet is higher than the column. Measure the height (H) from the top of the column to the surface of the slurry. H cm BPG Columns Operating Instructions 29193223 AB...
- Page 59 Insert the adapter in the column just above the slurry level in the column with the seal fully relaxed. H - (0.5 - 1.0) cm WARNING Pay extra attention when fitting the adapter to the column as there is a risk of crushing your hands. BPG Columns Operating Instructions 29193223 AB...
- Page 60 Secure the column adapter in place. Seal the adapter O-ring by turning the seal adjuster knob or handle on the top of the adapter, clockwise. Wait until a small clear zone is visible above the slurry. BPG Columns Operating Instructions 29193223 AB...
- Page 61 Move the height adjuster handle clockwise to position the adapter 0.1 to 0.5 cm below the top surface of the liquid. Result: Air, and then liquid, is pushed up through the adapter and out to waste as the adapter is pushed downwards. BPG Columns Operating Instructions 29193223 AB...
-
Page 62: Packing The Column - First Step
The user should proceed immediately to the second packing step. First step Step Action Remove any air in the hoses by positioning the valve from system to waste (A to C) and start the pump. BPG Columns Operating Instructions 29193223 AB... - Page 63 Check the packing flow rate and adjust as necessary. Stop the pump when the bed has settled, normally one to two column volumes. BPG Columns Operating Instructions 29193223 AB...
- Page 64 Close the bottom valve when the pressure in the column has returned to zero and set the top valve to waste (B to C). Loosen the adapter O-ring seal by turning the adjuster knob, or the seal adjuster handle, on the top of the column counter-clockwise. BPG Columns Operating Instructions 29193223 AB...
- Page 65 0.5 - 1.0 cm Seal the adapter O-ring by turning the knob, or seal adjuster handle, clock- wise and lower the adapter to 0.1 or 0.2 cm above the bed. 0.1 - 0.2 cm BPG Columns Operating Instructions 29193223 AB...
- Page 66 5 Operation 5.2 Column packing 5.2.3 Packing the column - first step Step Action Result: The buffer is passing out the top valve to waste (B to C). Close the top valve. BPG Columns Operating Instructions 29193223 AB...
-
Page 67: Packing The Column - Second Step
Open the bottom valve and put the top valve from pump to column (A to B) and start the pump. This will move the bed down and once stabilized the level should be marked on the tube. Stop the pump. BPG Columns Operating Instructions 29193223 AB... - Page 68 Close the top valve and the bottom valve. Result: The column is now packed. Test the packed column, see Section 5.3 Performance evaluation of the column, on page BPG Columns Operating Instructions 29193223 AB...
- Page 69 5.2.4 Packing the column - second step Remove buffer from adapter The design of BPG columns allows buffer to be on top of the adapter while packing. When packing is completed and the O-ring is sealed it is essential that all buffer (espe- cially salt) is removed from that space to avoid corrosion over time.
-
Page 70: Storage And Unpacking Of Packed Columns
Raise and remove the adapter. If the packed bed is difficult to reslurry, pumping buffer up through the bottom valve will help to lift and disperse the media more rapidly and clear the bottom net. BPG Columns Operating Instructions 29193223 AB... -
Page 71: Pressure Flow Curve
The figure below shows the pressure flow curve. 100% The description of the axis are: x = Pressure y = Flow rate The characters in the table are described below: Value Meaning Packing flow rate Packing pressure Max pressure BPG Columns Operating Instructions 29193223 AB... -
Page 72: Performance Evaluation Of The Column
A packed column can look good, but still need repacking for optimal perform- ance. Always check the column after packing and regularly between runs to ensure best column performance. Follow the specific instructions for the packed media to optimize the testing protocol. BPG Columns Operating Instructions 29193223 AB... - Page 73 HETP = L/N N=5.54 (V Variable Meaning Bed height Number of theoretical plates Elution volume Peak width at half peak height and W are in the same units BPG Columns Operating Instructions 29193223 AB...
- Page 74 The asymmetry factor A describes the deviation from an ideal Gaussian peak shape and is calculated from the peak width at 10% of peak height. = b/a BPG Columns Operating Instructions 29193223 AB...
-
Page 75: Maintenance
Make sure the system is depressurized before opening or disconnecting. WARNING Decontaminate before maintenance. To avoid personnel being exposed to potentially hazardous substances, make sure that the column is properly decontaminated and sanitized before mainte- nance or service. BPG Columns Operating Instructions 29193223 AB... - Page 76 The adapters on BPG 300 and 450 columns are heavy. For safety reasons, it is recom- mended that the adapter is lifted with an adapter handling unit or ceiling hoist connected to the eyebolts on the adapter top plate. BPG Columns Operating Instructions 29193223 AB...
-
Page 77: Service And Preventive Maintenance
A general recommendation is one service and preventive maintenance visit every two years, but if columns are in continuous operation an annual visit is recommended. Contact your local Cytiva representative for information about frequency of service requirements to suit individual application needs. - Page 78 Passivation procedure It is recommended to include a passivation procedure into a service and preventive maintenance program. Contact your Cytiva representative for additional information. BPG Columns Operating Instructions 29193223 AB...
-
Page 79: Replacements Of Nets And O-Rings
Worn O-rings may not seal properly. Tip: Cytiva recommends that column O-rings and seals are changed at least once each year. It may be necessary to change O-rings and seals exposed to some form of movement in the column more frequently, for example the O- rings on the adapter. - Page 80 The following tools are recommended when replacing nets and O-rings on the BPG columns. Illustration Part Hex keys Spanners Torque wrenches for hexagonal socket fittings and torque settings of 4, 5, 6, 6.5, 8 Nm 12-point opening sockets Screwdrivers BPG Columns Operating Instructions 29193223 AB...
-
Page 81: Replacements In The Adapter
6.2 Replacements of nets and O-rings 6.2.1 Replacements in the adapter 6.2.1 Replacements in the adapter Adapter items Order Part Description BPG 100 - Top- 140 - 200 Down Adapter plate O-ring Distribution plate Snap plug Support net BPG Columns Operating Instructions 29193223 AB... - Page 82 20% ethanol solution. Do NOT grease the O- ring. Remove the domed nuts and washers from the adapter top plate with help of a spanner. Loosen the screws cross-wise according to the illustration below. BPG Columns Operating Instructions 29193223 AB...
- Page 83 Remove any spillage on the floor immediately to minimize the risk for slipping accidents. Loosen the adapter top plate and lift out the adapter. Remove the adapter without letting the stainless steel touch the glass. BPG Columns Operating Instructions 29193223 AB...
- Page 84 6 Maintenance 6.2 Replacements of nets and O-rings 6.2.1 Replacements in the adapter Step Action BPG Columns Operating Instructions 29193223 AB...
- Page 85 Remove the support net. Be careful not to scratch the adapter as this may cause leakage. Fit new net items according the order in the table Adapter items, on page BPG Columns Operating Instructions 29193223 AB...
- Page 86 O-rings. If scratched, the sealing of the column may be compromised and leakage may result. Follow the instructions below to replace the O-ring in the adapter. Step Action Pull the O-ring off. Attach a new O-ring lubricated with 20% ethanol. BPG Columns Operating Instructions 29193223 AB...
-
Page 87: Replacements In The Column
6.2.2 Replacements in the column 6.2.2 Replacements in the column End-piece items Order Part Description BPG 100 Top- - 140 - Down O-ring Guide ring U-shaped seal on net Support net Snap plug Distribution plate End-piece BPG Columns Operating Instructions 29193223 AB... - Page 88 Tighten the nuts and bolts close to the given torque. But do not exceed the given torque, this could damage the column. Always use a torque wrench. Description Support rod nuts (4) Support rod nuts (6) Adapter top plate bolts BPG Columns Operating Instructions 29193223 AB...
- Page 89 6 Maintenance 6.2 Replacements of nets and O-rings 6.2.2 Replacements in the column Description Support rod nuts (4) End-piece domed nuts Support rod bolts top and bottom. BPG Columns Operating Instructions 29193223 AB...
- Page 90 Remove the flange carefully. NOTICE When the flange is removed, the column tube is unsup- ported. Make sure that the column tube does not tip over. Use a spanner to unscrew the support rods from the end-piece. BPG Columns Operating Instructions 29193223 AB...
- Page 91 6.2.2 Replacements in the column Step Action Lift off the glass tube. Carefully place the glass tube on a secure surface. Remove the bolts and washers securing the end-piece to the stand using a spanner. BPG Columns Operating Instructions 29193223 AB...
- Page 92 EPDM seals, change to seals in FEP/PFR. NOTICE Make sure not to scratch any steel surfaces of the column when removing seals and O-rings. If scratched, the sealing of the column may be compromised and leakage may result. BPG Columns Operating Instructions 29193223 AB...
- Page 93 Wet the net with 20% ethanol to eliminate trapped air. Note: BPG 450: Carefully place the column tube on the U-shaped seal. Make sure the flange is centered on the U-shaped seal. Secure the end-piece to the stand using the bolts and washers. BPG Columns Operating Instructions 29193223 AB...
- Page 94 Disassemble the column, on page Position and fit the bottom flange O-ring. Put back the glass tube. Position and fit the new top O-ring. Assemble the column according to Assemble the column, on page BPG Columns Operating Instructions 29193223 AB...
- Page 95 Screw the support rods into the end-piece, see Torque wrench, on page Fit the column tube to the end-piece with the bolts. Position the flange so that the support rods fit into the appropriate holes. BPG Columns Operating Instructions 29193223 AB...
- Page 96 Do not exceed the given torque, this could damage the column. Tighten the nuts in cross-wise sequence evenly as shown in Torque wrench, on page CAUTION After assembly, check that the column is tight and not leaking. BPG Columns Operating Instructions 29193223 AB...
- Page 97 6 Maintenance 6.2 Replacements of nets and O-rings 6.2.2 Replacements in the column Step Action NOTICE Failure to use cross and stepwise tightening can damage the column tube. BPG Columns Operating Instructions 29193223 AB...
-
Page 98: Replacement Sealing Washer
Tighten the retaining nut up 1/4 turn. Stabilize the valve for 24 hours, minimum (as PTFE is a floating material). Screw the retaining nut off 3/8 turn (the tightening torque of the retaining nut is 1.5 Nm). BPG Columns Operating Instructions 29193223 AB... -
Page 99: Fitting A Packing Extension Tube
Use the washers and domed nuts from the column lid to secure the exten- sion tube to the column. The extended column is now ready for the first packing step in two-step packing procedures. BPG Columns Operating Instructions 29193223 AB... - Page 100 Make sure that the thin O-ring is properly positioned in the flange. Use the bolts delivered with the extension tube to secure the extension tube to the column. The extended column is now ready for the first packing step in two-step packing procedures. BPG Columns Operating Instructions 29193223 AB...
-
Page 101: Disassemble And Assemble The Adapter
Remove the adapter, on page Remove the adapter screw bolts. Lift off the adapter top plate and adapter screws. Take care not to bend the inlet tube. The top plate assembly can be disassembled by removing the screws. BPG Columns Operating Instructions 29193223 AB... - Page 102 6 Maintenance 6.5 Disassemble and assemble the adapter Step Action Unscrew and remove the cap screws that secure the stopper on the adapter top plate with the hex key. Remove the stopper. BPG Columns Operating Instructions 29193223 AB...
- Page 103 Action Remove the stop screw and locking nut from the top plate. Unscrew the bolts on the upper ring of the sealing unit. This will release the sealing unit and the inner adapter tube. BPG Columns Operating Instructions 29193223 AB...
- Page 104 6.5 Disassemble and assemble the adapter Step Action Carefully unscrew and remove the adjusting knob. This releases the tension on the spring situated under the inner adapter tube. Remove the top-plate assembly by turning it in a clockwise direction. BPG Columns Operating Instructions 29193223 AB...
- Page 105 6 Maintenance 6.5 Disassemble and assemble the adapter Step Action Remove the sealing unit and the adapter O-ring. BPG Columns Operating Instructions 29193223 AB...
- Page 106 Position the bushing ring(s) in the recess on the adapter top plate. Note: This image shows BPG 140 column but is applicable to other BPG columns. Using the screws secure the adjuster nut insert to adjuster nut body through the adapter top plate so that the adjuster nut body turns on the bushing ring.
- Page 107 6.5 Disassemble and assemble the adapter Step Action Fasten the bolts by hand to assemble the outer adapter tube to the adapter plate. Tighten the bolts with a ring spanner to complete the assembly. BPG Columns Operating Instructions 29193223 AB...
- Page 108 BPG 100 BPG 200 BPG 300 BPG 450 Slide the sealing unit onto the adapter tube. In a counter clockwise direction, screw down the top plate assembly 5 cm along the outer adapter tube. BPG Columns Operating Instructions 29193223 AB...
- Page 109 Use a flashlight and a screwdriver through one hole to lock the inner tube in position. Then two of the adapter head screws can fasten the sealing unit in place. BPG Columns Operating Instructions 29193223 AB...
- Page 110 6.5 Disassemble and assemble the adapter Step Action Level the hole in the outer adapter tube with the inner adapter tube with the help of a fine screwdriver. Remove the screwdriver and fit the third screw. BPG Columns Operating Instructions 29193223 AB...
- Page 111 6 Maintenance 6.5 Disassemble and assemble the adapter Step Action Tighten the screws with a spanner. Locate the stop screw and locking nut in the top plate. BPG Columns Operating Instructions 29193223 AB...
- Page 112 Turn the stop screw until it engages the groove in the outer adaptor tube, preventing sideways movement of the tube without preventing vertical movement. Lock the stop screw in position with the locking nut. Attach the nets on the adapter plate. BPG Columns Operating Instructions 29193223 AB...
-
Page 113: Leakage Test
If the adapter O-ring seal is dry, it may be damaged by forced movement of the adapter. Wet the O-ring with water or 20% ethanol solution. Do NOT grease the O- ring. Seal the adapter with the seal adjuster. Remove the air in the column. BPG Columns Operating Instructions 29193223 AB... - Page 114 Wait about 15 minutes until the pressure has stabilized. Check the pressure drop on the pressure gauge. The pressure drop should not exceed 0.1 bar during 5 minutes. A recorder linked to a pressure controller gives more precise figures. BPG Columns Operating Instructions 29193223 AB...
-
Page 115: Cleaning
6 Maintenance 6.7 Cleaning Cleaning Regular cleaning Regular cleaning of BPG columns is essential for reliable results. It is important that the column is kept free from contamination such as microbiological growth and adsorbed proteins. Precautions WARNING EXPLOSION HAZARD! If cleaning the column in a potentially explosive atmosphere, prevent static electric charges building up. - Page 116 1 M NaCl/1 M NaOH for a M NaCl (not contact time of 1 to 2hours. Use HIC).Regenerate to reversed flow. start conditions, see instructions for respective media. Regenerate to start conditions, see instructions for respective media. BPG Columns Operating Instructions 29193223 AB...
- Page 117 After cleaning, restore the column to working conditions using the follow-up proce- dure. All conditions refer to room temperature unless otherwise stated. If special main- tenance routines are required, contact your local Cytiva representative for expert advice. For affinity media, please contact your local Cytiva representative.
- Page 118 NOTICE The accessory valves have bodies in PTFE, which can shrink, and thereby cause leakage after repeated autoclaving. Therefore, exclude the valves if autoclaving the column. BPG Columns Operating Instructions 29193223 AB...
-
Page 119: Storage
6 Maintenance 6.8 Storage Storage Bacteriostatic solution BPG columns packed with media should be stored in the bacteriostatic solution recommended for the media. Refer to your media instructions for media-specific recommendations. Refer also to Section 8.2 Chemical resistance, on page 132. - Page 120 When the BPG column is going to be taken into operation after storage, follow the instructions below: Step Action Disassemble the column. Perform routine maintenance, i.e., replace O-rings etc. Thoroughly dry all column components. Assemble the column. BPG Columns Operating Instructions 29193223 AB...
-
Page 121: Troubleshooting
BPG columns. If the suggested actions in this guide do not solve the problems, or if the problem is not covered by the this guide, contact your Cytiva representative for advice. Air in the column If air has entered the column, the column can be run at a high velocity in the opposite direction until de-aired. - Page 122 The column packing has not been Check the column packing. checked. The column has not been correctly equili- Equilibrate the column. brated. Old sample mixed with new. Check sample and sample handling. BPG Columns Operating Instructions 29193223 AB...
- Page 123 The valves are not shut tight enough. Check the valves and close them. The volume of the trap is too small or large. • Fill air trap with buffer. • Change air trap. BPG Columns Operating Instructions 29193223 AB...
-
Page 124: Reference Information
This chapter contains specifications of BPG. It also contains a list that specifies the chemical resistance of BPG to different chemicals. In this chapter Section See page Specifications Chemical resistance Abbreviations Recycling information Regulatory information Health and Safety Declaration Form BPG Columns Operating Instructions 29193223 AB... -
Page 125: Specifications
Bed volumes and bed heights are based on a slurry concentration of 75% and a packing compression of 15%. The compression is the difference in volume between a sedi- mented bed and a pressurized bed. Note: The optimal slurry concentration is close to 50%. BPG Columns Operating Instructions 29193223 AB... - Page 126 8 Reference information 8.1 Specifications Height Height (H) used in this section refers to a BPG column with the adapter in its most upper position. BPG Columns Operating Instructions 29193223 AB...
-
Page 127: Bpg 100
The bed height and volume are achievable when retaining the extension tube during the final packing step. Adapter must seal at least 5 cm into the column tube to avoid high tensions on glass tube. Use a pressure gauge to monitor the pressure. BPG Columns Operating Instructions 29193223 AB... -
Page 128: Bpg 140
The bed height and volume are achievable when retaining the extension tube during the final packing step. Adapter must seal at least 5 cm into the column tube to avoid high tensions on glass tube. Use a pressure gauge to monitor the pressure. BPG Columns Operating Instructions 29193223 AB... -
Page 129: Bpg 200
The bed height and volume are achievable when retaining the extension tube during the final packing step. Adapter must seal at least 5 cm into the column tube to avoid high tensions on glass tube. Use a pressure gauge to monitor the pressure. BPG Columns Operating Instructions 29193223 AB... -
Page 130: Bpg 300
The bed height and volume are achievable when retaining the extension tube during the final packing step. Adapter must seal at least 5 cm into the column tube to avoid high tensions on glass tube. Use a pressure gauge to monitor the pressure. BPG Columns Operating Instructions 29193223 AB... -
Page 131: Bpg 450
The bed height and volume are achievable when retaining the extension tube during the final packing step. Adapter must seal at least 5 cm into the column tube to avoid high tensions on glass tube. Use a pressure gauge to monitor the pressure. BPG Columns Operating Instructions 29193223 AB... -
Page 132: Chemical Resistance
This section provides general chemical resistance guidelines for various chemicals that may be used with BPG columns. Chemicals to be avoided In general, the use of the following chemicals in BPG columns should be avoided: • Extreme oxidizers (such as peroxides) • Halogenated compounds •... - Page 133 Isopropyl alcohol 100% EPDM rubber changes characteristics. For repetitive and long term use, use FEP/PFR/ PTFE O-rings and gaskets. Methanol 100% Nitric acid 0.1 M Not recommended to be used with PA nets. n-Propanol 100% BPG Columns Operating Instructions 29193223 AB...
- Page 134 Chemical resistance to sodium chloride BPG columns are equipped with wetted components of stainless steel and must there- fore be appropriately maintained when exposed to NaCl during chromatographic processes. If a process incorporates the use of NaCl solutions it is essential that the column be thoroughly rinsed to remove any residual NaCl.
-
Page 135: Abbreviations
Perfluor rubber Perfluor rubber PTFE Polytetrafluoroethane Polytetrafluoroethane Tetrahydrofurane Tetrahydrofurane Ultra violet Ultra violet Elution volume Elution volume Water for injection Water for injection Peak width at half peak height Peak width at half peak height BPG Columns Operating Instructions 29193223 AB... -
Page 136: Recycling Information
Decommissioning. Decontaminate the equipment before decommissioning to ensure that hazardous residues are removed. Disposal When taking BPG columns out of service, the different materials must be separated and recycled according to national and local environmental regulations. Recycling of hazardous substances BPG columns may contain hazardous substances. -
Page 137: Regulatory Information
8.5 Regulatory information Regulatory information Introduction This section lists the regulations and standards that apply to the product. In this section Section See page 8.5.1 Contact information 8.5.2 European Union and European Economic Area BPG Columns Operating Instructions 29193223 AB... -
Page 138: Contact Information
The table below summarizes the required manufacturing information. Requirement Information Name and address of manufacturer Cytiva Sweden AB Björkgatan 30 SE 751 84 Uppsala Sweden Telephone number of manufacturer + 46 771 400 600 BPG Columns Operating Instructions 29193223 AB... -
Page 139: European Union And European Economic Area
• used according to the Operating Instructions or user manuals, and • used in the same state as it was delivered, except for alterations described in the Operating Instructions or user manuals. BPG Columns Operating Instructions 29193223 AB... -
Page 140: Health And Safety Declaration Form
Service Ticket #: To make the mutual protection and safety of Cytiva service personnel and our customers, all equipment and work areas must be clean and free of any hazardous contaminants before a Service Engineer starts a repair. To avoid delays in the servicing of your equipment, complete this checklist and present it to the Service Engineer upon arrival. - Page 141 To make sure the mutual protection and safety of Cytiva personnel, our customers, transportation personnel and our environment, all equipment must be clean and free of any hazardous contaminants before shipping to Cytiva. To avoid delays in the processing of your equipment, complete this checklist and include it with your return.
-
Page 142: Index
Compression factor, 50 trations, 22 Connections, 47 BPG 300 columns illustrations, 25 arrange, 47 BPG 450 columns illustrations, 28 BPG columns, 6, 19, 20, 31, 125 accessories, 31 design pressure, 19 Decontamination, 136 intended use, 6 Disposal, 136 material, 20... - Page 143 85 Setup, 43 end-piece, 48 Slurry, 50, 52 replacement, 85 concentration, 50 Nets, 20, 93 preparation, 52 column, 93 Slurry volume, 50 Notes and tips, 7 Storage, 119 System operation, 12 precautions, 12 BPG Columns Operating Instructions 29193223 AB...
- Page 144 Index Tools, 36, 80 replacement, 80 unpacking, 36 Torque wrench, 88 Transport, 35 crate, 35 Troubleshooting, 121 Unpacking, 36 instructions, 36 Wheel, 38 lock, 38 BPG Columns Operating Instructions 29193223 AB...
- Page 145 Page intentionally left blank...
- Page 146 © 2020 Cytiva All goods and services are sold subject to the terms and conditions of sale of the supplying company operating within the Cytiva business. A copy of those terms and conditions is available on request. Contact your local Cytiva representative for the most current information.
Need help?
Do you have a question about the BPG Columns and is the answer not in the manual?
Questions and answers