
Related Manuals for Siemens SICHARGE UC 100


Summary of Contents for Siemens SICHARGE UC 100
- Page 1 Operating instructions SICHARGE UC 100, 200, 300, 400, 600, 800 (8EM4000-XXXXX-XXXX) Edition 10/2022 siemens.com/sichargeuc...
- Page 3 Introduction Safety information Description SICHARGE Application planning SICHARGE UC 100, UC 200, UC Mounting 300, UC 400, UC 600, UC 800 Connecting Operating Instructions Commissioning Operating Alarm, fault and system messages Maintenance and service Disposal Service & Support Technical specifications...
- Page 4 Note the following: WARNING Siemens products may only be used for the applications described in the catalog and in the relevant technical documentation. If products and components from other manufacturers are used, these must be recommended or approved by Siemens. Proper transport, storage, installation, assembly, commissioning, operation and maintenance are required to ensure that the products operate safely and without any problems.
-
Page 5: Table Of Contents
Application planning of UC 100..................41 4.2.1 Location planning ......................41 4.2.2 Preparing the base area...................... 47 Application planning of UC 200..................50 SICHARGE UC 100, UC 200, UC 300, UC 400, UC 600, UC 800 Operating Instructions, 10/2022, A5E50828019-AC... - Page 6 Connecting the auxiliary power supply ................108 External communication ....................110 Re-attaching protective cover ................... 111 Commissioning ..........................113 Initial commissioning ....................... 113 SICHARGE UC 100, UC 200, UC 300, UC 400, UC 600, UC 800 Operating Instructions, 10/2022, A5E50828019-AC...
- Page 7 Replacing the cabinet fan....................163 10.7 UC 300/400 maintenance ....................165 10.7.1 Replacing an air filter......................165 10.7.2 Replacing the cabinet fan....................167 SICHARGE UC 100, UC 200, UC 300, UC 400, UC 600, UC 800 Operating Instructions, 10/2022, A5E50828019-AC...
- Page 8 Declaration of Conformity ......................... 181 UC 600/800............................183 Introduction ........................183 Structure of UC 600/800 ....................183 Connection of UC 600/800....................185 Abbreviations............................. 187 Index ..............................189 SICHARGE UC 100, UC 200, UC 300, UC 400, UC 600, UC 800 Operating Instructions, 10/2022, A5E50828019-AC...
-
Page 9: Introduction
• Update of the section Charging current/power curve (Page 178) • Update of the chapter Declaration of Conformity (Page 181) • Update of the chapter Maintenance plan (Page 152) SICHARGE UC 100, UC 200, UC 300, UC 400, UC 600, UC 800 Operating Instructions, 10/2022, A5E50828019-AC... -
Page 10: Open-Source Software
We are liable for the product described, including the open-source software contained in it, pursuant to the conditions applicable to the product. Siemens accepts no liability for the use of the open source software over and above the intended program sequence, or for any faults caused by modifications to the software. -
Page 11: Safety Information
– Connecting electrical cables to the charging station – Perform electrotechnical work on the charging station • Users – Charging electric vehicles • Service personnel – Performing maintenance and servicing SICHARGE UC 100, UC 200, UC 300, UC 400, UC 600, UC 800 Operating Instructions, 10/2022, A5E50828019-AC... - Page 12 Do not store or use flammable liquids that produce flammable fumes, such as gasoline or ethanol, in the vicinity of the charging station. Electrostatic charge or heat generated during charging can ignite explosive and flammable liquids. SICHARGE UC 100, UC 200, UC 300, UC 400, UC 600, UC 800 Operating Instructions, 10/2022, A5E50828019-AC...
- Page 13 • Take the charging station out of service by switching it off at the electrical distributor. • Qualified personnel must dry the charging station and check it for damage. SICHARGE UC 100, UC 200, UC 300, UC 400, UC 600, UC 800 Operating Instructions, 10/2022, A5E50828019-AC...
-
Page 14: The Five Safety Rules For Working With Electrical Equipment
To ensure the safety of persons and property in accordance with the standards, always comply with the following safety rules. SICHARGE UC 100, UC 200, UC 300, UC 400, UC 600, UC 800 Operating Instructions, 10/2022, A5E50828019-AC... -
Page 15: Emergency Stop Button
Emergency Stop button In a hazardous situation, pressing the Emergency Stop button immediately puts the charging station into a safe emergency stop state. SICHARGE UC 100, UC 200, UC 300, UC 400, UC 600, UC 800 Operating Instructions, 10/2022, A5E50828019-AC... - Page 16 The Emergency Stop button is equipped with a rotate-to-unlatch mechanism. An arrow on the top of the button indicates the direction of rotation for unlatching. SICHARGE UC 100, UC 200, UC 300, UC 400, UC 600, UC 800 Operating Instructions, 10/2022, A5E50828019-AC...
-
Page 17: Safety Sign
The following safety signs are attached to the charging station cabinet: Safety sign Meaning Warning of general danger Warning of dangerous voltage Warning of tipping hazard SICHARGE UC 100, UC 200, UC 300, UC 400, UC 600, UC 800 Operating Instructions, 10/2022, A5E50828019-AC... -
Page 18: Cybersecurity At Siemens
Siemens’ products and solutions undergo continuous development to make them more secure. Siemens strongly recommends that product updates are applied as soon as they are available and that the latest product versions are used. Using versions that are obsolete or are no longer supported can increase the risk of cyber threats. - Page 19 Position of the nameplate on the device The nameplate is located on the left exterior of the device in the lower left corner of the cabinet. SICHARGE UC 100, UC 200, UC 300, UC 400, UC 600, UC 800 Operating Instructions, 10/2022, A5E50828019-AC...
- Page 20 Safety information 2.6 Identification of the device SICHARGE UC 100, UC 200, UC 300, UC 400, UC 600, UC 800 Operating Instructions, 10/2022, A5E50828019-AC...
-
Page 21: Description
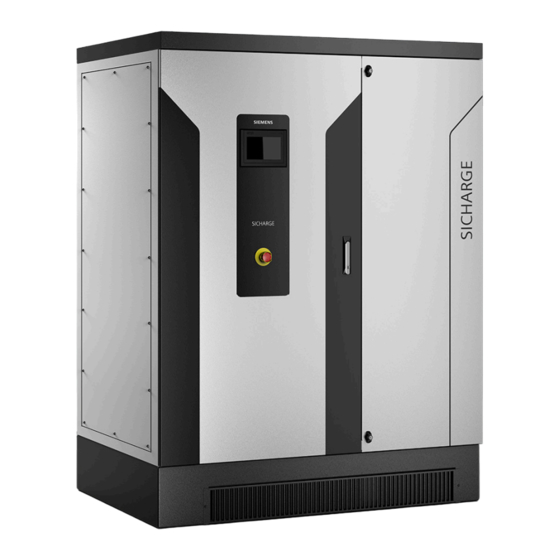
Performance features The SICHARGE UC 100 charging station charges your electric vehicle quickly and safely. To start the charging process, simply connect the charging cable to your vehicle. The charging station then controls the entire charging process precisely and fully automatically. -
Page 22: Display And Operator Controls
To adapt the display to different lighting situations, the backlight of the display can be dimmed over a wide range of brightness. SICHARGE UC 100, UC 200, UC 300, UC 400, UC 600, UC 800 Operating Instructions, 10/2022, A5E50828019-AC... - Page 23 You need a special door key to open the device door. The door key is included in the delivery. SICHARGE UC 100, UC 200, UC 300, UC 400, UC 600, UC 800 Operating Instructions, 10/2022, A5E50828019-AC...
-
Page 24: Design Of The Charging Station
The SECC communication module, the input filter and the transformer are arranged on the back. The transformer of the charging station is positioned in the middle of the cabinet behind the central switchboard. SICHARGE UC 100, UC 200, UC 300, UC 400, UC 600, UC 800 Operating Instructions, 10/2022, A5E50828019-AC... -
Page 25: Charging Cable
The UC 100 charging station can be ordered with a charging cable for charging electric vehicles with direct current. The charging cable enables charging of electric vehicles in accordance with the standard CCS Combo 2 (IEC 62196-3). SICHARGE UC 100, UC 200, UC 300, UC 400, UC 600, UC 800 Operating Instructions, 10/2022, A5E50828019-AC... - Page 26 The actuator bolt withstands very high extraction forces and thus offers maximum protection against the charging plug being pulled out by force during the charging process. SICHARGE UC 100, UC 200, UC 300, UC 400, UC 600, UC 800 Operating Instructions, 10/2022, A5E50828019-AC...
-
Page 27: Description Of Uc 200
The charging station features the following performance characteristics: • Fully automatic control of the charging process • User-friendly operation thanks to a central touch screen • Space-saving construction SICHARGE UC 100, UC 200, UC 300, UC 400, UC 600, UC 800 Operating Instructions, 10/2022, A5E50828019-AC... - Page 28 The charging station is designed for charging electric vehicles in semi-public commercial and industrial areas, e.g: • Terminals • Vehicle depots • Company parking lots SICHARGE UC 100, UC 200, UC 300, UC 400, UC 600, UC 800 Operating Instructions, 10/2022, A5E50828019-AC...
-
Page 29: Display And Operator Controls
To adapt the display to different lighting situations, the backlight of the display can be dimmed over a wide range of brightness. SICHARGE UC 100, UC 200, UC 300, UC 400, UC 600, UC 800 Operating Instructions, 10/2022, A5E50828019-AC... -
Page 30: Design Of The Charging Station
The following figure provides an overview of the positions of the various components. The right-hand graphic shows the version with another Siemens controller. SICHARGE UC 100, UC 200, UC 300, UC 400, UC 600, UC 800 Operating Instructions, 10/2022, A5E50828019-AC... - Page 31 The fans, the electronic components of the DC output and several inductors are located at the rear. The transformer of the charging station is positioned in the middle of the cabinet behind the central switchboard. SICHARGE UC 100, UC 200, UC 300, UC 400, UC 600, UC 800 Operating Instructions, 10/2022, A5E50828019-AC...
-
Page 32: Charging Cable
The UC 200 charging station can be ordered with a charging cable for charging electric vehicles with direct current. The charging cable enables charging of electric vehicles in accordance with the standard CCS Combo 2 (IEC 62196-3). SICHARGE UC 100, UC 200, UC 300, UC 400, UC 600, UC 800 Operating Instructions, 10/2022, A5E50828019-AC... - Page 33 The actuator bolt withstands very high extraction forces and thus offers maximum protection against the charging plug being pulled out by force during the charging process. SICHARGE UC 100, UC 200, UC 300, UC 400, UC 600, UC 800 Operating Instructions, 10/2022, A5E50828019-AC...
-
Page 34: Description Of Uc 300/400
The charging station features the following performance characteristics: • Fully automatic control of the charging process • User-friendly operation by a central touch screen • Space-saving construction SICHARGE UC 100, UC 200, UC 300, UC 400, UC 600, UC 800 Operating Instructions, 10/2022, A5E50828019-AC... -
Page 35: Display And Operator Controls
① Top door lock ② Door opener ③ Bottom door lock ④ Emergency Stop button ⑤ Touchscreen Figure 3-9 Display and operator controls SICHARGE UC 300/400 SICHARGE UC 100, UC 200, UC 300, UC 400, UC 600, UC 800 Operating Instructions, 10/2022, A5E50828019-AC... - Page 36 You need a special door key to open the device doors. The door key is included in the delivery. SICHARGE UC 100, UC 200, UC 300, UC 400, UC 600, UC 800 Operating Instructions, 10/2022, A5E50828019-AC...
-
Page 37: Design Of The Charging Station
Fans and several inductors are arranged on the back. The transformer of the charging station is positioned in the middle of the cabinet behind the central switchboard. SICHARGE UC 100, UC 200, UC 300, UC 400, UC 600, UC 800 Operating Instructions, 10/2022, A5E50828019-AC... -
Page 38: Decentralized Charge Points
You can operate one of the following charge points for electric vehicles at the SICHARGE UC charging station: • SICHARGE UC Dispenser • SICHARGE MastHood • SICHARGE MastPanto SICHARGE UC 100, UC 200, UC 300, UC 400, UC 600, UC 800 Operating Instructions, 10/2022, A5E50828019-AC... -
Page 39: Electrical Protection Devices
A fuse at the input protects the charging station against overcurrent. A fuse also protects the electric vehicle against overcurrent at the output. SICHARGE UC 100, UC 200, UC 300, UC 400, UC 600, UC 800 Operating Instructions, 10/2022, A5E50828019-AC... - Page 40 To reset the charging station, the user must acknowledge the alarm. When the alarm disappears, the charging station is ready for use again. SICHARGE UC 100, UC 200, UC 300, UC 400, UC 600, UC 800 Operating Instructions, 10/2022, A5E50828019-AC...
-
Page 41: Application Planning
SORGSAM HANDHABEN ACHTUNG WARNING HANDLE WITH CARE ① Indicator tube Figure 4-1 Schematic example: Shock indicator SICHARGE UC 100, UC 200, UC 300, UC 400, UC 600, UC 800 Operating Instructions, 10/2022, A5E50828019-AC... -
Page 42: Unpackaging The Charging Station
1. Remove the side walls of the packaging one-by-one as follows: – Unscrew the screws in the side panel – Remove side panel 2. Remove the cover of the transport packaging SICHARGE UC 100, UC 200, UC 300, UC 400, UC 600, UC 800 Operating Instructions, 10/2022, A5E50828019-AC... -
Page 43: Report Missing Delivery Components Or Transport Damage
Application planning of UC 100 4.2.1 Location planning To operate the charging station safely, you need a location that meets the following requirements. SICHARGE UC 100, UC 200, UC 300, UC 400, UC 600, UC 800 Operating Instructions, 10/2022, A5E50828019-AC... - Page 44 To ensure the stability of the charging station, the base area must meet the following requirements: • Level • Dry • Sufficiently solid and capable of bearing the load (e.g. concrete area in quality class C30/37) SICHARGE UC 100, UC 200, UC 300, UC 400, UC 600, UC 800 Operating Instructions, 10/2022, A5E50828019-AC...
- Page 45 In addition, a minimum clearance of 600 mm between the top of the charging station and the ceiling of the room is required at the intended location. SICHARGE UC 100, UC 200, UC 300, UC 400, UC 600, UC 800 Operating Instructions, 10/2022, A5E50828019-AC...
- Page 46 The fuse size must be suitable for the selected cable and larger than the input fuse of the charging station. Observe the maximum overall length of 100 m for the DC circuit. SICHARGE UC 100, UC 200, UC 300, UC 400, UC 600, UC 800 Operating Instructions, 10/2022, A5E50828019-AC...
- Page 47 LIYCY (TP) • RJ45 CAT 6 (TP) • F.O. 50/125, OM4, 4 fib. The cable cross-sections relate to the installation type "Installation type in ground". SICHARGE UC 100, UC 200, UC 300, UC 400, UC 600, UC 800 Operating Instructions, 10/2022, A5E50828019-AC...
- Page 48 – Lay Ethernet cables close to grounded cabinet components. – Ethernet cables and low-voltage and direct-voltage cables may only cross each other at a 90° angle. SICHARGE UC 100, UC 200, UC 300, UC 400, UC 600, UC 800 Operating Instructions, 10/2022, A5E50828019-AC...
-
Page 49: Preparing The Base Area
The dimensions and design of the foundation are determined by the static calculation. The figure below shows a schematic example of the design of the foundation made of reinforced SICHARGE UC 100, UC 200, UC 300, UC 400, UC 600, UC 800 Operating Instructions, 10/2022, A5E50828019-AC... - Page 50 Base area of charging station ② Area for the cable routing ③ Area for cable inlet ④ Reinforced concrete Figure 4-6 Example of foundation SICHARGE UC 100, UC 200, UC 300, UC 400, UC 600, UC 800 Operating Instructions, 10/2022, A5E50828019-AC...
- Page 51 To attach the charging station to the base area (Page 73), you need the following fasteners: • 10 M12 screws • 10 M12 washers • 10 M12 cement sockets SICHARGE UC 100, UC 200, UC 300, UC 400, UC 600, UC 800 Operating Instructions, 10/2022, A5E50828019-AC...
-
Page 52: Application Planning Of Uc 200
To ensure the stability of the charging station, the base area must meet the following requirements: • Level • Dry • Sufficiently solid and capable of bearing the load (e.g. concrete area in quality class C30/37) SICHARGE UC 100, UC 200, UC 300, UC 400, UC 600, UC 800 Operating Instructions, 10/2022, A5E50828019-AC... - Page 53 In addition, a minimum clearance of 600 mm between the top of the charging station and the ceiling of the room is required at the intended location. SICHARGE UC 100, UC 200, UC 300, UC 400, UC 600, UC 800 Operating Instructions, 10/2022, A5E50828019-AC...
- Page 54 The fuse size must be suitable for the selected cable and larger than the input fuse of the charging station. Observe the maximum overall length of 100 m for the DC circuit. SICHARGE UC 100, UC 200, UC 300, UC 400, UC 600, UC 800 Operating Instructions, 10/2022, A5E50828019-AC...
- Page 55 LIYCY (TP) • RJ45 CAT 6 (TP) • F.O. 50/125, OM4, 4 fib. The cable cross-sections relate to the installation type "Installation type in ground". SICHARGE UC 100, UC 200, UC 300, UC 400, UC 600, UC 800 Operating Instructions, 10/2022, A5E50828019-AC...
- Page 56 – Lay Ethernet cables close to grounded cabinet components. – Ethernet cables and low-voltage and direct-voltage cables may only cross each other at a 90° angle. SICHARGE UC 100, UC 200, UC 300, UC 400, UC 600, UC 800 Operating Instructions, 10/2022, A5E50828019-AC...
-
Page 57: Preparing The Base Area
The dimensions and design of the foundation are determined by the static calculation. The figure below shows a schematic example of the design of the foundation made of reinforced SICHARGE UC 100, UC 200, UC 300, UC 400, UC 600, UC 800 Operating Instructions, 10/2022, A5E50828019-AC... - Page 58 Base area of charging station ② Area for the cable routing ③ Area for cable inlet ④ Reinforced concrete Figure 4-12 Example of foundation SICHARGE UC 100, UC 200, UC 300, UC 400, UC 600, UC 800 Operating Instructions, 10/2022, A5E50828019-AC...
- Page 59 To attach the charging station to the base area (Page 77), you need the following fasteners: • 10 screws size M18 • 10 M18 washers • 10 M18 cement sockets SICHARGE UC 100, UC 200, UC 300, UC 400, UC 600, UC 800 Operating Instructions, 10/2022, A5E50828019-AC...
-
Page 60: Application Planning Of Uc 300/400
Do not operate the charging station in public areas. Restrict access to the charging station in the semi-public area, e.g. with a fence. Figure 4-14 Restricting access SICHARGE UC 100, UC 200, UC 300, UC 400, UC 600, UC 800 Operating Instructions, 10/2022, A5E50828019-AC... - Page 61 In addition, a minimum clearance of 600 mm between the top of the charging station and the ceiling of the room is required at the intended location. SICHARGE UC 100, UC 200, UC 300, UC 400, UC 600, UC 800 Operating Instructions, 10/2022, A5E50828019-AC...
- Page 62 The fuse size must be suitable for the selected cable and larger than the input fuse of the charging station. Observe the maximum overall length of 100 m for the DC circuit. SICHARGE UC 100, UC 200, UC 300, UC 400, UC 600, UC 800 Operating Instructions, 10/2022, A5E50828019-AC...
- Page 63 LIYCY (TP) • RJ45 CAT 6 (TP) • F.O. 50/125, OM4, 4 fib. The cable cross-sections relate to the installation type "Installation type in ground". SICHARGE UC 100, UC 200, UC 300, UC 400, UC 600, UC 800 Operating Instructions, 10/2022, A5E50828019-AC...
- Page 64 – Lay Ethernet cables close to grounded cabinet components. – Ethernet cables and low-voltage and direct-voltage cables may only cross each other at a 90° angle. SICHARGE UC 100, UC 200, UC 300, UC 400, UC 600, UC 800 Operating Instructions, 10/2022, A5E50828019-AC...
-
Page 65: Preparing The Base Area
The dimensions and design of the foundation are determined by the static calculation. The figure below shows a schematic example of the design of the foundation made of reinforced SICHARGE UC 100, UC 200, UC 300, UC 400, UC 600, UC 800 Operating Instructions, 10/2022, A5E50828019-AC... - Page 66 Base area of charging station ② Area for the cable routing ③ Area for cable inlet ④ Reinforced concrete Figure 4-18 Example of foundation SICHARGE UC 100, UC 200, UC 300, UC 400, UC 600, UC 800 Operating Instructions, 10/2022, A5E50828019-AC...
- Page 67 To attach the charging station to the base area (Page 81), you need the following fasteners: • 6 M18 screws • 6 M18 washers • 6 fastening elements, for example: Dowel SICHARGE UC 100, UC 200, UC 300, UC 400, UC 600, UC 800 Operating Instructions, 10/2022, A5E50828019-AC...
-
Page 68: Storing The Charging Station
• Regularly check that the actual storage conditions do not allow condensation to form. • Check the charging station at regular intervals for damage. SICHARGE UC 100, UC 200, UC 300, UC 400, UC 600, UC 800 Operating Instructions, 10/2022, A5E50828019-AC... -
Page 69: Transporting The Charging Station
The transport pallet protects the charging station from damage and facilitates transport. • Therefore, always transport the charging station on the transport pallet. Transporting the charging station Figure 4-20 Forklift transport SICHARGE UC 100, UC 200, UC 300, UC 400, UC 600, UC 800 Operating Instructions, 10/2022, A5E50828019-AC... - Page 70 2. Drive in until the forks protrude on the other side of the pallet. 3. Lift the charging station vertically. 4. Transport the charging station upright to the site. SICHARGE UC 100, UC 200, UC 300, UC 400, UC 600, UC 800 Operating Instructions, 10/2022, A5E50828019-AC...
-
Page 71: Mounting
1. Drive the forks from the front or from behind under the bottom of the cabinet. 2. Lift the charging station vertically upwards. 3. Transport the charging station in a vertical position in relation to the base area. SICHARGE UC 100, UC 200, UC 300, UC 400, UC 600, UC 800 Operating Instructions, 10/2022, A5E50828019-AC... -
Page 72: Installation Of Uc 100
To insert the power cable into the cabinet, you need to first lift the charging station and fix it in a raised position: 1. Drive the fork arms of the forklift underneath the cabinet base. 2. Lift the charging station vertically upwards. SICHARGE UC 100, UC 200, UC 300, UC 400, UC 600, UC 800 Operating Instructions, 10/2022, A5E50828019-AC... - Page 73 2. Remove the handle of the main switch. 3. Unscrew the fastening screws of the lowest protective cover. 4. Remove the protective cover. SICHARGE UC 100, UC 200, UC 300, UC 400, UC 600, UC 800 Operating Instructions, 10/2022, A5E50828019-AC...
- Page 74 If you are installing a charging station for charging via distributed charging points, pull the Ethernet cable through the opening in the base of the charging station cabinet. SICHARGE UC 100, UC 200, UC 300, UC 400, UC 600, UC 800 Operating Instructions, 10/2022, A5E50828019-AC...
-
Page 75: Securing The Charging Station
• Socket: Hexagonal, SW12 You will also need the following fasteners: • 10 M12 screws, strength class 8.8 • 10 washers • 10 cement sockets SICHARGE UC 100, UC 200, UC 300, UC 400, UC 600, UC 800 Operating Instructions, 10/2022, A5E50828019-AC... -
Page 76: Installation Of Uc 200
• Only lift the charging station in a vertical position. • The forks of the forklift must protrude on the opposite side of the charging station. SICHARGE UC 100, UC 200, UC 300, UC 400, UC 600, UC 800 Operating Instructions, 10/2022, A5E50828019-AC... - Page 77 2. Remove the handle of the main switch. 3. Unscrew the fastening screws of the lowest protective cover. 4. Remove the protective cover. SICHARGE UC 100, UC 200, UC 300, UC 400, UC 600, UC 800 Operating Instructions, 10/2022, A5E50828019-AC...
- Page 78 Only applies to equipment variants of the charging station that are set up for SICHARGE UC Dispenser, SICHARGE MastHood, or SICHARGE MastPanto. SICHARGE UC 100, UC 200, UC 300, UC 400, UC 600, UC 800 Operating Instructions, 10/2022, A5E50828019-AC...
-
Page 79: Securing The Charging Station
After inserting the power cord into the cabinet, attach the charging station to the base area. Required tools and fasteners You will need the following tools to secure the charging station: • Torque wrench • Socket: Hexagon, SW18 SICHARGE UC 100, UC 200, UC 300, UC 400, UC 600, UC 800 Operating Instructions, 10/2022, A5E50828019-AC... -
Page 80: Inserting The Connecting Cable Into The Cabinet
• Only lift the charging station in a vertical position. • The forks of the forklift must protrude on the opposite side of the charging station. SICHARGE UC 100, UC 200, UC 300, UC 400, UC 600, UC 800 Operating Instructions, 10/2022, A5E50828019-AC... - Page 81 2. Remove the handle of the main switch. 3. Unscrew the fastening screws of the lowest protective cover. 4. Remove the protective cover. SICHARGE UC 100, UC 200, UC 300, UC 400, UC 600, UC 800 Operating Instructions, 10/2022, A5E50828019-AC...
- Page 82 Pull the following cables through the opening in the cabinet floor: • Connecting cable • DC cable • Cable for the auxiliary power supply • Ethernet cable SICHARGE UC 100, UC 200, UC 300, UC 400, UC 600, UC 800 Operating Instructions, 10/2022, A5E50828019-AC...
-
Page 83: Securing The Charging Station
The charging station must be screwed to at least 2 of the 3 foundation fastening points on both the right and the left side. SICHARGE UC 100, UC 200, UC 300, UC 400, UC 600, UC 800 Operating Instructions, 10/2022, A5E50828019-AC... - Page 84 1. Insert the fasteners, e.g. dowels, into the drill holes. 2. Insert the fastening screws into the drill holes. 3. Tighten the screws. Tightening torque: 150 Nm SICHARGE UC 100, UC 200, UC 300, UC 400, UC 600, UC 800 Operating Instructions, 10/2022, A5E50828019-AC...
-
Page 85: Connecting
Cable designation and classes Flexibility is a design feature of a cable. This flexibility primarily depends on the number of conductors inside the cable. SICHARGE UC 100, UC 200, UC 300, UC 400, UC 600, UC 800 Operating Instructions, 10/2022, A5E50828019-AC... - Page 86 5 and class 6. However, they have a smaller diameter. This may result in clamping cables of equal diameters but different conductor cross-sections. Figure 6-2 Conductor classes Single-strand and multi-strand sector-shaped conductors are also used. SICHARGE UC 100, UC 200, UC 300, UC 400, UC 600, UC 800 Operating Instructions, 10/2022, A5E50828019-AC...
-
Page 87: Connecting Uc 100
• You have removed the handle of the main switch. • You have removed the bottom protective cover. • You have inserted the power cable into the cabinet. SICHARGE UC 100, UC 200, UC 300, UC 400, UC 600, UC 800 Operating Instructions, 10/2022, A5E50828019-AC... - Page 88 Connections of the power supply cable ① Terminal L3 (-Q1:6) ② Terminal L2 (-Q1:4) ③ Terminal L1 (-Q1:2) ④ PE ground connection (PE cabinet) Figure 6-5 I/Os SICHARGE UC 100, UC 200, UC 300, UC 400, UC 600, UC 800 Operating Instructions, 10/2022, A5E50828019-AC...
- Page 89 5. Plug the cable lug onto the pin of the PE cabinet ground connection 6. Tighten the fastening nut with the required torque: – Size of fastening nut: M8 – Required tightening torque: 20 Nm (±10%) SICHARGE UC 100, UC 200, UC 300, UC 400, UC 600, UC 800 Operating Instructions, 10/2022, A5E50828019-AC...
-
Page 90: Connecting Dc Cables
DC cable to the DC+ and DC- connectors of the charging station. Requirements • You have removed the handle of the main switch. • You have removed the bottom protective cover. SICHARGE UC 100, UC 200, UC 300, UC 400, UC 600, UC 800 Operating Instructions, 10/2022, A5E50828019-AC... - Page 91 6.3 Connecting UC 100 Connections for the DC cable ① PE ground connection ② Terminal DC- ③ Terminal DC+ Figure 6-7 Connections for the DC cable SICHARGE UC 100, UC 200, UC 300, UC 400, UC 600, UC 800 Operating Instructions, 10/2022, A5E50828019-AC...
- Page 92 – Size of fastening nut: M8 – Required tightening torque: 20 Nm Connecting DC+ and DC- conductors Connect the DC+/DC- conductors of the DC cable. SICHARGE UC 100, UC 200, UC 300, UC 400, UC 600, UC 800 Operating Instructions, 10/2022, A5E50828019-AC...
-
Page 93: Connecting The Communication Cable
When using the distributed charge points, connect the communication cable to the charging station. Requirements • You have removed the bottom protective cover. • You have inserted the communication cable into the cabinet. SICHARGE UC 100, UC 200, UC 300, UC 400, UC 600, UC 800 Operating Instructions, 10/2022, A5E50828019-AC... -
Page 94: Connecting The Auxiliary Power Supply
Connect the fiber-optic cables to the optical ports of the SCALANCE Ethernet switch. 6.3.4 Connecting the auxiliary power supply The SICHARGE UC charging station supplies further charge points with operating current. SICHARGE UC 100, UC 200, UC 300, UC 400, UC 600, UC 800 Operating Instructions, 10/2022, A5E50828019-AC... - Page 95 5. Make sure that the conductors are firmly connected to the terminal connections. You can find the terminal designations and the connection plan in the circuit diagram and here (Page 176). See also Technical specifications (Page 175) SICHARGE UC 100, UC 200, UC 300, UC 400, UC 600, UC 800 Operating Instructions, 10/2022, A5E50828019-AC...
-
Page 96: Connecting Uc 200
Connections of the power supply cable ① Terminal L3 (-Q1:6) ② Terminal L2 (-Q1:4) ③ Terminal L1 (-Q1:2) ④ PE ground connection (PE cabinet) Figure 6-11 I/Os SICHARGE UC 100, UC 200, UC 300, UC 400, UC 600, UC 800 Operating Instructions, 10/2022, A5E50828019-AC... - Page 97 5. Plug the cable lug onto the pin of the PE cabinet ground connection 6. Tighten the fastening nut with the required torque: – Size of fastening nut: M8 – Required tightening torque: 20 Nm (±10%) SICHARGE UC 100, UC 200, UC 300, UC 400, UC 600, UC 800 Operating Instructions, 10/2022, A5E50828019-AC...
-
Page 98: Connecting Dc Cables
DC cable to the DC+ and DC- connectors of the charging station. Requirements • You have removed the handle of the main switch. • You have removed the bottom protective cover. SICHARGE UC 100, UC 200, UC 300, UC 400, UC 600, UC 800 Operating Instructions, 10/2022, A5E50828019-AC... - Page 99 Connections for the DC cable ① PE ground connection (PE cabinet) ② Terminal DC- (-F12) ③ Terminal DC+ (-F11) Figure 6-13 Connections for the DC cable SICHARGE UC 100, UC 200, UC 300, UC 400, UC 600, UC 800 Operating Instructions, 10/2022, A5E50828019-AC...
- Page 100 – Size of fastening nut: M8 – Required tightening torque: 20 Nm Connecting DC+ and DC- conductors Connect the DC+/DC- conductors of the DC cable. SICHARGE UC 100, UC 200, UC 300, UC 400, UC 600, UC 800 Operating Instructions, 10/2022, A5E50828019-AC...
-
Page 101: Connecting The Communication Cable
When using the distributed charge points, connect the communication cable to the charging station. Requirements • You have removed the bottom protective cover. • You have inserted the communication cable into the cabinet. SICHARGE UC 100, UC 200, UC 300, UC 400, UC 600, UC 800 Operating Instructions, 10/2022, A5E50828019-AC... -
Page 102: Connecting The Auxiliary Power Supply
Connect the fiber-optic cables to the optical ports of the SCALANCE Ethernet switch. 6.4.4 Connecting the auxiliary power supply The SICHARGE UC charging station supplies further charge points with operating current. SICHARGE UC 100, UC 200, UC 300, UC 400, UC 600, UC 800 Operating Instructions, 10/2022, A5E50828019-AC... - Page 103 5. Make sure that the conductors are firmly connected to the terminal connections. You can find the terminal designations and the connection plan in the circuit diagram and here (Page 176). See also Technical specifications (Page 175) SICHARGE UC 100, UC 200, UC 300, UC 400, UC 600, UC 800 Operating Instructions, 10/2022, A5E50828019-AC...
-
Page 104: Connection Options
The following table provides an overview of the minimum dimensions of cables and connectors that can be installed using the nut keeper kit. Figure 6-17 Minimum dimensions of cables and connectors for nut keeper kits SICHARGE UC 100, UC 200, UC 300, UC 400, UC 600, UC 800 Operating Instructions, 10/2022, A5E50828019-AC... -
Page 105: Connecting The Power Supply Cable
Connections of the power supply cable ① Terminal L3 (-Q1:6) ② Terminal L2 (-Q1:4) ③ Terminal L1 (-Q1:2) ④ PE ground connection (PE cabinet) Figure 6-18 I/Os SICHARGE UC 100, UC 200, UC 300, UC 400, UC 600, UC 800 Operating Instructions, 10/2022, A5E50828019-AC... - Page 106 5. Plug the cable lug onto the bolt of the ground terminal 6. Tighten the fastening nut with the required torque: – Size of fastening nut: M8 – Required tightening torque: 20 Nm (±10%) SICHARGE UC 100, UC 200, UC 300, UC 400, UC 600, UC 800 Operating Instructions, 10/2022, A5E50828019-AC...
-
Page 107: Connecting Dc Cables
DC cable to the DC+ and DC- connectors of the charging station. Requirements • You have removed the handle of the main switch. • You have removed the bottom protective cover. SICHARGE UC 100, UC 200, UC 300, UC 400, UC 600, UC 800 Operating Instructions, 10/2022, A5E50828019-AC... - Page 108 5. Insert the cable lug on the bolt of the PE cabinet ground connection. 6. Tighten the fastening nut with the required torque: – Size of fastening nut: M8 – Required tightening torque: 20 Nm SICHARGE UC 100, UC 200, UC 300, UC 400, UC 600, UC 800 Operating Instructions, 10/2022, A5E50828019-AC...
-
Page 109: Connecting The Communication Cable
When using the distributed charge points, connect the communication cable to the charging station. Requirements • You have removed the bottom protective cover. • You have inserted the communication cable into the cabinet. SICHARGE UC 100, UC 200, UC 300, UC 400, UC 600, UC 800 Operating Instructions, 10/2022, A5E50828019-AC... -
Page 110: Connecting The Auxiliary Power Supply
Connect the fiber-optic cables to the optical ports of the SCALANCE Ethernet switch. 6.5.5 Connecting the auxiliary power supply The SICHARGE UC charging station supplies further charge points with operating current. SICHARGE UC 100, UC 200, UC 300, UC 400, UC 600, UC 800 Operating Instructions, 10/2022, A5E50828019-AC... - Page 111 5. Make sure that the conductors are firmly connected to the terminal connections. You can find the terminal designations and the connection plan in the circuit diagram and here (Page 176). See also Technical specifications (Page 175) SICHARGE UC 100, UC 200, UC 300, UC 400, UC 600, UC 800 Operating Instructions, 10/2022, A5E50828019-AC...
-
Page 112: External Communication
External communication The charging station can be equipped with a router. The router can be installed for the wireless connection to the Siemens Configuration Backend and the OCPP backend. The following figure shows the position of the router in the charging station. -
Page 113: Re-Attaching Protective Cover
1. Position the protective cover. 2. Tighten the fastening screws of the protective cover. 3. Replace the main switch handle on the handle extension. SICHARGE UC 100, UC 200, UC 300, UC 400, UC 600, UC 800 Operating Instructions, 10/2022, A5E50828019-AC... - Page 114 Connecting 6.7 Re-attaching protective cover SICHARGE UC 100, UC 200, UC 300, UC 400, UC 600, UC 800 Operating Instructions, 10/2022, A5E50828019-AC...
-
Page 115: Commissioning
Note Padlock dimensions Use a padlock with a shackle diameter of 3 mm to 9 mm (1/8" to 3/8") to protect against reclosing. SICHARGE UC 100, UC 200, UC 300, UC 400, UC 600, UC 800 Operating Instructions, 10/2022, A5E50828019-AC... - Page 116 – Ensure that the trim pots report the correct overload current and short-circuit current values. Reference to the technical section. You will need to check the crossover to verify the settings. SICHARGE UC 100, UC 200, UC 300, UC 400, UC 600, UC 800 Operating Instructions, 10/2022, A5E50828019-AC...
- Page 117 A vehicle with low SoC (< 60 %) must be available to proceed with this device. You need to connect your laptop to the charging unit to proceed with this device. SICHARGE UC 100, UC 200, UC 300, UC 400, UC 600, UC 800 Operating Instructions, 10/2022, A5E50828019-AC...
-
Page 118: Switch On Charging Station
• Before switching on the charging station, make sure that the charging plug is in the plug holder. • Leave the charging plug in the plug holder during the entire switch-on process. SICHARGE UC 100, UC 200, UC 300, UC 400, UC 600, UC 800 Operating Instructions, 10/2022, A5E50828019-AC... - Page 119 On the outside of the SICHARGE UC, attach a clearly visible map with the marked location of the SICHARGE UC and all connected charging points. Switch on charging station Figure 7-2 Interior view UC 100 SICHARGE UC 100, UC 200, UC 300, UC 400, UC 600, UC 800 Operating Instructions, 10/2022, A5E50828019-AC...
- Page 120 To switch on the charging station, proceed as follows: 1. Open the cabinet door. 2. Set the main switch to the "ON" position. SICHARGE UC 100, UC 200, UC 300, UC 400, UC 600, UC 800 Operating Instructions, 10/2022, A5E50828019-AC...
- Page 121 The charging station starts automatically. Wait until the charging station is fully started. When the display shows the Start menu, the charging station is ready for use. Figure 7-5 Start menu SICHARGE UC 100, UC 200, UC 300, UC 400, UC 600, UC 800 Operating Instructions, 10/2022, A5E50828019-AC...
- Page 122 Commissioning 7.2 Switch on charging station SICHARGE UC 100, UC 200, UC 300, UC 400, UC 600, UC 800 Operating Instructions, 10/2022, A5E50828019-AC...
-
Page 123: Operating
Optional rain cover for plug holder A rain cover is available as an accessory to additionally protect the plug holder on the charging station from rain. SICHARGE UC 100, UC 200, UC 300, UC 400, UC 600, UC 800 Operating Instructions, 10/2022, A5E50828019-AC... -
Page 124: Plug In The Charging Cable
• You have positioned the vehicle with the charging socket within reach of the charging plug. • You have engaged the parking brake of the vehicle. • You have switched off the motor. SICHARGE UC 100, UC 200, UC 300, UC 400, UC 600, UC 800 Operating Instructions, 10/2022, A5E50828019-AC... -
Page 125: Monitoring The Charging Process
After you have connected the electric vehicle to the charging station, the charging station display automatically shows the Start menu. Several display elements provide precise information about the progress of the charging process. SICHARGE UC 100, UC 200, UC 300, UC 400, UC 600, UC 800 Operating Instructions, 10/2022, A5E50828019-AC... - Page 126 The vehicle status indicator makes it easy to see if your vehicle is connected to the charging station and charging. Symbol Vehicle status Vehicle is not ready for charging Vehicle is connected and ready for charging. SICHARGE UC 100, UC 200, UC 300, UC 400, UC 600, UC 800 Operating Instructions, 10/2022, A5E50828019-AC...
- Page 127 The charging station increases the charging voltage up to the maximum volt‐ age level of the vehicle battery. Charging The charging station is charging the electric vehicle. SICHARGE UC 100, UC 200, UC 300, UC 400, UC 600, UC 800 Operating Instructions, 10/2022, A5E50828019-AC...
-
Page 128: Stop Charging
Charging current Figure 8-3 Charge level indicator Stop charging You can stop a charging process in progress at any time by pressing a button. SICHARGE UC 100, UC 200, UC 300, UC 400, UC 600, UC 800 Operating Instructions, 10/2022, A5E50828019-AC... -
Page 129: Unplugging The Charging Cable
• Never forcibly remove the charging plug from the charging socket. • First ensure that the charging station has unlocked the plug connection. SICHARGE UC 100, UC 200, UC 300, UC 400, UC 600, UC 800 Operating Instructions, 10/2022, A5E50828019-AC... -
Page 130: Displaying Alarms
In the event of an alarm, the charging station stops charging. The touch screen displays an alarm message in full screen mode or an alarm button in the Start menu. SICHARGE UC 100, UC 200, UC 300, UC 400, UC 600, UC 800 Operating Instructions, 10/2022, A5E50828019-AC... - Page 131 Start menu. ① Alarm button ② "Options menu" button Figure 8-5 Alarm ② To access the alarm history, press the "Options menu" button SICHARGE UC 100, UC 200, UC 300, UC 400, UC 600, UC 800 Operating Instructions, 10/2022, A5E50828019-AC...
- Page 132 In the Options menu, press the "Alarm" button Figure 8-6 Options menu "Alarm history" menu In the "Alarm history" menu, the charging station lists all recorded alarms: Figure 8-7 Alarm history SICHARGE UC 100, UC 200, UC 300, UC 400, UC 600, UC 800 Operating Instructions, 10/2022, A5E50828019-AC...
-
Page 133: Operating The Service Menu
To access the "Options" menu, press the following button on the Start menu: Figure 8-8 "Options menu" button "Options" menu The touch screen displays the following option buttons in the "Options" menu: Figure 8-9 Option buttons SICHARGE UC 100, UC 200, UC 300, UC 400, UC 600, UC 800 Operating Instructions, 10/2022, A5E50828019-AC... -
Page 134: Checking Recorded Alarms
Requirements • You have opened the Options menu. • You have pressed the "Alarm" button in the Options menu. SICHARGE UC 100, UC 200, UC 300, UC 400, UC 600, UC 800 Operating Instructions, 10/2022, A5E50828019-AC... - Page 135 Alarm status Meaning ③ Active alarm ④ (I)O Inactive alarm The alarm history also highlights the active alarm with a light blue coloring. SICHARGE UC 100, UC 200, UC 300, UC 400, UC 600, UC 800 Operating Instructions, 10/2022, A5E50828019-AC...
-
Page 136: Restarting The Charging Process After An Alarm
• Then deactivate the alarm. Requirements • You have opened the Options menu. • You have pressed the "Alarm" button in the Options menu. SICHARGE UC 100, UC 200, UC 300, UC 400, UC 600, UC 800 Operating Instructions, 10/2022, A5E50828019-AC... - Page 137 To restart the charging process after an alarm, proceed as follows: ③ 1. Press the alarm button ② 2. Press the "Acknowledge alarm" button SICHARGE UC 100, UC 200, UC 300, UC 400, UC 600, UC 800 Operating Instructions, 10/2022, A5E50828019-AC...
-
Page 138: Displaying Information About The Charging Station
Requirements • You have opened the Options menu. • You have pressed the "Charger Info" button in the Options menu. SICHARGE UC 100, UC 200, UC 300, UC 400, UC 600, UC 800 Operating Instructions, 10/2022, A5E50828019-AC... - Page 139 Current status of the AC-DC converter: • S_INIT: AC-DC converter initialization • S_CONNECTED: AC-DC converter OFF • S_RUNNING: AC-DC converter ON • S_ERROR_FLAGS_DETECTED: Error at the AC-DC converter SICHARGE UC 100, UC 200, UC 300, UC 400, UC 600, UC 800 Operating Instructions, 10/2022, A5E50828019-AC...
-
Page 140: Changing The Display Language
Changing the display language To change the display language of the user interface, press one of the following buttons: Button Selected display language German English SICHARGE UC 100, UC 200, UC 300, UC 400, UC 600, UC 800 Operating Instructions, 10/2022, A5E50828019-AC... -
Page 141: Displaying Energy Values Of The Charging Process
Requirements • You have opened the Options menu. • You have pressed the "Energy Meter" button in the Options menu. SICHARGE UC 100, UC 200, UC 300, UC 400, UC 600, UC 800 Operating Instructions, 10/2022, A5E50828019-AC... -
Page 142: Displaying The Current And Voltage Trend Of The Charging Process
Displaying the current and voltage trend of the charging process Requirements • You have opened the Options menu. • In the Options menu, you have pressed the "Graphics" button. SICHARGE UC 100, UC 200, UC 300, UC 400, UC 600, UC 800 Operating Instructions, 10/2022, A5E50828019-AC... - Page 143 The diagram area shifts to the right on the time axis. Move finger on the display to the right The diagram area shifts to the left on the time axis. SICHARGE UC 100, UC 200, UC 300, UC 400, UC 600, UC 800 Operating Instructions, 10/2022, A5E50828019-AC...
- Page 144 Operating 8.8 Operating the Service menu SICHARGE UC 100, UC 200, UC 300, UC 400, UC 600, UC 800 Operating Instructions, 10/2022, A5E50828019-AC...
-
Page 145: Alarm, Fault And System Messages
Emergency Stop button. When you press the Emergency Stop button on the front panel, the display of the charging station shows an alarm message. SICHARGE UC 100, UC 200, UC 300, UC 400, UC 600, UC 800 Operating Instructions, 10/2022, A5E50828019-AC... -
Page 146: Alarm Message "Cabinet's Door Opened
To cancel the emergency stop state, reset the Emergency Stop button (Page 13). Alarm message "Cabinet's Door Opened" When you open the charging station door, the display shows the following alarm message. SICHARGE UC 100, UC 200, UC 300, UC 400, UC 600, UC 800 Operating Instructions, 10/2022, A5E50828019-AC... -
Page 147: Alarm Message "Ground Fault Detection
To avoid a dangerous situation, the charging station continuously monitors the insulation of the connected electric vehicle. If the insulation monitor detects a ground fault, the display shows an alarm message. SICHARGE UC 100, UC 200, UC 300, UC 400, UC 600, UC 800 Operating Instructions, 10/2022, A5E50828019-AC... - Page 148 When the display of the charging station shows the Start menu, the charging station is ready for use again. SICHARGE UC 100, UC 200, UC 300, UC 400, UC 600, UC 800 Operating Instructions, 10/2022, A5E50828019-AC...
-
Page 149: Alarm Messages In The Alarm History
• Check plug connection for obstacles to good connection • Check measured values of the vehicle The vehicle's charging socket can cause overheating. SICHARGE UC 100, UC 200, UC 300, UC 400, UC 600, UC 800 Operating Instructions, 10/2022, A5E50828019-AC... - Page 150 The "Stop Charging" button on the HMI No fault. The alarm indicates that charging has been stopped by has been pressed. pressing the button on the HMI. SICHARGE UC 100, UC 200, UC 300, UC 400, UC 600, UC 800 Operating Instructions, 10/2022, A5E50828019-AC...
- Page 151 Insert the charging plug into the plug holder • Start the charging station in manual mode • If the error does not appear, try a new charging process. SICHARGE UC 100, UC 200, UC 300, UC 400, UC 600, UC 800 Operating Instructions, 10/2022, A5E50828019-AC...
- Page 152 Alarm, fault and system messages 9.4 Alarm messages in the alarm history SICHARGE UC 100, UC 200, UC 300, UC 400, UC 600, UC 800 Operating Instructions, 10/2022, A5E50828019-AC...
-
Page 153: Maintenance And Service
1 m. WARNING Falling parts When working at an elevated height, watch out for falling parts, cables or plugs. SICHARGE UC 100, UC 200, UC 300, UC 400, UC 600, UC 800 Operating Instructions, 10/2022, A5E50828019-AC... -
Page 154: Maintenance Plan
• Carefully remove any dirt. 10.2 Maintenance plan The following maintenance and service measures are necessary to maintain the functionality and operational safety of the charging station. SICHARGE UC 100, UC 200, UC 300, UC 400, UC 600, UC 800 Operating Instructions, 10/2022, A5E50828019-AC... - Page 155 Use a padlock with a shackle diameter of 3 mm to 9 mm (1/8" to 3/8") to protect against reclosing. Figure 10-1 Charging station with OFF position SICHARGE UC 100, UC 200, UC 300, UC 400, UC 600, UC 800 Operating Instructions, 10/2022, A5E50828019-AC...
- Page 156 Electrical safety measurements of electrical protective devices and earth resistance according to local regulations and standards = Adapt the maintenance period to the conditions on site SICHARGE UC 100, UC 200, UC 300, UC 400, UC 600, UC 800 Operating Instructions, 10/2022, A5E50828019-AC...
-
Page 157: Cleaning The Touch Screen
• Use a mild, non-corrosive cleaning agent, even in the case of heavy soiling. Mild detergents include dishwashing liquids. • Use only soft cleaning cloths. SICHARGE UC 100, UC 200, UC 300, UC 400, UC 600, UC 800 Operating Instructions, 10/2022, A5E50828019-AC... -
Page 158: Cleaning The Cabinet
Cleaning the exterior surfaces of the cabinet • Wipe the exterior surfaces of the charging station with a damp cloth. • Then rub the charging station dry. SICHARGE UC 100, UC 200, UC 300, UC 400, UC 600, UC 800 Operating Instructions, 10/2022, A5E50828019-AC... -
Page 159: Uc 100 Maintenance
Position Dimensions Front 630 x 105 x 60 mm Left and right side 830 x 105 x 35 mm Rear 630 x 105 x 35 mm SICHARGE UC 100, UC 200, UC 300, UC 400, UC 600, UC 800 Operating Instructions, 10/2022, A5E50828019-AC... - Page 160 1. Remove the cover of the air filters 2. Remove the used air filter 3. Insert the new air filter 4. Install the cover of the air filters SICHARGE UC 100, UC 200, UC 300, UC 400, UC 600, UC 800 Operating Instructions, 10/2022, A5E50828019-AC...
-
Page 161: Replacing The Cabinet Fan
You will need the following tools to replace the cabinet fan: • Screwdriver • Bit: Hexagon socket, SW 6 • Screwdriver You will also need the following spare part: • Cabinet fan SICHARGE UC 100, UC 200, UC 300, UC 400, UC 600, UC 800 Operating Instructions, 10/2022, A5E50828019-AC... - Page 162 1. Unscrew the fastening screws of the fan cover 2. Remove the fan cover 3. Remove the filter grille 4. Remove the fabric filter from the filter holder SICHARGE UC 100, UC 200, UC 300, UC 400, UC 600, UC 800 Operating Instructions, 10/2022, A5E50828019-AC...
-
Page 163: Uc 200 Maintenance
• Bit: Hexagon socket, SW6 You will also need the following spare part: • 3 Fabric filter: Filter class G3 according to standard EN 779, dimensions: 223 x 223 mm SICHARGE UC 100, UC 200, UC 300, UC 400, UC 600, UC 800 Operating Instructions, 10/2022, A5E50828019-AC... - Page 164 5. Insert the new fabric filter into the filter holder 6. Re-insert the filter grille 7. Reattach the fan cover 8. Tighten the fastening screws of the fan cover SICHARGE UC 100, UC 200, UC 300, UC 400, UC 600, UC 800 Operating Instructions, 10/2022, A5E50828019-AC...
-
Page 165: Replacing The Cabinet Fan
You will need the following tools to replace the cabinet fan: • Screwdriver • Bit: Hexagon socket, SW 6 • Screwdriver You will also need the following spare part: • Cabinet fan SICHARGE UC 100, UC 200, UC 300, UC 400, UC 600, UC 800 Operating Instructions, 10/2022, A5E50828019-AC... - Page 166 3. Tighten the fastening screws of the cabinet fan 4. Insert the fabric filter into the filter holder 5. Plug in the filter grille SICHARGE UC 100, UC 200, UC 300, UC 400, UC 600, UC 800 Operating Instructions, 10/2022, A5E50828019-AC...
-
Page 167: Uc 300/400 Maintenance
• Bit: Hexagon socket, SW6 You will also need the following spare part: • 4 Fabric filter: Filter class G3 according to standard EN 779, dimensions: 223 x 223 mm SICHARGE UC 100, UC 200, UC 300, UC 400, UC 600, UC 800 Operating Instructions, 10/2022, A5E50828019-AC... - Page 168 5. Insert the new fabric filter into the filter holder 6. Re-insert the filter grille 7. Reattach the fan cover 8. Tighten the fastening screws of the fan cover SICHARGE UC 100, UC 200, UC 300, UC 400, UC 600, UC 800 Operating Instructions, 10/2022, A5E50828019-AC...
-
Page 169: Replacing The Cabinet Fan
You will need the following tools to replace the cabinet fan: • Screwdriver • Bit: Hexagon socket, SW 6 • Screwdriver You will also need the following spare part: • Cabinet fan SICHARGE UC 100, UC 200, UC 300, UC 400, UC 600, UC 800 Operating Instructions, 10/2022, A5E50828019-AC... - Page 170 4. Remove the fabric filter from the filter holder 5. Unscrew the fastening screws of the cabinet fan 6. Pull out cabinet fan 7. Disconnect the connecting cables of the fan SICHARGE UC 100, UC 200, UC 300, UC 400, UC 600, UC 800 Operating Instructions, 10/2022, A5E50828019-AC...
- Page 171 4. Insert the fabric filter into the filter holder 5. Plug in the filter grille 6. Mount fan cover 7. Tighten the fastening screws of the fan cover SICHARGE UC 100, UC 200, UC 300, UC 400, UC 600, UC 800 Operating Instructions, 10/2022, A5E50828019-AC...
- Page 172 Maintenance and service 10.7 UC 300/400 maintenance SICHARGE UC 100, UC 200, UC 300, UC 400, UC 600, UC 800 Operating Instructions, 10/2022, A5E50828019-AC...
-
Page 173: Disposal
For environmentally friendly recycling and disposal of the device, contact a certified electronic waste disposal company. Dispose of the device and specific material, e.g. capacitors, in accordance with the applicable regulations in your country. SICHARGE UC 100, UC 200, UC 300, UC 400, UC 600, UC 800 Operating Instructions, 10/2022, A5E50828019-AC... - Page 174 Disposal SICHARGE UC 100, UC 200, UC 300, UC 400, UC 600, UC 800 Operating Instructions, 10/2022, A5E50828019-AC...
-
Page 175: Service & Support
You can find this information on the nameplate of the charging station. The eMobility Team (https://new.siemens.com/global/en/products/energy/ medium-voltage/solutions/emobility/sicharge-uc.html) will also answer questions on products and services. SICHARGE UC 100, UC 200, UC 300, UC 400, UC 600, UC 800 Operating Instructions, 10/2022, A5E50828019-AC... - Page 176 Service & Support SICHARGE UC 100, UC 200, UC 300, UC 400, UC 600, UC 800 Operating Instructions, 10/2022, A5E50828019-AC...
-
Page 177: Technical Specifications
2000 m sea level With temperatures in the range from -25 to -30 °C, the charging station must be at operating temperature before charging SICHARGE UC 100, UC 200, UC 300, UC 400, UC 600, UC 800 Operating Instructions, 10/2022, A5E50828019-AC... - Page 178 PE single conductor -XL-2 -XD10-1 -X230:1:A 9 ... 17 mm AC cable -XL-5 -XD10-2 -X230:2:A PE cabinet -XD10-5 -X230:PE:A Ethernet -K103-P2 -KF22-P1 -KF22:P6 7 ... 8 mm Ethernet cable SICHARGE UC 100, UC 200, UC 300, UC 400, UC 600, UC 800 Operating Instructions, 10/2022, A5E50828019-AC...
-
Page 179: Power Factor/Efficiency
Table 13-2 Power factor/efficiency Output line Power factor Efficiency cos φ η 0.97 0.94 0.98 0.95 0.98 0.96 0.98 0.96 0.98 0.96 0.99 0.96 SICHARGE UC 100, UC 200, UC 300, UC 400, UC 600, UC 800 Operating Instructions, 10/2022, A5E50828019-AC... -
Page 180: Charging Current/Power Curve
① UC 800 charging station ② UC 400 charging station ③ UC 300 charging station ④ UC 200 charging station ⑤ UC 100 charging station Figure 13-1 Charging current SICHARGE UC 100, UC 200, UC 300, UC 400, UC 600, UC 800 Operating Instructions, 10/2022, A5E50828019-AC... -
Page 181: Derating
The following table shows the derating depending on the ambient temperature from +45 C° with different charging voltages. The power is specified in % of the user charging station. SICHARGE UC 100, UC 200, UC 300, UC 400, UC 600, UC 800 Operating Instructions, 10/2022, A5E50828019-AC... - Page 182 Technical specifications 13.4 Derating ① 600 V DC output voltage ② 800 V DC output voltage ③ 1000 V DC output voltage Figure 13-3 Ambient temperature derating SICHARGE UC 100, UC 200, UC 300, UC 400, UC 600, UC 800 Operating Instructions, 10/2022, A5E50828019-AC...
-
Page 183: Declaration Of Conformity
Survey method using an enveloping measurement surface over a reflecting plane Safekeeping location of the declaration of conformity SIEMENS AG keeps the EU Declaration of Conformity of the charging station available for the responsible authorities at the following location: SIEMENS AG... - Page 184 Declaration of Conformity SICHARGE UC 100, UC 200, UC 300, UC 400, UC 600, UC 800 Operating Instructions, 10/2022, A5E50828019-AC...
-
Page 185: Auc 600/800
Two cabinets of the type UC 300/400 are used for the UC 600 / UC 800 charging stations. One control cabinet serves as parent device here and the other control cabinet serves as child device. SICHARGE UC 100, UC 200, UC 300, UC 400, UC 600, UC 800 Operating Instructions, 10/2022, A5E50828019-AC... - Page 186 AC Aux cable to the charge points ⑥ LAN cable to the charge points ⑦ Connecting cables between parent and child device Figure A-2 Schematic diagram of UC 600/800 SICHARGE UC 100, UC 200, UC 300, UC 400, UC 600, UC 800 Operating Instructions, 10/2022, A5E50828019-AC...
-
Page 187: Connection Of Uc 600/800
EMERGENCY STOP -X30:8A -X30:8A A1:EMERGENCY STOP -X30:10A -X30:10A 2 x 0.5 mm² input of child and parent A1:Signaling contact in‐ -X30:11A -X30:11A put of child and parent SICHARGE UC 100, UC 200, UC 300, UC 400, UC 600, UC 800 Operating Instructions, 10/2022, A5E50828019-AC... - Page 188 Auxiliary power -F106:3 -F106:3 2 x 1.5 mm² supply -F106:1 -F106:1 24 V DC -F110:3 -F110:3 2 x 1.5 mm² -F110:1 -F110:1 You can find additional information in the electrical diagram. SICHARGE UC 100, UC 200, UC 300, UC 400, UC 600, UC 800 Operating Instructions, 10/2022, A5E50828019-AC...
-
Page 189: Abbreviations
Combined Charging System Direct Current OCPP Open Charge Point Protocol Human Machine Interface IGBT Insulated-Gate Bipolar Transistor State of Charge Width across flats SICHARGE UC 100, UC 200, UC 300, UC 400, UC 600, UC 800 Operating Instructions, 10/2022, A5E50828019-AC... - Page 190 Abbreviations SICHARGE UC 100, UC 200, UC 300, UC 400, UC 600, UC 800 Operating Instructions, 10/2022, A5E50828019-AC...
-
Page 191: Index
Safety instructions, 69 Securing, 73, 77, 81 Intended use, 10 Storage, 66 Transportation, 67 Unpackaging, 40 Checking incoming goods, 39 Maintenance and service Cleaning Safety instructions, 151 Cabinet, 156 Charging cable, 157 Touchscreen, 155 Commissioning, 116 SICHARGE UC 100, UC 200, UC 300, UC 400, UC 600, UC 800 Operating Instructions, 10/2022, A5E50828019-AC... - Page 192 Replacing an air filter, 157, 161, 165 Routers, 110 Safety information, 9 Safety instructions Connecting, 83 Installation, 69 Maintenance and service, 151 Operation, 121 Safety rules for electrical work, 12 Safety sign, 15 Selecting options, 131 SIM card, 110 SICHARGE UC 100, UC 200, UC 300, UC 400, UC 600, UC 800 Operating Instructions, 10/2022, A5E50828019-AC...
- Page 194 Futher Information Siemens: www. siemens.com Siemens AG Smart Infrastructure Distribution Systems Mozartstr. 31c 91052 Erlangen Germany...
Need help?
Do you have a question about the SICHARGE UC 100 and is the answer not in the manual?
Questions and answers